42GR ATM Air Treatment Module - Carrier
42GR ATM Air Treatment Module - Carrier
42GR ATM Air Treatment Module - Carrier

Create successful ePaper yourself
Turn your PDF publications into a flip-book with our unique Google optimized e-Paper software.
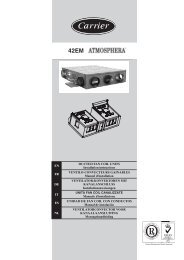
<strong>42GR</strong> <strong>ATM</strong><br />
<strong>Air</strong> <strong>Treatment</strong> <strong>Module</strong><br />
Nominal air flow, size 1: 97 l/s - 350 m 3 /h<br />
size 2: 139 l/s - 500 m 3 /h<br />
Installation manual
The photos shown on the front cover are solely for information, and not contractually binding. The manufacturer<br />
reserves the right to make changes without previous notification.<br />
2
ConTenTs<br />
1 - InTroduCTIon .....................................................................................................................................................................4<br />
2 - FeaTures .................................................................................................................................................................................6<br />
2.1 - Physical and electrical data .....................................................................................................................................................6<br />
2.2 - Suspension casing drawings ....................................................................................................................................................7<br />
2.3 - Dimensional drawings .............................................................................................................................................................9<br />
2.4 - Dimensional drawings ...........................................................................................................................................................11<br />
2.5 - Condensate drain dimensions ............................................................................................................................................... 12<br />
2.6 - Suspension casings - packaging............................................................................................................................................. 13<br />
2.7 - Suspension rails ......................................................................................................................................................................13<br />
3 - saFeTy ConsIderaTIons .............................................................................................................................................14<br />
3.1 - General ....................................................................................................................................................................................14<br />
3.2 - Precautions against electrocution .........................................................................................................................................14<br />
3.3 - General installation recommendations................................................................................................................................ 14<br />
3.4 - Conformity ..............................................................................................................................................................................14<br />
4 - suspensIon CasIng .........................................................................................................................................................15<br />
5 - aIr TreaTmenT module .............................................................................................................................................16<br />
5.1 - Installation ..............................................................................................................................................................................16<br />
5.2 - Removal ..................................................................................................................................................................................16<br />
6 - Fresh aIr ..............................................................................................................................................................................17<br />
6.1 - Standard suspension casing ................................................................................................................................................... 17<br />
6.2 - All fresh air suspension casing ..............................................................................................................................................17<br />
6.3 - Constant fresh air volume suspension casing ......................................................................................................................17<br />
6.4 - Variable fresh air volume suspension casing .......................................................................................................................17<br />
6.5 - <strong>Air</strong> <strong>Treatment</strong> <strong>Module</strong> <strong>ATM</strong> .................................................................................................................................................18<br />
7 - Fan moTor assembly ....................................................................................................................................................19<br />
7.1 - Description ..............................................................................................................................................................................19<br />
7.2 - Fan motor removal .................................................................................................................................................................19<br />
8 - WaTer CoIl ...........................................................................................................................................................................20<br />
8.1 - Removing the coil ..................................................................................................................................................................20<br />
8.2 - Water inlet/outlet connections ..............................................................................................................................................21<br />
9 - WaTer FloW ConTrol valves .................................................................................................................................22<br />
9.1 - Electrothermal actuator (on/off) ..........................................................................................................................................22<br />
9.2 - Replacing actuators ................................................................................................................................................................22<br />
9.3 - Electrical circuit diagrams for actuators ..............................................................................................................................22<br />
9.4 - Replacing a valve body ..........................................................................................................................................................23<br />
10 - FlexIble WaTer pIpes .................................................................................................................................................23<br />
11 - FIlTer ....................................................................................................................................................................................24<br />
12 - eleCTrIC heaTer ...........................................................................................................................................................24<br />
12.1 - Removing the electric heater from the <strong>ATM</strong> size 1 ........................................................................................................ 25<br />
12.2 - Removing the electric heater from the <strong>ATM</strong> size 2 ........................................................................................................ 25<br />
13 - perFormanCes ...............................................................................................................................................................26<br />
13.1 - Electrical data .......................................................................................................................................................................26<br />
13.2 - <strong>Air</strong> flow/available static pressure data ...............................................................................................................................27<br />
14 - ConTroller .....................................................................................................................................................................29<br />
14.1 - <strong>Carrier</strong> numeric controller ..................................................................................................................................................29<br />
14.2 - <strong>Carrier</strong> electromechanical controller with fan speed controller .....................................................................................29<br />
14.3 - The various <strong>ATM</strong> configurations available........................................................................................................................ 30<br />
14.4 - Technical specifications for the heating/cooling changeover switch ...............................................................................30<br />
14.5 - Master/slave control .............................................................................................................................................................31<br />
14.6 - Wiring diagrams ....................................................................................................................................................................33<br />
3
1 - IntroductIon<br />
The <strong>42GR</strong> <strong>Air</strong> <strong>Treatment</strong> <strong>Module</strong> (<strong>ATM</strong>) is something more<br />
than a simple air conditioner which enables room air temperature<br />
to be controlled. It is a total, integrated comfort<br />
system in the building.<br />
The <strong>Carrier</strong> <strong>42GR</strong> is a compact central station air handler in<br />
two sizes able to supply conditioned air at rates from 97 l/s<br />
to 139 l/s to rooms with floor areas from 25 to 40 m 2 . The<br />
main components of the unit are a centrifugal fan, an air<br />
filter, a hot water heating coil or an electric resistance heater<br />
and a chilled water cooling coil. The unit is controlled by a<br />
<strong>Carrier</strong> numeric controller or similar.<br />
The <strong>42GR</strong> is connected, on site, through two flexible ducts<br />
(low thermal conductivity, low noise transmission supplied<br />
by others) to one or more high induction plenums fitted<br />
with <strong>Carrier</strong> linear diffusers in the false ceiling. Typically,<br />
these will be <strong>Carrier</strong> Moduboot 35BD/35SR units with each<br />
one serving an individual room or zone and providing both<br />
supply air and return air paths according to diffuser model.<br />
4<br />
Moduboot return air unit<br />
Chilled/hot water<br />
supply and return<br />
The top of the range <strong>42GR</strong> <strong>ATM</strong> can have a <strong>Carrier</strong><br />
numeric controller. Each room occupant then has his or<br />
her own Zone User Interface control module, on a wall<br />
(with a mounting base) or desk, with which to select the<br />
preferred comfort level:<br />
• Room ambient temperature<br />
• Select Occupied or Unoccupied mode at each <strong>42GR</strong><br />
<strong>ATM</strong> to control energy usage<br />
• Ventilation air (the rate of air replacement)<br />
• Lighting on or off<br />
• Blinds raised or lowered and their inclination<br />
In addition, connection to a central Building Management<br />
System allows units to be controlled individually to satisfy<br />
overriding criteria or to respond to local regulations.<br />
The <strong>42GR</strong> <strong>ATM</strong> is designed to be installed in a machine<br />
room close to the centre of the space to be air conditioned.<br />
<strong>Module</strong>s can be installed side by side and their high static<br />
pressure capability allow them to be used with long ducts.<br />
With the <strong>42GR</strong> <strong>ATM</strong> located centrally in one machine<br />
room, service and maintenance are considerably easier.<br />
WARNING: Switch off the electrical power supply before<br />
doing any work on the unit.
aTm: 3 main components<br />
Suspension rail<br />
Suspension casing<br />
<strong>Air</strong> <strong>Treatment</strong> <strong>Module</strong> (<strong>ATM</strong>)<br />
5
2 - Features<br />
2.1 - Physical and electrical data<br />
42Gr atM size 1 size 2<br />
nominal air flow l/s (m3 /h) 97 (350) 139 (500)<br />
total cooling capacity (at nominal air flow)* kW 2.8 4.1<br />
sensible cooling capacity (at nominal air flow)* kW 1.9 2.7<br />
Heating capacity (at nominal air flow)** kW 1.2 2.2<br />
Power supply 230 V-1 ph- 50 Hz U% ± 15 ± 15<br />
operating weight (6-row coil) kg 35 50<br />
Water coil<br />
• 6-row coil: 5 cooling rows, 1 heating row<br />
• 5-row cooling coil<br />
3/8” copper tubes, aluminium fins at 1.8 mm spacing, test pressure 24 bar, operating<br />
pressure 16 bar<br />
• Cooling water volume l 0.83 1.5<br />
• Heating water volume<br />
Ptc electric heater (Positive temperature coefficient)<br />
l 0.17 0.3<br />
• Max. capacity at nominal air flow kW 1.7 1.8<br />
• Current draw ± 15% A 11 11<br />
• Power input at zero flow<br />
• VDE, CE, UL and CSA codes approved<br />
Fan<br />
W 80 80<br />
• Centrifugal fan, single wheel single inlet double inlet<br />
- Nominal air flow l/s (m3 /h) 97 (350) 139 (500)<br />
- Static pressure at nominal air flow Pa 310 320<br />
Fan motor 230 V-1 ph-50 Hz, 2-pole open asynchronous, permanent capacitor, inherent overload<br />
protection, class B insulation, varnish class F, connected to a speed controller.<br />
• Protection index IP 44 44<br />
• Max. power input at 230 VAC + W 143 208<br />
• Min. output from electronic speed controller (RMS) V 80 80<br />
• Nominal current + A 0.64 0.91<br />
• Starting current A 2.56 3.64<br />
air filter Throwaway, 55 mm thick, type F5, fire rating medium M1, metal frame<br />
• Dimensions<br />
• Pressure drop, clean<br />
mm 225 x 350 395 x 350<br />
- air flow 97 l/s Pa 35 –<br />
- air flow 139 l/s<br />
Fresh air connection on atM***<br />
Pa – 35<br />
• External diameter mm 75 125<br />
• Constant air flow (-10%, + 20%) l/s (m3 /h) 8.3 (30) 16.6 (60)<br />
• ΔP (upstream/downstream)<br />
Water connections<br />
Pa 50/200 70/200<br />
<strong>42GR</strong> modules are designed and tested for 16 bar operating pressure. The total operating circuit of the <strong>ATM</strong> is guaranteed for an operating pressure of 10 bar.<br />
Contact your local <strong>Carrier</strong> representative for advice when an application calls for an operating pressure of 16 bar.<br />
* Based upon water entering at 6°C, room air at 25°C dry bulb, 50% relative humidity, 5 K Δt and nominal air flow.<br />
** Based upon water entering at 50°C, room air at 19°C, 10 K Δt and nominal air flow.<br />
*** In the case of the size 2 <strong>ATM</strong>, the fresh air controller may be modified on site by relocating or removing two plastic restricters in order to increase its constant fresh air<br />
flow capacity to 20,8 (75), 27,7 (100), 36,1 (130), 44,4 l/s (160 m3 /h)<br />
+ Refer to extended electrical data table<br />
6
2.2 - suspension casing drawings<br />
standard suspension casing, mm<br />
Size 1<br />
Size 2<br />
Size 1<br />
Size 2<br />
Supply<br />
Return<br />
Supply<br />
Return<br />
all fresh air suspension casing, mm<br />
Suspension<br />
casing<br />
Suspension<br />
casing<br />
Supply<br />
Supply<br />
Suspension<br />
casing<br />
Suspension<br />
casing<br />
Fresh air<br />
Plastic cap to cover<br />
the return air inlet<br />
Fresh air<br />
Plastic cap to cover<br />
the return air inlet<br />
7
Constant fresh air volume suspension casing, mm<br />
8<br />
Size 1<br />
Size 2<br />
variable fresh air volume suspension casing, mm<br />
Size 1<br />
Size 2<br />
Supply<br />
Return<br />
Supply<br />
Return<br />
Supply<br />
Return<br />
Supply<br />
Return<br />
Suspension<br />
casing<br />
Suspension<br />
casing<br />
Suspension<br />
casing<br />
Suspension<br />
casing<br />
Fresh air<br />
Fresh air<br />
Fresh air<br />
Fresh air
2.3 - dimensional drawings<br />
2.3.1 - aTm with no fresh air inlet<br />
42gr size 1, mm<br />
42gr size 2, mm<br />
Condensate drain<br />
16 mm dia.<br />
Condensate drain<br />
16 mm dia.<br />
600 max.<br />
600 max.<br />
9
2.3.2 - aTm with fresh air inlet<br />
42gr size 1, mm<br />
42gr size 2, mm<br />
10<br />
Condensate drain<br />
16 mm dia.<br />
Condensate drain<br />
16 mm dia.<br />
max. 450<br />
600 max.<br />
max. 450<br />
600 max.<br />
Fresh air inlet<br />
Fresh air<br />
inlet
2.4 - dimensional drawings<br />
aTm with all fresh air or constant fresh air volume suspension casing, mm<br />
Supply<br />
Return<br />
aTm with standard suspension casing, mm<br />
Supply<br />
Return<br />
Suspension<br />
casing<br />
<strong>ATM</strong><br />
Controller<br />
Suspension<br />
casing<br />
<strong>ATM</strong><br />
Controller<br />
Fresh air<br />
inlet<br />
Fresh<br />
air inlet<br />
11
aTm with variable fresh air volume suspension casing, mm<br />
NOTE: The semi-rigid duct is not supplied by <strong>Carrier</strong>, and must be installed in the straightest line possible to prevent<br />
any air flow problems (maximum length without bends).<br />
2.5 - condensate drain dimensions, mm<br />
12<br />
Supply<br />
Return<br />
Controller<br />
The condensate drain pipe must be installed before the<br />
unit is switched on. A siphon not less than 100 mm deep<br />
(such as a U-bend in the drain pipe) must be installed in<br />
order to prevent foul odours being drawn back into the<br />
conditioned space.<br />
connection for 16 mm bore flexible tube<br />
<strong>ATM</strong> casing<br />
Fresh air duct<br />
<strong>Carrier</strong> recommends the installation of a<br />
semi-rigid round duct of 250 mm length<br />
Minimum static<br />
pressure 180 Pa
2.6 - suspension casings - packaging<br />
Casings are shipped on wooden pallets and covered overall<br />
with protective plastic film wrapping, in quantities shown<br />
in the table.<br />
units Pallet<br />
per Length Width Height Weight<br />
pallet (mm) (mm) (mm) (kg)<br />
casing size 1 20 1100 1600 1420 185<br />
casing size 2 12 1100 1600 1420 165<br />
atM size 1 10 1100 1600 1420 310<br />
atM size 2 5 1100 1600 1420 265<br />
2.7 - suspension rails<br />
480<br />
518<br />
19<br />
9<br />
Detail “A”<br />
12.5<br />
480<br />
11 Fix to concrete slab<br />
Detail “A”<br />
Immediately check for damage in transit when any shipment<br />
is received.<br />
To protect against damage and contamination, leave all<br />
packages fully wrapped until the units are about to be<br />
installed.<br />
For the same reasons leave the air inlets and outlets covered<br />
with the protective film until the air ducts are about to be<br />
connected.<br />
Detail “B” Casing installed<br />
Detail “B”<br />
2000<br />
Casing<br />
125 125<br />
250 500 500 500 250<br />
<strong>ATM</strong><br />
The suspension rail, which will carry the <strong>ATM</strong> casings, must<br />
be fixed rigidly to the concrete slab over the machine room.<br />
Rails are shipped in packages of five 2 m rails. This is sufficient<br />
for 40 <strong>ATM</strong>s size 1 or 23 <strong>ATM</strong>s size 2. Rails can be<br />
cut to length as required.<br />
13
3 - saFety consIderatIons<br />
3.1 - General<br />
Installing, commissioning and servicing of the various components<br />
which make up the different control loops can be<br />
dangerous unless certain aspects of the installation, such as<br />
the presence of mains electricity and hot or chilled-water<br />
in the air conditioning equipment, are taken into account.<br />
Only specially trained and qualified technicians and<br />
installers who have been fully trained on the product concerned<br />
are authorised to install, commission and service<br />
this equipment.<br />
During servicing work, it is essential to apply all recommendations<br />
and instructions given in service leaflets, on labels<br />
or in the instructions delivered with the equipment, and to<br />
comply with any other relevant instructions.<br />
definition of the pictograms used<br />
14<br />
electrical danger<br />
Caution hand hazard<br />
general danger<br />
uv-C light: do not look directly at this light<br />
without protective glasses.<br />
Comply with all the safety rules and regulations currently<br />
in force.<br />
Wear eye protectors and work gloves.<br />
Take care when moving or positioning equipment.<br />
3.2 - Precautions against electrocution<br />
Only electricians who are qualified to the level recommended<br />
by the IEC (International Electrotechnical Commission)<br />
in its standard IEC 364, corresponding to Europe HD 384,<br />
France NFC 15 100 and UK IEE Wiring Regulations, may<br />
have access to electrical components. In particular it is<br />
obligatory to disconnect all electrical power supplies to the<br />
unit and its accessories before carrying out any work.<br />
Disconnect the main power supply with an isolating device<br />
(not supplied by <strong>Carrier</strong>).<br />
IMPORTANT: The components, which make up the<br />
different control loops described in this manual include<br />
electronic items. As such, they may generate or be harmed<br />
by electromagnetic interference unless they are installed<br />
and used in accordance with these instructions. The<br />
components making up these control systems conform to<br />
the requirements of electromagnetic compatibility in<br />
residential and industrial areas. They also comply with<br />
the low-voltage directive.<br />
3.3 - General installation recommendations<br />
IMPORTANT: The numeric controller, power module,<br />
controls loops with speed controllers or in general units<br />
fitted with controls loops must have an isolating device<br />
upstream (for example a double-pole circuit breaker). If<br />
necessary, an easily operated emergency stop device (such<br />
as a punch-button switch) must cut off the power to all<br />
equipment. These safety devices shall be sized and installed<br />
in accordance with IEC Recommendation 364, corresponding<br />
to Europe HD 384, France NFC 15 100 and UK IEE<br />
Wiring Regulations. These devices are not supplied by<br />
<strong>Carrier</strong>.<br />
In general terms the following rules must be applied:<br />
• Units must be provided with over-voltage protection<br />
upstream (not supplied by <strong>Carrier</strong>).<br />
upstream over-voltage protection<br />
Unit without electric heater T2A<br />
Unit with electric heater T16A<br />
• Units must be protected by a differential type earth<br />
leakage current device (not supplied by <strong>Carrier</strong>).<br />
• The power disconnexion device must be clearly labelled<br />
to identify which items of equipment are connected to it.<br />
• The wiring of the components which make up the<br />
different control systems and the communication buses<br />
must be carried out in accordance with the latest rules<br />
and regulations by professional installers.<br />
• The power supply cable must be doubly insulated and<br />
fixed using an appropriate cable clamp or the cable<br />
clamp supplied with the numeric controller. The cable<br />
must be clamped on the outer insulation.<br />
• The control loop components must be installed in an<br />
environment, which conforms to their index of protection<br />
(IP).<br />
The maximum level of pollution is normally pollutant<br />
(level 2) and installation category II.<br />
• The low-voltage wiring (communication bus) must be<br />
kept physically separate from the power wiring.<br />
• In order to avoid interference with the communication<br />
links:<br />
- Keep low-voltage wiring away from power cables<br />
and avoid using the same cable run (a maximum of<br />
300 mm in common with the 230 VAC, 30 A cable)<br />
- Do not pass low-voltage wires through loops in<br />
the power cables<br />
- Do not connect heavy inductive loads to the same<br />
electrical supply (circuit breaker) used by the<br />
controllers, power modules or speed controllers.<br />
- Use the screened cable type recommended by<br />
<strong>Carrier</strong> and make sure all cables are connected to<br />
the controllers and power modules.<br />
3.4 - conformity<br />
This equipment has been declared to be in conformity with<br />
the main requirements of the directive by virtue of using<br />
the following standards:<br />
• Electromagnetic compatibility: 89/336/EEC<br />
• Low-voltage directive: 73/23/EEC
4 - susPensIon casInG<br />
This carries the <strong>ATM</strong> itself and provides the means for<br />
traversing the machine room partition. It comprises a noninsulated<br />
plenum within which an insulated duct carries<br />
the supply air.<br />
The modular design allows these units to be installed while<br />
building proceeds so that air ducts and the false ceiling can<br />
be installed much sooner than is usual. The operative section<br />
of the <strong>ATM</strong> need not be installed until just before the<br />
tenants arrive. They can be ordered for delivery very late in<br />
the building cycle - a very important financial consideration<br />
where major installations are involved.<br />
There are 4 types of suspension casing. The selection parameters<br />
are explained:<br />
WARNING: Once installed with ducts connected and the<br />
false ceiling completed, it is almost impossible to remove<br />
these units.<br />
With the exception of the removable constant air flow controllers<br />
and the electronic fresh air flow control module,<br />
there are no wearing parts in these casings.<br />
Ducts connect the casings to the diffusers. The pressure<br />
drops through the ducts must be compatible with the performance<br />
of the <strong>ATM</strong>s. The internal duct surfaces must be<br />
as smooth as possible. Avoid sharp bends. Check that there<br />
are no leaks and that they have not become fouled during<br />
installation.<br />
Protect the ducts against the ingress of building debris<br />
which could be sucked into the unit possibly damaging the<br />
fan and the thermostatic damper on the diffuser.<br />
As required by local sound emission codes install soundabsorbing<br />
and damping materials.<br />
15
5 - aIr treatMent ModuLe<br />
5.1 - Installation<br />
The <strong>Air</strong> <strong>Treatment</strong> <strong>Module</strong> (<strong>ATM</strong>) is generally the last<br />
component to be installed when all else is done. There are<br />
three reasons for this:<br />
• Avoidance of damage to the units while heavy work is<br />
still in progress<br />
• Releasing capital<br />
• Keeping work areas as free of clutter as possible.<br />
When the site is ready for the modules - casings are hooked<br />
onto the rails, air ducts are connected, water manifolds and<br />
shut-off valves are in place on their connection spigots,<br />
electrical installation is complete - only a few minutes are<br />
16<br />
Side A<br />
Size 1: 334 mm min.<br />
Size 2: 416 mm min.<br />
False ceiling<br />
Machine room wall<br />
Supply<br />
Return<br />
Controller<br />
needed to install the module, make the hydraulic and electrical<br />
connections and connect the condensate drain. Adequate<br />
filter access and manoeuvring space will have been<br />
provided (refer to the dimensional drawings).<br />
WARNING: Do not use the water valves or pipes or the<br />
electrical cables as handles for manoeuvring the modules.<br />
They may suffer serious damage.<br />
To fix the <strong>ATM</strong> on its casing, first hook it onto the suspension<br />
hooks provided then push it against the casing. This<br />
has the effect of compressing the gasket and locking the<br />
suspension latch. Next connect the water pipes. When all<br />
modules are installed in this way open the shut-off valves on<br />
the manifolds, bleed all air from the circuits (bleed valves<br />
are on the coil water outlets) then pressurise the system.<br />
Now the electrical connections can be made. Do not switch<br />
the power on until the electrical installation is complete.<br />
5.2 - removal<br />
atM assembled on its suspension casing<br />
• Disconnect the power supply by switching off the<br />
circuit breaker which must have been installed at the<br />
outset.<br />
• Disconnect the supply cables.<br />
• Close the water shut-off valves.<br />
• Disconnect the water pipes.<br />
• Disconnect the fresh air supply if fitted.<br />
• Unlatch the suspension latch.<br />
• Gently lower the unit to disengage it from the upper<br />
section. Pull it back about 10 mm to disengage it, then<br />
remove it.<br />
Filter access<br />
door opened<br />
Concrete ceiling<br />
See details in chapter 2.7<br />
“Suspension rails”<br />
Suspension casing<br />
<strong>ATM</strong><br />
Suspension casing<br />
Latch<br />
Suspension hook<br />
Gasket
6 - FresH aIr<br />
6.1 - standard suspension casing<br />
The <strong>ATM</strong> can have a fresh air controller to give precise<br />
control of the volume of fresh ventilation air admitted to<br />
the conditioned space. Space occupancy determines the<br />
fresh air requirement and the choice of controller. The size 1<br />
<strong>ATM</strong> has a 8.3 l/s (30 m 3 /h) fresh air controller. A 450 mm<br />
length of 80 mm diameter flexible duct (Class M1 fire rated)<br />
is supplied with every size 1 <strong>ATM</strong>.<br />
The size 2 <strong>ATM</strong> has a 16.6 l/s (60 m 3 /h) fresh air controller,<br />
and a 450 mm length of 125 mm diameter flexible duct<br />
(Class M1 fire rated) is supplied with every size 2 <strong>ATM</strong>.<br />
NOTE: Every duct has a metal collar to connect it to the<br />
main fresh air supply duct.<br />
Fresh air controllers need no special maintenance, but can<br />
be easily removed. Fresh air must be filtered upstream of<br />
the <strong>ATM</strong>.<br />
Fresh air ducts must be completely clear of debris before<br />
the unit is started up.<br />
6.2 - all fresh air suspension casing<br />
Plug<br />
<strong>ATM</strong> casing<br />
Flexible duct -<br />
max. length<br />
700 mm<br />
160 mm diameter<br />
connection duct<br />
This is for use on an <strong>ATM</strong> which is intended to operate<br />
using fresh air only, such as in a conference room.<br />
The casing is delivered with a plastic plug designed to blank<br />
off the return air outlet. This plug can be removed later if a<br />
change of use becomes necessary, such as in the event of<br />
repartitioning. The all fresh air casing is fitted with a 160 mm<br />
diameter air supply collar. Unlike the standard casing, the<br />
whole of the air flow passes through the coil and the filter.<br />
This casing is fitted with a 160 mm diameter flexible duct<br />
with a metal collar (maximum length 700 mm).<br />
6.3 - constant fresh air volume suspension casing<br />
atM without fresh air supply<br />
<strong>ATM</strong> casing<br />
160 mm diameter connection duct<br />
Restricter<br />
Flexible duct -<br />
max. length<br />
700 mm<br />
Connecting dia.: 125 mm<br />
Controller<br />
The multi-mode casing can accept the constant fresh air flow<br />
controller. Using this casing enables fresh air to be drawn<br />
across the <strong>ATM</strong> coil and <strong>ATM</strong> filter. It gives the opportunity<br />
to select from a wide range of constant air flow controllers:<br />
• Size 1 <strong>ATM</strong>: 8.3, 16.6-44.4 and 58.3 l/s (30, 60-160 and<br />
210 m 3 /h),<br />
• Size 2 <strong>ATM</strong>: 16.6-44.4, 58.3 and 69.4 l/s (60-160, 210<br />
and 250 m 3 /h).<br />
A 160 mm flexible connection duct, 700 mm long, with a<br />
metal collar is shipped with this casing.<br />
6.4 - Variable fresh air volume suspension casing<br />
atM without fresh air supply<br />
The use of this suspension casing permits fresh air treatment<br />
across the <strong>42GR</strong> coil and filter. It gives access to a<br />
wide fresh air flow range from 8.3 to 56 l/s. The fresh air<br />
flow can be set on the numeric controller. This casing is<br />
supplied without fresh air duct.<br />
17
6.5 - air treatment <strong>Module</strong> atM<br />
With important static pressure available at nominal air flow<br />
the <strong>ATM</strong> allows long runs of small diameter duct to be<br />
used (160 mm for size 1 and 200 mm for size 2).<br />
18<br />
Flexible duct -<br />
max. length<br />
700 mm<br />
Fresh air controller<br />
Fan motor<br />
access panel<br />
Fresh air controller (optional)<br />
The fresh air controller for the <strong>ATM</strong> gives precise control<br />
of the rate at which fresh air ventilation air is introduced<br />
and the supply air refresh rate. Selection of the fresh air<br />
controller bearing in mind the occupancy of each room or<br />
zone is critical.<br />
<strong>ATM</strong> size 1 when equipped with a 8.3 l/s or 30 m 3 /h (-10%<br />
+ 20%) fresh air controller is shipped with a flexible connection<br />
duct, with a length of 450 mm maximum and 80 mm<br />
diameter.<br />
<strong>ATM</strong> size 2 when equipped with a 16.6 l/s or 60 m 3 /h (-10%<br />
+ 20%) fresh air controller is shipped with a flexible connection<br />
duct, with a length of 450 mm maximum and 125 mm<br />
diameter.<br />
NOTE: A metal collar is also shipped with each unit to<br />
connect the flexible duct to the main supply duct.<br />
The 16.6 l/s or 60 m 3 /h fresh air controller may be modified<br />
on site by relocating or removing two plastic restricters in<br />
order to increase its constant fresh air flow capacity to a<br />
maximum of 44.4 l/s or 160 m 3 /h.<br />
A label on the <strong>42GR</strong> shows how to readjust the two plastic<br />
restricters.<br />
NOTE: To operate correctly, the 8.3 l/s or 30 m 3 /h constant<br />
fresh air flow controller requires a differential pressure in<br />
the range 50 Pa to 200 Pa. The 16.6 l/s or 60 m 3 /h constant<br />
fresh air controller requires a differential pressure in the<br />
range 70 Pa to 200 Pa.<br />
constant fresh air flow controller, adjustable from<br />
16.6 to 44.4 l/s (60 to 160 m 3 /h)
7 - Fan Motor asseMbLy<br />
7.1 - description<br />
<strong>ATM</strong>s have backward-curved fans on the size 1 and forwardcurved<br />
fans on the size 2, to give very high available static<br />
pressure. The fan motor is supplied at 230 V. Its speed is<br />
varied by either a controller card or a speed controller.<br />
2 screws C<br />
2 screws B<br />
Fan motor removal<br />
7.2 - Fan motor removal<br />
For the fan motor assembly to be removed, the <strong>ATM</strong> itself<br />
must first be removed. The assembly is accessed through<br />
the access door which must therefore be removed.<br />
Disconnect the quick connect power supply cable for the<br />
fan motor. Remove screws B and then remove screws C.<br />
Follow this procedure in reverse when installing the replacement<br />
assembly.<br />
Fan access door<br />
(8 screws)<br />
19
8 - Water coIL<br />
8.1 - removing the coil<br />
To remove the coil:<br />
• Remove the unit as described on page 16 and set it<br />
down flat on its side.<br />
• Remove the valves and the water pipes.<br />
• Open the filter access door.<br />
• Remove the filter.<br />
• Remove the coil fixing screws front and rear.<br />
20<br />
Filter access door<br />
coil removal<br />
• Withdraw the bleed valves.<br />
• Remove the nut retaining clips followed by the nuts.<br />
• Withdraw the coil via the filter access door taking care<br />
not to damage the insulation stuck to the sides of the<br />
coil.<br />
• Reverse the procedure described when installing the<br />
replacement coil.<br />
WARNING: Bleed the circuit thoroughly when refilling<br />
the circuit with water.<br />
2 rear fixing screws<br />
Cover with 3 screws<br />
2 front fixing screws
8.2 - Water inlet/outlet connections<br />
Coil connection layout - aTm size 1<br />
All Dimensions are in mm<br />
Coil connection layout - aTm size 2<br />
All Dimensions are in mm<br />
Hot water<br />
inlet<br />
Hot water<br />
inlet<br />
Chilled<br />
water outlet<br />
Chilled<br />
water outlet<br />
Chilled<br />
water inlet<br />
Chilled<br />
water inlet<br />
Hot water<br />
outlet<br />
Hot water<br />
outlet<br />
16 mm stub 1/2” gas (15/21)<br />
nut for plain joint<br />
1/2” gas (15/21) threaded stub<br />
for plain joint with bleed valve<br />
16 mm stub 1/2” gas (15/21)<br />
nut for plain joint<br />
1/2” gas (15/21) threaded stub<br />
for plain joint with bleed valve<br />
21
9 - Water FLoW controL VaLVes<br />
9.1 - electrothermal actuator (on/off)<br />
This on/off type actuator is used with a <strong>Carrier</strong> room<br />
thermostat (electromechanical controller) and the <strong>Carrier</strong><br />
numeric controller.<br />
NOTE: The electrothermal actuator is delivered in the<br />
normally closed position regardless of the two-way or<br />
three-way valve body used (way A-AB closed in the case<br />
of a three-way valve).<br />
Therefore to enable the installation to be filled with water,<br />
the water circuits to be equalised and the units to be purged,<br />
the valves will have to be opened by sending a command<br />
from the wall thermostats.<br />
9.2 - replacing actuators<br />
The actuators on both the chilled water and the hot water<br />
valves may be replaced if either develops a fault.<br />
• Disconnect the power supply to the unit before carrying<br />
out any work on a unit.<br />
• Disconnect the actuator power supply cable.<br />
- On/off type actuator used with a <strong>Carrier</strong> numeric<br />
controller:<br />
Disconnect the quick connect power supply cable<br />
on the actuator.<br />
- On/off actuator used with a wall-mounted<br />
thermostat:<br />
Remove the plastic protection cap (held in place<br />
with two hexagon head (8 mm AF) screws).<br />
Disconnect the quick connect power supply cable<br />
on the actuator. This can be done by using a screwdriver<br />
to press down on the spring tongue and<br />
pulling out the wire from the appropriate terminal.<br />
• Uncouple the faulty actuator. Reverse the removal<br />
procedure described above when installing the replacement<br />
motor.<br />
WARNING: Ensure that the actuator is firmly screwed to<br />
the valve body (maximum torque 15 N·m).<br />
22<br />
9.3 - electrical circuit diagrams for actuators<br />
9.3.1 - <strong>Carrier</strong> numeric controller<br />
NOTE: For further information, please refer to the selection<br />
manual, installation manual and start-up handbook<br />
for the <strong>Carrier</strong> numeric controller.<br />
9.3.2 - electromechanical controller with fan speed<br />
controller<br />
4-pipes<br />
cooling/heating valve actuator connections<br />
FM<br />
FM<br />
Brown<br />
Black<br />
Brown<br />
Blue<br />
Actuator for<br />
cooling water<br />
valve<br />
Blue<br />
Red Brown<br />
Change-over<br />
Actuator for<br />
heating water<br />
valve<br />
cooling/heating valve actuator connections<br />
Actuator for<br />
cooling water<br />
valve
9.4 - replacing a valve body<br />
• Disconnect the power supply to the unit before carrying<br />
out any work on a unit.<br />
• Close the isolating valves on the manifolds.<br />
• Uncouple the actuator from the valve body.<br />
• Disconnect the 1/2” gas connection nut on the flexible<br />
water pipe from the valve to be replaced.<br />
• Unscrew and remove the valve body to be replaced<br />
(1/2” gas connection).<br />
• Install a new valve body on the coil (do not forget the<br />
joint).<br />
• Reconnect the flexible water pipe.<br />
10 - FLexIbLe Water PIPes<br />
description<br />
Flexible pipes are used to make the water connections. Pipes<br />
are insulated for the chilled water circuit and not insulated<br />
for the hot water circuit. Every branch must therefore have<br />
an isolating valve.<br />
• Pipes: MEPD-based elastomer (modified ethylenepropylene-diene)<br />
• Braid: 304L stainless steel<br />
• Insulation: cell foam rubber to M1 fire rating (chilled<br />
water pipes only, 9 mm thickness)<br />
• Minimum bending radius: 72 mm non-insulated, 106 mm<br />
insulated<br />
• Reinstall the actuator ensuring that it is securely<br />
screwed to the valve body.<br />
• Tighten all water pipes ensuring that all seals are<br />
correctly installed (torque 15 N·m).<br />
• Open the isolating valves on the manifolds and bleed<br />
all air from the system.<br />
• Check that there are no leaks and restart the <strong>ATM</strong>.<br />
WARNING: When replacing a valve always ensure that<br />
the direction of flow through the valve is as shown by the<br />
arrow on the valve body.<br />
If the direction of flow is wrong, the valve will deteriorate<br />
rapidly.<br />
• The flexible water pipes are designed to carry treated<br />
or untreated water (maximum 40% concentration of<br />
ethylene glycol or propylene glycol)<br />
• Maximum hot water temperature 90°C<br />
• Operating pressure: 16 bar<br />
• Test pressure: 24 bar<br />
• Connections: 1/2” BSP threaded nut<br />
• Length: 650 mm<br />
23
11 - FILter<br />
description<br />
<strong>ATM</strong>s may have a high efficiency filters (type F5 throwaway).<br />
The filter can be removed through a door in the<br />
underside of the unit. The ease with which the filter can be<br />
removed and replaced is an important benefit for service<br />
technicians.<br />
24<br />
Latch<br />
Gasket<br />
<strong>Air</strong> filters should be changed regularly. How often this is<br />
needed depends on the cleanliness of the working environment<br />
and the rate at which the filter becomes clogged.<br />
If clogged filters are not changed they can increase the<br />
pressure drop, trapped dust particles may be given off and<br />
entrained in the air supply, and the general performance of<br />
the <strong>ATM</strong> may be degraded as the air flow reduces.<br />
12 - eLectrIc Heater<br />
The electric heater may be installed either on the fan inlet<br />
(size 1 <strong>ATM</strong>) or on the fan outlet (size 2 <strong>ATM</strong>). In both<br />
cases the <strong>ATM</strong> itself must be removed to access the electric<br />
heater (see chapter 7: “Fan motor assembly).
12.1 - removing the electric heater from the atM size 1<br />
Controller<br />
Two fixing screws for electric heater support bracket<br />
12.2 - removing the electric heater from the atM size 2<br />
Two external fixing screws for electric heater support bracket<br />
Controller<br />
Fan motor access panel<br />
25
13 - PerForMances<br />
13.1 - electrical data<br />
aTm size 1 without electric heater<br />
u I P Fan motor Qv Qv Pressure<br />
(V) (a) (W) speed (r/s) (m 3 /h) (l/s) (Pa)<br />
230 0.66 147 41.8 390 108.3 250<br />
230 0.64 143 42.3 350 97.5 310<br />
230 0.63 140 42.8 320 88.9 349<br />
230 0.62 137 43.3 290 80.6 391<br />
230 0.6 133 43.7 255 70.8 433<br />
230 0.59 128 44.1 222 61.7 469<br />
230 0.58 124 44.6 182 50.6 516<br />
230 0.56 119 45.1 140 38.9 562<br />
230 0.55 116 45.5 102 28.3 598<br />
230 0.54 111 46.0 63 17.5 629<br />
200 0.61 122 39.8 330 91.7 268<br />
200 0.59 119 40.4 301 83.6 311<br />
200 0.58 116 41.1 277 76.9 348<br />
200 0.56 112 41.7 247 68.6 391<br />
200 0.54 108 42.3 220 61.1 425<br />
200 0.52 104 43.0 184 51.1 473<br />
200 0.5 99 43.5 154 42.8 508<br />
200 0.47 93 44.3 102 28.3 562<br />
200 0.45 88 45.0 66 18.3 602<br />
170 0.59 104 34.9 286 79.4 206<br />
170 0.57 101 35.8 262 72.8 243<br />
170 0.55 98 36.9 237 65.8 286<br />
170 0.53 95 37.8 214 59.4 328<br />
170 0.51 91 38.9 185 51.4 373<br />
170 0.49 87 40.2 152 42.2 427<br />
170 0.47 84 41.3 124 34.4 469<br />
170 0.44 79 42.4 85 23.6 521<br />
170 0.41 73 43.5 52 14.4 561<br />
140 0.57 81 27.2 219 60.8 120<br />
140 0.56 78 29.3 189 52.5 175<br />
140 0.54 75 31.3 162 45.0 228<br />
140 0.52 73 33.2 138 38.3 279<br />
140 0.49 70 35.3 107 29.7 341<br />
140 0.47 67 37.1 78 21.7 396<br />
140 0.45 64 38.7 55 15.3 440<br />
110 0.49 55 21.0 129 35.8 88<br />
110 0.48 54 23.3 103 28.6 130<br />
110 0.47 53 25.2 88 24.4 165<br />
110 0.46 52 27.2 67 18.6 203<br />
80 0.36 30 14.0 82 22.8 37<br />
80 0.36 29 15.3 61 16.9 55<br />
80 0.35 29 16.7 43 11.9 76<br />
80 0.34 28 18.3 29 8.1 89<br />
Legend:<br />
U : Fan motor power supply<br />
I : Current draw<br />
P : Power input to the fan motor, <strong>Carrier</strong> numeric controller or speed<br />
controller<br />
r/s : Fan motor rotation speed (revolutions/second)<br />
Qv : <strong>Air</strong> flow<br />
Pressure : Available static pressure<br />
26<br />
aTm size 2 without electric heater<br />
u I P Fan motor Qv Qv Pressure<br />
(V) (a) (W) speed (r/s) (m 3 /h) (l/s) (Pa)<br />
230 0.91 208 38.3 500 138.9 320<br />
230 0.87 195 39.4 449 124.7 364<br />
230 0.83 184 40.8 403 111.9 408<br />
230 0.8 175 41.8 360 100.0 435<br />
230 0.77 168 42.4 323 89.7 460<br />
230 0.75 162 43.0 287 79.7 479<br />
230 0.74 157 43.5 247 68.6 499<br />
230 0.72 153 43.8 216 60.0 516<br />
200 0.88 176 34.3 440 122.2 250<br />
200 0.84 166 36.4 398 110.6 311<br />
200 0.8 158 38.1 359 99.7 359<br />
200 0.77 150 39.3 322 89.4 389<br />
200 0.74 142 40.5 277 76.9 421<br />
200 0.72 138 41.2 248 68.9 440<br />
200 0.7 132 41.8 204 56.7 461<br />
170 0.82 140 28.8 367 101.8 167<br />
170 0.78 135 32.0 329 91.4 243<br />
170 0.75 127 34.5 289 80.3 292<br />
170 0.72 122 36.2 258 71.7 325<br />
170 0.7 117 37.2 227 63.1 354<br />
170 0.68 114 38.0 195 54.2 377<br />
170 0.67 112 38.5 172 47.8 397<br />
140 0.71 100 22.1 266 73.9 93<br />
140 0.7 98 25.8 237 65.8 153<br />
140 0.68 97 27.8 217 60.3 188<br />
140 0.66 94 30.0 190 52.8 225<br />
140 0.65 92 31.1 168 46.7 255<br />
140 0.64 90 32.3 144 40.0 279<br />
110 0.57 64 16.3 190 52.8 47<br />
110 0.58 64 19.1 160 44.4 80<br />
110 0.57 64 20.4 140 38.9 99<br />
110 0.57 64 22.3 120 33.3 99<br />
110 0.56 63 24.3 90 25.0 155<br />
80 0.43 35 11.1 121 33.6 20<br />
80 0.42 35 13.3 83 23.1 39<br />
80 0.42 35 14.8 52 14.4 55
13.2 - air flow/available static pressure data<br />
13.2.1 - aTm size 1<br />
available static pressure curve (pa) as a function of air flow (m 3 /h or l/s)<br />
Available pressure, Pa<br />
Legend:<br />
Without electric heater (with 6-row water coil)<br />
With electric heater (with 5-row water coil)<br />
U Fan motor power supply<br />
<strong>Air</strong> flow, Qv<br />
IMPORTANT: The curves were derived by smoothing, based<br />
on the information contained in the electrical data table.<br />
27
13.2.2 - aTm size 2<br />
available static pressure curve (pa) as a function of air flow (m 3 /h or l/s)<br />
Available pressure, Pa<br />
Legend:<br />
Without electric heater (with 6-row water coil)<br />
With electric heater (with 5-row water coil)<br />
U Fan motor power supply<br />
28<br />
<strong>Air</strong> flow, Qv<br />
IMPORTANT: The curves were derived by smoothing, based<br />
on the information contained in the electrical data table.
14 - controLLer<br />
14.1 - carrier numeric controller<br />
At the top of the range, each <strong>ATM</strong> is fitted with a programmable<br />
numeric controller.<br />
The main functions of the controller are:<br />
• Controlling room temperature<br />
• Raising, lowering and adjusting the angle of Venetian<br />
blinds (optional)<br />
• Brightening and dimming light sources (optional)<br />
• Selecting comfort or unoccupied mode through a Zone<br />
User Interface or wall thermostat<br />
• Controlling ventilation (e.g. by selecting forced ventilation<br />
mode).<br />
NOTE: For further information, please refer to the selection<br />
manual, installation manual or start-up handbook<br />
for the <strong>Carrier</strong> numeric controller.<br />
14.2 - carrier electromechanical controller with fan<br />
speed controller<br />
14.2.1 - speed controller<br />
Inputting a preselected speed<br />
This input gives three speed settings to the speed controller.<br />
The speeds are each adjustable by a potentiometer on the<br />
face of the controller.<br />
Setting the speed is achieved when the supply power is<br />
applied to one of the 3 input pre-selections.<br />
Speed control potentiometer ranges are:<br />
• low speed 80 to 120 V (± 15 V)<br />
• medium speed 110 to 170 V (± 15 V)<br />
• high speed 160 to 225 V (± 15 V)<br />
The output ranges are given for a supply network input<br />
voltage of 230 V.a.c. (RMS).<br />
Control input 0-10 v.d.c.<br />
This signal has two operating bands:<br />
• between 0 and 2 V (± 150 mV), the output is zero<br />
• between 2 V (± 150 mV) and 10 V, the output ranges<br />
from 80 V (± 15 V) to 225 V (± 15 V), for an input<br />
voltage of 230 V.a.c.<br />
WARNING: Only one of the 2 different control inputs<br />
should be selected, otherwise the fan speed controller will<br />
be damaged.<br />
Control voltage<br />
V<br />
Supply network (supply to fan motor)<br />
14.2.2 - general characteristics<br />
Selection of inputting a 230 V.a.c. or 0 to 10 V control input<br />
is automatic. An LED on the face of the controller shows<br />
when it is on.<br />
NOTE: Note that the controller has a circuit which forces<br />
the selection of high speed for 2 seconds when:<br />
• power is switched on<br />
• an input control signal from 0 to 10 V at a level<br />
higher than 2 V is established<br />
• a speed is selected<br />
• Power supply: 230 V ± 15%<br />
• Output voltage range: 80 to 225 V (± 15 V)<br />
• Screw terminal connections: size 2 x 1.5 mm 2<br />
• Full load starting capability<br />
• Overload capacity: + 50% of maximum power for one<br />
minute<br />
• DIN enclosure, 12 screw terminals<br />
• IP 201 protection<br />
• Operating environment: + 5°C to + 40°C, 85% to 40%<br />
RH<br />
• Power input 2.5 VA<br />
• CE compliance:<br />
- in accordance with EMC directive 89/336/EEC,<br />
- in accordance with low-voltage directive 73/23/<br />
EEC dated 19/02/73 as amended by directive<br />
93/68/EEC dated 22/07/93.<br />
The speed control option also has a terminal block for<br />
connecting control valve cables or electric heater cables as<br />
appropriate.<br />
The controller and terminal block are protected by a selfextinguishing<br />
ABS plastic cover.<br />
The <strong>Carrier</strong> speed controller is the indispensable interface<br />
between the <strong>ATM</strong> and proprietary controllers of the fan<br />
coil type.<br />
V<br />
29
14.3 - the various atM configurations available<br />
Each <strong>ATM</strong> can be fitted with one or two on/off valves, two<br />
or three ports and flexible water pipes, depending how the<br />
unit is configured.<br />
a) The aTm is fitted with a speed controller and a 5-row<br />
cooling coil which operates in cooling mode only (2<br />
pipes).<br />
Operates in “cooling” mode only.<br />
This option includes a 2-way on/off valve and two<br />
insulated flexible water pipes.<br />
b) The aTm is fitted with a speed controller and a 5-row<br />
cooling or heating coil (2 pipes with changeover).<br />
Operates in cooling or heating mode. This application<br />
is of the heat pump type.<br />
This option includes a 3-way on/off valve, a heating/<br />
cooling changeover switch and two insulated flexible<br />
water pipes.<br />
c) The aTm is fitted with a speed controller, a 5-row<br />
cooling coil and a 1-row heating coil (4 pipes).<br />
Operates in cooling and heating mode in sequence.<br />
This option includes 2 on/off valves with 2 ports, and 4<br />
flexible water pipes, 2 of which are insulated and 2<br />
uninsulated.<br />
d) The aTm is fitted with a speed controller, a 5-row<br />
cooling coil and an electric heater (2 pipes and 2 wires).<br />
Operates in cooling mode or heating mode with electric<br />
heater in sequence.<br />
This option includes a 2-way on/off valve, 2 insulated<br />
flexible water pipes and 1 power relay for controlling<br />
the electric heater.<br />
30<br />
14.4 - technical specifications for the heating/<br />
cooling changeover switch<br />
The heating/cooling changeover switch is designed to be<br />
installed straight onto the couplings of the 3-way valves on<br />
the <strong>ATM</strong>. It detects temperature changes in the fluid circulating<br />
in the primary water circuit. A changeover switch<br />
operates according to the water temperature in accordance<br />
with the diagram below.<br />
All Dimensions are in mm<br />
Δ : Differential 11.1 K ± 3.3<br />
CM : Cooling Mode<br />
HM : Heating Mode<br />
θ : Water temperature °C<br />
Wire length:<br />
1000 mm<br />
When a heating/cooling changeover switch is connected<br />
between the room thermostat and the water flow control<br />
valve, the changeover between heating and cooling modes<br />
takes place automatically in accordance with the following<br />
diagram.<br />
HM<br />
CM
14.5 - Master/slave control<br />
With the high capacity fan speed controller it is possible to link up to 5 <strong>ATM</strong>s to one <strong>Carrier</strong> thermostat with no additional<br />
relays. Electrothermal 230 V.a.c. on/off actuators are used. When electric heaters are used with a cooling coil the heater<br />
power contactor must be used.<br />
14.5.1 - 4-pipe configurations<br />
Cooling<br />
valve<br />
Cooling<br />
valve<br />
Heating<br />
valve<br />
Blue<br />
Heating<br />
valve<br />
Blue<br />
Fan<br />
Fan<br />
Supply:<br />
230 V, 50 Hz, 1 phase<br />
3G1, 5 mm 2<br />
Protection: T2A<br />
Supply:<br />
230 V, 50 Hz, 1 phase<br />
3G1, 5 mm 2<br />
Protection: T2A<br />
5 x 0.75 mm 2<br />
Cooling valve control<br />
Heating valve control<br />
Speed 1 (LS)<br />
Speed 2<br />
Speed 3 (HS)<br />
L: Thermostat supply (230 V a.c.)<br />
N: Thermostat supply (230 V a.c.)<br />
7 x 0.75 mm 2<br />
31
14.5.2 - 2-pipe configuration and electric heater<br />
32<br />
RELAY<br />
RELAY<br />
Electric<br />
heater<br />
Electric<br />
heater<br />
Cooling<br />
valve<br />
Blue<br />
Cooling<br />
valve<br />
Blue<br />
Fan<br />
Fan<br />
Supply:<br />
230 V, 50 Hz, 1 phase<br />
3G2, 5 mm 2<br />
Protection: T16A<br />
Supply:<br />
230 V, 50 Hz, 1 phase<br />
3G2, 5 mm 2<br />
Protection: T16A<br />
5 x 0.75 mm 2<br />
Cooling valve open<br />
Electric heater control<br />
Speed 1 (LS)<br />
Speed 2<br />
Speed 3 (HS)<br />
L: Thermostat supply (230 V a.c.)<br />
N: Thermostat supply (230 V a.c.)<br />
7 x 0.75 mm 2
14.6 - Wiring diagrams<br />
The <strong>ATM</strong> unit can be delivered without a control system, that is, without valves or flexible water pipes, but with the fan<br />
cable bundle connected to the speed controller and the electric heater connected to the power relay (depending on the<br />
configuration). If this option is chosen, the <strong>ATM</strong> is delivered with a terminal strip and a plastic protective cover.<br />
14.6.1 - 5-row cooling coil (2 pipes)<br />
Cooling valve<br />
14.6.2 - 5-row coil with heating/cooling changeover (2-pipe change-over)<br />
Blue<br />
Reversing<br />
valve<br />
Blue<br />
Fan<br />
Fan<br />
Speed 1(LS)<br />
Speed 2<br />
Speed 3 (HS)<br />
Cooling valve open<br />
L: Thermostat supply (230 V a.c.)<br />
N: Thermostat supply (230 V a.c.)<br />
6 x 0.75 mm 2<br />
Supply:<br />
230 V, 50 Hz, 1 phase 3G1, 5 mm 2<br />
Protection: T2A<br />
Speed 1(LS)<br />
Speed 2<br />
Speed 3 (HS)<br />
Cooling valve control<br />
Heating valve control<br />
L: Thermostat supply (230 V a.c.)<br />
N: Thermostat supply (230 V a.c.)<br />
7 x 0.75 mm 2<br />
Supply:<br />
230 V, 50 Hz, 1 phase 3G1, 5 mm 2<br />
Protection: T2A<br />
33
14.6.3 - 6-row coil, 5 rows cooling, 1 row heating (4 pipes)<br />
14.6.4 - 5-row cooling coil and pTC electric heater<br />
34<br />
RELAY<br />
Cooling<br />
valve<br />
Electric<br />
heater<br />
Heating<br />
valve<br />
Blue<br />
Fan<br />
Cooling valve<br />
Blue<br />
Fan<br />
Speed 1(LS)<br />
Speed 2<br />
Speed 3 (HS)<br />
Cooling valve open<br />
Heating valve open<br />
L: Thermostat supply (230 V a.c.)<br />
N: Thermostat supply (230 V a.c.)<br />
7 x 0.75 mm 2<br />
Supply:<br />
230 V, 50 Hz, 1 phase 3G1, 5 mm 2<br />
Protection: T2A<br />
Speed 1(LS)<br />
Speed 2<br />
Speed 3 (HS)<br />
Cooling valve open<br />
Electric heater control<br />
L: Thermostat supply (230 V a.c.)<br />
N: Thermostat supply (230 V a.c.)<br />
6 x 0.75 mm 2<br />
Supply:<br />
230 V, 50 Hz, 1 phase 3G1, 5 mm 2<br />
Protection: T2A
carrier scs demonstration suite<br />
Whether you live in the tropics or in Greenland<br />
Whether you suffer from the heat, from the cold or from lack of air<br />
CARRIER has the solution and can show it to you in the demonstration suite<br />
✔ simulation of the climate in your region<br />
The programmes available<br />
✔ simulation of the heating and cooling loads according to<br />
your needs<br />
✔ measuring, storing and display of the air temperatures<br />
and the air distribution pattern taking into account your<br />
climatic and architectural constraints - even at climatic<br />
extremes<br />
✔ optimisation of the physical location of the air terminals in<br />
your building walls or ceilings<br />
✔ determination and control of the sound level in every<br />
room<br />
✔ simulation of the control system of your terminals<br />
and their link to your BMS system<br />
✔ and finally, simulation of how your interior will look,<br />
with a floor plan, lights and blinds to ensure true quality<br />
Experience a real preview of your future installation<br />
Order No.: 14243-76, 10.2007- Supersedes order No.: 14243-20, 02.2005. Manufacturer: <strong>Carrier</strong> SCS, Montluel, France.<br />
Manufacturer reserves the right to change any product specification without notice Printed in Holland.