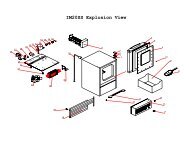
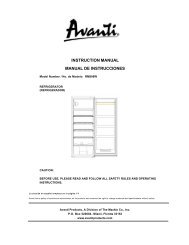
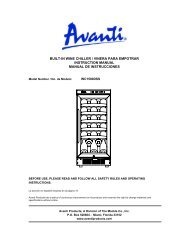
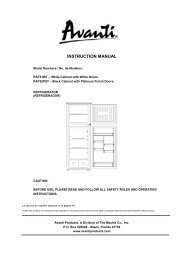
instruction manual manual de instrucciones - Avanti Products
instruction manual manual de instrucciones - Avanti Products
instruction manual manual de instrucciones - Avanti Products

You also want an ePaper? Increase the reach of your titles
YUMPU automatically turns print PDFs into web optimized ePapers that Google loves.
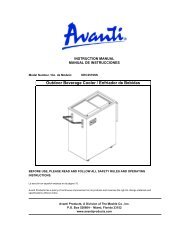
� Convierta su Dispensador <strong>de</strong> Cerveza en “Todo un Refrigerador”<br />
1. Gire el control a la posición “OFF”.<br />
2. Cierre la válvula principal en el cilindro <strong>de</strong> CO2 (GAS CARBONICO).<br />
3. Cierre la válvula <strong>de</strong> <strong>de</strong>sconexión secundaria en el tubo <strong>de</strong>l regulador.<br />
4. Cierre la conexión entre el barril <strong>de</strong> la cerveza y el acoplador <strong>de</strong>l barril.<br />
5. Drene cualquier tipo <strong>de</strong> residuo <strong>de</strong> cerveza en las vías.<br />
6. Desconecte las vías <strong>de</strong> cerveza y las vías <strong>de</strong> aire CO2 (GAS CARBONICO) <strong>de</strong>l barril <strong>de</strong><br />
cerveza.<br />
7. Retire el barril <strong>de</strong> cerveza, el soporte y el platillo <strong>de</strong> metal inferior <strong>de</strong> la cabina.<br />
8. Retire el adaptador <strong>de</strong>l barril.<br />
9. Desconecte la vía <strong>de</strong> aire <strong>de</strong>l cilindro <strong>de</strong> CO2 (GAS CARBONICO).<br />
10. Retire la vía <strong>de</strong> aire CO2 (GAS CARBONICO) <strong>de</strong> la tapa <strong>de</strong> la cabina.<br />
11. Reemplace la tapa <strong>de</strong> la vía <strong>de</strong> aire posterior.<br />
12. Retire la torre <strong>de</strong> cerveza. También tire <strong>de</strong> la línea <strong>de</strong> la cerveza a través <strong>de</strong>l hueco <strong>de</strong><br />
la cabina superior.<br />
13. Reemplace la tapa superior <strong>de</strong>l gabinete.<br />
14. Instale las parrillas opcionales en los soportes laterales.<br />
15. Ajuste la temperatura a su gusto.<br />
� Control <strong>de</strong> temperatura<br />
USANDO SU DISPENSADOR DE CERVEZA<br />
Para empezar, gire el control <strong>de</strong> temperatura al nivel más alto (6)<br />
para enfriamiento rápido. Deje que la unidad funcione por 3 horas<br />
seguidas. La temperatura <strong>de</strong>l termostato se pue<strong>de</strong> ajustar <strong>de</strong>s<strong>de</strong> 33<br />
°F a 45 °F (2.2ºC to 7.2ºC).<br />
La temperatura óptima para servir cerveza es entre 34° F y 38° F<br />
(1.1ºC – 3.3ºC) y ese es un factor importante que <strong>de</strong>be consi<strong>de</strong>rar<br />
para almacenar y surtir cerveza.<br />
Para apagar su dispensador, gire el control a la posición “OFF”.<br />
NOTA: Mantenga un termómetro a<strong>de</strong>cuado a la mano y ajuste el control temperatura según<br />
sus necesida<strong>de</strong>s.<br />
� Descongelamiento Automático<br />
No hay necesidad <strong>de</strong> <strong>de</strong>scongelar el dispensador <strong>de</strong> la cerveza. Toda el agua<br />
<strong>de</strong>scongelada pasa por la salida <strong>de</strong> drenaje por la pared posterior, a una ban<strong>de</strong>ja ubicada<br />
sobre el compresor, don<strong>de</strong> se evaporará.<br />
� NOTA Si la unidad es <strong>de</strong>senchufada, pier<strong>de</strong> po<strong>de</strong>r o es apagada, espere <strong>de</strong> 3 a 5<br />
minutos antes <strong>de</strong> reiniciar la unidad. Si usted intenta reiniciar antes <strong>de</strong> este tiempo, es<br />
muy posible que el dispensador no funcione.<br />
CUIDADO Y MANTENIMIENTO<br />
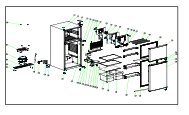
� Instalación <strong>de</strong> la puerta <strong>de</strong>l Dispensador <strong>de</strong> Cerveza<br />
El Dispensador <strong>de</strong> Cerveza tiene la capacidad <strong>de</strong> po<strong>de</strong>rse abrir no solo por la izquierda sino<br />
también por el lado <strong>de</strong>recho. La unidad viene con una puerta que se abre por la izquierda.<br />
Si usted <strong>de</strong>sea pue<strong>de</strong> invertir la dirección <strong>de</strong> apertura <strong>de</strong> la puerta, siga las siguientes<br />
<strong>instrucciones</strong>:<br />
� Como Cambiar la Direccion <strong>de</strong> Apertura <strong>de</strong> la Puerta<br />
En caso <strong>de</strong> que necesite cambiar el lado <strong>de</strong> apertura <strong>de</strong> la puerta, por favor consulte al<br />
31