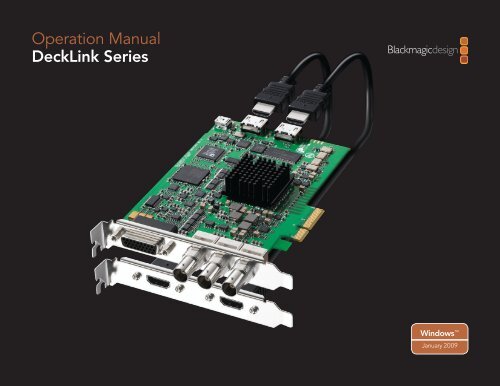
Operation Manual DeckLink Series - Go Electronic
Operation Manual DeckLink Series - Go Electronic
Operation Manual DeckLink Series - Go Electronic

You also want an ePaper? Increase the reach of your titles
YUMPU automatically turns print PDFs into web optimized ePapers that Google loves.
<strong>Operation</strong> <strong>Manual</strong><br />
<strong>DeckLink</strong> <strong>Series</strong><br />
Windows <br />
January 2009
Contents<br />
Overview<br />
Contents 2<br />
Welcome 3<br />
How to use your <strong>DeckLink</strong> card<br />
Installation 4<br />
Hardware Installation 4<br />
Installing a <strong>DeckLink</strong> PCIe card 4<br />
Installing the Software 6<br />
Testing your Installation 7<br />
Blackmagic Software 8<br />
Using Blackmagic Media Express 8<br />
Using Blackmagic Framelink 11<br />
Setting Blackmagic Preferences 12<br />
Lookup Tables (LUTs) in <strong>DeckLink</strong> HD Extreme 2 15<br />
Blackmagic Disk Speed Test 20<br />
Third Party Software 21<br />
Adobe Premiere Pro 21<br />
Adobe After Effects 23<br />
Adobe Photoshop 24<br />
Supported File Formats 25<br />
Troubleshooting Video Capture and Playback 26<br />
Connection Diagrams<br />
Betacam SP analog deck 27<br />
SDI digital deck 28<br />
Sony HDCAM SR deck in 4:2:2 <strong>DeckLink</strong> HD Extreme 2 29<br />
Sony HDCAM SR deck in 4:2:2 <strong>DeckLink</strong> HD Pro PCIe 30<br />
Sony HDCAM SR deck in 4:4:4 31<br />
NTSC/PAL monitor 32<br />
Connecting to S-Video <strong>DeckLink</strong> HD Extreme 2 33<br />
Connecting to S-Video <strong>DeckLink</strong> HD Extreme 34<br />
YUV component monitor 35<br />
Connecting to an HDTV 36<br />
HDMI Workflow 37<br />
Monitoring Via HDMI 38<br />
2K Monitoring with HDLink Pro 39<br />
Device Diagrams<br />
<strong>DeckLink</strong> HD Extreme 2 and Professional Breakout Cable 40<br />
<strong>DeckLink</strong> HD Extreme 2 and Consumer Breakout Cable 41<br />
<strong>DeckLink</strong> HD Extreme and Professional Breakout Cable 42<br />
<strong>DeckLink</strong> HD Extreme and Consumer Breakout Cable 43<br />
<strong>DeckLink</strong> SDI 44<br />
<strong>DeckLink</strong> Studio 45<br />
<strong>DeckLink</strong> HD Pro PCIe 46<br />
<strong>DeckLink</strong> HD Pro PCI-X 47<br />
<strong>DeckLink</strong> Extreme 48<br />
<strong>DeckLink</strong> Extreme PCIe 49<br />
<strong>DeckLink</strong> SP 50<br />
<strong>DeckLink</strong> SP PCIe 51<br />
<strong>DeckLink</strong> Pro 52<br />
<strong>DeckLink</strong> 53<br />
Developer Information<br />
Blackmagic 2K Format Overview 54<br />
Blackmagic 2K Format Table 55<br />
3 Year Limited Warranty<br />
Warranty Terms and Conditions 56<br />
2
Welcome<br />
Thank you for purchasing a <strong>DeckLink</strong> broadcast video card.<br />
We hope you share our dream for the television industry to become a truly creative industry by<br />
allowing anyone to have access to the highest quality video.<br />
Previously high end television and post production required investment in millions of dollars of<br />
hardware, however with <strong>DeckLink</strong> cards, even 10 bit uncompressed is now easily affordable. We<br />
hope you get years of use from your new <strong>DeckLink</strong> card and have fun working with some of the<br />
world’s hottest television and design software!<br />
This instruction manual should contain all the information you’ll need on installing your <strong>DeckLink</strong><br />
capture card, although it’s always a good idea to ask a technical assistant for help if you have not<br />
installed hardware cards into computers before. As <strong>DeckLink</strong> uses uncompressed video and the<br />
data rates are quite high, you’ll need fast disk storage and a high-end PC.<br />
We think it should take you approximately 10 minutes to complete installation. Before you install<br />
<strong>DeckLink</strong>, please check our website at www.blackmagic-design.com and click the support page to<br />
download the latest updates to this manual and <strong>DeckLink</strong> driver software. Lastly, please register<br />
your <strong>DeckLink</strong> when downloading software updates. We would love to keep you updated on new<br />
software updates and new features for your <strong>DeckLink</strong>. Perhaps you can even send us your latest<br />
show reel of work completed on your <strong>DeckLink</strong> and any suggestions for improvements to the<br />
software. We are constantly working on new features and improvements, so we would love to hear<br />
from you!<br />
Grant Petty<br />
CEO Blackmagic Design<br />
Overview<br />
3
Before installing a <strong>DeckLink</strong> card<br />
Hardware Installation<br />
1.<br />
2.<br />
3.<br />
4.<br />
5.<br />
6.<br />
7.<br />
8.<br />
Remove the power plug from the back of your PC. This is a safety precaution before opening<br />
your computer. Ensure that you are statically discharged by using a static strap.<br />
Remove the side cover of your PC to gain access to the PCI slots.<br />
Remove your <strong>DeckLink</strong> PCIe card from the protective static bag making sure you don’t touch<br />
the gold connectors on the base of the card. These precautions should be taken when handling<br />
any PCI card.<br />
Find a spare PCI, PCI-X or PCIe slot. Remove the metal port access cover, and screw, from the<br />
back of your PC.<br />
Insert your <strong>DeckLink</strong> PCIe card and ensure that it clicks into place.<br />
Secure the card by the screw or clamping device.<br />
The procedure for installing a RAID controller card is similar to the above.<br />
Now replace the side cover of your PC. Reconnect the power and start up the computer.<br />
Note: <strong>DeckLink</strong> standard defintion PCIe cards require a x1 lane PCI Express slot or faster. Some<br />
<strong>DeckLink</strong> high definition PCIe cards require a x4 lane PCI Express slot or faster and others only<br />
require a x1 lane PCI Express slot or faster. <strong>DeckLink</strong> HD Pro PCI-X requires a 133MHz PCI-X slot.<br />
Please see www.blackmagic-design.com/support for the latest list of supported motherboards for<br />
use with <strong>DeckLink</strong> cards.<br />
Installing a <strong>DeckLink</strong> PCIe card<br />
1. Shutdown and remove the power plug from the back of your PC. This is a safety precaution<br />
before opening your computer. Ensure that you are statically discharged by using a static strap.<br />
2. Remove the chassis cover of your PC to gain access to the PCI Express slots.<br />
3. Remove your <strong>DeckLink</strong> PCIe card from the protective static bag making sure you don’t touch the<br />
gold connectors on the base of the card. Although there are no electronics on this card, these<br />
precautions should be taken when handling any PCI Express card.<br />
4. Find a spare PCIe slot within the PC. PCIe x1 lane cards should work in any slot. PCIe x4 lane<br />
cards require a x4 lane or faster PCI Express slot. Remove the metal port access cover and screw,<br />
from the back of your PC.<br />
5. Insert your <strong>DeckLink</strong> PCIe card and ensure that it clicks firmly into place.<br />
6. Secure the card with the screw and replace the side cover of your PC.<br />
Installation<br />
Install a <strong>DeckLink</strong> PCIe x1 or x4 lane card in a<br />
compatible PCI Express slot as shown in the<br />
above picture. The <strong>DeckLink</strong> HD Extreme 2 also<br />
has an HDMI bracket, which installs in any spare<br />
port, and connects to the rear of the card with<br />
the supplied HDMI cables.<br />
4
Before installing a <strong>DeckLink</strong> card<br />
7. After installing your <strong>DeckLink</strong> PCIe card and closing the side cover on your PC, attach the supplied<br />
<strong>DeckLink</strong> breakout cable to to the external multi-pin connector on your <strong>DeckLink</strong> card. Some card<br />
models ship with both professional and consumer breakout cables for connecting to different<br />
video hardware. Attach the appropriate breakout cable for your needs.Installation<br />
Installing the HDMI bracket<br />
The <strong>DeckLink</strong> HD Extreme 2 includes an HDMI bracket. After installing the <strong>DeckLink</strong> HD Extreme 2<br />
card in a x4 lane PCIe slot, you will need a spare slot to install the HDMI bracket. Some PC’s include<br />
a double-width graphics slot in the x16 lane slot. If you have a regular-width graphics card in this slot,<br />
you can install the HDMI bracket in the spare port which would have been used by a double-width<br />
graphics card. If that port is already occupied by a double-width graphics card, use a spare slot to<br />
install the HDMI bracket. If you don’t need HDMI input and output, there is no necessity to install<br />
the HDMI bracket.<br />
Some computer cases provide a PCI clamp which is designed to secure all PCI Express cards without<br />
the need for screws. The clamp does not always firmly secure the HDMI bracket and so we have<br />
included 6 screws with your <strong>DeckLink</strong> HD Extreme 2. Use these screws, in place of the PCI clamp,<br />
to firmly secure all your PCI Express cards, port access covers and the HDMI bracket belonging to<br />
<strong>DeckLink</strong> HD Extreme 2.<br />
After installing and securing the HDMI bracket, loop the included HDMI cables around any other<br />
installed cards and plug them into the rear of the <strong>DeckLink</strong> HD Extreme 2 card. HDMI input is the<br />
lower connector and HDMI output is the upper connector. You may wish to secure any excess cable<br />
length by using a cable tie to neatly hold it in place.<br />
Note: Connecting audio and video cables to the <strong>DeckLink</strong> can be done at any time while the unit<br />
is powered on or off. You can leave the PCI Express card in the computer when the PCI Express<br />
cable is disconnected. It will then be ready to reconnect quickly when you need to use <strong>DeckLink</strong> as<br />
a capture and playback device again.<br />
Installation<br />
Attach the supplied <strong>DeckLink</strong> breakout cable to the<br />
<strong>DeckLink</strong> card. The <strong>DeckLink</strong> HD Extreme 2 card<br />
also includes a HDMI bracket as pictured above.<br />
5
Installation<br />
Installing the software<br />
Contents<br />
The <strong>DeckLink</strong> software installer will install the following components for you:<br />
Blackmagic <strong>DeckLink</strong> drivers<br />
Blackmagic Media Express application<br />
Blackmagic <strong>DeckLink</strong> Control Panel<br />
Blackmagic AVI and QuickTime codecs<br />
Project presets for Adobe Premiere Pro<br />
Blackmagic DirectShow SDK<br />
Blackmagic Disk Speed Test<br />
Blackmagic FrameLink<br />
<strong>DeckLink</strong> Utility<br />
<strong>DeckLink</strong> software<br />
1. The CD supplied with the <strong>DeckLink</strong> contains the <strong>DeckLink</strong> software. Before you install, ensure<br />
you have the very latest driver. Visit www.blackmagic-design.com/support<br />
2. Open the “<strong>DeckLink</strong> Installer” folder and launch the “<strong>DeckLink</strong> Installer” application.<br />
3. The drivers will now be installed on your system. A warning will appear that “Windows can’t<br />
verify the publisher of this driver software” or about “logo certification”. Click Continue<br />
Anyway to ignore this warning.<br />
4. You will see a dialog bubble saying “found new hardware” and the hardware wizard will appear.<br />
Select “install automatically” and the system will find the required <strong>DeckLink</strong> drivers. You will then<br />
receive another dialog bubble saying “your new hardware is ready for use.”<br />
5. Now restart your machine to enable the new software drivers.<br />
Automatic firmware updating<br />
After your computer has restarted, the software will talk to the <strong>DeckLink</strong> to see what firmware is<br />
running in it’s hardware. If the firmware is not the same as the <strong>DeckLink</strong> software requires, you’ll be<br />
asked to download the correct version. This is automatic, and all you need to do is click OK to start<br />
the update. After the firmware updates, restart your computer and to complete the process.<br />
Programmable firmware let’s us release new features and we can also update your <strong>DeckLink</strong> for<br />
greater compatibility with latest third party software tools.<br />
Installation<br />
<strong>DeckLink</strong> Setup Wizard.<br />
Click “Continue Anyway”.<br />
Restart your PC!<br />
6
Installation<br />
Testing your installation<br />
Testing<br />
To check the installation has been successful on most <strong>DeckLink</strong> cards with Windows XP:<br />
1. <strong>Go</strong> to the Control Panel and open Display. Click on the Settings tab. You should see an<br />
extra display which represents the extended desktop feature of your <strong>DeckLink</strong>. The size of<br />
the <strong>DeckLink</strong> display will appear differently to your computer display, and may be in HD or SD<br />
resolution. Select the second display. <strong>DeckLink</strong> models, which support high definition video<br />
with a x1 lane PCI Express card, do not include an extended desktop and will not show an extra<br />
display in the Settings tab.<br />
2. Then enable Extend my Windows desktop onto this monitor<br />
3. <strong>Go</strong> to the Control Panel and open <strong>DeckLink</strong>. Check the SDI, Analog Component, Composite<br />
NTSC/PAL, and the HDMI outputs for desktop video.<br />
The <strong>DeckLink</strong> HD Extreme 2 has SDI, Component analog, Composite analog and HDMI video<br />
outputs as well as SDI, HDMI, XLR analog and AES digital audio outputs. Other models of<br />
<strong>DeckLink</strong> cards have some but not all of these video and audio outputs.<br />
Note: You won’t see any video on the composite analog NTSC/PAL outputs if the desktop is set to<br />
HD or 2K modes. You won’t see any video on the component analog outputs if the desktop is set<br />
to 2K modes. A 2K monitoring solution, such as HDLink Pro and a 30” monitor, is required to view<br />
2K-SDI video output from hardware such as <strong>DeckLink</strong> HD Extreme 2 and Multibridge Eclipse.<br />
4. Check audio output channels 1 & 2 for audio playback. The same audio should be heard on all<br />
the audio outputs provided on your model of <strong>DeckLink</strong> card, eg: analog XLR, AES/SPDIF, HDMI<br />
and SDI. If this is all working well, you know your <strong>DeckLink</strong> is working correctly.<br />
Installation<br />
Display Properties.<br />
7
Blackmagic Software<br />
Using Blackmagic Media Express<br />
Blackmagic Media Express is a simple utility for frame-accurate capture and playback with your<br />
broadcast tape deck. It uses the RS-422 port on <strong>DeckLink</strong> and <strong>DeckLink</strong> hardware to control the<br />
deck using the Sony RS-422 protocol.<br />
It’s great for use with applications such as Adobe After Effects and eyeon Fusion which do not<br />
include their own deck control capabilities.<br />
Blackmagic Media Express supports capture and playback of AVI files in the following Blackmagic<br />
formats:<br />
Uncompressed 10-bit RGB (.avi)<br />
Uncompressed 10-bit YUV (.avi)<br />
Uncompressed 8-bit YUV (.avi)<br />
Compressed Motion JPEG (.avi)<br />
Playback of the following formats is also supported:<br />
Windows Media Video (.wmv)<br />
Blackmagic QuickTime Uncompressed 10-bit RGB (.mov)<br />
Blackmagic QuickTime Uncompressed 10-bit YUV (.mov)<br />
Blackmagic QuickTime Uncompressed 8-bit YUV (.mov)<br />
Playback of other video formats is likely to work as long as the relevant codec is present on the<br />
computer and the video is in a standard TV resolution and frame rate, eg 720 x 486 at 29.97 fps.<br />
Computer resolutions such as 640x480 cannot be used. Audio must use the television standard<br />
sample rate of 48Hz and 24 bit.<br />
This simple utility can capture or play back one video clip at a time. Put Clip<br />
Setting Up<br />
1. <strong>Go</strong> to the Windows Start menu and select All Programs > Blackmagic Design > <strong>DeckLink</strong><br />
> Media Express.<br />
2. Open Edit > Preferences and select the desired video format and compression type from the<br />
drop down menu.<br />
3. Set your disk array as the Capture Location and enter a Capture Filename to apply to any captured<br />
clips or frame grabs.<br />
Blackmagic Software<br />
Media Express preferences.<br />
Media Express interface.<br />
8
Blackmagic Software<br />
Using Blackmagic Media Express<br />
Playback<br />
1. Click on the Playback tab.<br />
2. Select File > Open Media File and choose the video file you wish to play back. Alternatively<br />
drag the desired video clip directly in to the Playback window. The movie will appear in the<br />
Playback window.<br />
3. Click the Play and Stop buttons to start and stop playback. You can also use the standard keys<br />
used for video playback to start, stop, play forwards and play backwards at different speeds,<br />
i.e. “”, “j”, “k” and “l” keys.<br />
4. You can also scrub the clip by dragging the playhead along the timeline.<br />
Video playback can be set to loop playback, or play once, by setting the playback switch as desired.<br />
Inserting to Tape<br />
1. Connect an RS-422 cable between the video deck and the <strong>DeckLink</strong> or <strong>DeckLink</strong> RS-422 port<br />
to ensure that timecode is available.<br />
2. Open the clip that you wish to print to tape.<br />
3. Ensure that the video deck is configured to accept the video format of the clip, e.g. one cannot<br />
send a PAL clip to an NTSC-only deck.<br />
3. From the View menu choose Deck Control. The Deck Control window will open.<br />
4. Enter the timecode of the desired in-point. Blackmagic Media Express will use the clip duration to<br />
automatically calculate the out point.<br />
5. Click Put Clip.<br />
Capturing Clips<br />
1. Click on the Capture tab<br />
2. Connect an RS-422 cable between the video deck and the <strong>DeckLink</strong> or <strong>DeckLink</strong> RS-422 port to<br />
ensure that timecode is available.<br />
3. <strong>Go</strong> to the Edit menu and choose Preferences.<br />
4. Configure the capture settings to match the video format and compression type you intend to<br />
capture, e.g. HD 1080i 59.94 and Uncompressed 10-bit YUV. Set the capture location. Uncompressed<br />
video should always be captured to a disk array.<br />
5. Click Put Clip.<br />
Blackmagic Software<br />
Media Express “Capturing to Disk”.<br />
Deck Control interface.<br />
9
Blackmagic Software<br />
Using Blackmagic Media Express<br />
There are two ways to capture clips:<br />
A. Record Now<br />
Captures video and audio instantly. (Control-R)<br />
The REC button lights up during capture. Click the STOP button or press the Esc key on your<br />
keyboard to stop the capture.<br />
B. Get Clip<br />
Captures frame accurate timecode, video, audio to “in” and “out-points” set by the user.<br />
From the View menu choose Deck Control. The Deck Control window will open.<br />
Connect an RS-422 cable between the video deck and the <strong>DeckLink</strong> or <strong>DeckLink</strong> RS-422 port t o<br />
ensure that timecode is available.<br />
Click the Play and Stop buttons in the Deck Control window to start and stop playback of the video<br />
deck. Your video deck will respond to the standard keys used for deck control, i.e. spacebar, “j”, “k”<br />
and “l” keys. In and Out points can be set using the “i” and “o” keys while playing the tape.<br />
Grab Frame<br />
Captures a frame of video from the video input.<br />
1. Click on the Capture tab<br />
2. <strong>Go</strong> to the Movie menu and choose Grab Frame As. (Control-G)<br />
3. The frame grab will be captured as a .bmp file.<br />
Blackmagic Software<br />
10
Blackmagic Software<br />
Using Blackmagic FrameLink<br />
Blackmagic FrameLink provides seamless DPX support using uncompressed AVI movies.<br />
The key to understanding FrameLink, is when you mount a movie file with FrameLink it appears as<br />
a virtual drive full of DPX frames from the movie. This virtual drive acts as a container for the DPX<br />
sequence. Any frames modified will be automatically written back into the movie when the frame<br />
is saved.<br />
FrameLink totally eliminates the time wasted using simple movie to image-sequence conversion<br />
utilities. FrameLink is great for using software that only supports still frames, or simply open individual<br />
media file frames in Photoshop for dirt and scratch removal, then save the frames back into the<br />
movie file for instant playback. If an audio track is included with the media that you are converting to<br />
a DPX sequence, the length of the sequence cannot be modified. To add and remove DPX frames<br />
from a sequence, the audio tracks should be removed and restore later in your NLE.<br />
Supported File Formats<br />
Windows AVI and Blackmagic uncompressed QuickTime files can be used with FrameLink,<br />
including 8-bit & 10-bit YUV HD and SD, as well as 10-bit RGB 4:4:4 HD.<br />
Mounting a FrameLink Volume<br />
1. Right click on an AVI file and select Mount with Blackmagic FrameLink<br />
The newly mounted drive will appear as next available drive letter. This volume will contain all the<br />
frames of the AVI movie in DPX format.<br />
Creating a New Movie from DPX Files<br />
1. Right click on the work area and select New > Blackmagic FrameLink Movie and format.<br />
(Matching the format of your existing DPX sequence.)<br />
Note: New movie will appear both as a new network drive and as a file.<br />
2. Copy the DPX file sequence to the appropriate drive letter.<br />
Note: You can save your DPX files from any application to the FrameLink volume, or simply drag<br />
and drop the files into the FrameLink volume.<br />
Unmounting a FrameLink Volume<br />
1. Deselect network drive.<br />
2. Right click drive letter and select Unmount from Blackmagic FrameLink<br />
Blackmagic Software<br />
Mounting FrameLink volume.<br />
New FrameLink movie.<br />
Unmounting FrameLink volume.<br />
11
Blackmagic Software<br />
Setting Blackmagic Preferences<br />
<strong>DeckLink</strong> preferences are located in the <strong>DeckLink</strong> Control Panel. Different <strong>DeckLink</strong> models have<br />
some different features. Any preferences not available to your <strong>DeckLink</strong> card will be grayed out and<br />
unavailable. The following preferences contain options for setting up your <strong>DeckLink</strong>.<br />
Settings<br />
Input and Output connections<br />
NTSC Setup<br />
Field Jitter<br />
4:4:4 color mode<br />
Black reference output during capture<br />
<strong>DeckLink</strong> Extended desktop<br />
Reference Output Timing (Genlock)<br />
Processing<br />
Down conversion<br />
Up conversion<br />
Lookup Table<br />
VITC Reader A Frame - 3:2 Pulldown Removal<br />
VANC input<br />
Video Levels<br />
Calibrate Analog Video In<br />
Calibrate Analog Video Out<br />
Betacam/SMPTE level switch<br />
Audio Levels<br />
HiFi/Professional Audio Levels<br />
Analog Audio Input Levels<br />
Analog Audio Output Levels<br />
AES/EBU Input Reference Level<br />
AES/EBU Output Reference Level<br />
Blackmagic Software<br />
Control Panel.<br />
<strong>DeckLink</strong> Control Panel.<br />
12
Blackmagic Software<br />
Setting Blackmagic Preferences<br />
<strong>DeckLink</strong> video and audio output connections<br />
All of the video and audio outputs of <strong>DeckLink</strong> cards are active all of the time and the only choice<br />
you need to make on some models is between component (Y,R-Y,B-Y) analog video, S-Video or<br />
composite NTSC/PAL analog video as they use shared connectors.<br />
The SDI, HDMI and component (Y,R-Y,B-Y) analog video outputs support HD and SD video.<br />
S-Video and composite analog video do not support high definition video and so you will not<br />
see video on these outputs when working with HD video.<br />
S-video is supported on some HD models of <strong>DeckLink</strong> cards and may require the use of an<br />
inexpensive S-video adapter cable. See the connection diagrams for S-video towards the end<br />
of this manual.<br />
<strong>DeckLink</strong> Studio switchable audio outputs<br />
The <strong>DeckLink</strong> Studio has switchable audio outputs. You can choose to output:<br />
4 analog and 2 AES/EBU audio channels, or<br />
2 analog and 6 AES/EBU audio channels<br />
<strong>DeckLink</strong> video and audio input connections<br />
Your <strong>DeckLink</strong> model may support some or all of the following combinations:<br />
SDI Video & SDI Audio<br />
SDI Video & AES/EBU Audio<br />
SDI Video & Analog XLR Audio<br />
HDMI Video & HDMI Audio<br />
HDMI Video & AES/EBU Audio<br />
HDMI Video & Analog XLR Audio<br />
Y, R-Y, B-Y Video & AES/EBU Audio<br />
Y, R-Y, B-Y Video & Analog XLR Audio<br />
NTSC/PAL (Y In) & AES/EBU Audio<br />
NTSC/PAL (Y In) & Analog XLR Audio<br />
S-Video & AES/EBU Audio<br />
S-Video & Analog XLR Audio<br />
Blackmagic Software<br />
Video and Audio Output Connections.<br />
Video and Audio Input Connections.<br />
13
Blackmagic Software<br />
Setting Blackmagic Preferences<br />
Reference Output Timing<br />
Genlock, also known as black burst, reference or house sync is used to lock various equipment in<br />
your facility to the same timing point. When two or more video devices are connected to the same<br />
sync signal, their video signals can be switched without jumping or rolling. This is critical when<br />
connecting equipment in large post production facilities and broadcast stations.<br />
To change video to reference timing:<br />
1. Open the <strong>DeckLink</strong> control panel.<br />
2. Select the Settings tab and adjust the Set reference output timing for timed output<br />
until the picture locks and is no longer rolling on the display.<br />
HDTV Up/Down Conversion<br />
The software drivers included with <strong>DeckLink</strong>, can be used to downconvert high definition to NTSC<br />
or PAL video in real time during capture or playback. They also provide upconversion on capture.<br />
Select the desired option from the output or input processing menus under the Processing tab.<br />
Output Processing<br />
HD to SD Letterbox 16:9<br />
HD to SD Anamorphic 16:9<br />
720p HD to 1080i HD<br />
Output Processing for <strong>DeckLink</strong> cards with permanent downconversion.<br />
HD to HD and SD Letterbox 16:9<br />
HD to HD and SD Anamorphic 16:9<br />
HD to HD and SD Center Cut 4:3<br />
Note: Permanent down conversion introduces a 2 frame delay on the SD-SDI output. To ensure<br />
accuracy, adjust the playback/timecode offset options when performing an insert or assemble edit<br />
to tape with Premiere Pro or Blackmagic Media Express.<br />
Input Processing<br />
1080i HD to SD Letterbox 16:9<br />
1080i HD to SD Anamorphic 16:9<br />
720p HD to SD Letterbox 16:9<br />
Blackmagic Software<br />
720p HD to SD Anamorphic 16:9<br />
SD Letterbox 16:9 to HD<br />
SD Anamorphic 16:9 to HD<br />
Genlock timing adjustment.<br />
HDTV Up/Down Converter preferences.<br />
14
Blackmagic Software<br />
Lookup Tables (LUT’s) in <strong>DeckLink</strong> HD Extreme 2 for Windows<br />
<strong>DeckLink</strong> HD Extreme 2 can use 1D or 3D LUT’s during playback. Lookup tables can be used for<br />
standard definition and high definition video as well as 2K film.<br />
1D LUT’s are useful for altering the brightness of an image but do not affect color. They are often<br />
used when working with log video so that the image can be displayed on screen as normal linear<br />
video. Built-in 1D LUT’s are provided for log to linear conversion when playing video captured from<br />
Panasonic Cinegamma and Viper Filmstream cameras.<br />
3D LUT’s provide the ability to increase and decrease the amount of color in each color channel,<br />
independently from brightness. This allows for precise color grading to ensure a video monitor<br />
matches the color printed to tape or film.<br />
How to use Lookup Tables in <strong>DeckLink</strong><br />
When the System Preferences are opened to access the <strong>DeckLink</strong> lookup table settings, your<br />
broadcast monitor will usually stop showing any video being played and instead will show an<br />
extended desktop. It is possible to replace the extended desktop, with the last played frame of<br />
video, so that adjustments to lookup tables can immediately be seen on the frame of video.<br />
To use this feature, open the <strong>DeckLink</strong> Control Panel. Under the Settings tab, look for, “When not<br />
playing video, send ... to all the video outputs.” This setting is usually set to Extended Desktop or<br />
Black depending upon your personal preference. Switch it to “Last Played Frame” and then restart<br />
the computer.<br />
After the computer has restarted, use your preferred video software application to play some<br />
video. The last played frame of video should remain on your broadcast monitor. Open the <strong>DeckLink</strong><br />
Control Panel and then click on the Processing tab. A Lookup Table button is available for output<br />
processing and this can be used even when all other processing functions are set to “Off”. Click on<br />
the output Lookup Table button and then activate the Enable Lookup Tables checkbox.<br />
The lookup table interface in <strong>DeckLink</strong> can be adjusted using a method similar to that used for<br />
image adjustment with the Curves feature in Adobe Photoshop. The horizontal axis of each<br />
graph represents the original color input values and the vertical axis represents the new colour<br />
output values. When first opened, each lookup table displays a straight diagonal line because the<br />
color values have not yet been changed.<br />
Changes made to the lookup tables can immediately be seen on all SDI, analog and HDMI outputs<br />
of the <strong>DeckLink</strong> card. Changes are saved to the <strong>DeckLink</strong> preferences by clicking the OK button.<br />
Lookup tables can be reset to original values by clicking the Reset Unity button. Lookup table<br />
processing can be disabled by deselecting the Enable Lookup Tables checkbox.<br />
Blackmagic Software<br />
Enable Last Played Frame.<br />
Click on the Lookup Table button.<br />
15
Blackmagic Software<br />
Importing and exporting 3D LUT’s<br />
<strong>DeckLink</strong> HD Extreme 2 supports the popular Autodesk .3dl, IRIDAS .itx and IRIDAS .cube lookup<br />
table formats when importing 3D LUT’s.<br />
3D LUT’s can also be exported from <strong>DeckLink</strong> in the .cube format. <strong>DeckLink</strong> uses the .cube format<br />
to store 3D LUT’s internally as this is a most memory efficient way to store complex lookup tables.<br />
Both 3D LUT’s created with curves in the lookup table interface, and 3D LUT’s imported from .3dl,<br />
.itx and .cube files, are exported from <strong>DeckLink</strong> in the .cube format.<br />
The .cube file format is fully compatible with the following Blackmagic Design products which<br />
share the same LUT format: <strong>DeckLink</strong> HD Extreme 2, <strong>DeckLink</strong> Eclipse, <strong>DeckLink</strong> Pro (October<br />
2007 model) and HDLink Pro.<br />
Importing and exporting 1D LUT’s<br />
<strong>DeckLink</strong> HD Extreme 2 can import 1D LUT’s. The 1D file format is any tab-delimited text file with<br />
red, green and blue values for each record and the first line (title line) is skipped. Lookup tables<br />
need to be 1024 records long with the first line reserved for the title line.<br />
1D LUT’s can also be exported from <strong>DeckLink</strong> HD Extreme 2 in the same text format mentioned<br />
above. Both 1D LUT’s created with the curves in the lookup table interface, and 1D LUT’s imported<br />
from text files, are exported from <strong>DeckLink</strong> in the same text format.<br />
The 1D LUT text file format is fully compatible with the following Blackmagic Design products<br />
which share the same LUT format: <strong>DeckLink</strong> HD Extreme 2, <strong>DeckLink</strong> Eclipse, <strong>DeckLink</strong><br />
Pro (October 2007 model), <strong>DeckLink</strong> Extreme (DVI output), HDLink Pro, HDLink and<br />
<strong>DeckLink</strong> HD Pro 4:4:4 (PCI-X).<br />
Blackmagic Software<br />
Load Lookup Table from File.<br />
Load Built-In Lookup Table.<br />
Lookup Table interface.<br />
16
Blackmagic Software<br />
Setting Blackmagic Preferences<br />
Black Video Output<br />
This setting allows <strong>DeckLink</strong> to output a stable black signal on one video output, while outputting<br />
video on the other output. Black Video Output is used for video referencing a deck when you don’t<br />
have a sync generator available. This allows the stable black video output to connect to the deck,<br />
and then by setting the deck to “input reference” you can operate without a sync generator. If<br />
you’re not using this mode, disable this setting to enable audio monitoring during capture.<br />
NTSC setup<br />
The NTSC composite video used in the USA, and some other countries uses 7.5% setup. However<br />
setup is only used in composite video, but is never used in SDI video. Your <strong>DeckLink</strong> will handle<br />
adding and removing setup from NTSC video automatically for you. The USA and countries that use<br />
7.5% setup should enable this setting; if you’re working in Japan and countries that don’t use this<br />
setup, leave this set to 0 IRE setup. The PAL and high definition standards do not use this setup.<br />
Video Desktop<br />
If your <strong>DeckLink</strong> card includes the extended desktop feature, this setting allows <strong>DeckLink</strong> to act<br />
as a display device with the desktop appearing out of the video outputs. This setting allows the<br />
desktop mode to be turned on and off and any change requires a restart. It’s important that you set<br />
the desktop mode to the same standard as your video capture and playback, or you will get slower<br />
switching between capture and playback modes, as the monitors need to re-lock.<br />
If you don’t want to use the Extended Desktop feature, set this option to Black and then restart<br />
the computer.<br />
If you’re adjusting LUT’s on some <strong>DeckLink</strong> models, set this option to Last Played Frame so you can<br />
observe the effect of any adjustment to LUT’s.<br />
The video desktop feature is supported in Windows XP . It is not available in Windows Vista .<br />
Blackmagic Software<br />
Black Video Output.<br />
NTSC Setup.<br />
Video Desktop.<br />
17
Blackmagic Software<br />
Setting Blackmagic Preferences<br />
Video Output Behavior<br />
Remove Filter Jitter<br />
“Remove field jitter when video is paused” allows <strong>DeckLink</strong> to display only a single field when<br />
paused, while turning this mode off will display a complete frame in pause. Single field is similar to<br />
how Betacam SP decks work when paused, eliminating field flicker from paused images.<br />
If you’re doing work without interlaced video, such as animation, then you can turn this mode off<br />
so you can see both fields in full resolution for best quality. Regardless of this setting, you always<br />
get the correct full frame dual field output when in playback mode, as this setting only effects<br />
paused video. Video Output Behavior.<br />
Blackmagic Software<br />
18
Blackmagic Software<br />
Setting Blackmagic Preferences<br />
Preserving Blanking Data or VANC<br />
This feature lets you use up to 3 video lines at the top of a captured movie file to store any 3 lines<br />
from vertical blanking. This allows 3 line timecode, VITC (vertical interval test signals) subtitle info or<br />
any other VANC data to be preserved during capture. These lines are then inserted back into the<br />
video blanking when the file is played back.<br />
To preserve VANC data:<br />
1. Open the <strong>DeckLink</strong> control panel.<br />
2. Select the VANC and 3:2 Pulldown tab and tick the On check box for video line 1, 2 or 3<br />
depending on how many blanking lines you want to capture.<br />
Note: Video file line 1 needs to be enabled for lines 2 and 3 to work.<br />
Because these lines can be passed to the application, a developer could write software to read the<br />
VANC data and use it for various purposes, e.g. 3-line timecode and audio chasing, or other uses.<br />
An example of VANC data is 3-line timecode, which uses lines 18, 19, and 20 in NTSC or lines 19,<br />
20 and 21 in PAL. 3-line timecode, as used in AATON equipped telecine suites, featuring audio<br />
timecode and keycode information along with the normal timecode numbers.<br />
Blackmagic Software<br />
VANC preferences.<br />
19
Blackmagic Software<br />
Blackmagic Disk Speed Test<br />
If you want to check your disk array speed, Blackmagic Disk Speed Test can be run to check the array<br />
speed, and to provide the results in video frame rates. This makes it much easier to understand<br />
how various disk arrays will handle video capture and playback at various video resolutions and<br />
frame rates.<br />
Disk Speed Test provides more accurate results for large disk arrays, as often the manufacturer<br />
provided speed results only check small data blocks; so you only get an indication of the cache<br />
speed of the disk and not the sustained data rate of the disk. Video uses sustained data rates and<br />
only Disk Speed Test provides a long burst of data for more accurate results.<br />
When using Disk Speed Test, you need to account for disk seeking, so it’s best to add a healthy<br />
margin to the results. If a disk array tests at 32 frames per second HD 1080, it doesn’t mean you can<br />
do 29.95 HD capture and playback, as the margin is too tight. However it should do 24 fps ok.<br />
Disk arrays<br />
If you intend to run your disk array as a software stripe, you will need to make sure that ‘host RAID’<br />
is disabled. Use the “Disk Management” tool in “Computer Management” within Windows <br />
to set up your software RAID, or refer to third party instructions when using pre-configured<br />
hardware RAIDs.<br />
Further information can be obtained via the Windows Help and Support. Search and review the<br />
section on “Dynamic Disks”. This section will provide you with information on how to convert a<br />
basic disk to dynamic disk and configuration steps on striping your disk array.<br />
Blackmagic Software<br />
Disk Speed RAID results after testing a disk array.<br />
Disk Management.<br />
20
Third Party Applications<br />
Adobe Premiere Pro<br />
Adobe Premiere Pro is a powerful real-time video and audio non-linear editing application. Full<br />
presets for Premiere Pro are included with <strong>DeckLink</strong> and will have been automatically loaded into<br />
your system during the installation process. Premiere Pro must be installed on your system before<br />
running the <strong>DeckLink</strong> installer.<br />
Setting Up<br />
1. Launch Premiere Pro.<br />
2. Open a New Project<br />
3. Select the appropriate Blackmagic preset for your project. e.g. NTSC, PAL, HDTV or 2K.<br />
4. Type the name of your project.<br />
5. Select your disk array as the location for your media and click OK<br />
Playback<br />
As a quick test to make sure everything is connected correctly, use the Premiere Pro test media (bars<br />
and tone). Copy a test clip, which matches the format of your project to your disk array e.g. NTSC 8<br />
bit. Take your media from within your Premiere Pro project and drop it into the timeline. You should<br />
now see the image on both your computer desktop and your <strong>DeckLink</strong> output. If you can’t see<br />
any video on your <strong>DeckLink</strong> output, check the connections again and ensure you have the correct<br />
output settings configured in both the <strong>DeckLink</strong> and Displays control panels. SDI, HDMI and analog<br />
outputs are always active.<br />
Capture<br />
To capture choose: File > Capture (F5)<br />
To immediately capture, click the red record button [G]. If you wish to log the clip, enter the desired<br />
“In and Out points” using either the “In” and “Out” buttons, or manually, by typing in the timecode<br />
and clicking “Log”. The empty clip will now appear in the bin window. Repeat this until you have<br />
logged all of the clips you wish to batch capture.<br />
Batch Capture<br />
Select the clips you wish to capture by drag selecting or shift/click each clip. Then go to and choose:<br />
File > Batch Capture. To set handles on the clips go to the batch capture window menu and<br />
type the number of additional frames you require at the start and end of each clip.<br />
Third Party Applications<br />
Adobe Premiere Pro.<br />
New Project.<br />
Capture.<br />
21
Third Party Applications<br />
Adobe Premiere Pro<br />
Audio<br />
<strong>DeckLink</strong> features support for ASIO audio output drivers. This allows Premiere Pro to use <strong>DeckLink</strong><br />
as an ASIO audio output device. When you first start your Premiere Pro project, make sure you select<br />
<strong>DeckLink</strong> Audio. This can be configured through Edit > Preferences > Audio Hardware<br />
You can also select the mix of the multi-channel audio from the Audio Output Mapping menu.<br />
Export to Tape<br />
To export to tape, select the sequence you require File > Export > Export to Tape<br />
Insert editing requires an unbroken timecode over the full length of the project you’re laying to<br />
tape. This is referred to as “blacking the tape”.<br />
In assemble mode the tape needs only to be “blacked” until a point just beyond the start time of<br />
the project. As assemble editing erases the tape ahead of the record heads, it should not be used<br />
where other projects already exist on the tape after the out point of your edit.<br />
When editing to tape, the software waits at the first frame of your program for the deck to drop into<br />
record at the predetermined timecode. At that exact moment, the program begins to play and the<br />
edit is completed. Should you find that either the first frame of your program is repeated or lost<br />
during the edit to tape procedure you will need to adjust the playback offset to bring the deck and<br />
your computer into sync. You should only need to do this once with any combination of deck and<br />
computer – and the setting will then stay correct.<br />
Now, simply enter the desired in point and offsets if required, and click OK<br />
Device Control<br />
Selection of the Serial Device Control is configured via:<br />
Edit > Preferences > Device Control<br />
Set the Device Control to <strong>DeckLink</strong> Device Control. The Options button is disabled as these<br />
settings are automatically detected and configured when you choose <strong>DeckLink</strong> Device Control.<br />
Third Party Applications<br />
Audio Output Mapping.<br />
Export to Tape.<br />
Device Control.<br />
22
Third Party Applications<br />
Adobe After Effects<br />
It’s very easy to setup playback and rendering in Adobe After Effects for a complete broadcast and<br />
design workstation that connects direct to decks for capture and playback of clips. <strong>DeckLink</strong> also<br />
supports real time preview while working on your compositions.<br />
First, open Adobe After Effects and select the television standard frame size and frame rate you<br />
wish to work with.<br />
How to use <strong>DeckLink</strong> as a Preview Output Frame Buffer<br />
To allow your Adobe After Effects composition to be displayed in real-time from your <strong>DeckLink</strong><br />
Card, go to Edit > Preferences > Video Preview. Set the Output Device to Blackmagic<br />
Video Output and then select the desired Blackmagic RGB output mode. This lets you view your<br />
Adobe After Effects compositions in video colorspace on your broadcast monitor as you work.<br />
This means you will always see the correct color and interlace when working, and you don’t have to<br />
wait until your composition is rendered to see what it looks like when output as video.<br />
Create a New Composition<br />
<strong>Go</strong> to the “Composition” menu and select Composition > New Composition (Control + n) In the<br />
dialogue box, select an appropriate television standard from the pulldown menu. Click OK<br />
For NTSC 720 x 486, select lower field first<br />
For PAL 720 x 576, select upper field first for uncompressed video<br />
For PAL DV, select lower field first<br />
For HD 1080i select 1920 x 1080, select upper field first<br />
For HD 1080 PsF select 1920 x 1080, select No Fields<br />
For HD 720p select 1280 x 720, select No Fields<br />
Rendering<br />
When you have completed your composition, you will need to render to a pixel format supported<br />
by <strong>DeckLink</strong>. Below is a list of supported codecs:<br />
Blackmagic QuickTime RGB (10 bit uncompressed)<br />
Blackmagic QuickTime (10 bit uncompressed)<br />
Blackmagic QuickTime (8 bit uncompressed)<br />
Apple QuickTime PhotoJPEG (compressed)<br />
Apple QuickTime DV - NTSC (compressed)<br />
Apple QuickTime DV - PAL (compressed)<br />
Third Party Applications<br />
Adobe After Effects.<br />
Video Preview preferences.<br />
23
Third Party Applications<br />
Adobe Photoshop<br />
<strong>DeckLink</strong> includes Adobe Photoshop plug-ins, so you can directly capture and output still<br />
frames from within the Photoshop application itself.<br />
If you’re working with 10 bit HD/SD-SDI, you can even import and export 16 bit Photoshop <br />
images for full quality. Use <strong>DeckLink</strong> keying to export and key graphics from the video input<br />
using Photoshop alpha channels.<br />
Import an image into Photoshop<br />
1. From Photoshop select File > Import > Blackmagic Image Capture<br />
2. Select the “Video Input Format” and the “Image Bit Depth” and select Capture Image.<br />
Export an image from Photoshop<br />
1. Select File > Export > Blackmagic Image Export<br />
2. Select Video Output Format and then Output Image.<br />
Note: Once you have set the options in the “Export” window, each subsequent Export will not<br />
display the window so you can output frames much faster. However, if you would like to change<br />
your export formats, hold the Ctrl key when selecting export.<br />
Third Party Applications<br />
Adobe Photoshop.<br />
Image Capture.<br />
Image Export.<br />
24
Supported File Formats<br />
Uncompressed data rates for capture and playback<br />
The data rates for uncompressed video are quite high, and listed below are minimum recommended<br />
disk requirements for uncompressed standard definition and high definition video.<br />
Uncompressed 10 bit YUV (4:2:2)<br />
Standard Definition<br />
Frame Size MB per second MB per minute GB per hour<br />
720x486/29.97fps 27 1 600 94<br />
720x576/25fps 26 1 582 93<br />
High Definition<br />
1280x720p/60fps 141 8 438 494<br />
1920x1080/24PsF 127 7 594 445<br />
1920x1080/50i 132 7 910 463<br />
1920x1080/60i 158 9 482 556<br />
Uncompressed 10 bit RGB (4:4:4)<br />
High Definition<br />
1280x720p/60fps 211 12 656 742<br />
1920x1080/24PsF 190 11 391 667<br />
1920x1080/50i 198 11 865 695<br />
1920x1080/60i 237 14 238 834<br />
Due to disk seeks, when calculating the data rates required for your disk system, it is a good idea<br />
to add a safety margin due to fluctuations in disk speed. Disk speeds can be increased by adding<br />
more disks.<br />
Serial ATA (SATA) disks can reduce to half their speed as they become full, so in a 2-disk SATA array<br />
you should aim for a 100% safety margin. In an 8-disk SATA array, a 30% safety margin should be<br />
adequate. SCSI disk arrays seem to display less fluctuation and so a 20% safety margin should be<br />
adequate for an 8-disk SCSI array. Generally the more disks in the array, the better.<br />
Note: Although other vendors and third parties may provide different data rates for uncompressed<br />
video, the above recommendations are tested for use with <strong>DeckLink</strong>.<br />
25
Troubleshooting Video Capture and Playback<br />
Using your <strong>DeckLink</strong> as a capture and playback solution when connected to a computer is exciting,<br />
but also complex due to the huge range of different software applications. Video data rates are<br />
also very high, so the disk array you use for video storage can have a big impact on your system’s<br />
performance.<br />
Information about a wide range of disk array solutions and compatible application software would<br />
be outside the scope of this manual, however there are three ways to get more information.<br />
There are four steps to getting help.<br />
1. Check out the Blackmagic Design website www.blackmagic-design.com/support for the latest<br />
support information. We have a huge number of technical notes covering all the common<br />
questions we are asked.<br />
2. Call your reseller. Your reseller will have the latest technical updates from Blackmagic Design<br />
and should be able to give you immediate assistance. We also recommend you check out the<br />
support options your dealer offers as they can arrange various support plans based on your<br />
workflow requirements. Your reseller will also understand your disk array configuration, and as<br />
disk array problems account for around 90% of support questions with NLE systems, your reseller<br />
or disk array vendor will be able to provide expert help.<br />
3. The next option is to email us with your questions using the web form at<br />
http://www.blackmagic-design.com/support/contact<br />
4. Phone a Blackmagic Design support office. Please check our web site for current support phone<br />
numbers in your area. http://www.blackmagic-design.com/company/.<br />
Note: Please provide us with as much information as possible regarding your technical problem and<br />
system specifications so that we may try to reproduce your problem quickly. Also please let us know<br />
how to reproduce any problem you’re having, so we can try it on our test systems before replying<br />
to your email.<br />
26
Connection Diagrams<br />
Connecting to a Betacam SP analog deck<br />
This example shows <strong>DeckLink</strong> HD Extreme 2 connected to an analog deck for capture and playback<br />
to the deck. The HDMI and SDI outputs can be used for local monitoring.<br />
Connection Diagrams<br />
2 3 4 5 6 7 8 9 10 11 12 13 14 15<br />
S VIDEO<br />
REF. VIDEO<br />
VIDEO<br />
VIDEO INPUT<br />
<strong>DeckLink</strong> HD Extreme<br />
Professional Breakout Cable<br />
2 3 4 5 6 7 8 9 10 11 12 13 14 15<br />
VIDEO<br />
COMPONENT 2 COMPONENT 2<br />
S VIDEO<br />
COMPONENT 1 COMPONENT 1<br />
TIME CODE MONITOR<br />
IN OUT AUDIO<br />
VIDEO OUTPUT AUDIO INPUT<br />
CH-1 CH-2<br />
AUDIO OUTPUT<br />
CH-1 CH-2<br />
REMOTE TBC REMOTE<br />
Cards which can be used in this workflow<br />
<strong>DeckLink</strong> SP<br />
<strong>DeckLink</strong> SP PCIe<br />
<strong>DeckLink</strong> Extreme<br />
<strong>DeckLink</strong> Extreme PCIe<br />
<strong>DeckLink</strong> Studio<br />
<strong>DeckLink</strong> HD Extreme<br />
<strong>DeckLink</strong> HD Extreme 2<br />
27
Connection Diagrams<br />
Connecting to an SDI digital deck<br />
This example shows <strong>DeckLink</strong> HD Extreme 2 connected to a digital deck in 4:2:2 SD mode for<br />
capture and playback to the SDI deck. The HDMI, spare SDI and analog outputs can be used for<br />
local monitoring.<br />
AC IN<br />
Connection Diagrams<br />
2 3 4 5 6 7 8 9 10 11 12 13 14 15<br />
VIDEO CONTROL<br />
CONTROL PANEL<br />
REMOTE - IN<br />
REMOTE - OUT<br />
IN<br />
REF VIDEO<br />
TIME CODE<br />
ANALOG VIDEO I/O DIGITAL AUDIO I/O (AES/EBU)<br />
IN<br />
OUT<br />
OUT<br />
IN<br />
OUT<br />
S VIDEO<br />
1<br />
2<br />
3<br />
OUT<br />
VIDEO IN<br />
VIDEO OUT<br />
IN<br />
IN<br />
OUT<br />
COMPONENT VIDEO<br />
OUT<br />
MONITOR AUDIO<br />
<strong>DeckLink</strong> HD Extreme<br />
Professional Breakout Cable<br />
2 3 4 5 6 7 8 9 10 11 12 13 14 15<br />
AUDIO IN<br />
AUDIO OUT<br />
SDI OUTPUT SDI INPUT<br />
CH-1 CH-2 CH-3 CH-4<br />
CH-1 CH-2 CH-3 CH-4<br />
Cards which can be used in this workflow<br />
<strong>DeckLink</strong><br />
<strong>DeckLink</strong> Pro<br />
<strong>DeckLink</strong> Extreme<br />
<strong>DeckLink</strong> Extreme PCIe<br />
<strong>DeckLink</strong> SDI<br />
<strong>DeckLink</strong> Studio<br />
<strong>DeckLink</strong> HD Pro PCI-X<br />
<strong>DeckLink</strong> HD Pro PCIe<br />
<strong>DeckLink</strong> HD Extreme<br />
<strong>DeckLink</strong> HD Extreme 2<br />
28
Connection Diagrams<br />
Connecting to a Sony HDCAM SR deck in 4:2:2<br />
This example shows <strong>DeckLink</strong> HD Extreme 2 connected to a Sony HDCAM SR series digital<br />
deck in 4:2:2 HD mode for capture and playback to the HD-SDI deck. The HDMI, spare SDI and<br />
component analog outputs can be used for local monitoring of 4:2:2 HD video.<br />
CH1 CH2<br />
MONITOR OUTPUT<br />
R L<br />
IN OUT<br />
Connection Diagrams<br />
2 3 4 5 6 7 8 9 10 11 12 13 14 15<br />
2 3 4 5 6 7 8 9 10 11 12 13 14 15<br />
ANALOG I/O DIGITAL I/O (AES/EBU) DIGITAL I/O<br />
AUDIO OUTPUT REF INPUT INPUT OUTPUT<br />
HD SDI INPUT FC OUT B<br />
CH3 CH4 1 2<br />
AUDIO<br />
CH1/2 CH3/4<br />
AUDIO<br />
CH1/2 CH3/4<br />
A<br />
INPUT<br />
MONITOR 1<br />
TIME CODE<br />
IN OUT<br />
CUE HD REF OUT SD OUT<br />
1 SYNC<br />
2<br />
COMPOSITE<br />
(MONITOR)<br />
CH5/6 CH7/8<br />
CH9/10 CH11/12<br />
CH5/6 CH7/8<br />
CH9/10 CH11/12<br />
REMOTE 2 PARALLEL I/O (50P)<br />
REMOTE 1-IN (9P) REMOTE 1-IN/OUT (9P)<br />
RS422<br />
USB<br />
VIDEO CONTROL<br />
<strong>DeckLink</strong> HD Extreme<br />
Professional Breakout Cable<br />
B INPUT<br />
B(OPTION) MONITOR 2<br />
1<br />
A<br />
HD SDI OUTPUT<br />
2<br />
A<br />
MONITOR<br />
A<br />
B(OPTION) B(OPTION) B(OPTION)<br />
FORMAT CONV. OUT (OPTION)<br />
1 MONITOR 2<br />
SD SDI OUTPUT<br />
1 2 MONITOR<br />
Cards which can be used in this workflow<br />
<strong>DeckLink</strong> SDI<br />
<strong>DeckLink</strong> Studio<br />
<strong>DeckLink</strong> HD Pro PCI-X<br />
<strong>DeckLink</strong> HD Pro PCIe<br />
<strong>DeckLink</strong> HD Extreme<br />
<strong>DeckLink</strong> HD Extreme 2<br />
29
Connection Diagrams<br />
Connecting to a Sony HDCAM SR deck in 4:2:2<br />
This example shows <strong>DeckLink</strong> HD Pro PCIe connected to a Sony HDCAM SR series digital deck in<br />
4:2:2 HD mode. In this case, 2 HD-SDI connections are used for HD-SDI 4:2:2 video in and out. The<br />
component analog output can be used for local monitoring of 4:2:2 HD video.<br />
CH1 CH2<br />
MONITOR OUTPUT<br />
R L<br />
IN OUT<br />
Connection Diagrams<br />
ANALOG I/O DIGITAL I/O (AES/EBU) DIGITAL I/O<br />
AUDIO OUTPUT REF INPUT INPUT OUTPUT<br />
HD SDI INPUT FC OUT B<br />
CH3 CH4 1 2<br />
AUDIO<br />
CH1/2 CH3/4<br />
AUDIO<br />
CH1/2 CH3/4<br />
A<br />
INPUT<br />
MONITOR 1<br />
TIME CODE<br />
IN OUT<br />
CUE HD REF OUT SD OUT<br />
1 SYNC<br />
2<br />
COMPOSITE<br />
(MONITOR)<br />
2 3 4 5 6 7 8 9<br />
CH5/6 CH7/8<br />
CH9/10 CH11/12<br />
CH5/6 CH7/8<br />
CH9/10 CH11/12<br />
REMOTE 2 PARALLEL I/O (50P)<br />
REMOTE 1-IN (9P) REMOTE 1-IN/OUT (9P)<br />
RS422<br />
USB<br />
VIDEO CONTROL<br />
B INPUT<br />
B(OPTION) MONITOR 2<br />
1<br />
A<br />
<strong>DeckLink</strong> HD Pro<br />
HD SDI OUTPUT<br />
2<br />
A<br />
Breakout Cable<br />
MONITOR<br />
A<br />
B(OPTION) B(OPTION) B(OPTION)<br />
FORMAT CONV. OUT (OPTION)<br />
1 MONITOR 2<br />
SD SDI OUTPUT<br />
1 2 MONITOR<br />
Cards which can be used in this workflow<br />
<strong>DeckLink</strong> SDI<br />
<strong>DeckLink</strong> Studio<br />
<strong>DeckLink</strong> HD Pro PCI-X<br />
<strong>DeckLink</strong> HD Pro PCIe<br />
<strong>DeckLink</strong> HD Extreme<br />
<strong>DeckLink</strong> HD Extreme 2<br />
30
Connection Diagrams<br />
Connecting to a Sony HDCAM SR deck in 4:4:4<br />
This example shows <strong>DeckLink</strong> HD Pro PCIe connected to a Sony HDCAM SR series digital deck in<br />
4:4:4 HD mode. In this case, 4 HD-SDI connections are used for dual-link HD-SDI 4:4:4 video in and<br />
out. The component analog output can be used for local monitoring of 4:4:4 HD video.<br />
CH1 CH2<br />
MONITOR OUTPUT<br />
R L<br />
IN OUT<br />
Connection Diagrams<br />
ANALOG I/O DIGITAL I/O (AES/EBU) DIGITAL I/O<br />
AUDIO OUTPUT REF INPUT INPUT OUTPUT<br />
HD SDI INPUT FC OUT B<br />
CH3 CH4 1 2<br />
AUDIO<br />
CH1/2 CH3/4<br />
AUDIO<br />
CH1/2 CH3/4<br />
A<br />
INPUT<br />
MONITOR 1<br />
TIME CODE<br />
IN OUT<br />
CUE HD REF OUT SD OUT<br />
1 SYNC<br />
2<br />
COMPOSITE<br />
(MONITOR)<br />
2 3 4 5 6 7 8 9<br />
CH5/6 CH7/8<br />
CH9/10 CH11/12<br />
CH5/6 CH7/8<br />
CH9/10 CH11/12<br />
REMOTE 2 PARALLEL I/O (50P)<br />
REMOTE 1-IN (9P) REMOTE 1-IN/OUT (9P)<br />
RS422<br />
USB<br />
VIDEO CONTROL<br />
B INPUT<br />
B(OPTION) MONITOR 2<br />
1<br />
A<br />
<strong>DeckLink</strong> HD Pro<br />
HD SDI OUTPUT<br />
2<br />
A<br />
Breakout Cable<br />
MONITOR<br />
A<br />
B(OPTION) B(OPTION) B(OPTION)<br />
FORMAT CONV. OUT (OPTION)<br />
1 MONITOR 2<br />
SD SDI OUTPUT<br />
1 2 MONITOR<br />
Cards which can be used in this workflow<br />
<strong>DeckLink</strong> HD Pro PCI-X<br />
<strong>DeckLink</strong> HD Pro PCIe<br />
31
Connection Diagrams<br />
Connecting to an NTSC/PAL monitor<br />
This example shows <strong>DeckLink</strong> HD Extreme 2 connected to a standard definition Sony PVM monitor<br />
via composite analog video. Connect a BNC cable from <strong>DeckLink</strong>’s Y output cable to the composite<br />
analog video input of the Sony PVM monitor. You can use this for SD capture and playback monitoring<br />
with analog, SDI and HDMI video sources.<br />
Y/C VIDEO<br />
IN<br />
LINE A LINE B<br />
Connection Diagrams<br />
2 3 4 5 6 7 8 9 10 11 12 13 14 15<br />
AUDIO<br />
IN<br />
OUT OUT OUT<br />
VIDEO AUDIO<br />
IN IN<br />
Y/C<br />
IN<br />
AC IN<br />
Y/C<br />
OUT<br />
<strong>DeckLink</strong> HD Extreme<br />
Professional Breakout Cable<br />
2 3 4 5 6 7 8 9 10 11 12 13 14 15<br />
LINE A LINE B<br />
VIDEO<br />
IN<br />
OUT<br />
AUDIO<br />
IN<br />
OUT<br />
VIDEO<br />
IN<br />
Y/C<br />
IN<br />
AUDIO<br />
IN<br />
AC IN<br />
Cards which can be used in this workflow<br />
<strong>DeckLink</strong> SP<br />
<strong>DeckLink</strong> SP PCIe<br />
<strong>DeckLink</strong> Pro<br />
<strong>DeckLink</strong> Extreme<br />
<strong>DeckLink</strong> Extreme PCIe<br />
<strong>DeckLink</strong> Studio<br />
<strong>DeckLink</strong> HD Pro PCI-X<br />
<strong>DeckLink</strong> HD Pro PCIe<br />
<strong>DeckLink</strong> HD Extreme<br />
<strong>DeckLink</strong> HD Extreme 2<br />
32
Connection Diagrams<br />
<strong>DeckLink</strong> HD Extreme 2 - connecting to S-Video<br />
This example shows the <strong>DeckLink</strong> HD Exteme Consumer Breakout Cable connecting to S-video<br />
adapter cables. The Professional Breakout Cable can also be used with S-video adapter cables. The<br />
numbering on the cables is the same on both the Consumer and Professional Breakout Cables so<br />
it’s easy to use either cable.<br />
Connection Diagrams<br />
S-Video<br />
S-Video<br />
S-Video<br />
S-Video<br />
S-Video<br />
3<br />
Y Input<br />
4<br />
B-Y Input<br />
5<br />
7<br />
Y Input 8<br />
9<br />
B-Y Input<br />
10<br />
12<br />
13<br />
14<br />
15<br />
Y Input<br />
B-Y Input<br />
Y Input<br />
B-Y Input<br />
<strong>DeckLink</strong> HD Extreme<br />
Consumer Y Input Breakout Cable<br />
B-Y Input<br />
33
Connection Diagrams<br />
<strong>DeckLink</strong> HD Extreme - connecting to S-Video<br />
This example shows the <strong>DeckLink</strong> HD Exteme Consumer Breakout Cable connecting to S-video<br />
adapter cables. The Professional Breakout Cable can also be used with S-video adapter cables. The<br />
numbering on the cables is the same on both the Consumer and Professional Breakout Cables so<br />
it’s easy to use either cable.<br />
Connection Diagrams<br />
S-Video<br />
S-Video<br />
S-Video<br />
S-Video<br />
S-Video<br />
Y Input<br />
3<br />
B-Y 4Input<br />
5<br />
7<br />
Y Input 8<br />
9<br />
B-Y Input<br />
10<br />
12<br />
13<br />
14<br />
15<br />
Y Input<br />
B-Y Input<br />
Y Input<br />
B-Y Input<br />
<strong>DeckLink</strong> HD Extreme<br />
Consumer Breakout Cable<br />
Y Input<br />
B-Y Input<br />
34
Connection Diagrams<br />
Connecting to a YUV component monitor<br />
This example shows <strong>DeckLink</strong> HD Extreme 2 connected to a multiformat Sony BVM monitor via<br />
component analog video. Connect three BNC cables from <strong>DeckLink</strong>’s Y, B-Y and R-Y output cables<br />
to the corresponding component analog inputs of the Sony BVM monitor. You can use this for SD<br />
or HD capture and playback monitoring with analog, SDI and HDMI video sources.<br />
REMOTE 1<br />
IN<br />
REMOTE 1<br />
OUT<br />
REMOTE 2<br />
ANALOG CONNECTORS<br />
Connection Diagrams<br />
ISR<br />
2 3 4 5 6 7 8 9 10 11 12 13 14 15<br />
Y/G<br />
IN<br />
OUT<br />
PB/B<br />
IN<br />
OUT<br />
PR/R<br />
IN<br />
OUT<br />
SYNC<br />
IN<br />
OUT<br />
CONTROL UNIT<br />
REMOTE 1<br />
IN<br />
MAIN POWER<br />
I<br />
O<br />
AC IN<br />
REMOTE 1<br />
OUT<br />
REMOTE 2<br />
ISR<br />
<strong>DeckLink</strong> HD Extreme<br />
Professional Breakout Cable<br />
2 3 4 5 6 7 8 9 10 11 12 13 14 15<br />
ANALOG CONNECTORS<br />
Y/G<br />
IN<br />
OUT<br />
PB/B<br />
IN<br />
OUT<br />
PR/R<br />
IN<br />
OUT<br />
SYNC<br />
IN<br />
OUT<br />
CONTROL UNIT<br />
Cards which can be used in this workflow<br />
<strong>DeckLink</strong> SP<br />
<strong>DeckLink</strong> SP PCIe<br />
<strong>DeckLink</strong> Pro<br />
<strong>DeckLink</strong> Extreme<br />
<strong>DeckLink</strong> Extreme PCIe<br />
<strong>DeckLink</strong> Studio<br />
<strong>DeckLink</strong> HD Pro PCI-X<br />
<strong>DeckLink</strong> HD Pro PCIe<br />
<strong>DeckLink</strong> HD Extreme<br />
<strong>DeckLink</strong> HD Extreme 2<br />
MAIN POWER<br />
I<br />
O<br />
AC IN<br />
35
Connection Diagrams<br />
Connecting to an HDTV<br />
This example shows <strong>DeckLink</strong> HD Extreme 2 connected to a consumer HDTV via HDMI. Connect a<br />
HDMI cable from <strong>DeckLink</strong>’s HDMI output to the HDMI input of the HDTV. You can use this for SD<br />
or HD capture and playback monitoring of analog, SDI and HDMI video sources.<br />
Connection Diagrams<br />
HDTV with HDMI<br />
2 3 4 5 6 27 8 3 9 4 10 5 11 6 12 7 13 8 14 9 15 10 11 12 13 14 15<br />
IN<br />
RGB<br />
PC IN<br />
AUDIO<br />
HDMI<br />
IN AUDIO<br />
L<br />
R<br />
VIDEO<br />
L<br />
AUDIO<br />
R<br />
S VIDEO<br />
VIDEO IN HD/DVD IN<br />
Y<br />
PB<br />
PR<br />
L<br />
AUDIO<br />
R<br />
CONTROLS<br />
IN OUT<br />
DIGITAL OUT<br />
(OPTICAL)<br />
L<br />
R<br />
AUDIO OUT<br />
Cards which can be used in this workflow<br />
<strong>DeckLink</strong> HD Extreme 2<br />
36
Connection Diagrams<br />
HDMI Workflow<br />
<strong>DeckLink</strong> HD Extreme 2 can use HDMI for connecting video cameras, televisions and projectors<br />
to your computer for use with popular editing and design applications. <strong>DeckLink</strong> HD Extreme 2<br />
captures video in real-time directly from the HDMI output on HDV cameras, and will play back<br />
directly to large screen HDTVs or HD projectors for client-monitoring and editing.<br />
Connection Diagrams<br />
Camera Outputs<br />
HDTV<br />
Cards which can be used in this workflow<br />
<strong>DeckLink</strong> HD Extreme 2<br />
37
Connection Diagrams<br />
<strong>DeckLink</strong> HD Extreme 2 - monitoring via HDMI<br />
Connection Diagrams<br />
4:3<br />
NTSC/PAL<br />
16:9<br />
NTSC/PAL<br />
1080i<br />
720p<br />
Desktop<br />
High Definition Desktop<br />
38
Connection Diagrams<br />
<strong>DeckLink</strong> HD Extreme 2 - 2K Monitoring with HDLink Pro<br />
Connection Diagrams<br />
Dual link DVI-D connection<br />
direct to LCD monitor<br />
30 inch<br />
2K-SDI video<br />
3 Gb/s 4:4:4<br />
39
Device Diagrams<br />
<strong>DeckLink</strong> HD Extreme 2 and Professional Breakout Cable<br />
The cable numbering is the same on both the Professional and Consumer Breakout Cables so it’s<br />
easy to use either cable. For example, component video output uses cables 3, 4 and 5 on both<br />
breakout cables.<br />
2. Deck Control<br />
3. R-Y Out<br />
4. Y Out<br />
5. B-Y Out<br />
6. Ref In<br />
7. R-Y In<br />
8. Y In<br />
9. B-Y In<br />
10. AES/EBU Out<br />
11. AES/EBU In<br />
12. Audio Out Left<br />
13. Audio Out Right<br />
14. Audio In Left<br />
15. Audio In Right<br />
Device Diagrams<br />
2<br />
2 3 4 5 6 7 8 9 10 11 12 13 14 15<br />
3<br />
4<br />
5<br />
6<br />
<strong>DeckLink</strong> HD Extreme<br />
Professional Breakout Cable<br />
2 3 4 5 6 7 8 9 10 11 12 13 14 15<br />
7<br />
8<br />
9<br />
10<br />
11<br />
12<br />
13<br />
14<br />
15<br />
2K/HD/SD-SDI Monitoring Output<br />
2K/HD/SD-SDI Output (to deck)<br />
2K/HD/SD-SDI Input (from deck)<br />
HDMI Output<br />
HDMI Input<br />
40
Device Diagrams<br />
<strong>DeckLink</strong> HD Extreme 2 and Consumer Breakout Cable<br />
The cable numbering is the same on both the Professional and Consumer Breakout Cables so it’s<br />
easy to use either cable. For example, component video output uses cables 3, 4 and 5 on both<br />
breakout cables.<br />
3. R-Y Out<br />
4. Y Out<br />
5. B-Y Out<br />
7. R-Y In<br />
8. Y In<br />
9. B-Y In<br />
10. AES/EBU Out<br />
12. Audio Out Left<br />
13. Audio Out Right<br />
14. Audio In Left<br />
15. Audio In Right<br />
Device Diagrams<br />
3<br />
4<br />
5<br />
<strong>DeckLink</strong> HD Extreme<br />
2 3 4 5 6 7 8 9 10 11 12 13 14 15<br />
7<br />
8<br />
9<br />
10<br />
12<br />
13<br />
14<br />
15<br />
Consumer Breakout Cable<br />
2K/HD/SD-SDI Monitoring Output<br />
2K/HD/SD-SDI Output (to deck)<br />
2K/HD/SD-SDI Input (from deck)<br />
HDMI Output<br />
HDMI Input<br />
41
Device Diagrams<br />
<strong>DeckLink</strong> HD Extreme and Professional Breakout Cable<br />
The cable numbering is the same on both the Professional and Consumer Breakout Cables so it’s<br />
easy to use either cable. For example, component video output uses cables 3, 4 and 5 on both<br />
breakout cables.<br />
Device Diagrams<br />
2. Deck Control<br />
3. R-Y Out<br />
4. Y Out<br />
5. B-Y Out<br />
6. Ref In<br />
7. R-Y In<br />
8. Y In<br />
9. B-Y In<br />
10. AES/EBU Out<br />
11. AES/EBU In<br />
12. Audio Out Left<br />
13. Audio Out Right<br />
14. Audio In Left<br />
15. Audio In Right<br />
2<br />
2 3 4 5 6 7 8 9 10 11 12 13 14 15<br />
3<br />
4<br />
5<br />
6<br />
<strong>DeckLink</strong> HD Extreme<br />
Professional Breakout Cable<br />
2 3 4 5 6 7 8 9 10 11 12 13 14 15<br />
7<br />
8<br />
9<br />
10<br />
11<br />
12<br />
13<br />
14<br />
15<br />
HD/SD-SDI Monitoring Output<br />
2 3 4 5 6 7 8 9 10 11 12 13 14 15<br />
HD/SD-SDI Output (to deck)<br />
HD/SD-SDI Input (from deck)<br />
42
Device Diagrams<br />
<strong>DeckLink</strong> HD Extreme and Consumer Breakout Cable<br />
The cable numbering is the same on both the Professional and Consumer Breakout Cables so it’s<br />
easy to use either cable. For example, component video output uses cables 3, 4 and 5 on both<br />
breakout cables.<br />
Device Diagrams<br />
3. R-Y Out<br />
4. Y Out<br />
5. B-Y Out<br />
7. R-Y In<br />
8. Y In<br />
9. B-Y In<br />
10. AES/EBU Out<br />
12. Audio Out Left<br />
13. Audio Out Right<br />
14. Audio In Left<br />
15. Audio In Right<br />
3<br />
4<br />
5<br />
7<br />
8<br />
9<br />
10<br />
12<br />
13<br />
14<br />
15<br />
<strong>DeckLink</strong> HD Extreme<br />
Consumer Breakout Cable<br />
2 3 4 5 6 7 8 9 10 11 12 13 14 15<br />
HD/SD-SDI Monitoring Output<br />
2 3 4 5 6 7 8 9 10 11 12 13 14 15<br />
HD/SD-SDI Output (to deck)<br />
HD/SD-SDI Input (from deck)<br />
43
Device Diagrams<br />
<strong>DeckLink</strong> SDI<br />
Device Diagrams<br />
Deck Control RS-422<br />
Reference In<br />
HD/SD-SDI Output (to deck)<br />
HD/SD-SDI Input (from deck)<br />
44
Device Diagrams<br />
<strong>DeckLink</strong> Studio<br />
2. RS-422 Deck Control<br />
3. Component Out<br />
4. Component Out<br />
5. Component Out<br />
6. Genlock Tri-Sync In<br />
7. Component In<br />
8. Component In<br />
9. Component In<br />
10. AES / EBU Out<br />
11. AES / EBU In<br />
12. Analog Audio Out 1<br />
13. Analog Audio Out 2<br />
14. Analog Audio Out 3 or AES / EBU In<br />
15. Analog Audio Out 4 or AES / EBU In<br />
16. Analog Audio In 1<br />
17. Analog Audio In 2<br />
18. Analog Audio In 3 or AES / EBU In<br />
19. Analog Audio In 4 or AES / EBU In<br />
20. Composite In<br />
21. Composite Out<br />
22. S-Video In<br />
23. S-Video Out<br />
24. Standard Definition SDI Out<br />
Device Diagrams<br />
02<br />
03<br />
04<br />
05<br />
06<br />
07<br />
08<br />
09<br />
10<br />
11<br />
12<br />
13<br />
14<br />
15<br />
16<br />
17<br />
18<br />
19<br />
20<br />
21<br />
22<br />
23<br />
24<br />
<strong>DeckLink</strong> Studio Breakout Cable<br />
HD/SD-SDI Output (to deck)<br />
HD/SD-SDI Input (from deck)<br />
45
Device Diagrams<br />
<strong>DeckLink</strong> HD Pro PCIe<br />
Device Diagrams<br />
2. Deck Control<br />
3. R-Y/R Monitor Out<br />
4. Y/G Monitor Out<br />
5. B-Y/B Monitor Out<br />
6. Ref In<br />
7. SPDIF/AES Out<br />
8 SPDIF/AES In<br />
9. Wordclock Out<br />
2<br />
3<br />
4<br />
5<br />
6<br />
7<br />
8<br />
9<br />
<strong>DeckLink</strong> HD Pro Breakout Cable<br />
HD/SD-SDI Monitoring Output Ch A<br />
HD/SD-SDI Output (to deck) Ch B<br />
HD/SD-SDI Input (from deck) Ch A<br />
HD-SDI Input for 4:4:4 Ch B<br />
46
Device Diagrams<br />
<strong>DeckLink</strong> HD Pro PCI-X<br />
Device Diagrams<br />
2. Deck Control<br />
3. R-Y/R Monitor Out<br />
4. Y/G Monitor Out<br />
5. B-Y/B Monitor Out<br />
6. Ref In<br />
7. SPDIF/AES Out<br />
8. SPDIF/AES In<br />
9. Wordclock Out<br />
2<br />
3<br />
4<br />
5<br />
6<br />
7<br />
8<br />
9<br />
<strong>DeckLink</strong> HD Pro Breakout Cable<br />
HD/SD-SDI Monitoring Output Ch A<br />
HD/SD-SDI Output (to deck) Ch B<br />
HD/SD-SDI Input (from deck) Ch A<br />
HD-SDI Input for 4:4:4 Ch B<br />
47
Device Diagrams<br />
<strong>DeckLink</strong> Extreme<br />
2. AES-S/PDIF Output<br />
(monitoring) (R) Audio Output<br />
3. (L) Audio Output (balanced analog)<br />
(balanced analog) (R) Audio Input<br />
4. (R) Audio Output (balanced analog)<br />
(balanced analog)<br />
(L) Audio Output<br />
5. (L) Audio Input (balanced analog)<br />
(balanced analog)<br />
(L) Audio Input<br />
6. (R) Audio Input (balanced analog)<br />
(balanced analog)<br />
AES-S/PDIF Output<br />
7. Y Input (monitoring)<br />
8. B-Y Input<br />
9. R-Y Input<br />
10. Y Output<br />
(composite monitoring) Y Input<br />
11. B-Y Output<br />
12. R-Y Output<br />
Device Diagrams<br />
R-Y Input<br />
B-Y Input<br />
R-Y Output<br />
B-Y Output<br />
13. SD-SDI Output<br />
Y Output<br />
14. Genlock Input (composite monitoring)<br />
15. SD-SDI Input<br />
SD-SDI Input<br />
SD-SDI Output<br />
16. Deck Control RS-422<br />
Genlock Input<br />
Deck Control RS-422<br />
2<br />
3<br />
4<br />
5<br />
6<br />
7<br />
8<br />
9<br />
10<br />
11<br />
12<br />
13<br />
14<br />
15<br />
16<br />
<strong>DeckLink</strong> Extreme<br />
Breakout Cable<br />
<strong>DeckLink</strong> Extreme<br />
7ft Breakout Cable<br />
48
Device Diagrams<br />
<strong>DeckLink</strong> Extreme PCIe<br />
2. AES-S/PDIF Output<br />
(R) Audio Output<br />
(monitoring)<br />
(balanced analog)<br />
3. (L) Audio Output<br />
(balanced (R) analog) Audio Input<br />
(balanced analog)<br />
4. (R) Audio Output<br />
(balanced (L) analog) Audio Output<br />
5. (L) Audio (balanced Input analog)<br />
(balanced (L) analog) Audio Input<br />
6. (R) Audio (balanced Input analog)<br />
(balanced<br />
SPDIF/AES<br />
analog)<br />
Output<br />
7. Y Input (monitoring)<br />
8. B-Y Input R-Y Input<br />
9. R-Y InputB-Y<br />
Input<br />
10. Y Output<br />
(composite Y monitoring) Input<br />
11. B-Y Output<br />
R-Y Output<br />
12. R-Y Output<br />
B-Y Output<br />
13. SD-SDI Output<br />
Y Output<br />
14. Genlock Input (composite monitoring)<br />
15. SD-SDI Input SD-SDI Input<br />
16. Deck Control SD-SDI RS-422<br />
Output<br />
Device Diagrams<br />
Genlock Input<br />
Deck Control RS-422<br />
2<br />
3<br />
4<br />
5<br />
6<br />
7<br />
8<br />
9<br />
10<br />
11<br />
12<br />
13<br />
14<br />
15<br />
16<br />
<strong>DeckLink</strong> Extreme<br />
Breakout Cable<br />
7ft break-out cable<br />
49
Device Diagrams<br />
<strong>DeckLink</strong> SP<br />
2. AES-S/PDIF (R) Output Audio Output<br />
(monitoring) (balanced analog) 2<br />
3. (L) Audio (R) Output Audio Input<br />
(balanced (balanced analog) analog)<br />
3<br />
4. (R) Audio (L) Output Audio Output<br />
(balanced (balanced analog) analog)<br />
4<br />
5. (L) Audio (L) Input Audio Input<br />
(balanced (balanced analog) analog)<br />
5<br />
6. (R) Audio SPDIF/AES Input Output<br />
(balanced (monitoring)<br />
analog)<br />
6<br />
7. Y Input SD-SDI Output<br />
(monitoring)<br />
7<br />
8. B-Y Input<br />
R-Y Input<br />
8<br />
9. R-Y Input<br />
10. Y Output B-Y Input<br />
9<br />
(composite monitoring)<br />
Y Input<br />
11. B-Y Output<br />
10<br />
12. R-Y Output R-Y Output<br />
13. SD-SDI Output<br />
(Monitoring) B-Y Output<br />
14. Genlock Input Y Output<br />
(composite monitoring)<br />
15. Deck Control RS-422<br />
Genlock Input<br />
Device Diagrams<br />
Deck Control RS-422<br />
11<br />
12<br />
13<br />
14<br />
15<br />
<strong>DeckLink</strong> SP<br />
Breakout Cable<br />
7ft break-out cable<br />
50
Device Diagrams<br />
<strong>DeckLink</strong> SP PCIe<br />
2.<br />
3.<br />
4.<br />
(R) Audio Output<br />
AES-S/PDIF (balanced Output analog)<br />
(monitoring)<br />
(R) Audio Input<br />
(L) Audio Output<br />
(balanced analog)<br />
(balanced analog)<br />
(R) Audio (L) Output Audio Output<br />
(balanced (balanced analog) analog)<br />
2<br />
3<br />
4<br />
5. (L) Audio (L) Input Audio Input<br />
(balanced (balanced analog) analog)<br />
5<br />
6. (R) Audio SPDIF Input Output<br />
(balanced (monitoring)<br />
analog)<br />
7. Y Input SD-SDI Output<br />
(monitoring)<br />
8. B-Y Input<br />
R-Y Input<br />
9. R-Y Input<br />
10. Y Output B-Y Input<br />
(composite monitoring)<br />
Y Input<br />
11. B-Y Output<br />
12. R-Y Output R-Y Output<br />
13. SD-SDI Output<br />
(Monitoring) B-Y Output<br />
14. Genlock Input Y Output<br />
(composite monitoring)<br />
15. Deck Control RS-422<br />
Genlock Input<br />
Device Diagrams<br />
Deck Control RS-422<br />
6<br />
7<br />
8<br />
9<br />
10<br />
11<br />
12<br />
13<br />
14<br />
15<br />
<strong>DeckLink</strong> SP<br />
Breakout Cable<br />
7ft break-out cable<br />
51
Device Diagrams<br />
<strong>DeckLink</strong> Pro<br />
SPDIF Output<br />
(monitoring A)<br />
2. AES-S/PDIF SPDIF Output Output A<br />
(monitoring) (monitoring B)<br />
3. AES-S/PDIF SPDIF Output Output B<br />
(monitoring) (monitoring C)<br />
4. AES-S/PDIF Output C<br />
(monitoring) SPDIF Output<br />
(monitoring D)<br />
5. AES-S/PDIF Output D<br />
(monitoring) R-Y Output<br />
(monitoring)<br />
6. SDI-SDI Output<br />
(Monitoring) B-Y Output<br />
(monitoring)<br />
7. SD-SDI Output<br />
Y Output<br />
8. SD-SDI Input (composite monitoring)<br />
SD-SDI Output<br />
9. Genlock Input (monitoring)<br />
10. Y Output SD-SDI Output<br />
(composite (to monitoring) deck)<br />
11. B-Y OutputSD-SDI<br />
Input<br />
(Monitoring) (from deck)<br />
12. R-Y Output<br />
(Monitoring) Genlock Input<br />
13. Deck Control RS-422<br />
Device Diagrams<br />
Deck Control RS-422<br />
2<br />
3<br />
4<br />
5<br />
6<br />
7<br />
8<br />
9<br />
10<br />
11<br />
12<br />
13<br />
<strong>DeckLink</strong> Pro<br />
Breakout Cable<br />
7ft break-out cable<br />
52
Device Diagrams<br />
<strong>DeckLink</strong><br />
Device Diagrams<br />
Deck Control RS-422<br />
SPDIF/AES Output<br />
SD-SDI Output<br />
(Monitoring)<br />
SD-SDI Output<br />
SD-SDI Input<br />
53
Developer Information<br />
Blackmagic 2K Format<br />
The latest Blackmagic Design products use the new 3 Gb/s SDI video, which allows twice the data<br />
rate of traditional HD-SDI video. We thought it would be a really nice idea to add 2K film support, via<br />
this new 3 Gb/s SDI technology, so we could simplify feature film workflows. With the popularity of<br />
Blackmagic Design editing systems worldwide, now thousands of people can benefit from a feature<br />
film workflow revolution.<br />
This information includes everything product developers need to know for building native 2K SDI<br />
equipment. Of course, all Blackmagic products can be updated, so if the television industry adopts an<br />
alternative SDI-based film standard, we can add support for that too!<br />
Frame Structure<br />
Transmitted at 23.98 or 24 frames per second as a Progressive Segmented Frame.<br />
Active video is 2048 pixels wide by 1556 lines deep.<br />
Total lines per frame : 1650<br />
Words per active line. One word consists of a sample on both data streams:<br />
3072 (2048*3/2). See following page.<br />
Total active lines : 1556<br />
Words per total line : 3750.<br />
Fields per frame : 2, 825 lines each<br />
Active lines located on lines 16-793 (field 1) and 841-1618 (field 2).<br />
Transport Structure<br />
Based on SMPTE S425M mapping structure 2.<br />
Timing reference signals, line number and line CRC insertion is the same as above.<br />
Optional ancillary data is inserted into both virtual interfaces.<br />
At present, only audio data is included: as per standard HD audio insertion (SMPTE S299M) the audio<br />
data packets are carried on data stream two and audio control packets are carried on data stream one.<br />
During active video, 10-bit Red, Green and Blue data is sent in the following sequence:<br />
Data stream1: Green_1, Red_1, Green_2, Green_3, Red_3, Green_4,…,Green_n-1, Red_n-1, Green_n.<br />
Data stream 2: Blue_1, Red_2, Blue_2, Blue_3, Red_4, Blue_4, …,Blue_n-1, Red_n, Blue_n.<br />
Diagrams on the following page show the vertical timing details with line numbers and Field, Vertical and<br />
Horizontal bits for the Timing Reference Signal codes.<br />
Final diagram shows the data stream formats around the optional ancillary data section of the horizontal<br />
line. Note that each active pixel takes up three samples.<br />
Developer Information<br />
54
Developer Information<br />
Blackmagic 2K Format<br />
FVH<br />
TRS<br />
LINE#<br />
FVH<br />
TRS<br />
LINE#<br />
DATA<br />
STREAM<br />
1<br />
DATA<br />
STREAM<br />
2<br />
WORD#<br />
101<br />
001<br />
Developer Information<br />
E<br />
E<br />
3745 B2045 G2045<br />
100<br />
000<br />
111<br />
011<br />
110<br />
010<br />
111<br />
011<br />
110<br />
010<br />
011<br />
111<br />
010<br />
110<br />
011<br />
1618 1619... 1650 1 2 3... 14 15 16<br />
111<br />
823 824 825 826 827 828... 839 840 841<br />
010<br />
110<br />
011<br />
111<br />
010<br />
110<br />
011<br />
111<br />
010<br />
110<br />
011<br />
111<br />
010<br />
110<br />
S E S E S E S E S E S E S E S E S E S E S E S E S E S E S<br />
101<br />
FIRST FIELD<br />
100<br />
101<br />
100<br />
SECOND FIELD<br />
Active Lines<br />
S E S E S E S E S E S E S E S E S E S E S E S E S E S E S<br />
3746 R2046 R2045<br />
3747 B2046 G2046<br />
3748 B2047 G2047<br />
3749 R2048 R2047<br />
3750 B2048 G2048<br />
1 EAV(3FFh) EAV(3FFh)<br />
2 EAV(000h) EAV(000h)<br />
3 EAV(000h) EAV(000h)<br />
4 EAV(XYZh) EAV(XYZh)<br />
5 LN0 LN0<br />
6 LN1 LN1<br />
7 CR0 CR0<br />
8 CR1 CR1<br />
REPLACED BY<br />
OPTIONAL<br />
ANCILLARY DATA<br />
REPLACED BY<br />
OPTIONAL<br />
ANCILLARY DATA<br />
9-674<br />
001<br />
675 SAV(3FFh) SAV(3FFh)<br />
000<br />
676 SAV(000h) SAV(000h)<br />
001<br />
000<br />
001<br />
17... 792 793 794... 824 825<br />
Active Lines<br />
101<br />
000<br />
100<br />
001<br />
101<br />
000<br />
100<br />
011<br />
111<br />
010<br />
110<br />
011<br />
111<br />
010<br />
110<br />
011<br />
111<br />
842... 1617 1618 1619... 1649 1650<br />
677 SAV(000h) SAV(000h)<br />
678 SAV(XYZh) SAV(XYZh)<br />
679 B1 G1<br />
680 R2 R1<br />
681 B2 G2<br />
682 B3 G3<br />
683 R4 R3<br />
684 B4 G4<br />
685 B5 G5<br />
686 R6 R5<br />
010<br />
110<br />
55
3 Year Limited Warranty<br />
Blackmagic Design warrants that this product will be free from defects in materials and workmanship<br />
for a period of 36 months from the date of purchase. If a product proves to be defective during this<br />
warranty period, Blackmagic Design, at its option, either will repair the defective product without<br />
charge for parts and labor, or will provide a replacement in exchange for the defective product.<br />
In order to obtain service under this warranty, you the Customer, must notify Blackmagic Design<br />
of the defect before the expiration of the warranty period and make suitable arrangements for<br />
the performance of service. The Customer shall be responsible for packaging and shipping the<br />
defective product to a designated service center nominated by Blackmagic Design, with shipping<br />
charges pre paid. Customer shall be responsible for paying all shipping changes, insurance, duties,<br />
taxes, and any other charges for products returned to us for any reason.<br />
This warranty shall not apply to any defect, failure or damage caused by improper use or improper<br />
or inadequate maintenance and care. Blackmagic Design shall not be obligated to furnish service<br />
under this warranty: a) to repair damage resulting from attempts by personal other than Blackmagic<br />
Design representatives to install, repair or service the product, b) to repair damage resulting from<br />
improper use or connection to incompatible equipment, c) to repair any damage or malfunction<br />
caused by the use of non Blackmagic Design parts or supplies, or d) to service a product that has<br />
been modified or integrated with other products when the effect of such a modification or integration<br />
increases the time or difficulty of servicing the product. THIS WARRANTY IS GIVEN BY BLACKMAGIC<br />
DESIGN IN LIEU OF ANY OTHER WARRANTIES, EXPRESS OR IMPLIED. BLACKMAGIC DESIGN<br />
AND ITS VENDORS DISCLAIM ANY IMPLIED WARRANTIES OF MERCHANTABILITY OR FITNESS<br />
FOR A PARTICULAR PURPOSE. BLACKMAGIC DESIGN’S RESPONSIBILITY TO REPAIR OR<br />
REPLACE DEFECTIVE PRODUCTS IS THE WHOLE AND EXCLUSIVE REMEDY PROVIDED TO<br />
THE CUSTOMER FOR ANY INDIRECT, SPECIAL, INCIDENTAL OR CONSEQUENTIAL DAMAGES<br />
IRRESPECTIVE OF WHETHER BLACKMAGIC DESIGN OR THE VENDOR HAS ADVANCE<br />
NOTICE OF THE POSSIBILITY OF SUCH DAMAGES. BLACKMAGIC DESIGN IS NOT LIABLE FOR<br />
ANY ILLEGAL USE OF EQUIPMENT BY CUSTOMER. BLACKMAGIC IS NOT LIABLE FOR ANY<br />
DAMAGES RESULTING FROM USE OF THIS PRODUCT. USER OPERATES THIS PRODUCT AT<br />
OWN RISK.<br />
Copyright 2008 Blackmagic Design. All rights reserved. ‘Blackmagic Design’, ‘<strong>DeckLink</strong>’, ‘HDLink’,<br />
‘Workgroup Videohub’, ‘ Videohub’, ‘<strong>DeckLink</strong>’, ‘Intensity’ and ‘Leading the creative video<br />
revolution’ are registered trademarks in the US and other countries. All other company and product<br />
names may be trade marks of their respective companies with which they are associated.<br />
Warranty<br />
56