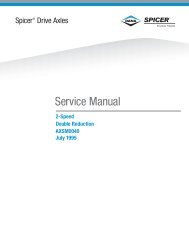
Service Manual - Dana Corporation
Service Manual - Dana Corporation
Service Manual - Dana Corporation

You also want an ePaper? Increase the reach of your titles
YUMPU automatically turns print PDFs into web optimized ePapers that Google loves.
Install Power Divider on Differential Carrier<br />
Special Instructions<br />
Lubricate all parts before installation.<br />
Procedure -<br />
1. Axle Housing Cover and Output Shaft Bearing Parts. If<br />
removed, install these parts following instructions on<br />
page 27.<br />
2. Output Shaft. If removed, lubricate "O" rings, then install<br />
shaft assembly in differential carrier and housing cover.<br />
Lubricate seal lip. Make sure yoke is clean and dry, then<br />
install yoke, flat washer* and self-locking nut. Torque nut<br />
to correct specification.<br />
Note: Late Model Axles may be equipped with a spring<br />
and thrust button mounted in end of output shaft.<br />
Power Divider Replacement<br />
3. Inter-axle Differential- Install this assembly on output<br />
shaft side gear (with nuts facing away from side gear).<br />
Silicone Gasket Compound<br />
4. Power Divider Assembly- Use silicone rubber gasket<br />
compound on differential carrier mating surface as shown<br />
in the illustration.<br />
Note: Compound will set in 20 minutes. Install power divider<br />
before compound sets or reapply.<br />
CAUTION<br />
During installation of power divider, the inter-axle differential<br />
may fall from carrier. Exert caution to prevent<br />
damage or injury.<br />
42<br />
<strong>Service</strong> Procedure