Download Kyocera Wild Card User Manual - Virgin Mobile
Download Kyocera Wild Card User Manual - Virgin Mobile
Download Kyocera Wild Card User Manual - Virgin Mobile

You also want an ePaper? Increase the reach of your titles
YUMPU automatically turns print PDFs into web optimized ePapers that Google loves.
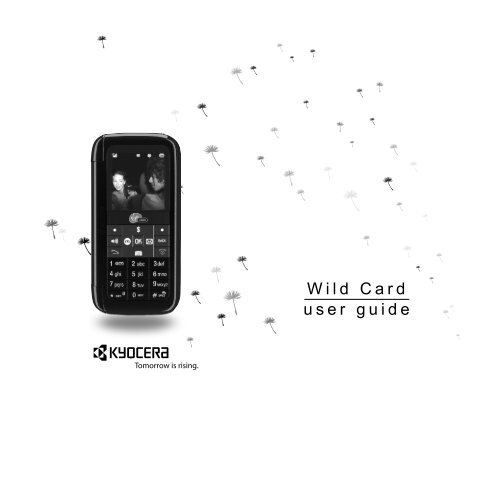
<strong>Wild</strong> <strong>Card</strong> VMU <strong>User</strong> Guide<br />
This manual is based on the production version of<br />
the <strong>Kyocera</strong> <strong>Wild</strong> <strong>Card</strong> phone. Software changes<br />
may have occurred after this printing. <strong>Kyocera</strong><br />
reserves the right to make changes in technical and<br />
product specifications without prior notice. The<br />
products and equipment described in this<br />
documentation are manufactured under license<br />
from QUALCOMM Incorporated under one or more<br />
of the following U.S. patents:<br />
4,901,307 5,109,390 5,267,262 5,416,797 5,506,865<br />
5,544,196 5,657,420 5,101,501 5,267,261 5,414,796<br />
5,504,773 5,535,239 5,600,754 5,778,338 5,228,054<br />
5,337,338 5,710,784 5,056,109 5,568,483 5,659,569<br />
5,490,165 5,511,073<br />
The <strong>Kyocera</strong> Wireless Corp. (“KWC”) products<br />
described in this manual may include copyrighted<br />
KWC and third party software stored in<br />
semiconductor memories or other media. Laws in<br />
the United States and other countries preserve for<br />
KWC and third party software providers certain<br />
exclusive rights for copyrighted software, such as<br />
the exclusive rights to distribute or reproduce the<br />
copyrighted software. Accordingly, any copyrighted<br />
software contained in the KWC products may not<br />
be modified, reverse engineered, distributed or<br />
reproduced in any manner not permitted by law.<br />
Furthermore, the purchase of the KWC products<br />
shall not be deemed to grant—either directly or by<br />
implication, estoppel, or otherwise—any license<br />
under the copyrights, patents, or patent<br />
applications of KWC or any third party software<br />
provider, except for the normal, non-exclusive<br />
royalty-free license to use that arises by operation<br />
of law in the sale of a product.<br />
<strong>Kyocera</strong> is a registered trademark of <strong>Kyocera</strong><br />
Corporation. Brick Attack and Race 21 are<br />
trademarks of <strong>Kyocera</strong> Wireless Corp.<br />
QUALCOMM is a registered trademark of<br />
QUALCOMM Incorporated.<br />
ii<br />
VIRGIN and the <strong>Virgin</strong> signature logo are registered<br />
trademarks of <strong>Virgin</strong> Enterprises Limited and are<br />
used under license.<br />
Openwave is a trademark of Openwave Systems<br />
Incorporated. eZiText is a registered trademark of<br />
Zi Corporation. TransFlash is a trademark of<br />
SanDisk Corporation. Bluetooth trademarks are<br />
owned by Bluetooth SIG, Inc. and used by <strong>Kyocera</strong><br />
Wireless Corp. under license.<br />
All other trademarks are the property of their<br />
respective owners.<br />
Copyright © 2007 <strong>Kyocera</strong> Wireless Corp.<br />
All rights reserved.<br />
Ringer Tones Copyright © 2000-2007<br />
<strong>Kyocera</strong> Wireless Corp.<br />
Bluetooth ® Certification<br />
For information about <strong>Wild</strong> <strong>Card</strong> Bluetooth<br />
Certification visit the Bluetooth Qualification<br />
Program Web site at qualweb.bluetooth.org.<br />
82-G1950-2EN, Rev. 001<br />
FCC Notice<br />
This device complies with part 15 of the FCC rules.<br />
Operation is subject to the following two conditions:<br />
(1) This device may not cause harmful interference,<br />
and (2) This device must accept any interference<br />
received, including interference that may cause<br />
undesired operation. To maintain compliance with<br />
FCC RF exposure guidelines, if you wear a handset<br />
on your body, use the <strong>Kyocera</strong> Wireless Corp.<br />
(KWC) supplied and approved universal pouch<br />
CV90-61344-03. Other accessories used with this<br />
device for body-worn operations must not contain<br />
any metallic components and must provide at least<br />
15 mm separation distance including the antenna<br />
and the user’s body.<br />
THIS MODEL PHONE MEETS THE<br />
GOVERNMENT’S REQUIREMENTS FOR<br />
EXPOSURE TO RADIO WAVES.
Your wireless phone is a radio transmitter and<br />
receiver. It is designed and manufactured to not<br />
exceed the emission limits for exposure to radio<br />
frequency (RF) energy set by the Federal<br />
Communications Commission of the U.S.<br />
Government. These limits are part of<br />
comprehensive guidelines and establish permitted<br />
levels of RF energy for the general population. The<br />
guidelines are based on standards that were<br />
developed by independent scientific organizations<br />
through periodic and thorough evaluation of<br />
scientific studies. The standards include a<br />
substantial safety margin designed to assure the<br />
safety of all persons, regardless of age and health.<br />
The exposure standard for wireless mobile phones<br />
employs a unit of measurement known as the<br />
Specific Absorption Rate, or SAR. The SAR limit set<br />
by the FCC is 1.6 W/kg.*<br />
Tests for SAR are conducted using standard<br />
operating positions specified by the FCC with the<br />
phone transmitting at its highest certified power<br />
level in all tested frequency bands.<br />
Although the SAR is determined at the highest<br />
certified power level, the actual SAR level of the<br />
phone while operating can be well below the<br />
maximum value.<br />
This is because the phone is designed to operate at<br />
multiple power levels so as to use only the power<br />
required to reach the network. In general, the closer<br />
you are to a wireless base station antenna, the<br />
lower the power output.<br />
Before a phone model is available for sale to the<br />
public, it must be tested and certified by the FCC<br />
that it does not exceed the limit established by the<br />
government-adopted requirement for safe<br />
exposure. The tests are performed in positions and<br />
locations (e.g., at the ear and worn on the body) as<br />
required by the FCC for each model.<br />
Body-worn measurements differ among phone<br />
models, depending upon availability of accessories<br />
and FCC requirements. While there may be<br />
differences between the SAR levels of various<br />
phones and at various positions, they all meet the<br />
government requirement for safe exposure.<br />
The FCC has granted an Equipment Authorization<br />
for this model phone with all reported SAR levels<br />
evaluated as in compliance with the FCC RF<br />
emission guidelines. SAR information on this model<br />
phone is on file with the FCC and can be found<br />
under the Display Grant section<br />
www.fcc.gov/oet/fccid after searching on the<br />
FCC ID: OVFKWC-M1000-2J0.<br />
Additional information on SAR can be found on the<br />
Cellular Telecommunications and Internet<br />
Association (CTIA) web-site at<br />
www.wow-com.com.<br />
* In the United States and Canada, the SAR limit for<br />
mobile phones used by the public is 1.6 watts/kg<br />
(W/kg) averaged over one gram of tissue. The<br />
standard incorporates a substantial margin of<br />
safety to give additional protection for the public<br />
and to account for any variations in measurements.<br />
Caution<br />
The user is cautioned that changes or modifications<br />
not expressly approved by the party responsible for<br />
compliance could void the warranty and user’s<br />
authority to operate the equipment.<br />
Optimize your phone’s performance<br />
Use the guidelines in this guide to learn how to<br />
optimize the performance and life of your phone<br />
and battery.<br />
Air bags<br />
If you have an air bag, DO NOT place installed or<br />
portable phone equipment or other objects over the<br />
air bag or in the air bag deployment area. If<br />
equipment is not properly installed, you and your<br />
passengers risk serious injury.<br />
<strong>User</strong> Guide iii
Medical devices<br />
Pacemakers—Warning to pacemaker wearers:<br />
Wireless phones, when in the ‘on’ position, have<br />
been shown to interfere with pacemakers. The<br />
phone should be kept at least six (6) inches away<br />
from the pacemaker to reduce risk.<br />
The Health Industry Manufacturers Association and<br />
the wireless technology research community<br />
recommend that you follow these guidelines to<br />
minimize the potential for interference.<br />
Always keep the phone at least six inches<br />
(15 centimeters) away from your pacemaker<br />
when the phone is turned on.<br />
Do not carry your phone near your heart.<br />
Use the ear opposite the pacemaker.<br />
If you have any reason to suspect that<br />
interference is taking place, turn off your<br />
phone immediately.<br />
Hearing aids—Some digital wireless phones may<br />
interfere with hearing aids. In the event of such<br />
interference, you may want to consult <strong>Virgin</strong><br />
<strong>Mobile</strong> or call the customer service line to<br />
discuss alternatives.<br />
Other medical devices—If you use any other<br />
personal medical device, consult the manufacturer<br />
of the device to determine if it is adequately<br />
shielded from external RF energy. Your physician<br />
may be able to help you obtain this information.<br />
In health care facilities—Turn your phone off in<br />
health care facilities when instructed. Hospitals and<br />
health care facilities may be using equipment that is<br />
sensitive to external RF energy.<br />
Potentially unsafe areas<br />
Posted facilities—Turn your phone off in any<br />
facility when posted notices require you to do so.<br />
Aircraft—FCC regulations prohibit using your<br />
phone on a plane that is in the air. Turn your phone<br />
off before boarding aircraft.<br />
iv<br />
Vehicles—RF signals may affect improperly<br />
installed or inadequately shielded electronic<br />
systems in motor vehicles. Check with the<br />
manufacturer of the device to determine if it is<br />
adequately shielded from external RF energy. Your<br />
auto manufacturer may be able to help you obtain<br />
this information.<br />
Blasting areas—Turn off your phone where<br />
blasting is in progress. Observe restrictions, and<br />
follow any regulations or rules.<br />
Potentially explosive atmospheres—Turn off your<br />
phone when you are in any area with a potentially<br />
explosive atmosphere. Obey all signs and<br />
instructions. Sparks in such areas could cause<br />
an explosion or fire, resulting in bodily injury or<br />
death.Areas with a potentially explosive<br />
atmosphere are often, but not always,<br />
clearly marked.<br />
They include:<br />
fueling areas such as gas stations<br />
below deck on boats<br />
transfer or storage facilities for fuel or chemicals<br />
vehicles using liquefied petroleum gas, such as<br />
propane or butane<br />
areas where the air contains chemicals or<br />
particles such as grain, dust, or metal powders<br />
any other area where you would normally be<br />
advised to turn off your vehicle engine<br />
Use with care<br />
Use only in normal position (to ear). Avoid dropping,<br />
hitting, bending, or sitting on the phone.<br />
Keep phone dry<br />
Keep the phone dry. Damage can result if the<br />
phone gets wet. Water damage is not covered<br />
under warranty.
Resetting the phone<br />
If the screen seems frozen and the keypad does not<br />
respond to keypresses, reset the phone by<br />
completing the following steps:<br />
1. Remove the battery door.<br />
2. Remove and replace the battery.<br />
If the problem persists, return the phone to the<br />
dealer for service.<br />
Accessories<br />
Use only <strong>Kyocera</strong>-approved accessories with<br />
<strong>Kyocera</strong> phones. Use of any unauthorized<br />
accessories may be dangerous and will invalidate<br />
the phone warranty if said accessories cause<br />
damage or a defect to the phone.<br />
Radio Frequency (RF) energy<br />
Your telephone is a radio transmitter and receiver.<br />
When it is on, it receives and sends out RF energy.<br />
<strong>Virgin</strong> <strong>Mobile</strong>’s network controls the power of the<br />
RF signal. This power level can range from 0.006 to<br />
0.6 watts. In August 1996, the U.S. Federal<br />
Communications Commission (FCC) adopted RF<br />
exposure guidelines with safety levels for hand-held<br />
wireless phones. These guidelines are consistent<br />
with the safety standards previously set by both<br />
U.S. and international standards bodies in the<br />
following reports:<br />
ANSI C95.1 (American National Standards<br />
Institute, 1992)<br />
NCRP Report 86 (National Council on<br />
Radiation Protection and Measurements, 1986)<br />
ICNIRP (International Commission on Non-<br />
Ionizing Radiation Protection, 1996)<br />
Your phone complies with the standards set by<br />
these reports and the FCC guidelines.<br />
E911 mandates<br />
Where service is available, this handset complies<br />
with the Phase I and Phase II E911 Mandates<br />
issued by the FCC.<br />
Hearing Aid Compatibility (HAC) features<br />
This <strong>Virgin</strong> <strong>Mobile</strong> phone has received a HAC<br />
performance rating (designated by the letter M<br />
followed by a number). The rating for this phone is<br />
identified on the outside of this phone’s original<br />
packaging. While there is no guarantee, digital<br />
wireless phones that receive a minimum of an M3<br />
rating should provide acceptable performance with<br />
most hearing aids. Hearing loss and hearing aids<br />
are highly individualized, however, so optimal<br />
performance cannot be guaranteed. Other factors,<br />
such as type of hearing aid device or degree of<br />
hearing loss, also can affect a phone’s performance<br />
for a particular user.<br />
Hearing aids and wireless phones<br />
A hearing aid uses a microphone to collect and<br />
convert sound waves to electrical signals. The<br />
hearing aid then amplifies and converts the<br />
electrical signals back to audible sounds for the<br />
hearing aid user to hear. Radio Frequency (RF)<br />
emissions generated by digital wireless phones<br />
often interfere with the operation of a hearing aid’s<br />
microphone, distorting the amplified audible sound.<br />
In addition, hearing aid microphones tend to collect<br />
ambient noise and amplify these sounds, interfering<br />
with the desired audio transmission.<br />
ANSI standard<br />
To diminish interference between wireless phones<br />
and hearing aids, the FCC requires wireless<br />
carriers to offer phones that meet the American<br />
National Standards Institute (ANSI) C63.19<br />
standard for reduced RF emissions. Wireless<br />
phones that comply with the FCC’s hearing aidcompatibility<br />
(HAC) regulations must receive a<br />
minimum rating of “M3” for RF emissions under the<br />
ANSI C63.19 standard. The “M” rating refers to the<br />
phone’s RF emissions level for use with hearing<br />
aids operating in the microphone setting.<br />
<strong>User</strong> Guide v
The higher the phone’s “M” rating, the more likely<br />
the phone is compatible with a hearing aid<br />
operating in the microphone setting. Hearing aids<br />
also have ratings similar to wireless phones.<br />
Most newer hearing aid models receive at least<br />
an M2 rating.<br />
To determine the level of compatibility between<br />
your hearing aid and this <strong>Virgin</strong> <strong>Mobile</strong> HACcertified<br />
phone, combine the M rating of your<br />
hearing aid and the M rating of this phone. For<br />
example, if you pair an M3 hearing aid with an M4<br />
phone, you will achieve a combined rating of 7.<br />
Any combined rating equal to or greater than 6<br />
provides excellent performance.<br />
Any combined rating equal to 5 offers<br />
good performance.<br />
Any combined rating equal to 4 offers<br />
acceptable performance.<br />
T-Ratings—Phones rated T3 or T4 meet FCC<br />
requirements and are likely to be more usable with<br />
a hearing device’s telecoil (“T Switch” or<br />
“Telephone Switch”) than unrated phones. T4 is the<br />
better/higher of the two ratings. (Note that not all<br />
hearing devices have telecoils in them.)<br />
Hearing devices may also be measured for<br />
immunity to this type of interference. Your hearing<br />
device manufacturer or hearing health professional<br />
may help you choose the proper rating for your<br />
mobile phone. The more immune your hearing aid<br />
is, the less likely you are to experience interference<br />
noise from mobile phones.<br />
Please visit www.virginmobileusa.com if you<br />
have any additional questions about hearing<br />
aid-compatibility.<br />
vi<br />
Battery and charger specifications<br />
Charger Input Output<br />
CE90-R2233 100-240 VAC / 50/60 Hz 5V 350mA<br />
CV90-G2926 100-240 VAC / 50/60 Hz 4.5V 1.2A<br />
CV90-K0281 100-240 VAC / 50/60 Hz 4.5V 600mA<br />
Standard Battery (5mm):<br />
CV90-N3344 3.7V / 900 mAh<br />
<strong>Kyocera</strong> Wireless Corp.<br />
10300 Campus Point Drive<br />
San Diego, CA 92121 USA<br />
www.kyocera-wireless.com<br />
To purchase accessories, visit<br />
www.kyocera-wireless.com/store or<br />
www.virginmobileusa.com.
Table of Contents<br />
1 Getting started . . . . . . . . . . . . . . . . . . . . . . 1<br />
Phone battery. . . . . . . . . . . . . . . . . . . . . . . . . . . .1<br />
Purchasing accessories . . . . . . . . . . . . . . . . . . . .2<br />
Finding your phone’s serial number. . . . . . . . . . .2<br />
Phone activation. . . . . . . . . . . . . . . . . . . . . . . . . .3<br />
Phone overview . . . . . . . . . . . . . . . . . . . . . . . . . .4<br />
Main menu. . . . . . . . . . . . . . . . . . . . . . . . . . . . .10<br />
Basic navigation . . . . . . . . . . . . . . . . . . . . . . . . .11<br />
Guide conventions . . . . . . . . . . . . . . . . . . . . . . .11<br />
2 Basic functions . . . . . . . . . . . . . . . . . . . . 12<br />
Powering up. . . . . . . . . . . . . . . . . . . . . . . . . . . .12<br />
Making phone calls . . . . . . . . . . . . . . . . . . . . . .12<br />
Answering phone calls . . . . . . . . . . . . . . . . . . . .12<br />
Ending phone calls. . . . . . . . . . . . . . . . . . . . . . .13<br />
Verifying your phone number. . . . . . . . . . . . . . .13<br />
Activating voice dialing. . . . . . . . . . . . . . . . . . . .13<br />
Taking a picture. . . . . . . . . . . . . . . . . . . . . . . . .13<br />
Using custom menu . . . . . . . . . . . . . . . . . . . . . .13<br />
3 Call features . . . . . . . . . . . . . . . . . . . . . . . 14<br />
Volume control . . . . . . . . . . . . . . . . . . . . . . . . .14<br />
Hold calls. . . . . . . . . . . . . . . . . . . . . . . . . . . . . .14<br />
Speed dial . . . . . . . . . . . . . . . . . . . . . . . . . . . . .14<br />
1-Touch dialing . . . . . . . . . . . . . . . . . . . . . . . . .14<br />
Voicemail. . . . . . . . . . . . . . . . . . . . . . . . . . . . . .14<br />
Emergency services . . . . . . . . . . . . . . . . . . . . . .15<br />
4 Text entry . . . . . . . . . . . . . . . . . . . . . . . . . 16<br />
QWERTY keypad . . . . . . . . . . . . . . . . . . . . . . . .16<br />
Number keypad . . . . . . . . . . . . . . . . . . . . . . . . .19<br />
5 Messaging . . . . . . . . . . . . . . . . . . . . . . . . 22<br />
Text messages . . . . . . . . . . . . . . . . . . . . . . . . . .22<br />
Picture messages . . . . . . . . . . . . . . . . . . . . . . . .24<br />
Email messages . . . . . . . . . . . . . . . . . . . . . . . . .26<br />
Instant messages . . . . . . . . . . . . . . . . . . . . . . . .26<br />
Erasing messages . . . . . . . . . . . . . . . . . . . . . . . .27<br />
Working with messages . . . . . . . . . . . . . . . . . . .27<br />
Message settings . . . . . . . . . . . . . . . . . . . . . . . . 28<br />
6 Contacts . . . . . . . . . . . . . . . . . . . . . . . . . . 30<br />
Viewing contacts list. . . . . . . . . . . . . . . . . . . . . . 30<br />
Adding contacts . . . . . . . . . . . . . . . . . . . . . . . . . 30<br />
Working with contacts . . . . . . . . . . . . . . . . . . . .31<br />
Using contact groups . . . . . . . . . . . . . . . . . . . . . 34<br />
Searching contacts. . . . . . . . . . . . . . . . . . . . . . . 35<br />
7 <strong>Virgin</strong>XL . . . . . . . . . . . . . . . . . . . . . . . . . . 36<br />
Accessing <strong>Virgin</strong>XL. . . . . . . . . . . . . . . . . . . . . . . 36<br />
Navigating <strong>Virgin</strong>XL . . . . . . . . . . . . . . . . . . . . . . 36<br />
Ending a <strong>Virgin</strong>XL session . . . . . . . . . . . . . . . . . 36<br />
8 My Account. . . . . . . . . . . . . . . . . . . . . . . . 37<br />
Checking your account balance . . . . . . . . . . . . . 37<br />
Top-Up your account . . . . . . . . . . . . . . . . . . . . . 37<br />
For more information . . . . . . . . . . . . . . . . . . . . 38<br />
9 My stuff. . . . . . . . . . . . . . . . . . . . . . . . . . . 39<br />
My ringtones . . . . . . . . . . . . . . . . . . . . . . . . . . . 39<br />
My games. . . . . . . . . . . . . . . . . . . . . . . . . . . . . . 39<br />
My graphics . . . . . . . . . . . . . . . . . . . . . . . . . . . . 39<br />
My other stuff. . . . . . . . . . . . . . . . . . . . . . . . . . .40<br />
My sounds . . . . . . . . . . . . . . . . . . . . . . . . . . . . . 40<br />
10 Recent calls . . . . . . . . . . . . . . . . . . . . . . . 41<br />
Call lists . . . . . . . . . . . . . . . . . . . . . . . . . . . . . . . 41<br />
Call timers . . . . . . . . . . . . . . . . . . . . . . . . . . . . . 42<br />
11 Pictures. . . . . . . . . . . . . . . . . . . . . . . . . . . 43<br />
Taking a picture. . . . . . . . . . . . . . . . . . . . . . . . . 43<br />
Picture mode options. . . . . . . . . . . . . . . . . . . . . 43<br />
Picture mode indicators and icons. . . . . . . . . . . 44<br />
12 Settings. . . . . . . . . . . . . . . . . . . . . . . . . . . 45<br />
Menu options. . . . . . . . . . . . . . . . . . . . . . . . . . .45<br />
Bluetooth. . . . . . . . . . . . . . . . . . . . . . . . . . . . . . 46<br />
Keyguard . . . . . . . . . . . . . . . . . . . . . . . . . . . . . . 48<br />
Sounds. . . . . . . . . . . . . . . . . . . . . . . . . . . . . . . . 48<br />
Alerts . . . . . . . . . . . . . . . . . . . . . . . . . . . . . . . . .49<br />
<strong>User</strong> Guide vii
Display . . . . . . . . . . . . . . . . . . . . . . . . . . . . . . . 49<br />
Convenience . . . . . . . . . . . . . . . . . . . . . . . . . . . 51<br />
Call options. . . . . . . . . . . . . . . . . . . . . . . . . . . . 52<br />
Messaging. . . . . . . . . . . . . . . . . . . . . . . . . . . . . 54<br />
Camera . . . . . . . . . . . . . . . . . . . . . . . . . . . . . . . 54<br />
Security. . . . . . . . . . . . . . . . . . . . . . . . . . . . . . . 54<br />
Network . . . . . . . . . . . . . . . . . . . . . . . . . . . . . . 55<br />
Accessories . . . . . . . . . . . . . . . . . . . . . . . . . . . . 56<br />
Phone information . . . . . . . . . . . . . . . . . . . . . . 57<br />
13 Tools . . . . . . . . . . . . . . . . . . . . . . . . . . . . . 58<br />
Voice memo . . . . . . . . . . . . . . . . . . . . . . . . . . . 58<br />
Scheduler . . . . . . . . . . . . . . . . . . . . . . . . . . . . . 58<br />
Alarm clock . . . . . . . . . . . . . . . . . . . . . . . . . . . 60<br />
Tip calculator . . . . . . . . . . . . . . . . . . . . . . . . . . 61<br />
Calculator . . . . . . . . . . . . . . . . . . . . . . . . . . . . . 61<br />
Timer . . . . . . . . . . . . . . . . . . . . . . . . . . . . . . . . 62<br />
Stopwatch . . . . . . . . . . . . . . . . . . . . . . . . . . . . . 62<br />
Flashlight . . . . . . . . . . . . . . . . . . . . . . . . . . . . . 62<br />
14 Voice recognition. . . . . . . . . . . . . . . . . . . 63<br />
Voice dial list . . . . . . . . . . . . . . . . . . . . . . . . . . 63<br />
Voice commands. . . . . . . . . . . . . . . . . . . . . . . . 63<br />
Voice Command Settings . . . . . . . . . . . . . . . . . . 64<br />
15 Getting Help . . . . . . . . . . . . . . . . . . . . . . . 65<br />
Customer Support . . . . . . . . . . . . . . . . . . . . . . . 65<br />
Qualified service . . . . . . . . . . . . . . . . . . . . . . . . 65<br />
Phone accessories. . . . . . . . . . . . . . . . . . . . . . . 65<br />
Product evaluation . . . . . . . . . . . . . . . . . . . . . . 65<br />
16 Consumer Limited Warranty. . . . . . . . . . 66<br />
Index . . . . . . . . . . . . . . . . . . . . . . . . . . . . . . . . . 68<br />
viii
1 Getting started<br />
Phone battery<br />
Installing the battery<br />
To install the battery:<br />
NK Hold the phone face down<br />
and locate the screw on the<br />
back cover.<br />
OK Turn the screw to set the<br />
screw slot in vertical<br />
position to unlock the<br />
back cover.<br />
PK Locate the groove on the<br />
left side of the phone and<br />
unsnap the hooks to<br />
remove the back cover.<br />
QK Place the battery in the<br />
phone casing with the<br />
metal contacts of the<br />
battery touching those of<br />
the phone.<br />
RK Replace the back cover by<br />
sliding the notches into the<br />
opening on the left side.<br />
SK Snap the back panel<br />
into place.<br />
TK Set the screw slot in<br />
horizontal position to lock<br />
the back cover.<br />
kçíÉW To remove the battery,<br />
make sure the phone is powered off.<br />
Charging the battery<br />
You must have at least a partial charge in the<br />
battery to make or receive calls.<br />
To charge the battery:<br />
Connect the AC adapter to the<br />
jack on the bottom of the<br />
phone. Do not force the AC<br />
adapter into the jack. Plug the<br />
adapter into a wall outlet.<br />
The battery icon in the upper-right corner of the<br />
screen tells you whether the phone is:<br />
Charging (animated icon)<br />
√<br />
Partially charged<br />
√<br />
Fully charged<br />
√<br />
The battery does not charge if you use<br />
t~êåáåÖW<br />
the phone while it is connected to an AC adapter.<br />
Recharging the battery<br />
You can safely recharge the battery at any time,<br />
even if it has a partial charge.<br />
Caring for the battery<br />
General safety guidelines<br />
Do not disassemble or open the battery.<br />
Do not crush, bend, deform, puncture, or<br />
shred the battery.<br />
Do not attempt to insert foreign objects into<br />
the battery.<br />
<strong>User</strong> Guide 1
Do not immerse the battery or expose it to<br />
water or other liquids. Even if a battery appears<br />
to dry out and operate normally, internal parts<br />
can slowly corrode and pose a safety hazard.<br />
Always keep the battery between 15°C and 25°C<br />
(59°F and 77°F). Do not expose the battery to<br />
extremes of temperature, fire, or other hazards<br />
such as a cooking surface, iron, or radiator.<br />
Never use any damaged battery.<br />
Only use the battery for its intended phone.<br />
Only use the battery with a qualified charger. Use<br />
of an unqualified battery charger may present a<br />
risk of fire, explosion, leakage, or other hazard.<br />
If you are unsure about whether a charger is<br />
qualified, contact customer support.<br />
Do not short-circuit the battery or allow metallic<br />
conductive objects—such as keys, coins, or<br />
jewelry—to contact the battery’s terminals.<br />
Replace the battery only with another qualified<br />
battery. Use of an unqualified battery may<br />
present a risk of fire, explosion, leakage, or<br />
other hazard. If you are unsure about whether<br />
a replacement battery is compatible, contact<br />
customer support.<br />
Promptly dispose of used batteries in<br />
accordance with local regulations and recycle<br />
if possible. Do not dispose as household waste.<br />
Supervise all battery usage by children.<br />
Avoid dropping the phone or battery. If the<br />
phone or battery is dropped, especially on a<br />
hard surface, an internal short-circuit can<br />
occur and pose a safety hazard. If you<br />
suspect battery damage, take it to a service<br />
center for inspection.<br />
Improper battery use may result in fire,<br />
explosion, or other hazard.<br />
Common causes of battery drain<br />
Playing games or using the Web.<br />
Keeping backlighting on.<br />
Taking pictures with the flash on.<br />
Operating in digital mode when far away from<br />
a base station or cell site.<br />
Using data cables or accessories.<br />
Operating when no service is available, or<br />
service is available intermittently.<br />
High earpiece and ringtone volume settings.<br />
Repeating sound, vibration, or lighted alerts.<br />
Extensive use of flashlight option.<br />
Purchasing accessories<br />
To purchase accessories for your new phone,<br />
such as a hands-free headset, carrying case, or<br />
car power adapter, please visit<br />
www.virginmobileusa.com.<br />
Finding your phone’s<br />
serial number<br />
To activate your <strong>Virgin</strong> <strong>Mobile</strong> account, you<br />
need your phone's serial number. To locate<br />
the number:<br />
NK Turn your phone off.<br />
Hold your phone face down.<br />
OK<br />
Unlock the back cover.<br />
PK<br />
2 Purchasing accessories
Locate the groove on the left side of the<br />
QK<br />
phone. Unsnap the hooks and remove the<br />
back cover.<br />
Remove the battery by pulling back on the top<br />
RK<br />
edge of the battery.<br />
Your phone's serial number is an 18-digit<br />
SK<br />
number located below the first barcode,<br />
next to the D.<br />
Write down the serial number.<br />
TK<br />
With your phone turned on, you can also<br />
kçíÉW<br />
jÉåì select pÉííáåÖë > mÜçåÉ=áåÑç > ><br />
áåÑç to find your phone’s ID number.<br />
_ìáäÇ<br />
Phone activation<br />
Activating your <strong>Virgin</strong><br />
<strong>Mobile</strong> account<br />
Before you can start talking, messaging, or<br />
downloading, you need to activate service<br />
with <strong>Virgin</strong> <strong>Mobile</strong>. To activate your <strong>Virgin</strong> <strong>Mobile</strong><br />
account, do one of the following with your<br />
phone's serial number.<br />
Go to www.virginmobileusa.com and click<br />
on Activate.<br />
Call <strong>Virgin</strong> <strong>Mobile</strong> At Your Service at<br />
1-888-322-1122.<br />
Programming your phone<br />
Once your account is activated, you need to<br />
program your <strong>Virgin</strong> <strong>Mobile</strong> phone number into<br />
your phone. When you are ready, follow these<br />
steps to program your phone:<br />
NK Turn on your phone. Program your phone<br />
using the external number keypad. DO NOT<br />
use the internal QWERTY keyboard.<br />
OK Dial ##VIRGIN# (that's #-#-8-4-7-4-4-6-#).<br />
PK You are now in the Programming menu.<br />
Scroll down to "Activate Phone" and hit "OK”.<br />
QK Your screen will say, "Do you want to activate<br />
your phone now ?" Select "Yes".<br />
RK Your phone will connect to the network, and<br />
then the screen will say “Hi. Press Start to<br />
continue the activation process”. Scroll<br />
down to “Start” and hit “OK”.<br />
SK Your phone will say “We’re getting your<br />
phone number for you,” then your phone will<br />
display your new <strong>Virgin</strong> <strong>Mobile</strong> phone<br />
number. Write it down.<br />
TK Scroll down to “Finish” and hit “OK” to<br />
complete the activation process. Your phone<br />
will turn off and back on by itself.<br />
It might take a couple of hours to set up the<br />
network. Once set up, your phone displays a text<br />
message informing that you can start talking. Also,<br />
it may take up to 4 hours for sáêÖáåui, Voicemail,<br />
and Top-Up features to come online.<br />
<strong>User</strong> Guide 3
Phone overview<br />
Getting to know your phone<br />
The phone has two keypads—the number keypad and the QWERTY keypad.<br />
Number keypad<br />
External screen.<br />
NK<br />
External `~ãÉê~ key activates picture mode.<br />
OK<br />
PK sçäìãÉ key to raise or lower speaker volume.<br />
QK k~îáÖ~íáçå key scrolls through lists and text entry fields<br />
and accesses shortcuts from the main screen.<br />
RK Left option button accesses menus and functions.<br />
SK péÉ~âÉêéÜçåÉ key activates the speakerphone and<br />
answers incoming calls.<br />
TK pÉåÇLq~äâ key starts or answers a call. Press once to<br />
activate voice command, twice to display the All Calls<br />
list, and three times to redial the last number dialed.<br />
Press and hold to access voice dial.<br />
UK External number keypad for entering numbers, letters,<br />
or symbols.<br />
VK G=pÜáÑí key changes the text mode in text entry.<br />
NMK Jack for AC adapter (included) and data cable (sold<br />
separately).<br />
4 Phone overview
External speaker.<br />
NNK<br />
Indicator light shows missed alert when in red or<br />
NOK<br />
incoming call when in green.<br />
lh key selects a menu item or option.<br />
NPK<br />
Right option button accesses the contacts list and other<br />
NQK<br />
menu options.<br />
_~Åâ key erases characters in text entry and returns you<br />
NRK<br />
to the previous screen.<br />
båÇLmçïÉê key turns the phone on and off, ends a call<br />
NSK<br />
or browser session, and returns you to the main screen.<br />
@=pé~ÅÉ key enters a space during text entry. Press and<br />
NTK<br />
hold to activate or deactivate Silent mode.<br />
Jack for hands-free headset only (sold separately).<br />
NUK<br />
M=kÉñí key cycles through word choices during<br />
NVK<br />
text entry.<br />
Inserting an accessory into the incorrect jack<br />
t~êåáåÖW<br />
damages the phone.<br />
<strong>User</strong> Guide 5
QWERTY keypad<br />
When the flip is open, use the QWERTY keypad to enter numbers, letters and symbols.<br />
NK Internal screen.<br />
Internal speaker.<br />
OK<br />
k~îáÖ~íáçå key scrolls through lists<br />
PK<br />
and text entry fields and accesses<br />
shortcuts from the main screen.<br />
Left option button accesses menus<br />
QK<br />
and functions.<br />
pÉåÇLq~äâ key starts or answers a<br />
RK<br />
call. Press once to activate voice<br />
command, twice to display the All<br />
Calls list, and three times to redial the<br />
last number dialed. Press and hold to<br />
access voice dial.<br />
Internal `~ãÉê~ key activates picture mode.<br />
SK<br />
`ìëíçã=ãÉåì key accesses the custom menu.<br />
TK<br />
póãÄçä key allows you to type symbol characters.<br />
UK<br />
pÜáÑí key changes the text mode in text entry.<br />
VK<br />
pé~ÅÉ key enters a space during text entry.<br />
NMK<br />
lh key selects a menu item or option.<br />
NNK<br />
Right option button accesses the contacts list and other menu options.<br />
NOK<br />
båÇLmçïÉê key turns the phone on and off, ends a call or browser session, and returns you to the<br />
NPK<br />
main screen.<br />
péÉ~âÉêéÜçåÉ key activates the speakerphone and answers incoming calls.<br />
NQK<br />
_~Åâ key erases characters in text entry and returns you to the previous screen.<br />
NRK<br />
båíÉê key allows you to enter hard returns.<br />
NSK<br />
6 Phone overview
Back cover<br />
Accessory eyelet (for optional straps and lanyards).<br />
NK<br />
Camera flash and flash light.<br />
OK<br />
Camera lens.<br />
PK<br />
Back cover lock in unlocked status<br />
QK<br />
(If locked, the screw slot is in horizontal position).<br />
<strong>User</strong> Guide 7
Common keys<br />
The following keys are pressed frequently when you use your phone. Throughout this user guide, these<br />
keys are referred as follows:<br />
Navigation key<br />
Back key (number keypad)<br />
OK key<br />
Back key (QWERTY keypad)<br />
Left option button (number keypad)<br />
Left option button (QWERTY keypad)<br />
Right option button (number keypad)<br />
Right option button (QWERTY keypad)<br />
Talk/Send key (number keypad)<br />
Talk/Send key (QWERTY keypad)<br />
End/Power key (number keypad)<br />
End/Power key (QWERTY keypad)<br />
Speakerphone key (number keypad)<br />
Speakerphone key (QWERTY keypad)<br />
Camera key (QWERTY keypad)<br />
Custom menu key (QWERTY keypad)<br />
Symbol key (QWERTY keypad)<br />
Shift key (QWERTY keypad)<br />
8 Phone overview
Screen icons<br />
These icons may appear on your phone’s screen.<br />
The phone is operating in IS95 digital mode.<br />
The phone is receiving a signal. You can make<br />
and receive calls. Fewer bars indicate a<br />
weaker signal.<br />
A call is in progress.<br />
The phone is not receiving a signal. You<br />
cannot make or receive calls.<br />
The file is DRM protected.<br />
High-speed (3G) data service is available and<br />
active on your phone. Check <strong>Virgin</strong> <strong>Mobile</strong>’s<br />
Web site at www.virginmobileusa.com for<br />
availability.<br />
(blinking) The phone is sending high-speed<br />
data.<br />
(blinking) The phone is receiving high-speed<br />
data.<br />
High-speed data service is available, but the<br />
phone is dormant.<br />
The battery is fully charged. The more black<br />
bars, the greater the charge.<br />
The alarm clock is set.<br />
The phone is in privacy mode, is accessing a<br />
secure Web site or the selected file is locked.<br />
You have a text message.<br />
You have a voice message.<br />
New voice and text message.<br />
New photo message.<br />
New photo and voice message.<br />
New photo and text message.<br />
New photo, voice and text message.<br />
The phone is in vibrate mode.<br />
Position location is set to your service<br />
provider and to emergency services.<br />
Position location is set to emergency<br />
services only.<br />
The phone is in picture mode.<br />
Camera flash mode is ready.<br />
Speakerphone is on.<br />
Auto-answer is on.<br />
Bluetooth wireless technology is<br />
enabled (On).<br />
Bluetooth wireless technology is<br />
disabled (Off).<br />
<strong>User</strong> Guide 9
Main menu<br />
The contents of the main menu are as follows:<br />
Messaging<br />
Send text msg<br />
Send picture msg<br />
Send email msg<br />
Send IM msg<br />
Inbox<br />
<strong>Virgin</strong> Alerts<br />
Outbox<br />
Saved<br />
Drafts<br />
Voicemail<br />
Erase msgs<br />
Msg settings<br />
Contacts<br />
View all<br />
Add new<br />
Find name<br />
Groups<br />
Speed dial list<br />
Voice dial list<br />
Information<br />
<strong>Virgin</strong>XL<br />
Launches <strong>Virgin</strong>XL<br />
My Account<br />
Launches My Account<br />
My stuff<br />
My ringtones<br />
My games<br />
My graphics<br />
My other stuff<br />
My sounds<br />
IM<br />
Launches <strong>Mobile</strong> IM<br />
Recent calls<br />
All calls<br />
Incoming calls<br />
Outgoing calls<br />
Missed calls<br />
Erase call lists<br />
Recent calls timer<br />
All calls timer<br />
Pictures<br />
Take a picture<br />
Send picture msg<br />
My pictures<br />
Help<br />
Settings<br />
Bluetooth<br />
Keyguard<br />
Sounds<br />
Display<br />
Convenience<br />
Call options<br />
Messaging<br />
Camera<br />
Security<br />
Network<br />
Accessories<br />
Phone info<br />
Tools<br />
Voice memo<br />
Scheduler<br />
Alarm clock<br />
Tip calculator<br />
Calculator<br />
Timer<br />
Stopwatch<br />
Flashlight<br />
kçíÉ: The menu items on your phone can change depending on the services provided. For more information,<br />
visit www.virginmobileusa.com.<br />
10 Main menu
Basic navigation<br />
You press your phone keys to access the various<br />
menus and other features of your phone. Some of<br />
the basic frequently used keys are as follows:<br />
iÉÑí=çéíáçå=Äìííçå: Select items that appear<br />
on the lower left of the display. At the main<br />
screen, you can select jÉåì.<br />
oáÖÜí=çéíáçå=Äìííçå: Select items that appear<br />
on the lower right of the display. At the main<br />
screen, you can select `çåí~Åíë.<br />
k~îáÖ~íáçå=âÉó: Scroll through menus and<br />
options. You can access the following<br />
shortcuts from the main screen.<br />
Scroll left to launch sáêÖáåui.<br />
Scroll right to access pÉåÇ=íÉñí=ãëÖ.<br />
Scroll up to access jó=^ÅÅçìåí.<br />
Scroll down to view oÉÅÉåí=Å~ääë.<br />
lh=âÉó: Select a menu item.<br />
_~Åâ=âÉó: Return to the previous menu level.<br />
båÇLmçïÉê=âÉó: Return to the main screen.<br />
Guide conventions<br />
In this guide the following conventions are used<br />
when describing phone features.<br />
pÉäÉÅí means to press the left or right option<br />
button, or the lh key to select an item on the<br />
display. For example, “select jÉåì” tells you to<br />
press the left option button at the main screen to<br />
access the main menu.<br />
means to press a phone key. For example,<br />
mêÉëë<br />
“press pÉåÇ the key to make a phone call” tells<br />
you to press pÉåÇ the key on your phone.<br />
means to press the k~îáÖ~íáçå key to move<br />
pÅêçää<br />
though a list on the display. For example, “scroll<br />
through your contacts list to choose a contact”<br />
means to press k~îáÖ~íáçå the key up or down to<br />
scroll through the list on the display.<br />
The greater than symbol “>” tells you to select an<br />
option from a menu or list. For jÉåì example, ><br />
means to:<br />
pÉííáåÖë<br />
Press the left option button at the main screen<br />
NK<br />
to select jÉåì.<br />
Scroll to the pÉííáåÖë option.<br />
OK<br />
Press the lh key to select pÉííáåÖë.<br />
PK<br />
<strong>User</strong> Guide 11
2 Basic functions<br />
This section explains the basic functionality of<br />
your phone. For more detailed explanation of<br />
your phone’s features please refer to the<br />
later chapters.<br />
Powering up<br />
To turn your phone on, press and hold the båÇ<br />
key and wait until the phone display lights up.<br />
To turn your phone off, press and hold the båÇ<br />
key until the phone turns off.<br />
Making phone calls<br />
Make sure you are in an area where a signal can<br />
be received. Look for the signal strength icon on<br />
the main screen. The more bars you see in this<br />
symbol, the stronger the signal. If there are no<br />
bars, move to where the signal strength is better.<br />
When the phone has been idle for a while with no<br />
signal, it changes to power save mode. When you<br />
see “Power Save” on your phone’s screen, press<br />
any key to return to normal operating mode. You<br />
can make a phone call in one of the<br />
following ways.<br />
Call using a number<br />
At the main screen:<br />
Enter a phone number.<br />
NK<br />
Press the pÉåÇ key.<br />
OK<br />
Call using a contact<br />
At the main screen:<br />
Select `çåí~Åíë to open your contacts list.<br />
NK<br />
Highlight a contact and press the pÉåÇ key.<br />
OK<br />
Call using voice commands<br />
You can use voice commands to call a contact<br />
from your voice dial list or to dial a phone<br />
number. For more information, see “Voice<br />
recognition” on page 63.<br />
Redial a number<br />
At the main screen:<br />
Press the pÉåÇ key twice to open your<br />
NK<br />
call history.<br />
Highlight a phone number or contact and<br />
OK<br />
press pÉåÇ the key.<br />
To redial the last number called, received or<br />
qáéW<br />
missed, press pÉåÇ the key three times.<br />
Answering phone calls<br />
When a call comes in, the phone rings, vibrates,<br />
or lights up. The phone number of the caller also<br />
appears if it is not restricted. If the number is<br />
stored in your contacts list, the contact<br />
name appears.<br />
You can answer a phone call in one of the<br />
following ways.<br />
12 Powering up
Answer using earpiece<br />
Press the pÉåÇ key.<br />
Answer using speakerphone<br />
Press the péÉ~âÉêéÜçåÉ key.<br />
Answer using flip<br />
You can set the phone to answer immediately<br />
when you open the flip. This feature does not<br />
apply to incoming data or fax calls.<br />
See “Open to answer” on page 51.<br />
Ending phone calls<br />
Press the båÇ key.<br />
Verifying your phone number<br />
To verify your phone number, select jÉåì ><br />
pÉííáåÖë > mÜçåÉ=áåÑç > _ìáäÇ=áåÑç.<br />
Activating voice dialing<br />
At the main screen:<br />
NK Press the pÉåÇ key once.<br />
OK Follow the prompts.<br />
For more information, see “Voice recognition” on<br />
page 63.<br />
Taking a picture<br />
At the main screen:<br />
Press and hold the `~ãÉê~ key to start the<br />
NK<br />
camera.<br />
OK Focus on the image and select `~éíìêÉ.<br />
For more information, see “Pictures” on page 43.<br />
Using custom menu<br />
You can use the custom menu to quickly access<br />
your frequently used functions.<br />
With the QWERTY keypad, press the `ìëíçã=<br />
NK<br />
key to access the custom menu.<br />
ãÉåì<br />
Select bÇáí.<br />
OK<br />
Scroll through the list of options and press<br />
PK<br />
to select your desired option(s). A check<br />
lh<br />
mark appears next to each selected option.<br />
(You can lh press again to remove<br />
check marks.)<br />
Select p~îÉ after checking all your desired<br />
QK<br />
option(s). Your selected options appear in<br />
the custom menu.<br />
Scroll through the list of your selected<br />
RK<br />
functions in the custom menu and lh press<br />
to access your desired one.<br />
<strong>User</strong> Guide 13
3 Call features<br />
This chapter describes call features such as<br />
volume, holding calls, speed dialing and<br />
other features.<br />
Volume control<br />
You have several ways to control the volume of<br />
your phone.<br />
Adjust volume during a call<br />
To adjust the earpiece volume during a call, press<br />
the sçäìãÉ key up or down.<br />
Use the speakerphone<br />
Your phone has a built-in speakerphone. To turn<br />
on the speakerphone, press the péÉ~âÉêéÜçåÉ<br />
key. The speakerphone icon appears on the main<br />
screen when the speakerphone is on. To turn off<br />
the speakerphone, press the péÉ~âÉêéÜçåÉ key.<br />
kçíÉW If you press the péÉ~âÉêéÜçåÉ key during<br />
an incoming call, you answer the call.<br />
Silence an incoming call<br />
To silence the phone without answering the call,<br />
press the båÇ key or select páäÉåÅÉ.<br />
To silence the phone and answer the call, press<br />
the båÇ key and then press the pÉåÇ key.<br />
kçíÉW In the absence of voicemail, this feature<br />
drops the call.<br />
Hold calls<br />
The Hold call feature allows you to place<br />
incoming calls on hold until you are ready to<br />
answer them. See “Hold call” on page 51.<br />
Speed dial<br />
Use the speed dial feature to assign a one- or twodigit<br />
shortcut to a contact. Before you can use<br />
speed dialing, you must save a phone number as a<br />
contact and assign a speed dial location to it. See<br />
“Contact number” on page 31.<br />
To call a contact that has a speed dial location.<br />
NK Enter the one- or two-digit speed dial<br />
location.<br />
OK Press the pÉåÇ key.<br />
1-Touch dialing<br />
The 1-touch dialing feature is the fastest way to<br />
speed dial a contact that has a speed dial location.<br />
See “1-Touch dialing” on page 52.<br />
Voicemail<br />
Configure your voicemail<br />
Before your phone can receive voicemail<br />
messages, you must set up a 4-10 digit passcode<br />
and record a personal voicemail greeting.<br />
14 Volume control
When you have set up your voicemail, all<br />
unanswered calls to your phone are automatically<br />
transferred to voicemail, even if your phone is in<br />
use or turned off.<br />
NK Press and hold the N key.<br />
OK Follow the system prompts to create a<br />
password and record a greeting.<br />
Check voicemail<br />
When a voice message is received, your screen<br />
displays “New Messages” along with the symbol at<br />
the top of your screen. The symbol flashes if<br />
the message is urgent. Standard airtime<br />
charges apply.<br />
If you see “New Messages”:<br />
NK Select `~ää, which initiates a call to your<br />
voicemail number.<br />
OK Follow the system prompts to retrieve<br />
the message.<br />
kçíÉW To clear the screen without checking<br />
messages, select fÖåçêÉ.<br />
If you see only the voicemail message icon:<br />
NK Select jÉåì > jÉëë~ÖáåÖ > sçáÅÉã~áä.<br />
OK If you have set up your voicemail, select `~ää,<br />
to call your voicemail number.<br />
PK Follow the system prompts to retrieve<br />
the message.<br />
Set voicemail alert<br />
You can set the phone to beep or vibrate every five<br />
minutes to remind you that you have voicemail.<br />
See “Other alerts” on page 49.<br />
Emergency services<br />
Call emergency service<br />
You can call an emergency code, even if your<br />
phone is locked or your account is restricted.<br />
When you call, your phone enters Emergency<br />
mode. This enables the emergency service<br />
exclusive access to your phone to call you back, if<br />
necessary. To make or receive regular calls after<br />
dialing the code, you must exit this mode.<br />
To dial an emergency code:<br />
Enter your 3-digit emergency code.<br />
NK<br />
Press the pÉåÇ key.<br />
OK<br />
Regardless of your 3-digit emergency code<br />
kçíÉW<br />
(911, 111, 999, 000, etc.), your phone operates<br />
as described.<br />
Exit emergency services<br />
When you have completed the emergency call:<br />
NK Select bñáí.<br />
OK Select bñáí again to confirm your choice.<br />
kçíÉW To determine who has access to your<br />
location, see “Location” on page 55.<br />
<strong>User</strong> Guide 15
4 Text entry<br />
You can enter letters, numbers, and symbols in<br />
contacts, text messages, and your banner with<br />
either QWERTY keypad (flip open) or the number<br />
keypad (flip closed).<br />
QWERTY keypad<br />
Text entry modes<br />
With the flip open, enter text with the QWERTY<br />
keypad. The current text entry mode (and<br />
capitalization setting, when applicable) are<br />
indicated by icons.<br />
The text entry screen has the following features:<br />
The number of<br />
NK<br />
remaining characters<br />
you can enter. Allowed<br />
length of messages can<br />
vary depending on<br />
your service.<br />
Text entry fields.<br />
OK<br />
Current capitalization setting.<br />
PK<br />
Current text entry mode.<br />
QK<br />
There are six text entry modes:<br />
Case change Numbers and symbols<br />
Normal alpha Add symbol<br />
Rapid entry Add smiley<br />
The mode you start in depends on the task<br />
kçíÉW<br />
you are doing. For example, when entering a<br />
phone number, you are in Numbers and symbols<br />
mode. When entering a name for a contact, you<br />
are in Normal alpha mode.<br />
Enter numbers and symbols<br />
To enter a number or symbol while in<br />
Numbers and symbols mode, press the<br />
appropriate key once.<br />
To enter a letter while in Numbers and symbols<br />
mode, press póãÄçä the key once, then press<br />
the appropriate key.<br />
To change to and from Numbers and symbols<br />
mode, press póãÄçä the key twice.<br />
Enter word letter by letter<br />
To enter text while in Normal alpha mode,<br />
NK<br />
press the appropriate key once.<br />
To enter a number or symbol while in Normal<br />
OK<br />
alpha mode, press póãÄçä the key once, then<br />
press the appropriate key.<br />
To change to and from Normal alpha mode,<br />
PK<br />
press póãÄçä the key twice.<br />
Enter symbols<br />
While entering text, you can enter many symbols<br />
with the keypad. To access extra symbols:<br />
From the text entry screen select léíáçåë ><br />
NK<br />
^ÇÇ=ëóãÄçä.<br />
16 QWERTY keypad
Scroll up or down to view the list of symbols.<br />
OK<br />
Press the number key corresponding to the<br />
PK<br />
symbol to enter it.<br />
Enter smileys<br />
From the text entry screen select léíáçåë ><br />
NK<br />
^ÇÇ=ëãáäÉó.<br />
Scroll up or down to view the list of smileys.<br />
OK<br />
Press the number key corresponding to the<br />
PK<br />
smiley to enter it.<br />
Change default text entry mode<br />
You can change the default text entry mode when<br />
creating a text message. This setting applies only<br />
to the message body screen, not the “To” screen.<br />
jÉåì Select jÉëë~ÖáåÖ > jëÖ=ëÉííáåÖë > ><br />
Éåíêó and one of the following:<br />
qÉñí<br />
enter text in letter by letter.<br />
kçêã~ä=~äéÜ~<br />
enter text with word recognition.<br />
o~éáÇ=ãçÇÉ<br />
Change modes<br />
Sometimes you need to change modes. For<br />
example, to enter numbers in an email address<br />
while in Normal alpha mode, you must change to<br />
Numbers and symbols mode, enter the numbers,<br />
and then change back to Normal alpha mode to<br />
complete the address.<br />
To change text entry modes, press póãÄçä the key<br />
twice, until the icon for the mode you want<br />
appears at the top of the screen. You can also<br />
léíáçåë select and a different mode.<br />
Capitalization<br />
You can change capitalization at any time while<br />
entering text. Press the pÜáÑí key while in Normal<br />
alpha mode.<br />
<strong>User</strong> Guide 17
Text entry quick reference<br />
This table gives instructions for entering letters, numbers, and symbols.<br />
aç=íÜáëKKK<br />
qçKKK<br />
Use Normal alpha mode and press a key until you see the letter you want.<br />
båíÉê=~=äÉííÉê<br />
For more options, see “Text entry modes” on page 19.<br />
Use Numbers only mode and press a key until you see the number you<br />
båíÉê=~=åìãÄÉê<br />
want. For more options, see “Text entry modes” on page 19.<br />
In either Normal alpha or Numbers only mode, press N until you find the<br />
båíÉê=~=ëóãÄçä<br />
symbol you want. For more options, see “Text entry modes” on page 19.<br />
båíÉê=~=ëãáäÉó Use the Add smiley feature.<br />
båíÉê=~=ëé~ÅÉ Press the pé~ÅÉ key.<br />
bê~ëÉ=~=ÅÜ~ê~ÅíÉê Press the _~Åâ key.<br />
bê~ëÉ=~ää=ÅÜ~ê~ÅíÉêë Press and hold the _~Åâ key.<br />
jçîÉ=Åìêëçê=êáÖÜí=çê=äÉÑí Scroll left or right.<br />
jçîÉ=Åìêëçê=ìé=çê=Ççïå Scroll up or down.<br />
`Ü~åÖÉ=íÉñí=Éåíêó=ãçÇÉë Press the póãÄçä key twice.<br />
In Normal alpha mode, press the pÜáÑí key to select uppercase if in<br />
`~éáí~äáòÉ=~åó=äÉííÉê<br />
lowercase or enter text if already in uppercase.<br />
içïÉêÅ~ëÉ=~åó=äÉííÉê In Normal alpha mode, enter text if already in lowercase or press the<br />
pÜáÑí key to select lowercase if in uppercase.<br />
fåáíá~ä=Å~éë In Normal alpha mode, press the pÜáÑí key to select sentence case.<br />
pÉäÉÅí=ëçÑí=çéíáçåë=çå=ëÅêÉÉå Press the appropriate left or right option button.<br />
18 QWERTY keypad
Number keypad<br />
Text entry modes<br />
When the flip is closed, enter text with the number<br />
keypad. The current text entry mode (and<br />
capitalization setting, when applicable) are<br />
indicated by icons.<br />
The text entry screen has the following features:<br />
The number of<br />
NK<br />
remaining characters<br />
you can enter. Allowed<br />
length of messages can<br />
vary depending on your<br />
service.<br />
Text entry fields.<br />
OK<br />
Current capitalization setting.<br />
PK<br />
Current text entry mode.<br />
QK<br />
There are six text entry modes:<br />
Case change Numbers only<br />
Normal alpha Add symbol<br />
Rapid entry Add smiley<br />
kçíÉW The mode you start in depends on the task<br />
you are doing. For example, when entering a<br />
phone number, you’re in Numbers only mode.<br />
When entering a name for a contact, you’re in<br />
Normal alpha mode.<br />
Enter numbers<br />
To enter a number while in Numbers only<br />
mode, press a number key once.<br />
To enter a number while in Normal alpha or<br />
Rapid mode, press and hold a number key<br />
until the number appears on the screen.<br />
Enter words letter by letter<br />
Press a key once for the first letter, twice for<br />
NK<br />
the second letter, and so on.<br />
Wait for the cursor to move right and enter<br />
OK<br />
the next letter.<br />
To enter a space, press the @=pé~ÅÉ key.<br />
kçíÉW<br />
Enter words quickly<br />
When you press a series of keys using Rapid<br />
mode, your phone checks its dictionary and<br />
guesses at the word you are trying to spell.<br />
For each letter of the word you want, press<br />
NK<br />
the key once. For example, to enter the word<br />
“any” press O the S > V > keys.<br />
If the word doesn’t match what you want,<br />
OK<br />
press M=kÉñí the key to check other word<br />
matches.<br />
When you see the word you want, press the<br />
PK<br />
key. @pé~ÅÉ<br />
<strong>User</strong> Guide 19
Enter symbols<br />
While entering text in normal text mode, you can<br />
enter symbols by pressing the N key until you see<br />
the symbol you want. Using this method, you have<br />
access to the following symbols:<br />
= ] = \ = > = J = I = C = W = Ú<br />
K<br />
To access the full set of symbols:<br />
From the text entry screen select léíáçåë ><br />
NK<br />
^ÇÇ=ëóãÄçä.<br />
Scroll up or down to view the list of symbols.<br />
OK<br />
Press the number key corresponding to the<br />
PK<br />
symbol to enter it.<br />
Enter smileys<br />
From the text entry screen select léíáçåë ><br />
NK<br />
^ÇÇ=ëãáäÉó.<br />
Scroll up or down to view the list of smileys.<br />
OK<br />
Press the number key corresponding to the<br />
PK<br />
smiley to enter it.<br />
Change default text entry mode<br />
You can change the default text entry mode when<br />
creating a text message. This setting applies only<br />
to the message body screen, not the “To” screen.<br />
jÉåì Select jÉëë~ÖáåÖ > jëÖ=ëÉííáåÖë > ><br />
Éåíêó and one of the following:<br />
qÉñí<br />
to enter text in letter by letter.<br />
kçêã~ä=~äéÜ~<br />
to enter text with word<br />
o~éáÇ=ãçÇÉ<br />
recognition.<br />
Change modes<br />
Sometimes you need to change modes. For<br />
example, to enter numbers in an email address<br />
while in Normal alpha mode, you must change to<br />
Numbers only mode, enter the numbers, and then<br />
change back to Normal alpha mode to complete<br />
the address.<br />
To change text entry modes, press and hold G= the<br />
key until the icon for the mode you want<br />
pÜáÑí<br />
appears at the top of the screen. You can also<br />
léíáçåë select and a different mode.<br />
Capitalization<br />
You can change capitalization at any time while<br />
entering text. Simply press to choose upper or<br />
lower case while in Normal alpha mode.<br />
20 Number keypad
Text entry quick reference<br />
This table gives instructions for entering letters, numbers, and symbols<br />
aç=íÜáëKKK<br />
qçKKK<br />
Use Normal alpha mode and press a key until you see the letter you want.<br />
båíÉê=~=äÉííÉê<br />
For more options, see “Text entry modes” on page 19.<br />
Use Numbers only mode and press a key until you see the number you<br />
båíÉê=~=åìãÄÉê<br />
want. For more options, see “Text entry modes” on page 19.<br />
In either Normal alpha or Numbers only mode, press N until you find the<br />
båíÉê=~=ëóãÄçä<br />
symbol you want. For more options, see “Text entry modes” on page 19.<br />
båíÉê=~=ëãáäÉó Use the Add smiley feature.<br />
båíÉê=~=ëé~ÅÉ Press the @=pé~ÅÉ key.<br />
bê~ëÉ=~=ÅÜ~ê~ÅíÉê Press the _~Åâ key.<br />
bê~ëÉ=~ää=ÅÜ~ê~ÅíÉêë Press and hold the _~Åâ key.<br />
jçîÉ=Åìêëçê=êáÖÜí=çê=äÉÑí Scroll left or right.<br />
jçîÉ=Åìêëçê=ìé=çê=Ççïå Scroll up or down.<br />
`Ü~åÖÉ=íÉñí=Éåíêó=ãçÇÉë Press and hold the G=pÜáÑí key.<br />
`~éáí~äáòÉ=~åó=äÉííÉê In Normal alpha mode, press the G=pÜáÑí key. Choose uppercase.<br />
içïÉêÅ~ëÉ=~åó=äÉííÉê In Normal alpha mode, press the G=pÜáÑí key. Choose lowercase.<br />
fåáíá~ä=Å~éë In Normal alpha mode, press the G=pÜáÑí key. Choose sentence case.<br />
pÉäÉÅí=ëçÑí=çéíáçåë=çå=ëÅêÉÉå Press the appropriate left or right option button.<br />
<strong>User</strong> Guide 21
5 Messaging<br />
This chapter describes how to send, receive, and<br />
erase messages from your phone. For information<br />
on voicemail messages, see “Voicemail” on<br />
page 14.<br />
kçíÉW The features and menus described in this<br />
chapter may vary depending on services available<br />
in your area. Visit www.virginmobileusa.com for<br />
details and possible usage charges.<br />
Text messages<br />
You can send text messages to phones that are<br />
capable of receiving them or to email addresses.<br />
Text messages have a 160 character limitation<br />
including spaces. Charges apply for the use of these<br />
features. See www.virginmobileusa.com for pricing.<br />
Send a text message<br />
At the main screen, scroll right or select<br />
NK<br />
> jÉëë~ÖáåÖ > pÉåÇ=íÉñí=ãëÖ.<br />
jÉåì<br />
At the Send To field, do one of the following to<br />
OK<br />
enter the recipient’s phone number or<br />
email address:<br />
Select léíáçåë > oÉÅÉåí=äáëí, oÉÅÉåí=<br />
√<br />
`çåí~Åíë Å~ääë, dêçìéë or to access your<br />
stored contacts.<br />
Enter the phone number or email address<br />
√<br />
manually. See “Text entry” on page 16.<br />
You can message up to ten recipients at once.<br />
PK<br />
Use a comma or spaces to separate<br />
addresses. If you select stored contacts, this is<br />
done automatically. Scroll down to move to<br />
the next field when done.<br />
The messages are sent one at a time, once to<br />
QK<br />
each recipient. Standard text messaging<br />
charges apply for each recipient.<br />
At the Message field, enter the message.<br />
RK<br />
Select pÉåÇ.<br />
SK<br />
Include auto text and symbols<br />
During text entry, you can insert prewritten text<br />
(auto text), symbols or smileys.<br />
From the text entry screen, select léíáçåë<br />
NK<br />
and one of the following.<br />
to insert prewritten text<br />
fåëÉêí=~ìíç=íÉñí<br />
from a list.<br />
to insert symbols. Press the<br />
^ÇÇ=ëóãÄçä<br />
corresponding number to select a symbol.<br />
to insert smileys. Press the<br />
^ÇÇ=ëãáäÉó<br />
corresponding number to select a smiley.<br />
Complete your message.<br />
OK<br />
Select pÉåÇ.<br />
PK<br />
22 Text messages
Use text message options<br />
When you are ready to send a text message, you<br />
have several options for how and when you want<br />
it received.<br />
After composing your message, select<br />
NK<br />
and one of the following:<br />
léíáçåë<br />
^ÇÇ=~ÇÇêÉëë returns you to Send To field<br />
√<br />
to add another recipient.<br />
p~îÉ=ãÉëë~ÖÉ saves the messages in your<br />
√<br />
Drafts folder. This prevents the message<br />
from being deleted if you activate<br />
Auto-erase.<br />
p~îÉ=~ë=~ìíç=íÉñí saves the message you<br />
√<br />
composed as a prewritten message.<br />
pÉííáåÖë sets your message settings. See<br />
√<br />
“Message settings” on page 28.<br />
After setting options, press the _~Åâ key to<br />
OK<br />
return to the message window.<br />
Complete your message.<br />
PK<br />
Select pÉåÇ.<br />
QK<br />
Retrieve a text message<br />
When a text message is received, your phone<br />
displays a notification and the message icon<br />
appears at the top of your screen. The message<br />
icon flashes if the message is urgent. Urgent<br />
messages are also marked in the Inbox.<br />
Message notifications<br />
If you see a message notification, fåÄçñ select to<br />
view messages. Choose a message and sáÉï select<br />
to open it. To clear a message notification,<br />
select fÖåçêÉ.<br />
Message icons<br />
If you see the message icon, jÉåì select ><br />
> fåÄçñ. Choose a message and<br />
jÉëë~ÖáåÖ<br />
sáÉï select to open it.<br />
View a text message<br />
The options available when viewing a text message<br />
may vary. For more information, visit<br />
www.virginmobileusa.com.<br />
Select jÉåì > jÉëë~ÖáåÖ > fåÄçñ.<br />
NK<br />
Select a message to view. If the message is<br />
OK<br />
long, scroll down to view the entire message.<br />
Select oÉéäó to create a response message or<br />
PK<br />
and one of the following:<br />
léíáçåë<br />
bê~ëÉ erases the message.<br />
√<br />
içÅâ=ãëÖ protects the message from the<br />
√<br />
accidentally deleted.<br />
cçêï~êÇ forwards the message.<br />
√<br />
oÉéäó=ïáíÜ=Åçéó replies to the message<br />
√<br />
with a copy of the original attached.<br />
p~îÉ=ãÉëë~ÖÉ saves the message.<br />
√<br />
<strong>User</strong> Guide 23
p~îÉ=~ë=~ìíç=íÉñí saves the message text as<br />
√<br />
auto text, which you can insert into other<br />
messages. Graphics and sounds are<br />
not saved.<br />
pÉåÇÉê displays the sender information.<br />
√<br />
If a graphic is too large or incorrectly<br />
kçíÉW<br />
formatted, and is not received with the message,<br />
an icon appears.<br />
Picture messages<br />
You can send picture messages to phones that are<br />
capable of receiving them or to email addresses.<br />
Picture messages have a predetermined character<br />
and file size limit. Charges apply for the use of<br />
these features. See www.virginmobileusa.com<br />
for pricing.<br />
Send a picture message<br />
Select jÉåì > jÉëë~ÖáåÖ ><br />
NK<br />
pÉåÇ=éáÅíìêÉ=ãëÖ.<br />
With any picture stored in jó=éáÅíìêÉë,<br />
OK<br />
select your desired image to attach to<br />
the message.<br />
At the To, CC (to send a copy of the message),<br />
PK<br />
and BCC (to send a blind copy) fields, do one<br />
of the following to enter the recipient’s phone<br />
number or email address. Scroll down to<br />
move to the next field when done.<br />
Select léíáçåë > oÉÅÉåí=iáëí, oÉÅÉåí=<br />
√<br />
Å~ääë, `çåí~Åíë, dêçìéë or to access<br />
your stored contacts.<br />
Enter the phone number or email<br />
√<br />
address manually. See “Text entry” on<br />
page 16.<br />
You can message up to ten recipients at once.<br />
QK<br />
Use a comma or spaces to separate<br />
addresses. (If you select stored contacts, your<br />
phone does this automatically.)<br />
At the Subject field, enter a subject. Scroll<br />
RK<br />
down to move to the next field when done.<br />
At the Text field, enter a message. Scroll down<br />
SK<br />
to move to the next field when done.<br />
At the Image field, you can attach or reattach<br />
TK<br />
an image file. léíáçåë Select and one of<br />
the following:<br />
to instantly take a photo<br />
q~âÉ=~=éáÅíìêÉ<br />
and attach it.<br />
to attach an existing file from<br />
jó=Öê~éÜáÅë<br />
jó=éáÅíìêÉë your or other image folders.<br />
Scroll down to move to the next field<br />
UK<br />
when done.<br />
At the Sound field, select léíáçåë and one of<br />
VK<br />
the following to attach a file:<br />
to instantly record a sound<br />
oÉÅçêÇ=ëçìåÇ<br />
and attach it.<br />
to attach an existing file<br />
jó=ëçìåÇë<br />
from p~îÉÇ=ëçìåÇë your or<br />
folders.<br />
sçáÅÉ=ãÉãçë<br />
Select pÉåÇ.<br />
NMK<br />
24 Picture messages
Use picture message options<br />
When you are ready to send a picture message,<br />
you have several options for how and when you<br />
want it to be received.<br />
While composing your message, select<br />
NK<br />
and one of the following:<br />
léíáçåë<br />
adds prewritten text to<br />
^ìíç=íÉñí<br />
your message.<br />
saves your message as<br />
p~îÉ=~ë=~ìíç=íÉñí<br />
prewritten text.<br />
plays your message.<br />
mêÉîáÉï=ãÉëë~ÖÉ<br />
saves the message to the<br />
p~îÉ=ãÉëë~ÖÉ<br />
draft folder.<br />
adds additional recipients to<br />
^ÇÇ=~ÇÇêÉëë<br />
your message.<br />
After setting options, press the _~Åâ key to<br />
OK<br />
return to the message window if necessary.<br />
Complete your message.<br />
PK<br />
Select pÉåÇ.<br />
QK<br />
Receive a picture message<br />
When receiving a picture message, your phone does<br />
not automatically download it. A notification appears<br />
when a new message is available for download.<br />
Charges apply for the use of these features, see<br />
www.virginmobileusa.com for pricing.<br />
Select one of the following:<br />
downloads and opens the message.<br />
vÉë<br />
deletes the message.<br />
bê~ëÉ<br />
oÉíêáÉîÉ=i~íÉê sends the message to the Inbox<br />
for you to download and view later.<br />
kçíÉW If a picture message is received during a<br />
call, the phone displays a notification after the<br />
call ends.<br />
View a picture message<br />
With a picture message received, the message<br />
icon appears at the top of your screen. The<br />
message icon flashes if the message is urgent. All<br />
notifications or messages are stored in the Inbox.<br />
NK Select jÉåì > jÉëë~ÖáåÖ > fåÄçñ.<br />
OK Select a message to view. If the message is<br />
long, scroll down to view the entire message.<br />
PK Select oÉéäó to create a response message or<br />
léíáçåë and one of the following:<br />
QK The options available to you may vary.<br />
Visit www.virginmobileusa.com for<br />
more information.<br />
oÉéäó=~ää creates a response message to<br />
all recipients.<br />
cçêï~êÇ forwards the message without<br />
showing the original address, graphic,<br />
sound, and text fields.<br />
bê~ëÉ deletes the message.<br />
jÉëë~ÖÉ=áåÑç displays the message<br />
information (priority, sender, subject, time<br />
sent and received, and message size).<br />
oÉÅáéáÉåíë displays all the addressees<br />
present in the "To" and "CC" fields.<br />
<strong>User</strong> Guide 25
plays the message again from<br />
oÉéä~ó<br />
the beginning.<br />
silences the message.<br />
jìíÉ<br />
displays the sender information.<br />
pÉåÇÉê<br />
calls the message sender.<br />
`~ää<br />
saves the picture embedded<br />
p~îÉ=éáÅíìêÉ<br />
in the message.<br />
saves the sound embedded in<br />
p~îÉ=ëçìåÇ<br />
the message.<br />
extracts email addresses,<br />
p~îÉ=~ÇÇêÉëë<br />
phone numbers, and/or URLs from the<br />
sender information and message body.<br />
p~îÉ=~ë=~ìíç=íÉñí saves the text in the<br />
√<br />
message to the auto text list.<br />
p~îÉ=ãÉëë~ÖÉ saves the message to the<br />
√<br />
Saved Folder.<br />
accesses a Web site.<br />
i~ìåÅÜ=_êçïëÉê<br />
Email messages<br />
You can send and receive email messages from<br />
your phone. Check <strong>Virgin</strong> <strong>Mobile</strong>’s Web site at<br />
www.virginmobileusa.com for availability<br />
and pricing.<br />
Sending email message<br />
Select jÉåì > jÉëë~ÖáåÖ > pÉåÇ=Éã~áä=ãëÖ to<br />
send an email message.<br />
Accessing <strong>Mobile</strong> Email<br />
To launch mobile email, select jÉåì ><br />
jó=ëíìÑÑ > jó=çíÜÉê=ëíìÑÑ > jçÄáäÉ=bã~áä.<br />
Instant messages<br />
You can send and receive instant messages (IMs)<br />
from your phone. Check <strong>Virgin</strong> <strong>Mobile</strong>’s Web site<br />
at www.virginmobileusa.com for availability<br />
and pricing.<br />
Sending IM message<br />
Select jÉåì > jÉëë~ÖáåÖ > pÉåÇ=fj=ãëÖ to<br />
access IM and send an instant message.<br />
Accessing <strong>Mobile</strong> IM<br />
To launch fj, select jÉåì > fj or jÉåì ><br />
jó ëíìÑÑ > jó=çíÜÉê=ëíìÑÑ > jçÄáäÉ=fj.<br />
Navigating IM<br />
Scroll through items and to highlight one.<br />
Press the lh key to select an IM menu item<br />
√<br />
or option.<br />
Press _~Åâ the key to go back one screen.<br />
A scroll bar on the right side of the screen<br />
kçíÉW<br />
indicates that there is more text. Scroll down to go<br />
to the next screen of text. Press _~Åâ the key to<br />
move back one screen.<br />
Ending IM session<br />
Press the båÇ key from any fj page.<br />
26 Email messages
Erasing messages<br />
It is a good idea to erase old messages to free up<br />
memory in your phone. You can erase messages<br />
and pages as you send or read them, erasing them<br />
one at a time, or erasing them all at once.<br />
Erase a single message<br />
Select jÉåì > jÉëë~ÖáåÖ > fåÄçñ,<br />
NK<br />
^äÉêíë, lìíÄçñ, p~îÉÇ, or aê~Ñíë.<br />
sáêÖáå<br />
Highlight the message you want to erase.<br />
OK<br />
Select bê~ëÉ or léíáçåë > bê~ëÉ depending<br />
PK<br />
on your selected folder.<br />
At the notification, select vÉë to erase<br />
QK<br />
the message.<br />
Erase all messages<br />
Select jÉåì > jÉëë~ÖáåÖ > bê~ëÉ=ãëÖë ><br />
fåÄçñ, lìíÄçñ, p~îÉÇ=ÑçäÇÉê, aê~Ñíë=ÑçäÇÉê or<br />
^ää=ãÉëë~ÖÉë > vÉë.<br />
kçíÉW To erase messages from all folders,<br />
select ^ää=ãÉëë~ÖÉë.<br />
Working with messages<br />
The following are some messaging tips.<br />
Unable to send messages<br />
You may not be able to send or receive messages<br />
if your phone’s memory is nearly full, or if digital<br />
service is not available at the time. To free up<br />
memory, erase old messages. See “Erasing<br />
messages” on page 27.<br />
Receive incoming calls while<br />
creating messages<br />
If you receive a call while creating a message,<br />
a notification appears. You can do one of<br />
the following:<br />
Select fÖåçêÉ to return to the message<br />
creation screen without answering the call.<br />
Press the `~ää key to answer the call and save<br />
the created message to the Drafts folder.<br />
Complete messages in Drafts folder<br />
To continue composing a message in the<br />
Drafts folder:<br />
Select jÉåì > jÉëë~ÖáåÖ > aê~Ñíë.<br />
NK<br />
Highlight the message you want to complete.<br />
OK<br />
Select bÇáí.<br />
PK<br />
Complete your message.<br />
QK<br />
Select pÉåÇ.<br />
RK<br />
View sent messages in Outbox folder<br />
To view your sent messages, you must first save<br />
them in the Outbox folder.<br />
Select jÉåì > jÉëë~ÖáåÖ > jëÖ=ëÉííáåÖë ><br />
NK<br />
p~îÉ=íç=çìíÄçñ.<br />
Select one of the following:<br />
OK<br />
does not save outgoing<br />
aáë~ÄäÉÇ<br />
messages.<br />
allows you to choose whether to<br />
mêçãéí<br />
save the message when sending it.<br />
<strong>User</strong> Guide 27
automatically saves successfully<br />
bå~ÄäÉÇ<br />
sent messages in the Outbox folder.<br />
After saving the successfully sent messages, select<br />
> jÉëë~ÖáåÖ > lìíÄçñ to view them.<br />
jÉåì<br />
Scroll through the list of messages. One of<br />
the following indicators appears next to<br />
each message:<br />
The scheduled message was sent and<br />
delivered as scheduled. You cannot cancel<br />
delivery of the message.<br />
The message has been received.<br />
The message has never been sent or has not<br />
been sent since it was last modified. You can<br />
cancel delivery of the message<br />
Message settings<br />
Message settings help configure your phones text<br />
and picture message settings.<br />
Alerts<br />
Choose how you want to be alerted of voicemail,<br />
pages, or text messages. Select jÉåì ><br />
jÉëë~ÖáåÖ > jëÖ=ëÉííáåÖë > ^äÉêíë > jëÖ=~äÉêí,<br />
m~ÖÉ=~äÉêí, or sçáÅÉã~áä=~äÉêí and select a<br />
ringtone from the list. (Scroll through the list to<br />
hear the different ringtones.)<br />
You can also select jÉåì > jÉëë~ÖáåÖ ><br />
jëÖ ëÉííáåÖë > ^äÉêíë > oÉãáåÇÉê > lå to set<br />
the phone to notify you with the selected ringtone<br />
every five minutes until you address the alert.<br />
jÉåì jÉëë~ÖáåÖ<br />
NK jÉåì jÉëë~ÖáåÖ jëÖ=ëÉííáåÖë<br />
^ìíç=íÉñí<br />
√<br />
√ kÉï=ãëÖ<br />
OK<br />
PK<br />
The message has been sent to more than one<br />
recipient.<br />
Auto text<br />
Your phone comes with prewritten (auto text)<br />
View failed or pending messages messages, such as “Please call me,” which you<br />
Failed or pending messages are stored in your can insert into the body of a text message. You can<br />
Outbox folder. To view messages in the Outbox edit these messages or create new ones. Your<br />
folder, select > > lìíÄçñ. phone stores up to 30 auto text messages, with up<br />
Your list of failed or pending messages will<br />
appear with the following symbols.<br />
The message is pending and will be sent when<br />
possible. You can cancel delivery of the<br />
message.<br />
to 100 characters per message.<br />
Select > > ><br />
and one of the following:<br />
Highlight an auto text message and<br />
select bÇáí.<br />
The message cannot be sent because service is<br />
Select to create a new auto<br />
not available. An alert appears on your phone<br />
text message.<br />
if the message cannot be sent.<br />
Enter or edit the text.<br />
28 Message settings<br />
Select açåÉ.
kçíÉW You can also save a message you have<br />
written or received as auto text.<br />
Text entry<br />
You can change the default text entry mode when<br />
creating a text message. This setting applies only<br />
to the message body screen, not the “To” screen.<br />
jÉåì Select jÉëë~ÖáåÖ > jëÖ=ëÉííáåÖë > ><br />
Éåíêó and one of the following:<br />
qÉñí<br />
to enter text in letter by letter.<br />
kçêã~ä=~äéÜ~<br />
to enter text with<br />
o~éáÇ=ãçÇÉ<br />
word recognition.<br />
Signature<br />
The signature you create is included at the end of<br />
all outgoing messages and is counted as<br />
characters in your messages; however, it does not<br />
appear in the message creation screen.<br />
Select jÉåì > jÉëë~ÖáåÖ > jëÖ=ëÉííáåÖë ><br />
NK<br />
páÖå~íìêÉ.<br />
Enter your signature in the text field.<br />
OK<br />
Select lh to save the signature.<br />
PK<br />
The characters in the signature are<br />
kçíÉW<br />
included in the total character count of<br />
the message.<br />
Save to outbox<br />
You can save your outgoing messages. Select<br />
jÉåì > jÉëë~ÖáåÖ > jëÖ=ëÉííáåÖë ><br />
p~îÉ=íç=çìíÄçñ and one of the following:<br />
mêçãéí allows you to choose whether to save<br />
your message when you send it.<br />
bå~ÄäÉÇ saves all outgoing messages to the<br />
Outbox folder.<br />
Auto-erase<br />
You can set your phone to erase messages<br />
automatically when memory is needed for<br />
incoming messages.<br />
jÉåì Select jÉëë~ÖáåÖ > jëÖ=ëÉííáåÖë > ><br />
and one of the following:<br />
^ìíçJÉê~ëÉ<br />
erases no messages.<br />
aáë~ÄäÉÇ<br />
erases old messages in your<br />
fåÄçñ=ãëÖë<br />
Inbox when memory is needed.<br />
erases old messages in your<br />
lìíÄçñ=ãëÖë<br />
Outbox folder when memory is needed.<br />
erases old messages in both your Inbox<br />
_çíÜ<br />
and Outbox folders when memory is needed.<br />
aáë~ÄäÉÇ does not save outgoing messages.<br />
<strong>User</strong> Guide 29
6 Contacts<br />
Use your phone’s contacts list to store information<br />
about a person or company. Each contact entry<br />
can have up to six phone numbers, two email<br />
addresses, two Web addresses, two street<br />
addresses, and a space for notes.<br />
Viewing contacts list<br />
To view existing contacts in your phone, open the<br />
flip and select jÉåì > `çåí~Åíë > sáÉï=~ää. Your<br />
contacts list is displayed alphabetically.<br />
qáéW You can also select `çåí~Åíë from the main<br />
screen to view the directory.<br />
Scroll to highlight the contact you want and do<br />
one of the following:<br />
√ Press the pÉåÇ key to call the<br />
highlighted contact.<br />
√ Press the lh key to view the highlighted<br />
contact’s detail.<br />
√ Select kÉï to add a new contact.<br />
√ Select léíáçåë to choose one of the following:<br />
√`~ää to make a call.<br />
√pÉåÇ=íÉñí=ãëÖ to send a text message.<br />
√pÉåÇ=éáÅíìêÉ=ãëÖ to send a picture message.<br />
√sáÉï=Åçåí~Åí to view contact details.<br />
√bÇáí=Åçåí~Åí to edit contact details.<br />
√bê~ëÉ=Åçåí~Åí to erase the contact.<br />
√`çåí~Åíë=ãÉåì to access your contacts.<br />
Adding contacts<br />
Add contact from main screen<br />
To add a contact to your contacts list:<br />
From the main screen, enter a phone number<br />
NK<br />
to save (including the area code).<br />
Select p~îÉ > p~îÉ=åÉï=Åçåí~Åí.<br />
OK<br />
Enter a name for the contact. For more<br />
PK<br />
information, see “Text entry” on page 16.<br />
Enter additional phone numbers, email<br />
QK<br />
addresses, Web addresses and note, if<br />
needed. Scroll up or down to move through<br />
the contact fields.<br />
When you are done entering information,<br />
RK<br />
select p~îÉ.<br />
Add contact from contacts menu<br />
To add a contact to your contacts list:<br />
Select jÉåì > `çåí~Åíë > ^ÇÇ=åÉï.<br />
NK<br />
Enter a name for the contact. When you are<br />
OK<br />
done, scroll down to move to the next field.<br />
For more information, see “Text entry” on<br />
page 16.<br />
Enter a primary number for the contact.<br />
PK<br />
Enter additional phone numbers, email<br />
QK<br />
addresses, IM addresses, Web addresses,<br />
Street addresses, and note. Scroll up or down<br />
to move through the contact fields.<br />
30 Viewing contacts list
When you are done entering information,<br />
RK<br />
select p~îÉ.<br />
Add code or extension<br />
When you save the phone number of an<br />
automated service, you may include a pause to<br />
stop dialing. For example, a pause where you<br />
would wait to dial an extension.<br />
NK From the main screen, enter a<br />
phone number.<br />
OK Select léíáçåë and a type of pause:<br />
√ qáãÉ=é~ìëÉ causes the phone to stop<br />
dialing for two seconds.<br />
√ e~êÇ=é~ìëÉ causes the phone to stop<br />
dialing until you select oÉäÉ~ëÉ=while<br />
making the call.<br />
PK Enter the remaining numbers and<br />
select p~îÉ.<br />
QK Select p~îÉ=åÉï=Åçåí~Åí.<br />
RK Complete the contact and select p~îÉ.<br />
Working with contacts<br />
Contact details<br />
To edit details of an existing contact:<br />
Select jÉåì > `çåí~Åíë > sáÉï=~ää.<br />
NK<br />
From the contacts list, select a contact.<br />
OK<br />
At the contact’s detail screen, select bÇáí.<br />
PK<br />
Edit or add phone numbers, email addresses,<br />
QK<br />
IM addresses, Web addresses, Street<br />
addresses, and notes. Scroll up or down to<br />
move through the contact fields.<br />
When you are done entering information,<br />
RK<br />
select p~îÉ.<br />
Contact name<br />
To work on the name of an existing contact:<br />
Select jÉåì > `çåí~Åíë > sáÉï=~ää.<br />
NK<br />
From the contacts list, select a contact.<br />
OK<br />
At the contact’s detail screen, highlight<br />
PK<br />
the name.<br />
Select léíáçåë and one of the following:<br />
QK<br />
assigns a specific ringtone to<br />
oáåÖÉê<br />
the contact.<br />
assigns a message alert ringtone<br />
jëÖ=~äÉêí<br />
to the contact.<br />
assigns a specific picture to<br />
máÅíìêÉ<br />
the contact.<br />
erases the entire contact.<br />
bê~ëÉ=Åçåí~Åí<br />
Contact number<br />
To work on the number of an existing contact:<br />
NK Select jÉåì > `çåí~Åíë > sáÉï=~ää.<br />
OK From the contacts list, select a contact.<br />
PK At the contact’s detail screen, highlight a<br />
contact number.<br />
<strong>User</strong> Guide 31
Select léíáçåë and one of the following:<br />
QK<br />
sends a call.<br />
`~ää<br />
sends a text message.<br />
pÉåÇ=íÉñí=ãëÖ<br />
sends a picture<br />
pÉåÇ=éáÅíìêÉ=ãëÖ<br />
message.<br />
adds the number to your<br />
^ÇÇ=ëéÉÉÇ=Çá~ä<br />
speed dial list.<br />
displays the number.<br />
sáÉï=åìãÄÉê<br />
erases the number from<br />
bê~ëÉ=åìãÄÉê<br />
the contact.<br />
makes the number secret, hiding it<br />
pÉÅêÉí<br />
from the screen until you enter the lock<br />
code. Secret numbers can be called<br />
without a lock code. For more information,<br />
see “Lock phone” on page 54.<br />
makes this number the<br />
mêáã~êó=åìãÄÉê<br />
primary number for the contact.<br />
adds the number to the<br />
^ÇÇ=íç=dêçìé<br />
business, personal or custom group.<br />
records a voice tag so you<br />
^ÇÇ=îçáÅÉ=Çá~ä<br />
can call a contact using voice recognition.<br />
erases the voice tag<br />
bê~ëÉ=îçáÅÉ=Çá~ä<br />
associated with the number.<br />
re-records the voice tag.<br />
bÇáí=îçáÅÉ=Çá~ä<br />
displays the contact’s detail<br />
mêÉéÉåÇ<br />
screen for you to change the number<br />
(adding an area code) or other data of<br />
the contact.<br />
Contact email address<br />
To access the email address of an existing contact:<br />
Select jÉåì > `çåí~Åíë > sáÉï=~ää.<br />
NK<br />
From the contacts list, select a contact.<br />
OK<br />
At the contact’s detail screen, highlight a<br />
PK<br />
contact email address.<br />
Select léíáçåë and one of the following:<br />
QK<br />
launches the<br />
pÉåÇ=bã~áä<br />
email application.<br />
sends a text message.<br />
pÉåÇ=íÉñí=ãëÖ<br />
sends a<br />
pÉåÇ=éáÅíìêÉ=ãëÖ<br />
picture message.<br />
displays the email address.<br />
sáÉï=~ÇÇêÉëë<br />
adds the email address to<br />
^ÇÇ=íç=dêçìé<br />
the business, personal or custom group.<br />
erases the email address<br />
bê~ëÉ=~ÇÇêÉëë<br />
from the contact.<br />
makes the address secret, hiding<br />
pÉÅêÉí<br />
it from the screen until you enter the<br />
lock code.<br />
Contact IM address<br />
To access the IM address of an existing contact:<br />
NK Select jÉåì > `çåí~Åíë > sáÉï=~ää.<br />
OK From the contacts list, select a contact.<br />
PK At the contact’s detail screen, highlight a<br />
contact IM address.<br />
32 Working with contacts
QK Select léíáçåë and one of the following:<br />
sáÉï=fj displays the IM address.<br />
bê~ëÉ=fj erases the IM address from<br />
the contact.<br />
pÉåÇ=fj launches the IM application.<br />
Contact Web address<br />
To access the Web address of an existing contact:<br />
NK Select jÉåì > `çåí~Åíë > sáÉï=~ää.<br />
OK From the contacts list, select a contact.<br />
PK At the contact’s detail screen, highlight a<br />
contact Web address.<br />
QK Select léíáçåë and one of the following:<br />
i~ìåÅÜ=ïÉÄ to go to the Web address.<br />
sáÉï=ïÉÄ to view the Web address.<br />
bê~ëÉ=ïÉÄ to erase the Web address from<br />
the contact.<br />
pÉÅêÉí makes the address secret, hiding<br />
it from the screen until you enter the<br />
lock code.<br />
Contact street address<br />
To access the street address of an existing contact:<br />
Select jÉåì > `çåí~Åíë > sáÉï=~ää.<br />
NK<br />
From the contacts list, select a contact.<br />
OK<br />
At the contact’s detail screen, highlight a<br />
PK<br />
contact street address.<br />
Select léíáçåë and one of the following:<br />
QK<br />
displays the street address.<br />
sáÉï=~ÇÇêÉëë<br />
erases the street address<br />
bê~ëÉ=~ÇÇêÉëë<br />
from the contact.<br />
makes the address secret, hiding it<br />
pÉÅêÉí<br />
from the screen until you enter the<br />
lock code.<br />
Contact note<br />
To work on the note of an existing contact:<br />
Select jÉåì > `çåí~Åíë > sáÉï=~ää.<br />
NK<br />
From the contacts list, select a contact.<br />
OK<br />
At the contact’s detail screen, highlight a note.<br />
PK<br />
Select léíáçåë and one of the following:<br />
QK<br />
displays the note.<br />
sáÉï=åçíÉ<br />
erases the note from the<br />
bê~ëÉ=åçíÉ<br />
contact.<br />
makes the note secret, hiding it<br />
pÉÅêÉí<br />
from the screen until you enter the<br />
lock code.<br />
Assign ringtone to contacts<br />
To assign a ringtone:<br />
Select jÉåì > `çåí~Åíë > sáÉï=~ää.<br />
NK<br />
From the contacts list, select a contact.<br />
OK<br />
At the contact’s detail screen, highlight the<br />
PK<br />
contact name.<br />
Select léíáçåë > oáåÖÉê > ^ëëáÖå=êáåÖÉê.<br />
QK<br />
<strong>User</strong> Guide 33
Select a ringtone from the list. (Scroll<br />
RK<br />
through the list to hear the different<br />
ringtones.)<br />
Assign message alert to contacts<br />
To assign a message alert ringtone:<br />
Select jÉåì > `çåí~Åíë > sáÉï=~ää.<br />
NK<br />
From the contacts list, select a contact.<br />
OK<br />
At the contact’s detail screen, highlight the<br />
PK<br />
contact name.<br />
Select léíáçåë > jëÖ=~äÉêí > ^ëëáÖå=~äÉêí.<br />
QK<br />
Select a ringtone from the list. (Scroll<br />
RK<br />
through the list to hear the different<br />
ringtones.)<br />
Assign picture to contacts<br />
To assign a picture:<br />
Select jÉåì > `çåí~Åíë > sáÉï=~ää.<br />
NK<br />
From the contacts list, select a contact.<br />
OK<br />
At the contact’s detail screen, highlight the<br />
PK<br />
contact name.<br />
Select léíáçåë > máÅíìêÉ > ^ëëáÖå=éáÅíìêÉ.<br />
QK<br />
Scroll through the folders to select one where<br />
RK<br />
to get your pictures.<br />
Scroll through to select a picture to assign.<br />
SK<br />
With <strong>Mobile</strong> Phone Tools (MPT) for<br />
kçíÉW<br />
<strong>Kyocera</strong>, you can transfer digital pictures to your<br />
phone. To purchase MPT or other accessories<br />
visit ïïïKâóçÅÉê~JïáêÉäÉëëKÅçãLëíçêÉ.<br />
Assign number type<br />
When you assign a number type, an icon is placed<br />
in front of the contact number to specify the type<br />
of number it is.<br />
NK Select jÉåì > `çåí~Åíë > sáÉï=~ää.<br />
OK From the contacts list, select a contact.<br />
PK At the contact’s detail screen, select bÇáí.<br />
QK Scroll down twice to highlight the number<br />
type dropdown and press the lh key.<br />
Select dÉåÉê~ä, tçêâ, eçãÉ, jçÄáäÉ, m~ÖÉê<br />
RK<br />
or c~ñ. The appropriate icon appears next to<br />
the number in your phone lists.<br />
Select p~îÉ.<br />
SK<br />
Using contact groups<br />
You can assign your contacts to groups that share<br />
the common ringtone or image. Your phone<br />
comes with two default groups, Business and<br />
Personal. You can also create your own groups.<br />
Create groups<br />
Select jÉåì > `çåí~Åíë > dêçìéë.<br />
NK<br />
Select kÉï.<br />
OK<br />
Enter a name for the group and select kÉñí.<br />
PK<br />
Add or remove your desired contacts from<br />
QK<br />
the list. A check mark appears next to<br />
each selection.<br />
After selecting all your desired contacts,<br />
RK<br />
select açåÉ.<br />
Your new group appears the next time you view<br />
your groups.<br />
34 Using contact groups
Use a group<br />
Select jÉåì > `çåí~Åíë > dêçìéë.<br />
NK<br />
Scroll to your desired group in the<br />
OK<br />
Groups list.<br />
Select léíáçåë and one of the following:<br />
PK<br />
displays the group details.<br />
sáÉï<br />
edits the group.<br />
bÇáí<br />
deletes the group.<br />
bê~ëÉ<br />
sends the group a<br />
pÉåÇ=íÉñí=ãëÖ<br />
text message.<br />
sends the group a<br />
pÉåÇ=éáÅíìêÉ=ãëÖ<br />
multimedia message.<br />
Customize a group<br />
Select jÉåì > `çåí~Åíë > dêçìéë.<br />
NK<br />
Select a group from the Groups list.<br />
OK<br />
Select léíáçåë and one of the following:<br />
PK<br />
assigns a ringer to the group.<br />
oáåÖÉê<br />
assigns a message alert ringtone<br />
jëÖ=~äÉêí<br />
to the group.<br />
assigns a picture to the group.<br />
máÅíìêÉ<br />
deletes the group.<br />
bê~ëÉ<br />
edits the group.<br />
bÇáí<br />
Since Business and Personal are<br />
kçíÉW<br />
predefined groups, you cannot erase any of them.<br />
Searching contacts<br />
To find a phone number or contact, you can<br />
search the contacts list, use the c~ëí=ÑáåÇ, or<br />
check the cêÉèìÉåí=äáëí. See “Fast find” on<br />
page 51 and “Frequent list” on page 51.<br />
To search your contacts list, select jÉåì ><br />
`çåí~Åíë > sáÉï=~ää, cáåÇ=å~ãÉ, dêçìéë,<br />
péÉÉÇ Çá~ä=äáëí or sçáÅÉ=Çá~ä=äáëí.<br />
You can also use the `çåí~Åíë shortcut from the<br />
main screen to view the contacts list. To quickly<br />
get down the list, enter the first letter of the<br />
contact. You skip to that letter of the alphabet.<br />
<strong>User</strong> Guide 35
7 <strong>Virgin</strong>XL<br />
Accessing <strong>Virgin</strong>XL<br />
With <strong>Virgin</strong>XL, you can access music,<br />
entertainment, and information services from<br />
your phone. <strong>Download</strong> games, ringtones,<br />
wallpapers, screen savers, and other content; surf<br />
the web; and more. Check <strong>Virgin</strong> <strong>Mobile</strong>’s Web<br />
site at www.virginmobileusa.com for availability<br />
and pricing, or check directly from your phone<br />
using <strong>Virgin</strong>XL. Charges apply.<br />
To launch sáêÖáåui, from the main screen, scroll<br />
left or select jÉåì > sáêÖáåui.<br />
kçíÉW You cannot receive incoming calls during a<br />
<strong>Virgin</strong>XL session. All incoming calls are<br />
automatically sent to your voicemail.<br />
Navigating <strong>Virgin</strong>XL<br />
Scroll through items and to highlight one.<br />
Press lh the key to select sáêÖáåui a menu<br />
item or option.<br />
Press _~Åâ the key to go back one screen.<br />
A scroll bar on the right side of the screen<br />
kçíÉW<br />
indicates that there is more text. Scroll down to go<br />
to the next screen of text. Press _~Åâ the key to<br />
move back one screen.<br />
Ending a <strong>Virgin</strong>XL session<br />
Press the båÇ key from any sáêÖáåui page.<br />
36 Accessing <strong>Virgin</strong>XL
8 My Account<br />
You can manage your <strong>Virgin</strong> <strong>Mobile</strong> account<br />
directly from your phone. The basic tasks are<br />
summarized in this chapter. For more information<br />
about your account, go to<br />
www.virginmobileusa.com.<br />
Checking your account balance<br />
You can check your <strong>Virgin</strong> <strong>Mobile</strong> account status<br />
in one of two ways:<br />
From the main screen, scroll up.<br />
Select jÉåì > jó=^ÅÅçìåí.<br />
Your account information appears with Top-Up<br />
information relative to your selected plan. When<br />
your account is low or empty, you receive a<br />
notification to Top-Up.<br />
Top-Up your account<br />
Top-Up is how you add money to your <strong>Virgin</strong><br />
<strong>Mobile</strong> account. You can Top-Up your <strong>Virgin</strong><br />
<strong>Mobile</strong> account right from your phone. First, buy<br />
a Top-Up card at the thousands of retailers that<br />
carry them or register your debit card, credit<br />
card, or PayPal account at<br />
www.virginmobileusa.com.<br />
When your balance is low, you can Top-Up your<br />
account from your phone.<br />
kçíÉW Additional charges may apply for multiple<br />
balance checks in one day. Visit<br />
www.virginmobileusa.com for more details.<br />
Top-Up with a Top-Up <strong>Card</strong><br />
From the main screen, select jÉåì ><br />
NK<br />
^ÅÅçìåí. jó<br />
OK Scroll down to the qçéJré link and press the<br />
lh key.<br />
PK Enter your Account Pin (vKey) and press the<br />
lh key to login.<br />
QK Scroll down to select içÖáå and press the<br />
lh key.<br />
RK Enter your Top-Up card's PIN number and<br />
press the lh key.<br />
SK Scroll down to select qçéJré=kçï and press<br />
the lh key.<br />
TK You are now topped up. Press the båÇ key to<br />
exit.<br />
<strong>User</strong> Guide 37
Top-Up with a debit card, credit card,<br />
or PayPal account<br />
Before you can Top-Up from your phone with a<br />
debit card, credit card, or PayPal account, you<br />
need to register the card or PayPal account at<br />
www.virginmobileusa.com.<br />
From the main screen, select jÉåì ><br />
NK<br />
^ÅÅçìåí. jó<br />
Scroll down to the qçéJré link and press the<br />
OK<br />
key. lh<br />
Enter your Account Pin (vKey) and press the<br />
PK<br />
key. lh<br />
Scroll down to select içÖáå and press the<br />
QK<br />
key. lh<br />
Scroll down and select `êÉÇáí=`~êÇ or<br />
RK<br />
m~óm~ä.<br />
Enter the amount you want to Top-Up and<br />
SK<br />
press lh the key. You can Top-Up in<br />
amounts of $20, $30, $50, or $90.<br />
Scroll down to select qçéJré=kçï and press<br />
TK<br />
lh the key.<br />
At the confirmation screen, select vÉë.<br />
UK<br />
You are now topped up. Press the båÇ key to<br />
VK<br />
exit.<br />
You can also Top-Up over the Web at<br />
kçíÉW<br />
www.virginmobileusa.com.<br />
For more information<br />
For more information about your <strong>Virgin</strong> <strong>Mobile</strong><br />
account or <strong>Virgin</strong> <strong>Mobile</strong> service, visit<br />
www.virginmobileusa.com.<br />
38 For more information
9 My stuff<br />
My ringtones<br />
The My ringtones folder stores your preloaded<br />
and downloaded ringtones. You can download<br />
ringtones to your phone from the <strong>Virgin</strong> <strong>Mobile</strong><br />
Web site at www.virginmobileusa.com or directly<br />
from your phone using sáêÖáåui. Select jÉåì ><br />
jó=ëíìÑÑ > jó=êáåÖíçåÉë > dÉí ãçêÉ=êáåÖíçåÉë.<br />
Charges apply.<br />
<strong>Download</strong>ing ringtones<br />
Before downloading, make sure you have enough<br />
money in your account; otherwise you can Top-Up<br />
your account.<br />
At the main screen, scroll left to launch<br />
NK<br />
and then search for ringtones.<br />
sáêÖáåui<br />
Follow the prompts to purchase and<br />
OK<br />
download the selected ringtone.<br />
The downloaded ringtones are stored in the<br />
> jó=ëíìÑÑ > jó=êáåÖíçåÉë folder in<br />
jÉåì<br />
your phone.<br />
Assigning downloaded ringtones<br />
Select jÉåì > jó=ëíìÑÑ > jó=êáåÖíçåÉë.<br />
NK<br />
Select a downloaded ringtone and<br />
OK<br />
ÇÉÑ~ìäí. pÉí<br />
kçíÉW The downloaded ringtone is also listed in<br />
the Ringtones folder and available to assign to<br />
individual contacts or as the Personal or Business<br />
ringer. See “Add contact from main screen” on<br />
page 30 and “Assign message alert to contacts”<br />
on page 34.<br />
My games<br />
You can download games to your phone from<br />
the <strong>Virgin</strong> <strong>Mobile</strong> Web site at<br />
www.virginmobileusa.com or directly from your<br />
phone using sáêÖáåui. jÉåì Select jó=ëíìÑÑ > ><br />
> dÉí=ãçêÉ=Ö~ãÉë. Charges apply.<br />
jó=Ö~ãÉë<br />
If you don’t have enough money in your<br />
kçíÉW<br />
account, you need to Top-Up before downloading.<br />
At the main screen, scroll left to launch<br />
NK<br />
and then search for games.<br />
sáêÖáåui<br />
Follow the prompts to purchase and<br />
OK<br />
download the selected games.<br />
The downloaded games are stored in jÉåì the ><br />
> jó=Ö~ãÉë folder in your phone.<br />
jó=ëíìÑÑ<br />
My graphics<br />
You can download wallpapers and screensavers to<br />
your phone from the <strong>Virgin</strong> <strong>Mobile</strong> Web site at<br />
www.virginmobileusa.com or directly from your<br />
phone using sáêÖáåui. Select jÉåì > jó=ëíìÑÑ ><br />
jó=Öê~éÜáÅë > dÉí=ãçêÉ=Öê~éÜáÅë. Charges apply.<br />
<strong>User</strong> Guide 39
If you don’t have enough money in your<br />
kçíÉW<br />
account, you need to Top-Up before downloading.<br />
At the main screen, scroll left to launch<br />
NK<br />
and then search for graphics.<br />
sáêÖáåui<br />
Follow the prompts to purchase and<br />
OK<br />
download the selected graphic.<br />
The downloaded graphics are stored in the<br />
> jó=ëíìÑÑ > jó=Öê~éÜáÅë folder in<br />
jÉåì<br />
your phone.<br />
You can assign downloaded graphics as<br />
kçíÉW<br />
either screensavers or wallpapers.<br />
To assign downloaded graphics:<br />
At the main screen, select jÉåì > jó=ëíìÑÑ ><br />
NK<br />
jó=Öê~éÜáÅë.<br />
Select jó=éáÅíìêÉë, sáêÖáåui=Öê~éÜáÅë,<br />
OK<br />
pÅêÉÉåë~îÉêë t~ääé~éÉêë, or `~ääÉê=faë,<br />
and then lh.<br />
Scroll to the graphic you want to assign and<br />
PK<br />
select léíáçåë.<br />
Select ^ëëáÖå or pÉí=ÇÉÑ~ìäí, and press the<br />
QK<br />
key. lh<br />
My other stuff<br />
You can download other stuff to your phone from<br />
the <strong>Virgin</strong> <strong>Mobile</strong> Web site at<br />
www.virginmobileusa.com or directly from your<br />
phone using sáêÖáåui. Select jÉåì > jó=ëíìÑÑ ><br />
jó=çíÜÉê=ëíìÑÑ > dÉí=ãçêÉ=ëíìÑÑ. Charges apply.<br />
kçíÉW If you don’t have enough money in your<br />
account, you need to Top-Up before downloading.<br />
At the main screen, scroll left to launch<br />
NK<br />
and then search for applications.<br />
sáêÖáåui<br />
Follow the prompts to purchase and<br />
OK<br />
download the selected application.<br />
The downloaded applications are stored in the<br />
> jó=ëíìÑÑ > jó=çíÜÉê=ëíìÑÑ folder in<br />
jÉåì<br />
your phone.<br />
My sounds<br />
You can record and save voice memos and all<br />
received, attached sound files to My sounds. To<br />
listen to saved sounds or recorded voice memos:<br />
At the main screen, select jÉåì > jó=ëíìÑÑ ><br />
NK<br />
jó=ëçìåÇë.<br />
Select p~îÉÇ=ëçìåÇë or sçáÅÉ=ãÉãçë and<br />
OK<br />
then lh.<br />
Highlight a sound and select léíáçåë.<br />
PK<br />
Highlight oÉÅçêÇ=åÉï, bê~ëÉ, içÅâLråäçÅâ,<br />
QK<br />
oÉå~ãÉ, aÉí~áäë, bê~ëÉ=~ää or and press the<br />
key.<br />
lh<br />
40 My other stuff
10 Recent calls<br />
Call lists<br />
Details on the last 60 calls you made, received, or<br />
missed are stored in the Recent Calls list and are<br />
identified by the following icons:<br />
Outgoing call<br />
Incoming call<br />
Missed call (flashing)<br />
View recent calls<br />
Select jÉåì > oÉÅÉåí=Å~ääë and one of the<br />
NK<br />
following:<br />
displays all calls made<br />
^ää=Å~ääë<br />
or received.<br />
displays calls answered.<br />
fåÅçãáåÖ=Å~ääë<br />
displays calls made.<br />
lìíÖçáåÖ=Å~ääë<br />
displays calls received, but<br />
jáëëÉÇ=Å~ääë<br />
not answered.<br />
Highlight a recent call.<br />
OK<br />
Press the pÉåÇ key to call the number or<br />
PK<br />
léíáçåë select and one of the following:<br />
creates a new contact or sáÉï<br />
p~îÉ<br />
displays the contact’s detail screen.<br />
sends a text message to<br />
pÉåÇ=íÉñí=ãëÖ<br />
the number.<br />
sends a picture message<br />
pÉåÇ=éáÅíìêÉ=ãëÖ<br />
to the number.<br />
deletes the call from the<br />
bê~ëÉ=êÉÅçêÇ<br />
call list.<br />
If the phone number is classified as<br />
kçíÉW<br />
“secret,” you must enter your four-digit lock code<br />
to access it.<br />
Missed calls<br />
When you have missed a call, “Missed Call”<br />
appears on your screen unless the caller leaves a<br />
voicemail. You can do one of the following:<br />
To clear the screen, select lh.<br />
To view the call details, `~ääë select and press<br />
lh the key.<br />
To return the call, `~ääë select and press the<br />
key. pÉåÇ<br />
Set alert for missed calls<br />
You can set an alert to beep every five minutes<br />
after you have missed a call. jÉåì Select ><br />
pçìåÇë pÉííáåÖë=> ^äÉêíë > jáëëÉÇ=Å~ää=~äÉêí<br />
><br />
and select a ringtone from the list. (Scroll through<br />
the list to hear the different ringtones.)<br />
<strong>User</strong> Guide 41
Erase call lists<br />
You can erase your phone’s call lists.<br />
Select jÉåì > oÉÅÉåí=Å~ääë ><br />
NK<br />
> ^ää=Å~ääë, fåÅçãáåÖ=Å~ääë,<br />
bê~ëÉ=Å~ää=äáëíë<br />
lìíÖçáåÖ=Å~ääë, or jáëëÉÇ=Å~ääë.<br />
Select vÉë.<br />
OK<br />
Call timers<br />
You can track the number and duration of calls<br />
made and received on your phone. Select jÉåì ><br />
oÉÅÉåí=Å~ääë and one of the following:<br />
oÉÅÉåí=Å~ääë=íáãÉê tracks all calls you have<br />
made and received since you last reset this<br />
timer. To reset this timer to zero, select oÉëÉí.<br />
^ää=Å~ääë=íáãÉê tracks all calls you have made<br />
and received. You cannot reset this timer.<br />
42 Call timers
11 Pictures<br />
The following are some tips for you to operate<br />
your phone’s camera:<br />
You cannot activate the camera while on an<br />
active call or while browsing files in the<br />
media gallery.<br />
Once the camera is active, the main screen acts<br />
as the viewfinder.<br />
If you get a “Low memory” error, check your<br />
resolution and quality compression settings.<br />
If there is no activity within 45 seconds after<br />
you turn your camera on, the camera quits and<br />
returns to the previous launch point.<br />
Menu settings and options can only be<br />
accessed when the camera is active.<br />
Taking a picture<br />
To take a picture:<br />
Activate the camera in one of the<br />
NK<br />
following ways:<br />
Press `~ãÉê~ the key until the camera<br />
screen appears.<br />
jÉåì Select máÅíìêÉë > > q~âÉ=~=éáÅíìêÉ.<br />
Focus on the image using the phone’s display<br />
OK<br />
as a viewfinder.<br />
Take a picture in one of the following ways:<br />
PK<br />
Press lh the key.<br />
Press `~ãÉê~ the key.<br />
Select `~éíìêÉ.<br />
The picture is saved to the jó=éáÅíìêÉë<br />
QK<br />
folder.<br />
Select pÉåÇ to create a picture message or<br />
RK<br />
to delete the picture from your phone.<br />
bê~ëÉ<br />
Press the båÇ key to exit picture mode.<br />
SK<br />
Picture mode options<br />
You can set up how your camera takes pictures.<br />
While in picture mode, select léíáçåë and one of<br />
the following:<br />
pÉííáåÖë displays the following camera settings<br />
you may set up prior to taking a picture:<br />
Ó cä~ëÜ sets the camera flash as ^ìíçã~íáÅ,<br />
lå, or lÑÑ.<br />
oÉëçäìíáçå sets the horizontal and vertical<br />
number of pixels for the picture.<br />
içï=äáÖÜí=ãçÇÉ brightens the picture for low<br />
light environments.<br />
pÉäÑ=íáãÉê sets up a countdown timer to<br />
automatically take a picture when the timer<br />
expires. When set, the camera beeps from 3<br />
seconds down to the time the shutter<br />
automatically snaps the picture (unavailable<br />
for Multishot mode).<br />
jìäíáëÜçí takes up to six multiple pictures<br />
with the `~ãÉê~ key pressed and held. A tone<br />
plays each time a picture is taken. A second<br />
tone plays when the final picture is taken.<br />
<strong>User</strong> Guide 43
pÜìííÉê=ëçìåÇ sets the sound used when the<br />
camera takes a picture.<br />
tÜáíÉ=Ä~ä~åÅÉ adjusts the camera for<br />
different lighting.<br />
`çäçê=íçåÉ sets the color tone of the picture.<br />
máÅíìêÉ=èì~äáíó sets the picture compression.<br />
The higher the compression, the better the<br />
detail of the picture (higher pixel rate). When<br />
set to eáÖÜ, the picture file size is larger, using<br />
more memory.<br />
iba flashes the indicator light when taking<br />
apicture.<br />
sáÉïÑáåÇÉê=Çáëéä~ó sets the camera viewfinder<br />
as cìääëÅêÉÉå or ^Åíì~ä.<br />
√ _êáÖÜíåÉëë adjusts the brightness of the image<br />
in the main screen LCD.<br />
√ jó=éáÅíìêÉë displays all pictures taken<br />
and stored.<br />
i~ëí=éáÅíìêÉ displays the most recently<br />
taken picture.<br />
cê~ãÉë adds a frame or a stamp to your<br />
picture. A frame or stamp cannot be removed<br />
once it has been used in a picture. The picture<br />
resolution changes to NOM=ñ=NSM (with the<br />
number keypad) or NSMñNOM (with the<br />
QWERTY keypad) while taking pictures with<br />
cê~ãÉë enabled. The resolution returns to the<br />
original setting with cê~ãÉë disabled.<br />
kçíÉW The following settings revert to the default<br />
setting each time you enter and exit the camera<br />
application: içï=äáÖÜí=ãçÇÉ, pÉäÑ=íáãÉê,<br />
jìäíáëÜçí, and sáÉïÑáåÇÉê=Çáëéä~ó.<br />
Picture mode indicators<br />
and icons<br />
The camera may display the following on screen<br />
indicators and icons.<br />
kçíÉW Numbers in the top right corner indicate<br />
the number of snapshot remaining. Numbers in<br />
the bottom left corner indicate the resolution<br />
setting for pictures.<br />
Flash is on.<br />
Camera is in picture mode.<br />
Multishot feature is on.<br />
Self-timer feature is on<br />
44 Picture mode indicators and icons
12 Settings<br />
Menu options<br />
The contents of the Settings menu are as follows:<br />
Bluetooth<br />
On/Off<br />
My devices<br />
Settings<br />
Keyguard<br />
Guard on close<br />
Disabled<br />
Sounds<br />
Ringtone volume<br />
Ringtones<br />
Business ringtones<br />
Personal ringtones<br />
Flip closed<br />
Flip open<br />
Pwr on/off sound<br />
Key volume<br />
Key length<br />
Alerts<br />
Smart volume<br />
Minute alert<br />
Earpiece volume<br />
Spkrphone volume<br />
Display<br />
Greeting banner<br />
Menu style<br />
Wallpapers<br />
Screensavers<br />
Backlight<br />
Auto-hyphen<br />
Time/Date format<br />
Brightness<br />
Convenience<br />
Open to answer<br />
Fast find<br />
Frequent list<br />
Hold call<br />
1-Touch dialing<br />
Any key<br />
Call options<br />
Add voice dial<br />
Erase voice dial<br />
Voice training<br />
Voice wake-up<br />
Voice answer<br />
Expert mode<br />
Auto-answer<br />
Messaging<br />
Alerts<br />
Auto text<br />
Text entry<br />
Signature<br />
Save to outbox<br />
Auto-erase<br />
Camera<br />
Resolution<br />
Picture quality<br />
Shutter sound<br />
Viewfinder display<br />
kçíÉ: Some features may not be available. For more information, visit www.virginmobileusa.com.<br />
Security<br />
Lock phone<br />
Change lock code<br />
Emergency numbers<br />
Erase contacts<br />
Network<br />
Privacy alert<br />
Location<br />
Accessories<br />
Headset sound<br />
Auto-answer<br />
Pwr backlighting<br />
TTY device<br />
Hearing aid<br />
Phone info<br />
Build info<br />
Icon keys<br />
<strong>User</strong> Guide 45
Bluetooth<br />
The Bluetooth ® wireless technology on your<br />
phone enables wireless connectivity with<br />
headsets. You must use a Bluetooth wireless<br />
technology device (compatible with Class 2<br />
Bluetooth wireless technology, version 1.2) in<br />
order to use this phone wirelessly. Bluetooth<br />
wireless technology accessories have the<br />
symbol. For additional information on carriersupported<br />
profiles and third-party accessory<br />
compatibility for Bluetooth wireless technology,<br />
visit www.kyocera-wireless.com/support.<br />
Turning Bluetooth on<br />
You must turn on your phone’s Bluetooth feature<br />
to use it with Bluetooth wireless technology<br />
headsets. Select jÉåì > pÉííáåÖë > _äìÉíççíÜ ><br />
låLlÑÑ and one of the following:<br />
lå=sáëáÄäÉ allows other headsets to find<br />
your phone.<br />
lå=fåîáëáÄäÉ hides your phone for all headsets<br />
except those listed in your jó=ÇÉîáÅÉë.<br />
lÑÑ prohibits your phone from being used with<br />
any Bluetooth wireless technology headset. To<br />
prolong battery life, it is recommended to set<br />
_äìÉíççíÜ to lÑÑ when you are not using it.<br />
When you turn Bluetooth On the first time, you<br />
are prompted to do a device search. Then you can<br />
pair with a headset.<br />
Pairing<br />
You must first “pair” your phone with the<br />
Bluetooth wireless technology enabled headset to<br />
allow your phone to communicate with it. Refer to<br />
the following instructions for setting up Bluetooth<br />
wireless technology in conjunction with the user<br />
guide provided with your Bluetooth wireless<br />
technology headset.<br />
Select jÉåì > pÉííáåÖë > _äìÉíççíÜ ><br />
NK<br />
> lå=sáëáÄäÉ or lå=fåîáëáÄäÉ.<br />
låLlÑÑ<br />
Prepare the Bluetooth wireless technology<br />
OK<br />
headset (Bluetooth accessory) for pairing as<br />
described in the other headset’s user guide.<br />
Select jÉåì > pÉííáåÖë > _äìÉíççíÜ ><br />
PK<br />
ÇÉîáÅÉë > cáåÇ=åÉï. Your phone then<br />
jó<br />
searches and detects visible Bluetooth<br />
wireless technology enabled headsets in<br />
the vicinity.<br />
With headsets found, select ^ÇÇ to see the<br />
QK<br />
list.<br />
Highlight your desired headset and select<br />
RK<br />
^ÇÇ.<br />
When pairing is initiated from another<br />
SK<br />
Bluetooth wireless technology headset, you<br />
are prompted to accept or reject the pairing.<br />
If necessary, enter the password provided in<br />
TK<br />
the Bluetooth wireless technology headset’s<br />
user guide and select lh.<br />
46 Bluetooth
Your phone waits for the headset’s response.<br />
UK<br />
With the password accepted, the headset<br />
shows in jó=ÇÉîáÅÉë.<br />
Using Bluetooth<br />
Before you can use the Bluetooth wireless<br />
technology functions of your phone, you must get<br />
your phone ready to communicate with a headset.<br />
This is called “connecting.”<br />
Connecting to a headset<br />
To connect your phone to an audio Bluetooth<br />
wireless technology headset:<br />
Select jÉåì > pÉííáåÖë > _äìÉíççíÜ ><br />
NK<br />
ÇÉîáÅÉë. jó<br />
At the device list, highlight a headset and<br />
OK<br />
select `çååÉÅí.<br />
A notification appears confirming the connection.<br />
You can now use the headset with your phone.<br />
Disconnecting from a headset<br />
To disconnect your phone from an audio<br />
Bluetooth wireless technology headset:<br />
Select jÉåì > pÉííáåÖë > _äìÉíççíÜ ><br />
NK<br />
ÇÉîáÅÉë. jó<br />
At the device list, highlight a headset and<br />
OK<br />
select aáëÅçååÉÅí.<br />
Device list options<br />
You can change or review the information about<br />
each headset you paired with your phone.<br />
Select jÉåì > pÉííáåÖë > _äìÉíççíÜ ><br />
NK<br />
ÇÉîáÅÉë. jó<br />
Highlight your desired headset.<br />
OK<br />
Select léíáçåë and one of the following:<br />
PK<br />
to rename the headset.<br />
oÉå~ãÉ<br />
to remove the headset from your<br />
aÉäÉíÉ<br />
phone if you are no longer going to use it.<br />
to view a description of the<br />
pÉêîáÅÉë<br />
headset.<br />
Bluetooth settings<br />
You can set how your phone interacts with<br />
Bluetooth wireless technology devices. Select<br />
jÉåì > pÉííáåÖë > _äìÉíççíÜ > pÉííáåÖë and<br />
one of the following:<br />
jó=å~ãÉ=changes the name of your phone for<br />
other devices it is paired with to identify.<br />
sáëáÄäÉ=Çìê~íáçå sets the time your phone<br />
remains visible to other devices.<br />
pÉêîáÅÉë shows the list of the Bluetooth<br />
wireless technology service protocol<br />
supported by your phone.<br />
<strong>User</strong> Guide 47
Keyguard<br />
Lock the keyguard<br />
The keyguard locks the external number keypad<br />
on your phone to prevent accidental keypresses<br />
when the phone is turned on and a call is not in<br />
progress. You can still answer or silence an<br />
incoming call.<br />
To lock the keypad, press and hold the<br />
G=pÜáÑí key.<br />
To unlock the keypad, select hÉóÖì~êÇ and<br />
press the lh key.<br />
Set the keyguard<br />
You can set the phone to lock the keypad<br />
automatically when the flip is closed. Select<br />
> pÉííáåÖë > hÉóÖì~êÇ > dì~êÇ=çå=ÅäçëÉ<br />
jÉåì<br />
to activate the keyguard everytime the flip<br />
is closed.<br />
Sounds<br />
Your phone has several settings for sound control.<br />
You can select from a variety of ringtones and<br />
control the volume.<br />
Volume<br />
Ringtone, Key, Earpiece, and<br />
Speakerphone Volume<br />
To adjust the ringtone, keypad tone, earpiece, or<br />
speakerphone volume:<br />
Select jÉåì > pÉííáåÖë > pçìåÇë ><br />
NK<br />
oáåÖíçåÉ=îçäìãÉ, b~êéáÉÅÉ=<br />
hÉó=îçäìãÉ,<br />
îçäìãÉ, or péâêéÜçåÉ=îçäìãÉ.<br />
Scroll right to increase the volume, or left to<br />
OK<br />
decrease the volume.<br />
Select p~îÉ.<br />
PK<br />
Smart volume<br />
To automatically adjust the volume during a call<br />
based on surrounding noise levels, select jÉåì ><br />
pÉííáåÖë > pçìåÇë > pã~êí=îçäìãÉ > bå~ÄäÉÇ.<br />
Ringtones<br />
Your phone has multiple ringtones you can<br />
choose for incoming calls. You can also assign<br />
ringtones for contacts in your business or<br />
personal group. Select jÉåì > pÉííáåÖë ><br />
pçìåÇë > oáåÖíçåÉë, _ìëáåÉëë=êáåÖíçåÉë, or<br />
mÉêëçå~ä=êáåÖíçåÉë and a ringtone. You can hear<br />
the ringtones as you scroll down the list.<br />
Flip Sounds<br />
To set your phone’s sound tones when its flip<br />
closes or opens, select jÉåì > pÉííáåÖë ><br />
pçìåÇë > cäáé=ÅäçëÉÇ or cäáé=çéÉå and a<br />
sound. You can hear the sounds as you scroll<br />
down the list.<br />
Power on/off sound<br />
You can set your phone to play a sound when it<br />
powers on or off. Select jÉåì > pÉííáåÖë ><br />
pçìåÇë > mçïÉê=çåLçÑÑ=ëçìåÇ > bå~ÄäÉÇ.<br />
48 Keyguard
Key length<br />
To control the length of the keypad tones, select<br />
jÉåì > pÉííáåÖë > pçìåÇë > hÉó=äÉåÖíÜ and<br />
one of the following:<br />
kçêã~ä sets the keypad tones to<br />
normal length.<br />
içåÖ sets the keypad tones to long length.<br />
Alerts<br />
Minute alert<br />
Your phone can alert you with a short beep ten<br />
seconds before each minute passes during a call.<br />
Select jÉåì > pÉííáåÖë > pçìåÇë ><br />
jáåìíÉ ~äÉêí > bå~ÄäÉÇ.<br />
Other alerts<br />
You can choose the alert type for voicemails,<br />
pages, text messages or missed calls. Select<br />
jÉåì > pÉííáåÖë > pçìåÇë > ^äÉêíë ><br />
jëÖ ~äÉêí, m~ÖÉ=~äÉêí, sçáÅÉã~áä=~äÉêí, or<br />
jáëëÉÇ=Å~ää=~äÉêí and a ringtone. Scroll through<br />
the list to hear the different ringtones. You can<br />
also select jÉåì > pÉííáåÖë > pçìåÇë ><br />
^äÉêíë > oÉãáåÇÉê > lå to set the phone to<br />
notify you with the selected ringtone every five<br />
minutes until you address the alert.<br />
Display<br />
Greeting banner<br />
The banner is the personal label for your phone.<br />
It appears on the main screen above the time and<br />
date. The banner can be up to 14 characters long.<br />
To change your banner:<br />
NK Select jÉåì > pÉííáåÖë > aáëéä~ó ><br />
dêÉÉíáåÖ=Ä~ååÉê.<br />
OK Select bÇáí and press the _~Åâ key to clear<br />
the current banner.<br />
PK Enter your new text and select p~îÉ.<br />
Menu style<br />
To select a menu style, select jÉåì > pÉííáåÖë ><br />
aáëéä~ó > jÉåì=ëíóäÉ and one of the following:<br />
dê~éÜáÅ displays icons of each menu item,<br />
with its name at the bottom of the screen.<br />
iáëí displays a list of each menu item.<br />
The next time you select jÉåì from the main<br />
screen, your selected menu style appears.<br />
Wallpapers<br />
You can select a wallpaper for your phone’s<br />
main screen.<br />
NK Select jÉåì > pÉííáåÖë > aáëéä~ó ><br />
t~ääé~éÉêë.<br />
<strong>User</strong> Guide 49
Select one of the following options:<br />
OK<br />
Scroll to highlight a wallpaper, press the<br />
key, and select ^ëëáÖå to select a<br />
lh<br />
wallpaper.<br />
léíáçåë Select q~âÉ=~=éáÅíìêÉ > to take a<br />
new picture.<br />
léíáçåë Select jó=éáÅíìêÉë > to select an<br />
existing picture.<br />
léíáçåë Select jó=Öê~éÜáÅë > to select an<br />
existing image.<br />
Follow the prompts to save your selection.<br />
PK<br />
Screensavers<br />
Screen savers appear on the main screen when<br />
the flip is open or closed. A screen saver activates<br />
10 seconds after the last keypress. Incoming calls<br />
and alerts override the screen savers. See<br />
“Wallpapers” on page 49.<br />
Backlight<br />
Your screen lights up while you are in a call or<br />
when you press a key on the keypad. The<br />
backlight automatically turns off when the<br />
phone is inactive.<br />
Backlight duration<br />
You can set the length of time that bright<br />
backlighting remains on. jÉåì Select ><br />
> aáëéä~ó > _~ÅâäáÖÜí > aìê~íáçå and<br />
pÉííáåÖë<br />
one of the following:<br />
turns backlighting off.<br />
aáë~ÄäÉÇ<br />
T=ëÉÅçåÇë, NR=ëÉÅçåÇë, PM=ëÉÅçåÇë<br />
or<br />
turns backlighting on for the set time after<br />
your last keypress.<br />
T=ëÉÅK=C=áå=Å~ää, NR=ëÉÅK=C=áå=Å~ää, PM=ëÉÅK= or<br />
turns backlighting on for the<br />
C=áå=Å~ää<br />
duration of a call, and for the set time after<br />
your last keypress.<br />
The “in call” settings drain the battery<br />
kçíÉW<br />
more quickly.<br />
Power save mode<br />
You can conserve battery life by activating power<br />
save mode to dim the backlight. The power save<br />
mode sets the backlight of the phone to the lowest<br />
level. jÉåì Select pÉííáåÖë > aáëéä~ó > ><br />
> mïê=ë~îÉ=ãçÇÉ > lå.<br />
_~ÅâäáÖÜí<br />
Auto-hyphen<br />
Auto-hyphenation, when enabled, automatically<br />
inserts hyphens into your phone numbers to be<br />
consistent with the U.S. dialing plan, such as<br />
1-222-333-4444. Select jÉåì > pÉííáåÖë ><br />
aáëéä~ó > ^ìíçJÜóéÜÉå > bå~ÄäÉÇ.<br />
Time and date format<br />
Your phone can display different time/date<br />
formats. Select jÉåì > pÉííáåÖë > aáëéä~ó ><br />
qáãÉLa~íÉ=Ñçêã~í and a format.<br />
50 Display
Brightness<br />
To change the brightness of the display:<br />
Select jÉåì > pÉííáåÖë > aáëéä~ó ><br />
NK<br />
_êáÖÜíåÉëë.<br />
Scroll to change the brightness.<br />
OK<br />
PK Select p~îÉ.<br />
Convenience<br />
You phone provides you with settings that may<br />
make your phone more convenient to use.<br />
Open to answer<br />
You can open the flip of your phone to answer a<br />
call. Select jÉåì > pÉííáåÖë > `çåîÉåáÉåÅÉ ><br />
léÉå=íç=~åëïÉê > bå~ÄäÉÇ.<br />
Fast find<br />
To use fast find, select jÉåì > pÉííáåÖë ><br />
`çåîÉåáÉåÅÉ > c~ëí=ÑáåÇ > bå~ÄäÉÇ.<br />
With Fast find enabled, you can press one or two<br />
keys to view close matches of the number you are<br />
looking for.<br />
NK With the number keypad, from the main<br />
screen, press the keys corresponding to the<br />
letters of the name you want to find. A<br />
matching contact or speed dial entry appears.<br />
OK Highlight the contact you want and press the<br />
`~ää key to call the number.<br />
Frequent list<br />
To use frequent list, select jÉåì > pÉííáåÖë ><br />
`çåîÉåáÉåÅÉ > cêÉèìÉåí=äáëí > bå~ÄäÉÇ.<br />
From the main screen, select `çåí~Åíë. With the<br />
cêÉèìÉåí=äáëí enabled, the last 15 contacts of<br />
your most frequently called contacts appear.<br />
Scroll past the double line to view the entire<br />
contacts list.<br />
Hold call<br />
With the Hold call feature, you can place<br />
incoming calls on hold until you are ready to<br />
answer them.<br />
The Hold call feature does not work with<br />
kçíÉW<br />
the Open to answer feature enabled. See “Open to<br />
answer” on page 51.<br />
Enable hold call feature<br />
Select jÉåì > pÉííáåÖë > `çåîÉåáÉåÅÉ ><br />
NK<br />
and one of the following:<br />
eçäÇ=Å~ää<br />
turns hold call off.<br />
aáë~ÄäÉÇ<br />
turns hold call on.<br />
bå~ÄäÉÇ<br />
records a new hold call<br />
oÉJêÉÅçêÇ=ãëÖ<br />
message.<br />
With no hold message recorded, the phone<br />
OK<br />
prompts you to record one, such as “Please<br />
hold. I’ll answer in a minute.”<br />
Record the message twice, as prompted.<br />
PK<br />
<strong>User</strong> Guide 51
Select p~îÉ to save the message or léíáçåë<br />
QK<br />
and one of the following:<br />
to replay your message.<br />
mä~ó<br />
to record your message again.<br />
oÉJêÉÅçêÇ<br />
to exit. bñáí<br />
The next time a call comes in, you can place it<br />
on hold.<br />
Place a call on hold<br />
You can place a call on hold once you have<br />
enabled the Hold call feature.<br />
If you are already on a call and you receive<br />
kçíÉW<br />
another call, you cannot place the incoming call<br />
on hold. With no call waiting enabled, the call<br />
goes to voicemail instead.<br />
When a call comes in:<br />
Select eçäÇ=Å~ää. The caller is placed on hold<br />
NK<br />
and then hear your recorded hold message.<br />
Select ^åëïÉê to speak to the caller on hold<br />
OK<br />
båÇ=Å~ää or to hang up without speaking.<br />
Change the hold message<br />
Select jÉåì > pÉííáåÖë > `çåîÉåáÉåÅÉ ><br />
NK<br />
> oÉJêÉÅçêÇ=ãëÖ.<br />
eçäÇ=Å~ää<br />
Record the message twice, as prompted.<br />
OK<br />
Select p~îÉ to save the message or léíáçåë<br />
PK<br />
and one of the following:<br />
to replay your message.<br />
mä~ó<br />
to record your message again.<br />
oÉJêÉÅçêÇ<br />
to exit. bñáí<br />
1-Touch dialing<br />
The 1-touch dialing feature is the fastest way to<br />
speed dial a contact that has a speed dial location.<br />
To use 1-touch dialing, you must enable 1-touch<br />
dialing on your phone and have a speed dial<br />
location assigned to a contact.<br />
To enable 1-touch dialing, select jÉåì ><br />
pÉííáåÖë > `çåîÉåáÉåÅÉ > NJqçìÅÜ=Çá~äáåÖ ><br />
bå~ÄäÉÇ. To call a contact that has a speed<br />
dial location, press and hold the speed<br />
dialing number.<br />
kçíÉW If it is a two-digit number, press the first<br />
digit briefly, then press and hold the second digit.<br />
For example, if the speed dialing location is 15,<br />
press 1 briefly, then press and hold 5.<br />
Any key<br />
To set the phone to answer or silence calls when<br />
you press any key, select jÉåì > pÉííáåÖë ><br />
`çåîÉåáÉåÅÉ > ^åó=âÉó > ^åó=âÉó=~åëïÉê (to<br />
answer calls with any key except the båÇ, _~Åâ,<br />
or k~îáÖ~íáçå key) or ^åó=âÉó=ãìíÉ=(to mute the<br />
ringtone on incoming calls with any key except<br />
the pÉåÇ or péÉ~âÉêéÜçåÉ key).<br />
Call options<br />
Use `~ää=çéíáçåë to customize the voice<br />
commands.<br />
52 Call options
Add voice dial<br />
You can add a new voice dial to your phone.<br />
Select jÉåì > pÉííáåÖë > `~ää=çéíáçåë ><br />
NK<br />
^ÇÇ=îçáÅÉ=Çá~ä.<br />
At the voice prompt, say a name.<br />
OK<br />
At the voice prompt, repeat the name.<br />
PK<br />
QK Select one of the following:<br />
creates a new contact.<br />
^ÇÇ=kÉï<br />
adds the voice tag to an<br />
^ÇÇ=íç=ÉñáëíáåÖ<br />
existing contact.<br />
Erase voice dial<br />
You can erase all existing voice dial tags from<br />
your phone. Select jÉåì > pÉííáåÖë ><br />
`~ää çéíáçåë > bê~ëÉ=îçáÅÉ=Çá~ä > vÉë.<br />
Voice training<br />
If you phone is having trouble recognizing your<br />
voice, you can train with the vÉë, kç, and<br />
t~âÉ ìé commands. Select jÉåì > pÉííáåÖë ><br />
`~ää=çéíáçåë > sçáÅÉ=íê~áåáåÖ > lh > qê~áå=^ää<br />
or the item you want to train. Follow the prompts<br />
for each word until training is complete.<br />
Voice wake-up<br />
You can set your phone to make a call using a<br />
hands-free accessory.<br />
kçíÉW Voice wake-up does not work with<br />
keyguard active.<br />
Enable voice wake-up<br />
jÉåì Select pÉííáåÖë > `~ää=çéíáçåë > ><br />
ï~âÉJìé > táíÜ=~ÅÅÉëëçêó to enable calls<br />
sçáÅÉ<br />
with an accessory.<br />
Use voice wake-up<br />
To wake up the phone:<br />
Say “Wake Up” and listen for a tone.<br />
NK<br />
Say “Wake Up” again until you hear<br />
OK<br />
two tones.<br />
If the phone does not recognize your Wake Up<br />
command, see “Voice training” on page 53.<br />
Voice answer<br />
You can set your phone to answer a call<br />
automatically when using a hands-free headset.<br />
Enable voice answer<br />
jÉåì Select pÉííáåÖë > `~ää=çéíáçåë > ><br />
~åëïÉê > bå~ÄäÉÇ to enable answering a<br />
sçáÅÉ<br />
call with an accessory. To use the Voice answer<br />
feature, you must have the Auto-answer feature<br />
(see “Auto-answer” on page 56) disabled and the<br />
phone set to Normal Sounds.<br />
Use voice answer<br />
When you receive an incoming call, the phone<br />
prompts “Incoming call, answer?” or “Incoming<br />
roam call, answer?” If the caller is recognized as a<br />
contact entry in your phone, the phone prompts<br />
“Incoming call from (Name), answer?”<br />
<strong>User</strong> Guide 53
Say “Yes” or press any key except the båÇ key to<br />
answer. Say “No” and press the båÇ key to silence<br />
the alert. Remain silent. The voice alert repeats<br />
twice and the phone rings once, then returns to<br />
the main screen.<br />
Expert mode<br />
With the expert mode enabled, instead of<br />
speaking a command following the initial voice<br />
prompts, you can speak the command after you<br />
hear a tone.<br />
Select jÉåì > pÉííáåÖë > `~ää=çéíáçåë ><br />
bñéÉêí ãçÇÉ and one of the following:<br />
kçêã~ä sets phone to default voice prompts.<br />
bñéÉêí sets phone to sound tones instead of<br />
voice prompts.<br />
Auto-answer<br />
With a hands-free headset attached, you can set<br />
your phone to answer automatically. Select<br />
jÉåì > pÉííáåÖë > `~ää=çéíáçåë ><br />
^ìíçJ~åëïÉê > ^ÑíÉê=R=ëÉÅçåÇë to set the phone<br />
to automatically answer after 5 seconds.<br />
Messaging<br />
Messaging settings help configure your phones<br />
text and picture message settings.<br />
See “Message settings” on page 28.<br />
Camera<br />
You can set up how your camera takes pictures.<br />
Select jÉåì > pÉííáåÖë > `~ãÉê~ and one of the<br />
following:<br />
oÉëçäìíáçå sets the horizontal and vertical<br />
number of pixels for the picture.<br />
máÅíìêÉ=èì~äáíó sets the picture compression.<br />
The higher the compression, the better the<br />
detail of the picture (higher pixel rate). When<br />
set to eáÖÜ, the picture file size is larger, using<br />
more memory.<br />
√ pÜìííÉê=ëçìåÇ sets the sound used when the<br />
camera takes a picture.<br />
√ sáÉïÑáåÇÉê=Çáëéä~ó sets the camera<br />
viewfinder as cìääëÅêÉÉå or ^Åíì~ä.<br />
Security<br />
This section describes all the features involved in<br />
securing your phone and preventing access to<br />
personal information. All security features are<br />
shielded by a four-digit lock code.<br />
Lock phone<br />
When your phone is locked, you can call only<br />
emergency numbers or <strong>Virgin</strong> <strong>Mobile</strong>’s<br />
customer service number. You can still receive<br />
incoming calls.<br />
Select jÉåì > pÉííáåÖë > pÉÅìêáíó.<br />
NK<br />
Enter your four-digit lock code.<br />
OK<br />
54 Messaging
Select içÅâ=éÜçåÉ and one of the following:<br />
PK<br />
leaves the phone always unlocked.<br />
kÉîÉê<br />
locks the phone every time<br />
lå=éçïÉê=ìé<br />
you turn it on.<br />
locks the phone immediately.<br />
kçï<br />
To unlock the phone:<br />
From the main screen, select råäçÅâ.<br />
NK<br />
Enter your four-digit lock code.<br />
OK<br />
Change lock code<br />
Change your lock code from the default provided<br />
by the service provider. The lock code is typically<br />
0000 or the last 4 digits of your phone number.<br />
Select jÉåì > pÉííáåÖë > pÉÅìêáíó.<br />
NK<br />
Enter your four-digit lock code.<br />
OK<br />
Select `Ü~åÖÉ=äçÅâ=ÅçÇÉ > vÉë.<br />
PK<br />
Enter a new four-digit code.<br />
QK<br />
Re-enter your new lock code.<br />
RK<br />
The lock is now changed.<br />
Emergency numbers<br />
The emergency numbers feature allows you to<br />
specify three personal phone numbers that can be<br />
called when the phone is locked.<br />
Select jÉåì > pÉííáåÖë > pÉÅìêáíó.<br />
NK<br />
Enter your four-digit lock code.<br />
OK<br />
Select bãÉêÖÉåÅó=åìãÄÉêë.<br />
PK<br />
Select an rå~ëëáÖåÉÇ slot.<br />
QK<br />
Enter the phone number, including the area<br />
RK<br />
code. Do not enter 1 before the area code.<br />
Select açåÉ.<br />
SK<br />
You can view these numbers only when they’re<br />
being entered for the first time. To make a call to<br />
an emergency number from a locked phone, you<br />
must dial the number (including area code)<br />
exactly as it is stored in Emergency numbers.<br />
Erase contacts<br />
You can erase all entries from your contacts list.<br />
Select jÉåì > pÉííáåÖë > pÉÅìêáíó.<br />
NK<br />
Enter your four-digit lock code.<br />
OK<br />
Select bê~ëÉ=Åçåí~Åíë > vÉë > vÉë.<br />
PK<br />
Network<br />
Privacy alert<br />
To set your phone to alert you when enhanced<br />
digital CDMA privacy is lost or regained, select<br />
jÉåì > pÉííáåÖë > kÉíïçêâ > mêáî~Åó=~äÉêí ><br />
bå~ÄäÉÇ.<br />
Location<br />
Use this setting to share your location information<br />
with network services other than emergency<br />
services (for example, 911, 111, 999 and 000) in<br />
markets where service has been implemented.<br />
Select jÉåì > pÉííáåÖë > kÉíïçêâ > içÅ~íáçå<br />
and one of the following:<br />
<strong>User</strong> Guide 55
(default) shares your position<br />
VNN=çåäó<br />
information only with emergency services<br />
when you call your 3-digit emergency code.<br />
shares your position information,<br />
içÅ~íáçå=çå<br />
in addition to emergency services.<br />
This feature works only when your phone<br />
kçíÉW<br />
is in digital mode. You cannot turn off the locator<br />
to emergency services.<br />
Accessories<br />
This section describes settings that affect the<br />
accessories you use with your phone.<br />
Headset sound<br />
With a headset attached to your phone, the<br />
ringtone can be played through the headset or<br />
phone speaker. jÉåì Select pÉííáåÖë > ><br />
> eÉ~ÇëÉí=ëçìåÇ and one of<br />
^ÅÅÉëëçêáÉë<br />
the following:<br />
rings from the phone speaker.<br />
lìí=çÑ=éÜçåÉ<br />
rings from the headset.<br />
lìí=çÑ=ÜÉ~ÇëÉí<br />
Auto-answer<br />
With a hands-free headset attached, you can set<br />
your phone to answer automatically. Select<br />
> pÉííáåÖë > ^ÅÅÉëëçêáÉë ><br />
jÉåì<br />
> ^ÑíÉê=R=ëÉÅçåÇë to set the phone<br />
^ìíçJ~åëïÉê<br />
to automatically answer after 5 seconds.<br />
Power backlighting<br />
You can set backlighting to remain on when an<br />
external power source, such as the AC adapter, is<br />
used with the phone.<br />
kçíÉW Power backlighting may not be available<br />
with the optional desktop charger or other<br />
accessories. The battery charges more slowly with<br />
power backlighting on.<br />
Select jÉåì > pÉííáåÖë > ^ÅÅÉëëçêáÉë ><br />
mïê Ä~ÅâäáÖÜíáåÖ > kçêã~ä or ^äï~óë=çå.<br />
qáéW Use the power backlighting as a night light<br />
when traveling.<br />
TTY device<br />
You can connect the phone to a TTY device for the<br />
hearing impaired.<br />
kçíÉW Enable qqv=ÇÉîáÅÉ only when using the<br />
phone with a TTY device.<br />
NK Connect the TTY device to the phone.<br />
OK Select jÉåì > pÉííáåÖë > ^ÅÅÉëëçêáÉë ><br />
qqv=ÇÉîáÅÉ (or enter @@UUV from the main<br />
screen and select qqv) > lh > qqv=çå.<br />
Hearing aid<br />
You can use your phone with a hearing aid device.<br />
Select jÉåì > pÉííáåÖë > ^ÅÅÉëëçêáÉë ><br />
eÉ~êáåÖ=~áÇ > lh > bå~ÄäÉÇ.<br />
kçíÉW Enable eÉ~êáåÖ=~áÇ only when using the<br />
phone with a hearing aid device.<br />
56 Accessories
Phone information<br />
You can access information regarding your<br />
phone. Select jÉåì > pÉííáåÖë > mÜçåÉ=áåÑç and<br />
one of the following:<br />
_ìáäÇ=áåÑç shows specific software and<br />
hardware information for your phone.<br />
fÅçå=âÉóë shows the icons used by<br />
your phone.<br />
<strong>User</strong> Guide 57
13 Tools<br />
Voice memo<br />
The Voice memo tool enables you to record and<br />
play back audio memos.<br />
Record voice memos<br />
To record new voice memos:<br />
Select jÉåì > qççäë > sçáÅÉ=ãÉãç ><br />
NK<br />
oÉÅçêÇ=åÉï.<br />
Record your voice memo. Select píçé when<br />
OK<br />
you are done.<br />
Select p~îÉ to save your memo.<br />
PK<br />
If an incoming call is received while you are<br />
recording a memo, the memo is saved and the<br />
incoming call screen appears.<br />
Review voice memos<br />
To play and use voice memos:<br />
Select jÉåì > qççäë > sçáÅÉ=ãÉãç ><br />
NK<br />
oÉÅçêÇÉÇ=ãÉãçë.<br />
At the file list, highlight a file.<br />
OK<br />
Select mä~ó to listen to the memo or léíáçåë<br />
PK<br />
and one of the following:<br />
to record a new voice memo.<br />
oÉÅçêÇ=åÉï<br />
to erase the memo.<br />
bê~ëÉ<br />
to prevent accidental erasing of<br />
içÅâ<br />
the sound.<br />
to rename the sound.<br />
oÉå~ãÉ<br />
to look at details of the file.<br />
aÉí~áäë<br />
to erase all memos stored.<br />
bê~ëÉ=~ää<br />
Playback tools<br />
When you playback a sound, scroll left or right to<br />
select the playback tools displayed on the screen.<br />
Start or continue the file.<br />
Stop the playback.<br />
Pause the playback.<br />
Mute the playback.<br />
Unmute the playback.<br />
Scheduler<br />
Use the Scheduler to schedule events and set<br />
reminder alerts.<br />
Create an event<br />
Select jÉåì > qççäë > pÅÜÉÇìäÉê ><br />
NK<br />
åÉï=ÉîÉåí.<br />
^ÇÇ<br />
At the Event Name field, enter a name. Scroll<br />
OK<br />
down to move to the next field when done.<br />
At the Type field, press lh and scroll through<br />
PK<br />
the list to select a type.<br />
58 Voice memo
At the Date field, press lh to change the date.<br />
QK<br />
Scroll left or right to move between month,<br />
day, and year fields.<br />
Scroll up or down to change month, day,<br />
and year.<br />
lh Press to save date and move to the<br />
next field.<br />
At the Time field, press lh to change<br />
RK<br />
the time.<br />
Scroll left or right to move between hour,<br />
minute and AM/PM fields.<br />
Scroll up or down to change hour, minute<br />
and AM/PM.<br />
lh Press to save time and move to the<br />
next field.<br />
At the Duration field, press lh to change<br />
SK<br />
the duration.<br />
Scroll left or right to move between hour<br />
and minute fields.<br />
Scroll up or down to change hour<br />
and minute.<br />
lh Press to save duration and move to the<br />
next field.<br />
At the Priority field, press lh and select a<br />
TK<br />
priority from the list.<br />
At the Reminder field, press lh and select a<br />
UK<br />
reminder from the list.<br />
At the Reminder Sound field, press lh and<br />
VK<br />
select a reminder sound from the list.<br />
At the Silent Mode field, press lh and select a<br />
NMK<br />
Silent mode setting.<br />
At the Recurring Event field, press lh and<br />
NNK<br />
select an option from the list.<br />
Select p~îÉ.<br />
NOK<br />
View events<br />
You can view the events saved to the scheduler.<br />
View by date<br />
Select jÉåì > qççäë > pÅÜÉÇìäÉê and one<br />
NK<br />
of the following:<br />
to see the current month.<br />
sáÉï=ãçåíÜ<br />
Days with events are highlighted. Scroll<br />
through the calendar and lh press to<br />
select a date.<br />
to see the current date. Scroll<br />
sáÉï=Ç~ó<br />
right or left to move to another date.<br />
to select a specific date. Scroll<br />
dç=íç=Ç~íÉ<br />
left or right to move between month, day,<br />
and year fields. Scroll up or down to<br />
change month, day, and year. lh Press to<br />
select the date.<br />
At the day view, do one of the following:<br />
OK<br />
Highlight an existing event and press the<br />
key to view the event detail.<br />
lh<br />
Highlight a time and ^ÇÇ=åÉï select to<br />
create a new event.<br />
léíáçåë Select dç=íç=íçÇ~ó > to return to<br />
the current date.<br />
<strong>User</strong> Guide 59
léíáçåë Select dç=íç=a~íÉ > to select a<br />
specific date.<br />
léíáçåë Select bê~ëÉ=~ää=bîÉåíë > to erase<br />
all event for that date.<br />
View by list<br />
Select jÉåì > qççäë > pÅÜÉÇìäÉê ><br />
NK<br />
~ää=ÉîÉåíë.<br />
sáÉï<br />
At the event list, highlight a event.<br />
OK<br />
Select sáÉï to see the event detail or one the<br />
PK<br />
of the following:<br />
léíáçåë Select pçêí=Äó=íáãÉ > to sort<br />
events by time.<br />
léíáçåë Select pçêí=Äó=íóéÉ > to sort<br />
events by type.<br />
léíáçåë Select pçêí=Äó=éêáçêáíó > to sort<br />
events by priority.<br />
Modify an event<br />
You can modify existing events. From the event<br />
detail screen, you can lh select to return to<br />
the previous screen léíáçåë or and one<br />
the following:<br />
to change the event.<br />
bÇáí<br />
to erase the event.<br />
bê~ëÉ<br />
to copy the event.<br />
`çéó<br />
Scheduler settings<br />
You can change the default settings of<br />
your scheduler.<br />
Select jÉåì > qççäë > pÅÜÉÇìäÉê > pÉííáåÖë<br />
and one the following:<br />
pÅÜÉÇìäÉê=Üçìêë to change the work day.<br />
^ìíç=ÇÉäÉíÉ to select when events are<br />
automatically deleted.<br />
mêáçêáíó to select the priority given to<br />
new events.<br />
oÉãáåÇÉê to select the reminder given to<br />
new events.<br />
oÉãáåÇÉê=ëçìåÇ to select the sound alert<br />
given to new event reminders.<br />
páäÉåí=ãçÇÉ to select whether phone is in<br />
Silent mode during the duration of new events.<br />
Alarm clock<br />
You can set up to four alerts with your phone’s<br />
three alarm clocks and one quick alarm.<br />
kçíÉW The alert occurs only if the phone is on.<br />
Use alarm clocks<br />
NK Select jÉåì > qççäë > ^ä~êã=ÅäçÅâ.<br />
OK Highlight one of the alarms and select pÉí.<br />
PK At the Time field, press lh to change<br />
the time.<br />
Scroll left or right to move between hour,<br />
minute and AM/PM fields.<br />
60 Alarm clock
Scroll up or down to change hour, minute<br />
and AM/PM.<br />
lh Press to save time and move to the<br />
next field.<br />
At the Alarm Sound field, press lh and select<br />
QK<br />
a sound from the list.<br />
At the Recurring Alarm field, press lh and<br />
RK<br />
select an option from the list.<br />
At the Note field, enter a note and press lh.<br />
SK<br />
Select p~îÉ.<br />
TK<br />
When the alarm rings, lÑÑ select to turn off the<br />
alarm påççòÉ or to silence the alarm for<br />
10 minutes.<br />
Opening the flip turns off the alarm.<br />
qáéW<br />
Use quick alarm<br />
Select jÉåì > qççäë > ^ä~êã=ÅäçÅâ.<br />
NK<br />
Highlight the quick alarm and select pÉí.<br />
OK<br />
At the Time field, select a time option. A<br />
PK<br />
notification shows the quick alarm is on.<br />
When the quick alarm rings, lÑÑ select to turn off<br />
the alarm oÉëÉí or to set the quick alarm again.<br />
Tip calculator<br />
The Tip calculator helps you calculate how much<br />
tip to include with a bill.<br />
Select jÉåì > qççäë > qáé=Å~äÅìä~íçê.<br />
NK<br />
Enter the amount of your bill and select kÉñí.<br />
OK<br />
Select the percentage amount to tip. The new<br />
PK<br />
bill amount is shown.<br />
Select açåÉ to return to menu or péäáí to<br />
QK<br />
split the bill.<br />
To split the bill, enter the number of guests<br />
RK<br />
and select kÉñí. The phone shows the<br />
amount each guest pays. açåÉ Select to<br />
return to menu.<br />
Calculator<br />
Use the Calculator for basic mathematical<br />
equations.<br />
Select jÉåì > qççäë > `~äÅìä~íçê.<br />
NK<br />
Enter the first number.<br />
OK<br />
Use the k~îáÖ~íáçå key to select<br />
PK<br />
mathematical operation.<br />
Press left to multiply.<br />
Press right to divide.<br />
Press up to add.<br />
Press down to subtract.<br />
Enter the second number and press lh to get<br />
QK<br />
the result.<br />
Select bñáí to return to menu or léíáçåë and<br />
RK<br />
one of the following:<br />
adds the displayed result to the value<br />
jH<br />
stored in memory.<br />
displays the currently stored value on<br />
jo<br />
the screen.<br />
clears the currently stored value<br />
j`<br />
in memory.<br />
<strong>User</strong> Guide 61
Timer<br />
The Timer counts down for the specified time and<br />
beeps when that amount of time has elapsed.<br />
Select jÉåì > qççäë > qáãÉê > pÉí.<br />
NK<br />
At the Set Timer, enter the time length.<br />
OK<br />
Scroll left or right to move between hours,<br />
minutes and seconds fields.<br />
Scroll up or down to change hours,<br />
minutes and seconds.<br />
If need, select pçìåÇ and one of the sounds<br />
PK<br />
to change the sound.<br />
To work the timer, select the<br />
QK<br />
following options:<br />
to begin the countdown.<br />
pí~êí<br />
to pause the countdown.<br />
píçé<br />
to clear the timer.<br />
oÉëÉí<br />
When the countdown is complete lÑÑ select to<br />
silence the alarm.<br />
Stopwatch<br />
The Stopwatch counts time for you.<br />
Select jÉåì > qççäë > píçéï~íÅÜ.<br />
NK<br />
To work the stopwatch, select the following<br />
OK<br />
options:<br />
to begin counting.<br />
pí~êí<br />
to pause counting.<br />
píçé<br />
to clear the stopwatch.<br />
oÉëÉí<br />
Press _~Åâ the key to return to the menu.<br />
Flashlight<br />
You phone comes with a flashlight. Select jÉåì ><br />
qççäë > cä~ëÜäáÖÜí > qìêå=çå to activate the<br />
light, which stays on until you turn it off.<br />
kçíÉW You can also press and hold the _~Åâ key<br />
to turn on the flashlight. Once you release the<br />
_~Åâ key, the flashlight turns off.<br />
62 Timer
14 Voice recognition<br />
With voice features, you can call a contact, dial a<br />
phone number, access menus, or find contact<br />
information from your voice dial list using<br />
voice recognition.<br />
kçíÉW You cannot use voice recognition to end a<br />
call; you must press the båÇ key when the flip<br />
is open.<br />
Voice dial list<br />
To call or find a contact using voice dial you must<br />
add the contact to your voice dial list. The contact<br />
name must not have more than three words or<br />
components for voice dialing recognition.<br />
Add a voice tag<br />
You can add a voice dial tag to your phone. See<br />
“Add voice dial” on page 53.<br />
Edit a voice tag<br />
To edit existing voice dial tags:<br />
Select jÉåì > `çåí~Åíë > sçáÅÉ=Çá~ä=äáëí.<br />
NK<br />
Select your desired contact.<br />
OK<br />
Highlight the number with a voice tag and<br />
PK<br />
léíáçåë select > bÇáí=îçáÅÉ=<br />
^ÇÇ=îçáÅÉ=Çá~ä,<br />
or bê~ëÉ=îçáÅÉ=Çá~ä.<br />
Çá~ä<br />
Follow the prompts.<br />
QK<br />
Voice commands<br />
With voice commands, you speak your commands<br />
into the phone’s microphone.<br />
Start voice commands<br />
Press the `~ää key to initiate voice commands.<br />
NK<br />
The phone prompts, “Say a name or say dial”.<br />
Say one of the following commands and<br />
OK<br />
follow the voice prompts.<br />
“p~ó=~=å~ãÉ” to call a contact on your<br />
voice dial list.<br />
“aá~ä” to speak the digits of the<br />
√<br />
phone number.<br />
Press the `~ää key again to exit and go to the<br />
PK<br />
Recent calls list.<br />
Call a contact<br />
Before calling a person, you need to add the<br />
contact name to the Voice dial list.<br />
See “Add voice dial” on page 53.<br />
From the main screen, press the `~ää key. The<br />
NK<br />
phone prompts, “Say a name”.<br />
Say the name of the person you want to call.<br />
OK<br />
If the name you said matches a contact in the<br />
PK<br />
Voice dial list, the phone responds: “Calling<br />
(Name).” Remain silent to make the call, or<br />
say “No” to cancel.<br />
<strong>User</strong> Guide 63
If the phone finds multiple voice tags that<br />
QK<br />
sound like the name you said, the phone lists<br />
the names and asks you to verify which name<br />
you want to call. Say “Yes” when you hear the<br />
correct name. Say “No” when you hear an<br />
incorrect name.<br />
Press the båÇ key to end the call.<br />
RK<br />
Call Using Digit Dial<br />
When using digit dialing, you speak digits to dial a<br />
phone number.<br />
kçíÉW You cannot speak a string of digits.<br />
You must speak one digit at a time and wait for<br />
the prompt.<br />
NK From the main screen, press the `~ää key. The<br />
phone prompts, “Say a name or say dial”.<br />
OK Say “Dial”. The phone responds<br />
“Speak a digit”.<br />
PK Speak the first digit of the phone number you<br />
want to call. Once the phone repeats the digit,<br />
you can speak the next digit.<br />
If you pause, the phone prompts you with one<br />
of the following options. After the prompt,<br />
speak an option:<br />
Say “Clear” to erase the last digit entered.<br />
The phone responds: “Digit cleared.” To<br />
clear the entire phone number, say “Clear”<br />
again. When the phone prompts you with<br />
“Clear entire phone number?”, say “Yes” to<br />
clear or “No” to cancel.<br />
Say “Call” to dial the number.<br />
Say “Verify” to cause phone to repeat the<br />
set of digits you input.<br />
Say “Cancel” to exit voice recognizer and<br />
return to the main screen.<br />
Speak a digit to enter the next digit. Once<br />
the phone repeats the digit, you can speak<br />
the next digit or pause to hear the prompt.<br />
QK Press the båÇ key to end the call.<br />
Voice Command Settings<br />
To customize the voice commands, see “Call<br />
options” on page 52.<br />
64 Voice Command Settings
15 Getting Help<br />
Customer Support<br />
To contact <strong>Virgin</strong> <strong>Mobile</strong>’s customer support<br />
department for information about your phone,<br />
account history, call coverage area, and specific<br />
features available to you, such as call forwarding<br />
or voicemail:<br />
Go to www.virginmobileusa.com.<br />
Dial *VM from your <strong>Virgin</strong> <strong>Mobile</strong> phone.<br />
Dial 888-322-1122 from any phone.<br />
For questions about the phone features, refer to<br />
the materials provided with your phone, or visit<br />
www.virginmobileusa.com.<br />
For additional questions, you may contact the<br />
<strong>Kyocera</strong> Wireless Corp. Customer Care Center in<br />
any of the following ways:<br />
Web site: ïïïKâóçÅÉê~JïáêÉäÉëëKÅçã.<br />
Email: phone-help@kyocera-wireless.com.<br />
Phone: 1-800-349-4478 (U.S. and Canada) or<br />
1-858-882-1401.<br />
Before requesting support, please try to<br />
reproduce and isolate the problem. When you<br />
contact the Customer Care Center, be ready to<br />
provide the following information:<br />
The name of your service provider:<br />
<strong>Virgin</strong> <strong>Mobile</strong>.<br />
The actual error message or problem you<br />
are experiencing.<br />
The steps you took to reproduce the problem.<br />
√ The phone’s mobile equipment ID (MEID). To<br />
locate the MEID, select jÉåì > pÉííáåÖë ><br />
mÜçåÉ=áåÑç > _ìáäÇ=áåÑç and scroll down<br />
to MEID.<br />
Qualified service<br />
If the problem with your phone persists, return<br />
the phone with all accessories and packaging to<br />
the dealer for qualified service.<br />
Phone accessories<br />
To shop for phone accessories, visit<br />
ïïïKâóçÅÉê~JïáêÉäÉëëKÅçãLëíçêÉ. You may also<br />
call us at 800-349-4188 (U.S.A. only) or<br />
858-882-1410.<br />
Product evaluation<br />
To participate in the testing and evaluation of<br />
<strong>Kyocera</strong> Wireless Corp. products, including<br />
cellular or PCS phones, visit<br />
beta.kyocera-wireless.com.<br />
<strong>User</strong> Guide 65
16 Consumer Limited Warranty<br />
<strong>Kyocera</strong> Wireless Corp. (“KYOCERA”) offers you a<br />
limited warranty that the enclosed product or<br />
products (the “Product”) will be free from<br />
defects in material and workmanship for a period<br />
that expires one year from the date of sale of the<br />
Product to you, provided that you are the original<br />
end-user purchaser of the Product and provided<br />
that your purchase was made from an authorized<br />
supplier. Transfer or resale of a Product will<br />
automatically terminate warranty coverage with<br />
respect to that Product. This limited warranty is<br />
not transferable to any third party, including but<br />
not limited to any subsequent purchaser or owner<br />
of the Product.<br />
KYOCERA shall, at its sole and absolute discretion,<br />
either repair or replace a Product (which unit<br />
may use refurbished parts of similar quality and<br />
functionality) if found by KYOCERA to be defective<br />
in material or workmanship, or if KYOCERA<br />
determines that it is unable to repair or replace<br />
such Product, KYOCERA shall refund the purchase<br />
price for such Product, provided that the subject<br />
Product (i) is returned, with transportation<br />
prepaid, to a KYOCERA authorized service center<br />
within the one year warranty period, and (ii) is<br />
accompanied by a proof of purchase in the form<br />
of a bill of sale or receipted invoice which<br />
evidences that the subject Product is within the<br />
one year warranty period (“Proof of Purchase”).<br />
After the one year warranty period, you must pay<br />
all shipping, parts and labor charges.<br />
This limited warranty does not cover and is void<br />
with respect to the following: (i) any Product<br />
which has been improperly installed, repaired,<br />
maintained or modified; (ii) any Product which<br />
has been subjected to misuse (including any<br />
Product used in conjunction with hardware<br />
electrically or mechanically incompatible or used<br />
with accessories not approved by KYOCERA),<br />
abuse, accident, physical damage, abnormal<br />
operation, improper handling, neglect, exposure<br />
to fire, water or excessive moisture or dampness<br />
or extreme changes in climate or temperature;<br />
(iii) any Product operated outside published<br />
maximum ratings; (iv) cosmetic damage; (v) any<br />
Product on which warranty stickers or Product<br />
serial numbers have been removed, altered, or<br />
rendered illegible; (vi) cost of installation,<br />
removal or reinstallation; (vii) signal reception<br />
problems (unless caused by defects in material<br />
and workmanship); (viii) damage the result of<br />
fire, flood, acts of God or other acts which are not<br />
the fault of KYOCERA and which the Product is not<br />
specified to tolerate, including damage caused by<br />
mishandling, shipping and blown fuses; (ix)<br />
consumables (such as fuses); or (x) any Product<br />
which has been opened, repaired, modified or<br />
altered by anyone other than KYOCERA or a<br />
KYOCERA authorized service center.<br />
66 Product evaluation
USE ONLY KYOCERA APPROVED ACCESSORIES<br />
WITH KYOCERA PHONES. USE OF ANY<br />
UNAUTHORIZED ACCESSORIES MAY BE<br />
DANGEROUS AND WILL INVALIDATE THE PHONE<br />
WARRANTY IF SAID ACCESSORIES CAUSE<br />
DAMAGE OR A DEFECT TO THE PHONE.<br />
KYOCERA SPECIFICALLY DISCLAIMS LIABILITY<br />
FOR ANY AND ALL DIRECT, INDIRECT, SPECIAL,<br />
GENERAL, PUNITIVE, EXEMPLARY, AGGRAVATED,<br />
INCIDENTAL OR CONSEQUENTIAL DAMAGES,<br />
EVEN IF ADVISED OF THE POSSIBILITY THEREOF,<br />
WHETHER FORESEEABLE OR UNFORESEEABLE<br />
OF ANY KIND WHATSOEVER, INCLUDING BUT<br />
NOT LIMITED TO LOSS OF PROFITS,<br />
UNANTICIPATED BENEFITS OR REVENUE,<br />
ANTICIPATED PROFITS ARISING OUT OF USE OF<br />
OR INABILITY TO USE ANY PRODUCT (FOR<br />
EXAMPLE, WASTED AIRTIME CHARGES DUE TO<br />
THE MALFUNCTION OF A PRODUCT) OR<br />
CONTRIBUTION OR INDEMNITY IN RESPECT OF<br />
ANY CLAIM RELATED TO A PRODUCT.<br />
REPAIR OR REPLACEMENT OF A DEFECTIVE<br />
PRODUCT OR REFUND OF THE PURCHASE PRICE<br />
RELATING TO A DEFECTIVE PRODUCT, AS<br />
PROVIDED UNDER THIS WARRANTY, ARE YOUR<br />
SOLE AND EXCLUSIVE REMEDIES FOR BREACH<br />
OF THE LIMITED WARRANTY, AND SUBJECT TO<br />
THIS WARRANTY, THE PRODUCTS ARE<br />
APPROVED AND ACCEPTED BY YOU “AS IS”.<br />
KYOCERA MAKES NO OTHER WARRANTIES,<br />
REPRESENTATIONS OR CONDITIONS OF ANY<br />
KIND, ORAL OR VERBAL, EXPRESS OR IMPLIED,<br />
STATUTORY OR OTHERWISE, WITH RESPECT TO<br />
THE PRODUCTS, INCLUDING BUT NOT LIMITED<br />
TO ANY IMPLIED WARRANTY OR CONDITION OF<br />
MERCHANTABILITY OR FITNESS FOR A<br />
PARTICULAR PURPOSE OR AGAINST<br />
INFRINGEMENT OR ANY IMPLIED WARRANTY OR<br />
CONDITION ARISING OUT OF TRADE USAGE OR<br />
OUT OF A COURSE OF DEALING OR COURSE OF<br />
PERFORMANCE. NO DEALER, DISTRIBUTOR,<br />
AGENT OR EMPLOYEE IS AUTHORIZED TO MAKE<br />
ANY MODIFICATION OR ADDITION TO THIS<br />
WARRANTY.<br />
Some jurisdictions do not allow the exclusion or<br />
limitation of incidental or consequential damages,<br />
or allow limitations on how long an implied<br />
warranty lasts, so the above limitations or<br />
exclusions may not apply to you. This limited<br />
warranty gives you specific legal rights, and you<br />
may also have other rights which vary from<br />
jurisdiction to jurisdiction.<br />
For warranty service information, please call the<br />
following telephone number from anywhere in the<br />
continental United States and Canada: 1-800-349-<br />
4478 or 858-882-1401; or contact KYOCERA at<br />
the following address: 10300 Campus Point Drive,<br />
San Diego, California, 92121-1582, USA,<br />
Attention: Technical Support.<br />
DO NOT RETURN YOUR PRODUCTS TO THE<br />
ABOVE ADDRESS. Please call or write for the<br />
location of the <strong>Kyocera</strong> Wireless Corp. authorized<br />
service center nearest you and for procedures for<br />
obtaining warranty service.<br />
<strong>User</strong> Guide 67
Index<br />
Numerics<br />
1-touch dialing, 14, 52<br />
A<br />
accessory, v, vi, 2, 56, 65<br />
activation of phone, 3<br />
add address, 23<br />
add voice dial, 53<br />
air bag, iii<br />
aircraft, iv<br />
alarm clock, 60<br />
alert<br />
message settings, 28<br />
minute alert, 49<br />
missed calls, 41<br />
privacy, 55<br />
voicemail, 15<br />
answering calls, 12<br />
auto text, 28<br />
auto-answer, 54, 56<br />
auto-erase, 29<br />
auto-hyphen, 50<br />
B<br />
back cover, 7<br />
lock, 1, 2, 7<br />
backlight, 50<br />
duration, 50<br />
power, 56<br />
power save mode, 50<br />
banner<br />
greeting, 49<br />
battery, vi<br />
caring, 1<br />
charging, 1<br />
68<br />
installing, 1<br />
recharging, 1<br />
Bluetooth, 46<br />
connecting to other devices,<br />
47<br />
pairing, 46<br />
settings, 47<br />
turning on, 46<br />
brightness, 44, 51<br />
build information, 57<br />
C<br />
calculator, 61<br />
call history. See call log<br />
call history. See recent calls<br />
call list. See recent calls<br />
call log<br />
erasing, 42<br />
missed calls, 41<br />
call log. See recent calls<br />
call options, 52<br />
call timers, 42<br />
calls<br />
answering, 12<br />
emergency, 15<br />
ending, 13<br />
camera, 43<br />
color tone, 44<br />
flash, 7, 43<br />
LED, 44<br />
lens, 7<br />
multiple pictures, 43<br />
options, 43<br />
resolution, 43, 54<br />
self timer, 43<br />
sending picture, 24<br />
settings, 54<br />
shutter sound, 44<br />
taking a picture, 43<br />
white balance, 44<br />
capitalization, 17, 20<br />
charger, vi<br />
color tone, 44<br />
contacts, 30<br />
accessing, 30<br />
adding, 30<br />
adding extension, 31<br />
changing number type, 31<br />
editing, 31<br />
group, 32<br />
groups, 34<br />
notes, 33<br />
number type, 34<br />
picture, 31, 34<br />
primary number, 32<br />
ringtone, 31, 33, 34<br />
saving, 31<br />
searching, 35<br />
secret address, 32, 33<br />
secret note, 33<br />
secret numbers, 32<br />
speed dial, 32<br />
speed dial list, 35<br />
street address, 33<br />
voice dial, 32<br />
voice dial list, 35<br />
Web address, 32, 33<br />
convention<br />
using this guide, 11
custom menu, 13<br />
customer support, 65<br />
D<br />
default<br />
text entry, 29<br />
display settings, 49<br />
download, 39<br />
E<br />
earpiece, 13<br />
volume, 48<br />
electronic serial number (ESN).<br />
See MEID (mobile equipment<br />
ID)<br />
email messages, 26<br />
emergency call, 15<br />
emergency number<br />
security, 55<br />
enhancement. See accessory<br />
ESN (electronic serial number).<br />
See MEID (mobile equipment<br />
ID)<br />
evaluation<br />
product, 65<br />
event<br />
changing, 60<br />
creating, 58<br />
viewing, 59<br />
expert mode, 54<br />
eyelet, 7<br />
F<br />
fast find, 51<br />
flash, 43<br />
flashlight, 62<br />
frame, 44<br />
frequent list, 51<br />
G<br />
game<br />
downloading, 39<br />
greeting banner, 49<br />
groups, 34<br />
assigning message alert, 35<br />
assigning picture, 35<br />
assigning ringer, 35<br />
creating, 34<br />
editing, 35<br />
erasing, 35<br />
sending multimedia messages,<br />
35<br />
sending text messages, 35<br />
using, 35<br />
H<br />
hard pause, 31<br />
headset ringing, 56<br />
headset sound. See headset<br />
ringing<br />
hearing aid, iv, v, 56<br />
hearing-impaired usage, iv, v<br />
hold call, 14, 51<br />
I<br />
icons, 9<br />
IM, 26<br />
IM address<br />
contacts, 32<br />
Inbox, 23, 25<br />
instant messages, 26<br />
K<br />
key<br />
frequently used, 8<br />
navigation, 11<br />
volume, 48<br />
key length<br />
sounds, 49<br />
keyguard, 48<br />
settings, 48<br />
keypad<br />
number, 4<br />
QWERTY, 6<br />
L<br />
LED, 44<br />
left option button, 11<br />
location, 55<br />
lock<br />
back cover, 1, 2, 7<br />
keyguard, 48<br />
phone, 54<br />
lock code<br />
changing, 55<br />
lock msg, 23<br />
M<br />
main menu, 10<br />
making calls, 12<br />
medical device, iv<br />
MEID (mobile equipment ID), 65<br />
menu, 10<br />
custom, 13<br />
settings, 45<br />
style, 49<br />
message<br />
completing, 27<br />
erasing, 27<br />
failed or pending, 28<br />
forwarding, 23<br />
forwarding picture, 25<br />
indicators, 28<br />
notification, 23<br />
options, 23<br />
reading, 23<br />
<strong>User</strong> Guide 69
eceiving multimedia, 25<br />
replying multimedia, 25<br />
replying text, 23<br />
retrieving text, 23<br />
sending and receiving, 27<br />
sending text, 22<br />
usage tips, 27<br />
viewing multimedia, 25<br />
message settings, 28<br />
alert, 28<br />
messaging settings, 54<br />
minute alert, 49<br />
missed call, 41<br />
alert, 41<br />
mobile equipment ID (MEID), 65<br />
mode<br />
changing, 20<br />
entering text, 17<br />
expert, 54<br />
Numbers only, 19<br />
rapid, 19<br />
text entry, 16<br />
multimedia message<br />
forwarding, 25<br />
options, 25<br />
receiving, 25<br />
replying, 25<br />
viewing, 25<br />
multiple, 43<br />
multishot, 43<br />
My Account, 37<br />
my graphics, 39<br />
my pictures, 44<br />
my ringtones, 39<br />
my sounds, 40<br />
N<br />
navigation key, 11<br />
70<br />
normal alpha mode, 16<br />
notes<br />
contacts, 33<br />
number<br />
entering, 16, 19<br />
number keypad, 4<br />
entering text, 19<br />
number type<br />
contacts, 34<br />
numbers only mode, 19<br />
O<br />
Outbox, 27<br />
P<br />
pacemaker, iv<br />
pairing, 46<br />
phone<br />
accessories, 2, 65<br />
activating, 3<br />
build information, 57<br />
icons, 57<br />
keypads, 4<br />
lock, 55<br />
making calls, 12<br />
number extension, 31<br />
overview, 2<br />
programming, 3<br />
resetting, v<br />
safety, iii<br />
turning on and off, 12<br />
picture<br />
contacts, 34<br />
multiple, 43<br />
picture message<br />
options, 25<br />
receiving, 25<br />
viewing, 25<br />
picture mode<br />
indicators and icons, 44<br />
options, 43<br />
picture. See camera<br />
playback, 58<br />
power backlighting, 56<br />
power save mode, 50<br />
prepend, 32<br />
primary number<br />
contacts, 32<br />
privacy alert, 55<br />
Q<br />
qualified service, 65<br />
QWERTY keypad, 4, 6<br />
entering text, 16<br />
R<br />
rapid mode, 19<br />
recent calls, 41<br />
redialing, 12<br />
resetting phone, v<br />
resolution, 43, 54<br />
right option button, 11<br />
ringtone<br />
business, 48<br />
contacts, 33, 34<br />
downloading, 39<br />
personal, 48<br />
type, 48<br />
volume, 48<br />
S<br />
safety, iii<br />
save as auto text, 23, 24, 26<br />
save message, 23, 26<br />
save to Outbox, 29<br />
scheduler, 58<br />
settings, 60<br />
screen saver, 50
security<br />
emergency numbers, 55<br />
settings, 54<br />
send IM, 26<br />
Sender, 24<br />
settings<br />
Bluetooth, 47<br />
camera, 54<br />
display, 49<br />
messages, 28<br />
messaging, 54<br />
scheduler, 60<br />
settings menu, 45<br />
shutter sound, 44, 54<br />
signature, 29<br />
smart sound. See smart volume<br />
smart volume, 48<br />
smiley<br />
entering, 17, 20<br />
sound<br />
controlling, 48<br />
flip closed, 48<br />
flip open, 48<br />
turning on or off, 48<br />
sounds<br />
keypad length, 49<br />
speakerphone, 13<br />
volume, 48<br />
speed dial, 14<br />
contacts, 32<br />
stopwatch, 62<br />
street address<br />
contacts, 33<br />
style<br />
menu, 49<br />
symbol<br />
entering, 16, 20<br />
T<br />
T-coil hearing aid, 56<br />
text<br />
changing case, 17<br />
changing mode, 17, 20<br />
entering, 18<br />
normal alpha mode, 16<br />
number keypad, 19<br />
QWERTY keypad, 16<br />
rapid mode, 19<br />
text message<br />
forwarding, 23<br />
replying, 23<br />
retrieving, 23<br />
sender, 24<br />
sending, 22<br />
viewing, 23<br />
time pause, 31<br />
time/date formats, 50<br />
timer, 62<br />
tip calculator, 61<br />
Top-Up, 38<br />
TTY, 56<br />
turning on and off, 12<br />
V<br />
vehicle, iv<br />
viewfinder display, 54<br />
<strong>Virgin</strong>XL, 36<br />
voice answer, 53<br />
voice commands, 63, 64<br />
voice dial<br />
adding, 53, 63<br />
changing, 63<br />
erasing, 53<br />
voice dial list, 63<br />
voice memo, 58<br />
playing, 58<br />
recording, 58<br />
voice recognition, 63<br />
voice training, 53<br />
voice wake-up, 53<br />
voicemail, 14<br />
alert, 15<br />
volume<br />
adjusting, 14<br />
auto adjust, 48<br />
earpiece, 48<br />
key, 48<br />
ringtone, 48<br />
speakerphone, 48<br />
W<br />
wallpaper, 49<br />
Web address<br />
contacts, 33<br />
white balance, 44<br />
word<br />
entering, 16, 19<br />
<strong>User</strong> Guide 71
<strong>Kyocera</strong> Wireless Corp.<br />
10300 Campus Point Drive<br />
San Diego, CA 92121 USA<br />
www.kyocera-wireless.com<br />
82-G1950-2EN, Rev. 001