VITA ZYrcomat T® - Medipro International
VITA ZYrcomat T® - Medipro International
VITA ZYrcomat T® - Medipro International

You also want an ePaper? Increase the reach of your titles
YUMPU automatically turns print PDFs into web optimized ePapers that Google loves.
<strong>VITA</strong> <strong>ZYrcomat</strong><br />
®<br />
T<br />
Operating manual<br />
Date of issue: 07-07
<strong>VITA</strong> - <strong>ZYrcomat</strong> T<br />
Contents<br />
1 Technical information ...............................................................................................................5<br />
1.1 General description ....................................................................................................................5<br />
1.2 Safety features ...........................................................................................................................5<br />
1.3 Technical data ............................................................................................................................5<br />
1.4 Electrical data.............................................................................................................................5<br />
1.5 Scope of delivery........................................................................................................................5<br />
2 Installation and starting-up ......................................................................................................6<br />
2.1 Important information..................................................................................................................6<br />
2.2 Intended use...............................................................................................................................6<br />
2.3 Transport safety cover................................................................................................................6<br />
2.4 Installation of the firing unit (furnace) .........................................................................................6<br />
2.5 Installation of the power unit.......................................................................................................6<br />
2.6 Starting-up the unit .....................................................................................................................7<br />
2.7 Switching off the unit ..................................................................................................................7<br />
3 Safety advice .............................................................................................................................8<br />
3.1 Intended use...............................................................................................................................8<br />
3.2 Pictograms .................................................................................................................................8<br />
3.3 Copyright ....................................................................................................................................8<br />
3.4 Information of labels ...................................................................................................................9<br />
3.5 Cleaning the furnace ..................................................................................................................9<br />
3.6 Operation and cleaning of the control unit..................................................................................9<br />
3.7 Fuses..........................................................................................................................................9<br />
3.8 CE - mark .................................................................................................................................10<br />
4 Transport of the unit ...............................................................................................................10<br />
4.1 Warranty and liability ................................................................................................................10<br />
4.2 Spare parts...............................................................................................................................10<br />
5 Technical equipment...............................................................................................................10<br />
5.1 Cooling fan in the firing unit (furnace).......................................................................................10<br />
5.2 Cooling fan in the power unit ....................................................................................................11<br />
5.3 Mains power failure ..................................................................................................................11<br />
5.4 Temperature Controlling...........................................................................................................11<br />
5.5 Heating elements .....................................................................................................................11<br />
5.6 Firing chamber insulation .........................................................................................................11<br />
5.7 Program values (parameters)...................................................................................................12<br />
6 Saving of firing data for quality assurance...........................................................................12<br />
7 Control elements of the firing unit (furnace) ........................................................................12<br />
7.1 Selecting and starting a firing program....................................................................................13<br />
7.2 Changing program values ........................................................................................................14<br />
7.3 LEDs of power unit ...................................................................................................................14<br />
3
<strong>VITA</strong> - <strong>ZYrcomat</strong> T<br />
8 Service programs ....................................................................................................................15<br />
8.1 Information about the unit/Software..........................................................................................15<br />
8.2 Software Update.......................................................................................................................15<br />
8.3 Language selection ..................................................................................................................16<br />
8.4 Screen settings.........................................................................................................................16<br />
8.5 Process data ............................................................................................................................17<br />
8.6 Loading firing programs from the Memory Stick.......................................................................17<br />
8.7 Export failure report..................................................................................................................17<br />
8.8 Date - Time...............................................................................................................................17<br />
8.9 Display formats.........................................................................................................................18<br />
8.10 Lift speed adjustment ...............................................................................................................18<br />
8.11 Operating data..........................................................................................................................19<br />
8.12 Temperature calibration............................................................................................................19<br />
8.13 Aborting programs....................................................................................................................20<br />
8.14 Press key to stop......................................................................................................................20<br />
8.15 Melody for end of program .......................................................................................................20<br />
4
1 Technical information<br />
1.1 General description<br />
<strong>VITA</strong> - <strong>ZYrcomat</strong> T<br />
• Casing consisting of painted sheet steel and stainless steel<br />
• Firing chamber lined with high-quality insulating material<br />
• Molybdenum disilicide heating elements<br />
• Color graphic touchscreen display<br />
• 50 freely programmable sintering programs<br />
1.2 Safety features<br />
• Temperature sensor monitoring<br />
• Current monitoring<br />
• Protection against power failure<br />
1.3 Technical data<br />
Dimensions: Firing unit: w x h x d 360 mm x 810 mm x 490 mm<br />
Power unit: w x h x d 500 mm x 210 mm x 350 mm<br />
Weight: Firing unit: 32.0 kg<br />
Casing with power unit: 27.5 kg<br />
Firing chamber - capacity: Diameter : 84.0 mm<br />
Height: 90.0 mm<br />
Firing chamber - temperature: max. 1600°C<br />
1.4 Electrical data<br />
Power supply: 200/230 Volt AC 50 Hz<br />
110 Volt AC 50/60HZ<br />
Power consumption: max. 1500 Watts<br />
Classification: Safety class 1<br />
1.5 Scope of delivery<br />
Furnace in special shipping carton with:<br />
• 1 firing unit (furnace)<br />
• 1 casing with power unit<br />
• 1 mains power lead for heating devices type HO5RR-FG1.0 mm 2<br />
• 1 high-current connecting cable power unit - firing unit 4 x10 mm 2<br />
• 1 control connecting cable power unit - firing unit -<br />
• 1 firing tray (2 elements)<br />
• 1 sintering crucible<br />
• 1 pair of furnace tweezers<br />
• 1 operating manual<br />
• 1 Allen key 2.5 mm<br />
• 1 Allen key 4.0 mm<br />
• 1 Styles for control unit<br />
5
2 Installation and starting-up<br />
2.1 Important information<br />
<strong>VITA</strong> - <strong>ZYrcomat</strong> T<br />
Read this operating manual before starting-up the unit. Keep the operating manual at a place which<br />
can be accessed by all users at any time. If problems should occur when starting-up the unit, we ask<br />
you not to perform any impermissible manipulations. Do not change any settings of the internal<br />
electronics of the unit; this may put your warranty in danger. When performing any interference inside<br />
the unit, the regulations according to DIN EN 61340-5-1 (protection of components exposed to<br />
electrostatic hazards)" must be adhered to. Please note that no liability will be assumed for any<br />
damage caused by ESD. ESD = electrostatic discharge.<br />
2.2 Intended use<br />
The unit may exclusively be used for sintering firing of dental oxide ceramics up to 1600°C.<br />
When processing other materials, the insulation of the firing chamber and the molybdenum disilicide<br />
heating elements may be damaged so that any claim under guarantee will be void.<br />
2.3 Transport safety cover<br />
To ensure safe transport, the heating elements feature a cover. This cover must be removed before<br />
starting up the unit (see Starting-up the unit 2.6).<br />
2.4 Installation of the firing unit (furnace)<br />
• When positioning the furnace, the minimum distance of the furnace and any wall is at least 30 cm.<br />
The furnace must be placed into a dry, heated room.<br />
• The air escaping in the rear upper area of the firing chamber must not be inhibited.<br />
• At temperatures of less than 15°C (e.g. after transport) leave the unit for approx. 30 min. before<br />
starting-up. Make sure that the unit is placed on a heat-resistant surface. Heat radiation and heating<br />
up of the unit are within a harmless range if the unit is operated according to the instructions.<br />
However it can not be excluded that sensitive furniture surfaces and veneerings may exhibit slight<br />
discoloration due to continuous exposure to heat.<br />
• The unit must not be exposed to direct sunlight.<br />
• Do not place any combustible objects near the furnace.<br />
2.5 Installation of the power unit<br />
• Basically, the information provided under item 2 applies.<br />
• Place the power unit in the direct vicinity of the furnace; a minimum distance of 50 cm must be kept.<br />
• Place the power unit in a way to ensure that air that is sucked in at the air grille can escape freely.<br />
The air that is sucked in by the fan must not exceed a supply air temperature of 35°C.<br />
Clearance of the power unit to ground surfaces must be ensured.<br />
6
2.6 Starting-up the unit<br />
<strong>VITA</strong> - <strong>ZYrcomat</strong> T<br />
Note: Prior to starting up, please adhere to item 3 Safety advice!<br />
• Note: Remove the transport safety cover at the top of the<br />
firing unit. Loosen screw of the device with the enclosed<br />
Allen key 2.5 mm and remove the cover (Fig. 1). Lift the<br />
transport safety cover and remove it, place the cover on<br />
again and fasten it with screws.<br />
• Plug the high-current connecting cable into the power unit<br />
and the furnace and fasten it with screws using the<br />
enclosed 4,0 mm Allen key (Fig. 2 + 3)<br />
Caution! The cable is laid out in such a way as to avoid<br />
damage or wedging of the cable. While the furnace is<br />
operated, the cable will reach a temperature of approx.<br />
40°C due to the high current consumption of the heating<br />
elements.<br />
• Plug control cable into power unit and furnace and fasten it<br />
with securing screws (Fig. 2 + 3)<br />
• Connect power unit to mains supply with the enclosed<br />
mains power lead. (Fig. 2)<br />
Caution: The unit must not be connected to multiway<br />
outlet sockets with extension cable; overload may result in<br />
a fire.<br />
• Switch on main switch at the power unit (Fig. 4 )<br />
• Switch on the On/Off switch at the furnace (Fig. 5 )<br />
• Press Lift down key (Fig. 5) and lift will descend to its<br />
lower position. (due to vibrations during transport particles<br />
of the firing chamber insulation will accumulate on the<br />
firing tray platform. They must be removed with a dry<br />
cloth)<br />
• Function of LED, see section LEDs of power unit.<br />
• Place firing tray on the firing tray platform. (Fig. 5)<br />
Caution: Furnace must not be operated without firing tray<br />
placed on, there is an increased risk of fire and injury due<br />
to considerable heating of the casing components.<br />
2.7 Switching off the unit<br />
If the furnace is not used, the lift should be moved into the firing chamber. Closing of the firing<br />
chamber will protect the insulation and avoid the absorption of moisture.<br />
After the lift tray platform has been moved into the firing chamber, switch the furnace (switch to Off)<br />
and the power unit off (main switch).<br />
7<br />
Fig. 1<br />
Fig. 2<br />
Fig. 3<br />
Fig. 4<br />
Fig. 5<br />
control cable<br />
main switch<br />
Hauptschalter<br />
mains<br />
power lead<br />
high current<br />
cable<br />
Brenntisch<br />
Touch Bedienteil
3 Safety advice<br />
3.1 Intended use<br />
<strong>VITA</strong> - <strong>ZYrcomat</strong> T<br />
For your personal safety we would like to ask you to read the following safety-relevant<br />
information completely before starting-up the unit.<br />
Basis for the design of the unit<br />
The unit is of state of the art design and complies with the generally accepted rules concerning health<br />
and safety.<br />
However, danger for the health and safety of the user or third parties as well as impairments of the<br />
unit and other material values may arise if the unit is improperly used.<br />
Inadmissible modes of operation<br />
Operation of the unit is not permitted<br />
• with power sources, products etc. which are subject of a dangerous chemicals ordinance or which<br />
could affect the health of the operating personnel in any other way<br />
• with equipment that has been changed by the user<br />
Permitted modes of operation<br />
Operation of this machine is only permitted if these operating instructions were read and understood<br />
and the procedures described are complied with.<br />
Any other use and any use beyond these limits, such as processing of products other than the ones<br />
specified and handling of hazardous or health threatening substances, is considered as unintended<br />
use.<br />
The manufacturer/supplier will not assume liability for damage resulting from this. The risk must solely<br />
be born by the user.<br />
3.2 Pictograms<br />
3.3 Copyright<br />
This pictogram warns of dangerous voltage. Before opening the unit it must be<br />
separated from the power supply by pulling out the mains plug.<br />
Please note that electrical/electronic units must be disposed of separately.<br />
Do not dispose with household waste.<br />
The black bar below the "garbage bin" symbol indicates that the unit was put into<br />
circulation after August 13, 2005.<br />
Please note that the unit is subject to regulation 2002/96/EC (WEEE) and applicable<br />
national laws and must be disposed of accordingly.<br />
Please contact your dealer if the unit needs to be disposed of.<br />
This pictogram highlights useful hints, explanations and additional information<br />
concerning handling of the unit.<br />
These operating instructions must be treated confidentially. They should ony be used by authorized<br />
persons. Disclosure to third parties is only permitted with the written approval of <strong>VITA</strong> <strong>VITA</strong> Zahnfabrik<br />
H. Rauter GmbH & Co. KG.<br />
All documents are protected by copyright law.<br />
Any disclosure as well as the reproduction of documents, even in form of excerpts, utilization and<br />
publication of the content are not permitted, if not explictly approved. Violations are liable to<br />
prosecution and oblige to compensation.<br />
All rights concerning the exercise of industrial property rights remain reserved.<br />
8
3.4 Information of labels<br />
<strong>VITA</strong> - <strong>ZYrcomat</strong> T<br />
This is a warning label about<br />
dangerous electrical current.<br />
Disconnect the unit (pull off plug at<br />
power unit) before opening it (Fig. 6).<br />
The manufacturer disclaims any liability for accidents of<br />
the user if the furnace is not closed.<br />
Caution: Do not place any objects near the lift tray.<br />
Furnaces must not be operated without firing trays<br />
placed on. (Fig.7)<br />
During continuous operation (max. end temperature, max.<br />
firing time) some parts of the firing chamber may reach high<br />
temperatures (above 70°C).<br />
If the unit is connected to the mains supply, do not reach<br />
into the open firing chamber to avoid contact with live and<br />
hot components. When working at the open furnace, safety<br />
goggles must be worn.<br />
3.5 Cleaning the furnace<br />
Pull the plug from the power unit each time before the furnace is cleaned !! (Fig. 6)<br />
It is not necessary to clean the interior of the firing chamber, cleaning of the casing with a wet cloth<br />
within regular intervals will ensure operational reliability. Standard cleaning agents can be used for the<br />
stainless steel casing.<br />
Basically, no flammable liquids must be used for any type of cleaning work.<br />
3.6 Operation and cleaning of the control unit.<br />
The control unit may exclusively be operated with the enclosed pen (stylus).<br />
The use of other operating elements will cause damage to the touchscreen.<br />
Clean the display at regular intervals with a screen cleansing agent.<br />
Such cleansers will not leave any scratches, have an anti-static effect and retard resoiling.<br />
Damage to the display caused by inappropriate handling during operation or cleaning is excluded from<br />
warranty.<br />
3.7 Fuses<br />
At the rear of the power unit there are two fuses for the unit. The labels provide information on the<br />
fuses used in the unit. Fuses with different values must not be used. (Fig. 6)<br />
version 200 / 230 Volt version 110 Volt<br />
T 10 H 230 Volt T 16 H 250 Volt<br />
9<br />
Fig. 6<br />
Mains power lead<br />
Fig. 7<br />
Brenntisch<br />
Fuses
3.8 CE - mark<br />
<strong>VITA</strong> - <strong>ZYrcomat</strong> T<br />
The CE - mark entails a legally binding statement<br />
that the unit complies with the basic requirements,<br />
directive 73 / 23 / EEC, amended by directive 93/68/EEC, concering<br />
electrical equipment.<br />
We declare the conformity based on the following standards:<br />
• Safety: IEC 610110-1:2001 2nd edition and IEC 610110-2-010:2003 2nd edition.<br />
4 Transport of the unit<br />
The unit may only be shipped in the original packaging.<br />
Therefore we recommend to save the transport packaging and the transportation safety elements in the<br />
upper area of the firing chamber (see item 2.6).<br />
If the original packaging is no longer available, please contact your service agent or the manufacturer.<br />
Damage caused by inappropriate packaging shall be at the expense of the sender.<br />
4.1 Warranty and liability<br />
The warranty and liability are based on the conditions agreed upon by contract.<br />
Changes to the software without the knowledge of and approval by <strong>VITA</strong> Zahnfabrik H. Rauter<br />
GmbH & Co KG cause the exemption from liability and warranty.<br />
The warranty period starts when the unit is put into operation for the first time and is 2 years.<br />
The heating elements are subject to increase wear; the warranty period for these components is 6<br />
months.<br />
4.2 Spare parts<br />
Spare parts must comply with the technical requirements determined by the manufacturer. This is<br />
always assured when using original spare parts.<br />
5 Technical equipment<br />
5.1 Cooling fan in the firing unit (furnace)<br />
The furnace has been equipped with a cooling fan which is switched on at a temperature of 100°C in<br />
the firing chamber.<br />
The cooling fan remains switched on during the entire process time and will be switched off after the<br />
firing chamber has cooled down to a temperature of 95°C.<br />
For safety reasons the unit must not be operated in case of failure of the cooling fan.<br />
10
5.2 Cooling fan in the power unit<br />
<strong>VITA</strong> - <strong>ZYrcomat</strong> T<br />
The power unit has also been equipped with a cooling fan which is switched on or off as soon as the<br />
main switch of the power unit is pressed.<br />
The cooling fan avoids excessive heating of electrical and electronic components and contributes to<br />
ensure general operational reliability.<br />
Failure of the cooling fan is displayed by the unit (see 7.3).<br />
For safety reasons the unit must not be operated in case of failure of the cooling fan.<br />
5.3 Mains power failure<br />
The unit features a power failure safety device.<br />
This element avoids program abortion and thus incorrect firing during short-time breakdown of the<br />
mains voltage supply (max. 15 minutes).<br />
This backup device is activated in the event of a mains power failure during an active firing program.<br />
If mains voltage is supplied again, the program is continued if the difference between the actual and<br />
the set temperature is less than 30 %.<br />
If the difference is larger, the display shows power failure.<br />
The program must be started again.<br />
5.4 Temperature Controlling<br />
Corresponding to the safety regulations for such high temperatures the <strong>ZYrcomat</strong> is equipped with two<br />
temperature sensors. These sensors will be controlled by a internal temperature controller.<br />
During a intermittent failure within the temperature measurement the heating will be switched off.<br />
It will release if the thermoelement get damaged (broken) or the difference between both temperature<br />
sensors is higher than 10°C.<br />
5.5 Heating elements<br />
The unit is equipped with high quality heating elements for a max. Temperature of 1.800°C.<br />
The 200/230 V-Version has got 4 pcs. and the 110V-Version has got 5 pcs. of those heating<br />
elements.<br />
A manual for the exchange of faulty heating elements can be downloaded from the <strong>VITA</strong> webside<br />
www.vita-zahnfabrik.com , Services / Equipment / Downloads / Equipment ( within the system circle ).<br />
A faulty heating element will be indicated by the lit yellow LED at the <strong>ZYrcomat</strong> Power Unit<br />
( please see item 7.3 ).<br />
5.6 Firing chamber insulation<br />
The insulation of the firing chamber and the firing tray consist of high-quality insulating material.<br />
Formation of cracks caused by high temperatures can not be excluded.<br />
Such crack formation must be attributed to materials used and does not affect the function of the unit<br />
or the quality of the firing objects.<br />
In this case warranty claims can not be submitted.<br />
11
5.7 Program values (parameters)<br />
<strong>VITA</strong> - <strong>ZYrcomat</strong> T<br />
The firing program has been preset and includes the following values:<br />
Rising time: 1,5 h<br />
End temperature: 1530°C<br />
Hold-time for end temperature: 2 hrs<br />
Cooling down to 400°C with furnace chamber being closed (lift key can only be used for opening at<br />
400°C).<br />
6 Saving of firing data for quality assurance<br />
• Saving of nominal and actual firing data values (see section 8.5).<br />
• Saving of user name, unit no., date of firing process, job no.,<br />
• These data are saved to the memory of the control unit and exported to the<br />
management program (FDS – Firing – Data – System) on the PC using a memory stick<br />
(see section 8.6).<br />
The necessary PC software (program) is available under Order No. DFDS.<br />
7 Control elements of the firing unit (furnace)<br />
Program selection<br />
Change to Service programs<br />
12<br />
Firing chamber<br />
temperature<br />
Switch off the unit.<br />
After pressing the key, the lift<br />
moves to top position.<br />
Display shows – unit can be<br />
switched off.
7.1 Selecting and starting a firing program.<br />
<strong>VITA</strong> - <strong>ZYrcomat</strong> T<br />
Switch on the main switch of the power unit - green control lamp in the main switch is lit.<br />
Switch on the main switch of the firing unit (furnace) - touchscreen of the control element is activated.<br />
Press button Prog. Nr.<br />
• Enter Program number<br />
• Press Select program button<br />
• Press Start button<br />
Program runs with the specified values.<br />
While the program is run, the total time of the program is displayed.<br />
After the program has been completed and cooling down of the firing chamber to 400°C, the lift key<br />
can be pressed to move the lift to the bottom position.<br />
Heating is only active, when the lift has been completely retracted!<br />
13
7.2 Changing program values<br />
<strong>VITA</strong> - <strong>ZYrcomat</strong> T<br />
• Press desired program value, e.g. end temperature -- keyboard is displayed.<br />
• Use keyboard to enter value - possible values are displayed in the lower info field.<br />
• Press OK button.<br />
• Press Save button.<br />
• Press Yes or No buttons - if No is pressed, program is run with the changed value;<br />
the previously saved value is active after the end of the program.<br />
This sequence applies to changes of all program values.<br />
7.3 LEDs of power unit<br />
The LEDs of the power unit indicate the following function:<br />
green = unit switched on<br />
yellow = load file overload/ failure of heating element<br />
red = current limit current-limit control active<br />
red = overheat operating temperature in the power unit<br />
exceeded<br />
14
8 Service programs<br />
Press "Service" button in the start menu.<br />
8.1 Information about the unit/Software<br />
<strong>VITA</strong> - <strong>ZYrcomat</strong> T<br />
The information field shows technical information about the unit for:<br />
Version opt. = Software of control unit<br />
Version core = Software for core<br />
Unit – ID opt. = Serial-no. of control unit<br />
Unit – ID core = Serial-no. of core<br />
<strong>VITA</strong> = Hotline phone-no.<br />
Dealer = <strong>VITA</strong><br />
Factory Settings: With "Factory Settings" the following functions are reset to factory settings:<br />
• Firing programs acc. to <strong>VITA</strong> firing table, see section 5.7<br />
• Contrast see section 8.4<br />
• Language: English, see section 8.3<br />
• Time format to DD:MM:YY, see section 0<br />
• Stop single push button contact, see section, see section 8.15<br />
• Process data off, see section 8.5<br />
• Temperature display °C, see section 8.9<br />
8.2 Software Update<br />
All programs deviating from the <strong>VITA</strong> table will be deleted.<br />
A software update is loaded from the Memory Stick into the control unit.<br />
The directory below must be created on the Memory Stick. The name of the storage medium may be<br />
different.<br />
15<br />
Observe the use of small initial letters
8.3 Language selection<br />
• Select the desired language.<br />
• Press Accept button.<br />
• Press Main menu button.<br />
8.4 Screen settings<br />
<strong>VITA</strong> - <strong>ZYrcomat</strong> T<br />
The actual screen display may vary from the illustration above.<br />
Calibrating the touch panel<br />
This calibration must be carried out when actuation of a field on the screen does not trigger any action<br />
of the desired function.<br />
• Press the button "Calibrate touch panel".<br />
• Keep on pressing the dots appearing on the dark display until the display lights up.<br />
Contrast<br />
• Adjust the desired contrast with the slide control.<br />
• Press Accept button.<br />
16
8.5 Process data<br />
<strong>VITA</strong> - <strong>ZYrcomat</strong> T<br />
See also section Fehler! Verweisquelle konnte nicht gefunden werden..<br />
"On" = Process data are saved in the control unit.<br />
"Off" = Process data will not be saved.<br />
"Process data" = Number of saved firing programs.<br />
8.6 Loading firing programs from the Memory Stick<br />
Saved firing programs are exported to the Memory Stick.<br />
• Plug in the Memory Stick.<br />
• Press button "Service".<br />
• Press button "Process data".<br />
• Press button "Export"<br />
Firing data are transferred to the Memory Stick<br />
After data are transferrred, change to the main menu and pull out the stick.<br />
8.7 Export failure report<br />
Generally, the previous 10 firing programs that have been run are saved.<br />
If an unsatisfactory firing result is obtained or failure has occurred in the program sequence, the failure<br />
report can be exported on a memory stick and emailed to instruments-service@vita-zahnfabrik.com<br />
for analysis.<br />
An immediate analysis of the failure report is carried out and sent back to the customer.<br />
8.8 Date - Time<br />
17
• Select "Date/Time".<br />
• Press "Date" or "Time" button.<br />
Date format = DD: MM: YY<br />
Time format = HH: MM<br />
See also section "Display formats".<br />
• Press Accept button.<br />
8.9 Display formats<br />
<strong>VITA</strong> - <strong>ZYrcomat</strong> T<br />
Adjustment for temperature display:<br />
Temperature display in °C or Temperature display in °F<br />
Setting Date/Time:<br />
24 h or am/pm<br />
• Select the desired option.<br />
• Press button "Accept".<br />
8.10 Lift speed adjustment<br />
Adjust the lift speed with the slide control.<br />
• Move the slide control.<br />
• Press Accept button.<br />
18
8.11 Operating data<br />
<strong>VITA</strong> - <strong>ZYrcomat</strong> T<br />
Operating hours: Total time of unit<br />
Firing hours of heating: Total firing time<br />
Firing hours of heating: Firing hours of firing muffle<br />
Degree of aging of firing muffle: Display in %, related to 3000 firing hours.<br />
• Reset: If a new firing muffle is used, the counter for the firing hours<br />
8.12 Temperature calibration<br />
of the muffle can be reset.<br />
The unit features automatic temperature adjustment.<br />
The temperature is automatically adjusted whenever a program is started.<br />
The temperature, however, can still be changed within a range of plus to minus 20°C.<br />
Entering "Global temperature offset":<br />
• Select "°C" field, keyboard is shown<br />
• Enter value.<br />
• Press Accept.<br />
19<br />
Temperature too high, e.g. 15°C:<br />
Enter: + 15°C<br />
Temperature too low, e.g. 15°C:<br />
Enter: - 15°C
8.13 Aborting programs<br />
8.14 Press key to stop<br />
<strong>VITA</strong> - <strong>ZYrcomat</strong> T<br />
"Once" = abortion of program without confirmation.<br />
"Confirm" = abortion of program with confirmation.<br />
• Select "Once" or "Confirm".<br />
• Press Accept button.<br />
8.15 Melody for end of program<br />
• Select desired length.<br />
Press Accept button.<br />
20
Index<br />
A<br />
Aborting programs ................................................20<br />
Adjustment for temperature display......................18<br />
C<br />
Calibrating the touch panel ...................................16<br />
CE - mark..............................................................10<br />
Changing program values .....................................14<br />
Cleaning of the control unit ....................................9<br />
Cleaning the furnace ...............................................9<br />
Contrast .................................................................16<br />
Control elements of the firing unit........................12<br />
Cooling down........................................................12<br />
Cooling fan in the firing unit ................................10<br />
Cooling fan in the power unit ...............................11<br />
Copyright ................................................................8<br />
D<br />
Date - Time ...........................................................17<br />
Date/Time..............................................................18<br />
Display format.......................................................18<br />
Display formats.....................................................18<br />
Disposal...................................................................8<br />
E<br />
Electrical data..........................................................5<br />
End temperature ....................................................12<br />
Export failure report..............................................17<br />
F<br />
Firing chamber - capacity ....................................5<br />
Firing chamber insulation .....................................11<br />
Firing hours of heating..........................................19<br />
Fuses........................................................................9<br />
G<br />
General description .................................................5<br />
H<br />
Heating elements...................................................11<br />
Hold-time ..............................................................12<br />
Hotline phone-no...................................................15<br />
I<br />
Important information.............................................6<br />
Inadmissible modes of operation ............................8<br />
Information about the unit ....................................15<br />
Information of labels...............................................9<br />
Installation and starting-up .....................................6<br />
Installation of the firing unit ...................................6<br />
Installation of the power unit ..................................6<br />
Intended use ........................................................6, 8<br />
L<br />
Language selection................................................16<br />
LEDs of power unit...........................................7, 14<br />
Liability.................................................................10<br />
Lift speed...............................................................18<br />
Lift speed adjustment............................................18<br />
<strong>VITA</strong> - <strong>ZYrcomat</strong> T<br />
21<br />
Loading firing programs from the Memory Stick 17<br />
M<br />
Mains power failure ..............................................11<br />
Melody for end of program...................................20<br />
O<br />
Operating data.......................................................19<br />
Operating hours.....................................................19<br />
Operation and cleaning of the control unit .............9<br />
P<br />
Permitted modes of operation .................................8<br />
Pictograms...............................................................8<br />
Press key to stop....................................................20<br />
Process data...........................................................17<br />
Program values......................................................12<br />
Q<br />
Quality assurance ..................................................12<br />
R<br />
Rising time ............................................................12<br />
S<br />
Safety advice...........................................................8<br />
Safety features.........................................................5<br />
Saved firing programs are exported to the Memory<br />
Stick ..................................................................17<br />
Saving of firing data for quality assurance ...........12<br />
Scope of delivery ....................................................5<br />
Screen settings.......................................................16<br />
Selecting a firing program ....................................13<br />
Serial-no. of control unit.......................................15<br />
Serial-no. of core...................................................15<br />
Service programs...................................................15<br />
Setting Date/Time .................................................18<br />
Software for core...................................................15<br />
Software of control unit ........................................15<br />
Software Update....................................................15<br />
Spare parts.............................................................10<br />
Starting a firing program.......................................13<br />
Starting-up the unit .................................................7<br />
T<br />
Technical data .........................................................5<br />
Technical equipment.............................................10<br />
Technical information.............................................5<br />
Temperature calibration ........................................19<br />
Temperature Controlling.......................................11<br />
Temperature display in .........................................18<br />
Temperature display in °C ....................................18<br />
Time ......................................................................17<br />
Transport of the unit..............................................10<br />
Transport safety cover.............................................6<br />
W<br />
Warranty................................................................10
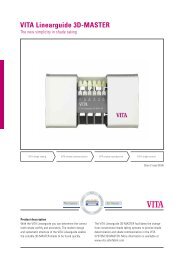
With the unique <strong>VITA</strong> SYSTEM 3D-MASTER ®<br />
all natural tooth shades are systematically<br />
determined and completely reproduced.<br />
Please note: Our products should be used according to the working instructions.<br />
We cannot be held liable for damages resulting from incorrect handling or usage.<br />
The user is furthermore obliged to check the product before use with regard to its suitability<br />
for the intended area of applications. We cannot accept any liability if the product is used in<br />
conjunction with materials and equipment from other manufacturers which are not compatible<br />
or not authorized for use with our product. Furthermore, our liability for the correctness of this<br />
information is independent of the legal ground and, in as far as legally permissible, is limited<br />
to the invoiced value of the goods supplied excluding turnover tax. In particular, as far as<br />
legally permissible, we do not assume any liability for profit loss, for indirect damages,<br />
for consequential damages or for claims of third parties against the purchaser.<br />
Claims for damages based on fault liability (culpa in contrahendo, breach of contract,<br />
E<br />
unlawful acts, etc.) can only be made in the case of intent or gross negligence.<br />
Date of issue of these directions for use: 07-07. 1466<br />
TÜV Rheinland<br />
geprüfte<br />
Sicherheit<br />
<strong>VITA</strong> Zahnfabrik H. Rauter GmbH & Co.KG<br />
Postfach 1338 · D-79704 Bad Säckingen . Germany<br />
Tel. +49/7761/562-0 · Fax +49/7761/562-299<br />
Hotline: +49/7761/562-222 · Fax +49/7761/562-446<br />
www.vita-zahnfabrik.com · info@vita-zahnfabrik.com<br />
- 0707 (100) S