CanOBD2 Diagnostic Tool - Sears
CanOBD2 Diagnostic Tool - Sears
CanOBD2 Diagnostic Tool - Sears
- TAGS
- diagnostic
- tool
- sears
- c.sears.com
Create successful ePaper yourself
Turn your PDF publications into a flip-book with our unique Google optimized e-Paper software.
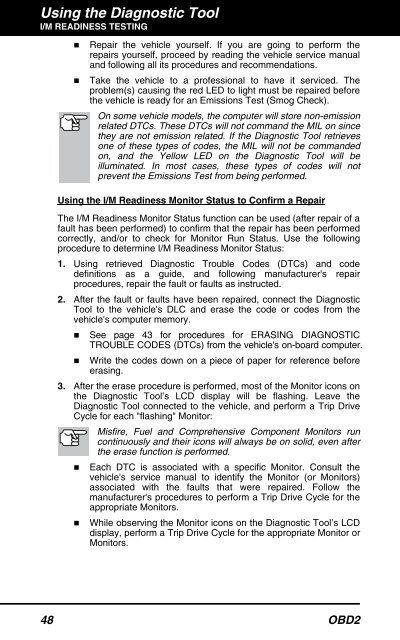
Using the <strong>Diagnostic</strong> <strong>Tool</strong><br />
I/M READINESS TESTING<br />
� Repair the vehicle yourself. If you are going to perform the<br />
repairs yourself, proceed by reading the vehicle service manual<br />
and following all its procedures and recommendations.<br />
� Take the vehicle to a professional to have it serviced. The<br />
problem(s) causing the red LED to light must be repaired before<br />
the vehicle is ready for an Emissions Test (Smog Check).<br />
On some vehicle models, the computer will store non-emission<br />
related DTCs. These DTCs will not command the MIL on since<br />
they are not emission related. If the <strong>Diagnostic</strong> <strong>Tool</strong> retrieves<br />
one of these types of codes, the MIL will not be commanded<br />
on, and the Yellow LED on the <strong>Diagnostic</strong> <strong>Tool</strong> will be<br />
illuminated. In most cases, these types of codes will not<br />
prevent the Emissions Test from being performed.<br />
Using the I/M Readiness Monitor Status to Confirm a Repair<br />
The I/M Readiness Monitor Status function can be used (after repair of a<br />
fault has been performed) to confirm that the repair has been performed<br />
correctly, and/or to check for Monitor Run Status. Use the following<br />
procedure to determine I/M Readiness Monitor Status:<br />
1. Using retrieved <strong>Diagnostic</strong> Trouble Codes (DTCs) and code<br />
definitions as a guide, and following manufacturer's repair<br />
procedures, repair the fault or faults as instructed.<br />
2. After the fault or faults have been repaired, connect the <strong>Diagnostic</strong><br />
<strong>Tool</strong> to the vehicle's DLC and erase the code or codes from the<br />
vehicle's computer memory.<br />
� See page 43 for procedures for ERASING DIAGNOSTIC<br />
TROUBLE CODES (DTCs) from the vehicle's on-board computer.<br />
� Write the codes down on a piece of paper for reference before<br />
erasing.<br />
3. After the erase procedure is performed, most of the Monitor icons on<br />
the <strong>Diagnostic</strong> <strong>Tool</strong>’s LCD display will be flashing. Leave the<br />
<strong>Diagnostic</strong> <strong>Tool</strong> connected to the vehicle, and perform a Trip Drive<br />
Cycle for each "flashing" Monitor:<br />
Misfire, Fuel and Comprehensive Component Monitors run<br />
continuously and their icons will always be on solid, even after<br />
the erase function is performed.<br />
� Each DTC is associated with a specific Monitor. Consult the<br />
vehicle's service manual to identify the Monitor (or Monitors)<br />
associated with the faults that were repaired. Follow the<br />
manufacturer's procedures to perform a Trip Drive Cycle for the<br />
appropriate Monitors.<br />
� While observing the Monitor icons on the <strong>Diagnostic</strong> <strong>Tool</strong>’s LCD<br />
display, perform a Trip Drive Cycle for the appropriate Monitor or<br />
Monitors.<br />
48 OBD2


