Neuro Balloon Catheter - Integra LifeSciences
Neuro Balloon Catheter - Integra LifeSciences
Neuro Balloon Catheter - Integra LifeSciences

Create successful ePaper yourself
Turn your PDF publications into a flip-book with our unique Google optimized e-Paper software.
Instructions for Use - Mode d'emploi<br />
Gebrauchsanleitung<br />
Istruzioni per l'uso - Instrucciones de uso<br />
<strong>Neuro</strong><br />
<strong>Balloon</strong><br />
<strong>Catheter</strong><br />
MADE BY / Fabriqué par / Hergestellt von<br />
Prodotto da / Manufacturado por<br />
<strong>Integra</strong> <strong>Neuro</strong>Sciences Implants S.A.<br />
2905 Route des Dolines<br />
06921 Sophia Antipolis cedex, FRANCE<br />
BL915001-05 © 2003 by <strong>Integra</strong> <strong>Neuro</strong>Sciences. All Rights Reserved.
3<br />
English<br />
Sterile - Sterilized with ethylene oxide gas. Non pyrogenic. For single use only. Do not<br />
use open or damaged packages. Do not resterilize.<br />
WARRANTY DISCLAIMER AND LIMITATION OF REMEDY<br />
THERE IS NO EXPRESS OR IMPLIED WARRANTY OF<br />
MERCHANTABILITY, FITNESS FOR A PARTICULAR PURPOSE, OR<br />
OTHER WARRANTY ON INTEGRA NEUROSCIENCES PRODUCTS<br />
DESCRIBED IN THESE INSTRUCTIONS FOR USE. UNDER NO<br />
CIRCUMSTANCES SHALL INTEGRA NEUROSCIENCES IMPLANTS BE<br />
LIABLE FOR MEDICAL EXPENSES OR ANY DIRECT, INDIRECT,<br />
INCIDENTAL, OR CONSEQUENTIAL DAMAGES OTHER THAN AS<br />
EXPRESSLY PROVIDED BY SPECIFIC LAW. NO PERSON HAS ANY<br />
AUTHORITY TO BIND INTEGRA NEUROSCIENCES IMPLANTS TO ANY<br />
REPRESENTATION OR WARRANTY CONCERNING INTEGRA<br />
NEUROSCIENCES IMPLANTS PRODUCTS EXCEPT AS SPECIFICALLY<br />
SET FORTH HEREIN.<br />
Descriptions and specifications appearing in <strong>Integra</strong> <strong>Neuro</strong>Sciences printed matter,<br />
including this publication, are meant solely to generally describe the product at the time<br />
of manufacture and do not constitute any express<br />
warranties.<br />
Rx only.<br />
Product returns to <strong>Integra</strong> <strong>Neuro</strong>Sciences: Contact your local Representative for<br />
instructions on return of products.<br />
DESCRIPTION<br />
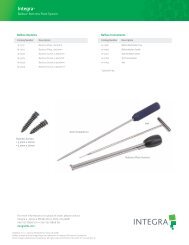
The sterile, disposable <strong>Neuro</strong> <strong>Balloon</strong> <strong>Catheter</strong> consists of a 64 cm usable length, single<br />
lumen catheter with a distal inflatable balloon attached to the catheter's tip (see figure<br />
page 2). It is designed to be inserted through a lumen presenting a French 4 minimum<br />
diameter (1.35 mm minimum). The balloon inflates with a 1 ml (1 cc) syringe which is<br />
included in the package. Upon inflation following the recommended procedure described in<br />
these instructions for use, the balloon inflates in a dumb-bell shape.<br />
The diameter of the inflated balloon waist - secondary to a pre-inflation at 1 ml (1 cc) of<br />
air - is between 3.5 mm minimum with 0.6 ml (0.6 cc) of air and 6 mm maximum with 1 ml<br />
(1 cc) of air (when measured immediately after inflation at the atmosphere pressure).<br />
NEVER INFLATE WITH MORE THAN 1 ML (1CC) OF AIR.<br />
The special dumb-bell balloon shape facilitates positioning, and maintains the balloon<br />
within the cerebral membrane. As the air is slowly injected, the sections of the balloon<br />
inflate either at the same time or in sequence (the proximal section inflates shortly before<br />
the distal section), positioning the balloon waist in the center of the prepunctured<br />
membrane opening. The membrane opening is progressively dilated to the outer diameter<br />
of the balloon waist. During the dilatation procedure, the balloon waist can be visualized<br />
through the clear membrane of the inflated proximal balloon section.<br />
Materials in contact with body tissues or body fluids are polyurethane, silicone elastomer<br />
and cyanoacrylate glue.<br />
INDICATION<br />
The <strong>Neuro</strong> <strong>Balloon</strong> <strong>Catheter</strong> is intended for dilatation of cerebral membrane fenestrations<br />
under direct or endoscopic visualization during intracranial procedures.<br />
WARNING<br />
Not for intravascular use. Do not use in rigid neuro-tissues, such as dilatation of aqueducts<br />
stenosis or thick membranes of arachnoid cysts, since the balloon is not designed to<br />
withstand high pressure. If the dilatation of the target site is not successful with 1 ml of air,<br />
the tissue may be too rigid for this instrument. Over-inflation should not be attempted as it<br />
may damage the balloon; another technique should be used.
PRECAUTIONS<br />
4<br />
English<br />
• Do not expose to organic solvents.<br />
• Have a duplicate of the sterile product available during the procedure.<br />
• Do not attempt to pass the balloon catheter through a lumen smaller than French 4.<br />
• If a strong resistance is felt during introduction, discontinue the procedure and<br />
determine the cause of resistance before proceeding. If the cause of the resistance<br />
cannot be determined, withdraw the deflated balloon catheter under negative pressure.<br />
• Inflate balloon with air only. Do not inflate with saline or contrast media.<br />
• Do not inflate the balloon in excess of 1 ml (1 cc) of air. Over-inflation increases the<br />
possibility of balloon damage.<br />
• Slowly inflate the balloon.<br />
• Do not advance or retract the catheter unless the balloon is fully deflated under<br />
negative pressure.<br />
• These balloon catheters are extremely delicate instruments: Extra care must be taken in<br />
their handling and use. Even though each product is inspected and tested to assure<br />
integrity during manufacture, a pin hole or leak may still occasionally develop during<br />
use due to the special construction of the device. Prior to use, inspect the balloon<br />
catheter by gently inflating with 1 ml (1 cc) of air and examine to verify balloon<br />
integrity and shape (see paragraph below: Instructions for Use - Preparation). If the<br />
balloon still does not maintain inflation during a procedure, remove it from the surgical<br />
site as indicated in step 15 of the instructions for use below, and replace it with new<br />
balloon catheter.<br />
This product is recommended for single use only.<br />
This product is sterilized with ethylene oxide. Do not use if the package is open or<br />
damaged. Use the device prior to the "Use Before" date on the package label.<br />
Caution - Do not resterilize. <strong>Integra</strong> <strong>Neuro</strong>Sciences will not be liable for any direct,<br />
indirect, incidental or consequential damages resulting from or related to<br />
resterilization.<br />
COMPLICATIONS<br />
Complications may occur at any time during or after the procedure. Possible complications<br />
include, but are not limited to: hemorrhage, infection, elevated intracranial pressure,<br />
bradycardia, air embolism, neurological disorders, CSF leak, subdural collection, death.<br />
Intracranial procedures should not be attempted by physicians unfamiliar with the possible<br />
complications.<br />
Risk of incident such as balloon rupture may potentially occur during procedure. This risk<br />
is minimized when following the instructions for use below.<br />
INSTRUCTIONS FOR USE<br />
Preparation<br />
1. Carefully remove the balloon catheter from its protective, transparent plastic sheath<br />
before use.<br />
Caution: When pulling the catheter out of the sheath, be careful not to kink the<br />
catheter.<br />
2. The use of the syringe provided within the package is strongly recommended. Fill the<br />
syringe with 1 ml (1cc) of air and connect it to the catheter hub.<br />
Warning: Do not use more than 1 ml (1 cc) of air; over-inflation may damage the<br />
balloon.
5<br />
English<br />
3. Inflate the balloon by slowly injecting with 1 ml (1 cc) of air. The balloon should<br />
inflate into a dumb-bell shape (see figure page 2), both sections inflating either at the<br />
same time or the proximal section inflating shortly before the distal section. Carefully<br />
inspect the catheter with the balloon inflated. A balloon that leaks or inflates in a<br />
grossly asymetric (eccentric) manner should not be used.<br />
4. Completely deflate the balloon by pulling back on the syringe's plunger in order to<br />
collapse the balloon over the catheter tip. Disconnect the syringe from the catheter<br />
hub.<br />
5. Gently moisten the exterior of the balloon catheter with sterile, non pyrogenic saline<br />
solution (or similar isotonic solution) to facilitate balloon introduction into the cannula<br />
or other introducing tool.<br />
Insertion, Inflation and Withdrawal<br />
6. Using a technique of choice, insert an introducing tool (e.g. : a neuroendoscope or a<br />
multilumen cannula) close to the membrane to be punctured.<br />
7. Create the puncture opening in the cerebral membrane.<br />
8. Connect the syringe unfilled to the catheter hub. Pull back on the syringe's plunger in<br />
order to collapse the balloon over the catheter tip and to remove any residual inflation<br />
of the balloon. Leave the syringe connected.<br />
9. Carefully introduce the deflated balloon catheter through the 4 French (or bigger)<br />
lumen of the introducing tool, just proximal to the tool's distal tip. If any resistance is<br />
felt during advancement, gently remove the catheter, check for possible residual<br />
inflation of the balloon or other cause of obstruction. Never force the catheter down<br />
the lumen as this may damage the balloon.<br />
10. Once the balloon tip clearly appears under direct visualization or on the endoscopy<br />
visualization system screen, disconnect the syringe and fill it with 1 ml (1 cc) of air.<br />
Then, reconnect the syringe to the catheter hub.<br />
11. Carefully position the balloon within the opening in the cerebral membrane. A black<br />
marker within the balloon indicates the balloon waist. This black marker should be<br />
positioned within the membrane opening.<br />
12. Inflate the balloon by slowly injecting 0.6 ml (0.6 cc) of air (advance the plunger to<br />
the graduation 0.4 ml (0.4 cc) of the syringe).<br />
The balloon will inflate into a dumb-bell shape, the proximal section inflating shortly<br />
before the distal section. Upon inflation, the proximal and distal balloon sections will<br />
capture the membrane, progressively dilating the hole to the outer diameter of the<br />
balloon waist. The dilatation can be visualized through the transparent wall of the<br />
proximal balloon section.<br />
13. Maintain inflation for 2 minutes to facilitate hemostasis of eventual<br />
microhemorrhages.<br />
14. It should be noted that air slowly diffuses through the balloon wall. If required, inject<br />
the residual 0.4 ml (0.4 cc) left in the syringe to compensate for air loss. If necessary,<br />
maintain the inflation for 2 more minutes.<br />
Warning: Do not try to inject more than 1 ml (1 cc) of air as over-inflation may<br />
damage the balloon.<br />
15. Deflate the balloon by completely pulling back on the syringe's plunger and, without<br />
disconnecting the syringe, gently remove the catheter from the introducing tool under<br />
negative pressure.
6<br />
Français<br />
Stérile - Stérilisé à l'oxyde d'éthylène. Apyrogène. A usage unique. Vérifier l'intégrité<br />
de l'emballage avant usage. Ne pas restériliser.<br />
DENI DE GARANTIE ET LIMITATION DES RECOURS<br />
AUCUNE GARANTIE EXPRESSE NI IMPLICITE, Y COMPRIS TOUTE<br />
GARANTIE IMPLICITE DE COMMERCIALISATION OU D'APTITUDE A<br />
UNE DESTINATION PARTICULIERE, N'EST ACCORDEE SUR LES<br />
PRODUITS INTEGRA NEUROSCIENCES DECRITS DANS LA PRESENTE<br />
NOTICE. INTEGRA NEUROSCIENCES IMPLANTS NE SAURAIT EN<br />
AUCUN CAS ETRE TENUE RESPONSABLE DE DOMMAGES DIRECTS,<br />
INDIRECTS OU INCIDENTS A L'EXCLUSION DE CEUX PREVUS AU TITRE<br />
DE DISPOSITIONS SPECIFIQUES DE LA LOI. NUL N'EST AUTORISE A<br />
ENGAGER LA RESPONSABILITE DE INTEGRA NEUROSCIENCES<br />
IMPLANTS AU TERME D'UNE DECLARATION OU GARANTIE<br />
QUELCONQUES CONCERNANT LES PRODUITS INTEGRA<br />
NEUROSCIENCES IMPLANTS, SAUF AINSI QU'IL EN EST<br />
EXPRESSEMENT DISPOSE DANS LA PRESENTE NOTICE.<br />
Les descriptions ou spécifications figurant dans les publications de <strong>Integra</strong><br />
<strong>Neuro</strong>Sciences, y inclus la présente notice, ont pour seul but de décrire le produit de<br />
manière générale au moment de sa fabrication et ne sauraient constituer une<br />
quelconque garantie.<br />
Retour à <strong>Integra</strong> <strong>Neuro</strong>Sciences : Contacter votre représentant local pour la marche à<br />
suivre sur les retours de produits.<br />
DESCRIPTION<br />
Le <strong>Neuro</strong> <strong>Balloon</strong> <strong>Catheter</strong>, stérile et à usage unique, est un cathéter à simple lumière qui<br />
mesure 64 cm de longueur utile et qui possède un ballonnet gonflable à son extrémité<br />
distale (voir figure page 2). Il est conçu pour être introduit dans un canal de diamètre<br />
minimum French 4 (1,35 mm minimum). Le ballonnet se gonfle à l'aide d'une seringue de<br />
1 ml (1 cc) qui est fournie avec le cathéter. Gonflé selon la procédure recommandée dans<br />
ces instructions d'utilisation, le ballonnet a une forme d'haltère.<br />
L'étranglement du ballonnet gonflé, après un gonflage préliminaire avec 1 ml (1cc) d'air,<br />
présente un diamètre compris entre 3,5 mm minimum avec 0,6 ml (0,6 cc) d'air et 6 mm<br />
maximum avec 1 ml (1 cc) d'air (mesure immédiate après gonflage à pression<br />
atmosphérique). NE JAMAIS GONFLER AVEC PLUS DE 1 ML (1 CC) D'AIR.<br />
La forme particulière en haltère du ballonnet facilite le positionnement et le maintien du<br />
ballonnet au niveau de la membrane cérébrale. Lorsque l'air est injecté lentement, les deux<br />
parties du ballonnet se gonflent en même temps ou l'une après l'autre (la partie proximale se<br />
gonflant légèrement avant la partie distale), positionnant l'étranglement du ballonnet au<br />
centre de l'ouverture préformée de la membrane cérébrale. L'ouverture de la membrane est<br />
progressivement dilatée à la dimension du diamètre de l'étranglement du ballonnet.<br />
La procédure de dilatation peut être visualisée par transparence à travers la partie proximale<br />
gonflée du ballonnet.<br />
Les matériaux en contact avec les tissus ou les fluides corporels sont le polyuréthane,<br />
l'élastomère de silicone et la colle cyanoacrylique.<br />
INDICATION<br />
Le <strong>Neuro</strong> <strong>Balloon</strong> <strong>Catheter</strong> est indiqué pour la dilatation d’une ouverture réalisée dans une<br />
membrane cérébrale. Cette dilatation est effectuée sous une visualisation directe ou sous<br />
endoscopie lors de procédures intracrâniennes.<br />
MISES EN GARDE<br />
N’est pas prévu pour un usage intravasculaire.<br />
Ne pas utiliser dans des tissus neurologiques rigides comme pour la dilatation de sténoses<br />
d’aqueducs ou de membranes épaisses de kystes arachnoïdiens, le ballonnet n'étant pas<br />
conçu pour supporter des pressions d'air élevées. Si la dilatation du site cible ne peut pas se<br />
faire avec 1 ml d’air, il est possible que le tissu soit trop rigide pour cet instrument. Dans ce<br />
cas, un surgonflage ne doit pas être tenté car le ballonnet risque d’être endommagé ; une<br />
autre technique doit être utilisée.<br />
PRECAUTIONS
7<br />
Français<br />
• Ne pas exposer à des solvants organiques.<br />
• Avoir un double du produit stérile à disposition pendant la procédure.<br />
• Ne pas tenter de passer le cathéter à travers un canal plus petit que French 4.<br />
• Si une résistance est ressentie à l'insertion du cathéter, arrêter la procédure et déterminer<br />
la cause de la résistance avant de poursuivre. Si cette cause ne peut pas être déterminée,<br />
dégonfler totalement le ballonnet, maintenir une pression négative, et retirer le cathéter.<br />
• Utiliser seulement de l’air pour gonfler le ballonnet. Ne pas gonfler avec des solutions<br />
salines ou des produits de contraste.<br />
• Ne pas gonfler avec plus de 1 ml (1 cc) d'air. Tout surgonflage augmente la probabilité<br />
d'endommager le ballonnet.<br />
• Gonfler lentement le ballonnet.<br />
• Ne pas introduire ou retirer le cathéter si le ballonnet n'est pas totalement dégonflé et<br />
maintenu sous pression négative.<br />
• Ces cathéters à ballonnet sont des outils extrêmement fragiles : Une attention<br />
particulière doit être apportée lors de leur manipulation et de leur utilisation. L'intégrité<br />
de chaque produit est inspectée et testée durant la fabrication, cependant un trou<br />
"d'épingle" ou une fuite peuvent occasionnellement se développer durant l'utilisation du<br />
fait de la construction particulière de ce dispositif. Avant toute utilisation, examiner le<br />
cathéter à ballonnet en le gonflant doucement avec un volume d'air de 1 ml (1cc), puis<br />
vérifier l'intégrité et la forme du ballonnet (voir le paragraphe ci-dessous: Instructions<br />
d'utilisation - Préparation). Si malgré tout le gonflage du ballonnet ne peut être<br />
maintenu durant la procédure clinique, retirer le cathéter du site chirurgical comme<br />
indiqué à l'étape 15 des instructions d'utilisation ci-dessous, et le remplacer par un<br />
nouveau cathéter à ballonnet.<br />
Ce produit est conçu pour un usage unique. Ce produit est stérilisé avec de l'oxyde<br />
d'éthylène. Ne pas utiliser si l'emballage est ouvert ou endommagé. Utiliser le produit<br />
avant la date limite d'utilisation imprimée sur l'étiquette figurant sur l'emballage.<br />
Attention - Ne pas restériliser. <strong>Integra</strong> <strong>Neuro</strong>Sciences ne saurait être tenue<br />
responsable de dommages directs, indirects, consécutifs ou afférents à la<br />
restérilisation.<br />
COMPLICATIONS<br />
Des complications peuvent survenir en cours de procédure ou après la procédure. Les<br />
complications possibles comprennent les cas suivants, mais ne sont pas limitées à ces cas :<br />
hémorragie, infection, pression intracrânienne élevée, bradycardie, aéroembolisme, troubles<br />
neurologiques, fuite de LCR, collection sous-durale, décès. Les procédures intracrâniennes<br />
ne doivent pas être tentées par des chirurgiens qui ne sont pas familiers avec les<br />
complications possibles.<br />
Un risque d'incident tel qu'une rupture du ballonnet en cours de procédure peut<br />
éventuellement exister. Ce risque est minimisé en respectant les instructions d'utilisation cidessous.<br />
INSTRUCTIONS D'UTILISATION<br />
Préparation<br />
1. Retirer avec précaution le cathéter à ballonnet de son étui plastique transparent avant<br />
usage.<br />
Attention : Lors du retrait du cathéter de son étui, ne pas plier le cathéter.<br />
2. L'utilisation de la seringue fournie avec le cathéter est fortement recommandée. Remplir<br />
la seringue avec 1 ml (1 cc) d'air et l'attacher au connecteur du cathéter.<br />
Attention: Ne pas essayer d'utiliser plus de 1 ml (1 cc) d'air car un surgonflage peut<br />
endommager le ballonnet.
8<br />
Français<br />
3. Gonfler le ballonnet en injectant lentement le volume d'air de 1 ml (1 cc) contenu dans<br />
la seringue. Le ballon doit se gonfler en forme d'haltère (voir figure page 2), les<br />
2 parties du ballon se gonflant en même temps ou la partie proximale se gonflant<br />
légèrement avant la partie distale. Examiner attentivement le cathéter avec le ballonnet<br />
gonflé. Un ballonnet qui présente une fuite ou qui se gonfle de manière exagérément<br />
asymétrique (excentrique) ne doit pas être utilisé.<br />
4. Dégonfler le ballonnet en tirant complètement sur le piston de la seringue afin de<br />
plaquer le ballonnet contre le cathéter. Déconnecter la seringue du connecteur.<br />
5. Humidifier délicatement l'extérieur du cathéter à ballonnet avec une solution saline<br />
stérile et apyrogène (ou une solution isotonique similaire) pour faciliter l'introduction<br />
du cathéter dans la canule ou dans l’instrument d’introduction.<br />
Insertion, gonflage, retrait<br />
6. En utilisant une technique appropriée, insérer un instrument d’introduction (ex : un<br />
neuroendoscope ou une canule multilumen) jusqu'à ce qu'il se trouve à proximité de la<br />
membrane à percer.<br />
7. Créer un petit orifice dans la membrane cérébrale.<br />
8. Connecter la seringue vide d'air au connecteur du cathéter. Tirer sur le piston de la<br />
seringue afin de plaquer le ballonnet sur le cathéter et d'éliminer tout gonflage résiduel<br />
du ballonnet. Laisser la seringue connectée.<br />
9. Introduire avec précaution le cathéter avec le ballonnet dégonflé dans le canal French<br />
4 (ou de dimension supérieure) de l’instrument d’introduction. Arrêter l'introduction<br />
juste avant l'extrémité distale de l’instrument. Si une résistance est ressentie à<br />
l'insertion du cathéter, retirer doucement le cathéter et vérifier s'il ne s'agit pas d'un<br />
gonflage résiduel du ballonnet ou d'une autre cause d'obstruction. Ne jamais forcer<br />
pour introduire le cathéter à l'intérieur du canal afin d’éviter tout endommagement du<br />
ballonnet.<br />
10. Lorsque l'extrémité du ballonnet apparaît clairement en visualisation directe ou sur<br />
l'écran du système de visualisation endoscopique, déconnecter la seringue et la gonfler<br />
avec 1 ml (1 cc) d'air. Puis reconnecter la seringue au connecteur du cathéter.<br />
11. Avancer avec précaution le ballonnet dégonflé dans l'orifice de la membrane<br />
cérébrale. Une marque noire sur le cathéter indique l'étranglement du ballonnet.<br />
Positionner cette marque noire au niveau de l'orifice de la membrane.<br />
12. Gonfler le ballonnet en injectant lentement un volume de 0,6 ml (0,6 cc) d'air (avancer<br />
le piston jusqu'à la graduation 0,4 ml (0,4 cc) de la seringue).<br />
Le ballonnet se gonfle en forme d'haltère, sa partie proximale se gonflant légèrement<br />
avant sa partie distale. Lors du gonflage, la membrane est maintenue entre les parties<br />
proximale et distale du ballonnet et l'orifice est progressivement dilaté à la dimension<br />
du diamètre externe de l'étranglement du ballonnet. La dilatation peut être visualisée<br />
par transparence à travers la partie proximale du ballonnet.<br />
13. Maintenir le ballonnet ainsi gonflé durant 2 minutes pour faciliter l'hémostase<br />
d'éventuelles microhémorragies.<br />
14. Il est à noter que l'air peut diffuser lentement à travers les parois du ballonnet.<br />
Si besoin, injecter le volume de 0,4 ml (0,4 cc) restant afin de compenser la perte d'air.<br />
Si nécessaire, maintenir le ballonnet ainsi gonflé durant encore 2 minutes.<br />
Attention : Ne pas essayer d'injecter plus de 1 ml (1 cc) d'air car un surgonflage peut<br />
endommager le ballonnet.<br />
15. Dégonfler le ballonnet en tirant complètement sur le piston de la seringue et, sans<br />
déconnecter la seringue, retirer délicatement le cathéter en maintenant une pression<br />
négative.
9<br />
Deutsch<br />
Steril - Mit Ethylenoxid sterilisiert. Pyrogenfrei. Zum Einmalgebrauch. Nicht<br />
verwenden, wenn die Packung geöffnet oder beschädigt ist. Nicht resterilisieren.<br />
GARANTIE- UND HAFTUNGSANSPRÜCHE<br />
INTEGRA NEUROSCIENCES IMPLANTS ÜBERNIMMT KEINE GARANTIE<br />
FÜR MARKTFÄHIGKEIT ODER EIGNUNG DER NACHFOLGEND<br />
BESCHRIEBENEN PRODUKTE FÜR EINEN BESTIMMTEN ZWECK.<br />
GEDRUCKTE BESCHREIBUNGEN ODER SPEZIFIKATIONEN DIENEN<br />
NUR DER ALLGEMEINEN BESCHREIBUNG DES PRODUKTES ZUM<br />
ZEITPUNKT SEINER HERSTELLUNG UND STELLEN KEINE<br />
GARANTIEERKLÄRUNG DAR. INTEGRA NEUROSCIENCES IMPLANTS<br />
HAFTET IM ÜBRIGEN - GLEICH AUS WELCHEM RECHTSGRUND - NUR<br />
IN FÄLLEN AUSDRÜCKLICH GEGEBENER ZUSICHERUNG EINER<br />
EIGENSCHAFT UND IN FÄLLEN EIGENEN GROBEN VERSCHULDENS.<br />
DIESE HAFTUNGSEINSCHRÄNKUNG GILT NICHT BEI VERLETZUNG<br />
WESENTLICHER, AUS DER NATUR DES VERTRAGES FOLGENDEN<br />
PFLICHTEN, WENN HIERDURCH DIE ERREICHUNG DES<br />
VERTRAGSZWECKES GEFÄHRDET WIRD ODER SOWEIT DURCH DIESE<br />
FREIZEICHNUNG BEI DER VERLETZUNG VON NEBENPFLICHTEN DIE<br />
RISIKOVERTEILUNG DES VERTRAGES EMPFINDLICH GESTÖRT<br />
WURDE.<br />
Produktrückgabe : Für Produktrücksendungen an <strong>Integra</strong> <strong>Neuro</strong>Sciences setzen Sie sich<br />
bitte mit dem für Sie zuständigen Außendienstmitarbeiter in Verbindung.<br />
BESCHREIBUNG<br />
Der sterile <strong>Neuro</strong> <strong>Balloon</strong> <strong>Catheter</strong> zum Einmalgebrauch hat eine Arbeitslänge von 64 cm.<br />
Es ist ein Einzellumen-Katheter mit einem distal inflatierbaren Ballon, der an der<br />
Katheterspitze befestigt ist (s. Abb. Seite 2). Er ist für die Einführung durch Lumen mit<br />
einem Mindestdurchmesser von F4 (min. 1,35 mm) ausgelegt. Der Ballon wird mit einer<br />
1ml (1 cc)-Spritze inflatiert, die der Verpackung beigefügt ist. Bei Inflation nach dem<br />
empfohlenen, in der Gebrauchsanleitung beschriebenen Verfahren entfaltet sich der Ballon<br />
hantelförmig.<br />
Der Durchmesser der inflatierten Ballontaille umfasst - nach Vorinflation von 1 ml (1 cc)<br />
Luft - mindestens 3,5 mm bei 0,6 ml (0,6 cc) Luft, und maximal 6 mm bei 1 ml (1 cc) Luft<br />
(Messung direkt nach der Inflation bei atmosphärischem Druck). DAS<br />
INFLATIONSVOLUMEN DARF 1 ML (1 CC) LUFT NICHT ÜBERSCHREITEN.<br />
Die spezielle Form vereinfacht die Positionierung und gewährleistet die Positionstreue des<br />
Ballons innerhalb der zerebralen Membran. Durch vorsichtiges Injizieren von Luft werden<br />
die Ballonsektionen gleichzeitig oder in Etappen inflatiert (der proximale Bereich inflatiert,<br />
kurz bevor der distale Bereich sich entfaltet), die Taille des Ballons fügt sich in die<br />
vorpunktierte Membranöffnung. Die Membranöffnung wird langsam bis zum<br />
Außendurchmesser der Ballontaille geweitet. Während der Dilatation ist die Taille des<br />
Ballons durch die transparente Membran des inflatierten proximalen Ballonbereichs<br />
sichtbar.<br />
Materialien, die mit Körpergewebe oder Körperflüssigkeit in Berührung gelangen, sind<br />
Polyurethan, Silikonelastomer und Zyanacrylatkleber.<br />
INDIKATION<br />
Der <strong>Neuro</strong> <strong>Balloon</strong> <strong>Catheter</strong> dient der Dilatation zerebraler Membranfensterungen unter<br />
direkter oder endoskopischer Sicht im Rahmen intrakranialer Verfahren.<br />
WARNHINWEIS<br />
Nicht zur intravaskulären Verwendung.<br />
Nicht zu verwenden bei festen neuroanatomischen Geweben - wie z.B. zur Dilatation von<br />
Aquäduktstenosen oder dicken Membranen von Arachnoidalzysten - da der Ballon nicht<br />
für hohe Drücke ausgelegt ist. Gelingt die Dilatation der Zielstelle mit 1 ml Luft nicht,<br />
könnte das Gewebe für dieses Instrument zu fest sein. Nicht übermäßig inflatieren, da der<br />
Ballon hierdurch beschädigt werden könnte, sondern eine andere Technik anwenden.
VORSICHTSMASSNAHMEN<br />
10<br />
Deutsch<br />
• Nicht mit organischen Lösemitteln in Berührung bringen.<br />
• Während der Prozedur sollte das sterile Produkt doppelt verfügbar sein.<br />
• Den Ballonkatheter nicht durch ein Lumen einführen, welches kleiner als F4 ist.<br />
• Bei starkem Widerstand während der Prozedur die Prozedur abbrechen und vor<br />
Wiederaufnahme die Ursache ermitteln. Ist dies nicht möglich, den deflatierten<br />
Ballonkatheter unter negativem Druck zurückziehen.<br />
• Den Ballon nur mit Luft inflatieren. Nicht mit Kochsalzlösung oder Kontrastmitteln<br />
inflatieren.<br />
• Den Ballon nicht mit mehr als 1 ml (1 cc) Luft inflatieren. Bei zu hohem<br />
Inflationsdruck erhöht sich das Risiko einer Beschädigung des Ballons.<br />
• Den Ballon langsam inflatieren.<br />
• Den Katheter nicht vorschieben oder zurückziehen, bevor der Ballon unter negativem<br />
Druck nicht völlig deflatiert ist.<br />
• Der Ballonkatheter ist ein äußerst empfindliches Instrument, dessen Handhabung und<br />
Gebrauch besondere Vorsicht erfordern. Obwohl jedes Produkt bei seiner Herstellung<br />
geprüft und auf Integrität getestet wird, kann es während des Einsatzes aufgrund der<br />
speziellen Konstruktion zur Ausbildung von kleinen Löchern oder Leckagen kommen.<br />
Den Ballonkatheter vor dem Einsatz durch vorsichtiges Injizieren von 1 ml (1 cc) Luft<br />
prüfen und die Integrität des Ballons sowie dessen Form eingehend prüfen (siehe<br />
untenstehenden Abschnitt: Gebrauchsanleitung – Vorbereitung). Sollte der Ballon<br />
während eines Einsatzes die Inflation dennoch nicht halten, muss er, wie in Schritt 15<br />
der untenstehenden Gebrauchsanleitung beschrieben, entfernt und durch einen neuen<br />
Ballonkatheter ersetzt werden.<br />
Dieses Produkt ist nur zum Einmalgebrauch bestimmt. Das Produkt ist mit Ethylenoxid<br />
sterilisiert. Nicht verwenden, wenn die Packung geöffnet oder beschädigt ist. Vor dem auf<br />
der Packung angegebenen Verfallsdatum ("Use Before") verwenden.<br />
Achtung - Nicht resterilisieren! <strong>Integra</strong> <strong>Neuro</strong>Sciences haftet nicht für direkte,<br />
indirekte, Neben- oder Folgeschäden, die auf eine Resterilisation zurückzuführen sind.<br />
KOMPLIKATIONEN<br />
Komplikationen können zu jeder Zeit während oder nach der Prozedur auftreten. Hierzu<br />
gehören u.a.: Hämorrhagie, Infektion, erhöhter Hirndruck, Bradykardie, Luftembolie,<br />
<strong>Neuro</strong>logische Störungen, Leckage von Zerebrospinaler Flüssigkeit, Subdurale<br />
Ansammlung, Tod. Intrakraniale Prozeduren sollten nicht von Ärzten durchgeführt werden,<br />
die nicht mit den möglichen Komplikationen vertraut sind.<br />
Unfallrisiken wie ein Platzen des Ballons während der Prozedur sind potentiell gegeben.<br />
Ein solches Risiko kann durch die Beachtung der nachfolgenden Gebrauchsanleitung<br />
minimiert werden.<br />
GEBRAUCHSANLEITUNG<br />
Vorbereitung<br />
1. Vor der Anwendung den Ballonkatheter vorsichtig der transparenten Plastikhülle<br />
entnehmen.<br />
Achtung: Beim Herausziehen aus der Schleuse den Katheter nicht knicken.<br />
2. Es sollte unbedingt die in der Verpackung mitgelieferte Spritze verwendet werden.<br />
Die Spritze mit 1 ml (1 cc) Luft füllen und am Katheteranschluss konnektieren.<br />
Warnhinweis: Nicht mehr als 1 ml (1 cc) Luft inflatieren! Ein Inflationsvolumen von<br />
mehr als 1 ml (1 cc) Luft kann den Ballon beschädigen.<br />
3. Den Ballon durch langsames Injizieren von 1 ml (1cc) Luft inflatieren. Der Ballon<br />
entfaltet sich hantelförmig (s. Abb. Seite 2), wobei die beiden Ballonsektionen<br />
gleichzeitig inflatieren oder der proximale Bereich kurz vor dem distalen Ballonteil<br />
inflatiert. Den Katheter mit dem inflatierten Ballon eingehend prüfen. Ein Ballon, der<br />
eine Leckage aufweist oder der sichtbar asymetrisch (exzentrisch) inflatiert, darf nicht<br />
verwendet werden.
11<br />
Deutsch<br />
4. Den Ballon durch Zurückziehen des Spritzenkolbens komplett deflatieren, bis sich die<br />
Ballonmembran vollständig an die Katheterspitze schmiegt. Die Spritze vom<br />
Katheteranschluss enfernen.<br />
5. Die Außenseite des Ballonkatheters mit einer sterilen, pyrogenfreien Kochsalzlösung<br />
(oder vergleichbaren isotonischen Lösung) anfeuchten, um den Ballon besser in die<br />
Kanüle oder ein anderes Einführinstrument einführen zu können.<br />
Einführen, Inflatieren und Entfernen<br />
6. Das Einführinstrument (z.B. ein <strong>Neuro</strong>endoskop oder eine mehrläufige Kanüle) in der<br />
bevorzugten Technik bis nahe an die zu punktierende Membran einführen.<br />
7. Die zerebrale Membran punktieren.<br />
8. Die Spritze ungefüllt am Katheteranschluss konnektieren. Den Spritzenkolben<br />
zurückziehen, bis sich die Ballonmembran vollständig an die Katheterspitze schmiegt<br />
und jegliche Residualinflation aus dem Ballon entfernt ist. Die Spritze angeschlossen<br />
lassen.<br />
9. Den deflatierten Ballonkatheter vorsichtig durch ein F4 (oder größeres) Lumen des<br />
Einführinstruments einführen, so dass er gerade proximal zur distalen Spitze des<br />
Einführinstruments liegt. Wird beim Vorschub ein Widerstand bemerkt, den Katheter<br />
vorsichtig entfernen und auf mögliche Restinflation innerhalb des Ballons oder auf<br />
andere Obstruktionsursachen hin überprüfen. Um Beschädigungen am Ballon zu<br />
vermeiden, den Katheter immer vorsichtig vorschieben.<br />
10. Wenn die Ballonspitze unter direkter Beobachtung oder auf dem Bildschirm des<br />
Endoskopiesystems sichtbar wird, die Spritze entfernen und mit 1 ml (1 cc) Luft<br />
füllen. Anschließend die Spritze erneut am Katheteranschluss konnektieren.<br />
11. Den Ballon vorsichtig innerhalb der zerebralen Membranöffnung plazieren. Die<br />
schwarze Markierung, die die Ballontaille kenntlich macht, genau in der<br />
Membranöffnung positionieren.<br />
12. 0,6 ml (0,6 cc) Luft langsam in den Ballon inflatieren (den Kolben auf die 0,4 ml<br />
(0,4 cc)-Markierung der Spritze bewegen).<br />
Der Ballon entfaltet sich hantelförmig, wobei sich der proximale Bereich kurz vor<br />
dem distalen Ballonteil entfaltet. Nach der Inflation befindet sich die Membran<br />
zwischen dem Proximal- und dem Distalbereich des Ballons, dabei wird die Öffnung<br />
nach und nach bis zum Außendurchmesser der Ballontaille dilatiert. Die Dilatation<br />
kann durch die transparente Wand des proximalen Ballonbereiches beobachtet<br />
werden.<br />
13. Die Inflation 2 Minuten beibehalten, um eine Hämostase eventuell vorhandener<br />
Mikroblutungen zu ermöglichen.<br />
14. Es ist zu beachten, dass die Luft langsam durch die Ballonwand diffundiert. Falls<br />
notwendig, können die restlichen in der Spritze verbliebenen 0,4 ml (0,4 cc) Luft<br />
inflatiert werden, um einen Luftverlust auszugleichen. Falls notwendig, die Inflation<br />
2 Minuten beibehalten.<br />
Warnhinweis: Nicht mehr als 1 ml (1 cc) Luft inflatieren! Ein Inflationsvolumen von<br />
mehr als 1 ml (1 cc) Luft kann den Ballon beschädigen.<br />
15. Durch Zurückziehen des Spritzenkolbens den Ballon vollständig deflatieren und den<br />
Katheter, ohne die Spritze zu entfernen, unter negativem Druck vorsichtig aus dem<br />
Einführinstrument entfernen.
12<br />
Italiano<br />
Sterile - Sterilizzato con ossido di etilene. Apirogeno. Monouso. Non usare se la<br />
confezione è aperta o danneggiata. Non risterilizzare.<br />
DISCONOSCIMENTO DI GARANZIA E LIMITE DEI PROVVEDIMENTI<br />
I PRODOTTI INTEGRA NEUROSCIENCES DESCRITTI IN QUESTE<br />
ISTRUZIONI PER L'USO NON SONO COPERTI DA ALCUNA GARANZIA,<br />
ESPLICITA O IMPLICITA, DI COMMERCIABILITÀ O IDONEITÀ A UNO<br />
SCOPO DETERMINATO O DA ALTRA GARANZIA. INTEGRA<br />
NEUROSCIENCES IMPLANTS NON SI ASSUME ALCUNA<br />
RESPONSABILITÀ PER SPESE MEDICHE O DANNI DIRETTI O<br />
CONSEGUENTI TRANNE CHE NEI CASI ESPRESSAMENTE PREVISTI<br />
DALLA LEGGE. NESSUNO È AUTORIZZATO A FARSI GARANTE PER I<br />
PRODOTTI INTEGRA NEUROSCIENCES, TRANNE QUANDO<br />
ESPRESSAMENTE SPECIFICATO.<br />
Le descrizioni e le specifiche contenute negli stampati <strong>Integra</strong> <strong>Neuro</strong>Sciences,<br />
compreso il presente inserto, hanno l'unico scopo di descrivere in generale il prodotto al<br />
momento della fabbricazione e non costituiscono alcuna garanzia esplicita.<br />
Per le modalità di restituzione del prodotto contattare il rappresentante locale <strong>Integra</strong><br />
<strong>Neuro</strong>Sciences.<br />
DESCRIZIONE<br />
Il <strong>Neuro</strong> <strong>Balloon</strong> <strong>Catheter</strong> sterile monouso è costituito da un catetere a lume singolo,<br />
lunghezza utile 64 cm, dotato distalmente di un palloncino gonfiabile fissato alla punta del<br />
catetere (figura pagina 2). Il prodotto è concepito per essere introdotto attraverso lumi di<br />
diametro minimo 4 F (1,35 mm min.). Il palloncino viene gonfiato con una siringa da 1 ml<br />
(1cc), inclusa nella confezione. Gonfiandolo secondo la procedura raccomandata, descritta<br />
nelle presenti istruzioni per l'uso, il palloncino assume una forma a violino.<br />
Dopo il gonfiaggio con 1 ml (1 cc) di aria, il restringimento del palloncino gonfiato<br />
presenta un diametro da un minimo di 3,5 mm con 0,6 ml (0,6 cc) di volume d’aria, a un<br />
massimo di 6 mm con 1 ml (1 cc) di volume d’aria (se misurato a pressione atmosferica,<br />
immediatamente dopo il gonfiaggio). NON GONFIARE MAI CON PIU’ DI 1 ML (1 CC) DI ARIA.<br />
La speciale configurazione a violino del palloncino ne facilita il posizionamento e lo<br />
mantiene fermo all’interno della membrana cerebrale. Quando l'aria viene insufflata<br />
lentamente, le sezioni del palloncino si gonfiano contemporaneamente o in successione (la<br />
sezione prossimale si gonfia leggermente prima di quella distale), permettendo che il<br />
restringimento venga a posizionarsi al centro della puntura precedentemente praticata nella<br />
membrana. L’apertura della membrana viene progressivamente dilatata fino al diametro<br />
esterno del restringimento del palloncino. Durante la procedura di dilatazione, il<br />
restringimento del palloncino è visibile attraverso la parete trasparente della sezione<br />
prossimale del palloncino gonfiato.<br />
I materiali che entrano in contatto con i tessuti o i liquidi corporei sono il poliuretano, il<br />
silicone e il cianoacrilato.<br />
INDICAZIONI<br />
Il <strong>Neuro</strong> <strong>Balloon</strong> <strong>Catheter</strong> serve per dilatare fenestrazioni della membrana cerebrale sotto<br />
visualizzazione endoscopica o diretta nel corso di procedure intracraniali.<br />
AVVERTENZA<br />
Non per uso intravascolare.<br />
Non usare in tessuti neuroanatomici rigidi, come ad esempio per la dilatazione di stenosi<br />
acqueduttali o membrane spesse di cisti aracnoidali, dato che il palloncino non è concepito<br />
per resistere a pressioni elevate. Se la dilatazione del sito interessato non risulta possibile<br />
con 1 ml di aria, il tessuto potrebbe essere troppo rigido per l’uso di questo strumento. Non<br />
tentare di gonfiare eccessivamente il prodotto, dato che il sovragonfiaggio potrebbe<br />
danneggiare il palloncino, ma utilizzare una tecnica diversa.
PRECAUZIONI<br />
13<br />
Italiano<br />
• Non mettere a contatto con solventi organici.<br />
• Durante la procedura, tenere a disposizione un prodotto sterile di riserva.<br />
• Non tentare di far passare il catetere attraverso lumi inferiori a 4 French.<br />
• Se durante l'inserimento viene avvertita una forte resistenza, interrompere la procedura<br />
e, prima di proseguire, determinarne la causa. Se la causa della resistenza non può<br />
essere accertata, rimuovere il catetere a pressione negativa.<br />
• Gonfiare il palloncino esclusivamente con aria. Non gonfiare con soluzione fisiologica<br />
o mezzi di contrasto.<br />
• Non gonfiare il palloncino con più di 1 ml (1cc) di aria. Il sovragonfiaggio aumenta il<br />
rischio di danneggiare il palloncino.<br />
• Gonfiare il palloncino lentamente.<br />
• Non far avanzare o ritrarre il catetere se il palloncino non è stato completamente<br />
sgonfiato a pressione negativa.<br />
• Il caterere a palloncino è uno strumento estremamente delicato che deve essere<br />
maneggiato e usato con estrema cura. Nonostante ogni singolo prodotto sia controllato<br />
al momento della fabbricazione e testato per accertarne l'integrità, non è possibile<br />
escludere, a causa della costruzione speciale di questo strumento, l'eventuale<br />
formazione di piccole fessure o di perdite durante l'utilizzo. Prima dell'uso controllare il<br />
caterere a palloncino, iniettandovi delicatamente 1 ml (1 cc) d'aria. Mantenere gonfiato<br />
il palloncino controllandone minuziosamente l'integrità e la forma (vedi sezione in<br />
basso: Istruzioni per l'uso - Preparazione). Qualora, durante una procedura, il palloncino<br />
tuttavia non mantenesse il volume, è necessario rimuoverlo dal sito chirurgico come<br />
descritto al punto 15 delle istruzioni per l'uso riportate in basso, e sostituirlo con un<br />
nuovo catetere a palloncino.<br />
Il prodotto è concepito per essere usato una sola volta. Il prodotto è sterilizzato con ossido<br />
di etilene. Non usare se la confezione è aperta o danneggiata. Usare prima della data di<br />
scadenza ("Use Before") riportata sulla confezione.<br />
Attenzione - Non risterilizzare! <strong>Integra</strong> <strong>Neuro</strong>Sciences non è responsabile per danni<br />
diretti, indiretti, accidentali o conseguenti riconducibili alla risterilizzazione.<br />
COMPLICAZIONI<br />
Complicazioni possono sorgere in ogni momento durante e dopo la procedura. Tali<br />
complicazioni comprendono, fra l’altro, emorragia, infezioni, pressione intracranica<br />
elevata, bradicardia, embolia gassosa, turbe neurologiche, fuoriuscita di LCS, raccolta<br />
subdurale, decesso del paziente. Le procedure intracraniali non devono essere eseguite da<br />
medici che non abbiano dimestichizza con le possibili complicazioni. Durante la procedura,<br />
esiste il rischio potenziale di incidenti come la rottura del palloncino. Questo rischio può<br />
essere ridotto al minimo seguendo accuratamente le Istruzioni per l’uso qui di seguito<br />
riportate.<br />
ISTRUZIONI PER L’USO<br />
Preparazione<br />
1. Prima dell’uso, rimuovere delicatamente il catetere a palloncino dalla guaina protettiva<br />
di plastica trasparente.<br />
Attenzione: nel togliere il catetere dalla custodia, fare attenzione a non piegarlo.<br />
2. E’ vivamente raccomandato l’uso della siringa inclusa nella confezione. Riempire la<br />
siringa con 1 ml (1cc) di aria e collegarla al connettore del catetere.<br />
Avvertenza: Non tentare di insufflare più di 1 ml (1 cc) di aria, dato che il<br />
sovragonfiaggio potrebbe danneggiare il palloncino.<br />
3. Gonfiare il palloncino iniettandovi lentamente 1 ml (1 cc) di aria. Il palloncino deve<br />
assumere una forma finale a violino (figura pagina 2): le due sezioni del palloncino si<br />
dilateranno contemporaneamente o la sezione prossimale si dilaterà poco prima di<br />
quella distale. Controllare attentamente il catetere quando il palloncino è stato<br />
gonfiato.Non usare palloncini che non siano a tenuta o si gonfino in modo decisamente<br />
asimmetrico (eccentrico).
14<br />
Italiano<br />
4. Sgonfiare completamente il palloncino ritraendo il pistone della siringa in modo da far<br />
aderire il palloncino alla punta del catetere. Scollegare la siringa dal connettore del<br />
catetere.<br />
5. Inumidire delicatamente la parte esterna del catetere a palloncino con soluzione<br />
fisiologica sterile apirogena (o una soluzione isotonica simile), allo scopo di facilitare<br />
l’inserimento del palloncino nella cannula o in un altro strumento da introduzione).<br />
Inserimento, gonfiaggio e ritiro<br />
6. Secondo una tecnica di propria scelta, introdurre lo strumento da introduzione (p.es. un<br />
neuroendoscopio o una cannula a più lumi) in vicinanza della membrana che deve<br />
essere forata.<br />
7. Praticare un foro nella membrana cerebrale.<br />
8. Collegare la siringa svuotata al connettore del catetere. Ritrarre il pistone della siringa<br />
in modo da far aderire il palloncino alla punta del catetere e per eliminare eventuali<br />
residui di aria rimasti nel palloncino. Lasciare collegata la siringa.<br />
9. Inserire delicatamente il catetere a palloncino sgonfio nel lume da 4 French (o più<br />
grande) dello strumento da introduzione fino alla punta distale dello strumento stesso.<br />
Se durante l’avanzamento venisse avvertita una resistenza, rimuovere delicatamente il<br />
catetere e controllare l’eventuale presenza di aria residua nel palloncino o altre<br />
possibili cause di ostruzione. Non forzare mai il catetere nel lume della cannula, dato<br />
che il catetere potrebbe venirne danneggiato.<br />
10. Quando la punta del palloncino appare chiaramente sotto visualzzazione diretta o sullo<br />
schermo del sistema di visualizzazione endoscopica, scollegare la siringa e riempirla<br />
con 1 ml (1cc) di aria. Ricollegarla quindi al connettore del catetere.<br />
11. Posizionare accuratamente il palloncino all'interno dell‘apertura praticata nella<br />
membrana cerebrale. Un indicatore nero indica il restringimento del palloncino. Questo<br />
indicatore deve venir posizionato a cavallo dell’apertura della membrana.<br />
12. Gonfiare il palloncino iniettandovi lentamente 0,6 ml (0,6 cc) di aria (facendo avanzare<br />
il pistone fino alla tacca della siringa che indica 0,4 ml (0,4 cc).<br />
Il palloncino si dilaterà dapprima nella sua sezione prossimale e subito dopo in quella<br />
distale, assumendo una forma finale a violino (figura pagina 2). Durante il gonfiaggio,<br />
le sezioni prossimale e distale del palloncino “intrappoleranno” fra di esse la<br />
membrana cerebrale, dilatandone progressivamente l’apertura fino alla dimensione del<br />
diametro esterno del restringimento del palloncino. La dilatazione è visibile attraverso<br />
la parete trasparente della sezione prossimale del palloncino.<br />
13. Mantenere il gonfiaggio per 2 minuti in modo da facilitare l’emostasi di eventuali<br />
microemorragie.<br />
14. E' necessario tener presente che l'aria si diffonde lentamente attraverso la parete del<br />
palloncino. Se necessario, iniettare il volume residuo di 0,4 ml (0,4 cc) di aria rimasto<br />
nella siringa, così da compensare eventuali perdite di aria. Se necessario, mantenere il<br />
gonfiaggio per altri 2 minuti.<br />
Avvertenza: Non tentare di insufflare più di 1 ml (1 cc) di aria, dato che il<br />
sovragonfiaggio può danneggiare il palloncino.<br />
15. Sgonfiare il palloncino ritraendo completamente il pistone della siringa e, senza<br />
sconnettere la siringa, rimuovere delicatamente, a pressione negativa, il catetere dallo<br />
strumento da introduzione.
15<br />
Español<br />
Estéril. Esterilizado con óxido de etileno. Apirógeno. Para usar una sola vez. No<br />
utilizar si el envase está abierto o deteriorado. No reesterilizar.<br />
RESTRICCION DE GARANTIA Y DE RECURSO LEGAL<br />
NO EXISTE GARANTIA EXPRESA O IMPLICITA DE MERCANTIBILIDAD,<br />
ADECUACION A UN PROPOSITO DETERMINADO U OTRA GARANTIA<br />
PARA LOS PRODUCTOS DE INTEGRA NEUROSCIENCES, DESCRITOS EN<br />
ESTAS INSTRUCCIONES. BAJO NINGUNA CIRCUNSTANCIA INTEGRA<br />
NEUROSCIENCES IMPLANTS SE RESPONSABILIZARA DE GASTOS<br />
MEDICOS O DE DAÑOS DIRECTOS, INCIDENTALES O QUE SE<br />
PRODUZCAN COMO CONSECUENCIA DEL USO DE ESTOS PRODUCTOS,<br />
EXCEPTO AQUELLOS REGULADOS POR UNA LEY EXPRESA. NINGUNA<br />
PERSONA TIENE AUTORIDAD PARA OBLIGAR A INTEGRA<br />
NEUROSCIENCES IMPLANTS A NINGUNA RECLAMACION O GARANTIA<br />
CONCERNIENTE A LOS PRODUCTOS DE INTEGRA NEUROSCIENCES<br />
IMPLANTS, EXCEPTO A LAS ESPECIFICAMENTE ESTABLECIDAS AQUI.<br />
Las descripciones y especificaciones que aparecen en la literatura de <strong>Integra</strong><br />
<strong>Neuro</strong>Sciences, incluyendo esta publicación, están destinadas únicamente a la<br />
descripción general del producto en el momento de su fabricación y no constituyen<br />
ninguna garantía expresa.<br />
Devoluciones de productos a <strong>Integra</strong> <strong>Neuro</strong>Sciences : Sírvase contactar con su<br />
representante local, quien le dará instrucciones de como proceder a la devolución de<br />
productos.<br />
DESCRIPCION<br />
El <strong>Neuro</strong> <strong>Balloon</strong> <strong>Catheter</strong> es estéril y desechable y consiste en un catéter de longitud útil<br />
64 cm, de un solo lumen, dotado de un balón inflable distal sujeto a la punta del catéter (ver<br />
la figura página 2). Está diseñado para insertarlo por un lumen con un diámetro mínimo F4<br />
(1,35 mm como mínimo). El balón se infla mediante una jeringa de 1 ml (1 cc) que se<br />
suministra incluida en el envase del producto. Después del inflado siguiendo el<br />
procedimiento recomendado en estas instrucciones de uso, el balón queda inflado en una<br />
configuración en forma de pesas de gimnasia.<br />
El diámetro de la cintura del balón inflado, después de un preinflado con un máximo de<br />
1 ml (1 cc) de aire, está entre 3,5 mm, si se infla con 0,6 ml (0,6 cc) de aire, y 6 mm si se<br />
infla con 1 ml (1,0 cc) de aire (diámetro medido inmediatamente después del inflado a<br />
presión atmosférica). JAMAS INFLAR EL BALON CON UN VOLUMEN DE AIRE MAYOR DE<br />
1 ML (1 CC).<br />
El balón inflado adquiere una forma similar a “pesas de gimnasia”. Esta forma<br />
especialmente diseñada de balón facilita el posicionamiento y el mantenimiento del balón<br />
dentro de la membrana cerebral. Conforme el aire va lentamente inflando el balón, las<br />
distintas secciones del mismo se inflan bien de forma simultánea o secuencialmente (la<br />
sección proximal se infla un poco antes que la sección distal), posicionando la cintura del<br />
balón en el centro de la abertura de la membrana, practicada por punción previa de la<br />
misma. La abertura de la membrana se dilata progresivamente hasta alcanzar el diámetro<br />
externo de la cintura del balón. Mientras dura el procedimiento de dilatación, puede<br />
visualizarse la cintura del balón a través de la membrana transparente de su sección<br />
proximal inflada.<br />
Los materiales en contacto con los tejidos o fluidos corporales son poliuretano,<br />
elastómero de silicona y adhesivo cianoacrilato.<br />
INDICACIONES<br />
El <strong>Neuro</strong> <strong>Balloon</strong> <strong>Catheter</strong> está concebido para la dilatación de aberturas practicadas en las<br />
membranas cerebrales con visualización directa o endoscópica durante las intervenciones<br />
intracraneales.
ADVERTENCIA<br />
16<br />
Español<br />
No apto para uso intravascular.<br />
No utilizar en tejidos nerviosos rígidos, como dilatación de estenosis de conductos o<br />
membranas gruesas de quistes de la aracnoides dado que el balón no está diseñado para<br />
soportar altas presiones. Si no se consigue dilatar el punto a tratar con 1 ml de aire,<br />
posiblemente el tejido sea demasiado rígido para este instrumento. No se debe intentar<br />
inflar en exceso el balón ya que podría dañarse; en dicho caso, aplicar otra técnica.<br />
PRECAUCIONES<br />
• No exponer a disolventes orgánicos.<br />
• Tener disponible un duplicado del producto estéril durante el procedimiento.<br />
• No intentar pasar el catéter de balón a través de un lumen inferior a 4F.<br />
• Si se encuentra fuerte resistencia durante su introducción, interrumpir el procedimiento<br />
y determinar la causa de la misma antes de proseguir. Si no puede determinarse la causa<br />
de la resistencia, retirar el catéter de balón desinflado aplicando presión negativa.<br />
• Inflar el balón con aire exclusivamente. No inflar con solución salina o medios de<br />
contraste.<br />
• No inflar el balón con un volumen de aire superior a 1 ml (1 cc) puesto que un inflado<br />
excesivo aumenta la posibilidad de que se dañe.<br />
• Proceder lentamente al inflado del balón.<br />
• No hacer avanzar ni retirar el catéter a menos que esté totalmente desinflado bajo<br />
aplicación de presión negativa.<br />
• Estos catéteres de balón son productos extremadamente delicados; por eso, deberán<br />
manejarse y utilizarse con el debido cuidado. Si bien cada producto es inspeccionado y<br />
sometido a ensayo para asegurar su integridad durante la fabricación del mismo, pueden<br />
ocasionalmente aparecer durante su uso microporos o fisuras que dan lugar a fugas,<br />
debido a la construcción especial del producto. Antes de su utilización, inspeccionar el<br />
catéter de balón inflándolo suavemente con 1 ml (1 cc) de aire y examinarlo para<br />
verificar la integridad y la forma del mismo (véase párrafo a continuación:<br />
Instrucciones de uso - Preparación). Si a pesar de estas precauciones el balón no se<br />
mantiene inflado durante un procedimiento, proceder a retirarlo del punto tratado según<br />
se indica en el paso 15 de las Instrucciones de Uso que se encuentran a continuación y<br />
substituirlo por un catéter de balón nuevo.<br />
Este producto está indicado para un solo uso.<br />
Este producto está esterilizado con óxido de etileno. No utilizar si el envase está abierto o<br />
deteriorado. Usar el producto antes de la fecha de caducidad indicada en la etiqueta del<br />
envase.<br />
Precaución - No reesterilizar. <strong>Integra</strong> <strong>Neuro</strong>Sciences no se hará responsable de ningún<br />
daño directo, incidental o que resulte de la reesterilización del producto.<br />
COMPLICACIONES<br />
Las complicaciones pueden ocurrir en cualquier momento durante o después del<br />
procedimiento. Las complicaciones posibles, pero no únicas, pueden ser: hemorragia,<br />
infección, elevada presión intracraneal, bradicardia, embolia gaseosa, trastornos<br />
neurológicos, extravasación de fluido, acumulación subdural, muerte.<br />
Las intervenciones intracraneales no deben ser realizadas por especialistas que no estén<br />
familiarizados con las posibles complicaciones. Durante la intervención existe un riesgo<br />
potencial por ruptura del balón. Este riesgo se reduce al mínimo procediendo como se<br />
indica a continuación.
PROCEDIMIENTO DE UTILIZACION RECOMENDADO<br />
Preparación<br />
17<br />
Español<br />
1. Extraer con cuidado el catéter de balón de su envase protector de plástico transparente.<br />
Precaución: Cuando se tira del catéter para extraerlo de su envase protector, proceder<br />
con el debido cuidado para no provocar acodamientos.<br />
2. Se recomienda encarecidamente la utilización de la jeringa incluida en el envase.<br />
Llenar la jeringa con 1 ml (1 cc) de aire y conectarla al cono del catéter.<br />
Advertencia: No intentar utilizar más de 1 ml (1 cc) de aire pues un inflado excesivo<br />
del balón puede dañarlo.<br />
3. Inflar el balón inyectando lentamente el volumen de 1 ml (1 cc) de aire contenido en la<br />
jeringa. El balón adquirirá una forma de pesas de gimnasia (ver la figura página 2),<br />
inflándose ambas secciones bien de forma simultánea o bien siendo la sección<br />
proximal la que se infle un poco antes que la sección distal. Inspeccionar<br />
cuidadosamente el catéter con el balón inflado. No debería utilizarse un balón que<br />
exhiba fugas o se infle de una forma exageradamente asimétrica (excéntrica).<br />
4. Desinflar completamente el balón tirando del émbolo de la jeringa para dejar las<br />
paredes del balón en contacto sobre el extremo del catéter. Desconectar la jeringa del<br />
cono del catéter.<br />
5. Humedecer cuidadosamente el exterior del catéter de balón con solución salina<br />
apirógena estéril, para facilitar la introducción del balón en la cánula u otro<br />
instrumento de introducción.<br />
Inserción, Inflado y Retirada del balón<br />
6. Elegir una técnica e insertar un instrumento de introducción (p. ej. un<br />
neuroendoscopio o una cánula multilumen) cerca de la membrana cuya punción vaya a<br />
efectuarse.<br />
7. Practicar la abertura de punción en la membrana cerebral.<br />
8. Conectar la jeringa vacía al cono del catéter. Tirar del émbolo de la jeringa para dejar<br />
las paredes del balón en contacto sobre el extremo del catéter y eliminar cualquier<br />
inflado residual del balón. Dejar la jeringa conectada.<br />
9. Introducir con el debido cuidado el catéter de balón desinflado a través del lumen 4F<br />
(o mayor) del instrumento de introducción, justamente proximal al extremo distal del<br />
instrumento. Si se encuentra resistencia al hacer avanzar el catéter, proceder a retirar<br />
éste suavemente, comprobar que el balón está completamente desinflado y que no<br />
existe ninguna otra causa de obstrucción al avance del mismo. Jamás forzar el avance<br />
del catéter en el lumen de la cánula pues este proceder puede dañar el balón.<br />
10. Tan pronto el extremo del balón se vea claramente bajo visualización directa o<br />
aparezca en la pantalla del sistema de visualización del endoscopio, desconectar la<br />
jeringa y llenarla con 1 ml (1 cc) de aire. A continuación, volver a conectar la jeringa<br />
al cono del catéter.<br />
11. Posicionar con el debido cuidado el balón dentro de la abertura practicada en la<br />
membrana cerebral. Una marcación negra en el catéter indica la zona de la cintura del<br />
balón. Esta señal de marcación negra debería quedar posicionada dentro de la abertura<br />
de la membrana.
18<br />
Español<br />
12. Inflar el balón inyectando lentamente 0,6 ml (0,6 cc) de aire (hacer avanzar el émbolo<br />
hasta la graduación 0,4 ml (0,4 cc) de la jeringa). El balón adquirirá una forma de<br />
pesas de gimnasia, siendo la sección proximal la que se inflará un poco antes que la<br />
sección distal. Una vez concluido el inflado, las secciones proximal y distal del balón<br />
harán cautiva la sección de membrana comprendida entre las mismas, dilatando<br />
progresivamente el orificio hasta que su diámetro alcance el diámetro exterior de la<br />
cintura del balón. El progreso de la dilatación puede visualizarse a través de la pared<br />
transparente de la sección proximal del balón.<br />
13. Mantener la presión de inflado durante 2 minutos para facilitar la hemostasia de<br />
posibles microhemorragias.<br />
14. Debería señalarse que el aire difunde lentamente a través de la pared del balón. Si así<br />
fuese preciso, inyectar los 0,4 ml (0,4 cc) residuales de aire que quedan en la jeringa<br />
para compensar por pérdidas de aire por difusión. Si fuese necesario, mantener el<br />
inflado durante 2 minutos más.<br />
Advertencia: No inyectar más de 1 ml (1 cc) de aire pues un inflado excesivo puede<br />
dañar el balón.<br />
15. Desinflar el balón tirando completamente del émbolo de la jeringa, y sin desconectar<br />
ésta, retirar suavemente el catéter del instrumento de introducción aplicando presión<br />
negativa.
19<br />
Notes
USA<br />
TEL +1 800 997 4868<br />
+1 800 654 2873<br />
FAX +1 609 275 5363<br />
FRANCE<br />
TEL +33 4 93 95 56 00<br />
FAX +33 4 93 65 40 30<br />
The wave logo and <strong>Integra</strong> <strong>Neuro</strong>Sciences are trademarks<br />
of <strong>Integra</strong> <strong>LifeSciences</strong> Corporation.