AXIS P5532/P5534 Installation Guide - Axis Communications
AXIS P5532/P5534 Installation Guide - Axis Communications
AXIS P5532/P5534 Installation Guide - Axis Communications

Create successful ePaper yourself
Turn your PDF publications into a flip-book with our unique Google optimized e-Paper software.
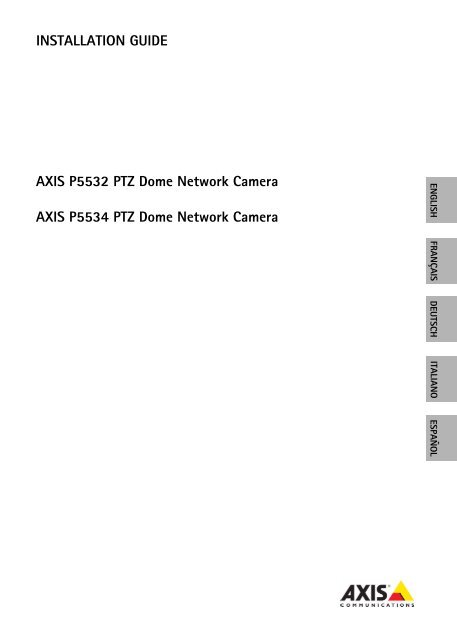
INSTALLATION GUIDE<br />
<strong>AXIS</strong> <strong>P5532</strong> PTZ Dome Network Camera<br />
<strong>AXIS</strong> <strong>P5534</strong> PTZ Dome Network Camera<br />
ENGLISH FRANÇAIS DEUTSCH ITALIANO ESPAÑOL
Legal Considerations<br />
Video and audio surveillance can be prohibited by laws<br />
that vary from country to country. Check the laws in<br />
your local region before using this product for<br />
surveillance purposes.<br />
This product includes one (1) H.264 decoder license. To<br />
purchase further licenses, contact your reseller.<br />
Electromagnetic Compatibility (EMC)<br />
This equipment generates, uses and can radiate radio<br />
frequency energy and, if not installed and used in<br />
accordance with the instructions, may cause harmful<br />
interference to radio communications. However, there is<br />
no guarantee that interference will not occur in a<br />
particular installation.<br />
If this equipment does cause harmful interference to<br />
radio or television reception, which can be determined<br />
by turning the equipment off and on, the user is<br />
encouraged to try to correct the interference by one or<br />
more of the following measures: Re-orient or relocate<br />
the receiving antenna. Increase the separation between<br />
the equipment and receiver. Connect the equipment to<br />
an outlet on a different circuit to the receiver. Consult<br />
your dealer or an experienced radio/TV technician for<br />
help. Shielded (STP) network cables must be used with<br />
this unit to ensure compliance with EMC standards.<br />
USA - This equipment has been tested and found to<br />
comply with the limits for a Class B computing device<br />
pursuant to Subpart B of Part 15 of FCC rules, which are<br />
designed to provide reasonable protection against such<br />
interference when operated in a commercial<br />
environment. Operation of this equipment in a<br />
residential area is likely to cause interference, in which<br />
case the user at his/her own expense will be required to<br />
take whatever measures may be required to correct the<br />
interference.<br />
Canada - This Class B digital apparatus complies with<br />
Canadian ICES-003<br />
Europe - This digital equipment fulfills the requirements<br />
for radiated emission according to limit B of EN55022,<br />
and the requirements for immunity according to<br />
EN55024 residential and commercial industry.<br />
Japan - This is a class B product based on the standard<br />
of the Voluntary Control Council for Interference from<br />
Information Technology Equipment (VCCI). If this is used<br />
near a radio or television receiver in a domestic<br />
environment, it may cause radio interference. Install and<br />
use the equipment according to the instruction manual.<br />
Australia - This electronic device meets the<br />
requirements of the Radio communications<br />
(Electromagnetic Compatibility) Standard AS/NZS<br />
CISPR22:2002.<br />
Korea - Class B: As this equipment has obtained EMC<br />
registration for household use, it can be used in any area<br />
including residential areas.<br />
Safety<br />
Complies to EN 60950-1 (IEC 60950-1), Safety of<br />
Information Technology Equipment.<br />
Equipment Modifications<br />
This equipment must be installed and used in strict<br />
accordance with the instructions given in the user<br />
documentation. This equipment contains no<br />
user-serviceable components. Unauthorized equipment<br />
changes or modifications will invalidate all applicable<br />
regulatory certifications and approvals.<br />
Liability<br />
Every care has been taken in the preparation of this<br />
document. Please inform your local <strong>Axis</strong> office of any<br />
inaccuracies or omissions. <strong>Axis</strong> <strong>Communications</strong> AB<br />
cannot be held responsible for any technical or<br />
typographical errors and reserves the right to make<br />
changes to the product and documentation without<br />
prior notice. <strong>Axis</strong> <strong>Communications</strong> AB makes no<br />
warranty of any kind with regard to the material<br />
contained within this document, including, but not<br />
limited to, the implied warranties of merchantability<br />
and fitness for a particular purpose. <strong>Axis</strong><br />
<strong>Communications</strong> AB shall not be liable nor responsible<br />
for incidental or consequential damages in connection<br />
with the furnishing, performance or use of this material.<br />
RoHS<br />
This product complies with both the European<br />
RoHS directive, 2002/95/EC, and the Chinese<br />
RoHS regulations, ACPEIP.<br />
WEEE Directive<br />
The European Union has enacted a Directive<br />
2002/96/EC on Waste Electrical and Electronic<br />
Equipment (WEEE Directive). This directive is<br />
applicable in the European Union member<br />
states.<br />
The WEEE marking on this product (see right) or its<br />
documentation indicates that the product must not be<br />
disposed of together with household waste. To prevent<br />
possible harm to human health and/or the environment,<br />
the product must be disposed of in an approved and<br />
environmentally safe recycling process. For further<br />
information on how to dispose of this product correctly,<br />
contact the product supplier, or the local authority<br />
responsible for waste disposal in your area.<br />
Business users should contact the product supplier for<br />
information on how to dispose of this product correctly.<br />
This product should not be mixed with other commercial<br />
waste.<br />
Support<br />
Should you require any technical assistance, please<br />
contact your <strong>Axis</strong> reseller. If your questions cannot be<br />
answered immediately, your reseller will forward your<br />
queries through the appropriate channels to ensure a<br />
rapid response. If you are connected to the Internet, you<br />
can:<br />
• download user documentation and firmware updates<br />
• find answers to resolved problems in the FAQ database.<br />
Search by product, category, or phrases<br />
• report problems to <strong>Axis</strong> support by logging in to your<br />
private support area.<br />
<strong>AXIS</strong> <strong>P5532</strong>/<strong>P5534</strong> uses a 3.0V CR2032 Lithium battery,<br />
for more information please see page 111.
<strong>AXIS</strong> <strong>P5532</strong>/<strong>P5534</strong> <strong>Installation</strong> <strong>Guide</strong> Page 3<br />
<strong>AXIS</strong> <strong>P5532</strong> & <strong>AXIS</strong> <strong>P5534</strong><br />
<strong>Installation</strong> <strong>Guide</strong><br />
This installation guide provides instructions for installing an <strong>AXIS</strong> <strong>P5532</strong>/<strong>AXIS</strong> <strong>P5534</strong> PTZ Dome<br />
Network Camera on your network. For all other aspects of using the product, please see the User’s<br />
Manual, available on the CD included in this package, or from www.axis.com<br />
<strong>Installation</strong> Steps<br />
1. Check the package contents against the list below.<br />
Important!<br />
2. Hardware overview. See page 4.<br />
This product must be used in<br />
3. Install the hardware.<br />
compliance with local laws and<br />
• Prepare for installation, see page 6.<br />
regulations.<br />
• Hard ceiling mount, see page 7.<br />
• Drop ceiling mount, see page 8.<br />
• Bracket mount (optional accessory), see page 10.<br />
• Install the <strong>AXIS</strong> T8123 High PoE Midspan 1-port, see page 11.<br />
4. Assign an IP address. See page 12.<br />
5. Set the password. See page 15.<br />
ENGLISH<br />
Package Contents<br />
Item<br />
Network camera<br />
Dome covers<br />
Mounting kit<br />
High PoE Midspan<br />
CD<br />
Printed materials<br />
Models/variants/notes<br />
<strong>AXIS</strong> <strong>P5532</strong><br />
<strong>AXIS</strong> <strong>P5534</strong><br />
Clear transparent cover (pre-mounted)<br />
Smoked transparent cover<br />
Mounting kit for hard ceilings and drop ceilings<br />
Resitorx screw driver<br />
<strong>AXIS</strong> T8123<br />
<strong>AXIS</strong> Network Video Product CD, including product documentation,<br />
installation tools and other software.<br />
<strong>AXIS</strong> <strong>P5532</strong>/<strong>P5534</strong> Network Camera <strong>Installation</strong> <strong>Guide</strong> (this document),<br />
<strong>Axis</strong> Warranty Document, Drill template, Extra serial number labels (2x),<br />
AVHS Authentication key<br />
Optional accessories<br />
<strong>AXIS</strong> T91A Mounting Accessories<br />
Multi-connector cable for connection of I/O, audio, and power<br />
See www.axis.com for information on power accessories and outdoor housings
Page 4<br />
<strong>AXIS</strong> <strong>P5532</strong>/<strong>P5534</strong> <strong>Installation</strong> <strong>Guide</strong><br />
Hardware Overview<br />
Camera unit<br />
Control button<br />
SDHC card slot<br />
Status indicator LED<br />
Restart button<br />
Dome cover<br />
Dome ring<br />
screws (6)<br />
Dome ring Dome cover Top cover<br />
Sealing ring
<strong>AXIS</strong> <strong>P5532</strong>/<strong>P5534</strong> <strong>Installation</strong> <strong>Guide</strong> Page 5<br />
Hard ceiling mount<br />
Mounting plate<br />
Drop ceiling mount<br />
Mounting<br />
plate screws<br />
(3)<br />
Bracket arm<br />
(3)<br />
Bracket arm<br />
screw (3)<br />
and<br />
washer (3)<br />
ENGLISH<br />
Trim ring<br />
Safety wire<br />
Unit holders (3)<br />
Camera base lid<br />
Camera base lid screws (4)<br />
Hook for safety wire<br />
Part number (P/N) & Serial number (S/N).<br />
The serial number may be required<br />
during the installation.<br />
Cable tracks<br />
Foam gasket<br />
Network connector<br />
Multi-connector<br />
Top cover screws (4)<br />
Top cover
Page 6<br />
<strong>AXIS</strong> <strong>P5532</strong>/<strong>P5534</strong> <strong>Installation</strong> <strong>Guide</strong><br />
Install the hardware<br />
!<br />
IMPORTANT!<br />
- To use <strong>AXIS</strong> <strong>P5532</strong>/<strong>P5534</strong> outdoors, it must be installed in an approved<br />
outdoor housing. Please see www.axis.com for more information on outdoor housing.<br />
Prepare for installation<br />
Read all the instructions before preparing to install <strong>AXIS</strong> <strong>P5532</strong>/<strong>P5534</strong> since several installation<br />
preparation steps require removing the top cover and would benefit from being completed together.<br />
• Follow the instructions Remove the protective packaging, below to remove the protective<br />
packing before installing the camera.<br />
• The camera is supplied with a clear transparent cover and a smoked transparent cover. If<br />
required, follow the instructions Replace the clear/smoked dome cover (optional), below to<br />
replace the dome cover.<br />
• A standard or high capacity SD card (not included) is required to store images locally in the<br />
network camera. Follow the instructions Install an SD card (optional), below to remove the<br />
top cover and install an SD card.<br />
Remove the protective packaging<br />
1. Loosen the 4 top cover screws and remove the top cover, see illustration on page 5.<br />
2. Remove the protective packaging.<br />
Protective packaging<br />
3. If replacing the clear/smoked dome cover or installing an SD card, refer to the instructions<br />
Replace the clear/smoked dome cover (optional) and Install an SD card (optional), below.<br />
4. Put the top cover back in its original position and fasten the screws.
<strong>AXIS</strong> <strong>P5532</strong>/<strong>P5534</strong> <strong>Installation</strong> <strong>Guide</strong> Page 7<br />
Replace the clear/smoked dome cover (optional)<br />
1. Loosen the 4 top cover screws and remove the top cover, see illustration on page 5.<br />
2. Remove the 6 dome ring screws and remove the dome ring from the top cover.<br />
3. Attach the dome ring and the dome cover to the top cover and secure by tightening the 6<br />
screws.<br />
4. If installing an SD card, refer to the instructions Install an SD card (optional), below.<br />
5. Put the top cover back in its original position and fasten the screws.<br />
Note:<br />
Be careful not to scratch or damage the dome cover. Use a soft cloth to wipe clean before<br />
attaching the dome cover to the camera unit.<br />
Install an SD card (optional)<br />
1. Loosen the 4 top cover screws and remove the top cover, see illustration on page 5.<br />
2. Insert an SD card (not included) into the SDHC (Secure Digital High Capacity) card slot.<br />
3. Put the top cover back in its original position and fasten the screws.<br />
Note:<br />
The SD card is automatically mounted when inserted into the SDHC card slot. However,<br />
before removing the SD card it should be unmounted through the camera’s web pages. Go<br />
to Setup > System Options > Storage > SD Card and click Unmount. For more information,<br />
please see the User’s Manual available from the <strong>AXIS</strong> Network Video Product CD supplied<br />
with this product or from the website at www.axis.com<br />
ENGLISH<br />
Hard ceiling mount<br />
1. Prepare the ceiling for installation of the mounting plate, use the supplied drill template to<br />
position the holes. Make sure to use drill bits, screws, and plugs that are appropriate for the<br />
material.<br />
2. Install the mounting plate.<br />
Mounting plate<br />
Security wire<br />
3. Loosen the 4 camera base lid screws and remove the camera base lid, see illustration on page 5.
Page 8<br />
<strong>AXIS</strong> <strong>P5532</strong>/<strong>P5534</strong> <strong>Installation</strong> <strong>Guide</strong><br />
4. Route and connect the network cable and the multi-connector cable, if applicable, to the<br />
network camera. Be careful not to damage the cables when connecting them. Make sure the<br />
foam gasket holes are aligned with the cable tracks and, if applicable, remove the cut-out piece<br />
for the multi-connector cable from the foam gasket.<br />
5. Put the camera base lid back in its original position and fasten the screws.<br />
6. Secure the camera using the supplied safety wire.<br />
7. Slide the unit holders on the network camera into the slots on the mounting plate and rotate<br />
the camera unit.<br />
8. Install the High PoE Midspan 1-Port, see Install the <strong>AXIS</strong> T8123 High PoE Midspan 1-port, on<br />
page 11.<br />
9. Check that the indicator LEDs on the midspan indicate the correct conditions, see the table on<br />
page 21 for further details.<br />
Drop ceiling mount<br />
1. Remove the ceiling tile in which the drop ceiling mount is to be fitted.<br />
2. Use the supplied template to mark the position for the 210 mm (8.3 in.) hole in the ceiling tile.<br />
Cut around the template.<br />
Ceiling tile<br />
Hole diameter<br />
210 mm (8.3 in.)<br />
Notes:<br />
• The combined weight of the camera and ceiling mount is approximately 2.3 kg (5.1 lb.). Check<br />
that the ceiling material is strong enough to support this weight.<br />
• The ceiling tile should be 5 mm–60 mm (0.2 in.–2.4 in.) thick.<br />
3. Assemble the ceiling bracket.<br />
4. Put the ceiling bracket into the ceiling tile, see illustration on page 9.<br />
5. Tighten the bracket arm screws using a torx 20 screwdriver head.<br />
6. Loosen the 4 camera base lid screws and remove the camera base lid, see illustration on page 5.
<strong>AXIS</strong> <strong>P5532</strong>/<strong>P5534</strong> <strong>Installation</strong> <strong>Guide</strong> Page 9<br />
7. Route and connect the network cable and the multi-connector cable, if applicable, to the<br />
network camera. Be careful not to damage the cables when connecting them. Make sure the<br />
foam gasket holes are aligned with the cable tracks and, if applicable, remove the cut-out piece<br />
for the multi-connector cable from the foam gasket.<br />
Multi-connector cable<br />
Network cable<br />
ENGLISH<br />
8. Put the camera base lid back in its original position and fasten the screws.<br />
9. Secure the camera using the supplied safety wire.<br />
Ceiling bracket<br />
Safety wire<br />
Ceiling tile<br />
10. Slide the unit holders on the network camera into the slots on the mounting plate and rotate<br />
the camera unit.<br />
11. Install the High PoE Midspan 1-Port, see Install the <strong>AXIS</strong> T8123 High PoE Midspan 1-port, on<br />
page 11.<br />
12. Check that the indicator LEDs on the midspan indicate the correct conditions. See the table on<br />
page 21 for further details.<br />
13. Install the ceiling tile, with the camera mounted, into the ceiling.
Page 10<br />
<strong>AXIS</strong> <strong>P5532</strong>/<strong>P5534</strong> <strong>Installation</strong> <strong>Guide</strong><br />
14. Place the trim ring over the ceiling bracket and snap it into place.<br />
Trim ring<br />
Bracket mount (optional accessory)<br />
1. Install the selected bracket according to the<br />
instructions supplied with the bracket. If drilling is<br />
required, make sure to use drill bits, screws, and<br />
plugs that are appropriate for the material.<br />
2. Loosen the 4 camera base lid screws and remove<br />
the camera base lid, see illustration on page 5.<br />
3. Route the network cable and the multi-connector<br />
cable, if applicable, through the holes in the<br />
mounting bracket.<br />
4. Hook the camera to the safety wire on the bracket.<br />
5. Connect the network cable and, if applicable, the<br />
multi-connector cable to the network camera.<br />
Safety<br />
wire<br />
Wall bracket (mounting example)<br />
6. Install <strong>AXIS</strong> T8123, see Install the <strong>AXIS</strong> T8123 High PoE Midspan 1-port, on page 11.<br />
7. Put the camera base lid back in its original position.<br />
8. Slide the unit holders on the network camera into the slots on the bracket and rotate the<br />
camera unit.<br />
9. Secure the network camera to the mounting bracket by fastening the 3 screws (Torx T30).<br />
Torx T30<br />
Screws<br />
Slots for<br />
unit holders
<strong>AXIS</strong> <strong>P5532</strong>/<strong>P5534</strong> <strong>Installation</strong> <strong>Guide</strong> Page 11<br />
Install the <strong>AXIS</strong> T8123 High PoE Midspan 1-port<br />
<strong>AXIS</strong> T8123 High PoE Midspan 1-port enables <strong>Axis</strong> network video products with high power<br />
consumption to receive data and power over the same Ethernet cable. Follow these instructions to<br />
connect <strong>AXIS</strong> T8123.<br />
1. Connect <strong>AXIS</strong> T8123 (Data in) to the network switch using a standard network cable.<br />
2. Connect <strong>AXIS</strong> T8123 (Data and Power Out) to the network camera, using the network cable that<br />
has been connected to the camera.<br />
3. Connect <strong>AXIS</strong> T8123 to an AC outlet (100–240 V AC), using the supplied power cable.<br />
<strong>AXIS</strong> T8123<br />
Port<br />
connectivity<br />
indicator<br />
Data &<br />
Power out<br />
Data in<br />
ENGLISH<br />
AC Input<br />
connectivity<br />
indicator<br />
Network camera<br />
Ethernet<br />
For information on the LEDs on the midspan, see <strong>AXIS</strong> T8123 Status indicators, on page 21.
Page 12<br />
<strong>AXIS</strong> <strong>P5532</strong>/<strong>P5534</strong> <strong>Installation</strong> <strong>Guide</strong><br />
Assign an IP Address<br />
Most networks today have a DHCP server that automatically assigns IP addresses to connected<br />
devices. If your network does not have a DHCP server the network camera will use 192.168.0.90 as<br />
the default IP address.<br />
If you would like to assign a static IP address, the recommended method in Windows is either <strong>AXIS</strong><br />
IP Utility or <strong>AXIS</strong> Camera Management. Depending on the number of cameras you wish to install,<br />
use the method that best suits your purpose.<br />
Both of these free applications are available on the <strong>AXIS</strong> Network Video Product CD supplied with<br />
this product, or they can be downloaded from www.axis.com<br />
Method Recommended for Operating system<br />
<strong>AXIS</strong> IP Utility<br />
See page 13<br />
<strong>AXIS</strong> Camera Management<br />
See page 14<br />
Single camera<br />
Small installations<br />
Multiple cameras<br />
Large installations<br />
<strong>Installation</strong> on a different subnet<br />
Windows<br />
Windows 2000<br />
Windows XP Pro<br />
Windows 2003 Server<br />
Windows Vista<br />
Windows 7<br />
Notes:<br />
• If assigning the IP address fails, check that there is no firewall blocking the operation.<br />
• For other methods of assigning or discovering the IP address, e.g. in other operating systems, see<br />
page 17.
<strong>AXIS</strong> <strong>P5532</strong>/<strong>P5534</strong> <strong>Installation</strong> <strong>Guide</strong> Page 13<br />
<strong>AXIS</strong> IP Utility - single camera/small installation<br />
<strong>AXIS</strong> IP Utility automatically discovers and displays <strong>Axis</strong> devices on your network. The application<br />
can also be used to manually assign a static IP address.<br />
ENGLISH<br />
Note that the computer running <strong>AXIS</strong> IP Utility must be on the same network segment (physical<br />
subnet) as the network camera.<br />
Automatic discovery<br />
1. Check that the network camera is connected to the network and that power has been applied.<br />
2. Start <strong>AXIS</strong> IP Utility.<br />
3. When the camera appears in the window, double-click it to open its home page.<br />
4. See page 15 for instructions on how to assign the password.<br />
Assign the IP address manually (optional)<br />
1. Acquire an unused IP address on the same network segment as your computer.<br />
2. Select the network camera in the list.<br />
3. Click the Assign new IP address to the selected device button and enter the IP address.<br />
4. Click Assign and follow the on-screen instructions. Note that the camera must be restarted<br />
within 2 minutes for the new IP address to be set.<br />
5. Click Home Page to access the camera’s web pages.<br />
6. See page 15 for instructions on how to set the password.
Page 14<br />
<strong>AXIS</strong> <strong>P5532</strong>/<strong>P5534</strong> <strong>Installation</strong> <strong>Guide</strong><br />
<strong>AXIS</strong> Camera Management - multiple cameras/large installations<br />
<strong>AXIS</strong> Camera Management can automatically discover multiple <strong>Axis</strong> devices, show connection<br />
status, manage firmware upgrades and set IP addresses.<br />
Automatic discovery<br />
1. Check that the camera is connected to the network and that power has been applied.<br />
2. Start <strong>AXIS</strong> Camera Management. When the network camera appears in the window, right-click<br />
the link and select Live View Home Page.<br />
3. See page 15 for instructions on how to set the password.<br />
Assign an IP address in a single device<br />
1. Select the network camera in <strong>AXIS</strong> Camera Management and<br />
click the Assign IP button.<br />
2. Select Assign the following IP address and enter the IP<br />
address, subnet mask and default router the device will use.<br />
3. Click OK.<br />
Assign IP addresses in multiple devices<br />
<strong>AXIS</strong> Camera Management speeds up the process of assigning<br />
IP addresses to multiple devices, by suggesting IP addresses<br />
from a specified range.<br />
1. Select the devices you wish to configure (different models<br />
can be selected) and click the Assign IP button.<br />
2. Select Assign the following IP address range and enter<br />
the range of IP addresses, the subnet mask and default<br />
router the devices will use.<br />
3. Click Update. Suggested IP addresses are listed under New<br />
IP Addresses and can be edited by selecting a device and<br />
clicking Edit.<br />
4. Click OK.
<strong>AXIS</strong> <strong>P5532</strong>/<strong>P5534</strong> <strong>Installation</strong> <strong>Guide</strong> Page 15<br />
Set the Password<br />
To gain access to the product, the password for the default administrator user root must be set. This<br />
is done in the ‘Configure Root Password’ dialog, which is displayed when the network camera is<br />
accessed for the first time.<br />
To prevent network eavesdropping when setting the root password, this can be done via an<br />
encrypted HTTPS connection, which requires an HTTPS certificate.<br />
Note: HTTPS (Hypertext Transfer Protocol over SSL) is a protocol used to encrypt the traffic between web<br />
browsers and servers. The HTTPS certificate controls the encrypted exchange of information.<br />
To set the password via a standard HTTP connection, enter it directly in the first dialog shown<br />
below.<br />
ENGLISH<br />
To set the password via an encrypted HTTPS connection, follow these steps:<br />
1. Click the Create self-signed certificate button.<br />
2. Provide the requested information and click OK. The certificate is created and the password can<br />
now be set securely. All traffic to and from the network camera is encrypted from this point on.<br />
3. Enter a password and then re-enter it to confirm the spelling. Click OK. The password has now<br />
been configured.<br />
To create an HTTPS connection,<br />
start by clicking this button.<br />
To configure the password directly<br />
via an unencrypted connection, enter<br />
the password here.<br />
4. To log in, enter the user name “root” in the dialog as requested.<br />
Note: The default administrator user name root cannot be deleted.<br />
5. Enter the password as set above, and click OK.<br />
Note: If the password is lost, the camera must be reset to the factory default settings. See page 22.
Page 16<br />
<strong>AXIS</strong> <strong>P5532</strong>/<strong>P5534</strong> <strong>Installation</strong> <strong>Guide</strong><br />
Access the video stream<br />
The Live View page of the network camera is displayed, with links to the Setup tools, which allow<br />
you to customize the camera.<br />
If required, click Yes to install AMC (<strong>AXIS</strong> Media Control), which allows viewing of the video stream<br />
in Internet Explorer. You will need administrator rights on the computer to do this.<br />
If required, click the link to install missing decoders.<br />
Note: To install AMC in Windows 7/Windows Vista, you must run Internet Explorer as an administrator.<br />
Right-click the Internet Explorer icon and select Run as administrator.<br />
Setup - Provides all the<br />
tools for configuring the<br />
camera to requirements.<br />
Help - Displays<br />
online help on all<br />
aspects of using<br />
the camera.
<strong>AXIS</strong> <strong>P5532</strong>/<strong>P5534</strong> <strong>Installation</strong> <strong>Guide</strong> Page 17<br />
Other Methods of Setting the IP address<br />
The table below shows the other methods available for setting or discovering the IP address. All<br />
methods are enabled by default, and all can be disabled.<br />
Use in operating<br />
system<br />
Notes<br />
AVHS Service<br />
Connection<br />
All<br />
To connect the camera to an AVHS service, refer to the service<br />
provider´s <strong>Installation</strong> <strong>Guide</strong>. For information and help to find a local<br />
AVHS Service Provider go to www.axis.com<br />
UPnP Windows When enabled on your computer, the camera is automatically detected<br />
and added to “My Network Places.”<br />
Bonjour<br />
<strong>AXIS</strong> Dynamic<br />
DNS Service<br />
MAC OSX<br />
(10.4 or later)<br />
All<br />
Applicable to browsers with support for Bonjour. Navigate to the Bonjour<br />
bookmark in your browser (e.g. Safari) and click on the link to<br />
access the camera’s web pages.<br />
A free service from <strong>Axis</strong> that allows you to quickly and simply install<br />
your camera. Requires an Internet connection with no HTTP proxy. See<br />
www.axiscam.net for more information<br />
ARP/Ping All See below. The command must be issued within 2 minutes of<br />
connecting power to the camera.<br />
DHCP All To view the admin pages for the network DHCP server, see the server’s<br />
own documentation.<br />
ENGLISH
Page 18<br />
<strong>AXIS</strong> <strong>P5532</strong>/<strong>P5534</strong> <strong>Installation</strong> <strong>Guide</strong><br />
Set the IP address with ARP/Ping<br />
1. Acquire an IP address on the same network segment your computer is connected to.<br />
2. Locate the serial number (S/N) on the product label on the camera.<br />
3. Open a command prompt on your computer and enter the following commands:<br />
Windows syntax:<br />
arp -s <br />
ping -l 408 -t <br />
UNIX/Linux/Mac syntax:<br />
arp -s temp<br />
ping -s 408 <br />
Windows example:<br />
arp -s 192.168.0.125 00-40-8c-18-10-00<br />
ping -l 408 -t 192.168.0.125<br />
UNIX/Linux/Mac example:<br />
arp -s 192.168.0.125 00:40:8c:18:10:00 temp<br />
ping -s 408 192.168.0.125<br />
4. Check that the network cable is connected to the camera and then start/restart the camera, by<br />
disconnecting and reconnecting power.<br />
5. Close the command prompt when you see ‘Reply from 192.168.0.125: ...’ or similar.<br />
6. In your browser, type in http:// in the Location/Address field and press Enter on<br />
your keyboard.<br />
Notes:<br />
• To open a command prompt in Windows: from the Start menu, select Run... and type cmd. Click OK.<br />
• To use the ARP command in Windows 7/ Windows Vista, right-click the command prompt icon and<br />
select Run as administrator.<br />
• To use the ARP command on a Mac OS X, use the Terminal utility in Application > Utilities.
<strong>AXIS</strong> <strong>P5532</strong>/<strong>P5534</strong> <strong>Installation</strong> <strong>Guide</strong> Page 19<br />
Unit Connectors<br />
Network connector – RJ-45 Ethernet connector. Supports High PoE (Power over Ethernet, IEEE<br />
802.3at). Use <strong>AXIS</strong> T8123 High PoE Midspan 1-port (included). Shielded cables should be used to<br />
comply with EMC.<br />
Multi-connector – Terminal connector for connection of external equipment:<br />
• Audio equipment<br />
• Input/output (I/O) devices<br />
• AC/DC power supply<br />
When connecting external equipment to <strong>AXIS</strong> <strong>P5532</strong>/<strong>P5534</strong>, a multi-connector cable is required in<br />
order to maintain the IP51 rating. The multi-connector cable can be purchased from your <strong>Axis</strong><br />
reseller. For more information, please see the User’s Manual available from the <strong>AXIS</strong> Network Video<br />
Product CD supplied with this product or from the website at www.axis.com<br />
SDHC card slot – A standard or high capacity SD card (not included) is required to store images<br />
locally in the network camera. To insert and remove the SD card, the camera’s top cover must be<br />
removed, see Install an SD card (optional), on page 7.<br />
ENGLISH<br />
Note:<br />
Before removal, the SD card should be unmounted to prevent corruption of recordings. To<br />
unmount the SD card, go to Setup > System Options > Storage > SD Card and click<br />
Unmount. For more information, please see the User’s Manual available from the <strong>AXIS</strong> Network<br />
Video Product CD supplied with this product or from the website at www.axis.com
Page 20<br />
<strong>AXIS</strong> <strong>P5532</strong>/<strong>P5534</strong> <strong>Installation</strong> <strong>Guide</strong><br />
Multi-connector cable (not included)<br />
When connecting external equipment to <strong>AXIS</strong> <strong>P5532</strong>/<strong>P5534</strong>, a multi-connector cable is required in<br />
order to maintain the camera’s IP51 rating. The multi-connector cable can be purchased from your<br />
<strong>Axis</strong> reseller.<br />
Connect the multi-connector cable to the camera’s multi connector, see illustration on page 5 and<br />
instructions on page 7 and page 8. The cable provides the following connectors:<br />
Power connector – 3-pin terminal block used for power input.<br />
DC power input, 24-34 V DC<br />
<strong>AXIS</strong> <strong>P5532</strong>: max 15 W<br />
<strong>AXIS</strong> <strong>P5534</strong>: max 17 W<br />
AC power input, 20-24 V AC<br />
<strong>AXIS</strong> <strong>P5532</strong>: max 20 VA<br />
<strong>AXIS</strong> <strong>P5534</strong>: max 23.6 VA<br />
Audio in (pink) – 3.5 mm input for a mono microphone, or a line-in mono signal (left channel is<br />
used from a stereo signal).<br />
Audio out (green) – 3.5 mm output for audio (line level) that can be connected to a public address<br />
(PA) system or an active speaker with a built-in amplifier. A pair of headphones can also be<br />
attached. A stereo connector must be used for the audio out.<br />
I/O terminal connector – Used in applications for e.g. motion detection, event<br />
triggering, time lapse recording and alarm notifications. In addition to an auxiliary<br />
power and a GND pin, the I/O terminal connector has 4 pins that can be<br />
configured as either input or output. These pins provide the interface to:<br />
• Digital output - For connecting external devices such as relays and LEDs. Connected devices<br />
can be activated by the VAPIX® Application Programming Interface, output buttons on the<br />
Live View page or by an Event Type. The output will show as active (shown under<br />
Events > Port Status if the alarm device is activated.
<strong>AXIS</strong> <strong>P5532</strong>/<strong>P5534</strong> <strong>Installation</strong> <strong>Guide</strong> Page 21<br />
• Digital input - An alarm input for connecting devices that can toggle between an open and<br />
closed circuit, for example: PIRs, door/window contacts, glass break detectors, etc. When a<br />
signal is received the state changes and the input becomes active (shown under<br />
Events > Port Status).<br />
Function Pin Notes Specifications<br />
GND 1 Ground<br />
3.3 V DC<br />
Power<br />
Configurable<br />
(input or<br />
Output)<br />
2 Can be used to power auxiliary equipment.<br />
Note: This pin can only be used as power out.<br />
3-6 Digital input – Connect to GND to activate, or leave floating<br />
(unconnected) to deactivate.<br />
Digital output – Uses an open-drain NFET transistor with the<br />
source connected to GND. If used with an external relay, a<br />
diode must be connected in parallel with the load, for protection<br />
against voltage transients.<br />
Max. load = 250 mA<br />
Min. input = -40 V DC<br />
Max. input = +40 V DC<br />
Max. load = 100 mA<br />
Max. voltage = +40 V DC<br />
ENGLISH<br />
<strong>AXIS</strong> <strong>P5532</strong>/<strong>P5534</strong> Status indicators<br />
Color<br />
Unlit<br />
Amber<br />
Amber/red<br />
Red<br />
Green<br />
Indication<br />
Steady connection/normal operation<br />
Steady during system initiating and reset to factory default. Flashes during firmware upgrade.<br />
No network connection<br />
Firmware upgrade failure<br />
Steady for 10 sec. after successful restart<br />
Note:<br />
For more information on the <strong>AXIS</strong> <strong>P5532</strong>/<strong>P5534</strong> status indicators, please see the User’s<br />
Manual available from the <strong>AXIS</strong> Network Video Product CD supplied with this product or<br />
from the website at www.axis.com<br />
<strong>AXIS</strong> T8123 Status indicators<br />
LED Color Indication<br />
Port Unlit No camera connected<br />
Flashing<br />
Power overload or other input voltage error<br />
Green<br />
Camera connected, normal behavior<br />
AC input Steady green AC power connected
Page 22<br />
<strong>AXIS</strong> <strong>P5532</strong>/<strong>P5534</strong> <strong>Installation</strong> <strong>Guide</strong><br />
Resetting to the Factory Default Settings<br />
To reset the camera to the original factory default settings, use the control button and the restart<br />
button on the side of the camera, see Hardware Overview, on page 4, as described below:<br />
Using the control and restart buttons will reset all the parameters, including the IP address, to the<br />
factory default settings:<br />
1. Remove the top cover, see Remove the protective packaging, on page 6.<br />
2. Press and hold the control button and the restart button at the same time.<br />
3. Release the restart button but continue to hold down the control button.<br />
4. Continue to hold down the control button until the status indicator color changes to amber<br />
(this may take up to 15 seconds).<br />
5. Release the control button.<br />
6. When the status indicator changes to green (which may take up to 1 minute), the process is<br />
complete and the camera has been reset. The unit now has the default IP address 192.168.0.90<br />
7. Put the top cover back in its original position.<br />
8. Re-assign the IP address, using one of the methods described in Assign an IP Address, on page<br />
12.<br />
It is also possible to reset parameters to the original factory default settings via the web interface.<br />
For more information, please see the online help or the User’s Manual available from the <strong>AXIS</strong><br />
Network Video Product CD supplied with this product.<br />
Accessing the Camera from the Internet<br />
Once installed, your network camera is accessible on your local network (LAN). To access the<br />
camera from the Internet, network routers must be configured to allow incoming traffic, which is<br />
usually done on a specific port.<br />
• HTTP port (default port 80) for viewing and configuration<br />
• RTSP port (default port 554) for viewing H.264 video streams<br />
Please refer to the documentation for your router for further instructions. For more information on<br />
this and other topics, visit the <strong>Axis</strong> Support Web at www.axis.com/techsup<br />
Further Information<br />
The User’s Manual is available from the <strong>Axis</strong> Web site at www.axis.com or from the <strong>AXIS</strong> Network<br />
Video Product CD supplied with this product.<br />
Tip!<br />
Visit www.axis.com/techsup to check if there is updated firmware available for your network<br />
camera. To see the currently installed firmware version, see Setup > About.
<strong>AXIS</strong> <strong>P5532</strong>/<strong>P5534</strong> <strong>Guide</strong> d'installation Page 23<br />
<strong>AXIS</strong> <strong>P5532</strong> & <strong>AXIS</strong> <strong>P5534</strong><br />
<strong>Guide</strong> d’installation<br />
Ce guide d’installation explique comment installer la Caméra réseau à dôme <strong>AXIS</strong> <strong>P5532</strong>/<strong>AXIS</strong><br />
<strong>P5534</strong> PTZ sur votre réseau. Pour toute autre question concernant l’utilisation du produit, reportezvous<br />
au manuel de l’utilisateur du produit, que vous trouverez sur le CD joint ou sur le site<br />
www.axis.com<br />
Procédure d’installation<br />
Important !<br />
1. Vérifiez le contenu de l’emballage par rapport<br />
Ce produit doit être utilisé<br />
à la liste ci-dessous.<br />
conformément aux lois et<br />
dispositions locales en vigueur.<br />
2. Vue d’ensemble du matériel. Reportez-vous à la page 24<br />
3. <strong>Installation</strong> du matériel.<br />
• Préparation de l’installation, reportez-vous à la page 26.<br />
• Fixation au plafond, reportez-vous à la page 27.<br />
• Fixation au faux-plafond, reportez-vous à la page 28.<br />
• Fixation du support (accessoire en option), reportez-vous à la page 30.<br />
• <strong>Installation</strong> de l’injecteur High PoE <strong>AXIS</strong> T8123 à 1 port, reportez-vous à la page 31.<br />
4. Attribution d’une adresse IP. Reportez-vous à la page 32.<br />
5. Configuration du mot de passe. Reportez-vous à la page 35.<br />
FRANÇAIS<br />
Contenu de l’emballage<br />
Article<br />
Caméra réseau<br />
Bulle de Dôme<br />
Kit de montage<br />
Injecteur High PoE<br />
CD<br />
Documentation imprimée<br />
Modèles/variantes/remarques<br />
<strong>AXIS</strong> <strong>P5532</strong><br />
<strong>AXIS</strong> <strong>P5534</strong><br />
Bulle transparente non fumée (prémontée)<br />
Bulle transparente fumée<br />
Kit de fixation au plafond et au faux-plafond. Tournevis Resitorx<br />
<strong>AXIS</strong> T8123<br />
CD du produit de vidéo sur IP <strong>AXIS</strong> comprenant la documentation, les outils<br />
d’installation et les autres logiciels.<br />
<strong>AXIS</strong> <strong>P5532</strong>/<strong>P5534</strong> <strong>Guide</strong> d’installation (le présent document)<br />
Document de garantie d’<strong>Axis</strong>, Gabarit de perçage, Étiquettes de numéro de série<br />
supplémentaires (2x), Clé d’authentification AVHS<br />
Accessoires en option<br />
Accessoires de montage <strong>AXIS</strong> T91A<br />
Câble multi-connexion pour la connexion d’E/S, audio et d’alimentation<br />
Pour plus d’informations sur les accessoires d’alimentation et les boîtiers<br />
d’extérieur, visitez le site www.axis.com
Page 24<br />
<strong>AXIS</strong> <strong>P5532</strong>/<strong>P5534</strong> <strong>Guide</strong> d'installation<br />
Présentation du matériel<br />
Caméra<br />
Bouton de commande<br />
Logement de carte SDHC<br />
Voyant d’état<br />
Bouton Redémarrer<br />
Bulle du dôme<br />
Anneau du<br />
dôme vis (6)<br />
Anneau du dôme Bulle du dôme Couvercle supérieur Anneau d’étanchéité
<strong>AXIS</strong> <strong>P5532</strong>/<strong>P5534</strong> <strong>Guide</strong> d'installation Page 25<br />
Fixation au plafond<br />
Plaque de<br />
fixation<br />
Fixation au faux-plafond<br />
Vis de la<br />
plaque de<br />
fixation (3)<br />
Bras du<br />
support (3)<br />
Vis du bras<br />
du support<br />
(3) et<br />
rondelle (3)<br />
Bague<br />
décorative<br />
Fil de<br />
sécurité<br />
FRANÇAIS<br />
Supports de rack (3)<br />
Couvercle de base de la caméra<br />
Vis du couvercle de base de la caméra (4)<br />
Crochet pour fil de sécurité<br />
Référence et numéro de série.<br />
Le numéro de série peut<br />
être demandé pendant l'installation.<br />
Passages pour câble<br />
Joint en mousse<br />
Connecteur réseau<br />
Multi-connexion<br />
Vis du couvercle supérieur (4)<br />
Couvercle supérieur
Page 26<br />
<strong>AXIS</strong> <strong>P5532</strong>/<strong>P5534</strong> <strong>Guide</strong> d'installation<br />
<strong>Installation</strong> du matériel<br />
!<br />
IMPORTANT<br />
! - Pour pouvoir utiliser la caméra <strong>AXIS</strong> <strong>P5532</strong>/<strong>P5534</strong> à l’extérieur, elle<br />
doit être placée dans un boîtier d’extérieur homologué. Visitez le site www.axis.com<br />
pour plus d’informations sur le boîtier d’extérieur.<br />
Préparation de l’installation<br />
Lisez toutes les instructions avant de préparer l’installation la caméra <strong>AXIS</strong> <strong>P5532</strong>/<strong>P5534</strong>. En effet,<br />
de nombreuses étapes de cette préparation requièrent le retrait du couvercle supérieur et il serait<br />
plus judicieux de les effectuer ensemble.<br />
• Suivez les instructions décrites dans la section Enlèvement de l’emballage de protection ciaprès<br />
pour enlever l’emballage de protection avant d’installer la caméra.<br />
• La caméra est fournie avec deux bulles transparentes (non fumée et fumée). Si nécessaire,<br />
suivez les instructions décrites dans la section Remplacement de la bulle du dôme fumée/<br />
non fumée (facultatif) ci-après pour replacer le couvercle du dôme.<br />
• Une carte SD standard ou haute capacité (non fournie) est requise pour stocker des images<br />
en local sur la caméra réseau. Suivez les instructions décrites dans la section <strong>Installation</strong><br />
d’une carte SD (facultatif) ci-après pour retirer le couvercle supérieur et installer la carte<br />
SD.<br />
Enlèvement de l’emballage de protection<br />
1. Desserrez les quatre vis du couvercle supérieur et retirez-le, voir l’illustration à la page 25.<br />
2. Enlèvement de l’emballage de protection.<br />
Emballage de protection<br />
3. Si vous remplacez la bulle du dôme fumée/non fumée ou installez la carte SD, suivez les<br />
instructions décrites dans les sections Remplacement de la bulle du dôme fumée/non fumée<br />
(facultatif) et <strong>Installation</strong> d’une carte SD (facultatif) ci-après.<br />
4. Remettez en place le couvercle supérieur, puis serrez les vis.
<strong>AXIS</strong> <strong>P5532</strong>/<strong>P5534</strong> <strong>Guide</strong> d'installation Page 27<br />
Remplacement de la bulle du dôme fumée/non fumée (facultatif)<br />
1. Desserrez les quatre vis du couvercle supérieur et retirez-le, voir l’illustration à la page 25.<br />
2. Desserrez les six vis de l’anneau du dôme, puis retirez ce dernier du couvercle supérieur.<br />
3. Fixez l’anneau et la bulle du dôme sur le couvercle supérieur, puis serrez les six vis.<br />
4. En cas d’installation de la carte SD, reportez-vous aux instructions décrites dans la section<br />
<strong>Installation</strong> d’une carte SD (facultatif) ci-après.<br />
5. Remettez en place le couvercle supérieur, puis serrez les vis.<br />
Remarque : Veillez à ne pas rayer ou endommager la bulle du dôme. Utilisez un chiffon doux pour<br />
nettoyer la bulle du dôme avant de la fixer à la caméra.<br />
<strong>Installation</strong> d’une carte SD (facultatif)<br />
1. Desserrez les quatre vis du couvercle supérieur et retirez-le, voir l’illustration à la page 25.<br />
2. Insérez une carte SD (non fournie) dans le logement de carte SDHC (Secure Digital High<br />
Capacity).<br />
3. Remettez en place le couvercle supérieur, puis serrez les vis.<br />
FRANÇAIS<br />
Remarque : La carte SD est automatiquement installée une fois insérée dans le logement de carte SDHC.<br />
Il est cependant nécessaire de désinstaller la carte SD à partir des pages Web de la caméra<br />
avant de la retirer. Choisissez Setup > System Options > Storage > SD Card<br />
(Configuration/Options système/Stockage/Carte SD), puis cliquez sur Unmount<br />
(Désinstaller). Pour plus d’informations, consultez le manuel de l’utilisateur, disponible sur le<br />
CD du produit de vidéo sur IP <strong>AXIS</strong>, fourni avec le produit ou en téléchargement sur le site<br />
Web www.axis.com<br />
Fixation au plafond<br />
1. Préparez le plafond pour monter la plaque de fixation. Marquez les emplacements des trous à<br />
l’aide du gabarit de perçage fourni. Vérifiez que les forets, vis et chevilles à utiliser sont<br />
appropriés pour le matériau.<br />
2. Installez la plaque de fixation.<br />
Plaque de fixation<br />
Fil de sécurité
Page 28<br />
<strong>AXIS</strong> <strong>P5532</strong>/<strong>P5534</strong> <strong>Guide</strong> d'installation<br />
3. Desserrez les quatre vis du couvercle de base de la caméra, puis retirez le couvercle, voir<br />
l’illustration à la page 25.<br />
4. Acheminez le câble réseau et le câble multi-connexion, le cas échéant, puis branchez-les à la<br />
caméra réseau. Veillez à ne pas endommager les câbles lors du branchement. Vérifiez que les<br />
trous sur le joint en mousse sont alignés aux passages pour câble et, le cas échéant, enlevez<br />
l’échancrure du joint en mousse pour laisser passer le câble multi-connexion.<br />
5. Remettez en place le couvercle de base de la caméra, puis serrez les vis.<br />
6. Fixez la caméra à l’aide du fil de sécurité fourni.<br />
7. Glissez les supports de rack de la caméra réseau dans les logements de la plaque de fixation,<br />
puis tournez la caméra.<br />
8. Installez l’injecteur High PoE à 1 port, reportez-vous à la section <strong>Installation</strong> de l’injecteur High<br />
PoE <strong>AXIS</strong> T8123 à 1 port, page 31.<br />
9. Vérifiez que les voyants lumineux sur l’injecteur indiquent les conditions correctes. Pour plus<br />
d’informations, reportez-vous au tableau à la page 43.<br />
Fixation au faux-plafond<br />
1. Retirez la plaque de plafond sur laquelle le kit de montage doit être fixé.<br />
2. Utilisez le modèle fourni pour marquer l’emplacement du trou de 210 mm dans la plaque de<br />
plafond. Faites un trou suivant le contour du modèle.<br />
Plaque de plafond<br />
Diamètre du trou<br />
210 mm<br />
Remarques :<br />
• Le poids total de la caméra plus le kit de montage est environ 2,3 kg. Assurez-vous que le<br />
matériau du plafond est suffisamment solide pour supporter ce poids.<br />
• L’épaisseur de la plaque de plafond doit être entre 5 mm et 60 mm.<br />
3. Assemblez le support pour installation au plafond.<br />
4. Posez le support sur la plaque de plafond, voir l’illustration à la page 29.<br />
5. Serrez les vis du bras de support à l’aide d’un tournevis torx 20.<br />
6. Desserrez les quatre vis du couvercle de base de la caméra, puis retirez le couvercle, voir<br />
l’illustration à la page 25.
<strong>AXIS</strong> <strong>P5532</strong>/<strong>P5534</strong> <strong>Guide</strong> d'installation Page 29<br />
7. Acheminez le câble réseau et le câble multi-connexion, le cas échéant, puis branchez-les à la<br />
caméra réseau. Veillez à ne pas endommager les câbles lors du branchement. Vérifiez que les<br />
trous sur le joint en mousse sont alignés aux passages pour câble et, le cas échéant, enlevez<br />
l’échancrure du joint en mousse pour laisser passer le câble multi-connexion.<br />
Câble multi-connexion<br />
Câble réseau<br />
8. Remettez en place le couvercle de base de la caméra, puis serrez les vis.<br />
9. Fixez la caméra à l’aide du fil de sécurité fourni.<br />
Plaque de plafond<br />
Fil de sécurité<br />
FRANÇAIS<br />
Support sur la plaque<br />
10. Glissez les supports de rack de la caméra réseau dans les logements de la plaque de fixation,<br />
puis tournez la caméra.<br />
11. Installez l’injecteur High PoE à 1 port, reportez-vous à la section <strong>Installation</strong> de l’injecteur High<br />
PoE <strong>AXIS</strong> T8123 à 1 port, page 31.<br />
12. Vérifiez que les voyants lumineux sur l’injecteur indiquent les conditions correctes. Pour plus<br />
d’informations, reportez-vous au tableau de la page 43.<br />
13. Installez la plaque de plafond (avec la caméra déjà montée) dans le plafond.
Page 30<br />
<strong>AXIS</strong> <strong>P5532</strong>/<strong>P5534</strong> <strong>Guide</strong> d'installation<br />
14. Placez la brague décorative sur le support, puis mettez-le en position.<br />
Brague décorative<br />
Fixation du support (accessoire en option)<br />
1. Installez le support choisi conformément aux<br />
instructions fournies avec le support. S’il s’avère<br />
nécessaire de percer, vérifiez que les forets, vis<br />
et chevilles à utiliser sont appropriés pour le<br />
matériau.<br />
2. Desserrez les quatre vis du couvercle de base de<br />
la caméra, puis retirez le couvercle, voir<br />
l’illustration à la page 25.<br />
3. Acheminez le câble réseau et le câble multiconnexion,<br />
le cas échéant, dans les trous du<br />
support de fixation.<br />
4. Accrochez la caméra au fil de sécurité du support.<br />
Fil de<br />
sécurité<br />
Support mural (exemple de fixation)<br />
Vis Torx<br />
T30<br />
Logements pour<br />
supports de rack<br />
5. Branchez le câble réseau et le câble multi-connexion, le cas échéant, à la caméra réseau.<br />
6. Installez l’injecteur <strong>AXIS</strong> T8123, reportez-vous à la section <strong>Installation</strong> de l’injecteur High PoE<br />
<strong>AXIS</strong> T8123 à 1 port, page 31.<br />
7. Remettez en place le couvercle de base de la caméra.<br />
8. Glissez les supports de rack de la caméra réseau dans les logements du support, puis tournez la<br />
caméra.<br />
9. Fixez la caméra réseau au support de fixation à l’aide des trois vis (Torx T30).
<strong>AXIS</strong> <strong>P5532</strong>/<strong>P5534</strong> <strong>Guide</strong> d'installation Page 31<br />
<strong>Installation</strong> de l’injecteur High PoE <strong>AXIS</strong> T8123 à 1 port<br />
L’injecteur High PoE <strong>AXIS</strong> T8123 à 1 port permet aux produits de vidéo sur IP <strong>Axis</strong> consommant<br />
une quantité importante d’énergie de recevoir des données et de l’alimentation via le même câble<br />
Ethernet. Procédez comme suit pour brancher l’injecteur <strong>AXIS</strong> T8123 :<br />
1. Branchez l’injecteur <strong>AXIS</strong> T8123 (Données d’entrée) au commutateur réseau via un câble réseau<br />
standard.<br />
2. Branchez l’injecteur <strong>AXIS</strong> T8123 (Données et alimentation de sortie) à la caméra réseau, via un<br />
câble réseau déjà branché à la caméra.<br />
3. Branchez l’injecteur <strong>AXIS</strong> T8123 à une prise CA (100–240 V CA), à l’aide du câble<br />
d’alimentation fourni.<br />
<strong>AXIS</strong> T8123<br />
Indicateur<br />
de connexion<br />
de port<br />
Indicateur<br />
de connexion<br />
d’entrée CA<br />
Données et<br />
alimentation de sortie Données d’entrée<br />
Caméra réseau<br />
Ethernet<br />
FRANÇAIS<br />
Pour plus d’informations sur les voyants lumineux de l’injecteur, reportez-vous à la section Voyants<br />
d’état <strong>AXIS</strong> T8123, page 43.
Page 32<br />
<strong>AXIS</strong> <strong>P5532</strong>/<strong>P5534</strong> <strong>Guide</strong> d'installation<br />
Attribution d’une adresse IP<br />
Aujourd’hui, la plupart des réseaux sont équipés d’un serveur DHCP qui attribue automatiquement<br />
des adresses IP aux périphériques connectés. Si votre réseau ne possède pas de serveur DHCP, la<br />
caméra réseau utilise l’adresse IP 192.168.0.90 comme adresse IP par défaut.<br />
Si vous souhaitez paramétrer une adresse IP statique, sous Windows nous recommandons<br />
l’utilisation de l’application <strong>AXIS</strong> IP Utility ou de l’application <strong>AXIS</strong> Camera Management. Selon le<br />
nombre de caméras à installer, utilisez la méthode qui vous convient le mieux.<br />
Ces deux applications gratuites sont disponibles sur le CD du produit de vidéo sur IP <strong>AXIS</strong> fourni<br />
avec ce produit. Vous pouvez également les télécharger à partir du site www.axis.com<br />
Méthode Recommandée pour Système<br />
d’exploitation<br />
<strong>AXIS</strong> IP Utility<br />
Reportez-vous à la page 33<br />
<strong>AXIS</strong> Camera Management<br />
Reportez-vous à la page 34<br />
Une seule caméra<br />
Petites installations<br />
Plusieurs caméras<br />
Grandes installations<br />
<strong>Installation</strong> sur un autre sousréseau<br />
Windows<br />
Windows 2000<br />
Windows XP Pro<br />
Windows 2003 Server<br />
Windows Vista<br />
Windows 7<br />
Remarques :<br />
• En cas d’échec de l’attribution d’adresse IP, vérifiez qu’aucun pare-feu ne bloque l’opération.<br />
• Pour connaître les autres méthodes d’attribution ou de détection de l’adresse IP, par exemple<br />
sous d’autres systèmes d’exploitation, reportez-vous à la page 38.
<strong>AXIS</strong> <strong>P5532</strong>/<strong>P5534</strong> <strong>Guide</strong> d'installation Page 33<br />
<strong>AXIS</strong> IP Utility : une seule caméra et une petite installation<br />
<strong>AXIS</strong> IP Utility détecte automatiquement les périphériques <strong>Axis</strong> de votre réseau et les affiche. Cette<br />
application sert également à attribuer manuellement une adresse IP statique.<br />
Notez que l’ordinateur exécutant l’application <strong>AXIS</strong> IP Utility doit se trouver sur le même segment<br />
de réseau (sous-réseau physique) que la caméra réseau.<br />
FRANÇAIS<br />
Recherche automatique<br />
1. Vérifiez que la caméra réseau est connectée au réseau et qu’elle se trouve sous tension.<br />
2. Lancez <strong>AXIS</strong> IP Utility.<br />
3. Lorsque l’icône de la caméra apparaît dans la fenêtre, double-cliquez dessus pour ouvrir la page<br />
d’accueil correspondante.<br />
4. Reportez-vous à la page 35 pour savoir comment configurer le mot de passe.<br />
Attribution manuelle de l’adresse IP (facultatif)<br />
1. Trouvez une adresse IP inutilisée sur le même segment de réseau que celui de votre ordinateur.<br />
2. Sélectionnez la caméra réseau dans la liste.<br />
3. Cliquez sur le bouton Assign new IP address to the selected device (Attribuer une nouvelle<br />
adresse IP au périphérique sélectionné) , puis saisissez l’adresse IP.<br />
4. Cliquez sur le bouton Assign (Attribuer) et suivez les instructions qui s’affichent à l’écran. La<br />
caméra doit être redémarrée dans les 2 minutes pour que la nouvelle adresse IP soit prise en<br />
compte.<br />
5. Cliquez sur le bouton Home Page (Page d’accueil) pour accéder aux pages Web de la caméra.<br />
6. Reportez-vous à la page 35 pour savoir comment configurer le mot de passe.
Page 34<br />
<strong>AXIS</strong> <strong>P5532</strong>/<strong>P5534</strong> <strong>Guide</strong> d'installation<br />
<strong>AXIS</strong> Camera Management : plusieurs caméras et de grandes<br />
installations<br />
<strong>AXIS</strong> Camera Management peut détecter automatiquement plusieurs dispositifs <strong>Axis</strong>, afficher les<br />
états de connexion, gérer les mises à niveau du microprogramme et définir les adresses IP.<br />
Recherche automatique<br />
1. Vérifiez que la caméra est connectée au réseau et sous tension.<br />
2. Lancez <strong>AXIS</strong> Camera Management. Lorsque la caméra réseau apparaît dans la fenêtre, cliquez<br />
sur le lien avec le bouton droit de la souris, puis sélectionnez Live View Home Page (Page<br />
d’accueil – Vidéo en direct).<br />
3. Reportez-vous à la page 35 pour savoir comment configurer le mot de passe.<br />
Attribution d’une adresse IP à un seul périphérique<br />
1. Sélectionnez la caméra réseau dans l’application <strong>AXIS</strong> Camera<br />
Management, puis cliquez sur le bouton Assign IP (Attribuer<br />
une adresse IP).<br />
2. Sélectionnez Assign the following IP address (Attribuer<br />
l’adresse IP suivante) et saisissez l’adresse IP, le masque de<br />
sous-réseau et le routeur par défaut que le périphérique<br />
utilisera.<br />
3. Cliquez sur OK.
<strong>AXIS</strong> <strong>P5532</strong>/<strong>P5534</strong> <strong>Guide</strong> d'installation Page 35<br />
Attribution d’adresses IP à plusieurs<br />
périphériques<br />
<strong>AXIS</strong> Camera Management accélère le processus d’attribution<br />
d’adresses IP à plusieurs périphériques en suggérant des<br />
adresses IP parmi une plage spécifiée.<br />
1. Sélectionnez les périphériques à configurer (il peut s’agir de<br />
plusieurs modèles), puis cliquez sur le bouton Assign IP<br />
(Attribuer une adresse IP).<br />
2. Sélectionnez Assign the following IP address range<br />
(Attribuer la plage d’adresses IP suivante) et saisissez la<br />
plage d’adresses IP, le masque de sous-réseau et le routeur<br />
par défaut que les périphériques utiliseront.<br />
3. Cliquez sur Update (Mettre à jour). Les adresses IP suggérées sont énumérées sous le champ<br />
New IP Addresses (Nouvelles adresses IP) et peuvent être modifiées en sélectionnant un<br />
périphérique et en cliquant sur le bouton Edit (Modifier).<br />
4. Cliquez sur OK.<br />
FRANÇAIS<br />
Configuration du mot de passe<br />
Pour accéder au produit, le mot de passe par défaut de l’administrateur, root, doit être configuré.<br />
Pour ce faire, utilisez la boîte de dialogue Configure Root Password (Configurer le mot de passe<br />
root) qui s’affiche lors du premier accès à la caméra réseau.<br />
Pour éviter les écoutes électroniques lors de la configuration du mot de passe root, utilisez une<br />
connexion HTTPS cryptée nécessitant un certificat HTTPS.<br />
Remarque : Le protocole HTTPS (Hypertext Transfer Protocol over Secure Socket Layer) est utilisé pour<br />
crypter le trafic entre les navigateurs Web et les serveurs. Le certificat HTTPS contrôle<br />
l’échange crypté des informations.<br />
Pour configurer le mot passe avec une connexion HTTP standard, saisissez directement le mot de<br />
passe dans la première boîte de dialogue représentée ci-dessous.<br />
Pour configurer le mot passe avec une connexion HTTPS cryptée, procédez comme suit :<br />
1. Cliquez sur le bouton Create self-signed certificate (Créer un certificat autosigné).<br />
2. Saisissez les informations demandées, puis cliquez sur OK. Le certificat est créé et le mot de<br />
passe peut maintenant être configuré en toute sécurité. Tout le trafic vers et depuis la caméra<br />
réseau est désormais crypté.
Page 36<br />
<strong>AXIS</strong> <strong>P5532</strong>/<strong>P5534</strong> <strong>Guide</strong> d'installation<br />
3. Saisissez un mot de passe, puis saisissez-le de nouveau pour confirmation. Cliquez sur OK. Le<br />
mot de passe est maintenant configuré.<br />
Pour créer une connexion HTTPS,<br />
cliquez sur ce bouton.<br />
Pour configurer directement le mot<br />
de passe via une connexion cryptée,<br />
saisissez le mot de passe à cet<br />
endroit.<br />
4. Pour vous connecter, saisissez le nom d’utilisateur « root » dans la boîte de dialogue à l’invite.<br />
Remarque : Le nom d’utilisateur par défaut de l’administrateur est root et il ne peut pas être<br />
supprimé.<br />
5. Saisissez le mot de passe configuré ci-dessus et cliquez sur OK.<br />
Remarque : Si vous avez oublié votre mot de passe, vous devrez rétablir les paramètres d’usine par<br />
défaut de votre caméra. Reportez-vous à la page 43.
<strong>AXIS</strong> <strong>P5532</strong>/<strong>P5534</strong> <strong>Guide</strong> d'installation Page 37<br />
Accès au flux de données vidéo<br />
La page Live View (Vidéo en direct) de la caméra réseau s’affiche, avec des liens vers les outils de<br />
configuration, lesquels vous permettent d’adapter la caméra à vos besoins.<br />
Si nécessaire, cliquez sur Yes (Oui) pour installer AMC (<strong>AXIS</strong> Media Control) afin de visualiser le flux<br />
de données vidéo dans Internet Explorer. Vous devez pour cela avoir des droits d’administrateur sur<br />
cet ordinateur.<br />
Si nécessaire, cliquez sur le lien pour installer les décodeurs manquants.<br />
Remarque : Pour installer AMC sous Windows 7/Windows Vista, vous devez exécuter Internet Explorer<br />
en tant qu’administrateur. Cliquez avec le bouton droit de la souris sur l’icône Internet<br />
Explorer et sélectionnez Run as administrator (Exécuter en qu’administrateur).<br />
Setup (Configuration) : contient<br />
tous les outils nécessaires pour<br />
configurer la caméra en fonction<br />
de vos besoins.<br />
Help (Aide) : affiche l’aide<br />
en ligne sur tout ce qui a<br />
trait à l’utilisation de la<br />
caméra.<br />
FRANÇAIS
Page 38<br />
<strong>AXIS</strong> <strong>P5532</strong>/<strong>P5534</strong> <strong>Guide</strong> d'installation<br />
Autres méthodes de configuration de l’adresse IP<br />
Le tableau ci-dessous indique les autres méthodes permettant de configurer ou de déterminer<br />
l’adresse IP. Toutes les méthodes sont activées par défaut et peuvent être désactivées.<br />
Utilisation sous<br />
le système<br />
d’exploitation<br />
Remarques<br />
AVHS Service<br />
Connection<br />
Tous<br />
Permet de connecter la caméra à un service AVHS. Consultez le guide<br />
d’installation du fournisseur de service. Pour plus d’informations et<br />
pour rechercher un fournisseur de service AVHS local, visitez le site<br />
www.axis.com<br />
UPnP Windows Lorsque la caméra est activée sur votre ordinateur, elle est détectée<br />
automatiquement et vient s’ajouter au dossier Favoris réseau.<br />
Bonjour<br />
<strong>AXIS</strong> Dynamic<br />
DNS Service<br />
MAC OS X<br />
(10.4 ou version<br />
ultérieure)<br />
Tous<br />
Pour les navigateurs compatibles avec Bonjour : Accédez au signet de<br />
Bonjour dans votre navigateur (par exemple Safari), puis cliquez sur le<br />
lien permettant d’accéder aux pages Web de la caméra.<br />
Service <strong>Axis</strong> gratuit vous permettant d’installer rapidement et<br />
facilement votre caméra. Nécessite une connexion Internet sans proxy<br />
HTTP. Pour plus d’informations, visitez le site www.axiscam.net<br />
ARP/Ping Tous Reportez-vous aux instructions ci-dessous. La commande doit être<br />
saisie dans les deux minutes suivant la mise sous tension de la caméra.<br />
DHCP Tous Pour consulter les pages administratives du serveur DHCP réseau,<br />
reportez-vous à la documentation du serveur.
<strong>AXIS</strong> <strong>P5532</strong>/<strong>P5534</strong> <strong>Guide</strong> d'installation Page 39<br />
Définition de l’adresse IP à l’aide d’ARP/Ping<br />
1. Trouvez une adresse IP sur le même segment de réseau que celui de votre ordinateur.<br />
2. Repérez le numéro de série (S/N) sur l’étiquette de la caméra.<br />
3. Ouvrez une invite de commande sur votre ordinateur et saisissez les commandes suivantes :<br />
Syntaxe pour Windows : Exemple pour Windows :<br />
arp -s <br />
ping -l 408 -t <br />
arp -s 192.168.0.125 00-40-8c-18-10-00<br />
ping -l 408 -t 192.168.0.125<br />
Syntaxe pour UNIX/Linux/Mac : Exemple pour UNIX/Linux/Mac :<br />
arp -s temp<br />
ping -s 408 <br />
arp -s 192.168.0.125 00:40:8c:18:10:00 temp<br />
ping -s 408 192.168.0.125<br />
4. Vérifiez que le câble réseau est branché à la caméra, puis démarrez/redémarrez cette dernière<br />
en débranchant puis en rebranchant l’alimentation.<br />
5. Fermez l’invite de commande quand vous voyez « Reply from 192.168.0.125:... » (Réponse de<br />
192.168.0.125 : ...) ...’ ou un message similaire.<br />
6. Dans votre navigateur, tapez http:// dans le champ Emplacement/Adresse, puis<br />
appuyez sur la touche Entrée de votre clavier.<br />
Remarques :<br />
• Ouvrir une invite de commande sous Windows : dans le menu Démarrer, sélectionnez<br />
Exécuter… et tapez cmd. Cliquez sur OK.<br />
• Pour utiliser la commande ARP sous Windows 7/Windows Vista, cliquez avec le bouton droit<br />
de la souris sur l’icône d’invite de commande et sélectionnez Run as administrator (Exécuter<br />
en tant qu’administrateur).<br />
• Pour utiliser la commande ARP sous Mac OS X, utilisez l’utilitaire Terminal dans Application ><br />
Utilitaires.<br />
FRANÇAIS
Page 40<br />
<strong>AXIS</strong> <strong>P5532</strong>/<strong>P5534</strong> <strong>Guide</strong> d'installation<br />
Connecteurs de l’appareil<br />
Connecteur réseau : connecteur Ethernet RJ-45. Prend en charge High PoE (alimentation par<br />
Ethernet, IEEE 802.3at). Utilisez l’injecteur High PoE <strong>AXIS</strong> T8123 à 1 port (fourni). Des câbles<br />
blindés doivent être utilisés par souci de conformité aux normes EMC.<br />
Multi-connecteur : connecteur pour terminaux pour une connexion à l’équipement externe :<br />
• Équipement audio<br />
• Périphériques d’entrée ou de sortie (E/S)<br />
• Bloc d’alimentation CA/CC<br />
Lors du branchement d’un équipement externe à l’injecteur <strong>AXIS</strong> <strong>P5532</strong>/<strong>P5534</strong>, un câble multiconnexion<br />
est requis afin de maintenir la classification IP51. Le câble multi-connexion est<br />
disponible auprès de votre revendeur <strong>Axis</strong>. Pour plus d’informations, consultez le manuel de<br />
l’utilisateur, disponible sur le CD du produit de vidéo sur IP <strong>AXIS</strong>, fourni avec le produit ou en<br />
téléchargement sur le site Web www.axis.com<br />
Logement de carte SDHC : une carte mémoire SD standard ou haute capacité (non fournie) est<br />
requise pour stocker des images en local sur la caméra réseau. Pour insérer et retirer la carte SD, il<br />
est indispensable de retirer le couvercle supérieur de la caméra, reportez-vous à la section<br />
<strong>Installation</strong> d’une carte SD (facultatif), page 27.<br />
Remarque : Vous devez désinstaller la carte SD avant de la retirer pour éviter que les enregistrements<br />
soient corrompus. Pour désinstaller la carte SD, choisissez<br />
Setup > System Options > Storage > SD Card (Configuration/Options système/Stockage/<br />
Carte SD), puis cliquez sur Unmount (Désinstaller). Pour plus d’informations, consultez le<br />
manuel de l’utilisateur, disponible sur le CD du produit de vidéo sur IP <strong>AXIS</strong>, fourni avec le<br />
produit ou en téléchargement sur le site Web www.axis.com
<strong>AXIS</strong> <strong>P5532</strong>/<strong>P5534</strong> <strong>Guide</strong> d'installation Page 41<br />
Câble multi-connexion (non fourni)<br />
Lors de la connexion d’un équipement externe à l’injecteur <strong>AXIS</strong> <strong>P5532</strong>/<strong>P5534</strong>, un câble multiconnexion<br />
est requis afin de maintenir la classification IP51 de la caméra. Le câble multi-connexion<br />
est disponible auprès de votre revendeur <strong>Axis</strong>.<br />
Branchez le câble multi-connexion au port multi-connexion, voir l’illustration à la page 25 et les<br />
instructions à la page 27 et à la page 28. Les connecteurs que comprend le câble sont les suivants :<br />
Connecteur d’alimentation : bloc terminal à trois broches utilisé pour la puissance d’entrée.<br />
Alimentation en CC, 24-34 V CC<br />
<strong>AXIS</strong> <strong>P5532</strong> : max 15 W<br />
<strong>AXIS</strong> <strong>P5534</strong> : max 17 W<br />
Alimentation en CA, 20-24 V CA<br />
<strong>AXIS</strong> <strong>P5532</strong> : max 20 VA<br />
<strong>AXIS</strong> <strong>P5534</strong> : max 23,6 VA<br />
FRANÇAIS<br />
Entrée audio (rose) : entrée de 3,5 mm pour microphone mono ou signal d’entrée mono (le canal<br />
de gauche est utilisé pour le signal stéréo).<br />
Sortie audio (vert) : sortie de 3,5 mm pour audio (niveau de ligne) qui peut être connectée à un<br />
système d’annonce publique (PA) ou haut-parleur actif avec amplificateur intégré. Une paire<br />
d’écouteurs peut être connectée également. Un connecteur stéréo doit être utilisé pour la sortie<br />
audio.<br />
Connecteur pour terminaux d’E/S : utilisé dans le cadre d’applications telles que<br />
la détection de mouvement, le déclenchement d’événements, l’enregistrement à<br />
intervalles et les notifications d’alarme. En plus d’une alimentation auxiliaire et<br />
d’une broche de terre, le connecteur pour terminaux d’E/S possède 4 broches qui<br />
peuvent être configurées comme entrées ou sorties. Ces broches assurent<br />
l’interface avec :<br />
• Sortie numérique : permet de connecter des dispositifs externes, comme des relais ou des<br />
voyants lumineux. Les dispositifs connectés peuvent être activés à l’aide de l’interface de<br />
programmation VAPIX®, des boutons de sortie sur la page Live View (Vidéo en direct) ou à<br />
l’aide d’un type d’événement. La sortie est considérée comme étant active (ce qui est visible<br />
dans Events > Port Status (Événements - État du port) si le dispositif d’alarme est activé.
Page 42<br />
<strong>AXIS</strong> <strong>P5532</strong>/<strong>P5534</strong> <strong>Guide</strong> d'installation<br />
• Entrée numérique : entrée d’alarme utilisée pour connecter des dispositifs pouvant passer<br />
d’un circuit ouvert à un circuit fermé, par exemple : Détecteurs infrarouge passifs, contacts<br />
de porte/fenêtre, détecteurs de bris de verre, etc. Lorsqu’un signal est reçu, l’état change et<br />
l’entrée devient active (sous Events > Port Status (Événements/État du port)).<br />
Fonction Broche Remarques Caractéristiques techniques<br />
Terre 1 Terre<br />
3.3Alimentation<br />
VCC<br />
Configurable<br />
(entrée ou<br />
sortie)<br />
2 Cette broche peut également servir à<br />
l’alimentation du matériel auxiliaire.<br />
Remarque : Cette broche ne peut être utilisée<br />
que comme sortie d’alimentation.<br />
3-6 Entrée numérique : connectez-la à la terre pour<br />
l’activer ou laissez-la flotter (ou déconnectée)<br />
pour la désactiver.<br />
Sortie numérique : utilise un transistor NFET à<br />
drain ouvert avec la source connectée à la terre.<br />
En cas d’utilisation avec un relais externe, une<br />
diode doit être connectée en parallèle avec la<br />
charge, en guise de protection contre les<br />
tensions transitoires.<br />
Charge maximale = 250 mA<br />
Entrée minimum = -40 V CC<br />
Entrée maximale = +40 V CC<br />
Charge maximale = 100 mA<br />
Tension maximale = +40 V CC<br />
<strong>AXIS</strong> <strong>P5532</strong>/<strong>P5534</strong> Voyants d’état<br />
Couleur<br />
Éteint<br />
Orange<br />
Orange/rouge<br />
Rouge<br />
Vert<br />
Indication<br />
Connexion stable/fonctionnement normal<br />
En continu pendant l’initialisation du système et le rétablissement des valeurs d’usine par<br />
défaut. Clignote pendant les mises à niveau du microprogramme.<br />
Pas de connexion au réseau.<br />
Échec de la mise à niveau du microprogramme<br />
Continu pendant 10 s après avoir redémarré avec succès<br />
Remarque : Pour plus d’informations sur les voyants d’état <strong>AXIS</strong> <strong>P5532</strong>/<strong>P5534</strong>, consultez le manuel de<br />
l’utilisateur, disponible sur le CD du produit de vidéo sur IP <strong>AXIS</strong>, fourni avec le produit ou en<br />
téléchargement sur le site Web www.axis.com
<strong>AXIS</strong> <strong>P5532</strong>/<strong>P5534</strong> <strong>Guide</strong> d'installation Page 43<br />
Voyants d’état <strong>AXIS</strong> T8123<br />
Témoin Couleur Indication<br />
Indicateur Éteint Aucune caméra connectée<br />
Clignotement Surcharge de l’alimentation ou autre erreur de tension d’entrée<br />
Vert<br />
Caméra connectée, fonctionnement normal<br />
Entrée CA Vert continu Alimentation CA connectée<br />
Rétablissement des paramètres d’usine par défaut<br />
Pour rétablir les paramètres d’usine par défaut de la caméra, utilisez le bouton de commande et le<br />
bouton de redémarrage situés sur le côté de la caméra, reportez-vous à la section Présentation du<br />
matériel, page 24, comme décrit ci-après :<br />
Les boutons de commande et de redémarrage permettent de rétablir les paramètres par défaut<br />
définis en usine et de réinitialiser l’adresse IP :<br />
1. Retirez le couvercle supérieur, reportez-vous à la section Enlèvement de l’emballage de<br />
protection, page 26.<br />
2. Appuyez sur le bouton de commande et le bouton de redémarrage en même temps et<br />
maintenez-les enfoncés.<br />
3. Relâchez le bouton de redémarrage, mais maintenez le bouton de commande enfoncé.<br />
4. Maintenez le bouton de commande enfoncé jusqu’à ce que la couleur du témoin d’état change<br />
en orange (cela peut prendre jusqu’à 15 secondes).<br />
5. Relâchez le bouton de commande.<br />
6. Lorsque le voyant d’état change en vert (ce qui peut prendre 1 minute), les paramètres par<br />
défaut de la caméra ont été rétablis. L’adresse IP de la caméra est maintenant 192.168.0.90<br />
7. Remettez en place le couvercle supérieur de la caméra.<br />
8. Attribuez à nouveau l’adresse IP selon une des méthodes décrites dans la section Attribution<br />
d’une adresse IP, page 32.<br />
Il est également possible de rétablir les paramètres d’usine par défaut d’origine à partir de<br />
l’interface Web. Pour plus d’informations, consultez l’aide en ligne ou le manuel de l’utilisateur,<br />
disponible sur le CD du produit de vidéo sur IP <strong>AXIS</strong> fourni avec le produit.<br />
FRANÇAIS
Page 44<br />
<strong>AXIS</strong> <strong>P5532</strong>/<strong>P5534</strong> <strong>Guide</strong> d'installation<br />
Accès à la caméra via Internet<br />
Une fois installée, votre caméra réseau est accessible sur votre réseau local (LAN). Pour accéder à la<br />
caméra via Internet, les routeurs réseau doivent être configurés pour autoriser le trafic entrant, ce<br />
qui est généralement réalisé sur un port spécifique.<br />
• Le port HTTP (port 80 par défaut) pour l’affichage et la configuration<br />
• Le port RTSP (port 554 par défaut) pour l’affichage des flux de données vidéo H.264<br />
Pour plus d’informations, consultez la documentation du routeur. Pour plus d’informations à ce<br />
sujet ou pour toute autre question, consultez la page Assistance technique du site Web d’<strong>Axis</strong> à<br />
l’adresse www.axis.com/techsup.<br />
Plus d’informations<br />
Le manuel de l’utilisateur est disponible sur le site Web d’<strong>Axis</strong> (www.axis.com) et sur le CD du<br />
produit de vidéo sur IP <strong>AXIS</strong> fourni avec le produit.<br />
Conseil :<br />
Visitez le site www.axis.com/techsup pour vérifier si des micrologiciels mis à jour sont<br />
disponibles pour votre caméra réseau. Pour connaître la version du micrologiciel<br />
actuellement installée, reportez-vous à la page Setup > About (Configuration - À propos de).
<strong>AXIS</strong> <strong>P5532</strong>/<strong>P5534</strong> <strong>Installation</strong>sanleitung Seite 45<br />
<strong>AXIS</strong> <strong>P5532</strong> & <strong>AXIS</strong> <strong>P5534</strong><br />
<strong>Installation</strong>sanleitung<br />
In dieser Anleitung wird die <strong>Installation</strong> der <strong>AXIS</strong> <strong>P5532</strong>/<strong>AXIS</strong> <strong>P5534</strong> PTZ-Dome-Netzwerk-Kamera<br />
in einem Netzwerk beschrieben. Alle weiteren Hinweise zur Verwendung des Produkts finden Sie im<br />
Benutzerhandbuch, das auf der mitgelieferten CD oder auf unserer Website unter „www.axis.com“<br />
zur Verfügung steht.<br />
<strong>Installation</strong>sschritte<br />
1. Prüfen Sie, ob alle in der nachfolgenden Liste aufgeführten Komponenten vorhanden sind.<br />
2. Sehen Sie sich die Hardwareübersicht an. Siehe Seite 46.<br />
3. Installieren Sie die Hardware.<br />
• Vorbereitung der <strong>Installation</strong>, siehe Seite 48.<br />
• Deckenmontage, siehe Seite 50.<br />
• Hängedeckenmontage, siehe Seite 51.<br />
• Montagehalterung (Sonderzubehör), siehe Seite 53.<br />
• <strong>Installation</strong> des <strong>AXIS</strong> T8123 High PoE Midspan (1 Anschluss), siehe Seite 54.<br />
4. Weisen Sie eine IP-Adresse zu. Siehe Seite 55.<br />
5. Legen Sie das Kennwort fest. Siehe Seite 58.<br />
Lieferumfang<br />
Wichtig!<br />
Verwenden Sie dieses Produkt<br />
unter Beachtung der geltenden<br />
rechtlichen Bestimmungen.<br />
DEUTSCH<br />
Komponente<br />
Netzwerk-Kamera<br />
Kuppelabdeckungen<br />
Montagesatz<br />
High PoE Midspan<br />
CD-ROM<br />
Gedruckte Dokumente<br />
Modell/Varianten/Anmerkungen<br />
<strong>AXIS</strong> <strong>P5532</strong><br />
<strong>AXIS</strong> <strong>P5534</strong><br />
Transparente Klarglasabdeckung (vormontiert)<br />
Getönte transparente Abdeckung<br />
Montagesatz für die Befestigung an Decken und in Hängedecken<br />
Resitorx-Schraubendreher<br />
<strong>AXIS</strong> T8123<br />
CD für <strong>AXIS</strong>-Netzwerkvideoprodukte einschließlich Produktdokumentation,<br />
<strong>Installation</strong>swerkzeugen und anderer Software<br />
<strong>AXIS</strong> <strong>P5532</strong>/<strong>P5534</strong> <strong>Installation</strong>shandbuch (dieses Dokument),<br />
<strong>Axis</strong>-Garantieerklärung, Bohrschablone, Zwei zusätzliche Etiketten mit der<br />
Seriennummer, AVHS-Authentifizierungsschlüssel<br />
Optionales Zubehör<br />
<strong>AXIS</strong> T91A Montagezubehör<br />
Mehrfachanschlusskabel zum Anschluss von E/A- und Audiogeräten sowie für<br />
die Stromversorgung<br />
Weitere Informationen zu Zubehör für die Stromversorgung und<br />
Außengehäusen finden Sie unter „www.axis.com“
Seite 46<br />
<strong>AXIS</strong> <strong>P5532</strong>/<strong>P5534</strong> <strong>Installation</strong>sanleitung<br />
Hardwareübersicht<br />
Kameraeinheit<br />
Steuertaste<br />
SDHC-Speicherkarteneinschub<br />
Statusanzeige (LED)<br />
Neustarttaste<br />
Kuppelabdeckung<br />
Kuppelring<br />
schrauben (6) Kuppelring Kuppelabdeckung Obere Abdeckung<br />
Dichtungsring
<strong>AXIS</strong> <strong>P5532</strong>/<strong>P5534</strong> <strong>Installation</strong>sanleitung Seite 47<br />
Deckenmontage<br />
Montageplatte<br />
Hängedeckenmontage<br />
Schrauben<br />
für Montage-<br />
platte (3)<br />
Schrauben<br />
(3) und<br />
Unterlegscheiben<br />
(3)<br />
für<br />
Halterungsarm<br />
Montagering<br />
Halterungsarm<br />
(3)<br />
Sicherheitsdraht<br />
DEUTSCH<br />
Kamerabefestigungen (3)<br />
Kameragrundplatte<br />
Schrauben für die Kameragrundplatte (4)<br />
Haken für Sicherheitsdraht<br />
Artikelnummer (P/N) und Seriennummer (S/N).<br />
Die Seriennummer wird für die <strong>Installation</strong><br />
benötigt.<br />
Kabelführungen<br />
Schaumstoffdichtung<br />
Netzwerkanschluss<br />
Mehrfachanschluss<br />
Schrauben für obere Abdeckung (4)<br />
Obere Abdeckung
Seite 48<br />
<strong>AXIS</strong> <strong>P5532</strong>/<strong>P5534</strong> <strong>Installation</strong>sanleitung<br />
Installieren der Hardware<br />
!<br />
WICHTIG!<br />
- Um die <strong>AXIS</strong> <strong>P5532</strong>/<strong>P5534</strong> im Freien zu verwenden, muss sie in einem<br />
zugelassenen Außengehäuse installiert werden. Auf unserer Homepage unter<br />
„www.axis.com“ finden Sie weitere Informationen über Außengehäuse.<br />
Vorbereitung der <strong>Installation</strong><br />
Lesen Sie zunächst alle Anweisungen, bevor Sie mit der <strong>Installation</strong>svorbereitung der <strong>AXIS</strong> <strong>P5532</strong>/<br />
<strong>P5534</strong> beginnen. Bei einigen Vorbereitungsschritten muss die obere Abdeckung abgenommen<br />
werden, sodass es sinnvoll ist, diese Schritte zusammen durchzuführen.<br />
• Führen Sie die unter Entfernen der Schutzfolien beschriebenen Schritte zur Entfernung der<br />
Schutzfolien aus, bevor Sie mit der <strong>Installation</strong> der Kamera beginnen.<br />
• Im Lieferumfang der Kamera ist eine transparente Abdeckung in Klarglas und in Rauchglas<br />
enthalten. Führen Sie bei Bedarf die Anweisungen unter Austauschen der klaren/getönten<br />
Kuppelabdeckung (optional) aus, um die Kuppelabdeckung auszutauschen.<br />
• Wenn Sie Bilder lokal in der Netzwerk-Kamera speichern möchten, benötigen Sie eine SD-<br />
Speicherkarte mit normaler oder hoher Kapazität (separat erhältlich). Führen Sie die unter<br />
<strong>Installation</strong> einer SD-Speicherkarte (optional) beschriebenen Schritte aus, um die obere<br />
Abdeckung zu entfernen und eine SD-Speicherkarte zu installieren.<br />
Entfernen der Schutzfolien<br />
1. Lösen Sie die vier Schrauben der oberen Abdeckung und nehmen Sie die Abdeckung ab. Siehe<br />
Abbildung auf Seite 47.<br />
2. Entfernen Sie die Schutzfolien.<br />
Schutsfolien<br />
3. Wenn Sie die klare bzw. getönte Kuppelabdeckung austauschen oder eine SD-Speicherkarte<br />
installieren möchten, führen Sie die Anweisungen unter Austauschen der klaren/getönten<br />
Kuppelabdeckung (optional) bzw. unter <strong>Installation</strong> einer SD-Speicherkarte (optional) aus.<br />
4. Bringen Sie die obere Abdeckung wieder an der ursprünglichen Position an und ziehen Sie die<br />
Schrauben fest.
<strong>AXIS</strong> <strong>P5532</strong>/<strong>P5534</strong> <strong>Installation</strong>sanleitung Seite 49<br />
Austauschen der klaren/getönten Kuppelabdeckung (optional)<br />
1. Lösen Sie die vier Schrauben der oberen Abdeckung und nehmen Sie die Abdeckung ab. Siehe<br />
Abbildung auf Seite 47.<br />
2. Lösen Sie die 6 Schrauben des Kuppelrings und entfernen Sie den Kuppelrung von der oberen<br />
Abdeckung.<br />
3. Bringen Sie den Kuppelring und die Kuppelabdeckung an der oberen Abdeckung an und<br />
befestigen Sie diese, indem Sie die sechs Schrauben anziehen.<br />
4. Zur <strong>Installation</strong> einer SD-Speicherkarte führen Sie die unter <strong>Installation</strong> einer SD-Speicherkarte<br />
(optional) beschriebenen Schritte aus.<br />
5. Bringen Sie die obere Abdeckung wieder an der ursprünglichen Position an und ziehen Sie die<br />
Schrauben fest.<br />
Hinweis: Achten Sie darauf, die Kuppelabdeckung nicht zu zerkratzen oder zu beschädigen.<br />
Säubern Sie die Kuppelabdeckung mit einem weichen Tuch, bevor Sie sie an der<br />
Kameraeinheit anbringen.<br />
<strong>Installation</strong> einer SD-Speicherkarte (optional)<br />
1. Lösen Sie die vier Schrauben der oberen Abdeckung und nehmen Sie die Abdeckung ab. Siehe<br />
Abbildung auf Seite 47.<br />
2. Schieben Sie eine SD-Speicherkarte (separat erhältlich) in den SDHC-Speicherkartenschacht.<br />
3. Bringen Sie die obere Abdeckung wieder an der ursprünglichen Position an und ziehen Sie die<br />
Schrauben fest.<br />
DEUTSCH<br />
Hinweis: Die SD-Speicherkarte wird automatisch aktiviert, wenn Sie sie in den SDHC-<br />
Speicherkarteneinschub einsetzen. Bevor Sie die SD-Speicherkarte entfernen, müssen<br />
Sie sie über die Webseiten der Kamera deaktivieren. Wählen Sie hierzu<br />
Setup > System Options > Storage > SD Card (Setup > Systemoptionen > Speicher<br />
> SD-Speicherkarte) und klicken Sie auf Unmount (Deaktivieren). Weitere<br />
Informationen hierzu finden Sie im Benutzerhandbuch, das sich auf der<br />
mitgelieferten CD für <strong>Axis</strong>-Netzwerkvideoprodukte befindet und auf der Website<br />
unter „www.axis.com“ erhältlich ist.
Seite 50<br />
<strong>AXIS</strong> <strong>P5532</strong>/<strong>P5534</strong> <strong>Installation</strong>sanleitung<br />
Deckenmontage<br />
1. Bereiten Sie die Befestigung der Montageplatte an der Decke vor. Markieren Sie die Position der<br />
Bohrlöcher mithilfe der mitgelieferten Bohrschablone. Stellen Sie sicher, dass die Bohrerspitzen,<br />
Schrauben und Dübel für den Baustoff der Decke geeignet sind.<br />
2. Bringen Sie die Montageplatte an der Decke an.<br />
Montageplatte<br />
Sicherheitsdraht<br />
3. Lösen Sie die vier Schrauben der Kameragrundplatte und nehmen Sie die Grundplatte ab. Siehe<br />
Abbildung auf Seite 47.<br />
4. Verbinden Sie das Netzwerkkabel und bei Bedarf das Mehrfachanschlusskabel mit der<br />
Netzwerk-Kamera. Achten Sie darauf, die Kabel beim Anschließen nicht zu beschädigen.<br />
Vergewissern Sie sich, dass die Schaumstofflöcher auf die Kabelführungen ausgerichtet sind<br />
und entfernen Sie ggf. das herausnehmbare Teil für das Mehrfachanschlusskabel aus der<br />
Schaumstoffdichtung.<br />
5. Bringen Sie die Kameragrundplatte wieder an der ursprünglichen Position an und ziehen Sie die<br />
Schrauben fest.<br />
6. Sichern Sie die Kamera mit dem mitgelieferten Sicherheitsdraht.<br />
7. Schieben Sie die Kamerabefestigungen an der Netzwerk-Kamera in die Aussparungen in der<br />
Montageplatte und drehen Sie die Kameraeinheit.<br />
8. Installieren Sie den High PoE Midspan (1 Anschluss), siehe <strong>Installation</strong> des <strong>AXIS</strong> T8123 High<br />
PoE Midspan (1 Anschluss), auf Seite 54.<br />
9. Überprüfen Sie, ob die LED-Anzeigen die Betriebszustände korrekt angeben. Weitere<br />
Informationen hierzu finden Sie in der Tabelle auf Seite 66.
<strong>AXIS</strong> <strong>P5532</strong>/<strong>P5534</strong> <strong>Installation</strong>sanleitung Seite 51<br />
Hängedeckenmontage<br />
1. Nehmen Sie die Deckenplatte ab, in der die Halterung für Hängedecken angebracht werden soll.<br />
2. Markieren Sie mithilfe der mitgelieferten Schablone die Position des 210-mm-Lochs in der<br />
Deckenplatte. Schneiden Sie das Loch entlang der Schablone aus.<br />
Deckenplatte<br />
Lochdurchmesser<br />
210-mm<br />
Hinweise:<br />
• Das Gesamtgewicht von Kamera und Deckenhalterung beträgt etwa 2,3 kg. Vergewissern Sie<br />
sich, dass das Deckenmaterial stabil genug ist, um dieses Gewicht zu tragen.<br />
• Die Stärke der Deckplatte sollte 5 mm bis 60 mm betragen.<br />
3. Setzen Sie die Deckenhalterung zusammen.<br />
4. Bringen Sie die Deckenhalterung in der Deckenplatte an. Siehe Abbildung auf Seite 52.<br />
5. Ziehen Sie die Schrauben des Halterungsarms mit einem Torx-Schraubenzieher für Torx 20-<br />
Schrauben fest.<br />
6. Lösen Sie die vier Schrauben der Kameragrundplatte und nehmen Sie die Grundplatte ab. Siehe<br />
Abbildung auf Seite 47.<br />
7. Verbinden Sie das Netzwerkkabel und bei Bedarf das Mehrfachanschlusskabel mit der<br />
Netzwerk-Kamera. Achten Sie darauf, die Kabel beim Anschließen nicht zu beschädigen.<br />
Vergewissern Sie sich, dass die Schaumstofflöcher auf die Kabelführungen ausgerichtet sind<br />
und entfernen Sie ggf. das herausnehmbare Teil für das Mehrfachanschlusskabel aus der<br />
Schaumstoffdichtung.<br />
DEUTSCH<br />
Mehrfachanschlusskabel<br />
Netzwerkkabel<br />
8. Bringen Sie die Kameragrundplatte wieder an der ursprünglichen Position an und ziehen Sie die<br />
Schrauben fest.
Seite 52<br />
<strong>AXIS</strong> <strong>P5532</strong>/<strong>P5534</strong> <strong>Installation</strong>sanleitung<br />
9. Sichern Sie die Kamera mit dem mitgelieferten Sicherheitsdraht.<br />
Deckenhalterung<br />
Sicherheitsdraht<br />
Deckenplatte<br />
10. Schieben Sie die Kamerabefestigungen an der Netzwerk-Kamera in die Aussparungen in der<br />
Montageplatte und drehen Sie die Kameraeinheit.<br />
11. Installieren Sie den High PoE Midspan (1 Anschluss), siehe <strong>Installation</strong> des <strong>AXIS</strong> T8123 High<br />
PoE Midspan (1 Anschluss), auf Seite 54.<br />
12. Überprüfen Sie, ob die LED-Anzeigen auf dem Midspan die Betriebszustände korrekt angeben.<br />
Weitere Informationen hierzu finden Sie in der Tabelle auf Seite 66.<br />
13. Montieren Sie die Deckenplatte mit der montierten Kamera in die Decke.<br />
14. Platzieren Sie den Montagering über die Deckenhalterung und rasten Sie diesen ein.<br />
Montagering
<strong>AXIS</strong> <strong>P5532</strong>/<strong>P5534</strong> <strong>Installation</strong>sanleitung Seite 53<br />
Montagehalterung (Sonderzubehör)<br />
1. Montieren Sie die gewünschte Halterung<br />
gemäß den im Lieferumfang des<br />
Montagesatzes enthaltenen Anweisungen.<br />
Falls das Bohren von Löchern erforderlich<br />
ist, stellen Sie sicher, dass die<br />
Bohrerspitzen, Schrauben und Dübel für<br />
den Baustoff der Wand geeignet sind.<br />
2. Lösen Sie die vier Schrauben der<br />
Kameragrundplatte und nehmen Sie die<br />
Grundplatte ab. Siehe Abbildung auf Seite<br />
47.<br />
Sicherheitsdraht<br />
Wandhalterung (Montagebeispiel)<br />
Torx T30<br />
Schrauben<br />
Aussparungen für<br />
Kamerabefestigungen<br />
3. Führen Sie das Netzwerkkabel und bei Bedarf das Mehrfachanschlusskabel durch die Löcher in<br />
der Halterung.<br />
4. Haken Sie die Kamera in den Sicherheitsdraht an der Halterung ein.<br />
5. Verbinden Sie das Netzwerkkabel und bei Bedarf das Mehrfachanschlusskabel mit der<br />
Netzwerk-Kamera.<br />
6. Installieren Sie den <strong>AXIS</strong> T8123, siehe <strong>Installation</strong> des <strong>AXIS</strong> T8123 High PoE Midspan (1<br />
Anschluss), auf Seite 54.<br />
7. Bringen Sie die Kameragrundplatte wieder an der ursprünglichen Position an.<br />
8. Schieben Sie die Kamerabefestigungen an der Netzwerk-Kamera in die Aussparungen in der<br />
Halterung und drehen Sie die Kameraeinheit.<br />
9. Befestigen Sie die Netzwerk-Kamera an der Halterung, indem Sie die drei Schrauben (Torx T30)<br />
anziehen.<br />
DEUTSCH
Seite 54<br />
<strong>AXIS</strong> <strong>P5532</strong>/<strong>P5534</strong> <strong>Installation</strong>sanleitung<br />
<strong>Installation</strong> des <strong>AXIS</strong> T8123 High PoE Midspan (1 Anschluss)<br />
Mit dem <strong>AXIS</strong> T8123 High PoE Midspan (1 Anschluss) können Netzwerk-Videoprodukte von <strong>Axis</strong> mit<br />
einem großen Stromverbrauch über dasselbe Ethernet-Kabel sowohl mit Daten als auch mit Strom<br />
versorgt werden. Führen Sie zum Verbinden des <strong>AXIS</strong> T8123 die folgenden Schritte aus.<br />
1. Verbinden Sie den <strong>AXIS</strong> T8123 (Dateneingang) über ein Standard-Netzwerkkabel mit dem<br />
Netzwerk-Switch.<br />
2. Verbinden Sie den <strong>AXIS</strong> T8123 (Daten- und Stromausgang) über das zuvor an die Kamera<br />
angeschlossene Netzwerkkabel mit der Netzwerk-Kamera.<br />
3. Schließen Sie den <strong>AXIS</strong> T8123 über das mitgelieferte Netzkabel an eine Netzsteckdose (100 bis<br />
240 V Wechselstrom) an.<br />
<strong>AXIS</strong> T8123<br />
Netzeingangsverbindungsanzeige<br />
Port<br />
verbindungsanzeige<br />
Daten- und<br />
Stromausgang<br />
Dateneingang<br />
Netzwerk-Kamera<br />
Ethernet<br />
Informationen zu den LEDs auf dem Midspan finden Sie unter <strong>AXIS</strong> T8123 Statusanzeigen, auf Seite<br />
66.
<strong>AXIS</strong> <strong>P5532</strong>/<strong>P5534</strong> <strong>Installation</strong>sanleitung Seite 55<br />
Zuweisen einer IP-Adresse<br />
In den meisten Netzwerken ist heutzutage ein DHCP-Server eingebunden, der angeschlossenen<br />
Geräten automatisch IP-Adressen zuweist. Wenn Ihr Netzwerk über keinen DHCP-Server verfügt,<br />
wird für die Netzwerk-Kamera die Standard-IP-Adresse 192.168.0.90 verwendet.<br />
Zum Zuweisen einer statischen IP-Adresse stehen unter Windows die Programme <strong>AXIS</strong> IP Utility<br />
und <strong>AXIS</strong> Camera Management zur Verfügung. Verwenden Sie die Methode, die für die gewünschte<br />
Anzahl der zu installierenden Kameras geeignet ist.<br />
Beide Anwendungen stehen kostenlos auf der mitgelieferten CD für <strong>Axis</strong>-Netzwerkvideoprodukte<br />
zur Verfügung oder können unter „www.axis.com“ heruntergeladen werden.<br />
Methode Empfohlen für Betriebssystem<br />
<strong>AXIS</strong> IP Utility<br />
Siehe Seite 56<br />
Einzelne Kamera<br />
Kleine <strong>Installation</strong>en<br />
Windows<br />
<strong>AXIS</strong> Camera Management<br />
Siehe Seite 57<br />
Mehrere Kameras<br />
Große <strong>Installation</strong>en<br />
<strong>Installation</strong> in einem anderen<br />
Subnetz<br />
Windows 2000<br />
Windows XP Pro<br />
Windows 2003 Server<br />
Windows Vista<br />
Windows 7<br />
Hinweise:<br />
• Falls eine Festlegung der IP-Adresse nicht möglich ist, müssen ggf. die Einstellungen der<br />
Firewall überprüft werden.<br />
• Weitere Informationen zu alternativen Methoden zum Festlegen der IP-Adresse, z. B. in<br />
anderen Betriebssystemen, finden Sie auf Seite 61.<br />
DEUTSCH
Seite 56<br />
<strong>AXIS</strong> <strong>P5532</strong>/<strong>P5534</strong> <strong>Installation</strong>sanleitung<br />
<strong>AXIS</strong> IP Utility - einzelne Kamera/kleine <strong>Installation</strong><br />
<strong>AXIS</strong> IP Utility erkennt automatisch die im Netzwerk vorhandenen <strong>Axis</strong>-Geräte und zeigt diese an.<br />
Die Anwendung kann außerdem zur manuellen Zuweisung einer statischen IP-Adresse verwendet<br />
werden.<br />
Beachten Sie, dass sich der Computer, auf dem <strong>AXIS</strong> IP Utility ausgeführt wird, und die Netzwerk-<br />
Kamera in demselben Netzwerksegment (physischen Subnetz) befinden müssen.<br />
Automatische Erkennung<br />
1. Stellen Sie sicher, dass die Netzwerk-Kamera an das Netzwerk und an die Stromversorgung<br />
angeschlossen ist.<br />
2. Starten Sie <strong>AXIS</strong> IP Utility.<br />
3. Doppelklicken Sie auf das Symbol der Kamera, um die entsprechende Startseite zu öffnen.<br />
4. Anweisungen zum Festlegen des Kennworts finden Sie auf Seite 58.<br />
Manuelle Zuweisung der IP-Adresse (optional)<br />
1. Wählen Sie eine nicht zugewiesene IP-Adresse im selben Netzwerksegment, in dem sich Ihr<br />
Computer befindet.<br />
2. Wählen Sie die Netzwerk-Kamera in der Liste aus.<br />
3. Klicken Sie auf die Schaltfläche Assign new IP address to the selected device button<br />
(Zuweisung einer neuen IP-Adresse an das ausgewählte Gerät) und geben Sie die IP Adresse ein.<br />
4. Klicken Sie auf die Schaltfläche Assign (Zuweisen) und befolgen Sie die angezeigten<br />
Anweisungen. Beachten Sie, dass die Kamera innerhalb von 2 Minuten neu gestartet werden<br />
muss, um die neue IP-Adresse festzulegen.<br />
5. Klicken Sie auf die Schaltfläche Home Page (Startseite), um auf die Webseiten der Kamera<br />
zuzugreifen.<br />
6. Anweisungen zum Festlegen des Kennworts finden Sie auf Seite 58.
<strong>AXIS</strong> <strong>P5532</strong>/<strong>P5534</strong> <strong>Installation</strong>sanleitung Seite 57<br />
<strong>AXIS</strong> Camera Management - mehrere Kameras/große <strong>Installation</strong>en<br />
Mit <strong>AXIS</strong> Camera Management können automatisch mehrere <strong>Axis</strong>-Geräte erkannt, der<br />
Verbindungsstatus angezeigt, die Firmware-Aktualisierungen verwaltet und IP-Adressen festgelegt<br />
werden.<br />
Automatische Erkennung<br />
1. Stellen Sie sicher, dass die Kamera an das Netzwerk und die Stromversorgung angeschlossen ist.<br />
2. Starten Sie <strong>AXIS</strong> Camera Management. Wenn die Netzwerk-Kamera im Fenster angezeigt wird,<br />
klicken Sie mit der rechten Maustaste darauf und wählen Sie Live View Home Page (Homepage<br />
der Live-Ansicht).<br />
3. Anweisungen zum Festlegen des Kennworts finden Sie auf Seite 58.<br />
DEUTSCH<br />
Zuweisen einer IP-Adresse für ein einzelnes Gerät<br />
1. Wählen Sie in <strong>AXIS</strong> Camera Management die Netzwerk-<br />
Kamera aus und klicken Sie auf die Schaltfläche Assign IP (IP-<br />
Adresse zuweisen).<br />
2. Wählen Sie die Option Assign the following IP address<br />
(Folgende IP-Adresse zuweisen) und geben Sie die IP-Adresse,<br />
die Subnetzmaske und den Standardrouter für das Gerät ein.<br />
3. Klicken Sie auf OK.
Seite 58<br />
<strong>AXIS</strong> <strong>P5532</strong>/<strong>P5534</strong> <strong>Installation</strong>sanleitung<br />
Zuweisen von IP-Adressen für mehrere<br />
Geräte<br />
<strong>AXIS</strong> Camera Management beschleunigt die Zuweisung von IP-<br />
Adressen an mehrere Geräte, indem IP-Adressen aus einem<br />
angegebenen Bereich vorgeschlagen werden.<br />
1. Wählen Sie die zu konfigurierenden Geräte aus (es können<br />
auch unterschiedliche Modelle gewählt werden) und<br />
klicken Sie auf die Schaltfläche Assign IP (IP-Adresse<br />
zuweisen).<br />
2. Wählen Sie die Option Assign the following IP address<br />
range (Folgenden IP-Adressbereich zuweisen) und geben<br />
Sie den IP-Adressbereich, die Subnetzmaske und den Standardrouter für die Geräte ein.<br />
3. Klicken Sie auf Update (Aktualisieren). Die vorgeschlagenen IP-Adressen werden in der Liste<br />
New IP Addresses (Neue IP-Adressen) aufgeführt. Wenn Sie eine IP-Adresse ändern möchten,<br />
wählen Sie das Gerät aus und klicken Sie auf die Schaltfläche Edit (Bearbeiten).<br />
4. Klicken Sie auf OK.<br />
Festlegen des Kennworts<br />
Für den Zugriff auf das Produkt muss das Kennwort für den standardmäßigen Administrator-<br />
Benutzer root festgelegt werden. Beim erstmaligen Zugriff auf die Netzwerk-Kamera wird das<br />
Dialogfeld Configure Root Password (Root-Kennwort konfigurieren) angezeigt. Dort kann das<br />
Kennwort festgelegt werden.<br />
Um ein Abhören der Netzwerkkommunikation während der Festlegung des Root-Kennworts zu<br />
vermeiden, können Sie diesen Vorgang über eine verschlüsselte HTTPS-Verbindung durchführen, die<br />
ein HTTPS-Zertifikat erfordert.<br />
Hinweis: Das Protokoll HTTPS (Hypertext Transfer Protocol over SSL) wird verwendet, um den<br />
Datenverkehr zwischen Webbrowsern und Servern zu verschlüsseln. Das HTTPS-<br />
Zertifikat steuert den verschlüsselten Informationsaustausch.<br />
Zum Festlegen des Kennworts über eine standardmäßige HTTP-Verbindung geben Sie es direkt in<br />
das erste unten abgebildete Dialogfeld ein.<br />
Um das Kennwort über eine verschlüsselte HTTPS-Verbindung festzulegen, führen Sie die folgenden<br />
Schritte aus:<br />
1. Klicken Sie auf die Schaltfläche Create self-signed certificate (Selbstsigniertes Zertifikat<br />
erstellen).<br />
2. Geben Sie die angeforderten Informationen ein und klicken Sie auf OK. Das Zertifikat wird<br />
erstellt, und das Kennwort kann jetzt sicher festgelegt werden. Der gesamte Datenverkehr der<br />
Netzwerk-Kamera wird ab diesem Zeitpunkt verschlüsselt.
<strong>AXIS</strong> <strong>P5532</strong>/<strong>P5534</strong> <strong>Installation</strong>sanleitung Seite 59<br />
3. Geben Sie ein Kennwort ein, und wiederholen Sie die Eingabe, um die korrekte Schreibweise zu<br />
bestätigen. Klicken Sie auf OK. Damit ist das Kennwort konfiguriert.<br />
Klicken Sie zum Herstellen einer<br />
HTTPS-Verbindung zunächst auf diese<br />
Schaltfläche.<br />
Um das Kennwort direkt über eine<br />
unverschlüsselte Verbindung zu<br />
konfigurieren, geben Sie es hier ein.<br />
4. Geben Sie den Benutzernamen „root“ wie erforderlich ein.<br />
Hinweis: Der standardmäßige Administrator-Benutzername „root“ kann nicht gelöscht<br />
werden.<br />
DEUTSCH<br />
5. Geben Sie das zuvor festgelegte Kennwort ein und klicken Sie auf „OK“.<br />
Hinweis: Wenn Sie das Kennwort vergessen haben, muss die Kamera auf die<br />
Werkseinstellungen zurückgesetzt werden. Siehe Seite 66.
Seite 60<br />
<strong>AXIS</strong> <strong>P5532</strong>/<strong>P5534</strong> <strong>Installation</strong>sanleitung<br />
Zugriff auf den Videostrom<br />
Die Seite „Live View“ (Live-Ansicht) der Netzwerk-Kamera wird geöffnet. Sie enthält Links zu Setup-<br />
Tools, mit denen Sie die Kamera Ihren Bedürfnissen entsprechend anpassen können.<br />
Klicken Sie bei Bedarf auf Yes (Ja), um AMC (<strong>AXIS</strong> Media Control) zu installieren. Nach Abschluss<br />
der <strong>Installation</strong> können Sie Videoströme in Internet Explorer anzeigen. Hierzu müssen Sie über<br />
Administratorrechte für den Computer verfügen.<br />
Falls nötig, klicken Sie auf den Link, um fehlende Decoder zu installieren.<br />
Hinweis: Für die <strong>Installation</strong> von AMC unter Windows 7/Windows Vista müssen Sie Internet<br />
Explorer als Administrator ausführen. Klicken Sie mit der rechten Maustaste auf das<br />
Internet Explorer-Symbol und wählen Sie „Als Administrator ausführen“.<br />
Setup: Alle zur<br />
benutzerspezifischen<br />
Konfiguration der Kamera<br />
notwendigen Werkzeuge.<br />
Hilfe: Zum<br />
Aufrufen der<br />
Online-Hilfe für<br />
die Kamera.
<strong>AXIS</strong> <strong>P5532</strong>/<strong>P5534</strong> <strong>Installation</strong>sanleitung Seite 61<br />
Andere Methoden zum Festlegen der IP-Adresse<br />
Diese Tabelle bietet einen Überblick über weitere Methoden, die IP-Adresse festzulegen bzw. zu<br />
ermitteln. Alle Methoden sind standardmäßig aktiviert und können deaktiviert werden.<br />
Verwendung im<br />
Betriebssystem<br />
Hinweise<br />
Verbindung zum<br />
AVHS-Service<br />
Alle<br />
Informationen zur Verbindung der Kamera mit einem AVHS-Service<br />
finden Sie im <strong>Installation</strong>shandbuch des AVHS-Dienstanbieters.<br />
Informationen zu lokalen AVHS-Dienstanbietern finden Sie unter<br />
„www.axis.com“.<br />
UPnP Windows Wenn die Funktion auf dem Computer aktiviert ist, wird die Kamera<br />
automatisch erkannt und zu „Netzwerkumgebung“ hinzugefügt.<br />
Bonjour<br />
<strong>AXIS</strong> Dynamic<br />
DNS Service<br />
MAC OSX<br />
(10.4 oder<br />
höher)<br />
Alle<br />
Kann nur bei Browsern verwendet werden, die Bonjour unterstützen.<br />
Navigieren Sie zum Bonjour-Lesezeichen Ihres Browsers (z. B. Safari)<br />
und klicken Sie auf den Link, um auf die Webseiten der Kamera zu<br />
gelangen.<br />
Ein kostenloser Service von <strong>Axis</strong>, mit dem Sie Ihre Kamera schnell und<br />
einfach installieren können. Eine Internetverbindung ohne HTTP-<br />
Proxyserver ist Voraussetzung. Weitere Informationen hierzu finden Sie<br />
auf „www.axiscam.net“.<br />
ARP/Ping Alle Siehe unten. Der Befehl muss innerhalb von 2 Minuten erfolgen,<br />
nachdem die Kamera an das Stromnetz angeschlossen wurde.<br />
DHCP Alle Hinweise zum Anzeigen der Administrationsseiten des DHCP-Servers<br />
im Netzwerk finden Sie in der Serverdokumentation.<br />
DEUTSCH
Seite 62<br />
<strong>AXIS</strong> <strong>P5532</strong>/<strong>P5534</strong> <strong>Installation</strong>sanleitung<br />
Zuweisen der IP-Adresse per ARP/Ping<br />
1. Wählen Sie eine IP-Adresse aus dem Netzwerksegment, in dem sich auch Ihr Computer<br />
befindet.<br />
2. Suchen Sie die Seriennummer (S/N) auf dem Produktaufkleber an der Kamera.<br />
3. Öffnen Sie auf Ihrem Computer die Eingabeaufforderung, und geben Sie die folgenden Befehle<br />
ein:<br />
Windows-Syntax:<br />
arp -s <br />
ping -l 408 -t <br />
Syntax unter UNIX/Linux/Mac:<br />
arp -s temp<br />
ping -s 408 <br />
Beispiel für Windows:<br />
arp -s 192.168.0.125 00-40-8c-18-10-00<br />
ping -l 408 -t 192.168.0.125<br />
Beispiel für UNIX/Linux/Mac:<br />
arp -s 192.168.0.125 00:40:8c:18:10:00 temp<br />
ping -s 408 192.168.0.125<br />
4. Stellen Sie sicher, dass das Netzwerkkabel mit der Kamera verbunden ist und starten Sie die<br />
Kamera bzw. starten Sie diese neu, indem Sie die Stromversorgung unterbrechen und<br />
wiederherstellen.<br />
5. Schließen Sie die Befehlszeile, sobald „Reply from 192.168.0.125:“ ...’ oder eine ähnliche<br />
Meldung erscheint.<br />
6. Starten Sie einen Browser, geben Sie im Adressfeld „http://“ ein und drücken Sie<br />
die Eingabetaste auf der Tastatur.<br />
Hinweise:<br />
• So öffnen Sie die Eingabeaufforderung unter Windows: Wählen Sie im Startmenü die Option<br />
„Ausführen...“ und geben Sie „cmd“ ein. Klicken Sie auf OK.<br />
• Klicken Sie zum Eingeben des Befehls „ARP“ unter Windows 7/Windows Vista mit der rechten<br />
Maustaste auf das Befehlszeilensymbol und wählen Sie Als Administrator ausführen.<br />
• Verwenden Sie zum Eingeben des Befehls „ARP“ unter Mac OS X das Dienstprogramm<br />
„Terminal“, das Sie unter „Anwendung > Dienstprogramme“ finden.
<strong>AXIS</strong> <strong>P5532</strong>/<strong>P5534</strong> <strong>Installation</strong>sanleitung Seite 63<br />
Geräteanschlüsse<br />
Netzwerkanschluss - RJ-45.Ethernetanschluss. Unterstützt High PoE (Power over Ethernet, IEEE<br />
802.3at). Verwenden Sie den im Lieferumfang enthaltenen <strong>AXIS</strong> T8123 High PoE Midspan (1<br />
Anschluss). Zur Einhaltung der Vorschriften über die elektromagnetische Verträglichkeit müssen<br />
abgeschirmte Kabel verwendet werden.<br />
Mehrfachanschluss - Anschluss für externe Geräte:<br />
• Audio-Geräte<br />
• Eingabe-/Ausgabegeräte<br />
• AC/DC-Netzteil<br />
Wenn Sie externe Geräte an die <strong>AXIS</strong> <strong>P5532</strong>/<strong>P5534</strong> anschließen, benötigen Sie ein<br />
Mehrfachanschlusskabel, damit der IP51-Schutz erhalten bleibt. Das Mehrfachanschlusskabel<br />
können Sie von Ihrem <strong>Axis</strong>-Händler erwerben. Weitere Informationen hierzu finden Sie im<br />
Benutzerhandbuch, das sich auf der mitgelieferten CD für <strong>Axis</strong>-Netzwerkvideoprodukte befindet<br />
und auf der Website unter „www.axis.com“ erhältlich ist.<br />
SDHC-Speicherkarteneinschub - Wenn Sie Bilder lokal in der Netzwerk-Kamera speichern<br />
möchten, benötigen Sie eine SD-Speicherkarte mit normaler oder hoher Kapazität (separat<br />
erhältlich). Zum Einsetzen bzw. Entfernen der SD-Speicherkarte, müssen Sie die obere Abdeckung<br />
der Kamera abnehmen. Weitere Informationen hierzu finden Sie unter <strong>Installation</strong> einer SD-<br />
Speicherkarte (optional), auf Seite 49.<br />
Hinweis: Bevor Sie die SD-Speicherkarte entfernen, müssen Sie diese deaktivieren, um zu<br />
verhindern, dass die aufgezeichneten Daten beschädigt werden. Wählen Sie zum<br />
Deaktivieren der SD-Speicherkarte die Option<br />
Setup > System Options > Storage > SD Card (Setup > Systemoptionen > Speicher<br />
> SD-Speicherkarte) und klicken Sie auf Unmount (Deaktivieren). Weitere<br />
Informationen hierzu finden Sie im Benutzerhandbuch, das sich auf der<br />
mitgelieferten CD für <strong>Axis</strong>-Netzwerkvideoprodukte befindet und auf der Website<br />
unter „www.axis.com“ erhältlich ist.<br />
DEUTSCH
Seite 64<br />
<strong>AXIS</strong> <strong>P5532</strong>/<strong>P5534</strong> <strong>Installation</strong>sanleitung<br />
Mehrfachanschlusskabel (separat erhältlich)<br />
Wenn Sie externe Geräte an die <strong>AXIS</strong> <strong>P5532</strong>/<strong>P5534</strong> anschließen, benötigen Sie ein<br />
Mehrfachanschlusskabel, damit der IP51-Schutz erhalten bleibt. Das Mehrfachanschlusskabel<br />
können Sie von Ihrem <strong>Axis</strong>-Händler erwerben.<br />
Schließen Sie das Mehrfachanschlusskabel an den Mehrfachanschluss der Kamera an, siehe die<br />
Abbildung auf Seite 47 und die Anweisungen auf Seite 50 und Seite 51. Das Kabel verfügt über die<br />
folgenden Anschlüsse:<br />
Netzanschluss - 3-poliger Anschlussblock für Netzeingang.<br />
Gleichstromeingang<br />
24-34 V Gleichstrom<br />
<strong>AXIS</strong> <strong>P5532</strong>: max. 15 W<br />
<strong>AXIS</strong> <strong>P5534</strong>: max. 17 W<br />
Wechselstromeingang<br />
20-24 V Wechselstrom<br />
<strong>AXIS</strong> <strong>P5532</strong>: max 20 VA<br />
<strong>AXIS</strong> <strong>P5534</strong>: max. 23,6 VA<br />
Audioeingang (rosa) - 3,5-mm-Anschluss für ein Monomikrofon oder ein Monosignal (linker Kanal<br />
wird von einem Stereosignal benutzt).<br />
Audioausgang (grün) - 3,5-mm-Audio-Ausgang (Leistungsstufe) zum Anschließen einer<br />
Rundrufanlage (PA) oder eines Aktivlautsprechers mit integriertem Verstärker. Auch ein Kopfhörer<br />
kann angeschlossen werden. Für den Audioausgang muss ein Stereostecker benutzt werden.<br />
E/A-Anschluss - Wird z. B. für Bewegungserkennung, Ereignisauslösung,<br />
Zeitrafferaufnahmen, Alarmbenachrichtigungen usw. verwendet. Außer den<br />
Kontakten für eine Zusatzstromversorgung und Masse verfügt der E/A-Anschluss<br />
noch über 4 weitere Kontakte, die entweder als Eingang oder als Ausgang<br />
konfiguriert werden können. Diese Kontakte stellen die Schnittstelle für Folgendes<br />
bereit:<br />
• Digitalausgang: Zum Anschluss externer Geräte wie Relais und LEDs. Angeschlossene<br />
Geräte können über die VAPIX® API (Application Programming Interface), über die<br />
Ausgabeschaltflächen auf der Seite Live View (Live-Ansicht) oder durch einen Ereignistyp<br />
aktiviert werden. Der Ausgang wird als aktiv [siehe Events > Port Status (Ereignisse > Port-<br />
Status)] angezeigt, wenn die Alarmvorrichtung eingeschaltet ist.
<strong>AXIS</strong> <strong>P5532</strong>/<strong>P5534</strong> <strong>Installation</strong>sanleitung Seite 65<br />
• Digitaler Eingang - Alarmeingang für den Anschluss von Geräten, die zwischen geöffnetem<br />
und geschlossenem Schaltkreis wechseln können, z. B.: PIR-Kameras, Tür/Fensterkontakte,<br />
Glasbruchmelder usw. Bei Empfang eines Signals ändert sich der Status und der Eingang<br />
wird aktiviert [siehe Events > Port Status (Ereignisse > Port-Status)].<br />
Funktion Anschluss Hinweise Spezifikationen<br />
ERDE 1 Masse<br />
3.3 V Gleichstrom 2 Dieser Kontakt kann auch für die<br />
Stromversorgung von Zusatzgeräten<br />
verwendet werden.<br />
Hinweis: Dieser Anschluss kann nur<br />
für die Stromversorgung verwendet<br />
werden.<br />
Konfigurierbar<br />
(Ein- oder<br />
Ausgang)<br />
3-6 Digitaleingang: Zum Aktivieren mit<br />
dem Massekontakt verbinden; zum<br />
Deaktivieren nicht anschließen.<br />
Digitalausgang: Verwendet einen<br />
NFET-Transistor mit offener Senke,<br />
wobei die Quelle mit der Masse<br />
verbunden ist. Zum Schutz vor<br />
Spannungsspitzen muss bei der<br />
Kombination mit einem externen<br />
Relais eine Diode parallel zur Last<br />
geschaltet werden.<br />
Max. Stromstärke = 250 mA<br />
Min. Eingang = -40 V Gleichstrom<br />
Max. Eingang = +40 V Gleichstrom<br />
Max. Stromstärke = 100 mA<br />
Max. Spannung = +40 V Gleichstrom<br />
DEUTSCH<br />
<strong>AXIS</strong> <strong>P5532</strong>/<strong>P5534</strong> Statusanzeigen<br />
Farbe<br />
Leuchtet nicht<br />
Gelb<br />
Gelb/rot<br />
Rot<br />
Grün<br />
Bedeutung<br />
Konstante Verbindung/Normalbetrieb<br />
Leuchtet konstant bei der Systeminitialisierung und beim Zurücksetzen auf die<br />
Werkseinstellungen. Blinkt bei der Firmware-Aktualisierung.<br />
Keine Netzwerkverbindung vorhanden<br />
Firmware-Aktualisierung fehlgeschlagen<br />
Konstant für 10 Sek. nach erfolgreichem Neustart<br />
Hinweis: Weitere Informationen zu den <strong>AXIS</strong> <strong>P5532</strong>/<strong>P5534</strong> Statusanzeigen finden Sie im<br />
Benutzerhandbuch, das sich auf der mitgelieferten CD für <strong>Axis</strong>-<br />
Netzwerkvideoprodukte befindet und auf der Website unter „www.axis.com“<br />
erhältlich ist.
Seite 66<br />
<strong>AXIS</strong> <strong>P5532</strong>/<strong>P5534</strong> <strong>Installation</strong>sanleitung<br />
<strong>AXIS</strong> T8123 Statusanzeigen<br />
LED Farbe Bedeutung<br />
Port Leuchtet nicht Keine Kamera angeschlossen<br />
Blinkt<br />
Stromüberlast oder anderer Fehler bei der Eingangsspannung<br />
Grün<br />
Kamera verbunden, normales Verhalten<br />
Netzeingang Konstant grün Netzstrom verbunden<br />
Wiederherstellen der werkseitigen Standardeinstellungen<br />
Wenn Sie die Kamera auf die Werkseinstellungen zurücksetzen möchten, drücken Sie die<br />
Steuertaste und die Neustarttaste an der Seite der Kamera (siehe Hardwareübersicht, auf Seite 46)<br />
wie im Folgenden beschrieben:<br />
So setzen Sie mithilfe der Steuer- und der Neustarttaste sämtliche Parameter einschließlich der IP-<br />
Adresse auf die werkseitigen Standardeinstellungen zurück:<br />
1. Nehmen Sie die obere Abdeckung ab, siehe Entfernen der Schutzfolien, auf Seite 48.<br />
2. Drücken Sie gleichzeitig die Steuer- und die Neustarttaste und halten Sie die Tasten gedrückt.<br />
3. Lassen Sie die Neustarttaste los und halten Sie die Steuertaste weiterhin gedrückt.<br />
4. Halten Sie die Steuertaste gedrückt, bis die Statusanzeige gelb leuchtet (dies kann bis zu 15<br />
Sekunden dauern).<br />
5. Lassen Sie die Steuertaste los.<br />
6. Wenn die Statusanzeige grün wird (was bis zu einer Minute lang dauern kann), ist der Vorgang<br />
abgeschlossen, und die Kamera wurde zurückgesetzt. Die Kamera hat jetzt die Standard-IP-<br />
Adresse 192.168.0.90.<br />
7. Bringen Sie die obere Abdeckung wieder an der ursprünglichen Position an.<br />
8. Legen Sie die IP-Adresse erneut fest. Wenden Sie dabei eines der unter Zuweisen einer IP-<br />
Adresse, auf Seite 55 beschriebenen Verfahren an.<br />
Die Parameter können auch über die Weboberfläche auf die werkseitigen Einstellungen<br />
zurückgesetzt werden. Weitere Informationen hierzu finden Sie in der Online-Hilfe und im<br />
Benutzerhandbuch auf der mitgelieferten CD für <strong>Axis</strong>-Netzwerkvideoprodukte.
<strong>AXIS</strong> <strong>P5532</strong>/<strong>P5534</strong> <strong>Installation</strong>sanleitung Seite 67<br />
Zugriff auf die Kamera über das Internet<br />
Sobald die Netzwerk-Kamera installiert ist, können Sie in Ihrem lokalen Netzwerk (LAN) darauf<br />
zugreifen. Um auch über das Internet auf die Kamera zugreifen zu können, müssen Sie die<br />
Netzwerk-Router so konfigurieren, dass diese den entsprechenden eingehenden Datenverkehr<br />
zulassen, was üblicherweise durch Zuweisung eines bestimmten Ports geschieht.<br />
• HTTP-Port (standardmäßig Port 80) für die Anzeige und Konfiguration<br />
• RTSP-Port (standardmäßig Port 554) für die Anzeige von H.264-Videoströmen<br />
Ausführliche Informationen zu diesem Thema finden Sie in der Dokumentation des Routers. Weitere<br />
Informationen zu diesem und zu anderen Themen erhalten Sie auf der <strong>Axis</strong> Support-Website unter<br />
„www.axis.com/techsup“.<br />
Weitere Informationen<br />
Das Benutzerhandbuch ist auf der <strong>Axis</strong> Website unter http://www.axis.com erhältlich und befindet<br />
sich auch auf der mitgelieferten CD für <strong>Axis</strong>-Netzwerkvideoprodukte.<br />
Tipp!<br />
Unter „www.axis.com/techsup“ finden Sie Firmware-Aktualisierungen für Ihre Netzwerk-<br />
Kamera. Informationen zur aktuellen Firmware-Version finden Sie unter Setup > Info.<br />
DEUTSCH
Guida all'installazione <strong>AXIS</strong> <strong>P5532</strong>/<strong>P5534</strong> Pagina 69<br />
<strong>AXIS</strong> <strong>P5532</strong> & <strong>AXIS</strong> <strong>P5534</strong><br />
Guida all'installazione<br />
Questo documento fornisce le istruzioni necessarie per installare un Telecamera di rete PTZ a cupola<br />
<strong>AXIS</strong> <strong>P5532</strong>/<strong>AXIS</strong> <strong>P5534</strong> nella rete in uso. Per ulteriori informazioni sull'utilizzo del prodotto,<br />
consultare la Guida per l'utente disponibile sul CD incluso nella confezione oppure visitare il sito<br />
web all'indirizzo www.axis.com.<br />
Procedura di installazione<br />
Importante!<br />
1. Controllare il contenuto della confezione utilizzando<br />
Il prodotto deve essere utilizzato<br />
l'elenco fornito di seguito.<br />
in conformità alle leggi e alle<br />
regolamentazioni locali.<br />
2. Panoramica dell'hardware. Vedere a pagina 70.<br />
3. Installazione dell'hardware.<br />
• Preparazione dell'installazione. Vedere a pagina 72.<br />
• Montaggio su un controsoffitto. Vedere a pagina 73.<br />
• Montaggio su un soffitto mobile. Vedere a pagina 74.<br />
• Montaggio su staffa (accessorio opzionale). Vedere a pagina 76.<br />
• Installazione del Midspan <strong>AXIS</strong> T8123 High PoE a 1 porta. Vedere a pagina 76.<br />
4. Assegnazione di un indirizzo IP. Vedere a pagina 77.<br />
5. Impostazione della password. Vedere a pagina 80.<br />
Articolo<br />
Contenuto della confezione<br />
Modelli/varianti/note<br />
ITALIANO<br />
Telecamera di rete<br />
Coperture a cupola<br />
Kit di montaggio<br />
Midspan High PoE<br />
CD<br />
Documentazione cartacea<br />
<strong>AXIS</strong> <strong>P5532</strong><br />
<strong>AXIS</strong> <strong>P5534</strong><br />
Copertura trasparente chiara (premontata)<br />
Copertura trasparente oscurata<br />
Kit di montaggio per controsoffitti e soffitti mobili. Cacciavite Resitorx<br />
<strong>AXIS</strong> T8124<br />
CD di <strong>AXIS</strong> Network Video Product, comprensivo della documentazione del<br />
prodotto, utensili di installazione e altro software.<br />
<strong>AXIS</strong> <strong>P5532</strong>/<strong>P5534</strong> Guida all'installazione (questo documento), Certificato di<br />
garanzia <strong>Axis</strong>, Maschera per la foratura, Etichetta aggiuntiva con numero di<br />
serie (2x), Chiave di autenticazione AVHS<br />
Accessori opzionali<br />
Staffe <strong>AXIS</strong> T91A<br />
Cavo multiplo per la connessione di I/O, audio e alimentazione<br />
Per informazioni sugli accessori per l'alimentazione e gli alloggiamenti per<br />
esterni, visitare il sito web www.axis.com
Pagina 70<br />
Guida all'installazione <strong>AXIS</strong> <strong>P5532</strong>/<strong>P5534</strong><br />
Panoramica dell'hardware<br />
Telecamera<br />
Pulsante di comando<br />
Alloggiamento<br />
scheda SDHC<br />
LED di stato<br />
Pulsante di riavvio<br />
Copertura a cupola<br />
Viti dell’anello (6) Anello della Cupola Copertura a cupola Copertura superiore Guarnizione ad anello
Guida all'installazione <strong>AXIS</strong> <strong>P5532</strong>/<strong>P5534</strong> Pagina 71<br />
Montaggio su controsoffitto<br />
Piastra di<br />
montaggio<br />
Montaggio su soffitto mobile<br />
Viti della<br />
piastra<br />
di montaggio<br />
(3)<br />
Braccio della<br />
staffa (3)<br />
Vite del<br />
braccio<br />
della staffa<br />
(3) e<br />
rondella (3)<br />
Anello<br />
esterno<br />
Cavo di<br />
sicurezza<br />
Supporti dell'unità (3)<br />
Coperchio della base della telecamera<br />
Viti del coperchio della base della telecamera (4)<br />
Gancio del cavo di sicurezza<br />
ITALIANO<br />
Codice prodotto (N/P) e numero di serie (N/S)<br />
Il numero di serie è talvolta<br />
necessario al momento dell'installazione.<br />
Passaggi dei cavi<br />
Guarnizione in spugna<br />
Connettore di rete<br />
Connettore multiplo<br />
Viti della copertura superiore (4)<br />
Copertura superiore
Pagina 72<br />
Guida all'installazione <strong>AXIS</strong> <strong>P5532</strong>/<strong>P5534</strong><br />
Installazione dell'hardware<br />
!<br />
IMPORTANTE!<br />
- Per utilizzare la telecamera <strong>AXIS</strong> <strong>P5532</strong>/<strong>P5534</strong> all'esterno, è necessario<br />
installarla in un alloggiamento per esterni approvato. Per ulteriori informazioni sulle<br />
custodie per esterni, visitare il sito www.axis.com<br />
Preparazione dell'installazione<br />
Leggere tutte le istruzioni prima di installare l'unità <strong>AXIS</strong> <strong>P5532</strong>/<strong>P5534</strong> poichè numerose fasi di<br />
preparazione dell'istallazione richiedono la rimozione del coperchio superiore ed è opportuno che<br />
vengano completate nello stesso momento.<br />
• Seguire le istruzioni in Rimuovere l'imballo protettivo, più avanti, per rimuovere l'imballo<br />
protettivo prima di installare l'unità.<br />
• La telecamera viene fornita con una copertura trasparente chiara e una copertura<br />
trasparente oscurata. Se necessario, seguire le istruzioni in Sostituire la copertura a cupola<br />
trasparente/oscurata (facoltativo), più avanti, per sostituire la copertura a cupola.<br />
• Per memorizzare localmente le immagini riprese dalla macchina fotografica di rete, è<br />
necessaria una scheda SD (non inclusa) con capacità standard o elevata. Seguire le<br />
istruzioni in Installazione di una scheda SD (facoltativa), più avanti, per rimuovere la<br />
copertura superiore prima di installare una scheda SD.<br />
Rimuovere l'imballo protettivo<br />
1. Allentare le 4 viti della copertura superiore e rimuoverla, come nell'illustrazione a pagina 71.<br />
2. Rimuovere l'imballo protettivo.<br />
Imballo protettivo<br />
3. Se si deve sostituire la copertura a cupola chiara/oscurata o installare una scheda SD, fare<br />
riferimento alle istruzioni in Sostituire la copertura a cupola trasparente/oscurata (facoltativo) e<br />
Installazione di una scheda SD (facoltativa), più avanti.<br />
4. Rimontare la copertura superiore nella posizione originale e stringere le viti.
Guida all'installazione <strong>AXIS</strong> <strong>P5532</strong>/<strong>P5534</strong> Pagina 73<br />
Sostituire la copertura a cupola trasparente/oscurata (facoltativo)<br />
1. Allentare le 4 viti della copertura superiore e rimuoverla, come nell'illustrazione a pagina 71.<br />
2. Rimuovere le 6 viti dell'anello della copertura e rimuovere l'anello dalla copertura superiore.<br />
3. Fissare l'anello della cupola e la copertura a cupola sulla copertura superiore serrando le 6 viti.<br />
4. Se si installa una scheda SD, fare riferimento alle istruzioni in Installazione di una scheda SD<br />
(facoltativa), più avanti.<br />
5. Rimontare la copertura superiore nella posizione originale e stringere le viti.<br />
Nota: Fare attenzione a non graffiare o danneggiare la copertura a cupola. Usare un panno morbido<br />
per pulire la copertura a cupola prima di montarla sulla telecamera.<br />
Installazione di una scheda SD (facoltativa)<br />
1. Allentare le 4 viti della copertura superiore e rimuoverla, come nell'illustrazione a pagina 71.<br />
2. Inserire una scheda SD (non inclusa) nell'alloggiamento per la scheda SDHC (Secure Digital<br />
High Capacity).<br />
3. Rimontare la copertura superiore nella posizione originale e stringere le viti.<br />
Nota: La scheda SD viene montata automaticamente quando la si inserisce nell'alloggiamento SDHC.<br />
Tuttavia, prima di rimuovere la scheda SD, questa dovrebbe essere smontata per mezzo delle<br />
pagine web della telecamera. Selezionare Setup (Configurazione) >SystemOptions (Opzioni<br />
di sistema) >Storage (Archiviazione) >SDCard (Scheda SD) e fare clic su Unmount<br />
(Smonta) Per ulteriori informazioni, leggere la Guida per l'utente, disponibile sul CD del<br />
prodotto video di rete <strong>AXIS</strong> fornito insieme al prodotto, oppure sul sito web di <strong>Axis</strong> all'indirizzo<br />
www.axis.com.<br />
Montaggio su controsoffitto<br />
1. Preparare il soffitto per l'installazione della piastra di montaggio, utilizzando la maschera di<br />
foratura fornita per posizionare i fori. Assicurarsi di utilizzare punte, viti e tasselli adatti al<br />
materiale.<br />
2. Installare la piastra di montaggio.<br />
3. Allentare le 4 viti del coperchio della base della telecamera e rimuoverlo, come nell'illustrazione<br />
a pagina 71.<br />
4. Stendere e collegare alla telecamera il cavo di rete ed il cavo multiplo, se applicabile. Fare<br />
attenzione a non danneggiare i cavi mentre se ne esegue la connessione. Assicurarsi che i fori<br />
della guarnizione di spugna siano allineati con i passaggi dei cavi e, se necessario, rimuovere<br />
dalla guarnizione di spugna il pezzo pretagliato per il cavo multiplo.<br />
5. Rimontare il coperchio della base della telecamera nella posizione originale e stringere le viti.<br />
6. Fissare la telecamera usando il cavo di sicurezza fornito.<br />
7. Far scorrere i supporti della telecamera di rete nelle scanalature della piastra di montaggio e<br />
ruotare la telecamera.<br />
8. Installare il Midspan High PoE a 1 porta, vedere Installare il Midspan <strong>AXIS</strong> T8123 High PoE a 1<br />
porta, a pagina 76.<br />
ITALIANO
Pagina 74<br />
Guida all'installazione <strong>AXIS</strong> <strong>P5532</strong>/<strong>P5534</strong><br />
9. Controllare che i LED di segnalazione del midspan indichino le condizioni corrette e consultare<br />
la tabella a pagina 87 per ulteriori dettagli.<br />
Montaggio su soffitto mobile<br />
1. Rimuovere il pannello del soffitto su cui deve essere eseguito il montaggio.<br />
2. Utilizzare la maschera fornita per contrassegnare la posizione del foro da 210 mm nel pannello<br />
del soffitto. Tagliare lungo la maschera.<br />
Pannello del soffitto<br />
Diametro del foro<br />
210 mm<br />
Note:<br />
• Il peso totale della telecamera e degli accessori per il montaggio a soffitto è di circa 2,3 kg.<br />
Controllare che il materiale del soffitto sia sufficientemente robusto per sostenere tale peso.<br />
• Il pannello del soffitto dovrebbe essere spesso da 5 mm a 60 mm.<br />
3. Montare la staffa per il montaggio a soffitto.<br />
4. Inserire la staffa per il soffitto nel pannello, come nell'illustrazione a pagina 75.<br />
5. Stringere le viti del braccio della staffa usando un cacciavite torx 20.<br />
6. Allentare le 4 viti del coperchio della base della telecamera e rimuoverlo, come nell'illustrazione<br />
a pagina 71.<br />
7. Stendere e collegare alla telecamera il cavo di rete e il cavo multiplo, se applicabile. Fare<br />
attenzione a non danneggiare i cavi mentre se ne esegue la connessione. Assicurarsi che i fori<br />
della guarnizione di spugna siano allineati con i passaggi dei cavi e, se necessario, rimuovere<br />
dalla guarnizione di spugna il pezzo pretagliato per il cavo multiplo.<br />
Cavo multiplo<br />
Cavo di rete<br />
8. Rimontare il coperchio della base della telecamera nella posizione originale e stringere le viti.
Guida all'installazione <strong>AXIS</strong> <strong>P5532</strong>/<strong>P5534</strong> Pagina 75<br />
9. Fissare la telecamera usando il cavo di sicurezza fornito.<br />
Staffa per il soffitto<br />
Cavo di sicurezza<br />
Pannello del soffitto<br />
10. Far scorrere i supporti della telecamera di rete nelle scanalature della piastra di montaggio e<br />
ruotare la telecamera.<br />
11. Installare il Midspan High PoE a 1 porta, vedere Installare il Midspan <strong>AXIS</strong> T8123 High PoE a 1<br />
porta, a pagina 76.<br />
12. Verificare che i LED di segnalazione del midspan indichino le condizioni di funzionamento<br />
corrette. Per ulteriori dettagli, vedere la tabella a pagina 87.<br />
13. Rimontare il pannello nel soffitto, con la telecamera montata.<br />
14. Collocare l'anello esterno sulla staffa per soffitto e farlo scattare in posizione.<br />
ITALIANO<br />
Anello esterno
Pagina 76<br />
Guida all'installazione <strong>AXIS</strong> <strong>P5532</strong>/<strong>P5534</strong><br />
Montaggio su staffa (accessorio opzionale)<br />
1. Installare la staffa selezionata secondo le<br />
istruzioni fornite con la staffa. Se è necessario<br />
forare, assicurarsi di utilizzare punte, viti e tasselli<br />
adatti al materiale.<br />
2. Allentare le 4 viti del coperchio della base della<br />
telecamera e rimuoverlo, come nell'illustrazione a<br />
pagina 71.<br />
3. Stendere il cavo di rete e il cavo multiplo, se<br />
applicabile, attraverso i fori della staffa a parete.<br />
4. Agganciare la telecamera al cavo di sicurezza<br />
della staffa.<br />
5. Collegare alla telecamera il cavo di rete e il cavo multiplo, se applicabile.<br />
6. Installare l'unità <strong>AXIS</strong> T8123, vedere Installare il Midspan <strong>AXIS</strong> T8123 High PoE a 1 porta, a<br />
pagina 76.<br />
7. Rimontare il coperchio della base della telecamera nella posizione originale.<br />
8. Far scorrere i supporti della telecamera di rete nelle scanalature della staffa e ruotare la<br />
telecamera.<br />
9. Fissare la telecamera di rete alla staffa di montaggio stringendo le 3 viti (Torx T30).<br />
Installare il Midspan <strong>AXIS</strong> T8123 High PoE a 1 porta<br />
Viti<br />
Torx T30<br />
Cavo Fessure per<br />
di sicurezza i supporti<br />
dell'unità<br />
Staffa di montaggio a muro (esempio di montaggio)<br />
Il Midspan T8123 High PoE a 1 porta consente di alimentare e trasmettere dati ai prodotti video di<br />
rete <strong>Axis</strong> che consumano molta energia, utilizzando un unico cavo Ethernet. Seguire queste<br />
istruzioni per connettere l'unità <strong>AXIS</strong> T8123.<br />
1. Collegare l'unità <strong>AXIS</strong> T8123 (ingresso dati) allo switch di rete utilizzando un cavo di rete<br />
standard.<br />
2. Collegare l'unità <strong>AXIS</strong> T8123 (uscita dati e alimentazione) alla telecamera di rete, utilizzando il<br />
cavo di rete già connesso alla telecamera.<br />
3. Collegare l'unità <strong>AXIS</strong> T8123 a una presa CA (100-240 V CA) utilizzando il cavo di<br />
alimentazione fornito.<br />
<strong>AXIS</strong> T8123<br />
Indicatore<br />
di connettività<br />
della porta<br />
Dati e<br />
alimentazione Ingresso dati<br />
Indicatore<br />
di connettività<br />
dell'ingresso CA<br />
Telecamera di rete<br />
Ethernet<br />
Per informazioni sui LED del midspan, vedere Indicatori di stato <strong>AXIS</strong> T8123, a pagina 87.
Guida all'installazione <strong>AXIS</strong> <strong>P5532</strong>/<strong>P5534</strong> Pagina 77<br />
Assegnazione di un indirizzo IP<br />
La maggior parte delle reti dispone di un server DHCP che assegna automaticamente gli indirizzi IP<br />
alle periferiche connesse. Se la rete non dispone di un server DHCP, per la telecamera di rete viene<br />
utilizzato l'indirizzo IP predefinito 192.168.0.90.<br />
Per assegnare un indirizzo IP statico, utilizzare <strong>AXIS</strong> IP Utility o <strong>AXIS</strong> Camera Management in<br />
ambiente Windows. In base al numero di videocamere da installare, utilizzare il metodo che meglio<br />
si adatta alle proprie esigenze.<br />
Entrambe le applicazioni sono disponibili gratuitamente sul CD del prodotto oppure possono essere<br />
scaricate dal sito web all'indirizzo www.axis.com.<br />
Metodo Consigliato per Sistema operativo<br />
<strong>AXIS</strong> IP Utility<br />
Vedere a pagina 78<br />
Telecamera singola<br />
Piccole installazioni<br />
Windows<br />
<strong>AXIS</strong> Camera Management<br />
Vedere a pagina 79<br />
Più videocamere<br />
Grandi installazioni<br />
Installazione in una diversa subnet<br />
Windows 2000<br />
Windows XP Pro<br />
Windows 2003 Server<br />
Windows Vista<br />
Windows 7<br />
Note:<br />
• Se l'assegnazione dell'indirizzo IP non è riuscita correttamente, verificare che non ci siano<br />
firewall che blocchino l'operazione.<br />
• Per altri metodi di assegnazione o rilevazione dell'indirizzo IP, per esempio in altri sistemi<br />
operativi, vedere a pagina 83.<br />
ITALIANO
Pagina 78<br />
Guida all'installazione <strong>AXIS</strong> <strong>P5532</strong>/<strong>P5534</strong><br />
<strong>AXIS</strong> IP Utility: telecamera singola/piccole installazioni<br />
<strong>AXIS</strong> IP Utility rileva e visualizza automaticamente i dispositivi <strong>Axis</strong> collegati alla rete.<br />
L’applicazione inoltre può essere utilizzata per assegnare manualmente un indirizzo IP statico.<br />
Si tenga presente che la telecamera di rete deve essere installata sullo stesso segmento di rete<br />
(subnet fisica) del computer sul quale è in esecuzione <strong>AXIS</strong> IP Utility.<br />
Rilevamento automatico<br />
1. Verificare che la telecamera di rete sia collegata alla rete e alimentata correttamente.<br />
2. Avviare <strong>AXIS</strong> IP Utility.<br />
3. Quando la telecamera viene visualizzata nella finestra, selezionarla con un doppio clic per<br />
aprire la home page.<br />
4. Vedere a pagina 80 per istruzioni su come assegnare la password.<br />
Assegnazione manuale dell'indirizzo IP (opzionale)<br />
1. Acquisire un indirizzo IP non utilizzato sullo stesso segmento di rete del computer.<br />
2. Selezionare la telecamera di rete dall'elenco.<br />
3. Fare clic sul pulsante Assign new IP address to the selected device (Assegna un nuovo<br />
indirizzo IP alla periferica selezionata) e immettere l'indirizzo IP.<br />
4. Fare clic su Assign (Assegna) e seguire le istruzioni visualizzate. Si tenga presente che la<br />
videocamera deve essere riavviata entro due minuti per impostare il nuovo indirizzo IP.<br />
5. Fare clic sul pulsante Home Page (Pagina home) per accedere alle pagine web della telecamera.<br />
6. Vedere a pagina 80 per le istruzioni sull'impostazione della password.
Guida all'installazione <strong>AXIS</strong> <strong>P5532</strong>/<strong>P5534</strong> Pagina 79<br />
<strong>AXIS</strong> Camera Management: più telecamere/grandi installazioni<br />
È possibile utilizzare <strong>AXIS</strong> Camera Management per individuare automaticamente la presenza di più<br />
periferiche <strong>Axis</strong>, mostrare lo stato di connessione, gestire gli aggiornamenti del firmware e<br />
impostare gli indirizzi IP.<br />
Rilevamento automatico<br />
1. Verificare che la videocamera sia collegata alla rete e alimentata correttamente.<br />
2. Avviare <strong>AXIS</strong> Camera Management. Non appena la telecamera di rete viene visualizzata nella<br />
finestra, fare clic con il pulsante destro sul collegamento e selezionare Live View Home Page<br />
(Immagini dal vivo).<br />
3. Vedere a pagina 80 per istruzioni su come impostare la password.<br />
Assegnazione di un indirizzo IP a una singola<br />
telecamera<br />
1. Selezionare la telecamera di rete in <strong>AXIS</strong> Camera Management<br />
e fare clic sul pulsante Assign IP (Assegna IP).<br />
2. Selezionare Assign the following IP address (Assegna il<br />
seguente indirizzo IP) e immettere l’indirizzo IP, la subnet mask<br />
e il router predefinito utilizzati dalla periferica.<br />
3. Fare clic su OK.<br />
ITALIANO
Pagina 80<br />
Guida all'installazione <strong>AXIS</strong> <strong>P5532</strong>/<strong>P5534</strong><br />
Assegnazione degli indirizzi IP a più<br />
telecamere<br />
<strong>AXIS</strong> Camera Management facilita il processo di assegnazione<br />
degli indirizzi IP di più periferiche, suggerendo gli indirizzi IP in<br />
base a un intervallo specifico.<br />
1. Selezionare le periferiche da configurare (è possibile<br />
selezionare più modelli) e fare clic sul pulsante Assign IP<br />
(Assegna IP).<br />
2. Selezionare Assign the following IP address range<br />
(Assegna il seguente intervallo di indirizzi IP) e immettere<br />
l'intervallo di indirizzi IP, la subnet mask e il router<br />
predefinito utilizzati dalla periferica.<br />
3. Fare clic su Update (Aggiorna). Gli indirizzi IP suggeriti sono elencati sotto a New IP Addresses<br />
(Nuovi indirizzi IP) e possono essere modificati selezionando una periferica e facendo clic su<br />
Edit (Modifica).<br />
4. Fare clic su OK.<br />
Impostazione della password<br />
Per ottenere l'accesso al prodotto, è necessario impostare la password dell'utente amministratore<br />
predefinito root. Questa operazione può essere effettuata nella finestra di dialogo 'Configure Root<br />
Password' (Configura password root), che viene visualizzata quando si accede alla telecamera per la<br />
prima volta.<br />
Per evitare l'interruzione della connessione di rete durante l'impostazione della password root, è<br />
possibile eseguire questa operazione tramite la connessione crittografata HTTPS, che richiede un<br />
certificato HTTPS.<br />
Nota: HTTPS (Hypertext Transfer Protocol over SSL) è un protocollo utilizzato per crittografare il traffico<br />
tra i browser e i server web. Il certificato HTTPS controlla lo scambio crittografato di informazioni.<br />
Per impostare la password tramite una connessione HTTP standard, inserirla direttamente nella<br />
prima finestra di dialogo mostrata di seguito.<br />
Per impostare la password tramite una connessione HTTPS crittografata, attenersi alla seguente<br />
procedura.<br />
1. Fare clic sul pulsante Create self-signed certificate (Crea certificato autofirmato).<br />
2. Fornire le informazioni richieste e fare clic su OK. Il certificato viene creato e la password può<br />
essere ora impostata in modo sicuro. Da questo momento in poi tutto il traffico verso e dalla<br />
telecamera di rete viene cifrato.
Guida all'installazione <strong>AXIS</strong> <strong>P5532</strong>/<strong>P5534</strong> Pagina 81<br />
3. Inserire una password e reinserirla per confermarla. Fare clic su OK. La password è stata ora<br />
configurata.<br />
Per creare una connessione HTTPS,<br />
iniziare facendo clic su questo pulsante.<br />
Per configurare la password<br />
direttamente tramite una<br />
connessione non crittografata,<br />
inserire la password in questo punto.<br />
4. Per eseguire l'accesso, inserire il nome utente “root” nella finestra di dialogo appena il<br />
programma lo richiede.<br />
Nota: Non è possibile eliminare il nome utente predefinito dell’amministratore.<br />
5. Inserire la password impostata in precedenza e fare clic su OK.<br />
Nota: Se si dimentica la password, sarà necessario ripristinare le impostazioni predefinite della<br />
telecamera. Vedere a pagina 88.<br />
ITALIANO
Pagina 82<br />
Guida all'installazione <strong>AXIS</strong> <strong>P5532</strong>/<strong>P5534</strong><br />
Accesso al flusso video<br />
Viene visualizzata la pagina Live View (Immagini dal vivo) con i collegamenti agli strumenti di<br />
configurazione che consentono di personalizzare la telecamera.<br />
Se necessario, fare clic su Yes (Sì) per installare AMC (<strong>Axis</strong> Media Control) che consente di<br />
visualizzare il flusso video in Microsoft Internet Explorer. A questo scopo è necessario disporre dei<br />
privilegi di amministratore.<br />
Se necessario, fare clic sul collegamento per installare i decodificatori mancanti.<br />
Nota: Per installare AMC in Windows 7/Windows Vista, è necessario eseguire Internet Explorer come<br />
amministratore. Fare clic con il pulsante destro del mouse sull'icona di Internet Explorer e<br />
selezionare Run as administrator (Esegui come amministratore).<br />
Setup (Configurazione):<br />
fornisce tutti gli strumenti<br />
necessari per configurare<br />
la telecamera.<br />
Help (Guida): visualizza<br />
la Guida in linea relativa<br />
alla modalità di utilizzo<br />
della telecamera.
Guida all'installazione <strong>AXIS</strong> <strong>P5532</strong>/<strong>P5534</strong> Pagina 83<br />
Altri metodi di assegnazione dell'indirizzo IP<br />
La seguente tabella descrive gli altri metodi disponibili per assegnare o individuare l'indirizzo IP. Per<br />
impostazione predefinita, tutti i metodi sono disponibili e possono essere disabilitati.<br />
Utilizzo nel<br />
sistema<br />
operativo<br />
Note<br />
Connessione al<br />
servizio AVHS<br />
Tutti i sistemi<br />
operativi<br />
Per connettere una telecamera ad un servizio AVHS, fare riferimento<br />
alla Guida per l'installazione del provider del servizio. Per informazioni<br />
su come trovare un provider di servizi AVHS locale, accedere a<br />
www.axis.com<br />
UPnP Windows Se è abilitata sul computer, la telecamera viene rilevata<br />
automaticamente e aggiunta a “Risorse di rete”.<br />
Bonjour<br />
<strong>AXIS</strong> Dynamic<br />
DNS Service<br />
ARP/Ping<br />
DHCP<br />
MAC OSX<br />
(versione 10.4 o<br />
successive)<br />
Tutti i sistemi<br />
operativi<br />
Tutti i sistemi<br />
operativi<br />
Tutti i sistemi<br />
operativi<br />
Si applica ai browser con supporto Bonjour. Selezionare il segnalibro<br />
Bonjour nel browser (ad esempio Safari) e fare clic sul collegamento<br />
per accedere alle pagine web della telecamera.<br />
Servizio gratuito fornito da <strong>Axis</strong> che consente di installare la<br />
videocamera in modo facile e veloce. È necessaria una connessione a<br />
Internet senza proxy http. Per ulteriori informazioni, visitare il sito web<br />
www.axiscam.net<br />
Vedere le sezioni che seguono. È necessario eseguire il comando entro<br />
2 minuti dal collegamento dell'alimentazione alla telecamera.<br />
Per visualizzare le pagine di amministrazione del server DHCP di rete,<br />
vedere la documentazione specifica del server.<br />
ITALIANO
Pagina 84<br />
Guida all'installazione <strong>AXIS</strong> <strong>P5532</strong>/<strong>P5534</strong><br />
Assegnazione dell'indirizzo IP con ARP/Ping<br />
1. Acquisire un indirizzo IP sullo stesso segmento di rete cui è connesso il computer in uso.<br />
2. Individuare il numero di serie indicato sull’etichetta della telecamera.<br />
3. Aprire una finestra MS-DOS sul computer e digitare i seguenti comandi:<br />
Sintassi di Windows:<br />
arp -s <br />
ping -l 408 -t <br />
Sintassi di UNIX/Linux/Mac:<br />
arp -s <br />
temp<br />
ping -s 408 <br />
Esempio di Windows:<br />
arp -s 192.168.0.125 00-40-8c-18-10-00<br />
ping -l 408 -t 192.168.0.125<br />
Esempio di UNIX/Linux/Mac<br />
arp -s 192.168.0.125 00:40:8c:18:10:00 temp<br />
ping -s 408 192.168.0.125<br />
4. Verificare che il cavo di rete sia collegato alla telecamera, quindi avviare/riavviare la<br />
telecamera, scollegando e ricollegando l’alimentazione.<br />
5. Chiudere la finestra MS-DOS appena viene visualizzato il messaggio ‘Reply from 192.168.0.125:<br />
...’ (Risposta da 192.168.0.125) o altro messaggio simile.<br />
6. Nel browser immettere http:// nel campo dell'indirizzo e premere Invio sulla<br />
tastiera.<br />
Note:<br />
• Per aprire una finestra MS-DOS in Windows: dal menu Start, scegliere Esegui... e digitare cmd.<br />
Fare clic su OK.<br />
• Per usare il comando ARP in Windows 7/Windows Vista, fare clic con il pulsante destro del<br />
mouse sull'icona della finestra MS-DOS e selezionare Esegui come amministratore.<br />
• Per utilizzare il comando ARP in un sistema operativo Mac OS X, usare l’utility Terminal, in<br />
Applicazioni > Utilità.
Guida all'installazione <strong>AXIS</strong> <strong>P5532</strong>/<strong>P5534</strong> Pagina 85<br />
Connettori<br />
Connettore di rete – Connettore Ethernet RJ-45. Supporto High PoE (Power over Ethernet, IEEE<br />
802.3at). Utilizzare il Midspan <strong>AXIS</strong> T8123 High PoE a 1 porta (incluso). Per la conformità EMC,<br />
utilizzare cavi schermati.<br />
Connettore multiplo – Connettore terminale per la connessione di dispositivi esterni:<br />
• Dispositivi audio<br />
• Dispositivi di Input/output (I/O)<br />
• Alimentatore CA/CC<br />
Quando si connettono dispositivi esterni all'unità <strong>AXIS</strong> <strong>P5532</strong>/<strong>P5534</strong>, è necessario un cavo multiplo<br />
per mantenere la classificazione IP51. Il cavo multiplo può essere acquistato dal proprio rivenditore<br />
<strong>Axis</strong>. Per ulteriori informazioni, leggere la Guida per l'utente, disponibile sul CD del prodotto video<br />
di rete <strong>AXIS</strong> fornito insieme al prodotto, oppure sul sito web di <strong>Axis</strong> all'indirizzo www.axis.com.<br />
Alloggiamento scheda SDHC – Per memorizzare localmente le immagini riprese dalla macchina<br />
fotografica di rete, è necessaria una scheda SD (non inclusa) con capacità standard o elevata. Per<br />
inserire o rimuovere la scheda SD, è necessario rimuovere la copertura superiore della telecamera,<br />
vedere Installazione di una scheda SD (facoltativa), a pagina 73.<br />
Nota: Prima della rimozione, la scheda SD dovrebbe essere smontata per evitare di danneggiare le<br />
registrazioni. Per smontare la scheda SD, selezionare Setup<br />
(Configurazione) > System Options (Opzioni di sistema) >Storage (Archiviazione) >SDCard<br />
(Scheda SD) e fare clic su Unmount (Smonta). Per ulteriori informazioni, leggere la Guida per<br />
l'utente, disponibile sul CD del prodotto video di rete <strong>AXIS</strong> fornito insieme al prodotto, oppure<br />
sul sito web di <strong>Axis</strong> all'indirizzo www.axis.com.<br />
ITALIANO
Pagina 86<br />
Guida all'installazione <strong>AXIS</strong> <strong>P5532</strong>/<strong>P5534</strong><br />
Cavo multiplo (non incluso)<br />
Quando si connettono dispositivi esterni all'unità <strong>AXIS</strong> <strong>P5532</strong>/<strong>P5534</strong>, è necessario un cavo multiplo<br />
per mantenere la classificazione IP51 della telecamera. Il cavo multiplo può essere acquistato dal<br />
proprio rivenditore <strong>Axis</strong>.<br />
Connettere il cavo multiplo al connettore multiplo della telecamera, osservando l'illustrazione a<br />
pagina 71 e le istruzioni a pagina 73 e a pagina 74. Il cavo contiene i seguenti connettori:<br />
Connettore di alimentazione – Morsettiera a 3 pin utilizzata per l'ingresso dell'alimentazione.<br />
Ingresso alimentazione CC<br />
24-34 V CC<br />
<strong>AXIS</strong> <strong>P5532</strong>: max 15 W<br />
<strong>AXIS</strong> <strong>P5534</strong>: max 17 W<br />
Ingresso alimentazione CA<br />
20-24 V CA<br />
<strong>AXIS</strong> <strong>P5532</strong>: max 20 VA<br />
<strong>AXIS</strong> <strong>P5534</strong>: max 23,6 VA<br />
Ingresso audio (rosa) – Ingresso audio da 3,5 mm per microfono in mono o segnale mono line-in (il<br />
canale sinistro è usato da un segnale stereo).<br />
Uscita audio (verde) – Uscita audio da 3,5 mm che può essere connessa a un sistema di indirizzo<br />
pubblico (PA), oppure ad un altoparlante con amplificatore integrato. Si possono collegare anche un<br />
paio di cuffie. Per l'uscita audio è necessario usare un connettore stereo.<br />
Morsettiera di I/O – Utilizzata per varie applicazioni, come ad esempio la<br />
rilevazione del movimento, l'attivazione di eventi, la registrazione continua e la<br />
notifica di allarmi. Oltre all'alimentazione ausiliaria e al pin GND, ogni morsettiera<br />
ha 4 pin che possono essere configurati come ingressi o uscite. Questi pin<br />
forniscono l'interfaccia per:<br />
• Uscita digitale: utilizzabile per collegare periferiche esterne come relè e LED. Le periferiche<br />
connesse possono essere attivate mediante la API (Application Programming Interface)<br />
VAPIX® o i pulsanti di controllo nella pagina Live View (Immagini da vivo) oppure tramite<br />
Event Type (Tipo di evento). L'uscita verrà visualizzata come attiva (in Events (Eventi) ><br />
Port Status (Stato porta) se il dispositivo di allarme si attiva.
Guida all'installazione <strong>AXIS</strong> <strong>P5532</strong>/<strong>P5534</strong> Pagina 87<br />
• Ingresso digitale: ingresso allarme utilizzabile per collegare le periferiche, che può passare<br />
dal circuito chiuso al circuito aperto, ad esempio: sensori di movimento (PIR), contatti<br />
porta/finestra, rilevatori di rottura vetri e così via. Dopo la ricezione del segnale lo stato<br />
cambia e l’ingresso diventa attivo (visualizzato in Event Configuration (Configurazione<br />
evento) > Port Status (Stato porta)).<br />
Funzione Pin Note Dati tecnici<br />
GND 1 Terra<br />
Alimentazione<br />
3,3 V CC<br />
Configurabile<br />
(ingresso o<br />
uscita)<br />
2 Il pin può essere utilizzato anche per alimentare una<br />
periferica ausiliaria.<br />
Nota: questo pin può essere usato soltanto come uscita<br />
alimentazione.<br />
3-6 Ingresso digitale: collegare a terra (GND) per attivarlo<br />
oppure lasciarlo isolato (scollegato) per disattivarlo.<br />
Uscita digitale: utilizza un transistor NFET open-drain<br />
con connessione della fonte a terra. Se si utilizza un relè<br />
esterno, è necessario collegare un diodo in parallelo al<br />
carico per proteggere la periferica da sovratensioni<br />
transitorie.<br />
<strong>AXIS</strong> <strong>P5532</strong>/<strong>P5534</strong> Indicatori di stato<br />
Carico max = 250 mA<br />
Ingresso min = -40 V CC<br />
Ingresso max = +40 V CC<br />
Carico max = 100 mA<br />
Tensione max = +40 V CC<br />
Colore<br />
Indicazione<br />
Spento<br />
Giallo<br />
Ambra/rosso<br />
Rosso<br />
Verde<br />
Connessione stabile/funzionamento normale<br />
Stabile durante l'inizializzazione del sistema o il ripristino delle impostazioni predefinite in<br />
fabbrica. Lampeggia durante l'aggiornamento del firmware.<br />
Connessione di rete non disponibile<br />
Errore durante l'aggiornamento del firmware<br />
Fisso per 10 secondi dopo un riavvio senza errori<br />
ITALIANO<br />
Nota: Per ulteriori informazioni sugli indicatori di stato dell'unità <strong>AXIS</strong> <strong>P5532</strong>/<strong>P5534</strong>, leggere la<br />
Guida per l'utente, disponibile sul CD del prodotto video di rete <strong>AXIS</strong> fornito insieme al<br />
prodotto, oppure sul sito web di <strong>Axis</strong> all'indirizzo www.axis.com.<br />
Indicatori di stato <strong>AXIS</strong> T8123<br />
LED Colore Indicazione<br />
Indicatore Spento Nessuna telecamera connessa<br />
Lampeggiante Sovraccarico di alimentazione o altro errore nella tensione di ingresso<br />
Verde<br />
Telecamera connessa, condizione normale<br />
Ingresso CA Verde fisso Connessione all’alimentazione CA attiva
Pagina 88<br />
Guida all'installazione <strong>AXIS</strong> <strong>P5532</strong>/<strong>P5534</strong><br />
Ripristino delle impostazioni predefinite<br />
Per reimpostare la telecamera alle impostazioni originali predefinite in fabbrica, utilizzare il<br />
pulsante di comando e il pulsante di riavvio sul lato della telecamera, vedere Panoramica<br />
dell'hardware, a pagina 70, come descritto di seguito:<br />
Utilizzando il pulsante di comando e il pulsante di riavvio, verranno ripristinati tutti i parametri,<br />
incluso l'indirizzo IP, alle impostazioni predefinite in fabbrica:<br />
1. Rimuovere la copertura superiore, vedere Rimuovere l'imballo protettivo, a pagina 72.<br />
2. Tenere premuti contemporaneamente i pulsanti di comando e di riavvio.<br />
3. Rilasciare il pulsante di riavvio, continuando a tener premuto il pulsante di comando.<br />
4. Continuare a tenere premuto il pulsante di comando fino a quando il colore dell'indicatore di<br />
stato non diventa giallo (l'operazione può richiedere fino a 15 secondi).<br />
5. Rilasciare il pulsante di comando.<br />
6. Quando l’indicatore di stato diventa verde (l'operazione può richiedere fino a 1 minuto) la<br />
procedura è completata e la telecamera è stata ripristinata. L'unità ha ora l'indirizzo IP<br />
predefinito 192.168.0.90<br />
7. Rimontare il coperchio superiore della telecamera nella posizione originale.<br />
8. Riassegnare l'indirizzo IP utilizzando uno dei metodi descritti in Assegnazione di un indirizzo IP,<br />
a pagina 77.<br />
È possibile inoltre ripristinare le impostazioni predefinite mediante l’interfaccia web. Per ulteriori<br />
informazioni, leggere la guida in linea o la Guida per l'utente, disponibile sul CD del prodotto video<br />
di rete <strong>AXIS</strong> fornito insieme al prodotto.<br />
Accesso alla telecamera da Internet<br />
Dopo l'installazione, la telecamera di rete è accessibile dalla rete locale (LAN). Per accedere alla<br />
videocamera da Internet, è necessario configurare i router di rete per consentire il traffico in<br />
entrata, che di norma avviene su una porta specifica.<br />
• Porta HTTP (porta predefinita 80) per la visualizzazione e la configurazione<br />
• Porta RTSP (porta predefinita 554) per la visualizzazione di flussi video in formato H.264<br />
Per ulteriori istruzioni, consultare la documentazione del router. Per maggiori informazioni su<br />
questo e altri argomenti, visitare il sito web per il supporto <strong>Axis</strong> all’indirizzo www.axis.com/techsup.<br />
Ulteriori informazioni<br />
La Guida per l’utente è disponibile sul sito web di <strong>Axis</strong> all’indirizzo www.axis.com oppure sul CD del<br />
prodotto video di rete <strong>AXIS</strong> fornito con il prodotto.<br />
Suggerimento<br />
Visitare il sito di <strong>Axis</strong> all’indirizzo www.axis.com/techsup per verificare se sono stati<br />
pubblicati aggiornamenti per la telecamera di rete. Per conoscere la versione installata del<br />
firmware, vedere >About (Informazioni su) nella pagina Setup (Configurazione).
<strong>AXIS</strong> <strong>P5532</strong>/<strong>P5534</strong> Guía de instalación Página 89<br />
<strong>AXIS</strong> <strong>P5532</strong> & <strong>AXIS</strong> <strong>P5534</strong><br />
Guía de instalación<br />
Esta guía de instalación incluye las instrucciones necesarias para instalar una Cámara de red domo<br />
<strong>AXIS</strong> <strong>P5532</strong>/<strong>AXIS</strong> <strong>P5534</strong> PTZ en su red. Para obtener información sobre cualquier cuestión<br />
relacionada con el uso del producto, consulte el Manual del usuario, disponible en el CD que se<br />
incluye en este paquete o en la página web www.axis.com.<br />
Pasos para la instalación<br />
Importante:<br />
1. Verifique el contenido del paquete con la lista que<br />
Este producto debe utilizarse de<br />
aparece más abajo.<br />
acuerdo a la legislación y<br />
normativas locales.<br />
2. Presentación del hardware. Consulte la página 90.<br />
3. Instalación del hardware.<br />
• Preparación para la instalación, consulte la página 92.<br />
• Montaje en techo duro, consulte la página 93.<br />
• Montaje en falso techo, consulte la página 94.<br />
• Montaje con escuadra (accesorio opcional), consulte la página 96.<br />
• Instalación del midspan High PoE <strong>AXIS</strong> T8123 con 1 puerto, consulte la página 97.<br />
4. Asignación de una dirección IP. Consulte la página 98.<br />
5. Configuración de la contraseña. Consulte la página 101.<br />
Contenido del paquete<br />
Artículo<br />
Modelos/variantes/notas<br />
Cámara de red<br />
Cubiertas de domo<br />
Kit de montaje<br />
Midspan High PoE<br />
<strong>AXIS</strong> <strong>P5532</strong><br />
<strong>AXIS</strong> <strong>P5534</strong><br />
Cubierta transparente clara (preinstalada)<br />
Cubierta transparente ahumada<br />
Kit de montaje para techo duro y falso techo. Destornillador Resitorx<br />
<strong>AXIS</strong> T8123<br />
ESPAÑOL<br />
CD<br />
Material impreso<br />
CD de los productos de vídeo en red de <strong>AXIS</strong>, incluida la documentación del<br />
producto, herramientas de instalación y otro software<br />
<strong>AXIS</strong> <strong>P5532</strong>/<strong>P5534</strong> Guía de instalación (este documento), Documento de<br />
garantía de <strong>Axis</strong>, Plantilla de taladrado, Etiquetas adicionales con el número de<br />
serie (2), Clave de autenticación AVHS<br />
Accesorios opcionales<br />
Accesorios de montaje de <strong>AXIS</strong> T91A<br />
Cable multiconector para la conexión de E/S, audio y alimentación<br />
Consulte nuestra web www.axis.com para obtener información sobre accesorios<br />
para alimentación y carcasas para exteriores
Página 90<br />
<strong>AXIS</strong> <strong>P5532</strong>/<strong>P5534</strong> Guía de instalación<br />
Presentación del hardware<br />
Unidad de cámara<br />
Botón de control<br />
Ranura para tarjeta SDHC<br />
LED indicador de estado<br />
Botón de reinicio<br />
Cubierta del domo<br />
Anillo del domo<br />
anillo del domo (6) Tornillos del Cubierta del domo Cubierta superior<br />
Anillo de sellado
<strong>AXIS</strong> <strong>P5532</strong>/<strong>P5534</strong> Guía de instalación Página 91<br />
Montaje en techo duro<br />
Placa de<br />
montaje<br />
Montaje en falso techo<br />
Tornillos de<br />
la placa<br />
de montaje<br />
(3)<br />
Brazo de la<br />
escuadra (3)<br />
Tornillos del<br />
brazo de la<br />
escuadra (3)<br />
y arandela<br />
(3)<br />
Anillo<br />
embellecedor<br />
Cable de<br />
seguridad<br />
Unidad de soporte (3)<br />
Tapa de la base de la cámara<br />
Tornillos de la tapa de la base de la cámara (4)<br />
Gancho para el cable de seguridad<br />
Referencia (P/N) y número de serie (S/N).<br />
Es posible que necesite el número de serie<br />
durante la instalación.<br />
ESPAÑOL<br />
Guías para el cable<br />
Junta de espuma<br />
Conector de red<br />
Multiconector<br />
Tornillos de la cubierta superior (4)<br />
Cubierta superior
Página 92<br />
<strong>AXIS</strong> <strong>P5532</strong>/<strong>P5534</strong> Guía de instalación<br />
Instalación del hardware<br />
!<br />
IMPORTANTE:<br />
Para utilizar la cámara <strong>AXIS</strong> <strong>P5532</strong>/<strong>P5534</strong> en exteriores, debe instalarse<br />
en una carcasa para exterior aprobada. Para obtener más información sobre carcasas<br />
para exteriores, consulte la página www.axis.com<br />
Preparación para la instalación<br />
Lea todas las instruciones de instalación antes de prepararse para instalar la cámara <strong>AXIS</strong> <strong>P5532</strong>/<br />
<strong>P5534</strong>, puesto que varios de los pasos de preparación para la instalación requieren que se retire la<br />
cubierta superior y es recomendable llevarlos a cabo todos juntos.<br />
• Siga las instrucciones de la sección Retirada del embalaje de protección a continuación para<br />
retirar el embalaje de protección antes de instalar la cámara.<br />
• La cámara se suministra con una cubierta transparente clara y otra ahumada. En caso<br />
necesario, siga las instrucciones de la sección Sustitución de la cubierta clara/ahumada del<br />
domo (opcional) a continuación para sustituir la cubierta del domo.<br />
• Es necesaria una tarjeta SD estándar o de alta capacidad (no incluida) para guardar las<br />
imágenes localmente en la cámara de red. Siga las instrucciones de la sección Instalación<br />
de una tarjeta SD (opcional) a continuación para retirar la cubierta superior e instalar una<br />
tarjeta SD.<br />
Retirada del embalaje de protección<br />
1. Afloje los 4 tornillos de la cubierta superior y retírela, consulte la ilustración en la página 91.<br />
2. Retire el embalaje de protección.<br />
Embalaje de protección<br />
3. Si va a sustituir la cubierta clara/ahumada del domo o va a instalar una tarjeta SD, consulte las<br />
instrucciones de las secciones Sustitución de la cubierta clara/ahumada del domo (opcional) y<br />
Instalación de una tarjeta SD (opcional) a continuación.<br />
4. Vuelva a colocar la cubierta superior en su posición original y apriete los tornillos.
<strong>AXIS</strong> <strong>P5532</strong>/<strong>P5534</strong> Guía de instalación Página 93<br />
Sustitución de la cubierta clara/ahumada del domo (opcional)<br />
1. Afloje los 4 tornillos de la cubierta superior y retírela, consulte la ilustración en la página 91.<br />
2. Quite los 6 tornillos del anillo del domo y retírelo de la cubierta superior.<br />
3. Fije el anillo y la cubierta del domo a la cubierta superior y asegúrelos apretando los 6 tornillos.<br />
4. Si va a instalar una tarjeta SD, consulte las instrucciones de la sección Instalación de una<br />
tarjeta SD (opcional) a continuación.<br />
5. Vuelva a colocar la cubierta superior en su posición original y apriete los tornillos.<br />
Nota: Tenga cuidado de no arañar ni dañar la cubierta del domo. Utilice un paño suave para<br />
limpiar antes de unir la cubierta del domo a la unidad de cámara.<br />
Instalación de una tarjeta SD (opcional)<br />
1. Afloje los 4 tornillos de la cubierta superior y retírela, consulte la ilustración en la página 91.<br />
2. Inserte una tarjeta SD (no incluida) en la ranura para tarjeta SDHC (Secure Digital High<br />
Capacity).<br />
3. Vuelva a colocar la cubierta superior en su posición original y apriete los tornillos.<br />
Nota: La tarjeta SD se instala automáticamente al insertarla en la ranura para tarjeta SDHC.<br />
No obstante, antes de retirar la tarjeta SD se debería desinstalar mediante las páginas<br />
web de la cámara. Vaya a Setup > System Options > Storage > SD Card<br />
(Configuración > Opciones de sistema > Almacenamiento > Tarjeta SD) y haga clic en<br />
Unmount (Desinstalar). Para obtener más información, consulte el Manual del usuario<br />
disponible en el CD de productos de vídeo en red de <strong>AXIS</strong> suministrado con este<br />
producto o en el sitio web www.axis.com<br />
Montaje en techo duro<br />
1. Prepare el techo para la instalación de la placa de montaje; utilice la plantilla de taladrado<br />
suministrada para situar los orificios. Asegúrese de utilizar las brocas, los tornillos y los tacos<br />
adecuados para el material.<br />
2. Instale la placa de montaje.<br />
Placa de montaje<br />
ESPAÑOL<br />
Cable de seguridad<br />
3. Afloje los 4 tornillos de la tapa de la base de la cámara y retírela, consulte la ilustración en la<br />
página 91.
Página 94<br />
<strong>AXIS</strong> <strong>P5532</strong>/<strong>P5534</strong> Guía de instalación<br />
4. Pase el cable de red y el cable multiconector, si procede, y conéctelos a la cámara de red. Tenga<br />
cuidado de no dañar los cables al conectarlos. Asegúrese de que los orificios de la junta de<br />
espuma coincidan con las guías para el cable y, si procede, retire de la junta de espuma la pieza<br />
extraíble para el cable multiconector.<br />
5. Vuelva a colocar la tapa de la base de la cámara en su posición original y apriete los tornillos.<br />
6. Fije la cámara mediante el cable de seguridad suministrado.<br />
7. Deslice los módulos de unidad de la cámara de red por las ranuras de la placa de montaje y gire<br />
la unidad de cámara.<br />
8. Instale el midspan High PoE de 1 puerto, consulte la sección Instalación del midspan High<br />
PoE <strong>AXIS</strong> T8123 con 1 puerto, en la página 97.<br />
9. Compruebe que los indicadores LED del midspan indiquen las condiciones correctas, consulte la<br />
tabla de la página 108 para obtener más información.<br />
Montaje en falso techo<br />
1. Retire el azulejo del techo donde se instalará el montaje del techo falso.<br />
2. Utilice la plantilla proporcionada para marcar la posición del orificio de 210 mm en el azulejo.<br />
Recorte la plantilla.<br />
Azulejo del techo<br />
Diámetro del orificio<br />
210 mm<br />
Notas:<br />
• El peso de la cámara junto con el montaje del techo es de aproximadamente 2,3 kg. Asegúrese<br />
de que el material del techo puede aguantar este peso.<br />
• El grosor del azulejo del techo debe ser de entre 5 y 60 mm.<br />
3. Monte la escuadra de techo.<br />
4. Coloque la escuadra de techo en el azulejo, consulte la ilustración en la página 95.<br />
5. Apriete los tornillos para el brazo de la escuadra con un destornillador torx 20.<br />
6. Afloje los 4 tornillos de la tapa de la base de la cámara y retírela, consulte la ilustración en la<br />
página 91.
<strong>AXIS</strong> <strong>P5532</strong>/<strong>P5534</strong> Guía de instalación Página 95<br />
7. Pase el cable de red y el cable multiconector, si procede, y conéctelos a la cámara de red. Tenga<br />
cuidado de no dañar los cables al conectarlos. Asegúrese de que los orificios de la junta de<br />
espuma coincidan con las guías para el cable y, si procede, retire de la junta de espuma la pieza<br />
extraíble para el cable multiconector.<br />
Cable multiconector<br />
Cable de red<br />
8. Vuelva a colocar la tapa de la base de la cámara en su posición original y apriete los tornillos.<br />
9. Fije la cámara mediante el cable de seguridad suministrado.<br />
Escuadra de techo<br />
Cable de seguridad<br />
Azulejo del techo<br />
ESPAÑOL<br />
10. Deslice los soportes de unidad de la cámara de red por las ranuras de la placa de montaje y gire<br />
la unidad de cámara.<br />
11. Instale el midspan High PoE de 1 puerto, consulte la sección Instalación del midspan High<br />
PoE <strong>AXIS</strong> T8123 con 1 puerto, en la página 97.<br />
12. Compruebe que los indicadores LED del midspan indiquen las condiciones adecuadas. Para<br />
obtener información más detallada, consulte la tabla de la página 108.<br />
13. Instale el azulejo, con la cámara montada, en el techo.
Página 96<br />
<strong>AXIS</strong> <strong>P5532</strong>/<strong>P5534</strong> Guía de instalación<br />
14. Coloque el anillo embellecedor sobre la escuadra de techo y presione hasta que encaje.<br />
Anillo embellecedor<br />
Montaje con escuadra (accesorio opcional)<br />
1. Instale la escuadra seleccionada según las<br />
instrucciones que se suministran con ella. Si es<br />
necesario taladrar, asegúrese de utilizar las brocas,<br />
los tornillos y los tacos adecuados para el material.<br />
2. Afloje los 4 tornillos de la tapa de la base de la<br />
cámara y retírela, consulte la ilustración en la<br />
página 91.<br />
3. Pase el cable de red y el cable multiconector, si<br />
procede, por los orificios de la escuadra de<br />
montaje.<br />
4. Enganche la cámara al cable de seguridad de la<br />
escuadra.<br />
Cable de<br />
seguridad<br />
Ranuras para<br />
los soportes<br />
de unidad<br />
Escuadra de pared (ejemplo de montaje)<br />
Tornillos<br />
torx T30<br />
5. Conecte el cable de red y el cable multiconector, si procede, a la cámara de red.<br />
6. Instale el dispositivo <strong>AXIS</strong> T8123, consulte la sección Instalación del midspan High PoE <strong>AXIS</strong><br />
T8123 con 1 puerto, en la página 97.<br />
7. Vuelva a colocar la tapa de la base de la cámara en su posición original.<br />
8. Deslice los soportes de unidad de la cámara de red por las ranuras de la escuadra y gire la<br />
unidad de cámara.<br />
9. Fije la cámara de red a la escuadra de montaje apretando los 3 tornillos (torx T30).
<strong>AXIS</strong> <strong>P5532</strong>/<strong>P5534</strong> Guía de instalación Página 97<br />
Instalación del midspan High PoE <strong>AXIS</strong> T8123 con 1 puerto<br />
El midspan High PoE <strong>Axis</strong> T8123 permite que los productos de vídeo en red de <strong>Axis</strong> con un consumo<br />
eléctrico elevado reciban datos y alimentación por el mismo cable Ethernet. Siga estas instrucciones<br />
para conectar el dispositivo <strong>AXIS</strong> T8123.<br />
1. Conecte el dispositivo <strong>AXIS</strong> T8123 (entrada de datos) al switch de red mediante un cable de red<br />
estándar.<br />
2. Conecte el dispositivo <strong>AXIS</strong> T8123 (salida de datos y alimentación) a la cámara de red mediante<br />
el cable de red que se ha conectado a la cámara.<br />
3. Conecte el dispositivo <strong>AXIS</strong> T8123 a una toma de corriente CA (100-240 V CA) mediante el<br />
cable de alimentación proporcionado.<br />
<strong>AXIS</strong> T8123<br />
Indicador de<br />
conectividad<br />
del puerto<br />
Salida de<br />
datos y alimentación Entrada de datos<br />
Indicador de<br />
conectividad<br />
de entrada de CA<br />
Cámara de red Ethernet<br />
Para obtener información sobre los LED del midspan, consulte la sección Indicadores de estado del<br />
dispositivo <strong>AXIS</strong> T8123, en la página 108.<br />
ESPAÑOL
Página 98<br />
<strong>AXIS</strong> <strong>P5532</strong>/<strong>P5534</strong> Guía de instalación<br />
Asignación de una dirección IP<br />
Actualmente, la mayoría de redes disponen de un servidor DHCP que asigna direcciones IP a los<br />
dispositivos conectados de forma automática. Si su red no dispone de un servidor DHCP, la cámara<br />
de red utilizará 192.168.0.90 como dirección IP predeterminada.<br />
Si desea asignar una dirección IP estática, el método recomendado en Windows es <strong>AXIS</strong> IP Utility o<br />
<strong>AXIS</strong> Camera Management. En función del número de cámaras que desee instalar, deberá utilizar el<br />
método que se adapte mejor a sus necesidades.<br />
Ambas aplicaciones son gratuitas y están disponibles en el CD de productos de vídeo en red de <strong>AXIS</strong><br />
suministrado con este producto, o pueden descargarse de www.axis.com<br />
Método Recomendado para Sistema operativo<br />
<strong>AXIS</strong> IP Utility<br />
Consulte la página 99<br />
<strong>AXIS</strong> Camera Management<br />
Consulte la página 100<br />
Cámaras individuales<br />
Instalaciones pequeñas<br />
Varias cámaras<br />
Instalaciones grandes<br />
Instalación en una subred diferente<br />
Windows<br />
Windows 2000<br />
Windows XP Pro<br />
Windows 2003 Server<br />
Windows Vista<br />
Windows 7<br />
Notas:<br />
• Si no puede asignar la dirección IP, compruebe que no haya ningún cortafuegos que bloquee la<br />
operación.<br />
• Para ver otros métodos de asignar o detectar la dirección IP, p. ej., en otros sistemas operativos,<br />
consulte la página 104.
<strong>AXIS</strong> <strong>P5532</strong>/<strong>P5534</strong> Guía de instalación Página 99<br />
<strong>AXIS</strong> IP Utility: para cámaras individuales o instalaciones pequeñas<br />
<strong>AXIS</strong> IP Utility detecta y muestra automáticamente los dispositivos <strong>Axis</strong> que existen en la red.<br />
Además, esta aplicación puede utilizarse para asignar manualmente una dirección IP estática.<br />
Recuerde que el equipo que ejecute <strong>AXIS</strong> IP Utility debe instalarse en el mismo segmento de red<br />
(subred física) que la cámara de red.<br />
Detección automática<br />
1. Compruebe que la cámara de red esté conectada a la red y que reciba alimentación.<br />
2. Inicie <strong>AXIS</strong> IP Utility.<br />
3. Cuando la cámara aparezca en la ventana, haga doble clic en ella para abrir su página de inicio.<br />
4. Consulte la página 101 para obtener instrucciones sobre cómo asignar la contraseña.<br />
Asignación manual de la dirección IP (opcional)<br />
1. Obtenga una dirección IP que no esté en uso y que se encuentre en el mismo segmento de red<br />
que su equipo.<br />
2. Seleccione la cámara de red en la lista.<br />
3. Haga clic en el botón Assign new IP address to the selected device (Asignar nueva dirección IP<br />
al dispositivo seleccionado) e introduzca la dirección IP.<br />
4. Haga clic en Assign (Asignar) y siga las instrucciones que aparecen en la pantalla. Recuerde que<br />
la cámara debe reiniciarse en los dos minutos siguientes a la configuración de la dirección IP.<br />
5. Haga clic en el botón Home Page (Página de inicio) para acceder a las páginas web de la<br />
cámara.<br />
6. Consulte la página 101 para obtener instrucciones sobre cómo configurar la contraseña.<br />
ESPAÑOL
Página 100<br />
<strong>AXIS</strong> <strong>P5532</strong>/<strong>P5534</strong> Guía de instalación<br />
<strong>AXIS</strong> Camera Management: para varias cámaras o instalaciones<br />
grandes<br />
<strong>AXIS</strong> Camera Management puede detectar automáticamente varios dispositivos <strong>Axis</strong>, mostrar el<br />
estado de la conexión, administrar las actualizaciones del firmware y configurar direcciones IP.<br />
Detección automática<br />
1. Compruebe que la cámara esté conectada a la red y que reciba alimentación.<br />
2. Inicie <strong>AXIS</strong> Camera Management. Cuando la cámara de red aparezca en la ventana, haga clic<br />
con el botón derecho en el enlace y seleccione Live View Home Page (Página de inicio de Live<br />
View).<br />
3. Consulte la página 101 para obtener instrucciones sobre cómo configurar la contraseña.<br />
Asignación de una dirección IP en un dispositivo<br />
individual<br />
1. Seleccione la cámara de red en <strong>AXIS</strong> Camera Management y<br />
haga clic en el botón Assign IP (Asignar IP).<br />
2. Seleccione Assign the following IP address (Asignar la<br />
siguiente dirección IP) e introduzca la dirección IP, la máscara<br />
de subred y el router predeterminado que utilizará el<br />
dispositivo.<br />
3. Haga clic en OK (Aceptar).
<strong>AXIS</strong> <strong>P5532</strong>/<strong>P5534</strong> Guía de instalación Página 101<br />
Asignación de direcciones IP en varios<br />
dispositivos<br />
<strong>AXIS</strong> Camera Management acelera el proceso de asignación de<br />
direcciones IP en varios dispositivos indicando direcciones IP<br />
disponibles dentro de un intervalo especificado.<br />
1. Seleccione los dispositivos que desee configurar (se pueden<br />
seleccionar varios modelos) y haga clic en el botón Assign<br />
IP (Asignar IP).<br />
2. Seleccione Assign the following IP address range (Asignar<br />
el siguiente intervalo de direcciones IP) e introduzca el<br />
intervalo de direcciones IP, la máscara de subred y el<br />
enrutador predeterminado que utilizará el dispositivo.<br />
3. Haga clic en Update (Actualizar). Las direcciones IP sugeridas se muestran en New IP Addresses<br />
(Nuevas direcciones IP) y se pueden editar si se selecciona un dispositivo y se hace clic en el<br />
botón Edit (Editar).<br />
4. Haga clic en OK (Aceptar).<br />
Configuración de la contraseña<br />
Para poder acceder al producto, hay que configurar la contraseña del usuario predeterminado para<br />
el administrador root. Aparecerá el cuadro de diálogo ‘Configure Root Password’ (Configurar<br />
contraseña de root) cuando se acceda a la cámara de red por primera vez.<br />
Para evitar la intercepción de la contraseña de root cuando se configura, este proceso se puede<br />
realizar a través de una conexión HTTPS cifrada, que precisa un certificado HTTPS.<br />
Nota: HTTPS (Hypertext Transfer Protocol over SSL) es un protocolo que se utiliza para cifrar el<br />
tráfico entre los servidores y los navegadores web. El certificado HTTPS controla el<br />
intercambio cifrado de información.<br />
Para configurar la contraseña a través de una conexión HTTP estándar, escríbala directamente en el<br />
primer cuadro de diálogo que se muestra a continuación.<br />
Para configurar la contraseña a través de una conexión HTTPS cifrada, siga estos pasos:<br />
1. Haga clic en el botón Create self-signed certificate (Crear un certificado de autofirma).<br />
2. Proporcione la información que se le solicita y haga clic en OK (Aceptar). Se creará el<br />
certificado y se podrá configurar la contraseña con seguridad. Todo el tráfico hacia y desde la<br />
cámara de red se cifrará a partir de este punto.<br />
ESPAÑOL
Página 102<br />
<strong>AXIS</strong> <strong>P5532</strong>/<strong>P5534</strong> Guía de instalación<br />
3. A continuación, escriba una contraseña y vuelva a escribirla para confirmarla. Haga clic en OK<br />
(Aceptar). La contraseña ya se ha configurado.<br />
Para crear una conexión HTTPS,<br />
empiece haciendo clic en este<br />
botón.<br />
Para configurar directamente la<br />
contraseña a través de una conexión<br />
sin cifrar, escriba aquí la contraseña.<br />
4. Para iniciar sesión, escriba el nombre de usuario "root" en el cuadro de diálogo.<br />
Nota: El nombre de usuario predeterminado para el administrador root no se puede borrar.<br />
5. Escriba la contraseña que introdujo anteriormente y haga clic en OK (Aceptar).<br />
Nota: Si ha perdido u olvidado la contraseña, la cámara debe restablecerse a los valores<br />
iniciales. Consulte la página 109.
<strong>AXIS</strong> <strong>P5532</strong>/<strong>P5534</strong> Guía de instalación Página 103<br />
Acceso al vídeo continuo<br />
La página Live View de la cámara de red aparece con enlaces a las herramientas de configuración<br />
que le permiten personalizar la cámara.<br />
En caso necesario, haga clic en Yes (Sí) para instalar AMC (<strong>AXIS</strong> Media Control), lo que permite la<br />
visualización de vídeo continuo en Internet Explorer. Para ello debe tener derechos de administrador<br />
en su equipo.<br />
Si es necesario, haga clic en el enlace para instalar los decodificadores que falten.<br />
Nota: Para instalar AMC en Windows 7/Windows Vista, debe ejecutar Internet Explorer como<br />
administrador. Haga clic con el botón derecho en el icono de Internet Explorer y<br />
seleccione Ejecutar como administrador.<br />
Configuración: proporciona todas las<br />
herramientas necesarias para configurar<br />
la cámara según sus necesidades.<br />
Ayuda: presenta<br />
ayuda en línea sobre<br />
todos los aspectos<br />
del uso de la cámara.<br />
ESPAÑOL
Página 104<br />
<strong>AXIS</strong> <strong>P5532</strong>/<strong>P5534</strong> Guía de instalación<br />
Otros métodos para configurar la dirección IP<br />
En esta tabla se presentan otros métodos disponibles para configurar o detectar la dirección IP.<br />
Todos los métodos están habilitados de forma predeterminada y es posible deshabilitarlos.<br />
Sistema<br />
operativo<br />
Notas<br />
Servicio de<br />
conexión AVHS<br />
Todos<br />
Para conectar la cámara a un servício AVHS, consulte la guía de<br />
instalación del proveedor del servício. Para obtener información y<br />
ayuda para buscar un proveedor local de servícios AVHS, visite<br />
www.axis.com<br />
UPnP Windows Cuando esta opción está habilitada, el equipo detecta y añade<br />
automáticamente la cámara a “Mis sitios de red”.<br />
Bonjour<br />
Servicio de DNS<br />
dinámico de <strong>AXIS</strong><br />
MAC OSX<br />
(10.4 o<br />
posterior)<br />
Todos<br />
Aplicable a navegadores compatibles con Bonjour. Navegue hasta el<br />
favorito Bonjour del explorador (p. ej., Safari) y haga clic en el enlace<br />
para acceder a las páginas web de la cámara.<br />
Servicio gratuito suministrado por <strong>Axis</strong> que permite instalar la cámara<br />
de forma rápida y sencilla. Es necesario disponer de conexión a<br />
Internet sin proxy HTTP. Para obtener más información, consulte<br />
www.axiscam.net<br />
ARP/Ping Todos Consulte la información siguiente. El comando debe emitirse en los dos<br />
minutos posteriores al encendido de la cámara.<br />
DHCP Todos Para acceder a las páginas admin. del servidor DHCP en red, consulte la<br />
documentación del servidor.
<strong>AXIS</strong> <strong>P5532</strong>/<strong>P5534</strong> Guía de instalación Página 105<br />
Configuración de la dirección IP con ARP/Ping<br />
1. Adquiera una dirección IP en el mismo segmento de red en el que está conectado su equipo.<br />
2. Localice el número de serie (S/N) en la etiqueta de producto de la cámara.<br />
3. Abra una línea de comando en su equipo y escriba los comandos siguientes:<br />
Sintaxis de Windows:<br />
arp -s <br />
ping -l 408 -t <br />
Sintaxis de UNIX/Linux/Mac:<br />
arp -s temp<br />
ping -s 408 <br />
Ejemplo en Windows:<br />
arp -s 192.168.0.125 00-40-8c-18-10-00<br />
ping -l 408 -t 192.168.0.125<br />
Ejemplo en UNIX/Linux/Mac:<br />
arp -s 192.168.0.125 00:40:8c:18:10:00 temp<br />
ping -s 408 192.168.0.125<br />
4. Compruebe que el cable de red esté conectado a la cámara y desconecte y vuelva a conectar la<br />
corriente para iniciarla o reiniciarla.<br />
5. Cierre la línea de comando cuando vea “Reply from 192.168.0.125:...” (Respuesta de<br />
192.168.0.125:...) o similar.<br />
6. En el navegador, escriba http:// en el campo Ubicación/Dirección y pulse Intro en<br />
el teclado.<br />
Notas:<br />
• Para abrir una línea de comando en Windows: desde el menú Inicio, seleccione Ejecutar... y<br />
escriba cmd. Haga clic en Aceptar.<br />
• Para utilizar el comando ARP en Windows 7/Windows Vista, haga clic con el botón derecho del<br />
ratón en el icono de línea de comando y seleccione Ejecutar como administrador.<br />
• Para utilizar el comando ARP en un sistema operativo Mac OS X, utilice la herramienta Terminal<br />
que se encuentra en Aplicaciones > Utilidades.<br />
ESPAÑOL
Página 106<br />
<strong>AXIS</strong> <strong>P5532</strong>/<strong>P5534</strong> Guía de instalación<br />
Conectores de la unidad<br />
Conector de red: conector Ethernet RJ-45. Admite High PoE (alimentación de alta potencia a través<br />
de Ethernet, IEEE 802.3at). Utilice el midspan High PoE <strong>AXIS</strong> T8123 de 1 puerto (incluido). Se deben<br />
utilizar cables blindados de conformidad con la EMC.<br />
Multiconector: conector terminal para la conexión de equipos externos:<br />
• Equipos de audio<br />
• Dispositivos de entrada/salida (E/S)<br />
• Alimentación eléctrica CA/CC<br />
Para conectar equipos externos a la cámara <strong>AXIS</strong> <strong>P5532</strong>/<strong>P5534</strong> es necesario un cable multiconector<br />
a fin de mantener la clasificación IP51. El cable multiconector se puede adquirir en un proveedor de<br />
<strong>Axis</strong>. Para obtener más información, consulte el Manual del usuario disponible en el CD de<br />
productos de vídeo en red de <strong>AXIS</strong> suministrado con este producto o en el sitio web www.axis.com.<br />
Ranura para tarjeta SDHC: es necesaria una tarjeta SD estándar o de alta capacidad (no incluida)<br />
para guardar las imágenes localmente en la cámara de red. Para insertar y sacar la tarjeta SD hay<br />
que retirar la cubierta superior de la cámara, consulte la sección Instalación de una tarjeta SD<br />
(opcional), en la página 93.<br />
Nota: Antes de retirar la tarjeta SD hay que desinstalarla para no dañar las grabaciones. Para<br />
desinstalar la tarjeta SD vaya a Setup > System Options > Storage > SD Card<br />
(Configuración > Opciones de sistema > Almacenamiento > Tarjeta SD) y haga clic en<br />
Unmount (Desinstalar). Para obtener más información, consulte el Manual del usuario<br />
disponible en el CD de productos de vídeo en red de <strong>AXIS</strong> suministrado con este<br />
producto o en el sitio web www.axis.com.
<strong>AXIS</strong> <strong>P5532</strong>/<strong>P5534</strong> Guía de instalación Página 107<br />
Cable multiconector (no incluido)<br />
Para conectar equipos externos a la cámara <strong>AXIS</strong> <strong>P5532</strong>/<strong>P5534</strong> es necesario un cable multiconector<br />
a fin de mantener la clasificación IP51 de la cámara. El cable multiconector se puede adquirir en un<br />
proveedor de <strong>Axis</strong>.<br />
Conecte el cable multiconector al multiconector de la cámara, consulte la ilustración de la<br />
página 91 y las instrucciones de la página 93 y la página 94. El cable incluye los siguientes<br />
conectores:<br />
Conector de alimentación: bloque de terminales de 3 pines para entrada de alimentación.<br />
Entrada de alimentación CC<br />
24-34 V CC<br />
<strong>AXIS</strong> <strong>P5532</strong>: 15 W máx.<br />
<strong>AXIS</strong> <strong>P5534</strong>: 17 W máx.<br />
Entrada de alimentación CA<br />
20-24 V CA<br />
<strong>AXIS</strong> <strong>P5532</strong>: 20 VA máx.<br />
<strong>AXIS</strong> <strong>P5534</strong>: 23,6 VA máx.<br />
Entrada de audio (rosa): conector de 3,5 mm para micrófono mono, o entrada de línea de señal<br />
mono (se usa el canal izquierdo de una señal estéreo).<br />
Salida de audio (verde): salida de audio de 3,5 mm (nivel de línea) que se puede conectar a un<br />
sistema de megafonía pública o a un altavoz con amplificador incorporado. También pueden<br />
conectarse unos auriculares. Debe utilizarse un conector estéreo.<br />
Conector de terminales de E/S: utilizado en aplicaciones como detección de<br />
movimiento, activación de eventos, grabación de secuencias y notificaciones de<br />
alarma. Además de un pin de alimentación auxiliar y un pin de toma de tierra, el<br />
conector de terminales de E/S tiene 4 pines que pueden configurarse como<br />
entrada o salida. Estos pines proporcionan la interfaz para:<br />
ESPAÑOL<br />
• Salida digital: para conectar dispositivos externos como relés y LED. Se pueden activar<br />
dispositivos conectados mediante la interfaz VAPIX® de programación de aplicaciones, los<br />
botones de salida de la página Live View o mediante un tipo de evento. La salida se<br />
mostrará activa (en Events > Port Status [Eventos > Estado del puerto]) si el dispositivo<br />
de alarma está activado.
Página 108<br />
<strong>AXIS</strong> <strong>P5532</strong>/<strong>P5534</strong> Guía de instalación<br />
• Entrada digital: una entrada de alarma para conectar dispositivos que puedan alternar<br />
entre circuito cerrado y abierto, como por ejemplo: detectores PIR, contactos de puertas y<br />
ventanas, detectores de rotura de cristales, etc. Cuando se recibe una señal, el estado<br />
cambia y la entrada se vuelve activa (indicado en Events > Port Status [Eventos > Estado<br />
del puerto]).<br />
Función Pines Notas Especificaciones<br />
GND (toma<br />
de tierra)<br />
Alimentación<br />
de 3,3 V CC<br />
Configurable<br />
(entrada o<br />
salida)<br />
1 Toma de tierra<br />
2 Se puede utilizar para alimentar equipos auxiliares.<br />
Nota: Este pin sólo se puede usar como salida de<br />
alimentación.<br />
3-6 Entrada digital: conecte a GND (toma de tierra) para<br />
activarla o déjela suelta (desconectada) para desactivarla.<br />
Salida digital: utilice un transistor NFET de drenaje abierto<br />
con la fuente conectada al pin de toma de tierra (GND). Si<br />
se utiliza con un relé externo, debe conectarse un diodo<br />
en paralelo a la carga como protección ante oscilaciones<br />
de tensión.<br />
Carga máx. = 250 mA<br />
Entrada min. = -40 V CC<br />
Entrada máx. = +40 V CC<br />
Carga máx. = 100 mA<br />
Tensión máx. = +40 V CC<br />
Indicadores de estado de la cámara <strong>AXIS</strong> <strong>P5532</strong>/<strong>P5534</strong><br />
Color<br />
Apagado<br />
Ámbar<br />
Ámbar/rojo<br />
Rojo<br />
Verde<br />
Indicación<br />
Fijo: funcionamiento o conexión normales<br />
Fijo durante el inicio del sistema y el restablecimiento de los valores iniciales. Parpadea<br />
durante la actualización del firmware<br />
Sin conexión de red<br />
Fallo de actualización de firmware<br />
Fijo durante 10 segundos después de un reinicio correcto<br />
Nota: Para obtener más información sobre los indicadores de estado de la cámara <strong>AXIS</strong> <strong>P5532</strong>/<br />
<strong>P5534</strong>, consulte el Manual del usuario disponible en el CD de productos de vídeo en red<br />
de <strong>AXIS</strong> suministrado con este producto o en el sitio web www.axis.com.<br />
Indicadores de estado del dispositivo <strong>AXIS</strong> T8123<br />
LED Color Indicación<br />
Puerto Apagado No se ha conectado ninguna cámara<br />
Intermitente Sobrecarga eléctrica u otro error de tensión de entrada<br />
Verde<br />
Cámara conectada, comportamiento normal<br />
Entrada de CA Verde fijo Conectado a la alimentación de CA
<strong>AXIS</strong> <strong>P5532</strong>/<strong>P5534</strong> Guía de instalación Página 109<br />
Restablecimiento de los valores iniciales<br />
Para restablecer la cámara a los valores iniciales, utilice el botón de control y el botón de reinicio<br />
que se encuentran en el lateral de la cámara, consulte la sección Presentación del hardware, en la<br />
página 90 como se describe a continuación:<br />
Mediante los botones de control y reinicio se restablecerán los valores iniciales de todos los<br />
parámetros, incluida la dirección IP:<br />
1. Retire la cubierta superior, consulte la sección Retirada del embalaje de protección, en la página<br />
92.<br />
2. Mantenga pulsados al mismo tiempo los botones de control y reinicio.<br />
3. Suelte el botón de reinicio pero siga manteniendo pulsado el de control.<br />
4. Mantenga el botón de control pulsado hasta que el indicador de estado cambie a ámbar (puede<br />
tardar hasta 15 segundos).<br />
5. Suelte el botón de control.<br />
6. Cuando el indicador de estado cambie a verde (puede tardar hasta 1 minuto), habrá finalizado<br />
el proceso y se habrán restablecido los valores iniciales de la cámara. La unidad tiene ahora la<br />
dirección IP predeterminada 192.168.0.90.<br />
7. Vuelva a colocar la cubierta superior en su posición original.<br />
8. Vuelva a asignar la dirección IP mediante uno de los métodos descritos en la sección Asignación<br />
de una dirección IP, en la página 98.<br />
También es posible restablecer los valores predeterminados de la cámara mediante la interfaz web.<br />
Para obtener más información, consulte la ayuda en línea o el Manual del usuario disponible en el<br />
CD de productos de vídeo en red de <strong>AXIS</strong> suministrado con este producto.<br />
Acceso a la cámara desde Internet<br />
Una vez instalada, podrá acceder a la cámara de red desde su red local (LAN). Para acceder a la<br />
cámara desde Internet, deben configurarse Routers de red que permitan el tráfico entrante, que<br />
habitualmente se realiza en un puerto específico.<br />
• Puerto HTTP (puerto 80 predeterminado) para visualización y configuración<br />
• Puerto RTSP (puerto 554 predeterminado) para visualización de secuencias de vídeo H.264<br />
Consulte la documentación de su enrutador para obtener más instrucciones. Para obtener más<br />
información sobre éste y otros temas, visite la página web de soporte de <strong>Axis</strong> en www.axis.com/<br />
techsup.<br />
ESPAÑOL<br />
Más información<br />
El Manual del usuario está disponible en el sitio web de <strong>Axis</strong>, www.axis.com, o en el CD de<br />
productos de vídeo en red de <strong>AXIS</strong> suministrado con este producto.<br />
Un consejo:<br />
Visite www.axis.com/techsup para comprobar si hay disponible firmware actualizado para<br />
su cámara de red. Para consultar la versión firmware que tiene instalada actualmente, vaya<br />
a Setup > About (Configuración > Acerca de).
<strong>AXIS</strong> <strong>P5532</strong>/<strong>P5534</strong> <strong>Installation</strong> <strong>Guide</strong> Page 111<br />
Safety Notice - Battery Replacement<br />
The <strong>AXIS</strong> <strong>P5532</strong>/<strong>P5534</strong> uses a 3.0V CR2032 Lithium battery as the power supply for its internal real-time clock<br />
(RTC). Under normal conditions this battery will last for a minimum of 5 years. Low battery power affects the<br />
operation of the RTC, causing it to reset at every power-up. A log message will appear when the battery needs<br />
replacing. The battery should not be replaced unless required!<br />
If the battery does need replacing, please contact www.axis.com/techsup for assistance.<br />
• Danger of Explosion if battery is incorrectly replaced<br />
• Replace only with the same or equivalent battery, as recommended by the manufacturer.<br />
• Dispose of used batteries according to the manufacturer's instructions.<br />
Consignes de sécurité - Remplacement de la pile<br />
L'<strong>AXIS</strong> <strong>P5532</strong>/<strong>P5534</strong> utilise une pile au lithium CR2032 (3 V) pour l'alimentation de son<br />
horloge temps réel (HTR) interne. Dans des conditions d'utilisation normales, la durée de vie de cette pile est d'au<br />
moins 5 ans. Si la pile est faible, le fonctionnement de l'horloge temps réel est affecté et celle-ci se réinitialise à<br />
chaque mise en marche. Un message de journal apparaît lorsqu'il est nécessaire de remplacer la pile. La pile ne doit<br />
être remplacée que si cela s'avère nécessaire !<br />
Si la pile doit être remplacée, veuillez contacter www.axis.com/techsup pour obtenir de l’aide.<br />
• Danger d'explosion si la pile n'est pas remplacée correctement<br />
• Ne remplacez la pile que par le même modèle ou un modèle équivalent recommandé par le fabricant.<br />
• Débarrassez-vous des piles usagées conformément aux instructions du fabricant.<br />
Sicherheitshinweis zum Batterieaustausch<br />
Die <strong>AXIS</strong> <strong>P5532</strong>/<strong>P5534</strong> benötigt eine Lithium-Batterie CR2032 3,0 V, um die interne Echtzeituhr (RTC) zu versorgen. Die<br />
Lebensdauer dieser Batterie beträgt unter normalen Betriebsbedingungen mindestens 5 Jahre. Bei niedrigem<br />
Batteriestand muss die RTC bei jedem Einschalten nachgestellt werden. Es wird eine Protokollnachricht angezeigt,<br />
wenn die Batterie ausgetauscht werden muss. Die Batterie sollte nur wenn unbedingt erforderlich ausgetauscht<br />
werden.<br />
Unter www.axis.com/techsup finden Sie Informationen darüber, was Sie beim Austausch der Batterie<br />
beachten müssen.<br />
• Es besteht Explosionsgefahr, wenn die Batterie nicht ordnungsgemäß eingesetzt wurde.<br />
• Nur gegen vom Hersteller empfohlene Batterien desselben oder eines ähnlichen Typs austauschen.<br />
• Entsorgen benutzter Batterien gemäß den Herstellervorgaben.<br />
Informazioni sulla sicurezza - Sostituzione della batteria<br />
Per il dispositivo <strong>AXIS</strong> <strong>P5532</strong>/<strong>P5534</strong> viene utilizzata una batteria al litio CR2032 3.0 V per l'alimentazione dell'orologio<br />
interno in tempo reale (RTC). In condizioni di normale utilizzo, questa batteria ha una durata minima di 5 anni. Se la<br />
carica della batteria non è sufficiente, il dispositivo RTC non funziona correttamente causando il ripristino delle<br />
impostazioni ad ogni accensione. Viene visualizzato un messaggio di registro quando è necessario sostituire la<br />
batteria. Sostituire la batteria solo quando richiesto.<br />
Se è necessario sostituire la batteria, visitare la pagina Web www.axis.com/techsup per assistenza.<br />
• Pericolo di esplosione se la batteria viene sostituita in modo errato.<br />
• Sostituire la batteria solo con una dello stesso tipo o equivalente, come consigliato dal produttore.<br />
• Smaltire le batterie usate secondo quanto stabilito dal produttore.<br />
ENGLISH FRANÇAIS DEUTSCH ITALIANO ESPAÑOL<br />
Aviso de seguridad - Sustitución de la pila<br />
La <strong>AXIS</strong> <strong>P5532</strong>/<strong>P5534</strong> utiliza una pila de litio CR2032 de 3,0 V como fuente de alimentación para el reloj en tiempo real<br />
interno (RTC). En condiciones normales, esta pila dura 5 años como mínimo. Si la alimentación de la pila es baja, el<br />
funcionamiento del RTC se ve afectado y se restablece después de cada arranque. Aparecerá un mensaje de registro<br />
cuando sea necesario cambiar la pila. La pila no debe reemplazarse a menos que sea necesario.<br />
Si necesita sustituir la batería, visite la página www.axis.com/techsup para recibir asistencia.<br />
• Existe peligro de explosión si la pila no se cambia de forma correcta<br />
• Sustitúyala sólo con una pila del mismo tipo o equivalente, según la recomendación del fabricante.<br />
• Deseche las pilas usadas de acuerdo con las instrucciones del fabricante..
<strong>Installation</strong> <strong>Guide</strong> Ver. 2.30<br />
<strong>AXIS</strong> <strong>P5532</strong>/<strong>P5534</strong> Printed: June 2010<br />
© <strong>Axis</strong> <strong>Communications</strong> AB, 2009-2010 Part No. 39632