- Page 1 and 2:
0 - 13 kg BABY-SAFE plus II RÖMER
- Page 3 and 4:
User instructions We are pleased th
- Page 5 and 6:
Contents 1. Suitability ...........
- Page 7 and 8:
8.4 Re-fitting the cover ..........
- Page 9 and 10:
• This approval will be invalidat
- Page 11 and 12:
as a Travel System on a pushchair f
- Page 13 and 14:
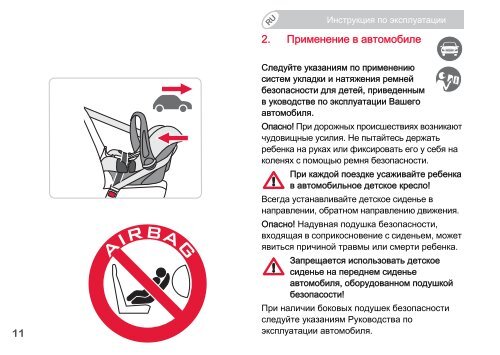
2. Use in the vehicle Please observ
- Page 15 and 16:
The BABY-SAFE plus II / BABY-SAFE p
- Page 17 and 18:
2.1 with the vehicle's 3-point belt
- Page 19 and 20:
on front passenger seat without fro
- Page 21 and 22:
• Never leave your baby unattende
- Page 23 and 24:
3.1 Adjusting the handle You can en
- Page 25 and 26:
• Handle position B : Safety stop
- Page 27 and 28:
3.2 Loosening the shoulder straps
- Page 29 and 30:
To adjust the height of the headres
- Page 31 and 32:
3.4 Securing your baby using the ha
- Page 33 and 34:
Tighten the straps until they are i
- Page 35 and 36:
3.6 Checklist to ensure that your b
- Page 37 and 38:
For the protection of all vehicle o
- Page 39 and 40:
4.1 Securing the baby seat in your
- Page 41 and 42:
Tighten the lap belt section 10 by
- Page 43 and 44:
Tighten the diagonal belt section 1
- Page 45 and 46:
Push the light blue holder 13 away
- Page 47 and 48:
• the diagonal belt section 12 ru
- Page 49 and 50:
5. Using the sunshade The sunshade
- Page 51 and 52:
6. Use as a Travel System Please re
- Page 53 and 54:
For the protection of your baby •
- Page 55 and 56:
With the infant carrier in a rearwa
- Page 57 and 58:
6.2 Removing the baby seat from the
- Page 59 and 60:
7. Using the accessories The follow
- Page 61 and 62:
Pull the elastic seamofthe rain cov
- Page 63 and 64:
Place your baby into the baby seat.
- Page 65 and 66:
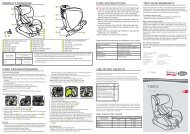
8. Care instructions To retain the
- Page 67 and 68:
• Never lubricate or oil parts of
- Page 69 and 70:
Remedy Wash out the harness buckle
- Page 71 and 72:
8.2 Cleaning Please be sure to use
- Page 73 and 74:
8.3 Removing the cover Loosen the
- Page 75 and 76:
Take the plastic eyelets 22 and the
- Page 77 and 78:
8.4 Re-fitting the cover Simply pr
- Page 79 and 80:
10. Next child safety seat Britax /
- Page 81 and 82:
The Warranty does not cover: • na
- Page 83:
Use, care and maintenance The car/b
- Page 86 and 87:
85 Übergabe-Check: 1. Vollständig
- Page 88:
87 Transfer Check: 1. Completeness
- Page 91 and 92:
90 Procès-verbal de remise : 1. In
- Page 93 and 94:
1 BABY-SAFE plus II * BABY-SAFE plu
- Page 95 and 96:
3 Contenido 1. Idoneidad ..........
- Page 97 and 98:
5 8.4 Colocación de la funda .....
- Page 99 and 100:
7 • La homologación deja de ser
- Page 101 and 102:
9 como Travel System en el chasis d
- Page 103 and 104:
11 2. Utilización en el vehículo
- Page 105 and 106:
13 El BABY-SAFE plus II / BABY-SAFE
- Page 107 and 108:
15 2.1 con el cinturón de tres pun
- Page 109 and 110:
17 ! ! ! en el asiento del copiloto
- Page 111 and 112:
19 • Preste atención a su bebé
- Page 113 and 114:
21 A I II 3.1 Regulación del asa L
- Page 115 and 116:
23 B C D • Posición de la manija
- Page 117 and 118:
25 3.2 Aflojamiento de los cinturon
- Page 119 and 120:
27 16 Así podrá ajustar la altura
- Page 121 and 122:
29 3.4 Sujeción del cinturón del
- Page 123 and 124:
31 Tense los cinturones hasta que
- Page 125 and 126:
33 3.6 Protección perfecta del beb
- Page 127 and 128:
35 recomendable que se asegure de q
- Page 129 and 130:
37 4.1 Sujeción del portabebés Pa
- Page 131 and 132:
39 Tense el cinturón de la cintur
- Page 133 and 134:
41 Tense el cinturón diagonal 12.
- Page 135 and 136:
43 Presione el soporte azul claro
- Page 137 and 138:
45 • el cinturón diagonal 12 se
- Page 139 and 140:
47 5. Utilización de la capota La
- Page 141 and 142:
49 6. Utilización como Travel Syst
- Page 143 and 144: 51 Para la protección del bebé
- Page 145 and 146: 53 Coloque el portabebés en el co
- Page 147 and 148: 55 6.2 Extracción del portabebés
- Page 149 and 150: 57 7. Utilización de los accesorio
- Page 151 and 152: 59 35 36 37 38 39 Mueva la asa 5 d
- Page 153 and 154: 61 38 1 39 16 40 1 Coloque a su be
- Page 155 and 156: 63 8. Instrucciones de mantenimient
- Page 157 and 158: 65 • No utilice nunca grasas o ac
- Page 159 and 160: 67 Posible solución Lave el broche
- Page 161 and 162: 69 8.2 Limpieza Asegúrese de utili
- Page 163 and 164: 71 8.3 Extracción de la funda Afl
- Page 165 and 166: 73 Desenganche de los ganchos los
- Page 167 and 168: 75 8.4 Colocación de la funda Rep
- Page 169 and 170: 77 10. Los próximos asientos Brita
- Page 171 and 172: 79 utilizados adecuadamente y que s
- Page 173 and 174: 81 aconsejarán y le proporcionará
- Page 176 and 177: 12. Tarjeta de garantía / Control
- Page 178 and 179: 12. Certificado de garantia / verif
- Page 181 and 182: 12. Cartolina di garanzia/ricevuta
- Page 183 and 184: 0 - 13 kg BABY-SAFE plus II RÖMER
- Page 185 and 186: Brugsvejledning Det glæder os, at
- Page 187 and 188: Indhold 1. Egnethed ...............
- Page 189 and 190: 10. Stoleudvalg ...................
- Page 191 and 192: • Godkendelsen bortfalder øjebli
- Page 193: som Travel System på et barnevogns
- Page 197 and 198: BABY-SAFE plus II / BABY-SAFE plus
- Page 199 and 200: 2.1 med køretøjets 3-punkt-sele (
- Page 201 and 202: på passagersædet uden frontairbag
- Page 203 and 204: • Hold altid øje med barnet, hvi
- Page 205 and 206: 3.1 Justering af bærehåndtaget B
- Page 207 and 208: • Bøjleposition B : Sikkerhedsst
- Page 209 and 210: 3.2 Sådan løsnes skulderselerne
- Page 211 and 212: Hovedstøttens højde tilpasses bar
- Page 213 and 214: 3.4 Fastspænding af barnet Løsn
- Page 215 and 216: Stram selerne, så de sidder tæt i
- Page 217 and 218: 3.6 Sådan sikrer du barnet korrekt
- Page 219 and 220: Passagersikkerhed Hårde opbremsnin
- Page 221 and 222: 4.1 Fastspænding af babystolen Så
- Page 223 and 224: Stram hofteselen 10 ved at trække
- Page 225 and 226: Stram diagonalselen 12. Klap D-SIP
- Page 227 and 228: Skub den lyseblå holder 13 lidt v
- Page 229 and 230: • diagonalselen 12 går gennem de
- Page 231 and 232: 5. Anvendelse af solkalechen Solkal
- Page 233 and 234: 6. Anvendelse som Travel System Fø
- Page 235 and 236: Beskyt barnet • Spænd altid barn
- Page 237 and 238: Løft babystolen mod kørselsretnin
- Page 239 and 240: 6.2 Sådan tage babystolen af barne
- Page 241 and 242: 7. Anvendelse af tilbehøret Babyst
- Page 243 and 244: Træk den elastiske sømkant til re
- Page 245 and 246:
Læg barnet ned i stolen. Træk se
- Page 247 and 248:
8. Anvisninger til vedligeholdelse
- Page 249 and 250:
• Smør eller oliér aldrig autos
- Page 251 and 252:
Hjælpeforanstaltning Sådan vaskes
- Page 253 and 254:
8.2 Rengøring Der må kun benyttes
- Page 255 and 256:
8.3 Aftagning af betrækket Løsn
- Page 257 and 258:
Tag betrækkets plastøjer 22 og gu
- Page 259 and 260:
8.4 Sådan sættes betrækket på
- Page 261 and 262:
10. Stoleudvalg Britax / RÖMER Aut
- Page 263 and 264:
Garantien dækker ikke: • naturli
- Page 265 and 266:
Anvendelse, pleje og vedligeholdels
- Page 267 and 268:
84 Формуляр контрол
- Page 269 and 270:
86 Udleveringskontrol: 1. Fuldstæn
- Page 271 and 272:
88 Overdrachtscontrole: 1. Volledig