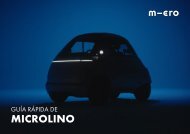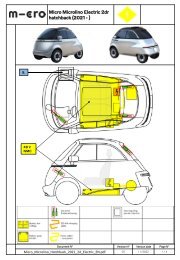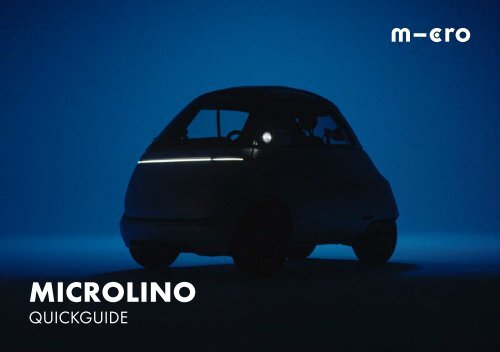
Microlino Quickguide
This is a Quickguide for the Microlino, everything you need to know.
This is a Quickguide for the Microlino, everything you need to know.

Create successful ePaper yourself
Turn your PDF publications into a flip-book with our unique Google optimized e-Paper software.
MICROLINO<br />
QUICKGUIDE<br />
<strong>Microlino</strong> <strong>Quickguide</strong> 1
EN<br />
CONTENT<br />
01<br />
01 UNLOCKING THE VEHICLE 3<br />
02 DOOR CLOSING 4<br />
03 STARTING THE VEHICLE 5<br />
04 PARKING 6<br />
05 DRIVE MODES 7<br />
06 MULTIMEDIA 8<br />
07 CHARGING 9<br />
08 DRIVING LIGHTS & HORN 11<br />
09 BATTERY OFF SWITCH 12<br />
10 IMPORTANT NOTES & TROUBLESHOOTING 13<br />
01 UNLOCKING THE VEHICLE<br />
UNLOCKING FROM THE OUTSIDE:<br />
• Electrically, using the radio remote control and then pressing the<br />
push button on the right-hand side of the vehicle (01)<br />
• Manually with the key on the right-hand side of the vehicle.<br />
To do this, press against the front door and turn the key<br />
clockwise.<br />
UNLOCKING FROM THE INSIDE:<br />
• By pressing the push-button behind the centre bar in the dashboard<br />
(02)<br />
• With the emergency release loop on the right-hand inside of<br />
the vehicle under the carpet next to the seat (03)<br />
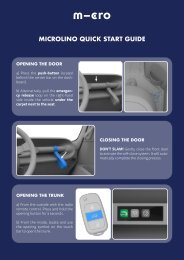
BOOT RELEASE:<br />
• From the outside with the radio remote control. The opening<br />
button must be pressed for 3 seconds.<br />
• From the inside with the opening symbol on the touch bar<br />
02<br />
03<br />
2 3
EN<br />
02 DOOR CLOSING<br />
PUSH DON’T SLAM!<br />
03 STARTING THE VEHICLE<br />
Your <strong>Microlino</strong> has a soft-close system.<br />
Please note that when closing the front door to only push slightly; the<br />
soft-close system completes the closing automatically. This protects the<br />
interior components from shocks and prolongs their life.<br />
APERTURE ANGLE<br />
1871 mm<br />
To start the vehicle, turn the ignition key to the fixed position<br />
1 or 2. The display then shows «Ready» (01). The vehicle is now<br />
ready for operation. The third ignition key position (not engaging)<br />
has no function.<br />
Before driving, make sure that the handbrake is released<br />
(see chapter 04 PARKING) and then select the desired gear (see<br />
chapter 05 DRIVING MODES & RECUPERATION).<br />
01<br />
Please note that the door opens automatically to the maximum opening<br />
angle due to the gas spring. For this reason, the opening of the door<br />
should always be slowed down by holding on to the loop to avoid damage.<br />
The maximum space needed for the open door is 60cm towards<br />
the front and 190cm upwards.<br />
3031 mm<br />
IMPORTANT!<br />
The vehicle cannot be operated at a cell temperature below -10°<br />
Celsius. When outside temperatures are -10° Celsius or lower, the<br />
vehicle should therefore be stored in a closed or heated place.<br />
4 5
EN<br />
04 PARKING<br />
PULL DON’T ROLL!<br />
The <strong>Microlino</strong> does not have a parking function. Because of this,<br />
it is necessary to pull the handbrake fully until the last click<br />
every time you park.<br />
Stop, select neutral gear & pull the handbrake.<br />
Also make sure that you release the handbrake when driving off.<br />
When the handbrake is applied, the symbol is shown in the<br />
display.<br />
05 DRIVE MODES<br />
To the left of the steering wheel is a dial with which the driving speed<br />
can be set. To select the driving modes the brake pedal must be<br />
pressed.<br />
Central position<br />
Right position<br />
Left position<br />
Button in the middle<br />
IMPORTANT!<br />
N = Neutral (idle)<br />
D = Drive<br />
R = Reverse gear<br />
= Sport mode<br />
The sport mode can be selected with the rocket button in the centre<br />
of the dial. The current driving level is shown in the display.<br />
If the vehicle is fully charged or the battery cell temperature is lower<br />
than -5° Celsius, energy recuperation may be limited to preserve<br />
the battery and electronic components. During deceleration due to<br />
recuperation, which occurs when the accelerator pedal is released,<br />
the brake lights do NOT illuminate.<br />
ENERGY RECUPERATION<br />
The vehicle recuperates energy both when the brake pedal is<br />
pressed and when the accelerator pedal is released.<br />
6 7
EN<br />
06 MULTIMEDIA<br />
07 CHARGING<br />
DISPLAY<br />
The display shows all driving-relevant data as well as warning symbols.<br />
The touch bar can be used to switch between a modern and<br />
retro display.<br />
TOUCHBAR<br />
The touchbar is used to operate all functions and adjust the settings.<br />
Tap on the symbols to activate/deactivate them. With the<br />
ventilation symbol, the fan strength can be adjusted to three different<br />
levels by tapping several times. Swiping to the left reveals<br />
further functions.<br />
SPEAKER<br />
The <strong>Microlino</strong> has a portable Bluetooth speaker. When the<br />
speaker is connected to the USB cable, it switches on automatically<br />
as soon as the vehicle is started. Search for <strong>Microlino</strong><br />
2.0 in the Bluetooth settings of your smartphone and connect it<br />
to the speaker.<br />
RECOMMENDED APPLICATIONS<br />
swipe<br />
The <strong>Microlino</strong> has a type 2 plug and can be charged with the<br />
appropriate cable at a wallbox, public AC charging station or a<br />
household socket. The on-board charger has an output of 2.6 kW<br />
(standard range = 1.35 kW).<br />
Charging at a DC fast charging station is not possible.<br />
WALLBOX / PUBLIC CHARGING STATION:<br />
1. Open the charging flap on the vehicle and pull off the grommet<br />
from the charging connection.<br />
2. Unlock the vehicle<br />
3. Connect the type 2 cable on the wallbox side<br />
4. If necessary, activate the wallbox with the corresponding<br />
card/CHIP or APP.<br />
5. As soon as the wallbox is ready to charge, connect the Type 2<br />
charging cable to the vehicle.<br />
6. Check the charging process visually. The charging bar<br />
shows the charging process in the instrument cluster with a<br />
pulsating movement of the charging bar from left to right.<br />
7. Lock the vehicle.<br />
DOMESTIC POWER SOCKET (ICCB):<br />
1. Open the charging flap on the vehicle and remove the grommet<br />
from the charging connection.<br />
2. Connecting the charger to the household socket<br />
3. Check the current setting (max. 8A is permissible).<br />
4. Check the charger’s readiness for charging (if the LED lights<br />
up red, the unit is in an error state --> see quick fixes).<br />
5. Plug in the connector on the vehicle<br />
6. Check the charging process visually. The charging bar<br />
shows the charging process in the instrument cluster with a<br />
pulsating movement of the charging bar from left to right.<br />
7. Lock the vehicle<br />
ATTENTION!<br />
Spotify<br />
TuneIn Radio App<br />
Never connect the ICCB cable to an extension cable!<br />
Due to the increased resistance, this can lead to a cable fire.<br />
8<br />
9
EN<br />
END THE CHARGING PROCESS:<br />
1. Unlock the vehicle (also unlocks the charging cable).<br />
2. Unlocking of the charging cable can take up to 10 seconds.<br />
3. Unplug the cable from the vehicle<br />
4. Remove the cable from the AC wallbox or household socket.<br />
PUBLIC CHARGING:<br />
The public charging points can be found on the applications of<br />
the charging card providers. Popular providers with access to all<br />
major charging networks include:<br />
Swisscharge<br />
evpass<br />
MOVE<br />
ADDITIONAL INFORMATION:<br />
At a cell temperature of -5°C, charging is not possible.<br />
In this case, we recommend driving the vehicle briefly to<br />
bring the cell temperature (not the same as the outside temperature)<br />
to a level suitable for charging.<br />
When charging at the household socket using an ICCB<br />
charger (In-Cable Control Box or also “household charger”),<br />
select a maximum current of 8 amps.<br />
We strongly recommend that you never leave the vehicle<br />
connected to the wallbox or the ICCB charger for<br />
more than 48 hours and ideally only for the charging time<br />
actually required. In rare cases if not done, it may occur that<br />
the 12V battery discharges and the vehicle can no longer<br />
be started.<br />
08 DRIVING LIGHTS & HORN<br />
The <strong>Microlino</strong> 2.0 is equipped with parking lights, daytime running<br />
lights, low and high beams, brake lights and direction indicators.<br />
The arrangement of the driving light switch is as follows:<br />
Lowest position<br />
Middle position<br />
Top position<br />
Side button<br />
= Daytime running light<br />
= Parking light<br />
= Low beam / high beam<br />
= Horn<br />
ADDITIONAL INFORMATION:<br />
The vehicle does not have a dusk sensor. This means that in the<br />
automatic position, the low beam is NOT activated automatically<br />
when it gets darker and must be switched on manually.<br />
10 11
EN<br />
10 IMPORTANT NOTES &<br />
TROUBLESHOOTING<br />
09 BATTERY OFF SWITCH<br />
If the vehicle is not in use for more than two weeks, the 12 V battery<br />
must be disconnected from the system using the battery-off switch.<br />
This prevents it from discharging during the standstill period.<br />
ADDITIONAL INFORMATION:<br />
If the battery off switch has been activated, the vehicle can<br />
no longer be unlocked via the radio remote control. When<br />
using the vehicle again, it must therefore be unlocked manually<br />
via the lock on the front door (apply light pressure to the front door<br />
when unlocking) and then the battery must be reactivated via the<br />
switch in the boot. The boot cannot be opened if the 12 V battery is<br />
switched off. The battery switch must be switched on from the front.<br />
IMPORTANT NOTES!<br />
VEHICLE IDENTIFICATION<br />
The vehicle identification number (VIN) is stamped into the chassis.<br />
Visible under the carpet in the passenger compartment (passenger<br />
side).<br />
TOWING HOOK<br />
The towing hook is located under the boot carpet. It is mounted on<br />
the front of the vehicle. For this, the cover in the front bumper must<br />
be removed.<br />
WHEELS AND TYRES<br />
• Recommended tyre pressure<br />
• Tightening torque wheels<br />
IMPORTANT!<br />
1.8 bar (front and rear)<br />
40 Nm<br />
The tightening torque of the wheels must be 40Nm and<br />
should not exceed this value. Otherwise, the rims may be<br />
damaged.<br />
SIDE WINDOW<br />
At temperatures below 0° Celsius, the side window guide may<br />
freeze. Please do not apply increased force, as otherwise damage<br />
to the closing device cannot be ruled out.<br />
TROUBLESHOOTING<br />
VEHICLE DOES NOT DRIVE<br />
Quick fix 1 Make sure that the door is completely closed (softclose).<br />
Quick fix 2 Remove the ignition key, wait approx. one minute<br />
and turn the ignition key back to the driving position.<br />
Quick fix 3 Turn the 12V switch to OFF, wait approx. five minutes<br />
(or until the illuminated ring around the USB ports in the<br />
front door goes out) and then turn the 12V switch back to ON.<br />
12 13
EN<br />
VEHICLE DOES NOT CHARGE<br />
Quick fix 1 Check whether there is a fault on the ICCB charger<br />
(LED lamp lights up red).<br />
If so, unplug the charger at both ends and plug it in again on<br />
the socket side. If no extension cables or adapters are used<br />
in the event of a fault and the current is set to 8 amps or less,<br />
please call in a specialist to check the house installation.<br />
Quick fix 2 Set the charging power on the ICCB charger to<br />
the lowest amperage.<br />
Quick fix 3 Try a different socket.<br />
Quick fix 4 Remove the key, wait 5 minutes until the illuminated<br />
ring around the USB ports goes out and then try again.<br />
Quick fix 5 Disconnect the charging plug. Turn the 12V switch<br />
to OFF, wait approx. five minutes (or until the illuminated ring<br />
around the USB ports in the front door goes out) and then<br />
turn the 12V switch back to ON.<br />
DOOR DOES NOT CLOSE<br />
Quick fix Make sure that the opening button on the righthand<br />
side of the vehicle is not stuck. To do this, pull the opening<br />
button slightly in the opposite direction with rocking<br />
movements.<br />
DOOR CANNOT BE OPENED MANUALLY<br />
WITH THE KEY<br />
Quick fix Press frontally against the front door and turn<br />
the key clockwise at the same time to manually unlock the<br />
lock. See also 02 DOOR CLOSING.<br />
For more information about the vehicle, refer to your<br />
manual. The language can be changed on the website.<br />
Watch the instruction video.<br />
<strong>Microlino</strong>-Assistance (by Allianz): +41 800 22 33 44<br />
14<br />
<strong>Microlino</strong> AG<br />
Bahnhofstrasse 10, 8700 Küsnacht<br />
Switzerland<br />
info @microlino-car.com<br />
www.microlino-car.com<br />
microlino-car<br />
microlino-car