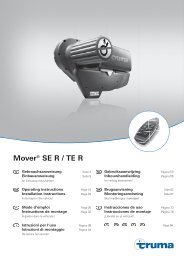
Instructions de montage / Mode d'emploi - Truma Gerätetechnik ...
Instructions de montage / Mode d'emploi - Truma Gerätetechnik ...
Instructions de montage / Mode d'emploi - Truma Gerätetechnik ...

You also want an ePaper? Increase the reach of your titles
YUMPU automatically turns print PDFs into web optimized ePapers that Google loves.
Connection<br />
Line lengths and cross-sections<br />
Implementation in accordance with EN 1648-1 and VDE 0100,<br />
part 721.<br />
Fuses F1<br />
5 A, slow-acting<br />
The fuses must be installed close to the energy source<br />
(e.g. battery). Only use the prescribed line cross-sections<br />
and fuse strengths!<br />
Energy source / consumer connection<br />
Connect the <strong>de</strong>vice to the solar modules and the battery<br />
as per the connection diagram. Ensure that the polarity is<br />
correct.<br />
Multiple solar modules must always be connected in parallel.<br />
For this purpose, only use modules with the same typical<br />
voltage values (approx. 18 V). Ask your <strong>de</strong>aler about the<br />
<strong>Truma</strong> wiring loom extension.<br />
Pay attention to the connecting or<strong>de</strong>r. Connect the consumers<br />
of the caravan (fig. A, a) directly to the battery,<br />
The optional consumer output must only be used for nonearthed<br />
small consumers (e.g. lamp).<br />
1. Connect battery to charge controller –<br />
plus and minus<br />
2. Connect solar modules to charge controller –<br />
plus and minus<br />
3. Connect DC current consumers to the optional consumer<br />
output plus - minus<br />
Deinstallation takes place in the reverse or<strong>de</strong>r.<br />
Cable fixing<br />
Secure all cables (e.g. to power sources, consumers and accessories)<br />
with cable bin<strong>de</strong>rs.<br />
Connection diagram<br />
See page 2, fig. A<br />
Taking into operation<br />
The <strong>de</strong>vice is in operation as soon as a battery is connected<br />
(pay attention to connecting or<strong>de</strong>r).<br />
25