SC 190-210:Layout 10mm Ränder.qxd - Saruhan Makina ve ...
SC 190-210:Layout 10mm Ränder.qxd - Saruhan Makina ve ...
SC 190-210:Layout 10mm Ränder.qxd - Saruhan Makina ve ...

Create successful ePaper yourself
Turn your PDF publications into a flip-book with our unique Google optimized e-Paper software.
Assembly<br />
GB<br />
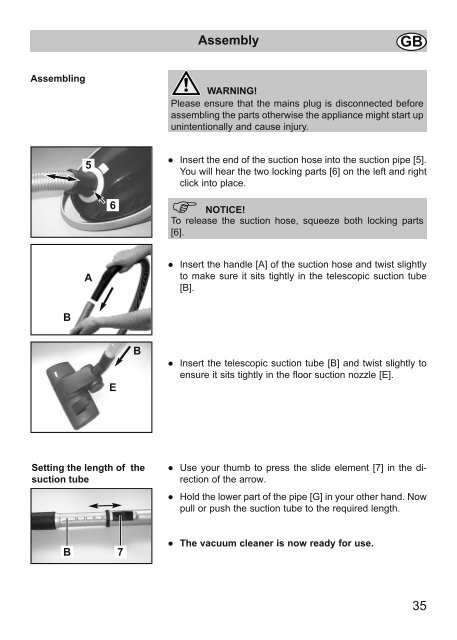
Assembling<br />
WARNING!<br />
Please ensure that the mains plug is disconnected before<br />
assembling the parts otherwise the appliance might start up<br />
unintentionally and cause injury.<br />
5<br />
● Insert the end of the suction hose into the suction pipe [5].<br />
You will hear the two locking parts [6] on the left and right<br />
click into place.<br />
6<br />
NOTICE!<br />
To release the suction hose, squeeze both locking parts<br />
[6].<br />
A<br />
● Insert the handle [A] of the suction hose and twist slightly<br />
to make sure it sits tightly in the telescopic suction tube<br />
[B].<br />
B<br />
E<br />
B<br />
● Insert the telescopic suction tube [B] and twist slightly to<br />
ensure it sits tightly in the floor suction nozzle [E].<br />
Setting the length of the<br />
suction tube<br />
● Use your thumb to press the slide element [7] in the direction<br />
of the arrow.<br />
● Hold the lower part of the pipe [G] in your other hand. Now<br />
pull or push the suction tube to the required length.<br />
B<br />
7<br />
● The vacuum cleaner is now ready for use.<br />
35