ECOTEL ISDN - teles
ECOTEL ISDN - teles
ECOTEL ISDN - teles

Create successful ePaper yourself
Turn your PDF publications into a flip-book with our unique Google optimized e-Paper software.
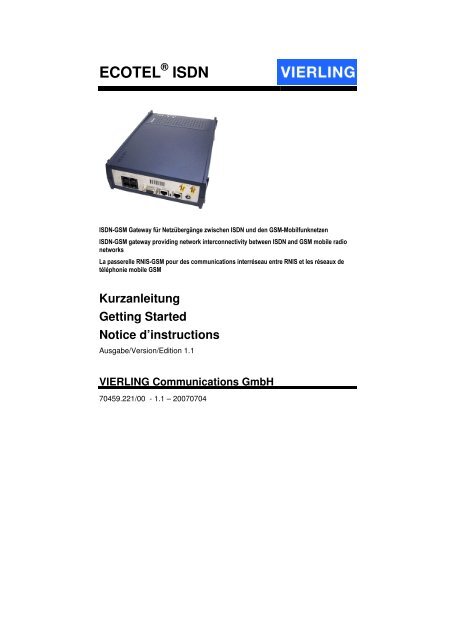
<strong>ECOTEL</strong> ® <strong>ISDN</strong><br />
<strong>ISDN</strong>-GSM Gateway für Netzübergänge zwischen <strong>ISDN</strong> und den GSM-Mobilfunknetzen<br />
<strong>ISDN</strong>-GSM gateway providing network interconnectivity between <strong>ISDN</strong> and GSM mobile radio<br />
networks<br />
La passerelle RNIS-GSM pour des communications interréseau entre RNIS et les réseaux de<br />
téléphonie mobile GSM<br />
Kurzanleitung<br />
Getting Started<br />
Notice d’instructions<br />
Ausgabe/Version/Edition 1.1<br />
VIERLING Communications GmbH<br />
70459.221/00 - 1.1 – 20070704
VIERLING<br />
VIERLING Communications GmbH<br />
Pretzfelder Straße 21, D-91320 Ebermannstadt<br />
Postfach 11 65, D-91316 Ebermannstadt<br />
E-Mail: info@vierling.de<br />
Internet: http://www.vierling.de<br />
© 2007 VIERLING Communications GmbH, Ebermannstadt<br />
Alle Rechte vorbehalten. Jegliche Vervielfältigung, Verarbeitung oder<br />
Verbreitung dieses Dokuments oder seines Inhalts, auch auszugsweise, gleich<br />
nach welchem Verfahren, ist ohne vorherige schriftliche Genehmigung durch<br />
die VIERLING Communications GmbH untersagt.<br />
Änderungen ohne vorherige Ankündigung behalten wir uns vor. Der vorliegende<br />
Text wurde mit größter Sorgfalt erarbeitet. Sollte er dennoch Fehler enthalten,<br />
kann die VIERLING Communications GmbH dafür keine Haftung übernehmen.<br />
All rights reserved. Any reproduction, further processing or dissemination of<br />
this document or its contents, whether in whole or in part, by any means is<br />
expressly prohibited without the prior written consent of VIERLING<br />
Communications GmbH.<br />
We reserve the right to make changes without prior notice. Please note that<br />
great care was exercised in the preparation of this text.<br />
However, VIERLING Communications GmbH does not accept any liability for<br />
any errors that might be present in the text.<br />
Tous droits réservés. Toute reproduction, traitement ou diffusion de ce<br />
document ou de son contenu, même partiellement, est interdit sans un accord<br />
écrit préalable de la société VIERLING Communications GmbH.<br />
Nous nous réservons le droit de modifier ce texte sans notification préalable. Le<br />
présent texte a été élaboré avec le plus grand soin. S'il devait toutefois<br />
comporter des erreurs, VIERLING Communications en décline toute<br />
responsabilité.<br />
2 70459.221/00 - 1.1 – 20070704 – <strong>ECOTEL</strong> ® <strong>ISDN</strong>
Inhalt / Contents / Table des matières<br />
VIERLING<br />
1. DAS <strong>ISDN</strong>-GSM-GATEWAY.......................................................5<br />
2. HARDWAREBESCHREIBUNG ..................................................6<br />
2.1 Geräte anschließen ...................................................................6<br />
3. INSTALLATION ........................................................................11<br />
3.1 Gerät vorbereiten.....................................................................11<br />
3.2 Weitere Grundeinstellungen ..................................................14<br />
3.2.1 Vorwahlnummern eingeben............................................14<br />
3.2.2 Schnittstellen aktivieren..................................................15<br />
3.2.3 <strong>ISDN</strong>-Schnittstellen konfigurieren..................................15<br />
3.2.4 Rufnummern der SIM-Karten eingeben .........................16<br />
3.2.5 Routingtabelle anpassen.................................................19<br />
1. THE <strong>ISDN</strong>-GSM GATEWAY.....................................................22<br />
2. HARDWARE DESCRIPTION....................................................23<br />
2.1 Connect the device .................................................................23<br />
2.2 Insert the SIM cards ................................................................26<br />
3. INSTALLATION ........................................................................27<br />
3.1 Prepare the device...................................................................27<br />
3.2 Further basic settings.............................................................30<br />
3.2.1 Enter the prefixes.............................................................30<br />
3.2.2 Activate interfaces ...........................................................31<br />
3.2.3 Configure <strong>ISDN</strong> interfaces...............................................31<br />
3.2.4 Enter telephone numbers of the SIM cards...................32<br />
3.2.5 Edit routing table..............................................................35<br />
1. PASSERELLES <strong>ISDN</strong>-GSM .....................................................38<br />
2. DESCRIPTION MATERIELLE..................................................39<br />
<strong>ECOTEL</strong> ® <strong>ISDN</strong> - 70459.221/00 - 1.1 – 20070704 3
VIERLING<br />
2.1 Raccordement des appareils .................................................39<br />
2.2 Introduction des cartes SIM ...................................................42<br />
3. INSTALLATION ........................................................................44<br />
3.1 Préparation de l’appareil ........................................................44<br />
3.2 Autres réglages de base.........................................................48<br />
3.2.1 Saisie des indicatifs.........................................................48<br />
3.2.2 Activation des interfaces.................................................48<br />
3.2.3 Configuration des interfaces <strong>ISDN</strong> (RNIS).....................48<br />
3.2.4 Saisie des numéros d’appel des cartes SIM .................50<br />
3.2.5 Adaptation du tableau de routage..................................53<br />
4 70459.221/00 - 1.1 – 20070704 – <strong>ECOTEL</strong> ® <strong>ISDN</strong>
1. Das <strong>ISDN</strong>-GSM-Gateway<br />
VIERLING<br />
<strong>ECOTEL</strong> ® <strong>ISDN</strong> stellt kostengünstige Verbindungen zwischen <strong>ISDN</strong>-<br />
und GSM-Netzen her. Dadurch sinken Verbindungskosten deutlich.<br />
Die Anzahl der GSM-Kanäle ist bis vier bzw. acht* skalierbar, und die<br />
GSM-Module sind für alle GSM-Netze geeignet (850, 900, 1800 und<br />
1900 MHz).<br />
Ein integrierter Antennensplitter gewährleistet eine einfache Installation<br />
mit maximal zwei Antennen.<br />
Einsatzmöglichkeiten reichen von der Integration in eine vorhandene<br />
TK-Infrastruktur über die Anbindung mobiler Büros bis hin zur verteilten<br />
Installation mehrerer Gateways mit SIM Card Server-Integration* und<br />
gemeinsamer Konfigurationssoftware.<br />
*nur <strong>ISDN</strong>2-2x<br />
<strong>ECOTEL</strong> ® <strong>ISDN</strong> - 70459.221/00 - 1.1 – 20070704 5
VIERLING<br />
2. Hardwarebeschreibung<br />
2.1 Geräte anschließen<br />
<strong>ECOTEL</strong> ® eignet sich für Tischaufstellung und Wandmontage.<br />
Schließen Sie das Gerät mit den entsprechenden Kabeln über folgende<br />
Schnittstellen an:<br />
<strong>ECOTEL</strong> ® <strong>ISDN</strong><br />
Schnittstellen-Buchsen beim <strong>ECOTEL</strong> ® <strong>ISDN</strong>2-12x<br />
Schnittstellen-Buchsen beim <strong>ECOTEL</strong> ® <strong>ISDN</strong>2-14x<br />
Schnittstellen-Buchsen beim <strong>ECOTEL</strong> ® <strong>ISDN</strong>2-24x<br />
6 70459.221/00 - 1.1 – 20070704 – <strong>ECOTEL</strong> ® <strong>ISDN</strong>
Schnittstellen-Buchsen beim <strong>ECOTEL</strong> ® <strong>ISDN</strong>2-28x<br />
DC<br />
Anschluss für mitgeliefertes Netzteil<br />
VIERLING<br />
Achtung: Bei Einsatz eines nicht von VIERLING zugelassenen<br />
Netzgerätes erlischt die Garantie für das<br />
<strong>ECOTEL</strong> ® ! Die verschiedenen <strong>ECOTEL</strong> ® -Typen benötigen<br />
unterschiedliche Netzgeräte, da sie sich in der Leistungsaufnahme<br />
unterscheiden!<br />
Ant 1, Ant 2 Anschlüsse für GSM-Antennen<br />
V.24 *<br />
Anschluss an Service-PC um <strong>ECOTEL</strong> zu konfigurieren<br />
USB ** Anschluss an Service-PC um <strong>ECOTEL</strong> zu konfigurieren<br />
I/O Anschaltung externer Kontakte<br />
LAN Anschaltung ans Netzwerk (Ethernet) mit Standard-<br />
Netzwerkkabel RJ45 für Konfiguration<br />
BRI 1, BRI 2 Anschluss an die TK-Anlage bzw. an das <strong>ISDN</strong>-<br />
Festnetz (Anschlusskabel RJ45)<br />
* nur <strong>ISDN</strong>2-1x<br />
** nur <strong>ISDN</strong>2-2x<br />
<strong>ECOTEL</strong> ® <strong>ISDN</strong> - 70459.221/00 - 1.1 – 20070704 7
VIERLING<br />
Anschaltung an BRI1 oder BRI2<br />
Welche der Buchsen BRI1 bzw. BRI2 verwendet wird, hängt im<br />
Wesentlichen davon ab, in welchem Modus die TK-Anlage betrieben<br />
wird, welche Ports an der TK-Anlage frei sind und ob diese LCR (Least<br />
Cost Routing) Features zur Verfügung stellt. Nachfolgend sind die<br />
häufigsten Fälle beschrieben:<br />
TK-Anlage als LCR<br />
Beispiel 1:<br />
<strong>ECOTEL</strong> ® wird mit BRI2/NT an<br />
externen S0-Port der TK-Anlage<br />
angeschlossen (als Netz eingerichtet)<br />
Betriebsmodus wie in TK-Anlage<br />
(meist PTMP)<br />
Anschluss der Extern-Leitung der TK-<br />
Anlage an BRI2 / NT des <strong>ECOTEL</strong> ®<br />
Zur Taktsynchronisation muss<br />
<strong>ECOTEL</strong> ® über BRI1/TE (als Endgerät<br />
eingerichtet) an den NTBA<br />
angeschlossen werden.<br />
Beispiel 2:<br />
<strong>ECOTEL</strong> ® wird als Endgerät an TK-<br />
Anlage angeschlossen<br />
Betriebsmodus wie in TK-Anlage<br />
(meist PTMP)<br />
Anschluss der Nebenstelle der TK-<br />
Anlage an BRI1 / TE des <strong>ECOTEL</strong> ®<br />
8 70459.221/00 - 1.1 – 20070704 – <strong>ECOTEL</strong> ® <strong>ISDN</strong>
<strong>ECOTEL</strong> ® als LCR<br />
Beispiel 3:<br />
<strong>ECOTEL</strong> ® wird in die Amtsleitung<br />
eingeschleift<br />
Betriebsmodus wie Festnetzanschluss<br />
bzw. TK-Anlage<br />
Anschluss des NTBA an BRI1 / TE<br />
des <strong>ECOTEL</strong> ®<br />
Anschluss der TK-Anlage an<br />
BRI2 / NT des <strong>ECOTEL</strong> ®<br />
VIERLING<br />
Weitere Informationen zu den Anschlussmöglichkeiten, insbesondere<br />
zur <strong>ISDN</strong>-Anschaltung finden Sie im Benutzerhandbuch Kapitel 9 auf der<br />
<strong>ECOTEL</strong>-CD.<br />
2.2 Einlegen der SIM-Karten<br />
Achtung: Legen Sie vor der Konfiguration noch keine<br />
SIM-Karte(n) in das Gerät ein, wenn SIM-PIN aktiviert ist!<br />
Grund: Nach dem Einschalten versucht <strong>ECOTEL</strong> ® sonst<br />
sofort, sich mit der SIM-Karte ins Netz einzubuchen. Da<br />
<strong>ECOTEL</strong> ® die gültige SIM-PIN noch nicht kennt, schlägt<br />
dies fehl. Nach zwei Fehlversuchen blockiert <strong>ECOTEL</strong> ®<br />
weitere Versuche.<br />
<strong>ECOTEL</strong> ® <strong>ISDN</strong>2-1x: Stecken Sie SIM-Karten in die SIM-Einschübe am<br />
Gehäuse.<br />
<strong>ECOTEL</strong> ® <strong>ISDN</strong>2-2x: Stecken Sie die SIM-Karten in den PCMCIA-SIM-<br />
Kartenhalter (Zubehör) und halten die PINs für die einzelnen SIM-Karten<br />
bereit.<br />
Steckplätze für SIM-Kartenhalter beim <strong>ECOTEL</strong> ® <strong>ISDN</strong>2-2x<br />
<strong>ECOTEL</strong> ® <strong>ISDN</strong> - 70459.221/00 - 1.1 – 20070704 9
VIERLING<br />
HINWEIS:<br />
Die Steckplätze auf den SIM-Kartenhaltern sind<br />
entsprechend der dazugehörigen GSM-Kanäle nummeriert.<br />
Falls nur eine SIM-Karte pro Kanal verwendet werden soll,<br />
muss stets der Steckplatz A (1A, 2A, ...) verwendet werden.<br />
Achtung: Die SIM-Karten und die SIM-Kartenhalter<br />
sind elektronische Bauteile, die durch elektrostatische<br />
Entladung zerstört werden können. Um dies zu<br />
verhindern müssen die SIM-Karten an einem ESD-<br />
Arbeitsplatz bestückt werden!<br />
10 70459.221/00 - 1.1 – 20070704 – <strong>ECOTEL</strong> ® <strong>ISDN</strong>
3. Installation<br />
Besonderheiten der Modelle:<br />
<strong>ECOTEL</strong> ® <strong>ISDN</strong>2-28x und <strong>ECOTEL</strong> ® <strong>ISDN</strong>2-14x<br />
VIERLING<br />
Diese Geräte bestehen im Prinzip aus zwei <strong>ECOTEL</strong> ® -Geräten in<br />
einem gemeinsamen Gehäuse. Sie müssen bei Inbetriebnahme und<br />
Konfiguration als zwei getrennte Geräte behandelt werden. Das<br />
bedeutet insbesondere:<br />
Legen Sie im Modul Service Gear zwei separate Geräte an<br />
Schließen Sie jede Gerätehälfte für sich an die gewünschten Netze an<br />
(<strong>ISDN</strong>, TK-Anlage, LAN usw.)<br />
Konfigurieren Sie jede Gerätehälfte für sich über die jeweilige<br />
Schnittstellenbuchse<br />
Achten Sie bei allen Upload- und Downloadvorgängen darauf, dass<br />
Sie mit der richtigen Gerätehälfte verbunden sind<br />
3.1 Gerät vorbereiten<br />
Das Handbuch finden Sie auf der CD-ROM unter<br />
:\help\Manual_DE.pdf,<br />
oder von der Konfigurationssoftware aus über das Menü Hilfe ><br />
Drucken...<br />
1 Installieren Sie die Konfigurationssoftware (ServiceGear).<br />
Prüfen Sie, ob Sie auf der CD-ROM die neueste Version haben.<br />
Sie ist downloadbar von<br />
http://webftp.vierling.de/public/index.php?dir=webftp_<strong>ECOTEL</strong>_VoIP/<br />
Entfernen Sie eine evtl. vorhandene ältere Version, bevor Sie das<br />
Setup ausführen.<br />
(Die im folgenden beschriebenen Funktionen und Menüpunkte<br />
beziehen sich auf die Version 4.5 der Service Gear Software.)<br />
2 Bereiten Sie die Konfigurationsschnittstelle vor.<br />
Sie können V.24 (<strong>ECOTEL</strong> ® <strong>ISDN</strong>2-1x) oder USB (<strong>ECOTEL</strong> ®<br />
<strong>ISDN</strong>2-2x) als Konfigurationsschnittstelle verwenden.<br />
<strong>ECOTEL</strong> ® <strong>ISDN</strong> - 70459.221/00 - 1.1 – 20070704 11
VIERLING<br />
So richten Sie die USB-Schnittstelle ein:<br />
• Konfigurationsrechner und <strong>ECOTEL</strong> ® mit dem USB-Kabel<br />
verbinden<br />
• Rechner starten, <strong>ECOTEL</strong> ® einschalten<br />
• Windows meldet, dass eine neue Hardware gefunden wurde<br />
• OK, um den Hardware-Assistenten zu starten<br />
• Anweisungen des Assistenten befolgen, folgende Option wählen:<br />
• Hardware-Treiber installieren<br />
• Nach einem passenden Treiber für das Gerät suchen<br />
• Auf Schaltfläche Durchsuchen klicken, auf der CD die<br />
Treiberdatei :\USB_Drivers\ftdibus.inf auswählen<br />
• Installation fertig stellen<br />
• Windows meldet erneut, dass eine neue Hardware gefunden<br />
wurde<br />
• Obige Schritte wiederholen, gleiche Treiberdatei auswählen<br />
• Windows-Gerätemanager öffnen mit rechtem Mausklick auf<br />
Arbeitsplatz > Verwalten > Computerverwaltung (lokal) > System<br />
> Gerätemanager<br />
• Unter Anschlüsse (COM und PLT) erscheint nun ein neuer<br />
Eintrag, z.B. USB Serial Port (COM3), USB Serial Port (COM4)<br />
o.Ä.<br />
• Notieren Sie sich diese COM-Nummer. Bei der Konfiguration<br />
wählen Sie die Schnittstelle unter dieser Bezeichnung aus.<br />
3 Starten Sie ServiceGear und legen Sie ein neues Gerät an.<br />
• Baumknoten Geräte markieren<br />
Bearbeiten > Gruppe hinzufügen<br />
Namen eingeben, OK<br />
• Gruppe markieren<br />
12 70459.221/00 - 1.1 – 20070704 – <strong>ECOTEL</strong> ® <strong>ISDN</strong>
Bearbeiten > Gerät hinzufügen<br />
Eigenschaften-Dialog erscheint<br />
VIERLING<br />
• Eigenschaften bearbeiten:<br />
Namen eingeben, Gerätetyp auswählen<br />
Im Feld Zugriff über Schnittstelle wählen, über die das Gerät<br />
konfiguriert wird:<br />
- USB (entsprechenden COM-Port eingeben, siehe oben)<br />
oder<br />
- IP (IP-Adresse für Konfiguration eingeben)<br />
Sicherheitscode leer lassen (Auslieferungszustand), OK<br />
4 Geben Sie die SIM-PINs ein und laden Sie diese ins <strong>ECOTEL</strong> ®<br />
sofern die Verwendung von PINs für die SIM-Karten aktiviert ist.<br />
Setzen Sie keine SIM-Karten ein, bevor die korrekten PINs ins Gerät<br />
übertragen wurden! Anderenfalls könnten die SIM-Karten beim<br />
Versuch, sich mit ungültigen PINs ins Netz einzubuchen, blockiert<br />
werden.<br />
4 a) <strong>ECOTEL</strong> ® <strong>ISDN</strong>2-1x<br />
• Zum Modul Firmware Tools wechseln:<br />
Extras > Start > Firmware Tools<br />
• Alle SIM-Karten entfernen!<br />
(falls schon eingelegt)<br />
• SIM-PINs eintragen:<br />
GSM-Parameter > Modul 1 ><br />
Schaltfläche PIN eingeben<br />
PIN der SIM-Karte eingeben, die im betreffenden Modul<br />
verwendet werden soll<br />
• Für die übrigen Module wiederholen<br />
• SIM-Karten einlegen<br />
4 b) <strong>ECOTEL</strong> ® <strong>ISDN</strong>2-2x<br />
Halten Sie die bestückten SIM-Kartenhalter bereit. Notieren Sie sich<br />
die PINs zu den entsprechenden Steckplätzen.<br />
• Extras > Start > SIM Management<br />
<strong>ECOTEL</strong> ® <strong>ISDN</strong> - 70459.221/00 - 1.1 – 20070704 13
VIERLING<br />
• Datei > Neu<br />
In der Liste Vorhandene Versionen die neueste auswählen<br />
• Baumknoten SIM-Kartenhalter auswählen und verwendete SIM-<br />
Kartenhalter (8, 16 oder 32) einstellen<br />
• Baumknoten GSM 1 auswählen<br />
Bei Eingelegt in: Steckplatz A auswählen<br />
Im Feld PIN entsprechende PIN eingeben<br />
• Für alle Steckplätze und alle GSM-Module wiederholen<br />
• Konfigurationsdatei speichern<br />
Datei > Speichern<br />
Dateinamen <strong>ECOTEL</strong> verwenden<br />
• Konfigurationsdatei ins Gerät downloaden<br />
Übertragung > in <strong>ECOTEL</strong> speichern ...<br />
5 Führen Sie die SIM-Kartenhalter in den Kartenhalter-Einschub<br />
an der Stirnseite des Gehäuses ein.<br />
Stellen Sie sicher, dass die Antennen angeschlossen sind.<br />
Sobald die SIM-Karten sich ins Netz eingebucht haben, hören die<br />
Lampen GSM auf zu blinken und erlöschen.<br />
3.2 Weitere Grundeinstellungen<br />
3.2.1 Vorwahlnummern eingeben<br />
• Wechseln Sie zum Modul Gateway Configuration:<br />
In der Baumansicht auf das Gerät doppelklicken<br />
(oder über Extras > Start > Gateway Configuration).<br />
• Wählen Sie in der Baumansicht Eigenschaften aus: Geben Sie im<br />
Feld Kennzahlen > die entsprechenden Kennzahlen ein:<br />
International,<br />
14 70459.221/00 - 1.1 – 20070704 – <strong>ECOTEL</strong> ® <strong>ISDN</strong>
National<br />
Landeskennzahl<br />
3.2.2 Schnittstellen aktivieren<br />
VIERLING<br />
• Im Modul Gateway Configuration:<br />
(Extras > Start > Gateway Configuration).<br />
Wählen Sie in der Baumansicht unter <strong>ISDN</strong>-Schnittstellen oder GSM-<br />
Schnittstellen die jeweilige Schnittstelle aus.<br />
• An folgenden Stellen im Kontrollkästchen Schnittstelle aktivieren<br />
den Haken gesetzt lassen oder nach Bedarf entfernen:<br />
<strong>ISDN</strong>-Schnittstellen > BRI 1 (bzw. 2)<br />
(je nach <strong>ISDN</strong>-Anschlussart)<br />
GSM-Schnittstellen > GSM 1 (bzw. 2, 3, ...)<br />
3.2.3 <strong>ISDN</strong>-Schnittstellen konfigurieren<br />
• Wechseln Sie zum Modul Basic Configuration:<br />
Extras > Start > Basic Configuration<br />
In der Baumansicht <strong>ISDN</strong>-Schnittstellen auswählen und die<br />
Einstellungen je nach <strong>ISDN</strong>-Anschlussart vornehmen.<br />
Folgende Einstellungen gelten für die auf Seite 8 beschriebenen <strong>ISDN</strong>-<br />
Anschlussarten:<br />
Beispiel 1 (Anschluss an externen S0-Port in NT-Betriebsart an BRI2)<br />
BRI1* BRI2 (100 Ohm)<br />
Buchse TE NT<br />
Schnittstelle aktivieren ja ja<br />
L1-Betrieb Endgerät Netz<br />
Anschluss PTP/PTMP** PTMP<br />
L2-Betrieb Endgerät Netz<br />
L3-Betrieb Endgerät Netz<br />
* <strong>ECOTEL</strong> muss mit der TK-Anlage synchron laufen. Hierzu ist BRI 1 mit dem<br />
NTBA zu verbinden.<br />
** abhängig von der Betriebsart des NTBA.<br />
<strong>ECOTEL</strong> ® <strong>ISDN</strong> - 70459.221/00 - 1.1 – 20070704 15
VIERLING<br />
Beispiel 2 (Anschluss als Endgerät TE/BRI1 an internen S0-Port der TK-<br />
Anlage)<br />
BRI1 BRI2 (100 Ohm)<br />
Buchse TE -<br />
Schnittstelle aktivieren ja nein<br />
L1-Betrieb Endgerät ...<br />
Anschluss PTMP ...<br />
L2-Betrieb Endgerät ...<br />
L3-Betrieb Endgerät ...<br />
Beispiel 3 (TE/BRI1 an NTBA, NT/BRI2 an Amtsleitung der TK-Anlage):<br />
BRI1 BRI2 (100 Ohm)<br />
Buchse TE NT<br />
Schnittstelle aktivieren ja ja<br />
L1-Betrieb Endgerät Netz<br />
Anschluss PTP PTP<br />
L2-Betrieb Endgerät Netz<br />
L3-Betrieb Endgerät Netz<br />
3.2.4 Rufnummern der SIM-Karten eingeben<br />
3.2.4.1 <strong>ECOTEL</strong> ® <strong>ISDN</strong>2-1x<br />
• Wechseln Sie zum Modul Gateway Configuration:<br />
Extras > Start > Gateway Configuration<br />
Aufruf: Im Hauptfenster Gateway Configuration unterhalb des Knotens<br />
GSM-Schnittstellen und unterhalb von GSM 1 (2, 3, ...) den Baumknoten<br />
SIM-Eigenschaften markieren.<br />
Mobilfunknummer Rufnummer der SIM-Karte, die im GSM-Modul<br />
eingesetzt ist<br />
Service-Center-<br />
Nummer<br />
Nummer des SMS-Service-Centers der eingesetzten<br />
SIM-Karte. Diese Nummer wird benötigt, damit vom<br />
<strong>ECOTEL</strong> ® SMS-Nachrichten versendet werden<br />
können<br />
16 70459.221/00 - 1.1 – 20070704 – <strong>ECOTEL</strong> ® <strong>ISDN</strong>
Taktung in<br />
Sekunden<br />
Einbuchen auf eine<br />
bestimmte LAIN<br />
VIERLING<br />
Hier ist die Gebührentaktung des Tarifmodells der<br />
eingesetzten SIM-Karte einzutragen. Auf Basis<br />
dieses Wertes wird das Erreichen der<br />
Zeitbegrenzung (s. u.) berechnet. Der erste Eintrag<br />
gibt die Dauer des ersten Gebührentaktes in<br />
Sekunden an, der zweite Eintrag den Abstand<br />
zwischen allen folgenden.<br />
Beispiel: 60 / 1 bedeutet, dass für den ersten Takt die<br />
Gebühren für 60 Sekunden berechnet werden, für<br />
jeden weiteren Takt die Gebühren für eine Sekunde.<br />
LAIN Hier ist die LAIN (Location Area Identification<br />
Number) des GSM-Netzes einzutragen, in das sich<br />
die eingesetzte SIM-Karte einbuchen soll.<br />
Ist keine LAIN eingetragen, bucht sich die SIM-Karte<br />
in das Netz mit dem besten Empfang ein.<br />
Genaueres über die lokal verfügbaren Netzbetreiber<br />
können Sie im Modul Firmware Tools auf der Seite<br />
GSM-Parameter ermitteln.<br />
Roaming erlaubt Wenn Roaming erlaubt ist, kann sich eine SIM-Karte<br />
auch in ein fremdes GSM-Netz einbuchen, sofern das<br />
Einbuchen unter der angegebenen LAIN fehlschlägt.<br />
Zeitbegrenzung für<br />
die gesamte<br />
Gesprächszeit<br />
Maximal ...<br />
Minuten<br />
Ist Roaming nicht erlaubt, darf sich die SIM-Karte<br />
ausschließlich unter der angegebenen LAIN<br />
einbuchen.<br />
Hier kann eine maximale Gesamtdauer für alle Gespräche<br />
über diese SIM-Karte eingestellt werden. Ist<br />
sie ausgeschöpft, führt das <strong>ECOTEL</strong> ® keine Gespräche<br />
mehr über diesen GSM-Kanal.<br />
Dieses Kontingent gilt jeweils für ein bestimmtes<br />
Intervall, z. B. pro Monat, danach wird der Zähler zurückgesetzt<br />
und das Kontingent steht erneut zur Verfügung.<br />
Ist für ein abgehendes Gespräch im Routing kein bestimmtes<br />
GSM-Modul vorgegeben, so wird das GSM-<br />
Modul mit der geringsten zeitlichen Auslastung<br />
gewählt.<br />
Erlaubte Gesprächsdauer pro Intervall<br />
<strong>ECOTEL</strong> ® <strong>ISDN</strong> - 70459.221/00 - 1.1 – 20070704 17
VIERLING<br />
pro ... Länge des maßgeblichen Intervalls<br />
ab (tt.mm.jjjj) ... Beginn des ersten Intervalls (um 00:00 Uhr des<br />
eingegebenen Tages)<br />
Tarifierung Legt für ankommende Rufe von der GSM-Seite fest,<br />
welche Tarifierungsinformationen der ausgehenden<br />
Seite zur Verfügung gestellt werden. Mögliche Werte:<br />
Keine Weitergabe von Tarifeinheiten, oder<br />
Erzeugung der Tarifeinheiten durch <strong>ECOTEL</strong>.<br />
Die Weitergabe der Tarifeinheiten vom GSM-Netz ist<br />
derzeit nicht möglich, da die GSM-Netze diese<br />
Information nicht senden.<br />
Die folgenden Parameter steuern die Erzeugung der<br />
Tarifeinheiten durch <strong>ECOTEL</strong> ® :<br />
t1 Dauer des ersten Tarifierungsintervalls<br />
x1 Übermittelte Einheiten für das erste<br />
Tarifierungsintervall<br />
t2 Dauer jedes weiteren Tarifierungsintervalls<br />
x2 Übermittelte Einheiten für jedes weitere<br />
Tarifierungsintervall<br />
3.2.4.2 <strong>ECOTEL</strong> ® <strong>ISDN</strong>2-2x<br />
Hinweis: Inwieweit diese Informationen auf der<br />
<strong>ISDN</strong>-Seite an den gerufenen Teilnehmer<br />
weitergeleitet werden, hängt von den Einstellungen<br />
der <strong>ISDN</strong>-Schnittstelle ab!<br />
• Wechseln Sie zum Modul SIM Management:<br />
Extras > Start > SIM Management<br />
• Falls keine Konfigurationsdatei gefunden wird, legen Sie eine neue<br />
an<br />
Datei > Neu<br />
In der Liste Vorhandene Versionen die neueste auswählen<br />
(Konfigurationsdatei vom Typ *.SMC wird erzeugt und in die Anzeige<br />
geladen)<br />
• Geben Sie die SIM-Kartenhalter-Typen ein:<br />
Auf der Seite SIM-Kartenhalter die zutreffenden Kartenhalter-Typen<br />
18 70459.221/00 - 1.1 – 20070704 – <strong>ECOTEL</strong> ® <strong>ISDN</strong>
VIERLING<br />
einstellen (Slot 2 oben, Slot 1 unten!)<br />
(Falls die SIM-Karten nicht im <strong>ECOTEL</strong> ® betrieben werden:<br />
Option Extern wählen, IP-Adresse des SIM-Management-Centers<br />
angeben)<br />
• Geben Sie die SIM-Eigenschaften ein:<br />
In der Baumstruktur GSM 1 auswählen<br />
Eingelegt in: Steckplatz A selektieren<br />
Die Daten eingeben, die zur SIM-Karte auf Steckplatz 1A auf dem<br />
SIM-Kartenhalter 1 gehören:<br />
PIN<br />
Mobilfunknummer (eigene Rufnummer der SIM-Karte)<br />
Service-Center-Nummer (Rufnr. des SMS Service Centers)<br />
Wiederholen Sie die Schritte für die übrigen SIM-Karten<br />
Zuordnung der Karten zu den GSM-Modulen und Steckplätzen.<br />
• Einlegen der SIM-Karten.<br />
• SIM-Karten freischalten:<br />
Falls mehr als eine SIM-Karte pro GSM-Modul eingesetzt sind:<br />
Seite GSM 1 > SIM-Gruppe 1<br />
Unter Nutze Karte(n) die gewünschten Karten kennzeichnen<br />
Unter Karte umschalten einen anderen Modus als Nie einstellen<br />
• Wiederholen Sie die Einstellungen für die Module GSM 2(, 3, ...),<br />
jeweils SIM-Gruppe 1<br />
• Konfigurationsdatei speichern:<br />
Datei > Speichern<br />
Als Dateiname muss <strong>ECOTEL</strong> eingegeben werden<br />
(die Dateiendung .SMC wird automatisch ergänzt)<br />
Den vorgeschlagenen Pfad beibehalten<br />
• Konfigurationsdatei ins Gerät downloaden:<br />
Übertragung > In <strong>ECOTEL</strong> speichern...<br />
(Im Fenster Kommunikation wird der Verlauf des Downloads<br />
angezeigt)<br />
3.2.5 Routingtabelle anpassen<br />
Mit einer sinnvollen Routingtabelle passen Sie das Routingverhalten<br />
optimal an Ihre Bedürfnisse an und können Gebühren sparen. Im<br />
<strong>ECOTEL</strong> ® <strong>ISDN</strong> - 70459.221/00 - 1.1 – 20070704 19
VIERLING<br />
Benutzerhandbuch Kap. 5 Einführung in die Routingtabelle werden<br />
Struktur und Syntax der Routingtabelle ausführlich beschrieben. Ein<br />
Routing-Assistent erleichtert das Anlegen der Routingeinträge. Der<br />
Aufruf erfolgt über den Button Routing-Assistent....<br />
Nachfolgend finden Sie Beispiele für Routingeinträge, die für die<br />
jeweilige Anschlussart vorteilhaft sind.<br />
• Wechseln Sie zum Modul Routing Table:<br />
Extras > Start > Routing Table<br />
• Vorhandene Routingtabelle laden:<br />
Upload von Ecotel<br />
(Die Routingtabelle erscheint im Bearbeitungsfenster.<br />
Im Auslieferungszustand enthält das Gerät eine Standard-Routingtabelle)<br />
• Tabelleneinträge bearbeiten:<br />
Lassen Sie die Einträge vom Typ (...) cm ... unverändert!<br />
• Ersetzen Sie, falls notwendig, die übrigen Einträge durch diejenigen,<br />
die zu Ihrer gewählten Anschlussart passen. Mehr dazu im Benutzerhandbuch,<br />
Kap. 3.2 <strong>ISDN</strong>-Schnittstelle: Wahl der Anschlussart.<br />
<strong>ISDN</strong>-Anschluss wie Beispiel 1: TK-Anlage als LCR (BRI2/NT), Seite<br />
8:<br />
Rufe von BRI2 (PBX) mit Zielrufnummer 015..., 016... oder 017... gehen<br />
nach GSM<br />
Alle Rufe von GSM gehen nach BRI2 (PBX)<br />
(oI2d01[5-7]*#) n G:d<br />
(oGd*#) n I2:d<br />
<strong>ISDN</strong>-Anschluss wie Beispiel 2: TK-Anlage als LCR (BRI/TE),<br />
Seite 8:<br />
20 70459.221/00 - 1.1 – 20070704 – <strong>ECOTEL</strong> ® <strong>ISDN</strong>
VIERLING<br />
Rufe von BRI1 (PBX) mit Zielrufnummer 015..., 016... oder 017... gehen<br />
nach GSM<br />
Alle Rufe von GSM gehen nach BRI1 (PBX)<br />
(oI1d01[5-7]*#) n G:d<br />
(oGd*#) n I1:d<br />
<strong>ISDN</strong>-Anschluss wie Beispiel 3: <strong>ECOTEL</strong> ® als LCR (in Amtsleitung<br />
eingeschleift), Seite 8:<br />
Rufe von BRI2 (PBX) mit Zielrufnummer 015..., 016... oder 017... gehen<br />
nach GSM<br />
Alle übrigen Rufe von BRI2 (PBX) gehen nach BRI1 (<strong>ISDN</strong>)<br />
Alle Rufe von BRI1 (<strong>ISDN</strong>) gehen nach BRI2 (PBX)<br />
Alle Rufe von GSM gehen nach BRI2 (PBX)<br />
(oI2d01[5-7]*#) n G:d<br />
(oI2d*#) n I1:d<br />
(oI1*#) n I2:d<br />
(oGd*#) n I2:d<br />
Weitere Beispieleinträge und Besonderheiten wie SIM-Switching, Kurzwahlnummern<br />
oder automatische Rückrufe lesen Sie bitte im Benutzerhandbuch<br />
nach.<br />
• Speichern Sie die Routingtabelle :<br />
Speichern unter...<br />
Dateinamen RTBL.TXT und den vorgeschlagenen Pfad beibehalten.<br />
• Routingtabelle ins Gerät downloaden:<br />
Download ins Ecotel<br />
(Die Datei wird ans Gerät übertragen)<br />
Mit diesen Grundeinstellungen können Sie Ihr <strong>ECOTEL</strong> ® bereits in<br />
Betrieb nehmen. Eine ausführliche Beschreibung der Hardware, sämtlicher<br />
Funktionen, Einstellungs- und Überwachungsmöglichkeiten finden<br />
Sie im Benutzerhandbuch.<br />
<strong>ECOTEL</strong> ® <strong>ISDN</strong> - 70459.221/00 - 1.1 – 20070704 21
1. The <strong>ISDN</strong>-GSM gateway<br />
<strong>ECOTEL</strong> ® <strong>ISDN</strong> provides reliable, cost-effective connections between<br />
GSM and <strong>ISDN</strong> networks. Using <strong>ECOTEL</strong> ® <strong>ISDN</strong> connection costs<br />
significantly decrease.<br />
The number of GSM channels is scalable up to a total of four or eight*,<br />
and the GSM modules are compatible with all types of GSM networks<br />
(GSM 850/900/1800/1900).<br />
<strong>ECOTEL</strong> ® <strong>ISDN</strong> offers a built-in antenna splitter which ensures easy<br />
installation with a maximum of two antennas.<br />
Potential applications range from integration into an existing PBX<br />
infrastructure and connecting of mobile offices all the way to distributed<br />
installations with SIM Card Server intergration* and common<br />
configuration software.<br />
*<strong>ISDN</strong>2-2x only
2. Hardware description<br />
2.1 Connect the device<br />
VIERLING<br />
<strong>ECOTEL</strong> ® is designed for permanent attachment to a wall or for mobile<br />
use. Connect the device with the corresponding cables via the following<br />
interfaces:<br />
<strong>ECOTEL</strong> ® <strong>ISDN</strong><br />
Interface jacks on <strong>ECOTEL</strong> ® <strong>ISDN</strong>2-12x<br />
Interface jacks on <strong>ECOTEL</strong> ® <strong>ISDN</strong>2-14x<br />
Interface jacks on <strong>ECOTEL</strong> ® <strong>ISDN</strong>2-24x<br />
<strong>ECOTEL</strong> ® <strong>ISDN</strong> - 70459.221/00 - 1.1 – 20070704 23
VIERLING<br />
Interface jacks on <strong>ECOTEL</strong> ® <strong>ISDN</strong>2-28x<br />
DC<br />
The supplied power supply is connected to the DC jack<br />
of <strong>ECOTEL</strong> ® .<br />
Warning: The guarantee for <strong>ECOTEL</strong> ® is nullified if you<br />
use a power supply which is not approved by VIERLING!<br />
Different <strong>ECOTEL</strong> ® types need different power supplies<br />
since their power consumption is different!<br />
Ant 1, Ant 2 Connectors for GSM antennas<br />
V.24 *<br />
Connection to service PC to configure the device<br />
USB ** Connection to service PC to configure the device<br />
I/O External input/output contacts<br />
LAN Connection to the network (Ethernet) via a standard<br />
RJ45 network cable for configuration<br />
BRI 1, BRI 2 Connection to the PBX or to the <strong>ISDN</strong> fixed network.<br />
(RJ45 connecting cables)<br />
BRI1 or BRI2 connection<br />
Whether you use BRI1 or BRI2 jack, depends basically on the operation<br />
mode of the PBX, which PBX ports are free and whether the PBX<br />
provides LCR features. Here are the most commonly used <strong>ISDN</strong><br />
connections:<br />
* <strong>ISDN</strong>2-1x only<br />
** <strong>ISDN</strong>2-2x only<br />
24 70459.221/00 - 1.1 – 20070704 – <strong>ECOTEL</strong> ® <strong>ISDN</strong>
PBX as LCR<br />
Example 1:<br />
<strong>ECOTEL</strong> ® is connected with BRI2/NT<br />
to an external BRI port of the PBX<br />
(<strong>ECOTEL</strong> ® is configured as network<br />
termination)<br />
Operation mode like PBX (often<br />
PTMP)<br />
External PBX BRI port is connected<br />
to the BRI2 / NT interface of<br />
<strong>ECOTEL</strong> ®<br />
To provide synchronization <strong>ECOTEL</strong> ®<br />
has to be connected via BRI1/TE to<br />
an NTBA (configured as terminal<br />
device)<br />
Example 2:<br />
<strong>ECOTEL</strong> ® is connected as a terminal<br />
device to the PBX<br />
Operation mode like PBX (often<br />
PTMP)<br />
Internal PBX BRI port is connected to<br />
the BRI1 / TE interface of <strong>ECOTEL</strong> ®<br />
<strong>ECOTEL</strong> ® as LCR<br />
Example 3:<br />
<strong>ECOTEL</strong> ® is looped directly into the<br />
connection line<br />
Operation mode like PBX<br />
NTBA is connected to the BRI1 / TE<br />
interface of the <strong>ECOTEL</strong> ®<br />
PBX is connected to the<br />
BRI2 / NT interface of the <strong>ECOTEL</strong> ®<br />
VIERLING<br />
Further information about the connection types, especially <strong>ISDN</strong><br />
connection, see manual, chapter 9, on the <strong>ECOTEL</strong> CD.<br />
<strong>ECOTEL</strong> ® <strong>ISDN</strong> - 70459.221/00 - 1.1 – 20070704 25
VIERLING<br />
2.2 Insert the SIM cards<br />
Do not insert the SIM cards right from the start!<br />
They may get blocked when used before the necessary settings<br />
have been made (If no SIM PINs are used, this warning does not<br />
apply).<br />
Reason: When it is powered on, <strong>ECOTEL</strong> ® will immediately<br />
attempt to log in to the network using the SIM card. Since<br />
<strong>ECOTEL</strong> ® does not yet have the valid SIM PIN, this will fail. After<br />
two failed attempts, <strong>ECOTEL</strong> ® will block any further attempts.<br />
<strong>ECOTEL</strong> ® <strong>ISDN</strong>2-1x: Insert the SIM cards in the slots of the device.<br />
<strong>ECOTEL</strong> ® <strong>ISDN</strong>2-2x: Insert the SIM cards in the PCMCIA SIM<br />
cardholder (accessory), if you use one, and keep ready the PIN of each<br />
SIM card.<br />
Slots for SIM cardholders in <strong>ECOTEL</strong> ® <strong>ISDN</strong>2-2x<br />
NOTE:<br />
The SIM cardholder is labeled with the according GSM channels. If<br />
you use only one SIM card per channel, you have to insert the SIM<br />
card into slot A (1A, 2A, …).<br />
Warning: Since the SIM cards and cardholders are electronic components,<br />
they can be damaged or destroyed by electrostatic discharge.<br />
To prevent this, you should install the SIM cards at an ESD<br />
workstation.<br />
26 70459.221/00 - 1.1 – 20070704 – <strong>ECOTEL</strong> ® <strong>ISDN</strong>
3. Installation<br />
Peculiarities of<br />
<strong>ECOTEL</strong> ® <strong>ISDN</strong>2-28x and <strong>ECOTEL</strong> ® <strong>ISDN</strong>2-14x<br />
VIERLING<br />
The design of these models basically involves two <strong>ECOTEL</strong> ®<br />
devices in a single housing. When you are setting up and<br />
configuring <strong>ECOTEL</strong> ® <strong>ISDN</strong>2-2, you should always treat it like two<br />
separate devices! In particular, you should:<br />
- Create two separate devices in the Service Gear module<br />
- Connect each semi-device separately to the desired networks (<strong>ISDN</strong>,<br />
PBX, LAN, etc.)<br />
- Configure each semi-device separately via the respective interface<br />
jack<br />
- During any uploads and downloads, make sure that you are<br />
connected to the correct semi-device<br />
3.1 Prepare the device<br />
The manual is available on your CD ROM under<br />
:\help\Manual_EN.pdf,<br />
or from the configuration software via menu Help > Print...<br />
1 Install the configuration software (Service Gear).<br />
Check if you have the latest version on your CD ROM.<br />
You can download it from<br />
http://webftp.vierling.de/public/index.php?dir=webftp_<strong>ECOTEL</strong>_VoIP/<br />
Before you start setup, remove any previous version.<br />
(The following functions and menus correspond to Service Gear<br />
Version 4.5.)<br />
2 Prepare the configuration interface.<br />
You can use V.24 (<strong>ECOTEL</strong> ® <strong>ISDN</strong>2-1x) or USB (<strong>ECOTEL</strong> ® <strong>ISDN</strong>2-<br />
2x) as configuration interface.<br />
Set up the USB interface as follows:<br />
• Connect the configuration computer and <strong>ECOTEL</strong> ® using the<br />
USB cable<br />
• Power up the computer and <strong>ECOTEL</strong>®<br />
<strong>ECOTEL</strong> ® <strong>ISDN</strong> - 70459.221/00 - 1.1 – 20070704 27
VIERLING<br />
• Windows should indicate that it found new hardware<br />
• Click OK to launch the hardware wizard<br />
• Follow the instructions provided by the wizard. Use the following<br />
options:<br />
• Install hardware driver<br />
• Search for a driver for the device<br />
• To choose the source: Click on the Browse button, select the<br />
driver file :\USB_Drivers\ftdibus.inf on the CD drive<br />
• Finish installation<br />
• Windows should indicate again that it found new hardware<br />
• Repeat the steps listed above with the driver file<br />
• Open Windows device manager:<br />
e.g. right-click on the desktop on My Computer,<br />
Manage, Computer Management (Local) > System Tools ><br />
Device Manager<br />
• Under Ports (COM & LPT), there should now be a new entry,<br />
e.g.: USB Serial Port (COM3), USB Serial Port (COM4) or<br />
something similar.<br />
• Write down this COM number. You will have to use it later to<br />
select this interface during the configuration process.<br />
3 Start Service Gear and create a new device.<br />
• Mark the Devices tree node<br />
Edit > Add Group.<br />
Give the group a name of your choice, OK<br />
• Mark a group<br />
Edit > Add Device.<br />
(The Properties dialog for the new device should appear.)<br />
• Edit the properties:<br />
Give your device a Name of your choice.<br />
28 70459.221/00 - 1.1 – 20070704 – <strong>ECOTEL</strong> ® <strong>ISDN</strong>
Select the Device Type.<br />
Under Access Via: Choose the interface you wish to use to<br />
configure the device:<br />
- USB (enter appropriate COM port, see above)<br />
or<br />
- IP (IP adresse for configuration)<br />
Leave the Security Code field blank (factory default), OK<br />
4 Enter the SIM PINs and download them to <strong>ECOTEL</strong> ®<br />
VIERLING<br />
if PIN usage is activated for the SIM cards. Do not insert SIM cards<br />
before the correct PINs have been downloaded! Otherwise your SIM<br />
cards may get blocked while trying to register to the network with<br />
invalid PINs.<br />
4 a) <strong>ECOTEL</strong> ® <strong>ISDN</strong>2-1x<br />
• Switch to Firmware Tools module:<br />
Extras > Start > Firmware Tools<br />
• Remove all SIM cards!<br />
(if they are inserted)<br />
• Enter SIM PINs:<br />
GSM parameters > Module 1 ><br />
Click on Enter PIN<br />
Enter the PIN for the SIM card to be used in the relevant module<br />
• Repeat this procedure for each of the remaining modules<br />
• Insert the SIM cards<br />
4 b) <strong>ECOTEL</strong> ® <strong>ISDN</strong>2-2x<br />
Insert the SIM cards in the PCMCIA SIM cardholder (accessory) and<br />
keep ready the PIN of each SIM card..<br />
• Tools > Start > SIM Management<br />
• File > New<br />
In the Available Versions list, choose the latest version<br />
• On the SIM Cardholder page, set the cardholder types (8, 16 or<br />
32) that apply (Slot 2 above, Slot 1 below!).<br />
<strong>ECOTEL</strong> ® <strong>ISDN</strong> - 70459.221/00 - 1.1 – 20070704 29
VIERLING<br />
• Select tree node GSM 1<br />
Select Inserted at: Location A<br />
Enter corresponding the PIN in the field PIN<br />
• Repeat these steps for the remaining SIM cards<br />
• Save the configuration file:<br />
Choose File > Save<br />
Enter the file name <strong>ECOTEL</strong>.<br />
• Transmit the configuration file to your device:<br />
Select Transmit > Save in <strong>ECOTEL</strong>…<br />
5 Insert the SIM cardholder into the slots on the rear of the<br />
housing (<strong>ECOTEL</strong> ® <strong>ISDN</strong>1-2x: insert the SIM cards into the slots<br />
of the housing).<br />
Make sure that the antennas are connected.<br />
When the SIM cards have registered to the GSM network, the GSM<br />
lights will change from blinking to off.<br />
3.2 Further basic settings<br />
3.2.1 Enter the prefixes<br />
• Switch to Gateway Configuration module:<br />
Click on the device in the tree view<br />
(or use Tools > Start > Gateway Configuration).<br />
• Choose Properties in the tree view:<br />
Enter the prefixes in the field Codes > :<br />
International,<br />
National<br />
Country Code<br />
30 70459.221/00 - 1.1 – 20070704 – <strong>ECOTEL</strong> ® <strong>ISDN</strong>
3.2.2 Activate interfaces<br />
VIERLING<br />
• Gateway Configuration module:<br />
(Tools > Start > Gateway Configuration).<br />
Select the respective interface under <strong>ISDN</strong> Interfaces and GSM<br />
Interfaces in the tree view.<br />
• Leave the default check by the option Activate Interface or remove it,<br />
if required:<br />
<strong>ISDN</strong> Interfaces > BRI 1 (or 2)<br />
(depending on the <strong>ISDN</strong> connection type)<br />
GSM Interfaces > GSM 1 (or 2, 3, ...)<br />
3.2.3 Configure <strong>ISDN</strong> interfaces<br />
• Switch to Basic Configuration module:<br />
Tools > Start > Basic Configuration<br />
On the <strong>ISDN</strong> settings page, make the settings depending on the<br />
<strong>ISDN</strong> connection type.<br />
These settings correspond to <strong>ISDN</strong> connection types on page 25:<br />
Example 1 (Connection to the external BRI port in NT mode at BRI2)<br />
BRI1* BRI2 (100 Ohm)<br />
Jack TE NT<br />
Activate interface yes yes<br />
L1 mode Terminal equipment network<br />
Connection PTP/PTMP** PTMP<br />
L2 mode Terminal equipment network<br />
L3 mode Terminal equipment Network<br />
* As <strong>ECOTEL</strong> has to synchronize with the PBX, connect BRI1 with the NTBA.<br />
** depending on operation mode of the NTBA<br />
<strong>ECOTEL</strong> ® <strong>ISDN</strong> - 70459.221/00 - 1.1 – 20070704 31
VIERLING<br />
Example 2 (Connection as terminal equipment TE/BRI1 at the internal<br />
PBX BRI port)<br />
BRI1 BRI2 (100 Ohm)<br />
Jack TE -<br />
Activate interface yes no<br />
L1mode Terminal equipment ...<br />
Connection PTMP ...<br />
L2 mode Terminal equipment ...<br />
L3 mode Terminal equipment ...<br />
Example 3 (TE/BRI1 to NTBA, NT/BRI2 to PBX trunk line):<br />
BRI1 BRI2 (100 Ohm)<br />
Jack TE NT<br />
Activate interface yes yes<br />
L1 mode Terminal equipment network<br />
Connection PTP PTP<br />
L2 mode Terminal equipment network<br />
L3 mode Terminal equipment network<br />
3.2.4 Enter telephone numbers of the SIM cards<br />
3.2.4.1 <strong>ECOTEL</strong> ® <strong>ISDN</strong>2-1x<br />
• Switch to Gateway Configuration module:<br />
Tools > Start > Gateway Configuration<br />
Call: In the Gateway Configuration main window under the GSM<br />
Interfaces node and under GSM 1 (2, 3, etc.), mark the tree node SIM<br />
Properties.<br />
Mobile number Telephone number of the SIM card which is installed<br />
in the GSM module.<br />
Service center<br />
number<br />
Number of the SMS service center for the SIM card<br />
which is installed. This number is needed so that<br />
<strong>ECOTEL</strong> ® can send SMS messages.<br />
32 70459.221/00 - 1.1 – 20070704 – <strong>ECOTEL</strong> ® <strong>ISDN</strong>
Clock model in<br />
seconds<br />
Lock to preferred<br />
LAIN<br />
VIERLING<br />
Here, you should enter the charge timing for the rate<br />
model for the installed SIM card. This value is used to<br />
compute when the call time limit is reached (see<br />
below). The first entry indicates the duration of the<br />
first charge pulse in seconds and the second entry<br />
indicates the spacing between all subsequent pulses.<br />
Example: 60 / 1 means that for the first pulse, the<br />
charges are computed for 60 seconds, while for each<br />
further pulse the charges are computed for one<br />
second.<br />
LAIN Here, you should enter the LAIN (Location Area<br />
Identification Number) of the GSM network in which<br />
the installed SIM card should register.<br />
If no LAIN is entered, the SIM card will register in the<br />
network with the best reception.<br />
You can get more details about the network operators<br />
which are available locally in the Firmware Tools<br />
module on the GSM parameters page.<br />
Roaming allowed If roaming is allowed, a SIM card can also register in<br />
an outside GSM network if registration fails under the<br />
specified LAIN.<br />
Overall calltime<br />
limit<br />
Use limit of …<br />
minutes<br />
If roaming is not allowed, the SIM card may only<br />
register under the specified LAIN.<br />
You can set a maximum for the total duration of all<br />
calls via this SIM card. If this limit is reached,<br />
<strong>ECOTEL</strong> ® will not route any more calls via this GSM<br />
channel.<br />
This allotment is applicable to a certain time period,<br />
e.g. per month. After this, the counter is reset and<br />
the allotment is available again.<br />
If no specific GSM module is specified in the routing<br />
for an outgoing call, the GSM module with the lowest<br />
utilization is chosen.<br />
Call time permitted per interval<br />
per … Length of the standard interval<br />
<strong>ECOTEL</strong> ® <strong>ISDN</strong> - 70459.221/00 - 1.1 – 20070704 33
VIERLING<br />
starting<br />
(dd.mm.yyyy) ...<br />
Charging<br />
information<br />
Start of the first interval (at 00:00 on the specified<br />
day)<br />
This determines for incoming calls from the GSM side<br />
what charging information should be made available<br />
to the outgoing side. Possible values:<br />
Generate none, or Generate in <strong>ECOTEL</strong>.<br />
Forwarding of charging information from the GSM<br />
network is not possible currently since GSM networks<br />
do not send this information.<br />
The following parameters control the generation of<br />
charge units by <strong>ECOTEL</strong> ® :<br />
t1 Duration of the first charging interval<br />
x1 Transferred units for the first charging interval<br />
t2 Duration of each additional charging interval<br />
x2 Transmitted units for each additional charging interval<br />
3.2.4.2 <strong>ECOTEL</strong> ® <strong>ISDN</strong>2-2x<br />
• Switch to SIM Management module:<br />
Tools > Start > SIM Management<br />
Note: The extent to which this information on the<br />
<strong>ISDN</strong> side is forwarded to the called subscriber<br />
depends on the settings for the <strong>ISDN</strong> interface!<br />
• Click on OK if the following message appears: “Configuration file not<br />
found…”<br />
File > New<br />
In the Available Versions list, choose the latest version<br />
(A configuration file (type *.SMC) will now be created and loaded into<br />
the display.)<br />
• Set SIM cardholder types:<br />
On the SIM Cardholder page, set the cardholder types that apply<br />
(Slot 2 above, Slot 1 below!).<br />
(If the SIM cards are not operated in the <strong>ECOTEL</strong> ® :<br />
Select the External option and enter the IP address for the SIM<br />
management center.)<br />
34 70459.221/00 - 1.1 – 20070704 – <strong>ECOTEL</strong> ® <strong>ISDN</strong>
• Set SIM properties:<br />
Page GSM 1<br />
Select Inserted at: Location A<br />
Enter the data belonging to the SIM card at position 1A on SIM<br />
cardholder 1:<br />
PIN<br />
Mobile Number (telephone number of the SIM card)<br />
Associated SMS Service Center Number<br />
• Repeat these steps for the remaining SIM cards.<br />
• Insert the SIM cards<br />
• Release SIM cards:<br />
If there is more than one SIM card per GSM module:<br />
Page GSM 1 > SIM Group 1<br />
Under Use SIM card(s), check the desired cards.<br />
Under Switch, choose an option other than Never.<br />
• Repeat for GSM 2(, 3, ...), each with SIM Group 1.<br />
• Save the configuration file:<br />
Choose File > Save.<br />
The file name has to be <strong>ECOTEL</strong> (the extension .SMC will be<br />
automatically added).<br />
You should keep the default path.<br />
VIERLING<br />
• Transmit the configuration file to your device:<br />
Select Transmit > Save in <strong>ECOTEL</strong>…<br />
(You can monitor the progress of the download in the Communication<br />
window.)<br />
3.2.5 Edit routing table<br />
By customizing the routing table, you can optimize the routing behavior<br />
to meet your needs and save money. Chapter 5 of the user manual<br />
(“Introduction to the routing table”) provides details on the structure and<br />
syntax of the routing table. The routing wizard helps you to create routing<br />
entries. Call it up by clicking on the Routing wizard... button.<br />
Below you will find examples of routing entries that are useful with the<br />
different connection types.<br />
<strong>ECOTEL</strong> ® <strong>ISDN</strong> - 70459.221/00 - 1.1 – 20070704 35
VIERLING<br />
• Switch to Routing Table module:<br />
Tools > Start > Routing Table<br />
• Load the existing routing table:<br />
Upload from Ecotel.<br />
(The routing table should appear in the editing window.<br />
The device contains a standard routing table when it is shipped from<br />
the factory).<br />
• Edit the table entries:<br />
Do not modify the entries of type (...) cm ... !<br />
• If necessary, replace the remaining entries with appropriate values<br />
after consulting the information on selecting the connection type; see<br />
also manual, chapter 3.2 <strong>ISDN</strong> interface: Selecting the connection<br />
type.<br />
<strong>ISDN</strong> configuration like example 1: PBX as LCR (BRI2/NT), page 25:<br />
Calls from BRI2 (PBX) with a destination number of 015..., 016... or<br />
017... go to GSM<br />
All calls from GSM go to BRI2 (PBX)<br />
(oI2d01[5-7]*#) n G:d<br />
(oGd*#) n I2:d<br />
<strong>ISDN</strong> configuration like example 2: PBX as LCR (BRI/TE), page 25:<br />
Calls from BRI1 (PBX) with a destination number of 015..., 016... or<br />
017... go to GSM<br />
All calls from GSM go to BRI1 (PBX).<br />
(oI1d01[5-7]*#) n G:d<br />
(oGd*#) n I1:d<br />
36 70459.221/00 - 1.1 – 20070704 – <strong>ECOTEL</strong> ® <strong>ISDN</strong>
VIERLING<br />
<strong>ISDN</strong> configuration like example 3: <strong>ECOTEL</strong> ® as LCR (looped in trunk<br />
line), page 25:<br />
Calls from BRI2 (PBX) with a destination number of 015..., 016... or<br />
017... go to GSM<br />
All other calls from BRI2 (PBX) go to BRI1 (<strong>ISDN</strong>)<br />
All calls from BRI1 (<strong>ISDN</strong>) go to BRI2 (PBX)<br />
All calls from GSM go to BRI2 (PBX)<br />
(oI2d01[5-7]*#) n G:d<br />
(oI2d*#) n I1:d<br />
(oI1*#) n I2:d<br />
(oGd*#) n I2:d<br />
For further examples and special entries like SIM switching, speed dial<br />
numbers or automatic callbacks please refer to the manual.<br />
• Save the routing table:<br />
Save as…<br />
Accept the file name RTBL.TXT and the suggested path.<br />
• Transmit the routing table to your device:<br />
Download to Ecotel.<br />
(The file will be transmitted to your device.)<br />
You can use these basic settings to get your <strong>ECOTEL</strong> ® up and running.<br />
For a detailed description of the hardware including all of the functions<br />
and the setting and monitoring options, see the user manual.<br />
<strong>ECOTEL</strong> ® <strong>ISDN</strong> - 70459.221/00 - 1.1 – 20070704 37
1. Passerelles <strong>ISDN</strong>-GSM<br />
<strong>ECOTEL</strong> ® <strong>ISDN</strong> assure des connexions à un prix avantageux entre les<br />
réseaux RNIS et GSM. Ça permet de réduire considérablement les<br />
coûts de connexion.<br />
Une mise à l’échelle de maximum huit* canaux GSM est possible et les<br />
modules GSM sont appropriés à tous les réseaux GSM (850, 900, 1800<br />
et 1900 MHz).<br />
Un séparateur d’antenne (splitter) facilite l’installation (deux antennes<br />
max.).<br />
Les applications vont de l’intégration à une infrastructure TK existante à<br />
l’installation de plusieurs passerelles distinctes avec serveur intégré<br />
carte SIM* et d’un logiciel de configuration commun, en passant par la<br />
liaison de bureaux mobiles.<br />
*uniquement <strong>ISDN</strong>2-2x
2. Description matérielle<br />
2.1 Raccordement des appareils<br />
VIERLING<br />
<strong>ECOTEL</strong> ® est idéal pour une installation sur le bureau et un montage<br />
mural. Raccordez l’appareil avec les câbles correspondants via les<br />
interfaces suivantes :<br />
<strong>ECOTEL</strong> ® <strong>ISDN</strong><br />
Prises interface sur <strong>ECOTEL</strong> ® <strong>ISDN</strong>2-12x<br />
Prises interface sur <strong>ECOTEL</strong> ® <strong>ISDN</strong>2-14x<br />
Prises interface sur <strong>ECOTEL</strong> ® <strong>ISDN</strong>2-24x<br />
<strong>ECOTEL</strong> ® <strong>ISDN</strong> - 70459.221/00 - 1.1 – 20070704 39
VIERLING<br />
Prises interface sur <strong>ECOTEL</strong> ® <strong>ISDN</strong>2-28x<br />
DC<br />
Raccordement pour bloc d’alimentation fourni<br />
Attention : La garantie prend fin pour <strong>ECOTEL</strong> ® à<br />
utilisation d’un bloc d’alimentation non agréé par<br />
VIERLING ! Les différents types <strong>ECOTEL</strong> ® requièrent<br />
différents blocs d’alimentation car leur puissance absorbée<br />
diffère !<br />
Ant 1, Ant 2 Raccordements pour antennes GSM<br />
V.24 *<br />
Raccordement au PC de service pour configurer<br />
<strong>ECOTEL</strong><br />
USB ** Raccordement au PC de service pour configurer<br />
<strong>ECOTEL</strong> (câble USB)<br />
I/O Connexion de contacts externes<br />
LAN Connexion au réseau (Ethernet) par l’intermédiaire d’un<br />
câble réseau standard RJ45 pour la configuration<br />
BRI 1, BRI 2 Raccordement à l’installation de télécommunication TK<br />
ou au réseau fixe RNIS (câble de connexion RJ45)<br />
Connexion à BRI1 ou BRI2<br />
L’utilisation des connecteurs BR11 ou BR12 est essentiellement en<br />
fonction du mode de l’installation de télécommunication TK, des ports<br />
libres de cette installation et de la disponibilité de la sélection<br />
* uniquement <strong>ISDN</strong>2-1x<br />
** uniquement <strong>ISDN</strong>2-2x<br />
40 70459.221/00 - 1.1 – 20070704 – <strong>ECOTEL</strong> ® <strong>ISDN</strong>
VIERLING<br />
automatique d’acheminement (LCR). Les cas les plus fréquents sont<br />
décrits ci-dessous :<br />
Installation de télécommunication<br />
TK en tant que LCR<br />
Exemple 1:<br />
<strong>ECOTEL</strong> ® est raccordé avec BRI2/NT à<br />
un port S0 externe de l’installation TK<br />
(configuré comme réseau)<br />
Mode de service comme dans<br />
l’installation TK (PTMP en général)<br />
Raccordement de la ligne externe de<br />
l’installation TK à BRI2 / NT<br />
d’<strong>ECOTEL</strong> ®<br />
Pour synchroniser avec PBX, <strong>ECOTEL</strong><br />
est raccordé à NTBA par BRI1/TE (en<br />
tant que terminal)<br />
Exemple 2:<br />
<strong>ECOTEL</strong> ® est raccordé en tant que<br />
terminal à l’installation TK<br />
Mode de service comme dans<br />
l’installation TK (PTMP en général)<br />
Raccordement du poste<br />
supplémentaire de l’installation TK à<br />
BRI1 / TE d’<strong>ECOTEL</strong> ®<br />
<strong>ECOTEL</strong> ® en tant que LCR<br />
Exemple 3:<br />
<strong>ECOTEL</strong> ® est bouclé dans la ligne<br />
principale<br />
Mode de service comme dans<br />
l’installation TK ou au réseau fixe<br />
Raccordement de NTBA à BRI1 / TE<br />
d’<strong>ECOTEL</strong> ®<br />
Raccordement de l’installation TK à<br />
BRI2 / NT d’<strong>ECOTEL</strong> ®<br />
<strong>ECOTEL</strong> ® <strong>ISDN</strong> - 70459.221/00 - 1.1 – 20070704 41
VIERLING<br />
Vous trouverez d’autres informations sur les possibilités de<br />
raccordement, notamment sur la connexion RNIS dans le manuel<br />
utilisateur, au chapitre 9 du CD <strong>ECOTEL</strong>.<br />
2.2 Introduction des cartes SIM<br />
Attention : n’introduisez pas de carte(s) SIM dans<br />
l’appareil avant la configuration si SIM-PIN est activé !<br />
Raison : <strong>ECOTEL</strong> ® essaie immédiatement après la mise<br />
en service de se connecter au réseau avec la carte SIM.<br />
Echec car <strong>ECOTEL</strong> ® ne connaît pas encore le code SIM-<br />
PIN valide. <strong>ECOTEL</strong> ® interdit tout autre essai après deux<br />
échecs.<br />
<strong>ECOTEL</strong> ® <strong>ISDN</strong>1-2x: Introduisez les cartes SIM dans le tiroir de<br />
l’appareil.<br />
<strong>ECOTEL</strong> ® <strong>ISDN</strong>2-2x: Introduisez les cartes SIM dans le porte-cartes<br />
PCMCIA-SIM (accessoires) et tenez les PIN des différentes cartes SIM<br />
à disposition.<br />
Emplacements pour porte-cartes SIM dans <strong>ECOTEL</strong> ® <strong>ISDN</strong>2-28x<br />
Emplacements pour porte-cartes SIM dans <strong>ECOTEL</strong> ® <strong>ISDN</strong>2-240<br />
42 70459.221/00 - 1.1 – 20070704 – <strong>ECOTEL</strong> ® <strong>ISDN</strong>
REMARQUE<br />
VIERLING<br />
Les emplacements sur les porte-cartes SIM sont numérotés suivant<br />
les canaux GSM correspondants. L’emplacement ou rainure A (1A,<br />
2A, …) doit toujours être utilisé en cas d’utilisation d’une seule carte<br />
SIM par canal.<br />
Attention : les cartes SIM et les porte-cartes SIM<br />
sont des composants électroniques qui risquent<br />
d’être détruits par suite d’une décharge électrostatique.<br />
C’est pourquoi l’équipement des cartes SIM<br />
doit être effectué à un poste de travail ESD !<br />
<strong>ECOTEL</strong> ® <strong>ISDN</strong> - 70459.221/00 - 1.1 – 20070704 43
VIERLING<br />
3. Installation<br />
Particularités des modèles<br />
<strong>ECOTEL</strong> ® <strong>ISDN</strong>2-28x et <strong>ECOTEL</strong> ® <strong>ISDN</strong>2-14x<br />
Ces modèles sont en fait constitués de deux appareils <strong>ECOTEL</strong> ®<br />
sous un boîtier commun. Lors de leur mise en service et de leur<br />
configuration, ces appareils doivent donc être traités séparément.<br />
Cela signifie en particulier que<br />
• deux appareils séparés doivent être enregistrés dans le module<br />
Service Gear<br />
• chaque moitié d’appareil doit être raccordée séparément aux<br />
réseaux souhaités (<strong>ISDN</strong>, installation de télécommunication,<br />
LAN, etc.)<br />
• chaque moitié d’appareil doit être configurée séparément par le<br />
biais de la prise d’interface correspondante<br />
• Lors de chaque opération de téléchargement, veillez à être<br />
connecté à la bonne moitié d’appareil.<br />
3.1 Préparation de l’appareil<br />
Vous trouverez le manuel sur le CD-ROM à<br />
:\help\Manual_EN.pdf,<br />
ou à partir du logiciel de configuration via le menu Help > Print...<br />
1 Installation du logiciel de configuration (ServiceGear).<br />
Vérifiez si vous avez la toute dernière version sur le CD-ROM.<br />
Vous pouvez la télécharger à<br />
http://webftp.vierling.de/public/index.php?dir=webftp_<strong>ECOTEL</strong>_VoIP/<br />
Supprimez une version plus ancienne éventuellement existante<br />
avant de procéder à l’installation.<br />
Les fonctions, qui suivent, concernent le logiciel Service Gear,<br />
version 4.5.<br />
2 Préparation de l’interface de configuration.<br />
V.24 (<strong>ECOTEL</strong> ® <strong>ISDN</strong>2-1x) ou USB (<strong>ECOTEL</strong> ® <strong>ISDN</strong>2-2x) peut<br />
servir d’interface de configuration.<br />
Procédez comme suit pour configurer l’interface USB :<br />
44 70459.221/00 - 1.1 – 20070704 – <strong>ECOTEL</strong> ® <strong>ISDN</strong>
VIERLING<br />
• reliez l’ordinateur de configuration et <strong>ECOTEL</strong> ® au câble USB<br />
• démarrez l’ordinateur, connectez <strong>ECOTEL</strong> ®<br />
• Windows signale qu’un nouveau matériel a été trouvé<br />
• appuyez sur OK pour démarrer l’assistant matériel<br />
• suivez les instructions de l’assistant, sélectionnez les options<br />
suivantes :<br />
• installer le pilote matériel<br />
• chercher un pilote compatible à l’appareil<br />
• appuyer sur Parcourir, sélectionner sur le CD le fichier du pilote<br />
:\pilotes_USB\ftdibus.inf<br />
• terminer l’installation<br />
• Windows signale une nouvelle fois qu’un nouveau matériel a été<br />
trouvé<br />
• répétez les opérations précédentes, sélectionnez le même fichier<br />
de pilote<br />
• ouvrez le gestionnaire Windows en appuyant par clic de la<br />
touche droite de souris sur Poste de travail > Gérer > Gestion<br />
ordinateur (locale) > Système > Gestionnaire appareil<br />
• une nouvelle entrée est alors affichée sous Connexions (COM et<br />
PLT), par exemple USB Serial Port (COM3), USB Serial Port<br />
(COM4).<br />
• notez ce numéro COM. Pour la configuration, sélectionnez<br />
l’interface à ce nom.<br />
3 Démarrage du ServiceGear et installation d’un nouvel appareil.<br />
• Marquez le nœud arborescent Appareils<br />
Edit > Add Group<br />
Entrez nom, OK<br />
• Marquez le.groupe<br />
Edit > Add Device<br />
<strong>ECOTEL</strong> ® <strong>ISDN</strong> - 70459.221/00 - 1.1 – 20070704 45
VIERLING<br />
Le dialogue Propriétés s’affiche<br />
• Traitez les propriétés :<br />
Entrez le nom, sélectionnez le type d’appareil<br />
Sélectionnez Interface dans le champ Access via permettant de<br />
configurer l’appareil :<br />
- USB (entrer port COM correspondant, voir ci-dessus)<br />
ou<br />
- IP (entrer adresse IP pour la configuration)<br />
Ne pas remplir le Security code (code de sécurité), (état de<br />
livraison), OK<br />
4 Entrez les codes SIM PIN et chargez les dans <strong>ECOTEL</strong> ®<br />
Dans la mesure où l’utilisation de PIN pour les cartes SIM est<br />
activée. Les PIN corrects doivent être transmis à l’appareil avant<br />
d’introduire une carte SIM ! Sinon, les cartes SIM risquent d’être<br />
bloquées lors d’un essai de connexion au réseau en utilisant des<br />
PIN incorrects.<br />
4 a) <strong>ECOTEL</strong> ® <strong>ISDN</strong>2-1x<br />
• Pour passer au module Outils du microprogramme, cliquez<br />
Options > Démarrage > Outils du microprogramme<br />
• Retirez toutes les cartes SIM !<br />
(si vous les avez déjà introduites)<br />
• Enregistrement des codes PIN des cartes SIM :<br />
Paramètres GSM > Module 1 ><br />
Cliquez sur le bouton Saisie du code PIN<br />
Entrez le code PIN de la carte SIM qui doit être utilisée dans le<br />
module correspondant<br />
• Répétez l’opération pour les autres modules<br />
• Introduisez les cartes SIM<br />
4 b) <strong>ECOTEL</strong> ® <strong>ISDN</strong>2-2x<br />
Tenez les porte-cartes SIM équipés à disposition. Notez les PIN<br />
46 70459.221/00 - 1.1 – 20070704 – <strong>ECOTEL</strong> ® <strong>ISDN</strong>
correspondants aux emplacements.<br />
• Tools > Start > SIM Management<br />
• File > New<br />
Sélectionnez dans la liste Available Versions (Versions<br />
existantes) la toute dernière version<br />
VIERLING<br />
• Sélectionnez le nœud arborescent SIM Cardholder (Portecartes<br />
SIM) et définissez le porte-carte utilisé (8, 16 ou 32)<br />
• Sélectionnez le nœud arborescent GSM<br />
A Inserted at (Introduit dans) : sélectionnez rainure A<br />
Entrez le PIN correspondant dans le champ PIN<br />
• Répétez pour toutes les rainures et tous les modules GSM<br />
• Mémorisez le fichier de configuration<br />
File > Save<br />
Utilisez le nom de fichier <strong>ECOTEL</strong><br />
• Téléchargez le fichier de configuration dans l’appareil<br />
Transfer > Save in <strong>ECOTEL</strong> ...<br />
5 Introduction des porte-cartes SIM dans le logement portecartes<br />
sur la partie frontale du boîtier.<br />
Vérifiez si les antennes sont bien raccordées.<br />
Les lampes-témoins GSM ne clignotent plus et s’éteignent dès que<br />
les cartes SIM se sont connectées au réseau.<br />
<strong>ECOTEL</strong> ® <strong>ISDN</strong> - 70459.221/00 - 1.1 – 20070704 47
VIERLING<br />
3.2 Autres réglages de base<br />
3.2.1 Saisie des indicatifs<br />
• Passez au module Configuration passerelle (Gateway Configuration):<br />
Faites un double clic sur l’appareil dans la vue arborescente<br />
(ou via Tools > Start > Gateway Configuration).<br />
• Sélectionnez dans la vue arborescente Properties (Propriétés) :<br />
Entrez dans le champ Codes > les indicatifs correspondants :<br />
International,<br />
National<br />
Country code (Indicatif pays)<br />
3.2.2 Activation des interfaces<br />
• Dans le module Gateway Configuration :<br />
(Tools > Start > Gateway Configuration).<br />
Sélectionnez dans la vue arborescente sous RNIS ou GSM l’interface<br />
respective.<br />
• Laissez coché, ou supprimer, aux points suivants dans la case<br />
de contrôle Activate interface (Activer) :<br />
<strong>ISDN</strong> Interfaces > BRI 1 (ou 2)<br />
(en fonction du type de raccordement RNIS)<br />
GSM Interfaces > GSM 1 (ou 2, 3, ...)<br />
3.2.3 Configuration des interfaces <strong>ISDN</strong> (RNIS)<br />
• Passez au module Configuration de base (Basic Configuration) :<br />
Tools > Start > Basic Configuration<br />
Sélectionnez dans la vue arborescente <strong>ISDN</strong> Interfaces et procédez<br />
aux réglages en fonction du type de raccordement RNIS.<br />
Les réglages suivants s’appliquent aux types de raccordement RNIS<br />
décrits à la page 41 :<br />
48 70459.221/00 - 1.1 – 20070704 – <strong>ECOTEL</strong> ® <strong>ISDN</strong>
VIERLING<br />
Exemple 1 (raccordement à un port S0 externe en mode NT à BRI2)<br />
BRI1* BRI2 (100 ohm)<br />
Prise TE NT<br />
Activer interface non oui<br />
Mode L1 Terminal Réseau<br />
Raccordement PTP/PTMP** PTMP<br />
Mode L2 Terminal Réseau<br />
Mode L3 Terminal Réseau<br />
* Pour synchroniser <strong>ECOTEL</strong> avec PBX, il faut raccorder BRI 1 à NTBA.<br />
** dépendant de mode d’opération du NTBA.<br />
Exemple 2 (raccordement en tant que terminal TE/BRI1 au port S0<br />
interne de l’installation de télécommunication TK)<br />
BRI1 BRI2 (100 ohm)<br />
Prise TE -<br />
Activer interface oui non<br />
Mode L1 Terminal ...<br />
Raccordement PTMP ...<br />
Mode L2 Terminal ...<br />
Mode L3 Terminal ...<br />
Exemple 3 (TE/BRI1 à NTBA, NT/BRI2 à la ligne principale de<br />
l’installation de télécommunication TK) :<br />
BRI1 BRI2 (100 ohm)<br />
Prise TE NT<br />
Activer interface oui oui<br />
Mode L1 Terminal Réseau<br />
Raccordement PTP PTP<br />
Mode L2 Terminal Réseau<br />
Mode L3 Terminal Réseau<br />
<strong>ECOTEL</strong> ® <strong>ISDN</strong> - 70459.221/00 - 1.1 – 20070704 49
VIERLING<br />
3.2.4 Saisie des numéros d’appel des cartes SIM<br />
3.2.4.1 <strong>ECOTEL</strong> ® <strong>ISDN</strong>2-1x<br />
Configuration des propriétés SIM<br />
• Passez au module Configuration passerelle (Gateway Configuration):<br />
Extras > Start > Gateway Configuration<br />
Appel : marquer le nœud arborescent SIM Properties dans la fenêtre<br />
principale Gateway Configuration en dessous du nœud GSM Interfaces<br />
et de GSM 1 (2, 3, …).<br />
Mobile number<br />
(Numéro de mobile)<br />
Service Center<br />
Number (Numéro du<br />
centre clientèle)<br />
Clock in Seconds<br />
(Cadence en<br />
secondes)<br />
Numéro d’appel de la carte SIM insérée dans le<br />
module GSM<br />
Numéro du centre clientèle SMS correspondant à la<br />
carte SIM. <strong>ECOTEL</strong> ® a besoin de ce numéro pour<br />
envoyer des textos (SMS)<br />
Fréquence de tarification du modèle tarifaire<br />
correspondant à la carte SIM. Cette valeur sert de<br />
base à la détermination des unités tarifaires (cf. cidessous).<br />
La première valeur saisie indique la durée<br />
de la première mesure en secondes, la seconde<br />
l’intervalle entre les mesures suivantes.<br />
Exemple : 60 / 1 signifie que pour la 1ère mesure, le<br />
tarif s’applique aux premières 60 secondes de<br />
l’appel, alors que pour les mesures suivantes, c’est le<br />
tarif d’une seconde qui est valable.<br />
50 70459.221/00 - 1.1 – 20070704 – <strong>ECOTEL</strong> ® <strong>ISDN</strong>
Enregistrement<br />
d’un LAIN<br />
spécifique<br />
VIERLING<br />
LAIN Numéro d’identification LAIN (Location Area<br />
Identification Number) du réseau GSM dans lequel la<br />
carte SIM doit être enregistrée.<br />
Roaming allowed<br />
(Autorisation<br />
d’itinérance)<br />
Calltime limit<br />
(Limitation de la<br />
durée totale des<br />
appels)<br />
Minutes (Nombre<br />
max. de minutes)<br />
Lorsqu’aucun numéro d’identification LAIN n’est<br />
enregistré, la carte SIM s’introduit dans le réseau<br />
avec la meilleure réception.<br />
De plus amples informations concernant les<br />
exploitants de réseau de votre région sont<br />
disponibles dans le module Outils du<br />
microprogramme à la page Paramètres GSM.<br />
Lorsque l’itinérance est autorisée, une carte SIM peut<br />
être introduite dans un réseau GSM étranger si son<br />
enregistrement sous le numéro LAIN mentionné a<br />
échoué.<br />
Lorsque l’itinérance n’est pas autorisée, la carte SIM<br />
ne peut s’introduire sur un réseau que sous le<br />
numéro d’identification LAIN mentionné.<br />
Réglage d’une durée maximale pour l’ensemble des<br />
appels effectués à partir de cette carte SIM. Une fois<br />
cette durée écoulée, <strong>ECOTEL</strong> ® n’effectue plus aucun<br />
appel sur ce canal GSM.<br />
Cette somme d’appels vaut pour une durée<br />
déterminée, un mois par ex. A l’issue de ce laps de<br />
temps, le compteur est réinitialisé et la carte SIM<br />
dispose à nouveau de la même quantité d’appels.<br />
Lorsqu’aucun module GSM particulier n’est<br />
déterminé dans le routage pour un appel sortant,<br />
c’est le module GSM le moins chargé dans la durée<br />
qui est sélectionné.<br />
Durée permise par intervalle<br />
per ... (par ) Longueur de l’intervalle étalon<br />
from (dd.mm.jjjj)<br />
... (à partir de<br />
(jj.mm.aaaa) …)<br />
Début du 1er intervalle (à 00 :00 h du jour enregistré)<br />
<strong>ECOTEL</strong> ® <strong>ISDN</strong> - 70459.221/00 - 1.1 – 20070704 51
VIERLING<br />
Charging towards<br />
<strong>ISDN</strong> (Tarification)<br />
Détermine, pour les appels arrivant sur un poste<br />
GSM, quelles informations tarifaires sont<br />
communiquées à l’appelant. Valeurs possibles :<br />
<strong>ECOTEL</strong> ne communique aucune information<br />
tarifaire, ou <strong>ECOTEL</strong> produit des unités tarifaires<br />
La transmission d’unités tarifaires du réseau GSM est<br />
impossible jusqu’à présent car les réseaux GSM<br />
n’envoient pas cette information.<br />
Les paramètres suivants permettent à <strong>ECOTEL</strong> ® de<br />
produire les unités tarifaires :<br />
t1 Durée du 1 er intervalle de tarification<br />
x1 Unités transmises du 1 er intervalle de tarification<br />
t2 Durée de chaque intervalle de tarification suivant<br />
x2 Unités transmises de chaque intervalle de tarification<br />
suivant<br />
3.2.4.2 <strong>ECOTEL</strong> ® <strong>ISDN</strong>2-2x<br />
Remarque : Les réglages de l’interface RNIS (<strong>ISDN</strong>)<br />
déterminent dans quelle mesure ces informations<br />
sont transmises côté RNIS à l’abonné appelé<br />
• Passez au module Gestion SIM (SIM Management) :<br />
Tools > Start > SIM Management<br />
• Si aucun fichier de configuration n’est trouvé, créez un nouveau<br />
fichier<br />
File > New<br />
Sélectionnez dans la liste Available Versions (Versions existantes) la<br />
toute dernière version<br />
(un fichier de configuration de type *.SMC est généré et chargé dans<br />
l’affichage)<br />
• Entrez les types de porte-cartes SIM :<br />
Définissez les types de porte-cartes correspondants à la page SIM<br />
cardholder (Porte-cartes SIM) (rainure 2 en haut, rainure 1 en bas!)<br />
(Si les cartes SIM ne fonctionnent pas dans <strong>ECOTEL</strong> ® :<br />
sélectionnez Option External, spécifiez adresse IP du centre de<br />
gestion SIM)<br />
52 70459.221/00 - 1.1 – 20070704 – <strong>ECOTEL</strong> ® <strong>ISDN</strong>
VIERLING<br />
• Entrez les propriétés SIM :<br />
sélectionnez dans la structure arborescente GSM 1<br />
Inserted at (Introduit dans) : Sélectionnez Location A (Rainure A)<br />
Entrez les données de la carte SIM qui sont à la rainure 1A du portecartes<br />
SIM 1 :<br />
PIN<br />
Mobile number (Numéro de mobile, le numéro de la carte SIM)<br />
Service Center number (Numéro du centre clientèle SMS)<br />
• Répétez les opérations pour les autres cartes SIM<br />
Attribution des cartes aux modules GSM et rainures, cf.<br />
2.2. Introduction des cartes SIM.<br />
• Activez les cartes SIM :<br />
si plus d’une carte SIM est utilisée par module GSM :<br />
Page GSM 1 > SIM Group 1<br />
Marquez les cartes souhaitées à Use SIM cards (Utilisation carte(s))<br />
Définissez un autre module en tant que Never (Jamais) sous Switch<br />
card (Commuter carte)<br />
• Répétez les paramétrages pour les modules GSM 2 (, 3, ...),<br />
respectivement SIM Group 1<br />
• Enregistrez le fichier de configuration :<br />
File > Save<br />
<strong>ECOTEL</strong> doit être entré comme nom de fichier<br />
(l’extension de fichier .SMC est complétée automatiquement)<br />
Gardez le chemin d’accès proposé<br />
• Téléchargez le fichier de configuration dans l’appareil :<br />
Transfer > Save in <strong>ECOTEL</strong> ...<br />
(le processus de téléchargement est affiché à la fenêtre<br />
Communication)<br />
3.2.5 Adaptation du tableau de routage<br />
Un tableau de routage rationnel vous permet d’adapter de manière<br />
optimale le comportement du routage à vos besoins et d’économiser<br />
des frais. La structure et la syntaxe du tableau de routage sont décrites<br />
en détail dans le manuel utilisateur, au chapitre 5 « Introduction au<br />
tableau de routage ». Un assistant de routage facilite l’application<br />
<strong>ECOTEL</strong> ® <strong>ISDN</strong> - 70459.221/00 - 1.1 – 20070704 53
VIERLING<br />
d’entrées de routage. L’appel est effectué via le bouton Routing Wizard<br />
(Assistant routage… )<br />
Vous trouverez ci-dessous des exemples d’entrées de routage<br />
avantageux pour le type de raccordement respectif.<br />
• Passez au module Tableau de routage (Routing Table) :<br />
Tools > Start > Routing table<br />
• Chargez le tableau de routage existant :<br />
Upload from Ecotel<br />
(Le tableau de routage s’affiche dans la fenêtre de traitement.<br />
L’appareil contient un tableau de routage standard à l’état de<br />
livraison)<br />
• Traitez les entrées de tableau :<br />
Ne modifiez pas les entrées de type (...) cm ... !<br />
• Remplacez, si nécessaire, les autres entrées par celles qui<br />
correspondent au type de raccordement que vous avez sélectionné.<br />
Pour plus de détails, reportez-vous au manuel utilisateur, chap. 3.2<br />
Interface RNIS : Sélection du type de raccordement.<br />
Raccordement RNIS comme exemple 1 : installation de<br />
télécommunication TK en tant que LCR (BRI2/NT),<br />
Page 41 :<br />
Tous les appels de BRI2 (PBX) avec le numéro d’appel cible 015...,<br />
016... ou 017... sont acheminés vers GSM<br />
Tous les appels de GSM sont acheminés vers BRI2 (PBX)<br />
(oI2d01[5-7]*#) n G:d<br />
(oGd*#) n I2:d<br />
Raccordement RNIS comme exemple 2 : installation de<br />
télécommunication TK en tant que LCR (BRI/TE),<br />
Page 41 :<br />
Tous les appels de BRI1 (PBX) avec le numéro d’appel cible 015...,<br />
016... ou 017... sont acheminés vers GSM<br />
Tous les appels de GSM sont acheminés vers BRI1 (PBX)<br />
54 70459.221/00 - 1.1 – 20070704 – <strong>ECOTEL</strong> ® <strong>ISDN</strong>
(oI1d01[5-7]*#) n G:d<br />
(oGd*#) n I1:d<br />
VIERLING<br />
Raccordement RNIS comme exemple 3 : <strong>ECOTEL</strong> ® en tant que LCR<br />
(bouclage dans la ligne principale), page 41 :<br />
les appels de BRI2 (PBX) avec le numéro d’appel cible 015..., 016... ou<br />
017... sont acheminés vers GSM<br />
Tous les autres appels de BRI2 (PBX) sont acheminés vers BRI1<br />
(RNIS)<br />
Tous les appels de GSM sont acheminés vers BRI2 (PBX)<br />
(oI2d01[5-7]*#) n G:d<br />
(oI2d*#) n I1:d<br />
(oI1*#) n I2:d<br />
(oGd*#) n I2:d<br />
Vous trouverez d’autres exemples d’entrée et particularités telles que<br />
commutation SIM, numéros abrégés ou rappels automatiques dans le<br />
manuel utilisateur.<br />
• Enregistrez le tableau de routage :<br />
Save As…<br />
Gardez le nom de fichier RTBL.TXT et le chemin d’accès proposé.<br />
• Téléchargez le fichier de configuration dans l’appareil :<br />
Download to Ecotel<br />
(le fichier est transféré à l’appareil)<br />
Ces réglages de base permettent la mise en service de votre <strong>ECOTEL</strong> ® .<br />
Vous trouverez une description détaillée du matériel, de toutes les<br />
fonctions, des possibilités de réglage et de surveillance dans le manuel<br />
utilisateur.<br />
<strong>ECOTEL</strong> ® <strong>ISDN</strong> - 70459.221/00 - 1.1 – 20070704 55