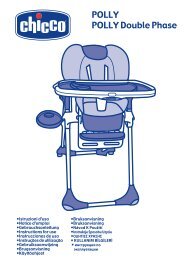
CHICCO AUTO-FIX GR. 0+ 0-13Kg
CHICCO AUTO-FIX GR. 0+ 0-13Kg
CHICCO AUTO-FIX GR. 0+ 0-13Kg

You also want an ePaper? Increase the reach of your titles
YUMPU automatically turns print PDFs into web optimized ePapers that Google loves.
WARNING! Never fi t the child car seat in a car<br />
seat which is only equipped with a 2 point car<br />
safety belt safety belt (diag. 2A).<br />
ADJUSTING THE RESTRAINT HARNESS<br />
WARNING! The restraint harness must always<br />
be adapted according to your child’s growth.<br />
Before fi tting the chid car seat into the car, adjust<br />
the child restraint harnesses to the correct height.<br />
The correct position of the harness height is<br />
slightly below your child’s shoulders (diag. 3). The<br />
child car seat can be adjusted to 3 positions (diag. 4).<br />
The child car seat is equipped with a comfort<br />
cushion, which guarantees the correct fastening<br />
of your child and the ideal position for neck and<br />
back, from birth until the child weighs 6 kg.<br />
To fi t the comfort cushion, check that the belts<br />
are inserted in the hole placed in the lowest<br />
position. WARNING: this is the only position<br />
allowed for using the child car seat with the<br />
comfort cushion (diag. 5).<br />
Warning: to guarantee the maximum safety of<br />
the product, remove the comfort cushion when<br />
the child weighs 6 Kg.<br />
To adjust the restraint harnesses, proceed as follows:<br />
Open the buckle by pressing the red button (diag. 6).<br />
Remove the harness from the back and insert it<br />
into the hole, which is the most suitable one for<br />
your child’s height.<br />
(diag. 7A and 7B).<br />
WARNING! Ensure that the safety harness is<br />
always inserted between the roller bar and the<br />
child car seat’s shell.<br />
The safety harness must always be tightened to<br />
the correct position.<br />
PLACING THE CHILD IN THE SEAT<br />
1. Lift the fabric fl ap, keep the adjusting button<br />
pressed and pull the child car seat harness to<br />
untighten it (diag. 8).<br />
2. Open the buckle by pressing the red button (diag. 6).<br />
3. Place the child.<br />
4. Overlap the two buckle straps (diag. 6A).<br />
5. Insert both buckle straps until an audible<br />
“click” is heard (diag. 6B). WARNING: never<br />
insert only one strap in the buckle.<br />
6. Tighten the child safety belts by pulling the<br />
central adjustment belt (diag.9).<br />
WARNING! Do not over-tighten the belts. If<br />
you can insert your fi ngers between the harness<br />
and your child’s body, it means that they are<br />
tightened correctly.<br />
CARRY HANDLE POSITIONS<br />
The carry handle of the child car seat can be<br />
adjusted to 4-positions (diag. 10):<br />
A. Position for car transport (WARNING: this is<br />
26<br />
the only position allowed during car transport).<br />
X. Middle position: Never use this position<br />
B. Position for carrying the child car seat by its<br />
hand.<br />
C. Position for using the child car seat as a baby<br />
rocker or fi tting it to the Chicco stroller.<br />
D. Position for using the child car seat as a baby chair.<br />
To adjust the handle, press the buttons placed on<br />
the handle simultaneously (diag. 11), rotate the<br />
handle to the desired position until an audible<br />
click is heard.<br />
FITTING THE CHILD CAR SEAT INTO THE CAR<br />
Please read this paragraph carefully: NECESSARY<br />
REQUIREMENTS OF THE CAR SEAT AND<br />
SAFETY BELT.<br />
The child car seat, with or without base, must be<br />
fi tted only rear-facing. WARNING! EXTREMELY<br />
DANGEROUS: DO NOT FIT ON CAR SEATS<br />
EQUIPPED WITH AIRBAGS, unless the airbags<br />
have been de-activated.<br />
WARNING! Never fi t the child car seat to a<br />
car seat if it is only equipped with a 2 point car<br />
safety belt safety belt.<br />
FITTING THE CHILD CAR SEAT WITH BASE UNIT:<br />
To fi t the child car seat with base unit to the car<br />
seat, proceed as follows:<br />
1. Release the child car seat from the base unit<br />
by pulling the release handle (diag.12), and<br />
simultaneously lift it by using the carry handle.<br />
2. Place the base unit on the desired car seat, and<br />
adjust it as shown in diag. 13, ensuring that it is<br />
placed against the backrest of the car seat.<br />
3. Pull the car seat belt and fasten it to the<br />
buckle by passing the horizontal part through<br />
the appropriate belt guides (diag.14).<br />
4. Before fi tting the child car seat on to its base<br />
unit, check that the securing device is closed<br />
(diag. 15).<br />
5. Place the child car seat on to its base unit in a<br />
rear-facing position, and press downward until it<br />
is secured (you will hear an audible click) (diag.<br />
16).<br />
6. Check that the child car seat has been<br />
correctly secured to its base unit by trying to pull<br />
it upward, both from the front and rear part.<br />
7. Take the diagonal belt of the car, and pass it<br />
through the belt guide located at the rear of the<br />
child car seat’s backrest diag. 17)...<br />
WARNING: DURING TRANSPORT, THE<br />
DIAGONAL BELT OF THE CAR MUST ALWAYS<br />
BE IN THE POSITION SHOWN IN DIAG.<br />
18A; NEVER USE THE CHILD CAR SEAT<br />
WITHOUT PASSING THE BELT THROUGH THE<br />
APPROPRIATE GUIDE: