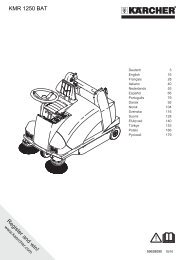
Register and win! KMR 1250 B - Kärcher
Register and win! KMR 1250 B - Kärcher
Register and win! KMR 1250 B - Kärcher

Create successful ePaper yourself
Turn your PDF publications into a flip-book with our unique Google optimized e-Paper software.
Safety notes regarding the batteries<br />
Please observe the follo<strong>win</strong>g warning notes<br />
when h<strong>and</strong>ling batteries:<br />
Observe the directions on the<br />
battery, in the instructions for<br />
use <strong>and</strong> in the vehicle operating<br />
instructions!<br />
Wear an eye shield!<br />
Keep away children from acid<br />
<strong>and</strong> batteries!<br />
Risk of explosion!<br />
Fire, sparks, open light, <strong>and</strong><br />
smoking not allowed!<br />
Danger of causticization!<br />
First aid!<br />
Warning note!<br />
Disposal!<br />
Do not throw the battery in the<br />
dustbin!<br />
Danger<br />
Risk of explosion! Do not put tools or similar<br />
on the battery, i.e. on the terminal poles<br />
<strong>and</strong> cell connectors.<br />
Danger<br />
Risk of injury! Ensure that wounds never come<br />
into contact with lead. Always clean your h<strong>and</strong>s<br />
after having worked with batteries.<br />
Danger<br />
Risk of fire <strong>and</strong> explosion!<br />
– Smoking <strong>and</strong> naked flames are strictly<br />
prohibited.<br />
– Rooms where batteries are charged<br />
must have good ventilation because<br />
highly explosive gas is emitted during<br />
charging.<br />
Danger<br />
Danger of causticization!<br />
– Rinse thoroughly with lots of clear water<br />
if acid gets into the eye or comes in contact<br />
with the skin.<br />
– Then consult a doctor immediately.<br />
– Wash off the acid If it comes in contact<br />
with the clothes.<br />
Installing <strong>and</strong> connecting the battery<br />
Open the device hood.<br />
Insert battery in battery mount.<br />
Screw on mounts on battery base.<br />
Connect pole terminal (red cable) to<br />
positive pole (+).<br />
Connect pole terminal to negative pole<br />
(-).<br />
Note<br />
Before removing the battery, make sure<br />
that the negative pole lead is disconnected.<br />
Check that the battery pole <strong>and</strong> pole terminals<br />
are adequately protected with pole<br />
grease.<br />
Charging battery<br />
Danger<br />
Risk of injury! Comply with safety regulations<br />
on the h<strong>and</strong>ling of batteries. Observe<br />
the directions provided by the manufacturer<br />
of the charger.<br />
Danger<br />
Charge the battery only with an appropriate<br />
charger.<br />
Disconnect battery.<br />
Unscrew all cell caps.<br />
Connect positive terminal cable from<br />
the charger to the positive pole connection<br />
on the battery.<br />
Connect negative terminal cable from<br />
the charger to the negative pole connection<br />
on the battery.<br />
Plug in mains connector <strong>and</strong> switch on<br />
charger.<br />
Charge battery using lowest possible<br />
level of charging current.<br />
Screw in cell caps.<br />
Note<br />
When the battery is charged, first remove<br />
the charger from the mains <strong>and</strong> then disconnect<br />
it from the battery.<br />
Check fluid level in the battery <strong>and</strong> adjust<br />
if required<br />
Warning<br />
Regularly check the fluid level in acid-filled<br />
batteries.<br />
– The acid in a fully charged battery has a<br />
specific weight of 1.28 kg/l at a temperature<br />
of 20 °C.<br />
– The acid in a partially discharged battery<br />
has a specific weight between 1.00<br />
<strong>and</strong> 1.28 kg/l.<br />
– The specific weight of the acid must be<br />
uniform in all cells.<br />
Unscrew all cell caps.<br />
Take a sample from each cell using the acid<br />
tester.<br />
Put the acid sample back into the same cell.<br />
Where fluid level is too low, top up cells to<br />
the mark provided with distilled water.<br />
Charge battery.<br />
Screw in cell caps.<br />
EN<br />
- 8<br />
Check the tyre pressure<br />
Park the sweeper on an even surface.<br />
Connect air pressure testing device to<br />
tyre valve.<br />
Check air pressure <strong>and</strong> adjust if required.<br />
Set air pressure for the front <strong>and</strong> rear<br />
tyres at 6 bar.<br />
Manually clean the dust filter<br />
The filter can also be cleaned manually in<br />
addition to the automatic interval.<br />
Note<br />
During operations, the dust filter should be<br />
shaken <strong>and</strong> cleaned every 15-30 minutes<br />
depending on the amount of collected dust.<br />
Stop the machine.<br />
Set the lever to "wet" sweeping operations.<br />
Briefly press the dust filter cleaning switch.<br />
The dust filter is cleaned for approx. 10 seconds.<br />
Set the lever to "dry" sweeping operations.<br />
Check engine oil level <strong>and</strong> top up, if required<br />
Danger<br />
Risk of burns!<br />
Allow engine to cool down.<br />
Wait for at least 5 minutes after switching<br />
off the engine before checking the<br />
engine oil fill level.<br />
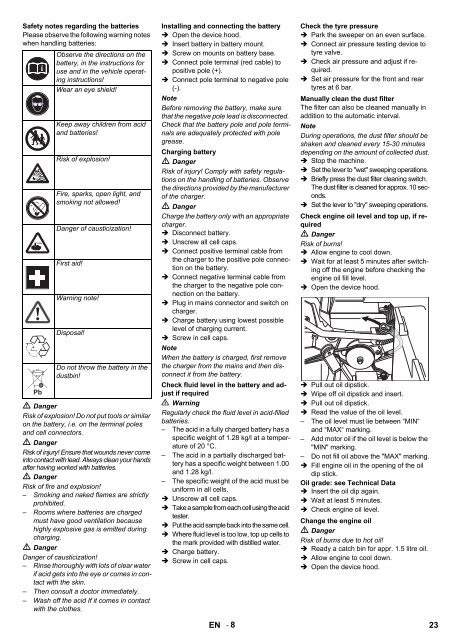
Open the device hood.<br />
Pull out oil dipstick.<br />
Wipe off oil dipstick <strong>and</strong> insert.<br />
Pull out oil dipstick.<br />
Read the value of the oil level.<br />
– The oil level must lie between “MIN“<br />
<strong>and</strong> “MAX“ marking.<br />
– Add motor oil if the oil level is below the<br />
"MIN" marking.<br />
– Do not fill oil above the "MAX" marking.<br />
Fill engine oil in the opening of the oil<br />
dip stick.<br />
Oil grade: see Technical Data<br />
Insert the oil dip again.<br />
Wait at least 5 minutes.<br />
Check engine oil level.<br />
Change the engine oil<br />
Danger<br />
Risk of burns due to hot oil!<br />
Ready a catch bin for appr. 1.5 litre oil.<br />
Allow engine to cool down.<br />
Open the device hood.<br />
23