Man. KT-370EE - Intek
Man. KT-370EE - Intek
Man. KT-370EE - Intek

Create successful ePaper yourself
Turn your PDF publications into a flip-book with our unique Google optimized e-Paper software.
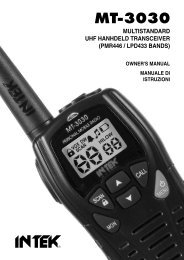
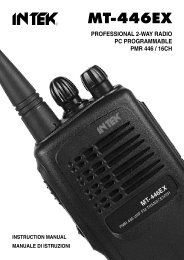
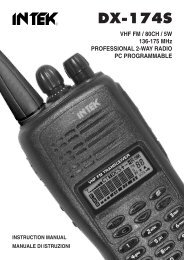
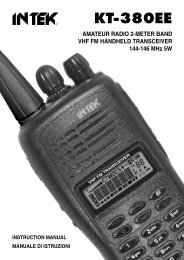
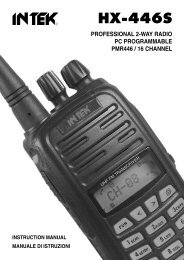
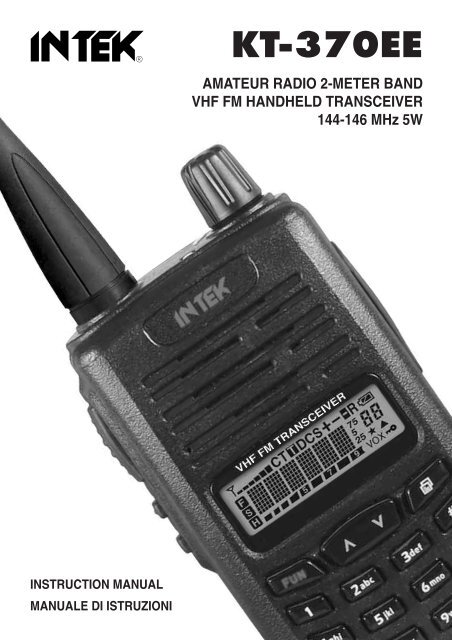
<strong>KT</strong>-<strong>370EE</strong>AMATEUR RADIO 2-METER BANDVHF FM HANDHELD TRANSCEIVER144-146 MHz 5WINSTRUCTION MANUALMANUALE DI ISTRUZIONI
Declaration of ConformityEC Certificate of Conformity(to EC Directive 99/5-89/336-93/68-73/23)DECLARATION OF CONFORMITYWith the present declaration, we certify that the following products :INTEK <strong>KT</strong>-<strong>370EE</strong>comply with all the technical regulations applicable to the above mentioned productsin accordance with the EC Directives 73/23/EEC, 89/336/EEC and 99/5/EC.Type of product :Amateur Radio Equipment VHFDetails of applied standards : EN 301 783 1, EN 301 489-1-5EN 60065<strong>Man</strong>ufacturer :INTEK S.R.L.Via G. Marconi, 1620090 Segrate, ItalyTel. 39-02-26950451 / Fax. 39-02-26952185E-mail : intek.com@intek-com.itNotified Body :EMCCert Dr. RasekBoelwiese 5, 91320 EbermannstadtGermanyIdentification Number : 0678Contact Reference :Armando ZanniTel. 39-02-26950451 / Fax. 39-02-26952185E-mail : intek.com@intek-com.itSegrate, 04/09/2007dr. Vittorio Zanetti(General <strong>Man</strong>ager)NOTICE !It is recommended to carefully read this owner’s manual before using the product. This will also help the user toprevent using the radio in violation of the regulations valid in the country where the product is used, as well as toavoid any possible interferences with other services.0678RoHS2002/95/EC
Index - NoticeIndex . . . . . . . . . . . . . . . . . . . . . . . . . . . . . . . . . . . . . . . . . . . . . . . . . . . . . . . . . . . . . . . . . . . 1Notice . . . . . . . . . . . . . . . . . . . . . . . . . . . . . . . . . . . . . . . . . . . . . . . . . . . . . . . . . . . . . . . . . . . 1General information . . . . . . . . . . . . . . . . . . . . . . . . . . . . . . . . . . . . . . . . . . . . . . . . . . . . . . . 2Unpacking and checking parts . . . . . . . . . . . . . . . . . . . . . . . . . . . . . . . . . . . . . . . . . . . . . . 3Supplied accessories . . . . . . . . . . . . . . . . . . . . . . . . . . . . . . . . . . . . . . . . . . . . . . . . . . . . . . 3Preliminary Steps . . . . . . . . . . . . . . . . . . . . . . . . . . . . . . . . . . . . . . . . . . . . . . . . . . . . . . . 4-6Getting acquainted with the product . . . . . . . . . . . . . . . . . . . . . . . . . . . . . . . . . . . . . . . . 7-9Getting started . . . . . . . . . . . . . . . . . . . . . . . . . . . . . . . . . . . . . . . . . . . . . . . . . . . . . . . . . . 10Menu Operation . . . . . . . . . . . . . . . . . . . . . . . . . . . . . . . . . . . . . . . . . . . . . . . . . . . . . . . 10-13Menu Shortcut Keys . . . . . . . . . . . . . . . . . . . . . . . . . . . . . . . . . . . . . . . . . . . . . . . . . . . . . . 13Self Programming Mode . . . . . . . . . . . . . . . . . . . . . . . . . . . . . . . . . . . . . . . . . . . . . . . . 13-16Specifications . . . . . . . . . . . . . . . . . . . . . . . . . . . . . . . . . . . . . . . . . . . . . . . . . . . . . . . . . . . 17Optional accessories . . . . . . . . . . . . . . . . . . . . . . . . . . . . . . . . . . . . . . . . . . . . . . . . . . . . . 17Notes . . . . . . . . . . . . . . . . . . . . . . . . . . . . . . . . . . . . . . . . . . . . . . . . . . . . . . . . . . . . . . . 39-41EnglishNOTICE !This transceiver has been factory programmed, in order to use the product immediately afterpurchase. The programming includes the activation of channels/frequencies in the VHF FMAmateur Band, according to the technical rules in force for the use of this band.NOTICE !This transceiver is programmable via PC, using the dedicated software and the PC interfacecable (optional items). Any programming or modification of the original default setting must bemade by a specialised technician or by an authorised service centre. Some functions of thistransceiver might be programmed in violation of the technical rules in force for the use of theVHF FM band. It is the user’s responsibility to check that any modification to the programmingwill be done in compliance with the current regulations. Any modification to the product,alteration of the internal circuit, of the external structure of the radio or any programming inviolation of the current regulations will automatically void the product certification and your rightto use the product. INTEK S.R.L. declines any responsibility concerning any modification of theproduct, made by the user or by a third party, after delivery of the product.- 1 -
General InformationEnglishThank you !Thank you for choosing INTEK for your amateur radio applications. This user friendly transceiver willprovide you with clear and reliable communications and will keep your professional activities at peakefficiency. This transceiver incorporates the latest and most advanced technology, so you will bepleased with its quality and its technical features.Important notice !The use of VHF FM transceivers is subject to the regulations applied in the country where the producthas to be used. As regulations are usually subject to possible modifications, please check the currentregulations in your country with your dealer or local supplier. INTEK does not take any responsibility forillegal use and operation of this product not in accordance with the regulation of the country where theproduct is used.Safety noticeThe user must know and understand the common risks related to the use of transceivers. Do not usethe transceiver in environments at risk of explosion (where there are gas, dusts, smokes, etc.). Do notuse the transceiver in service areas or fuel stations, on board aircrafts, etc.CautionsPlease observe the following precautions, in order to avoid causing fire, personal injuries or damage tothe radio:It is suggested that each transmitted message lasts a few minutes only, since very longtransmissions at the maximum transmitter RF output power may overheat the transmitter.Do not alter or modify in any way your transceiver.Do not expose the transceiver for a long time to direct sunlight and do not place it close toheat sources.Do not expose the transceiver to excessively dusty or damp places, do not place it onunstable surfaces.In case of anomalous smell or smoke that leaks out from the transceiver, turn it off immediatelyand remove the battery pack. Please contact an authorised service center.Please do not dispose off used battery with common garbage. Please use the dedicateddisposal containers.- 2 -
SPMICUnpacking and Checking Parts - Supplied AccessoriesUnpacking and checking partsCarefully unpack the product. Please identify all the parts listed below, before wasting the packaging. Ifany part is missing or if the packaging shows any damage, please contact your dealer immediately.EnglishSupplied accessoriesRubber flexible antenna with SMA connector7.2V 1200mAh Li-Ion Rechargeable Battery PackElectronic Quick Desk ChargerBelt ClipSpeaker-microphone Jack CoverUser <strong>Man</strong>ualRubber flexible antennawith SMA connectorQuick Desk ChargerLi-Ion Battery PackBelt ClipSpeaker-microphoneJack CoverUser <strong>Man</strong>ual- 3 -
Preliminary StepsEnglishBattery chargingConnect the 230VAC adaptor charger to the desk type battery chargerand to a 230VAC outlet. The Red Led will flash to confirm that the chargeris powered.Insert the empty battery or the transceiver with the battery pack in thebattery charger. Please make sure that the charging contacts of the radioare connected with the charging contacts of the charger cradle. The Ledindicator will light in red color then the device is ready to begin thecharging process. The charging time depends on the battery condition andcapacity). When the charging process has finished, the Led indicator willlight in Green color. Remove the battery pack or the transceiver from thebattery charger and disconnect it from the AC outlet.Warning !The battery is supplied empty and it has to be fully recharged before use.Some complete cycles of charge/discharge will be necessary in order for the battery to reach apeak efficiency level.Please do not charge the battery again when it has just been charged. Otherwise, you maydamage the battery or reduce its life.The battery charger does not switch OFF automatically when charging is complete, thereforeplease remove battery or radio from the charger cradle and disconnect it from the AC outlet.Do not recharge battery for more than 8 hours, in order to avoid battery overheating.To install the battery3Place the battery pack on the radio as showed in the drawing (item 1).2Push the battery pack forward (item 2) until it is locked on the radio(item 3).1- 4 -
Preliminary StepsTo remove the batteryEnglish1To remove the battery pack, press the battery lock on the radio (item 1) andpush back the battery pack, as showed in the drawing (item 2).2Warning !Please do not waste used batteries into the environment and do not trash them with the commongarbage. Please use the dedicated case for the collection of used up batteries at your supplier.Do not attempt to open or remove the battery casing.Do not short the battery terminals or throw the used batteries into fire.Installing the antennaConnect the antenna to the antenna connector located on the top panel ofthe radio. Gently turn the antenna clockwise until locked.Warning : Do not touch the antenna and do not move it close to amicrophone cable during transmission, as this might cause malfunctionand damage to the radio.- 5 -
Preliminary StepsEnglishTo install / to remove the belt clipIf necessary, attach the belt clip to the tranceiver, making it slide along thefit runner placed on the rear side of the battery untill the lock will hook. Toremove the belt clip press the lock and slide the belt clip away fromthe battery.Install the external earset-microphone jack rubber cover.If an external earset-microphone is not used, please install the earsetmicrophonejack rubber cover.Install the earset-microphone jack rubber cover, by matching the threerubber tabs with the holes on the radio, as showed on the drawing.If the earset-microphone jack rubber cover is removed, radio will not besplash proof.To install the external microphone (optional)To install the external microphone, remove the protection cover of theexternal microphone/speaker jack. This cover ensures the watertightintegrity of the transceiver (spray-guard) that will not be ensured after itsremoving. Insert the connector of the external microphone into theright jack.In order to avoid mulfunction or damage to the transceiver, use onlyoriginal microphones. Using non original accessories will authomaticallyvoid the warranty.Warning !If an external earset-microphone is used, radio will not be splash proof.- 6 -
Getting Acquainted with the ProductGETTING ACQUAINTED WITH THE PRODUCT2English131098745611121314151. AntennaRubber flexible antenna with SMA connector.2. RX/TX LED IndicatorThe LED indicator will light in green colour when the radio is receiving a signal and in red colourduring transmission.3. Power ON switch and volume controlSwitch on the transceiver turning the knob clockwise or counterclockwise to switch it off.To increase the volume, turn the knob clockwise or counterclockwise to decrease it.4. LCD DisplayBacklighted Dot Matrix LCD Display, provides clear reading and full information on every functionand status of the radio.5. Confirmation KeyIt selects and confirms the Menu selections.6. Numeric Keypad7. Fun KeyFunction key to quickly access several functions of the radio.8. UP/DOWN KeysChannels and menu operation selection keys.9. MicrophoneBuilt-in microphone.- 7 -
Getting Acquainted with the ProductEnglish10. SpeakerBuilt-in speaker.11. PTT key (Push-To-Talk)To transmit, press and keep pressed the PTT key (11), then speak into the microphone with yournormal voice. To receive release the PTT key (11).12. Lamp KeyRubber key to switch ON and OFF the LCD backlight function.13. Monitor KeyPress this key to open the Squelch and release it to close the Squelch.14. External earset-microphone jack rubber coverThis cover protects the external earset-microphone jack and makes the radio splash proof.15. Desktop Charger ContactsLCD DISPLAYA B C D E F GUTS75525HILMRQPONA. Signal Digital Bar MeterIndicates the received signal strenght in the receive mode.B. CT IndicationThe CT indication is lighted when the CTCSS function is enabled.C. T IndicationNon available on this model.D. DCS IndicationThe DCS indication is lighted when the DCS function is enabled.E. + - IndicationNon available on this model.- 8 -
Getting Acquainted with the ProductF. - IndicationThe - icon is lighted when the 12.5 KHz channel spacing (narrow) is selected.G. R IconThe R icon is lighted when the Reverse function is enabled.H. Battery Level IndicatorIt shows the current battery level condition.I. CTCSS / DCS Code NumberIt shows the CTCSS and DTS Codes setting.L. Stop Scanning IconThe channels scanning indicator is lighed when the scanning stops.M. MONITOR IconThis icon is lighted when the Monitor (13) key is pressed.N. Keypad Lock IconThe Lock icon is lighted when the keypad lock function has been enabled.O. VOX IndicationThe VOX icon is lighted when the VOX function has been enabled.P. Frequency Reading (25-5-75).It shows the KHz decimal figures of the frequency.Q. RF Digital MeterIt indicates the transmitter RF output power.R. Dot Matrix IndicationIt provides full information on channel, frequency and all enabled functions.S. H IconThe H icon is lighted when the transmitter is in HIGH POWER mode.T. S IconThe S icon is lighted when the automatic channel/frequency scanning function has been enable.The S icon will flash if a signal is detected on a channel.U. F IconNot available on this model.English- 9 -
Getting Started - Menu OperationEnglishGETTING STARTEDPower ONSwitch on the transceiver turning the Power/Volume knob (3) clockwise until you hear a click, thetransceiver now is in stand-by mode.Volume adjustmentTo adjust the volume, turn the volume knob (3) while using the MONITOR key (13) to listen to thebackground noise of the channels.Channel/frequency selectionSelect the desired channel by using the UP/DOWN (8) keys.TransmissionIn order to transmit, press the PTT (11) key and speak with your normal voice, keeping the microphoneat about 4 cm from your mouth. The LED indicator (2) will light in red color. Release the PTT key (11) atthe end of transmission.ReceivingRelease the PTT (11) keyand properly adjusting volume, you will be able to receive the incoming signals.When receiving a signal, the LED indicator (2) will light in green colour.MENU OPERATIONIn stand-by status, press FUN (7) key to enter the menu. Press the UP/DOWN (8) keys to choose menuitems. After finished setup, press FUN (7) key to return to previous menu (except SCAN, FREQ, T->R,LED). Press the FUN (7) key again to return to stand-by status.1. Channel Mode / Frequency ModeCHANNEL MODEPress the UP/DOWN (8) keys to choose desired channel.SCAN ---> T->R (reverse frequency) ---> FREQ (switch to frequency mode) ---> KEYBO (choosekeyboard lock mode) ---> LED (indicator setup) ---> BEEP (warning sound switch setup) ---> POW (RFoutput power HI/LOW) ---> SQL (voice level setup) ---> TOT (emission timing setup) ---> VOX (VOXsensitivity setup) ---> STEP (channel spacing setup) ---> N-W (Narrow-Wide channel spacing setup).FREQUENCY MODEPress the numeric keypad (7) to input frequency, and if the input frequency exceeds the allowed range,it will return to the default value. According to the input number, the Two-Way Radio automaticallycalculate frequency step.SCAN ---> CT/DCS ---> CHANL (switch to channel mode) ---> KEYBO (choose keyboard lock mode) --->LED (indicator setup) ---> BEEP (warning sound switch setup) ---> POW (RF output power HI/LOW) --->SQL (voice level setup) ---> TOT (emission timing setup) ---> VOX (VOX sensitivity setup) --->STEP (channel spacing setup) ---> N-W (Narrow-Wide channel spacing setup).2. Key Function in the Menu ModeFUN Key (7) : enter the menu set-up statusCONFIRMATION key (5) : selects and confirms the menu selectionUP/DOWN Keys (8) : choose items- 10 -
Menu OperationSCAN : scanningIn the stand-by status, press the FUN (7) key to display scanning indicator, and then press theCONFIRMATION (5) key to start scanning. If signals exist in one channel/frequency, thechannel/frequency will be displayed. Then press the CONFIRMATION (5) key, the Two-Way Radio willstop scanning and remain at the current channel/frequency, or else, it will start scanning for the nextchannel/frequency after 2 seconds. Press the FUN (7) key to return to stand-by status.EnglishT->R (reverse frequency)In the channel mode, when dual frequency is used to start reverse frequency function, the receiving frequencyand emission frequency will interchange. In the CHANNEL MODE press the FUN (7) key then press theUP/DOWN (8) keys. When the LCD display shows T->R ?, press the CONFIRMATION (5) key to confirm.CT/DCS (CTCSS / DCS selection)In the stand-by status, press the FUN (7) key to enter menu page, then press the UP/DOWN (10) keys toconfirm (you will see CT/DCS). Press the CONFIRMATION (5) key to enter then press the UP/DOWN (8)keys to choose CTCSS or DCS. Press the CONFIRMATION (5) key to enter the chosen item. Press theUP/DOWN (10) keys to set up CTCSS or DCS code. When DCS is chosen, press the LAMP (12) key tochoose forward or reverse direction, and press the CONFIRMATION (5) key to finished set-up.(Frequency mode only).FREQ : switch from channel mode to frequency modeIn the stand-by status, press the FUN (7) key and then numeric key 3 to switch to frequency mode. Ifthe Two-Way Radio is in frequency mode originally, then it switches to channel mode. Press thefunction key and then the UP/DOWN (8) keys to find, and when the display shows FREQ ?, press theCONFIRMATION (5) key to switch.CHANL : switch from frequency mode to channel modeIn the stand-by status, press the FUN (7) key and then numeric key 3 to switch to channel mode.Alternatively, press the FUN (7) key to find. When the display shows CHANL ?, press the UP/DOWN(8) keys to switch. (Confined to frequency mode only)KEYBO : Keyboard lock setupIn the stand-by status, press the FUN (7) key and then the UP/DOWN (8) keys to find, and when thedisplay shows KEYBO?, press the CONFIRMATION (5) key to enter. You will see two options available,AUTO and MANUAL.AUTO: automatic lockingWhen this option is chosen, the keyboard will be locked automatically when no operation is performed.MANUAL: manual lockingWhen this option is chosen, the keyboard cannot be locked automatically.After finished setup, press the FUN (7) key to return to previous menu.Press the FUN (7) key again to return to stand-by status.- 11 -
Menu OperationEnglishLED : light setupIn the stand-by status, press the FUN (7) key and then the UP/DOWN (8) keys, and when the displayshows LED ?, press the CONFIRMATION (5) key to enter. You will see three options available, AUTOand MANUAL and ON. Press the CONFIRMATION (5) key to select the desired item.AUTO: When this option is chosen, the display light will be turned on once you press the key.MANUAL: When this option is chosen, the display light will not be turned on automatically.You have to operate the side key manually to use light.ON: When this option is chosen, the display light will be turned on all the time. The light will be onwithout any operation.BEEP : warning sound setupIn the stand-by status, press the FUN (7) key and then the UP/DOWN (8) keys, and when the displayshows BEEP ?, press the CONFIRMATION (5) key to enter. Press the UP/DOWN (8) keys, and you cansee ON and OFF in turns. You can choose sound ON or OFF by pressing the CONFIRMATION (5) key.POW : RF output power setupIn the stand-by status, press the FUN (7) key and then the UP/DOWN (8) keys, and when the displayshows POW ?, press the CONFIRMATION (5) key to enter. Press the UP/DOWN (8) keys, and you cansee H and L in turns. You can choose high / low power by pressing the CONFIRMATION (5) key.SQL : Squelch level setupIn the stand-by status, press the FUN (7) key and then the UP/DOWN (8) keys, and when the displayshows SQL ?, press the CONFIRMATION (5) key to enter. Press the UP/DOWN (8) keys to choose thedesired squelch level and confirm the selection by pressing the CONFIRMATION (5) key.TOT : Emission Timing SetupIn the stand-by status, press the FUN (7) key and then the UP/DOWN (8) keys, and when the displayshows TOT ?, press CONFIRMATION (5) key to enter. Press the UP/DOWN (10) keys to set up emittingtime limit. The time unit is in seconds. Press the CONFIRMATION (5) key to confirm the selection.VOX : VOX Level SetupIn the stand-by status, press the FUN (9) key and then the UP/DOWN (8) keys, and when the displayshows VOX ?, press the CONFIRMATION (5) key to enter. Press the UP/DOWN (8) keys to select thedesired VOX level and press the CONFIRMATION (5) key to confirm the selection.STEP : Channel Spacing SetupIn the stand-by status, press the FUN (7) key to enter the menu mode, then press the UP/DOWN (8)keys and when the LCD shows STEP ?, press the CONFIRMATION (5) key to enter. Press theUP/DOWN (8) keys to select the desired channel spacing and press the CONFIRMATION (5) key toconfirm the selection.N-W : Narrow / Wide Band SwitchIn the stand-by status, press the the FUN (7) key to enter the menu mode, then press the UP/DOWN(8) keys and when the LCD shows N-W ?, press the CONFIRMATION (5) key to enter. Press theUP/DOWN (8) keys to select N (Narrow) or W (Wide) items. Press the CONFIRMATION (5) key toconfirm the selection.- 12 -
Menu Operation - Self Programming ModeMENU SHORTCUT KEYSPress the FUN (7) key, then press the numeric key to enter appropriate items. This shortcut function issame as the items of menu, but they more easy to operate the Two Way Radio.FUN + 1 Enter the channel/frequency scanning.FUN + 2 Switches ON/OFF the Reverse Frequency function and exits stand-by statusFUN + 3 Channel/frequency modes switch.FUN + 4 The way of keyboard locking (auto/manual) set-up.FUN + 5 LED light set-up.FUN + 6 Warning sound setup.FUN + 7 High/Low RF output power setup.FUN + 8 Squelch level setup.FUN + 9 Emission timing setup.FUN + 0 Swithes on the VOX function and VOX level setup.FUN + * Keyboard Lock/UnlockFUN + # Check the receiving/emission frequency of the channels and the CTCSS status.EnglishSELF PROGRAMMING MODEWhen the Two-Way Radio enters the Self Programming Mode, the handheld Two-Way Radio allowschannel set-up.Operation :1. Keep pressing the FUN (7) key and turn on the power at same time. When the display shows SELF,the radio enters the Self Programming Mode.2. When the Two-Way Radio enters the Self Programming Mode, see the following paragraphs foroperation steps. LCD turns to CH-01 01. .3. When the data is set up, press the CONFIRMATION (5) key to go on to the next step.(1) CHANNEL SETUPPress the UP/DOWN (8) keys to choose the desired channel (1-80).Press the CONFIRMATION (5) key to confirm.(2) RECEIVING FREQUENCY SETUPPress the numeric keypad (6) to input the receiving frequency. Thefrequency range is 144-146 MHz (136.000-174.99375 MHz) (*). Thedefault frequency step is 5 KHz.Press the CONFIRMATION (5) key to confirm.- 13 -
Self Programming ModeEnglish(3) RECEIVING CTCSS/DCS SETUPPress the MONITOR (14) key to select the CTCSS or DCS codes. Pressthe UP/DOWN (8) keys to choose the desired code number.If the CTCSS function is disabled (OFF) press the MONITOR (14) key toenable the code selection and use the UP/DOWN (8) keys to select thedesired code number (67.0 - 254.1 Hz).Press the CONFIRMATION (5) key to confirm.(4) TRANSMITTING FREQUENCY SETUPPress the numeric keypad (6) to input the transmitting frequency. The frequency range is 144-146 MHz(136.000-174.99375 MHz) (*). The default frequency step is 5 KHz.Press the CONFIRMATION (5) key to confirm.(5) TRANSMITTING CTCSS/DCS SETUPPress the MONITOR (14) key to select the CTCSS or DCS codes. Press the UP/DOWN (8) keys to choosethe desired code number.If the CTCSS function is disabled (OFF) press the MONITOR (14) key to enable the code selection and usethe UP/DOWN (8) keys to select the desired code number (67.0 - 254.1 Hz).Press the CONFIRMATION (5) key to confirm.(6) BCL (BUSY CHANNEL LOCKOUT)Press the UP/DOWN (8) keys oto choose the following items :1: carrier wave2: CTPress the CONFIRMATION (5) key to confirm.(7) SCANNING DELETION / ADDITION SETUPPress the UP/DOWN (8) keys to choose the following items :Del : scanning deletionAdd : scanning additionPress the CONFIRMATION (5) key to confirm.(8) RF OUTPUT POWERSETUPPress the UP/DOWN (10) keys or use the selector (2) to choose thefollowing items :- 14 -
Self Programming Mode(8) RF OUTPUT POWER SETUPPress the UP/DOWN (8) keys to choose the following items :H : high powerL : low powerPress the CONFIRMATION (5) key to confirm.EnglishRESET TO FACTORY SETTINGSIn the Power-OFF status, hold on the FUN (7) key and turn on the radio at the same time, then press1 0 1 0 to get back the factory setting.RECEIVING / TRANSMITTING SIGNAL SETUPIn the CTCSS and DCS code settings (RX and TX modes), use the MONITOR (14) key to select thefollowing modes :CTCSS disabled (OFF) ---> CTCSS selection ---> DCS selectionMONITOR KEYMONITOR KEYIn the DCS code setting, press the LAMP (12) key to select NORMAL code number (N) or invertedcode NUMBER (I).- 15 -
Self Programming ModeEnglishSelf Programming Mode DiagramPress thekey and switch on the radioLCD DISPLAYSelf Programming ModeChannel SelectorChannel SelectionSelect channel(1-80)Channel SelectorChannel SelectorReceiving FrequencyNumeric Keypad /Receiving CTCSS/DCS codesSelectreceivingfrequencySelectreceivingCTCSS/DCS codesChannel SelectorChannel SelectorTransmitting FrequencyNumeric Keypad /Transmitting CTCSS/DCS codesSelecttransmittingfrequencySelecttransmittingCTCSS/DCS codesChannel SelectorBCL (Busy Channel Lockout)OFF1 : carrier wave2 : CT/DCSChannel SelectorScanning frequency deletion/additionADD : add scanningDEL : delete scanningChannel SelectorRF output power selection (high/low)H : high powerL : low power- 16 -
Specifications - Optional AccessoriesSPECIFICATIONSGeneralFrequency 144-146 MHz (136.000 - 174.9875 MHz) (*)Channels 80Channel spacing5, 6.25, 10, 12.5, 25 KHzDC input voltage7.2 VDCOperating temperature -20/+55°Dimensions mm 58 x 105 x 35Weight200 gr. (with battery and antenna)ReceiverSensitivity (12dB Sinad) 0.16 µVSelectivity65dBIntermodulation60dBAudio output500mWTransmitterRF output power5W / 1WModulationF3ESpurious & Harmonicsin cmpliance with the R&TTE regulationsMaximum deviation≤ ±5KHzFrequency Stability±2.5ppm(*) <strong>KT</strong>-370EX (INTERNATIONAL VERSION) 136.000-174.995 MHz (not available for Europe)EnglishOPTIONAL ACCESSORIES- KME-315 External Earset-Microphone with tie clip- KME-614 External Earset-Microphone with adjustable ear hook- KME-801 External Earset-Microphone for security and bodyguard- KME-100A External Earset-Microphone with tie clip- KME-200A External Earset-Microphone with flexible boom mic and tie clip- KME-H115 External Speaker-Microphone (light duty)- KST-301 External Speaker-Microphone (heavy duty)- CDMT-0370 Programming Kit (PC interface cable and software CD)User Informationin accordance with art. 13 of the Legislative Decree of 25th July 2005, no. 15 ”Implementation of Directives 2002/95/EC, 2002/96/EC and2003/108/EC, relative to reduction of the use of hazardous substances in electrical and electronic equipment, in addition to waste disposal”.The crossed bin symbol shown on the equipment indicates that at the end of its working life the product must be collectedseparately from other waste.The user must therefore take the above equipment to the appropriate differentiated collection centres for electronic andelectro technical waste, or return it to the dealer when purchasing a new appliance of equivalent type, in a ratio of one to one.Appropriate differentiated waste collection for subsequent recycling, treatment and environment-friendly disposal of thediscarded equipment helps to prevent possible negative environmental and health effects and encourages recycling of thecomponent materials of the equipment.Illegal disposal of the product by the user will be punished by application of the administrative fines provided for by the legislativedecree no. 22/1997 (article 50 and following of the legislative decree no. 22/1997).- 17 -
Indice - IntroduzioneItalianoIndice . . . . . . . . . . . . . . . . . . . . . . . . . . . . . . . . . . . . . . . . . . . . . . . . . . . . . . . . . . . . . . . . . . 18Importante . . . . . . . . . . . . . . . . . . . . . . . . . . . . . . . . . . . . . . . . . . . . . . . . . . . . . . . . . . . . . . 18Informazioni per l' utente . . . . . . . . . . . . . . . . . . . . . . . . . . . . . . . . . . . . . . . . . . . . . . . . . . 19Disimballaggio e verifica delle parti . . . . . . . . . . . . . . . . . . . . . . . . . . . . . . . . . . . . . . . . . 20Accessori forniti . . . . . . . . . . . . . . . . . . . . . . . . . . . . . . . . . . . . . . . . . . . . . . . . . . . . . . . . . 20Preparazione . . . . . . . . . . . . . . . . . . . . . . . . . . . . . . . . . . . . . . . . . . . . . . . . . . . . . . . . . 21-23Familiarizzare con il prodotto . . . . . . . . . . . . . . . . . . . . . . . . . . . . . . . . . . . . . . . . . . . 24-26Operazioni di base . . . . . . . . . . . . . . . . . . . . . . . . . . . . . . . . . . . . . . . . . . . . . . . . . . . . . . . 27Utilizzo del menu . . . . . . . . . . . . . . . . . . . . . . . . . . . . . . . . . . . . . . . . . . . . . . . . . . . . . . 27-32Comandi veloci da tastiera . . . . . . . . . . . . . . . . . . . . . . . . . . . . . . . . . . . . . . . . . . . . . . . . 33Programmazione manuale da tastiera . . . . . . . . . . . . . . . . . . . . . . . . . . . . . . . . . . . . . 33-36Specifiche tecniche . . . . . . . . . . . . . . . . . . . . . . . . . . . . . . . . . . . . . . . . . . . . . . . . . . . . . . 37Accessori opzionali . . . . . . . . . . . . . . . . . . . . . . . . . . . . . . . . . . . . . . . . . . . . . . . . . . . . . . 37Garanzia limitata . . . . . . . . . . . . . . . . . . . . . . . . . . . . . . . . . . . . . . . . . . . . . . . . . . . . . . . . . 37Avvertenze importanti / Avviso agli utenti . . . . . . . . . . . . . . . . . . . . . . . . . . . . . . . . . . . . 38Note . . . . . . . . . . . . . . . . . . . . . . . . . . . . . . . . . . . . . . . . . . . . . . . . . . . . . . . . . . . . . . . . 39-41IMPORTANTE !Questo ricetrasmettitore è stato pre-programmato in origine, al fine di consentire all’utentel’utilizzo immediato del prodotto dopo l’acquisto. La programmazione eseguita comprendel’attivazione di canali/frequenze in banda VHF FM radioamatoriale, nel rispetto delle normetecniche in vigore per l’utilizzo di questa banda.IMPORTANTE !Questo ricetrasmettitore è programmabile tramite PC, utilizzando l’apposito software e cavettodi interfaccia (opzionali). L’eventuale programmazione o modifica della programmazioneesistente deve essere eseguita da un tecnico specializzato o da un centro di assistenzaautorizzato. Alcune funzioni del ricetrasmettitore potrebbero essere programmate in violazionedelle norme tecniche in vigore per l’utilizzo della banda VHF FM. E’ responsabilità dell’utenteverificare che eventuali modifiche nella programmazione delle funzioni del ricetrasmettitoresiano conformi a quanto previsto dalle norme tecniche in vigore. Modifiche al prodotto,manomissioni, alterazione delle regolazioni interne o delle strutture esterne della radio eprogrammazioni in violazione delle norme di legge fanno decadere le certificazioni eomologazioni del prodotto ed il diritto all’utilizzo dello stesso.INTEK s.r.l. declina qualsiasi responsabilità relativamente a modifiche della programmazionedel ricetrasmettitore, eseguite dall’utente o da terzi, dopo la consegna del prodotto.- 18 -
Informazioni per l' utenteGrazieVi ringraziamo per aver scelto INTEK per applicazioni radioamatoriali. Siamo certi che questoricetrasmettitore di facile uso vi consentirà di comunicare in modo affidabile e di svolgere le vostre attivitàhobbistiche con la massima efficienza. Questo ricetrasmettitore incorpora la più avanzata tecnologia esarete soddisfatti del suo livello di qualità e delle sue caratteristiche tecniche.Avviso importante per l' utente !L’utilizzo dei ricetrasmettitori VHF FM è regolato dalle norme di legge in vigore per uso esclusivoradioamatoriale. Poiché le norme stesse sono soggette a possibili variazioni, prima di utilizzare gliapparecchi, si raccomanda di informarsi presso il proprio rivenditore o fornitore verificando gli eventualiadempimenti da osservare. INTEK declina qualsiasi responsabilità relativamente ad un uso degliapparecchi non autorizzato o non conforme alle norme di legge.ItalianoSicurezzaL’utente deve conoscere e comprendere i rischi comuni legati all’uso di apparecchi ricetrasmittenti. Nonutilizzate mai il ricetrasmettitore in ambienti a rischio di esplosione (in presenza di gas, polveri, fumi,etc.). Non utilizzare inoltre il ricetrasmettitore nelle aree di servizio o distributori di carburante.PrecauzioniSi consiglia di osservare le seguenti precauzioni, al fine di evitare incendi, ferite personali e danni alricetrasmettitore:Si suggerisce di trasmettere per alcuni minuti in quanto trasmissioni molto lunghe o alla massimapotenza del trasmettitore potrebbero surriscaldare lo stesso.Non manomettere o modificare in alcun modo il ricetrasmettitore.Non esporre il ricetrasmettitore per lungo tempo alla luce solare diretta e non porlo vicino a fontidi calore.Non porre il ricetrasmettitore in luoghi eccessivamente polverosi o umidi, inoltre non porlo susuperfici instabili.Se sentite un odore anomalo o se vedete del fumo fuoriuscire dal ricetrasmettitore, spegneteloimmediatamente e rimuovete il pacco batteria. Quindi contattate un centro di assistenzaautorizzato.Non gettate batterie usate nella spazzatura. Utilizzate solo gli appositi contenitori per losmaltimento.- 19 -
SPMICDisimballaggio e verifica delle parti - Accessori fornitiDisimballaggio e verifica delle partiDisimballate accuratamente il ricetrasmettitore. Si raccomanda di identificare tutte le parti elencate nellatabella seguente, prima di eliminare l’imballo. Se vi sono stati danni o mancanze durante la spedizione,contattate immediatamente il vostro fornitore.ItalianoAccessori fornitiAntenna in gomma con connettore SMAPacco batteria Li-Ion 1200mAh 7.2VCaricabatterie rapido elettronico da tavolo 230VACClip da cinturaChiusura per presa earset-mic<strong>Man</strong>uale d' usoAntenna in gomma conconnettore SMACaricabatterie da tavoloBatteria Li-IonClip da cinturaChiusura per presaearset-mic<strong>Man</strong>uale d' uso- 20 -
PreparazioneRicarica della batteriaCollegare l’adattatore 230V alla presa posta sul retro del caricatore datavolo, come mostrato dal disegno. Collegare l' adattatore alla presa230VAC. Il LED inizierà a lampeggiare in colore rosso.Inserire la batteria scarica o il ricetrasmettitore con la batteria installata nelcaricabatteria. Assicurarsi che i terminali della batteria siano a contattocon quelli dei caricatore. Il LED smetterà di lampeggiare e rimarrà accesoin colore rosso, quindi l’apparecchio si predispone per iniziare la ricaricaautomatica della batteria. Il tempo di ricarica dipende dallo stato di caricae dalla capacità della batteria. Quando la ricarica è stata completata, ilLED sarà acceso in colore verde. A questo punto rimuovere la batteria o ilricetrasmettitore dal caricatore e scollegare quest’ultimo dalla reteelettrica.ItalianoAvvertenze !La batteria viene fornita scarica e deve essere quindi ricaricata prima dell’uso.Sono necessari alcuni cicli completi di carica/scarica affinché la batteria raggiunga il massimolivello di efficienza.La batteria non deve essere ricaricata nuovamente se è già stata completamente caricata.Diversamente, la vita della batteria può diminuire o la stessa essere danneggiata.Il caricabatterie non si spegne automaticamente dopo la ricarica pertanto rimuovere la batteria o ilricetrasmettitore dal caricatore e scollegare quest’ultimo dalla rete elettrica.Non superare le 8 ore di ricarica, per evitare il danneggiamento della batteria.Installare la batteria3Far coincidere le 3 guide della batteria con le 3 scanalature corrispondentiposte alla base del ricetrasmettitore, come mostrato nel disegno (punto 1).2Spingere la batteria sul retro del ricetrasmettitore (punto 2) fino a quandoil blocco posto nella parte alta della radio si aggancia e blocca la batteria(punto 3).1- 21 -
PreparazioneRimuovere la batteriaItaliano12Per rimuovere la batteria premere sul blocco posto nella parte alta dellaradio (punto 1) ed estrarla dalla stessa come mostrato nel disegno(punto 2).Avvertenze !Non disperdere batterie esaurite nell’ambiente e non gettarle tra i rifiuti ordinari. Utilizzate gliappositi contenitori per la raccolta delle batterie usate o restituite le batterie da eliminare al vostrofornitore.Non tentare mai di rimuovere l’involucro della batteria.Non cortocircuitare i teminali della batteria e non gettare quest' ultima nel fuoco.Installare l' antennaCollegare l' antenna in dotazione al connettore posto sul lato superioredella radio, come mostrato nel disegno. Ruotarla delicatamente in sensoorario fino a stringerla.Attenzione : non toccare l' antenna con le mani e non avvicinarla a cavimicrofonici durante la trasmissione in quanto ciò potrebbe causare danniricetrasmettitore.- 22 -
PreparazioneInstallare la clip da cinturaSe necessario, applicare la clip da cintura al ricetrasmettitore, facendolascivolare nell’apposita scanalatura posta sul retro della batteria fino aquando il blocco metallico si aggancia. Per rimuovere la clip premere sulblocco metallico e farla scivolare via dalla batteria.ItalianoInstallare la chiusura per la presa earset-micSe non si utilizza un microfono-altoparlante esterno, coprire la presa con ilcoperchio in gomma in dotazione.Applicare il coperchio facendo coincidere i 3 dentelli in gomma con i 3 foriposti sul lato destro della radio come mostrato nel disegno.Questa copertura assicura inoltre la tenuta stagna (anti spruzzo) delricetrasmettitore, che non sarà quindi più garantita dopo la sua rimozione.Installare un microfono esterno (opzionale)Per poter installare il microfono esterno, occorre prima rimuovere lacopertura fissata a protezione della presa per microfono/altoparlanteesterno.Inserire il connettore del microfono esterno nell’apposita presa.Per evitare malfunzionamenti o danni al ricetrasmettitore, utilizzareesclusivamente microfoni originali. L’utilizzo di accessori diversi da quellioriginali causa automaticamente la perdita del diritto alla garanzia.Attenzione :Se si utilizza un microno esterno, il ricetrasmettitore non è più a tenuta stagna.- 23 -
Familiarizzare con il prodottoFAMILIARIZZARE CON IL PRODOTTO213Italiano1091112144138576151. AntennaAntenna in gomma con connettore SMA.2. Indicatore LED RX/TXQuesto indicatore LED bi-colore rosso-verde è acceso in colore verde quando la radio è inmodalità ricezione e in colore rosso quando è in modalità trasmissione.3. Interruttore ON-OFF / Comando di volumeRuotare la manopola in senso orario per accendere il ricetrasmettitore e in senso antiorario perspegnerlo. Ruotare la manopola in senso orario per aumentare il volume e in senso antiorario perdiminuirlo.4. Display LCDDisplay LCD a matrice di punti, retroilluminato, consente la visualizzazione completa di tutte lefunzioni attivate e di tutte le informazioni impostabili dall' utente.5. Tasto CONFERMANelle operazioni del menu, consente di confermare le selezioni.6. Tastiera numerica7. Tasto FUN (Menu)Tasto funzione per l' accesso veloce alle varie funzioni della radio.8. Tasti UP/DOWNTasti per la selezione dei canali/frequenze. Nelle operazioni del menu consentono la selezionedelle varie funzioni.9. MicrofonoMicrofono entro contenuto.- 24 -
Familiarizzare con il prodotto10. AltoparlanteAltoparlante entro contenuto.11. Tasto PTT (Push-To-Talk)Per effettuare una chiamata, premere e tenere premuto il tasto PTT (13), quindi parlare nelmicrofono con un volume di voce normale. Rilasciare il tasto PTT per ricevere.12. Tasto LAMPPremere questo tasto per attivare l' illuminazione del display LCD. Ripremere il tasto per disattivarla.13. Tasto MONITORPremere questo tasto per aprire lo Squelch e ascoltare quindi il rumore di fondo. Rilasciare iltasto Monitor (15) per richiudere lo Squelch.14. Copertura della presa Earset-micCoperchio di gomma in dotazione che consente di coprire la presa per microfono esterno e quindidi rendere la radio a tenuta stagna.15. Contatti per caricabatterie da tavoloItalianoDISPLAY LCDA B C D E F GUTS75525HILMRQPONA. Strumento a barre S-Meterindica l' intensità del segnale in ricezione. In assenza di segnale, l' indicatore è spento.B. Indicazione CTL' indicazione CT è accesa quando è attiva la funzione CTCSS.C. Indicazione TNon disponibile in questo modello.D. Indicazione DCSL' indicazione DCS è accesa quando è attiva la funzione DCS.E. Indicazione + -Non disponibile in questo modello.- 25 -
Familiarizzare con il prodottoItalianoF. Indicazione -Questa indicazione è accesa quando è selezionata la canalizzazione a 12.5 KHz (Narrow).Se l' indicazione - (F) è spenta, la canalizzazione selezionata è a 25 KHz (Wide).G. Indicazione RL' indicazione R è accesa quando è attiva la funzione Reverse tra 2 frequenze.H. Indicatore di stato di carica della batteriaIndica lo stato della carica della batteria, in 2 livelli.Se l' indicatore di carica (H) lampeggia, è necessario procedere alla ricarica della batteria.I. Indicazione numericaIndicazione numerica che ha la funzione di contatore. Nella modalità menu indica il numero dellafunzione visualizzata in quel momento. Nei modi CTCSS e DCS indica il numero del tonoselezionato. Se non viene selezionato alcun tono, il contatore non viene visualizzato.L. Icona di arresto scansioneQuesta indicazione lampeggia quando è attiva la funzione di scansione canali/frequenze e lastessa si arresta in presenza di una comunicazione. L' icona (L) si spegne non appena lascansione riprende. Nella modalità CANALE l' icona (H) rimane accesa quando il canale in uso ènella lista di scansione (vedi "Programmazione manuale" punto 7).M. Icona MONITORL' icona Monitor (I) è accesa quando è attiva la funzione Monitor, cioè quando viene premuto iltasto Monitor (15). Rilasciando il tasto Monitor (15), l' icona (M) si spegne.N. Icona blocco tastiera (Key Lock)L' icona (N) è accesa quando è inserito il blocco della tastiera.O. Indicazione VOXL' icona VOX (O) è accesa quando è attiva la funzione VOX (uso a mani libere).P. Indicazione decimali di frequenza (25-5-75)Indicano i decimali in KHz della frequenza visualizzata.Q. Strumento a barre RF MeterIndica la potenza RF di uscita del trasmettitore.R. Indicazione a matrice di puntiIndicazione del canale/frequenza e di tutte le funzioni impostate. La visualizzazione è del tipo amatrice di punti.S. Icona HL' icona H (S) è accesa quando è selezionata l' alta potenza del trasmettitore.T. Icona SL' icona S (T) lampeggia quando è attiva la scansione automatica dei canali/frequenze. Inpresenza di una comunicazione la scansione si arresta e l' indicazione S (T) rimarrà accesa.Se la funzione di scansione automatica viene disattivata, l' icona S (T) rimarrà spenta.U. Icona FNon disponibile in questo modello.- 26 -
Operazioni di base - Utilizzo del menuOPERAZIONI DI BASEAccensioneAccendere il ricetrasmettitore ruotando in senso orario la manopola ON/OFF-Volume (3) fino a quandonon si sente un click, il ricetrasmettitore è ora nella modalità stand-by.La radio emetterà un beep e per un istante tutte le indicazioni del display saranno illuminate, aconferma del corretto funzionamento della radio.Regolazione del volumePer regolare il volume, ruotare la manopola ON/OFF-Volume (3) mentre si utilizza il tasto Monitor (13)per poter ascoltare il rumore di fondo dei canali.ItalianoSelezione dei canali/frequenzeIn modalità Stand-By, per selezionare il canale/frequenza desiderati, premere i tasti UP/DOWN (8).TrasmissionePer effettuare una chiamata, premere il tasto PTT (11) e parlare con un volume di voce normale,tenendo il microfono (9) a circa 4 cm dalla vostra bocca. L' indicatore LED (2) sarà acceso in colorerosso. Rilasciare il tasto PTT (11) al termine della conversazione.Se la funzione VOX è attivata, per trasmettere è sufficente parlare nel microfono. Terminata laconversazione, la radio passerà automaticamente in ricezione.RicezioneRilasciando il tasto PTT (11) e regolando opportunamente il volume, sarà possibile ascoltare il segnalein arrivo. Durante la ricezione di una comunicazione, l' indicatore LED (2) sarà acceso in colore verde.UTILIZZO DEL MENUNella modalità Stand-By, premere il tasto FUN (7) per entrare nella modalità menu. Utilizzare i tastiUP/DOWN (8) per scorrere le varie funzioni del menu e confermare la scelta premendo il tastoCONFERMA (5). Le varie funzioni del menu vengono conteggiate dall' indicatore numerico (I).A seconda che la radio sia in modalilà CANALE o FREQUENZA, la sequenza delle funzioni del menu saràdiversa. Per passare dalla modalità FREQUENZA alla modalità C ANALE (e viceversa), premere il tastoFUN (7) seguito dal tasto numerico 3. Questa operazione è possibile anche da menu (vedi paragrafiFREQ e CHANL a pag. 29). Per uscire dalla modalità menu e ritornare in modalità Stand-by, premerenuovamente il tasto FUN (7). Nella modalità menu, se non viene premuto alcun tasto in un lasso di tempodi circa 10 secondi, la radio tornerà automaticamente in modalità Stand-by.1. Modalità canale / Modalità frequenzaMODALITA' CANALEIn questa modalità verrà visualizzato sul display il canale corrente (es. CH-01). Utilizzare i tastiUP/DOWN (8) per selezionare il canale desiderato.La sequenza delle funzioni del menu è la seguente :SCAN - T->R (reverse di frequenza) ---> FREQ (selezione della modalità frequenza) ---> KEYBO(selezione del blocco della tastiera) ---> LED (impostazione dell' indicatore LED) ---> BEEP(impostazione dell' allarme beep) ---> POW (selezione della potenza RF alta/bassa) ---> SQL- 27 -
Utilizzo del menu(impostazione del livello di squelch) ---> TOT (Time Out Timer) ---> VOX (livello di sensibilità del VOX)---> STEP (selezione dello step di frequenza, che agisce però solo nella modalità frequenza) ---> N-W(selezione della canalizzazione di frequenza Narrow-Wide).ItalianoMODALITÀ FREQUENZAIn questa modalità verrà visualizzato sul display la frequenza corrente (es. 136.000). Utilizzare latastiera numerica (6) per inserire manualmente la frequenza desiderata. Se viene inserita unafrequenza al di fuori del range consentito dalla radio, verrà visualizzata nuovamente la frequenzaprecedente e verrà emesso un avviso sonoro.La sequenza delle funzioni del menu è la seguente :SCAN ---> CT/DCS (CTCSS/DCS) ---> CHANL (selezione della modalità canale) ---> KEYBO(selezione del blocco della tastiera) ---> LED (impostazione dell' indicatore LED) ---> BEEP(impostazione dell' allarme beep) ---> POW (selezione della potenza RF alta/bassa) ---> SQL(impostazione del livello di squelch) ---> TOT (Time Out Timer) ---> VOX (livello di sensibilità del VOX)---> STEP (selezione dello step di frequenza) ---> N-W (selezione della canalizzazione di frequenzaNarrow-Wide).2. Tasti funzioneFUN (Function) (7)Premendo questo tasto si accede direttamente alle funzioni del menu.Ripremendo il tasto FUN (7) si ritorna in modalità Stand-By.CONFERMA (5)Premendo questo tasto si conferma la selezione della funzione o dei parametri desiderati.3. FUNZIONI DEL MENUScansione automaticaIn modalità Stand-By, premere 1 volta il tasto FUN (7), sul display apparirà la scritta SCAN ?. Premerea questo punto il tasto CONFERMA (5) per iniziare la scansione automatica dei canali/frequenze;l' icona S (T) lampeggerà durante la scansione. Se durante la scansione viene rilevata unacomunicazione, la scansione si arresta per 2 secondi; l' icona di arresto scansione (L) inizierà alampeggiare e l' icona S (T) rimarrà accesa. Premendo a questo punto il tasto CONFERMA (5) lascansione verrà arrestata definitivamente e la radio rimarrà su quella frequenza. Se non viene premutoil tasto CONFERMA (5) entro 2 secondi, la scansione verrà ripresa automaticamente.Funzione T->R (reverse di frequenza)Questa funzione è attiva solamente nella modalità CANALE e quando sul canale in uso è impostatauna frequenza di trasmissione diversa da quella di ricezione. Questo è possibile tramite laprogrammazione da PC oppure accedendo alla modalità SELF (vedi il paragrafo "Programmazionemanuale da tastiera").La funzione Reverse consente di invertire la frequenza di trasmissione con quella di ricezione. Nellamodalità canale premere il tasto FUN (7) per accedere al menu. Premere i tasti UP/DOWN (8) fino avisualizzare sul display la scritta T->R ? e confermare con il tasto CONFERMA (5); sul display appariràl' icona R (G) a conferma del corretto inserimento della funzione.Per disabilitare la funzione REVERSE, ripetere le operazioni sopra descritte. Sul display scomparirà l'icona R (G).- 28 -
Utilizzo del menuFunzione CT/DCS (selezione toni CTCSS e DCS)Questa funzione è attiva solamente nella modalità FREQUENZA e consente di selezionare il tonoCTCSS o DCS desiderato e associarlo alla frequenza visualizzata. Premere il tasto FUN (7) peraccedere al menu. Premere i tasti UP/DOWN (8) fino a visualizzare sul display la scritta CT/DCS econfermare con il tasto CONFERMA (5). Utilizzare i tasti UP o DOWN (8) per selezionare la voceCTCSS (sul display comparirà la scritta CTCSS ?) oppure DCS (sul display comparirà la scritta DCS ?)e confermare premendo il tasto CONFERMA (5).CTCSSSelezionata la voce CTCSS sul display comparirà la frequenza del tono selezionato (es. 67.0) e ilnumero di riferimento del tono (I). Utilizzare i tasti UP o DOWN (8) per selezionare il tono desiderato econfermare premendo il tasto CONFERMA (5). A conferma della selezione avvenuta, sul displaycomparirà la scritta CT (B). Per disattivare la funzione CTCSS, ripetere la procedura sopra descritta eselezionare OFF nella lista dei toni; confermare poi premendo il tasto CONFERMA (5); sul displayscomparirà la scritta CT (B).DCSSelezionata la voce DCS sul display comparirà il codice digitale del tono selezionato (es. D032I) e ilnumero di riferimento del tono (G). Utilizzare i tasti UP o DOWN (10) per selezionare il tono desiderato.Ogni tono può essere NORMALE (es. D032N) oppure INVERTITO (es. D032I). Premendo il tastoLAMP (12) è possibile cambiare da NORMALE a INVERTITO; la lettera finale del tono selezionatocambierà da N a I o viceversa (es. D032I / D032N). Confermare la selezione premendo il tastoCONFERMA (5). A conferma della selezione avvenuta, sul display comparirà la scritta DCS (D).Per disattivare la funzione DCS, ripetere la procedura sopra descritta e selezionare OFF nella lista deitoni e confermare premendo il tasto CONFERMA (5); sul display scomparirà la scritta DCS (D).FREQ : commutazione da modalità CANALE a modalità FREQUENZAPremere in sequenza il tasto FUN (7) seguito dal tasto numerico 3 per passare rapidamente dallamodalità CANALE alla modalità FREQUENZA e viceversa.Questo è possibile anche utilizzando il menu. Se la radio si trova in modalità CANALE, premere il tastoFUN (7) e scorrere le funzioni del menu utilizzando i tasti UP/DOWN (8) fino a visualizzare sul displayla scritta FREQ ?. Premere il tasto CONFERMA (5) per confermare.CHANL : commutazione da modalità FREQUENZA a modalità CANALEPremere in sequenza il tasto FUN (7) seguito dal tasto numerico 3 per passare rapidamente dallamodalità FREQUENZA alla modalità CANALE e viceversa.Questo è possibile anche utilizzando il menu. Se la radio si trova in modalità FREQUENZA, premere iltasto FUN (7) e scorrere le funzioni del menu utilizzando i tasti UP/DOWN (8) fino a visualizzare suldisplay la scritta CHANL ?. Premere il tasto CONFERMA (5) per confermare.ItalianoKEYBO : blocco della tastieraPremere il tasto FUN (7) per accedere al menu. Premere i tasti UP/DOWN (8) fino a visualizzare suldisplay la scritta KEYBO? e confermare con il tasto CONFERMA (5). Questa funzione dispone di 2opzioni :AUTO : blocco tastiera automatico che interviene solo se nessuna operazione viene svolta con icomandi della radioMANUAL : blocco tastiera manuale.- 29 -
Utilizzo del menuItalianoUtilizzare i tasti UP/DOWN (8) per selezionare l' opzione desiderata e confermare premendo il tastoCONFERMA (5); a fianco della selezione comparirà un piccolo cerchio (I) a conferma del correttoinserimento. Premere 2 volte il tasto FUN (7) per ritornare in modalità Stand-By.E' possibile inserire velocemente il blocco manuale della tastiera premendo in sequenza il tasto FUN(7) seguito dal tasto numerico *. Ripetere la stessa procedura per togliere il blocco della tastiera.Se il blocco tastiera è attivato, tutti i comandi sono inibiti ad eccezione del tasto MONITOR (13).LED : impostazione dell' illuminazione del display LCDPremere il tasto FUN (7) per accedere al menu. Premere i tasti UP/DOWN (8) fino a visualizzare suldisplay la scritta LED ? e confermare con il tasto CONFERMA (5). Questa funzione dispone di 3opzioni :AUTO : illuminazione automatica, verrà attivata ogni qualvolta si interviene sui comandi della radio e sidisattiverà se nessuna operazione viene compiuta.MANUAL : illuminazione manuale, per attivare o disattivare la retroilluminazione del display LCDpremere il tasto LIGHT (12).ON : illuminazione sempre attiva. Per disattivarla è necessario premere il tasto LIGHT (12).Utilizzare i tasti UP/DOWN (8) per selezionare la voce ON (illuminazione sempre attiva), AUTO(illuminazione automatica) oppure MANUAL (illuminazione manuale). Confermare la selezione volutapremendo il tasto CONFERMA (5); a fianco della selezione comparirà un piccolo cerchio (I) a confermadel corretto inserimento. Premere 2 volte il tasto FUN (7) per ritornare in modalità Stand-By.BEEP : impostazione del tono di programmazioneQuesta funzione consente di attivare o disattivare il tono emesso ogni qualvota si interviene suicomandi della radio, ad eccezione dei tasti laterali. Premere il tasto FUN (7) per accedere al menu.Premere i tasti UP/DOWN (8) fino a visualizzare sul display la scritta BEEP ? e confermare con il tastoCONFERMA (5). Utilizzare i tasti UP/DOWN (8) per selezionare la voce ON (tono beep attivato) oppureOFF (beep disattivato). Confermare la selezione voluta premendo il tasto CONFERMA (5); a fiancodella selezione comparirà un piccolo cerchio (I) a conferma del corretto inserimento. Premere 2 volte iltasto FUN (7) per ritornare in modalità Stand-By.POW : selezione della potenza RF del trasmettitoreQuesta funzione consente di selezionare la potenza del trasmettitore in ALTA o BASSA, utile per ridurre ilconsumo delle batterie durante le comunicazioni a breve distanza.Premere il tasto FUN (7) per accedere al menu. Premere i tasti UP/DOWN (8) fino a visualizzare sul displayla scritta POW ? e confermare con il tasto CONFERMA (5). Utilizzare i tasti UP/DOWN (8) per selezionarela voce POW H (alta potenza) oppure POW L (bassa potenza). Confermare la selezione voluta premendo iltasto CONFERMA (5); a fianco della selezione comparirà un piccolo cerchio (I) a conferma del correttoinserimento. Premere 2 volte il tasto FUN (7) per ritornare in modalità Stand-By. Se è stata selezionata l'alta potenza del trasmettitore, sul display LCD comparirà l' icona H (S).- 30 -
Utilizzo del menuSQL : selezione del livello di SquelchQuesta funzione consente di selezionare ila soglia di Squelch desiderata in 10 livelli, da 0 (Squelch aperto)a 9. Premere il tasto FUN (7) per accedere al menu. Premere i tasti UP /DOWN (8) fino a visualizzare suldisplay la scritta SQL ? e confermare con il tasto CONFERMA (5). Utilizzare i tasti UP/DOWN (8) perselezionare il livello desiderato (es. SQL 1). Confermare la selezione voluta premendo il tasto CONFERMA(5); a fianco della selezione comparirà un piccolo cerchio (I) a conferma del corretto inserimento. Premere2 volte il tasto FUN (7) per ritornare in modalità Stand-By.Per aprire temporaneamente lo squelch e poter così ascoltare il rumore di fondo, mantenere premuto iltasto MONITOR (13); sul display comparirà l' icona (M).ItalianoTOT : Time Out TimerLo scopo di questa funzione è duplice :1. Permettere dopo un tempo prefissato l’ascolto di altre chiamate urgenti.2. Evitare la trasmissione per un tempo illimitato, al fine di prevenire surriscaldamento o danni delricetrasmettitore. Dopo un tempo programmabile di 30-270 secondi di trasmissione ininterrotta, ilricetrasmettitore interrompe automaticamente la trasmissione emettendo un suono di avviso.Per interrompere il suono di avviso, rilasciare il tasto PTT (11). Per riprendere la trasmissione, premerenuovamente il tasto PTT (11).Per programmare questa funzione premere il tasto FUN (7) per accedere al menu. Premere i tastiUPDOWN (8) fino a visualizzare sul display la scritta TOT ? e confermare con il tasto CONFERMA (5).Utilizzare i tasti UP/DOWN (8) per selezionare il tempo desiderato da 30 a 270 secondi. Confermare laselezione voluta premendo il tasto CONFERMA (5); a fianco della selezione comparirà un piccolo cerchio(I) a conferma del corretto inserimento. Premere 2 volte il tasto FUN (7) per ritornare in modalità Stand-By. Per disabilitare questa funzione ripetere la procedura sopra descritta e selezionare OFF (TOTOFF).VOX : uso a mani libereQuesta funzione permette di trasmettere in modo automatico cioè semplicemente parlando nelmicrofono. Non c'è quindi bisogno di premere il tasto PTT (11). E' possibile selezionare il livello disensibilità desiderato da 0 (bassa sensibilità) a 9 (sensibilità massima).Premere il tasto FUN (7) per accedere al menu. Premere i tasti UP/DOWN (8) fino a visualizzare sul displayla scritta VOX ? e confermare con il tasto CONFERMA (5). Utilizzare i tasti UP/DOWN (8) per selezionare illivello desiderato (es. VOX 1). Confermare la selezione voluta premendo il tasto CONFERMA (5); a fiancodella selezione comparirà un piccolo cerchio (I) a conferma del corretto inserimento. Premere 2 volte iltasto FUN (7) per ritornare in modalità Stand-By., sul display comparirà la scritta VOX (M) a conferma delcorretto inserimento della funzione.Per disabilitare questa funzione ripetere la procedura sopra descritta e selezionare OFF (VOXOFF).STEP : selezione del passo di frequenzaTramite questa funzione è possibile modificare il passo di frequenza. Premere il tasto FUN (7) peraccedere al menu. Premere i tasti UP/DOWN (8) fino a visualizzare sul display la scritta STEP ? econfermare con il tasto CONFERMA (5). Utilizzare i tasti UP/DOWN (8) per selezionare lo Step desideratotra quelli disponibili (05, 6.25,10, 12.5, 25 KHz). Confermare la selezione voluta premendo il tastoCONFERMA (5); a fianco della selezione comparirà un piccolo cerchio (I) a conferma del correttoinserimento. Premere 2 volte il tasto FUN (7) per ritornare in modalità Stand-By. Agendo sui tastiUP/DOWN (8) sarà possibile visualizzare la frequenza con lo spostamento selezionato. Questa funzione haeffetto solo nel modo FREQUENZA.- 31 -
Utilizzo del menuItalianoN-W : selezione della canalizzazione di frequenza (Narrow-Wide)Questa funzione permette di selezionare il tipo di canalizzazione desiderata, in Narrow (12.5 KHz) oWide (25 KHz). Premere il tasto FUN (7) per accedere al menu. Premere i tasti UP/DOWN (8) fino avisualizzare sul display la scritta N-W ? e confermare con il tasto CONFERMA (5). Utilizzare i tastiUP/DOWN (8) per selezionare N (Narrow, 12.5 KHz) oppure W (Wide, 25 KHz). Confermare la selezionevoluta premendo il tasto CONFERMA (5); a fianco della selezione comparirà un piccolo cerchio (I) aconferma del corretto inserimento. Premere 2 volte il tasto FUN (7) per ritornare in modalità Stand-By.Se è stata selezionata la canalizzazione Narrow, sul display comparirà l' icona - (F).Comandi veloci da tastieraOgni funzione del menu descritta precedentemente può essere attivata velocemente premendo il tastoFUN (9) seguito da uno dei tasti numerici della tastiera, compresi i simboli * e #. Questo consente un usoveloce e immediato di ogni funzione della radio senza dover ricorrere alle procedure del menu.FUN + 1FUN + 2FUN + 3FUN + 4FUN + 5FUN + 6FUN + 7FUN + 8FUN + 9Attiva la scansione automatica dei canali/frequenze.In modalità CANALE attiva la funzione REVERSE.In modalità FREQUENZA consente l' accesso veloce al menu CTCSS.Consente di commutare da modalità CANALE a modalità FREQUENZA e viceversa.Accesso veloce al menu KEYB (blocco tastiera). Da qui sono possibili le 2 selezioni (MANUALe AUTO).Accesso veloce al menu LED (illuminazione display). Da qui sono possibili le 3 selezioni (ON,MANUAL e AUTO).Accesso veloce al menu BEEP (tono di programmazione). Da qui sono possibili le 2 selezioni(ON e OFF).Accesso veloce al menu POW (selezione della potenza). Da qui sono possibili le 2 selezioniALTA (POW H) e BASSA (POW L).Accesso veloce al menu SQL (selezione livello di Squelch). Da qui è possibile selezionare unodei10 livelli di Squelch disponibili.Accesso veloce al menu TOT (Time Out Timer). Da qui sono possibili le 2 selezioni ALTA(POW H) e BASSA (POW L).FUN + 0 Accesso veloce al menu VOX (uso a mani libere). Da qui è possibile selezionare uno dei 9livelli di sensibilità disponibili.FUN + *FUN + #Selezione veloce del blocco della tastiera. Per sbloccarla ripetere la procedura.Nella modalità CANALE, attraverso questa procedura è possibile verificare la frequenza delcanale in uso.Nella modalità FREQUENZA questa procedura non ha alcun effetto.- 32 -
Programmazione manuale da tastieraPROGRAMMAZIONE MANUALE DA TASTIERA (Self Programming Mode)Questa funzione avanzata permette di programmare ciascun canale della radio, assegnando loro diversiparametri quali DCS, CTCSS, BCL (Busy Channel Lockout), ecc. La programmazione può essere eseguitaanche da PC utilizzando il Kit di programmazione opzionale mod. INTEK CD<strong>KT</strong>-0370.Si consiglia pertando questo tipo di programmazione in quanto più semplice e pratico.Accendere la radio mantenendo premuto il tasto FUN (7), sul display comparirà la scritta SELF.Premere a questo punto il tasto CONFERMA (5) per iniziare la programmazione; sul display comparirà lascritta CH-01 01. Utilizzare i tasti UP/DOWN (8) per modificare i parametri e confermare premendo il tastoCONFERMA (5). Si passerà così alla funzione successiva. Ogni pressione del tasto CONFERMA (5)consente di confermare la selezione e passare al punto successivo della programmazione. Ogni passaggiodella programmazione viene visualizzato dall' indicatore numerico (I). Di seguito vengono descritti tutti ipassaggi da seguire.Italiano(1) PROGRAMMAZIONE DEL CANALEPremere i tasti UP/DOWN (8) per selezionare il canale desiderato.I canali disponibili vanno da 1 a 80.Premere il tasto CONFERMA (5) per confermare la selezione e passareal punto successivo della programmazione.(2) FREQUENZA DI RICEZIONEDigitare da tastiera la frequenza desiderata. E' possibile comunqueutilizzare i tasti UP/DOWN (8).Premere il tasto CONFERMA (5) per confermare la selezione e passareal punto successivo della programmazione.Il range di frequenza disponibile : 144-146 MHz (136.000-174.99375MHz) (*). Lo step di fequenza di default è di 5 KHz.(3) TONO CTCSS/DCS IN RICEZIONEPremere il tasto MONITOR (14) per passare dalla selezione dei toniCTCSS alla selezione dei toni DCS ed utilizzare i tasti UP/DOWN (8) perselezionare il tono desiderato. Se la funzione CTCSS è disattivata (OFF)premere di nuovo il tasto MONITOR (14) per poter attivare la selezionedei toni e utilizzare i tasti UP/DOWN (8) per selezionare il tonodesiderato da 67.0 a 254.1 Hz.Premere il tasto CONFERMA (5) per confermare la selezione e passareal punto successivo della programmazione.- 33 -
Programmazione manuale da tastieraItaliano(4) FREQUENZA DI TRASMISSIONEIl display visualizza la frequenza in uso, come per il punto 2. L' indicatore numerico (I) visualizzerà 4.Digitare da tastiera la frequenza desiderata. E' possibile comunque utilizzare i tasti UpPDOWN (8).Premere il tasto CONFERMA (5) per confermare la selezione e passare al punto successivo dellaprogrammazione. Il range di frequenza disponibile : 144-146 MHz (136.000-174.99375) MHz. Lo step difrequenza di default è di 5 KHz.(5) TONO CTCSS/DCS IN TRASMISSIONEIl display visualizza il tono in uso, come per il punto 3. L' indicatore numerico (I) visualizzerà 5.Premere il tasto MONITOR (14) per passare dalla selezione dei toni CTCSS alla selezione dei toni DCS edutilizzare i tasti UP/DOWN (8) per selezionare il tono desiderato. Se la funzione CTCSS è disattivata (OFF)premere di nuovo il tasto MONITOR (14) per poter attivare la selezione dei toni e utilizzare i tasti UP/DOWN(8) per selezionare il tono desiderato da 67.0 a 254.1 Hz.Premere il tasto CONFERMA (5) per confermare la selezione e passare al punto successivo dellaprogrammazione.(6) BCL (BUSY CHANNEL LOCKOUT)Utilizzare i tasti UP/DOWN (8) per selezionare il parametro desiderato.E' possibile selezionare OFF (funzione disattivata), 1 (selezioneportante) o 2 (selezione tono CTCSS).Premere il tasto CONFERMA (5) per confermare la selezione e passareal punto successivo della programmazione.(7) SCANSIONE (AGGIUNTA/CANCELLAZIONE)Questa funzione permette di inserire il canale in uso nella lista discansione. Utilizzare i tasti UP/DOWN (8) per selezionare ADD (canaleinserito) o DEL (canale non inserito).Premere il tasto CONFERMA (5) per confermare la selezione e passareal punto successivo della programmazione.(8) SELEZIONE DELLA POTENZAE' possibile assegnare al canale in uso il tipo di potenza RF di uscita deltrasmettitore (alta/bassa).Utilizzare i tasti UP/DOWN (8) per selezionare H (alta potenza) oppure L(bassa potenza).Premere il tasto CONFERMA (5) per confermare la selezione, perterminare la programmazione di questo canale e passare così al canalesuccessivo.- 34 -
Programmazione manuale da tastieraNoteRESET GENERALEQuesta funzione consente di riportare tutti i parametri della radio nelle condizioni originali, molto utile nelcaso di inserimento di funzioni accidentali.Accendere la radio mantenendo premuto il tasto FUN (7), sul display comparirà la scritta SELF.Digitare da tastiera la sequenza numerica 1 0 1 0. La radio eseguirà un reset, emetterà un beep e perun attimo tutte le indicazioni del display saranno accese. A questo punto tutti i parametri sono riportatinelle condizioni di fabbrica.ItalianoPROGRAMMAZIONE CTCSS/DCS IN RICEZIONE E TRASMISSIONENella programmazione dei toni CTCSS e DCS (ricezione e trasmissione), il tasto MONITOR (13) consentedi cambiare visualizzazione come segue :CTCSS disattivato (OFF) --> selezione toni CTCSS --> selezione toni DCSTASTO MONITORTASTO MONITORNella selezione dei toni DCS, premere il tasto LAMP (12) per passare da tono normale (lettera N finale) atono invertito (lettera I finale).- 35 -
Programmazione manuale da tastieraDiagramma della programmazione manualeItalianoPremere il tastoProgrammazione manualee accendere la radioDISPLAY LCDSelettore canaliSelezione del canaleSelezionare il canaleda 1 a 80Selettore canaliSelettore canaliFrequenza in ricezioneTastiera numerica /Tono CTCSS/DCS in ricezioneSelezionarela frequenzain ricezioneSelezionareil tono CTCSS/DCSin ricezioneSelettore canaliSelettore canaliFrequenza in trasmissioneTastiera numerica /Tono CTCSS/DCS in trasmissioneSelezionarela frequenzain trasmissioneSelezionareil tono CTCSS/DCSin trasmissioneSelettore canaliBCL (Busy Channel Lockout)OFF1 : portante2 : toni CT/DCSSelettore canaliScansione (aggiunta/cancellazione)ADD : canale aggiuntoDEL : canale cancellatoSelettore canaliSelezione alta/bassa potenza in TXH : alta potenzaL : bassa potenza- 36 -
Specifiche tecniche - Accessori opzionali - Garanzia limitataSPECIFICHE TECNICHEGeneraliGamma di frequenza 144-146 MHz (136.000 - 174.9875 MHz) (*)Canali 80Step di frequenza5, 6.25, 10, 12.5, 25 KHzTensione di alimentazione 7.2 VDCTemperatura di funzionamento -20/+55°Dimensioni mm 58 x 105 x 35Weight200 gr. (con batteria e antenna)RicevitoreSensibilità (12dB Sinad) 0.16 µVSelettività65dBIntermodulazione60dBUscita audio500mWTrasmettitorePotenza di uscitaModulazioneSoppressione spurieDeviazione massimaStabilità di frequenza5W / 1WF3Esecondo le normative R&TTE≤ ±5KHz±2.5ppmItaliano(*) <strong>KT</strong>-370EX (INTERNATIONAL VERSION) 136.000-174.995 MHz (non disponibile in Italia)ACCESSORI OPZIONALI- KME-315 Microfono-auricolare esterno con clip di fissaggio- KME-614 Microfono-auricolare esterno con archetto orientabile- KME-801 Microfono-auricolare esterno per sicurezza e bodyguard- KME-100A Microfono-auricolare esterno con clip di fissaggio- KME-200A Microfono-auricolare esterno con astina flessibile e clip di fissaggio- KME-H115 Microfono-altoparlante esterno (light duty)- KST-301 Microfono-altoparlante esterno (heavy duty)- CD<strong>KT</strong>-0370 Software di programmazione (CD ROM) e cavetto di interfaccia per PCGaranzia LimitataQuesto prodotto é garantito contro difetti nei materiali e nella lavorazione, in condizioni di uso eservizio normali, per un periodo di un anno, sempre che il prodotto sia ritornato senza spese alrivenditore presso cui é stato acquistato, accompagnato dallo scontrino fiscale o altro documento diacquisto, comprovante la data effettiva di acquisto. Questa garanzia non copre difetti o danni derivantida abuso, uso improprio, modifiche non autorizzate, perdita di liquidi delle batterie, utilizzo in ambienteinadatto o normale deperimento d' uso.Tutti i valori presenti nel manuale sono misurati in condizioni ottimali di utilizzo. Tutti i disegni, i testi e lecaratteristiche tecniche non sono impegnativi e possono essere variati in qualunque momento.- 37 -
Avvertenze ImportantiItalianoAvvertenze Importanti !QUESTO PRODOTTO E' DESTINATO AL MERCATO ITALIANO E PERTANTO L' IMPIEGO DELLOSTESSO E' SOGGETTO ALLE NORME DI LEGGE IN VIGORE IN ITALIA.Gamma operativa : 144-146 MHzApparecchio soggetto a regime d' uso "Autorizzazione Generale", artt. 104 comma 1 e 135 commi 1, 2,3 Codice Comunicazioni Elettroniche del D.L. 01.08.2003 n. 259. L' apparato va utilizzato sul territorionazionale limitatamente nelle bande di frequenze attribuite dal vigente Piano Nazionale RipartizioneFrequenze al servizio di radioamatore.Avviso agli utentiAi sensi dell’art. 13 del decreto legislativo 25 luglio 2005, n. 15”Attuazione delle Direttive 2002/95/CE, 2002/96/CE e2003/108/CE, relative alla riduzione dell’uso di sostanze pericolose nelle apparecchiature elettriche ed elettroniche,nonché allo smaltimento dei rifiuti”.Il simbolo del cassonetto barrato riportato sull’apparecchiatura indica che il prodotto alla fine della propriavita utile deve essere raccolto separatamente dagli altri rifiuti.L’utente dovrà, pertanto, conferire l’apparecchiatura giunta a fine vita agli idonei centri di raccoltadifferenziata dei rifiuti elettronici ed elettrotecnici, oppure riconsegnarla al rivenditore al momentodell’acquisto di una nuova apparecchiatura di tipo equivalente, in ragione di uno a uno.L’adeguata raccolta differenziata per l’avvio successivo dell’apparecchiatura dismessa al riciclaggio, al trattamento e allosmaltimento ambientalmente compatibile contribuisce ad evitare possibili effetti negativi sull’ambiente e sulla salute efavorisce il riciclo dei materiali di cui è composta l’apparecchiatura.Lo smaltimento abusivo del prodotto da parte dell’utente comporta l’applicazione delle sanzioni amministrative di cui aldlgs. n. 22/1997” (articolo 50 e seguenti del dlgs. n. 22/1997).<strong>KT</strong>-<strong>370EE</strong>Data:Timbro e firma del rivenditoreProdotto importato e distribuito daINTEK S.R.L.Via G. Marconi, 16 - 20090 Segrate (MI) - Tel. 02-26950451 - Fax. 02-26952185www.intek-com.it / e-mail : intek.com@intek-com.it- 38 -
Notes- 39 -
Notes- 40 -
Notes- 41 -