Hydraulic Design of Highway Culverts - DOT On-Line Publications
Hydraulic Design of Highway Culverts - DOT On-Line Publications
Hydraulic Design of Highway Culverts - DOT On-Line Publications

You also want an ePaper? Increase the reach of your titles
YUMPU automatically turns print PDFs into web optimized ePapers that Google loves.
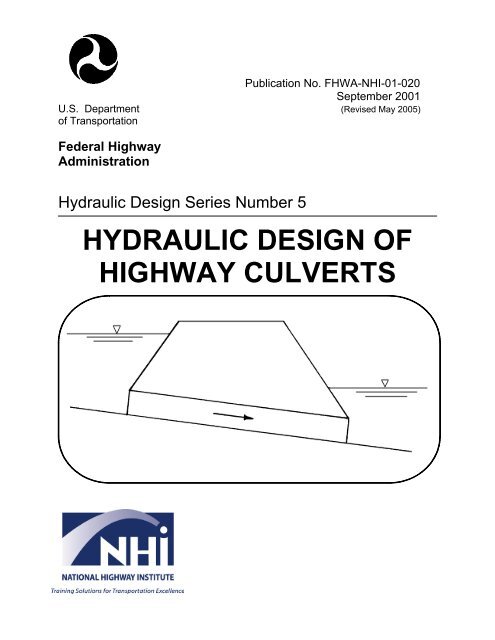
Publication No. FHWA-NHI-01-020<br />
September 2001<br />
U.S. Department (Revised May 2005)<br />
<strong>of</strong> Transportation<br />
Federal <strong>Highway</strong><br />
Administration<br />
<strong>Hydraulic</strong> <strong>Design</strong> Series Number 5<br />
HYDRAULIC DESIGN OF<br />
HIGHWAY CULVERTS
4. Title an<br />
1. Report No<br />
FHWA –NHI- 01-020<br />
HDS No. 5<br />
Technical Report Documentation Page<br />
d Subtitle<br />
2. Governmental Accession No.<br />
<strong>Hydraulic</strong> <strong>Design</strong> <strong>of</strong> <strong>Highway</strong> <strong>Culverts</strong>, Second Edition<br />
7. Author(s)<br />
Jerome M. Norman, Robert J. Houghtalen,<br />
and William J. Johnston<br />
9. Performing Organization Name and Address<br />
Ayres Associates<br />
Ft. Collins, CO<br />
12. Sponsoring Agency Name and Address<br />
Office <strong>of</strong> Bridge Technology National <strong>Highway</strong> Institute<br />
FHWA, Room 3203 4600 N. Fairfax Dr., Suite 800<br />
400 Seventh Street, SW Arlington, Virginia 22203<br />
Washington, D.C. 20590<br />
15. Supplementary Notes<br />
Project Manager: Philip Thompson<br />
Editor <strong>of</strong> Second Edition: Johnny L. Morris<br />
16. Abstract<br />
i<br />
3. Recipient's Catalog No.<br />
5. Report Date<br />
May 2001<br />
6. Performing Organization Code<br />
8. Performing Organization Report No.<br />
10. Work Unit No. (TRAIS)<br />
11. Contract or Grant No.<br />
DTFH61-97-D-00025`<br />
13. Type <strong>of</strong> Report and Period Covered<br />
14. Sponsoring Agency Code<br />
<strong>Hydraulic</strong> <strong>Design</strong> series No. 5 combines culvert design information previously contained in <strong>Hydraulic</strong><br />
Engineering Circulars (HEC) No. 5, No. 10, and No. 13 with hydrologic, storage routing, and special culvert<br />
design information. The result is a comprehensive culvert design publication. Hydrologic analysis methods<br />
are described, and references cited. Culvert design methods are presented for both conventional culverts and<br />
culverts with inlet improvements. Storage routing techniques are included which permit the designer to<br />
account for ponding effects upstream <strong>of</strong> the culvert. Unique culvert applications, erosion and sediment<br />
control, debris control, structural aspects, and long-span culverts are discussed and references cited. Inlet<br />
control, outlet control, and critical depth design charts, many <strong>of</strong> which are newly developed, are included for a<br />
variety <strong>of</strong> culverts sizes, shapes, and materials. New dimensionless culvert design charts are provided for the<br />
design <strong>of</strong> culverts lacking conventional design nomographs and charts. The appendices <strong>of</strong> the publication<br />
contain the equations and methodology used to construct the design charts, information <strong>of</strong> the hydraulic<br />
resistance <strong>of</strong> culverts, and methods <strong>of</strong> optimizing culvert design using performance curves and inlet<br />
depression. Calculation forms are provided for most <strong>of</strong> the design methodologies in the manual.<br />
The second edition corrected minor errors and provided both SI and English (U.S. customary) units for all<br />
equations and design charts.<br />
17. Key Words<br />
<strong>Culverts</strong>, hydrology, storage routing, inlet control,<br />
outlet control, critical depth, tapered inlets, hydraulics<br />
19. Security Classif. (<strong>of</strong> this report)<br />
20. Security Classif. (<strong>of</strong> this page)<br />
18. Distribution Statement<br />
Unclassified<br />
Unclassified<br />
Form <strong>DOT</strong> F 1700.7 (8-72) Reproduction <strong>of</strong> completed page authorized<br />
This document is available to the public from the<br />
National Technical Information Service,<br />
Springfield, Virginia 22151<br />
21. No. <strong>of</strong> Pages<br />
376<br />
22. Price
Acknowledgements<br />
This document’s first edition’s report number was FHWA-IP-85-15 with a date <strong>of</strong> September<br />
1985. Jerome M. Norman and Associates <strong>of</strong> Norfolk, Virginia 23503 prepared it.<br />
The sponsoring organization was:<br />
Office <strong>of</strong> Implementation, HRT-10<br />
Federal <strong>Highway</strong> Administration<br />
6200 Georgetown Pike<br />
McLean, Virginia 22101<br />
The project manager was John M. Kurdziel (HRT-10). The technical assistants were Philip L.<br />
Thompson, Dennis Richards, and J. Sterling Jones.<br />
ii
METRIC CONVERSION FACTORS<br />
For those interested in using the metric system, the inch-pound units used in this manual may<br />
be converted to metric units by the following factors.<br />
From Multiply<br />
by<br />
iii<br />
To obtain<br />
Unit Abbrev. Unit Abbrev.<br />
cubic foot ft 3 /s 0.02832 cubic meter m 3 /s<br />
per second per second<br />
foot ft 0.3048 meter m<br />
square foot ft, 0.0929 square meter m 2<br />
cubic foot ft 3 0.0283 cubic meter m 3<br />
inch in 2.54 centimeter cm<br />
square mile mi 2 2.59 square kilometer km 2<br />
acre 0.4047 hectare<br />
foot per second ft/s 0.3048 meter per second m/s
(Page intentionally blank)<br />
iv
TABLE OF CONTENTS<br />
Documentation......................................................................................................................... i<br />
Acknowledgements................................................................................................................. ii<br />
Metric Conversion Factors ......................................................................................................iii<br />
Table <strong>of</strong> Contents.................................................................................................................... v<br />
List <strong>of</strong> Figures .........................................................................................................................ix<br />
List <strong>of</strong> Tables..........................................................................................................................xii<br />
Glossary................................................................................................................................xiii<br />
I. INTRODUCTION<br />
A. General...................................................................................................................... 1<br />
B. Overview <strong>of</strong> <strong>Culverts</strong> ................................................................................................. 2<br />
1. Shapes................................................................................................................. 2<br />
2. Materials .............................................................................................................. 2<br />
3. Inlets .................................................................................................................... 2<br />
C. Culvert <strong>Hydraulic</strong>s ..................................................................................................... 5<br />
1. Flow Conditions ................................................................................................... 5<br />
2. Types <strong>of</strong> Flow Control .......................................................................................... 7<br />
3 Headwater............................................................................................................ 9<br />
4. Tailwater .............................................................................................................. 9<br />
5. Outlet Velocity...................................................................................................... 9<br />
6. Performance Curves ............................................................................................9<br />
D. Economics............................................................................................................... 10<br />
1. Benefits and Costs............................................................................................. 10<br />
2. Analysis.............................................................................................................. 10<br />
II. DESIGN CONSIDERATIONS<br />
A. Hydrology ................................................................................................................ 11<br />
1. General .............................................................................................................. 11<br />
2. Peak <strong>Design</strong> Flow .............................................................................................. 11<br />
3 Check Flows ...................................................................................................... 13<br />
4. Hydrographs ...................................................................................................... 13<br />
5. Basics <strong>of</strong> Storage Routing ................................................................................. 15<br />
B. Site Data.................................................................................................................. 16<br />
1. General .............................................................................................................. 16<br />
2. Culvert Location ................................................................................................. 16<br />
3 Waterway Data .................................................................................................. 17<br />
4. Roadway Data ................................................................................................... 19<br />
5. <strong>Design</strong> Headwater ............................................................................................. 20<br />
C. Summary <strong>of</strong> Data Needs ......................................................................................... 21<br />
v
TABLE OF CONTENTS (Cont.)<br />
III. CULVERT DESIGN<br />
A. Culvert Flow............................................................................................................. 23<br />
1. General .............................................................................................................. 23<br />
2. Types <strong>of</strong> Control................................................................................................. 23<br />
3. Roadway Overtopping ....................................................................................... 38<br />
4. Outlet Velocity.................................................................................................... 40<br />
B. Performance Curves................................................................................................ 42<br />
1. Inlet Control........................................................................................................ 43<br />
2. Outlet Control..................................................................................................... 43<br />
3. Roadway Overtopping ....................................................................................... 43<br />
C. Culvert <strong>Design</strong> Method............................................................................................ 44<br />
1. Culvert <strong>Design</strong> Form .......................................................................................... 44<br />
2. Inlet Control........................................................................................................ 45<br />
3. Outlet Control..................................................................................................... 46<br />
4. Evaluation <strong>of</strong> Results ......................................................................................... 50<br />
5. Example Problems............................................................................................. 51<br />
D. <strong>Design</strong> Methods for <strong>Culverts</strong> Without <strong>Design</strong> Charts .............................................. 68<br />
1. Inlet Control........................................................................................................ 68<br />
2. Outlet Control..................................................................................................... 70<br />
3. Discussion <strong>of</strong> Results......................................................................................... 70<br />
4. Example Problem............................................................................................... 70<br />
IV. TAPERED INLETS<br />
A. Introduction.............................................................................................................. 79<br />
B. Descriptions <strong>of</strong> Tapered Inlets................................................................................. 80<br />
1. Side-tapered ...................................................................................................... 80<br />
2. Slope-tapered .................................................................................................... 82<br />
C. <strong>Hydraulic</strong>s................................................................................................................ 85<br />
1. Inlet Control........................................................................................................ 85<br />
2. Outlet Control..................................................................................................... 86<br />
3. Outlet Velocity.................................................................................................... 86<br />
D. Performance Curves ............................................................................................... 87<br />
E. <strong>Design</strong> Methods....................................................................................................... 89<br />
1. Preliminary Culvert Sizing.................................................................................. 90<br />
2. Culvert Barrel <strong>Design</strong>......................................................................................... 90<br />
3. Tapered Inlet <strong>Design</strong>.......................................................................................... 90<br />
4. Dimensional Limitations ..................................................................................... 92<br />
F. Rectangular (Box) <strong>Culverts</strong>...................................................................................... 93<br />
1. <strong>Design</strong> Procedures ............................................................................................ 93<br />
2. Multiple Barrel <strong>Design</strong>s ...................................................................................... 94<br />
3. Example Problems............................................................................................. 95<br />
vi
TABLE OF CONTENTS (Cont.)<br />
G. Circular Pipe <strong>Culverts</strong> .......................................................................................... 113<br />
1. <strong>Design</strong> Procedures .......................................................................................... 113<br />
2. Multiple Barrel <strong>Design</strong>s .................................................................................... 114<br />
3. Dimensional Limitations ................................................................................... 115<br />
4. Example Problem............................................................................................. 115<br />
V. STORAGE ROUTING<br />
A. The Routing Concept............................................................................................. 123<br />
B. Methodology .......................................................................................................... 124<br />
C. Application to Culvert <strong>Design</strong> ................................................................................ 125<br />
1. Data Requirements .......................................................................................... 125<br />
2. Initial Culvert Sizing ......................................................................................... 126<br />
D. Storage Indication Method .................................................................................... 127<br />
E. Example Problem .................................................................................................. 129<br />
VI. SPECIAL CONSIDERATIONS<br />
A. Introduction............................................................................................................ 143<br />
B. Special Applications .............................................................................................. 143<br />
1. Flow Control and Measurement....................................................................... 144<br />
2. Low Head Installations..................................................................................... 144<br />
3. Bends............................................................................................................... 146<br />
4. Junctions.......................................................................................................... 147<br />
5. Siphons ............................................................................................................ 149<br />
6. Fish Passage ................................................................................................... 150<br />
C. Erosion, Sedimentation, and Debris Control ......................................................... 153<br />
1. Scour at Inlets .................................................................................................. 153<br />
2. Scour at Outlets ............................................................................................... 154<br />
3. Sedimentation .................................................................................................. 156<br />
4. Debris Control .................................................................................................. 157<br />
D. Site Related Modifications..................................................................................... 158<br />
1. Skewed Barrels................................................................................................ 159<br />
2. Skewed Inlets................................................................................................... 159<br />
3. Multiple Barrels ................................................................................................ 161<br />
E. Economics ............................................................................................................. 163<br />
1. Service Life ...................................................................................................... 163<br />
2. Comparisons Between <strong>Culverts</strong> and Bridges .................................................. 164<br />
3. Comparisons Between Materials and Shapes ................................................. 164<br />
4. Risk Analysis.................................................................................................... 166<br />
vii
TABLE OF CONTENTS (Cont.)<br />
F. Safety..................................................................................................................... 167<br />
1. Inlet and Outlet Location and <strong>Design</strong>............................................................... 167<br />
2. Safety Barriers and Grates .............................................................................. 168<br />
G. Structural Considerations...................................................................................... 171<br />
1. General Structural Analysis ............................................................................. 171<br />
2. Floatation and Anchorage................................................................................ 173<br />
3. Endwalls and Wingwalls .................................................................................. 175<br />
H. Long Span <strong>Culverts</strong>............................................................................................... 175<br />
1. Structural Aspects............................................................................................ 176<br />
2. <strong>Hydraulic</strong> Considerations ................................................................................. 177<br />
I. Culvert Durability.................................................................................................... 177<br />
1. Abrasion........................................................................................................... 177<br />
2. Corrosion ......................................................................................................... 178<br />
J. Culvert <strong>Hydraulic</strong> Programs ................................................................................... 179<br />
REFERENCES ................................................................................................................... 181<br />
APPENDIX A - <strong>Design</strong> Methods and Equations ................................................................. 191<br />
APPENDIX B - <strong>Hydraulic</strong> Resistance <strong>of</strong> Culvert Barrels..................................................... 201<br />
APPENDIX C - Culvert <strong>Design</strong> Optimization Using Performance Curves .......................... 209<br />
APPENDIX D - <strong>Design</strong> Charts, Tables, and Forms ............................................................ 217<br />
viii
LIST OF FIGURES<br />
Figure I-1 Typical Concrete Pipe Culvert ............................................................................ 1<br />
Figure I-2 Long Span Culvert.............................................................................................. 1<br />
Figure I-3 Culvert <strong>Design</strong> Procedure Flowchart.................................................................. 1<br />
Figure I-4 Commonly Used Culvert Shapes ....................................................................... 2<br />
Figure I-5 Precast Concrete Box Culvert ............................................................................ 3<br />
Figure I-6 Corrugated Metal Arch Culvert ........................................................................... 3<br />
Figure I-7 Four Standard Inlet Types .................................................................................. 3<br />
Figure I-8 Entrance Contraction.......................................................................................... 4<br />
Figure I-9 Side-tapered Inlet ...............................................................................................4<br />
Figure I-10 Slope-tapered Inlet ............................................................................................. 4<br />
Figure I-11 Culvert Flowing Full ............................................................................................ 5<br />
Figure I-12 Flow Over a Small Dam...................................................................................... 6<br />
Figure I-13 Typical Inlet Control Flow Condition ................................................................... 7<br />
Figure I-14 Typical Outlet Control Flow Conditions .............................................................. 8<br />
Figure I-15 Culvert Performance Curve ................................................................................ 9<br />
Figure I-16 Risk Analysis Benefit Versus Cost Curve......................................................... 10<br />
Figure II-1 Flood Hydrograph............................................................................................ 12<br />
Figure II-2 Unit Hydrograph Determination Procedure ..................................................... 14<br />
Figure II-3 <strong>Line</strong>arity and Superposition Concepts............................................................. 15<br />
Figure II-4 Flood Hydrograph Shape Modification ............................................................ 16<br />
Figure II-5 Culvert Location Methods................................................................................ 17<br />
Figure II-6 Cross Section Locations.................................................................................. 18<br />
Figure II-7 Roadway Cross Section and Culvert Length................................................... 19<br />
Figure II-8 Road Pr<strong>of</strong>ile - Valley Section........................................................................... 20<br />
Figure III-1 Types <strong>of</strong> Inlet Control ...................................................................................... 24<br />
Figure III-2 Flow Contractions for Various Culvert Inlets ................................................... 26<br />
Figure III-3 Beveled Edges ................................................................................................ 27<br />
Figure III-4 Inlet Control Curves......................................................................................... 28<br />
Figure III-5 Culvert with Depressed Apron and Wingwalls................................................. 29<br />
Figure III-6 Culvert with Inlet Sump.................................................................................... 30<br />
Figure III-7 Types <strong>of</strong> Outlet Control.................................................................................... 31<br />
Figure III-8 Full Flow Energy and <strong>Hydraulic</strong> Grade <strong>Line</strong>s .................................................. 35<br />
Figure III-9 Outlet Control Energy and <strong>Hydraulic</strong> Grade <strong>Line</strong>s .......................................... 37<br />
Figure III-10 Roadway Overtopping ..................................................................................... 38<br />
Figure III-11 English Discharge Coefficients for Roadway Overtopping .............................. 39<br />
Figure III-12 Weir Crest Length Determinations for Roadway Overtopping......................... 40<br />
Figure III-13 Outlet Velocity - Inlet Control........................................................................... 41<br />
Figure III-14 Outlet Velocity - Outlet Control ........................................................................ 41<br />
Figure III-15 Performance Curves and Equations for Weirs and Orifices ............................ 42<br />
Figure III-16 Culvert Performance Curve with Roadway Overtopping ................................. 44<br />
Figure III-17 Culvert <strong>Design</strong> Form........................................................................................ 45<br />
Figure III-18 Inlet Control Nomograph ................................................................................. 47<br />
Figure III-19 Critical Depth Chart ......................................................................................... 48<br />
Figure III-20 Outlet Control Nomograph............................................................................... 49<br />
ix
LIST OF FIGURES (Cont.)<br />
Figure III-21 Inlet Control Curves - Circular or Elliptical Structural Plate Corrugated<br />
Metal Conduits ................................................................................................ 68<br />
Figure III-22 Inlet Control Curves - High and Low Pr<strong>of</strong>ile Structural Plate Arches............... 69<br />
Figure IV-1 Side-Tapered Inlet........................................................................................... 80<br />
Figure IV-2 Side-Tapered Inlet with Upstream Depression Contained Between<br />
Wingwalls........................................................................................................ 81<br />
Figure IV-3 Side-Tapered Inlet with Upstream Sump ........................................................ 82<br />
Figure IV-4 Slope-Tapered Inlet with Vertical Face ........................................................... 83<br />
Figure IV-5 Slope-Tapered Inlet with Mitered Face ........................................................... 84<br />
Figure IV-6 Inlet Control Performance Curves................................................................... 85<br />
Figure IV-7 Culvert Performance Curve............................................................................. 87<br />
Figure IV-8 Performance Curves for 6 ft by 6 ft Box Culvert with 90-degree Wingwall...... 88<br />
Figure IV-9 Tapered Inlet <strong>Design</strong> Form ............................................................................. 89<br />
Figure IV-10 <strong>Design</strong> Form - Slope-Tapered Inlet with Mitered Face.................................... 90<br />
Figure IV-11 Inlet Edge Conditions, Face Section, Rectangular Tapered Inlets.................. 94<br />
Figure IV-12 Tapered Inlets for Pipe <strong>Culverts</strong>.................................................................... 113<br />
Figure IV-13 Slope-Tapered Inlet, Circular Pipe Culvert.................................................... 114<br />
Figure V-1 "Hole in the Barrel" Analogy........................................................................... 123<br />
Figure V-2 Inflow and Outflow Hydrograph...................................................................... 123<br />
Figure V-3 Graphical Representation <strong>of</strong> Routing Step..................................................... 125<br />
Figure V-4 Elevation versus Storage Curve..................................................................... 126<br />
Figure V-5 Performance Curve ........................................................................................ 126<br />
Figure V-6 Peak Flow Reduction Based on Available Storage........................................ 127<br />
Figure V-7 Storage Routing Form.................................................................................... 128<br />
Figure V-8 Inflow Hydrograph, Example Problem, SI Units ............................................. 130<br />
Figure V-9 Storage Routing Form - Example Problem, SI Units...................................... 132<br />
Figure V-10 Culvert <strong>Design</strong> Form for Example Problem, SI Units .................................... 133<br />
Figure V-11 Performance Curve Calculations, 2-900 mm CMP Barrels........................... 133<br />
Figure V-12 Performance Curves, Example Problem, 2-900 mm CMP Barrels ............... 134<br />
Figure V-13 Topographic Map <strong>of</strong> Site ............................................................................... 134<br />
Figure V-14 Storage vs. Outflow Relationship .................................................................. 135<br />
Figure V-15 Selected Culvert <strong>Design</strong>................................................................................ 135<br />
Figure V-16 Inflow Hydrograph, Example Problem, English Units..................................... 136<br />
Figure V-17 Storage Routing Form - Example Problem, English Units ............................. 138<br />
Figure V-18 Culvert <strong>Design</strong> Form for Example Problem, English Units…………………….139<br />
Figure V-19 Performance Curve Calculations, 2-36 in CMP Barrels…………………… .... 139<br />
Figure V-20 Performance Curves, Example Problem, 2-36 in CMP Barrels..................... 140<br />
Figure V-21 Topographic Map <strong>of</strong> Site ............................................................................... 140<br />
Figure V-22 Storage vs. Outflow Relationship .................................................................. 141<br />
Figure V-23 Selected Culvert <strong>Design</strong>................................................................................ 141<br />
Figure VI-1 Stormwater Management Pond with Culvert as Outflow Control Device ....... 143<br />
Figure VI-2 Sag Culvert .................................................................................................... 145<br />
Figure VI-3 "Broken-Back" Culvert.................................................................................... 145<br />
Figure VI-4 Culvert with a Horizontal Bend....................................................................... 146<br />
Figure VI-5 Culvert Junction ............................................................................................. 148<br />
x
LIST OF FIGURES (Cont.)<br />
Figure VI-6 Subatomospheric Pressure in <strong>Culverts</strong>......................................................... 149<br />
Figure VI-7 Fish Baffles in Culvert ................................................................................... 151<br />
Figure VI-8 Culvert Barrel Partially Buried to Preserve Natural Stream Bed ................... 152<br />
Figure VI-9 Baffle Arrangement for Fish Passage ........................................................... 152<br />
Figure VI-10 Culvert with Metal Headwall and Wingwalls.................................................. 154<br />
Figure VI-11 Scour at Culvert Outlet.................................................................................. 154<br />
Figure VI-12 Scour Hole at Culvert Outlet ......................................................................... 155<br />
Figure VI-13 Stream Degradation at Culvert Outlet ........................................................... 156<br />
Figure VI-14 Riprap Protection at Culvert Outlet ............................................................... 156<br />
Figure VI-15 Sediment Deposition in Culvert..................................................................... 157<br />
Figure VI-16 Debris Deflector ............................................................................................ 158<br />
Figure VI-17 Barrel Skew Angle......................................................................................... 159<br />
Figure VI-18 Inlet Skew Angle ........................................................................................... 160<br />
Figure VI-19 Barrel and Inlet Skew .................................................................................... 160<br />
Figure VI-20 Fill Warped to Avoid Inlet Skew .................................................................... 162<br />
Figure VI-21 Double Barrel Box Culvert............................................................................. 162<br />
Figure VI-22 Multiple Barrel <strong>Culverts</strong> with <strong>On</strong>e Low Flow Barrel ....................................... 163<br />
Figure VI-23 Bridge versus Culvert at Same Location....................................................... 164<br />
Figure VI-24 Corrugated Metal Box Culvert....................................................................... 165<br />
Figure VI-25 Precast Double Barrel Box Culvert ............................................................... 166<br />
Figure VI-26 LTEC <strong>Design</strong> Process................................................................................... 168<br />
Figure VI-27 LTEC Solution Surface.................................................................................. 168<br />
Figure VI-28 Guardrail Adjacent to Culvert Headwall ........................................................ 169<br />
Figure VI-29 Endwall for Safety Grate ............................................................................... 169<br />
Figure VI-30 Safety Grate Flush with Culvert Entrance ..................................................... 170<br />
Figure VI-31 Culvert Installations....................................................................................... 171<br />
Figure VI-32 Pressure Distribution-Rigid <strong>Culverts</strong> ............................................................. 172<br />
Figure VI-33 Unanchored Mitered End .............................................................................. 173<br />
Figure VI-34 Slope Paving Around a Mitered Inlet............................................................. 174<br />
Figure VI-35 Long Span Culvert ........................................................................................ 174<br />
Figure VI-36 Long Span Culvert ........................................................................................ 175<br />
Figure VI-37 Typical Long Span Culvert Shapes............................................................... 176<br />
Figure VI-38 Abrasion and Corrosion in <strong>Culverts</strong> .............................................................. 178<br />
Figure A-1 Dimensionless Performance Curve for Structural Plate Elliptical<br />
Conduit, Long Axis Horizontal, Thin Wall Projecting Entrance ..................... 197<br />
Figure B-1 Shapes <strong>of</strong> Annular Corrugations ................................................................... 203<br />
Figure B-2 Shape <strong>of</strong> 5- by 1-inch Corrugation ................................................................ 204<br />
Figure B-3 Manning’s n versus Diameter for Corrugated Metal Conduits....................... 205<br />
Figure C-1 Outlet Control Performance Curves.............................................................. 210<br />
Figure C-2 Box Culvert Outlet Control Performance Curves .......................................... 211<br />
Figure C-3 Inlet Control Performance Curves Various Inlet Configurations ................... 212<br />
Figure C-4 Optimization <strong>of</strong> Performance in Inlet Control ................................................ 213<br />
Figure C-5 Possible Face <strong>Design</strong> Selections Tapered Inlet ........................................... 214<br />
Figure C-6 Tapered Inlet <strong>Design</strong> Options for 8 ft by 6 ft Reinforced Concrete<br />
Box Culvert .................................................................................................. 216<br />
xi
LIST OF TABLES<br />
Table 1. Factors Influencing Culvert Performance............................................................... 8<br />
Table 2. Peak Determination Methods............................................................................... 13<br />
Table 3. Data Requirements for Culvert <strong>Design</strong> ............................................................... 22<br />
Table 4. Manning's n Values for <strong>Culverts</strong> .......................................................................... 33<br />
Table 5a. Inflow Hydrograph, Example Problem (from SCS Tabular Method) (SI)............ 131<br />
Table 5b. Inflow Hydrograph, Example Problem (from SCS Tabular Method) (English) ... 137<br />
Table 6. Loss Coefficients for Bends ............................................................................... 147<br />
Table 7. Effect <strong>of</strong> Inlet Skew Angle on Flow Capacity <strong>of</strong> 1829 mm x 1829 mm<br />
(6 ft by 6 ft) Box Culvert ..................................................................................... 161<br />
Table 8. Inlet Control <strong>Design</strong> Equations .......................................................................... 192<br />
Table 9. Constants for Inlet Control <strong>Design</strong> Equations .................................................... 193<br />
Table 10. Manning's n Values for <strong>Culverts</strong> ........................................................................ 208<br />
Table 11. Manning’s n for Small Natural Stream Channels ............................................... 222<br />
Table 12. Entrance Loss Coefficients ................................................................................ 223<br />
xii
GLOSSARY<br />
a Cross-sectional area <strong>of</strong> orifice, m 2 , (ft 2 )<br />
a’ Constant in rainfall intensity formula<br />
A Full cross-sectional area <strong>of</strong> culvert barrel or channel, m 2 , (ft 2 )<br />
Ab Area <strong>of</strong> bend section <strong>of</strong> slope-tapered inlet, m 2 , (ft 2 )<br />
Af Area <strong>of</strong> inlet face section <strong>of</strong> tapered inlet, m 2 , (ft 2 )<br />
AP Area <strong>of</strong> flow prism, m 2 , (ft 2 )<br />
At Area <strong>of</strong> tapered inlet throat section, m 2 , (ft 2 )<br />
AW Watershed area, hectares, (acres)<br />
b Face dimension <strong>of</strong> side bevel, mm, (in)<br />
b’ Constant in rainfall intensity formula<br />
B Span <strong>of</strong> culvert barrel, m (ft)<br />
Bb Width <strong>of</strong> bend section <strong>of</strong> a slope-tapered inlet, m (ft)<br />
Bf Width <strong>of</strong> face section <strong>of</strong> a tapered inlet, m (ft)<br />
c Coefficient for submerged inlet control equation<br />
C Run<strong>of</strong>f coefficient for use in the Rational equation<br />
Cb Discharge coefficient for bend section control<br />
Coefficient <strong>of</strong> discharge for flow over an embankment<br />
Cd<br />
Cf<br />
Discharge coefficient for face section control<br />
Cr Free flow coefficient <strong>of</strong> discharge for flow over an embankment<br />
Ct Discharge coefficient for throat section control<br />
CMP Corrugated metal pipe<br />
d Face dimension <strong>of</strong> top bevel, mm, (in)<br />
dc Critical depth, m (ft)<br />
D Interior height <strong>of</strong> culvert barrel, m (ft)<br />
De Equivalent diameter, De = 4R, m (ft)<br />
D50 Size <strong>of</strong> streambed material which exceeds 50% <strong>of</strong> the material by weight; i.e.,<br />
the median size, mm or m, (in or ft)<br />
E Height <strong>of</strong> face <strong>of</strong> tapered inlet, excluding bevel, m (ft)<br />
ELC Elevation <strong>of</strong> weir crest, m (ft)<br />
ELf Invert elevation at face, m (ft)<br />
ELhc Headwater elevation required for flow to pass crest in crest control, m (ft)<br />
<strong>Design</strong> headwater elevation, m (ft)<br />
Elhd<br />
xiii
ELhf<br />
ELhi<br />
ELho<br />
ELht<br />
ELO<br />
ELsf<br />
ELSO<br />
ELt<br />
ELtw<br />
GLOSSARY (Cont.)<br />
Headwater elevation required forflow to pass face section in face control, m (ft)<br />
Headwater elevation required for culvert to pass flow in inlet control, m (ft)<br />
Headwater elevation required for culvert to pass flow in outlet control, m (ft)<br />
Headwater elevation required for flow to pass throat section in throat control, m (ft)<br />
Invert elevation at outlet, m (ft)<br />
Stream bed elevation at face <strong>of</strong> culvert, m (ft)<br />
Stream bed elevation at outlet <strong>of</strong> culvert, m (ft)<br />
Invert elevation at throat, m (ft)<br />
Tailwater elevation, m (ft)<br />
f Darcy resistance factor<br />
Fr Froude number<br />
FALL Depression <strong>of</strong> inlet control section below the stream bed, m (ft). (Measured<br />
from stream bed to face invert for culvert, to throat invert for culvert<br />
with tapered inlet.)<br />
G The number <strong>of</strong> different materials (roughnesses) in the perimeter <strong>of</strong> a conduit<br />
with composite roughness<br />
9 Acceleration due to gravity, 9.81 m/s/s, (32.2 ft/s/s)<br />
HGL <strong>Hydraulic</strong> grade line<br />
h Height <strong>of</strong> hydraulic grade line above centerline <strong>of</strong> orifice, m (ft)<br />
hf Friction head loss, m (ft)<br />
ho Height <strong>of</strong> hydraulic grade line above outlet invert, m (ft)<br />
ht Height <strong>of</strong> tailwater above crown <strong>of</strong> submerged road, m (ft)<br />
H Sum <strong>of</strong> inlet loss, friction loss, and velocity head in a culvert, m (ft)<br />
HL Total energy required to pass a given discharge through a culvert, m (ft)<br />
Hb Head loss at bend, m (ft)<br />
HC Specific head at critical depth (dC + VC 2 /2g), m (ft)<br />
He Entrance head loss, m (ft)<br />
Hf Friction head loss in culvert barrel, m (ft)<br />
H9 Head loss at bar grate, m (ft)<br />
Hj Head loss at junction, m (ft)<br />
Hl Friction head loss in tapered inlet, m (ft)<br />
Exit head loss, m (ft)<br />
Ho<br />
xiv
GLOSSARY (Cont.)<br />
HV Velocity head = V 2 /2g, m (ft)<br />
HW Depth from inlet invert to upstream total energy grade line, m (ft)<br />
HWb Headwater depth above the bend section invert, m (ft)<br />
HWC Headwater depth above the weir crest, m (ft)<br />
HWd <strong>Design</strong> headwater depth, m (ft)<br />
HWi Headwater depth above inlet control section invert, m (ft)<br />
HWf Headwater depth above the culvert inlet face invert, m (ft)<br />
Headwater depth above the culvert outlet invert, m (ft)<br />
Total head <strong>of</strong> flow over embankment, m (ft) (Measured from roadway crest to up<br />
stream surface level.)<br />
HWt Depth from throat invert to upstream total energy grade line, m (ft)<br />
I Rate <strong>of</strong> inflow into a storage basin, m 3 /s, (ft 3 /s)<br />
Rainfall intensity, in/hr<br />
k Flow constant for an orifice, Q = kah 0.5 , m 0.5 /s, (ft 0.5 /s)<br />
ke Entrance loss coefficient<br />
kt Correction factor for downstream submergence during roadway overtopping<br />
K Coefficient for unsubmerged inlet control equation<br />
Kb Dimensionless effective pressure term for bend section control<br />
Kf Dimensionless effective pressure term for inlet face section control<br />
K9 Dimensionless bar shape factor for calculating grate head losses<br />
Kt Dimensionless effective pressure term for inlet throat control<br />
L Actual culvert length, m (ft)<br />
La Approximate length <strong>of</strong> culvert, including tapered inlet, but excluding wing<br />
walls, m (ft)<br />
Lr Width <strong>of</strong> roadway prism crest, m (ft)<br />
L1, L2,<br />
L3, L4<br />
Dimensions relating to tapered inlets, m (ft)<br />
M Exponent in unsubmerged inlet control equation<br />
n Manning’s roughness coefficient<br />
ñ Weighted Manning’s n value<br />
N Number <strong>of</strong> barrels<br />
0 Rate <strong>of</strong> outflow from a storage basin, m 3 /s, (ft 3 /s)<br />
xv
GLOSSARY (Cont.)<br />
p Wetted perimeter, m (ft)<br />
pf Wetted perimeter <strong>of</strong> tapered inlet face, m (ft)<br />
pt Wetted perimeter <strong>of</strong> tapered inlet throat, m (ft)<br />
P Length from crest <strong>of</strong> depression to face <strong>of</strong> culvert, m (ft)<br />
q0 Discharge over segment <strong>of</strong> embankment, m 3 /s, (ft 3 /s)<br />
Q Discharge, m 3 /s, (ft 3 /s)<br />
Qb Flow through culvert as opposed to flow over embankment, m 3 /s, (ft 3 /s)<br />
Qc Discharge at critical depth, m 3 /s, (ft 3 /s)<br />
Qd <strong>Design</strong> discharge, m 3 /s, (ft 3 /s)<br />
Qo Discharge over total length <strong>of</strong> embankment, m 3 /s, (ft 3 /s)<br />
QP Peak flow rate, m 3 /s, (ft 3 /s)<br />
Qr Routed (reduced) peak flow, m 3 /s, (ft 3 /s)<br />
Qt Total <strong>of</strong> Qb + Qo, m 3 /s, (ft 3 /s)<br />
Q50 Discharge for 50-year return period (similar for other return periods), m 3 /s, (ft 3 /s)<br />
R <strong>Hydraulic</strong> radius = cross-sectional area <strong>of</strong> flow through culvert or channel<br />
divided by wetter perimeter, m (ft)<br />
R/o Rainfall run<strong>of</strong>f, m 3 , (ft 3 )<br />
R/F Rainfall, mm, (in)<br />
RCP Reinforced concrete pipe<br />
s Storage in a storage basin, m 3 , (ft 3 )<br />
S Slope <strong>of</strong> culvert barrel, m/m, (ft/ft)<br />
Se Slope <strong>of</strong> embankment or face <strong>of</strong> excavation, expressed as Se:1,<br />
horizontal:vertical, m/m, (ft/ft)<br />
Sf Slope <strong>of</strong> fall at culvert inlet, expressed as Sf:1, horizontal:vertical, m/m, (ft/ft)<br />
Sn Friction slope <strong>of</strong> full flow HGL, m/m, (ft/ft)<br />
So Slope <strong>of</strong> channel bed, m/m, (ft/ft)<br />
t Time, min or sec<br />
ti Time <strong>of</strong> concentration for Rational equation, min<br />
tp Time to peak <strong>of</strong> a run<strong>of</strong>f hydrograph, min or sec<br />
T Depth <strong>of</strong> depression, m (ft)<br />
Rainfall duration, min<br />
Critical storm duration, min<br />
TC<br />
xvi
GLOSSARY (Cont.)<br />
TP Top width <strong>of</strong> flow prism, m (ft)<br />
TAPER Cotangent <strong>of</strong> angle <strong>of</strong> sidewalls in tapered inlet with respect to an extension<br />
<strong>of</strong> the culvert sidewalls, m/m, (ft/ft)<br />
TW Tailwater depth measured from culvert outlet invert, m (ft)<br />
V Mean velocity <strong>of</strong> flow, m/s, (ft/s)<br />
Vd Channel velocity downstream <strong>of</strong> culvert, ft/s m/s, (ft/s)<br />
V9 Velocity <strong>of</strong> flow between bars in a grate, m/s, (ft/s)<br />
Vo Velocity at outlet <strong>of</strong> culvert, m/s, (ft/s)<br />
VU Approach velocity upstream <strong>of</strong> culvert, m/s, (ft/s)<br />
w Maximum cross-sectional width <strong>of</strong> the bars facing the flow, m (ft)<br />
W Length <strong>of</strong> weir crest for slope tapered inlet with mitered face, m (ft)<br />
WP Length <strong>of</strong> weir crest <strong>of</strong> fall, excluding sides <strong>of</strong> depression, m (ft)<br />
WW Wingwall <strong>of</strong> culvert entrance<br />
x Minimum clear spacing between bars, m (ft)<br />
X1,X2,X3 Lengths <strong>of</strong> overflow sections along embankment, m (ft)<br />
y Depth <strong>of</strong> flow, m (ft)<br />
y' Change in hydraulic grade line through a junction, m (ft)<br />
Y Additive term in submerged inlet control equation<br />
Yh <strong>Hydraulic</strong> depth = AP/TP m (ft)<br />
Z The difference in elevation between the crest and face section <strong>of</strong> a slope<br />
tapered inlet with a mitered face, m (ft)<br />
Θg Angle <strong>of</strong> bar grate with respect to the horizontal, degrees<br />
Θs Flare angles <strong>of</strong> side walls <strong>of</strong> tapered inlet with respect to extension <strong>of</strong><br />
culvert side wall, degrees<br />
Θt Angle <strong>of</strong> departure <strong>of</strong> the top slab from a plane parallel to the bottom slab,<br />
degrees<br />
ΘW Flare angle <strong>of</strong> wingwalls with respect to extension <strong>of</strong> culvert side wall,<br />
degrees<br />
Angle between outfall and lateral at a junction, degrees<br />
Θj<br />
xvii
(Page intentionally blank)<br />
xviii
A. General<br />
I. INTRODUCTION<br />
The purpose <strong>of</strong> this publication is to provide information for the planning and hydraulic design <strong>of</strong><br />
highway culverts and inlet improvements for culverts (Figure I-1). <strong>Design</strong> methods are included<br />
for special shapes including long-span culverts (Figure I-2). Detailed information is provided on<br />
the routing <strong>of</strong> flow through culverts. Guidance and reference sources are furnished for<br />
environmental, safety, structural, economic, and other consideration.<br />
Figure I-1--Typical Concrete Pipe Culvert Figure I-2--Long Span Culvert<br />
Figure I-3--Culvert <strong>Design</strong><br />
Procedure Flowchart<br />
The check lists, design charts and tables, and<br />
calculation forms <strong>of</strong> this publication should provide<br />
the designer with the necessary tools to perform<br />
culvert designs ranging from the most basic culverts<br />
to more complex improved inlet designs (Figure I-3)<br />
is a flowchart <strong>of</strong> the culvert design procedure<br />
followed in this manual.<br />
The methodology <strong>of</strong> culvert design presented in this<br />
publication is in a clear, usable format. It is intended<br />
for those with a good understanding <strong>of</strong> basic<br />
hydrologic and hydraulic methods and with some<br />
experience in the design <strong>of</strong> hydraulic structures.<br />
The experienced designer is assumed to be able to<br />
understand the variety <strong>of</strong> flow conditions which are<br />
possible in these complex hydraulic structures and<br />
make appropriate adjustments. The inexperienced<br />
designer and those unfamiliar with hydraulic<br />
phenomena should use this publication with caution.<br />
This publication combines the information and<br />
methodology contained in <strong>Hydraulic</strong> Engineering<br />
Circular HEC Number 5, <strong>Hydraulic</strong> Charts for the<br />
Selection <strong>of</strong> <strong>Highway</strong> <strong>Culverts</strong>, HEC Number10,<br />
Capacity Charts for the <strong>Hydraulic</strong> <strong>Design</strong> <strong>of</strong><br />
<strong>Highway</strong> <strong>Culverts</strong>, and HEC Number 13, <strong>Hydraulic</strong><br />
<strong>Design</strong> <strong>of</strong> Improved Inlets for <strong>Culverts</strong> with other<br />
more recent culvert information developed by<br />
governmental agencies, universities, and culvert<br />
manufacturers to produce a comprehensive culvert<br />
design publication. (1,2,3)<br />
1
B. Overview <strong>of</strong> <strong>Culverts</strong><br />
A culvert is a hydraulically short conduit which conveys stream flow through a roadway<br />
embankment or past some other type <strong>of</strong> flow obstruction. <strong>Culverts</strong> are constructed from a<br />
variety <strong>of</strong> materials and are available in many different shapes and configurations. Culvert<br />
selection factors include roadway pr<strong>of</strong>iles, channel characteristics, flood damage evaluations,<br />
construction and maintenance costs, and estimates <strong>of</strong> service life.<br />
1. Shapes. Numerous cross-sectional shapes are available. The most commonly used<br />
shapes, depicted in Figure I-4, include circular, box (rectangular), elliptical, pipe-arch, and arch.<br />
The shape selection is based on the cost <strong>of</strong> construction, the limitation on upstream water<br />
surface elevation, roadway embankment height, and hydraulic performance.<br />
Figure I-4--Commonly Used Culvert Shapes<br />
2. Materials. The selection <strong>of</strong> a culvert material may depend upon structural strength,<br />
hydraulic roughness, durability, and corrosion and abrasion resistance. The three most common<br />
culvert materials are concrete and nonreinforced), corrugated aluminum, and corrugated steel.<br />
<strong>Culverts</strong> may also be lined with other materials to inhibit corrosion and abrasion, or to reduce<br />
hydraulic resistance. For example, corrugated metal culverts may be lined with asphaltic<br />
concrete. A concrete box culvert and a corrugated metal arch culvert depicted in Figures I-5 and<br />
I-6 respectively.<br />
3. Inlets. A multitude <strong>of</strong> different inlet configurations are utilized on culvert barrels. These<br />
include both prefabricated and constructed-in-place installations. Commonly used inlet<br />
configurations include projecting culvert barrels, cast-in-place concrete headwalls, precast or<br />
prefabricated end sections, and culvert ends mitered to conform to the fill slope (Figure I-7).<br />
Structural stability, aesthetics, erosion control, and fill retention are considerations in the<br />
selection <strong>of</strong> various inlet configurations.<br />
2
Figure I-5--Precast Concrete Box Culvert<br />
(American Concrete Pipe Association)<br />
3<br />
Figure I-6--Corrugated Metal Arch<br />
(Contech)<br />
The hydraulic capacity <strong>of</strong> a culvert may be improved by appropriate inlet selection. Since the<br />
natural channel is usually wider than the culvert barrel, the culvert inlet edge represents a flow<br />
contraction and may be the primary flow control. The provision <strong>of</strong> a more gradual flow transition<br />
will lessen the energy loss and thus create a more hydraulically efficient inlet condition (Figure I-<br />
8). Beveled edges are therefore more efficient than square edges. Side-tapered and slopetapered<br />
inlets, commonly referred to as improved inlets, further reduce the flow contraction.<br />
Depressed inlets, such as slope-tapered inlets, increase the effective head on the flow control<br />
section, thereby further increasing the culvert efficiency. Figures I-9 and I-10 depict a sidetapered<br />
and a slope-tapered inlet respectively.<br />
Figure I-7--Four Standard Inlet Types (schematic)
Figure I-9--Side-tapered inlet<br />
Figure I-8—Entrance Contraction (schematic)<br />
4<br />
Figure I-10--Slope-tapered inlet
C. Culvert <strong>Hydraulic</strong>s<br />
A complete theoretical analysis <strong>of</strong> the hydraulics <strong>of</strong> a particular culvert installation is timeconsuming<br />
and difficult. Flow conditions vary from culvert to culvert and they also vary over time<br />
for any given culvert. The barrel <strong>of</strong> the culvert may flow full or partly full depending upon<br />
upstream and downstream conditions, barrel characteristics, and inlet geometry.<br />
Research by the National Bureau <strong>of</strong> Standards (NBS) sponsored and supported by the Federal<br />
<strong>Highway</strong> Administration (FHWA), formerly the Bureau <strong>of</strong> Public Roads (BPR), began in the early<br />
1950s and resulted in a series <strong>of</strong> seven reports. (see references 4, 5, 6, 7, 8, 9, and 10) These<br />
reports provided a comprehensive analysis <strong>of</strong> culvert hydraulics under various flow conditions.<br />
These data were used by the BPR staff to develop culvert design aids, called nomographs.<br />
These nomographs are the basis <strong>of</strong> the culvert design procedures in HEC No. 5, HEC No. 13,<br />
and this publication.<br />
The approach presented in HEC No. 5 is to analyze a culvert for various types <strong>of</strong> flow control<br />
and then design for the control which produces the minimum performance. <strong>Design</strong>ing for<br />
minimum performance- ignores transient conditions which might result in periods <strong>of</strong> better<br />
performance. The benefits <strong>of</strong> designing for minimum performance are ease <strong>of</strong> design and<br />
assurance <strong>of</strong> adequate performance under the least favorable hydraulic conditions.<br />
1. Flow Conditions. A culvert barrel may flow full over all <strong>of</strong> its length or partly full. Full flow in<br />
a culvert barrel is rare. Generally, at least part <strong>of</strong> the barrel flows partly full. A water surface<br />
pr<strong>of</strong>ile calculation is the only way to accurately determine how much <strong>of</strong> the barrel flows full.<br />
a. Full Flow. The hydraulic condition in a culvert flowing full is called pressure flow. If the crosssectional<br />
area <strong>of</strong> the culvert in pressure flow were increased, the flow area would expand. <strong>On</strong>e<br />
condition which can create pressure flow in a culvert is the back pressure caused by a high<br />
downstream water surface elevation. A high upstream water surface elevation may also<br />
produce full flow (Figure I-11). Regardless <strong>of</strong> the cause, the capacity <strong>of</strong> a culvert operating<br />
under pressure flow is affected by upstream and downstream conditions and by the hydraulic<br />
characteristics <strong>of</strong> the culvert.<br />
Figure I-11--Culvert Flowing Full<br />
(No tailwater at outlet end)<br />
5
. Partly Full (Free Surface) Flow. Free surface flow or open channel flow may be categorized<br />
as subcritical, critical, or supercritical. A determination <strong>of</strong> the appropriate flow regime is<br />
accomplished by evaluating the dimensionless number, Fr, called the Froude number:<br />
Fr = V/ (g yh) 0.5<br />
In this equation, V is the average velocity <strong>of</strong> flow, g is the gravitational acceleration, and yh is the<br />
hydraulic depth. The hydraulic depth is calculated by dividing the cross-sectional flow area by<br />
the width <strong>of</strong> the free water surface. When Fr > 1.0, the flow is supercritical and is characterized<br />
as swift. When Fr < 1.0, the flow is subcritical and characterized as smooth and tranquil. If Fr =<br />
1.0, the flow is said to be critical.<br />
The three flow regimes are illustrated in the depiction <strong>of</strong> a small dam in Figure I-12. Subcritical<br />
flow occurs upstream <strong>of</strong> the dam crest where the water is deep and the velocity is low.<br />
Supercritical flow occurs downstream <strong>of</strong> the dam crest where the water is shallow and the<br />
velocity is high. Critical flow occurs at the dam crest and represents the dividing point between<br />
the subcritical and supercritical flow regimes.<br />
Figure I-12--Flow over a small dam (schematic)<br />
To analyze free surface flow conditions, a point <strong>of</strong> known depth and flow (control section) must<br />
first be identified. A definable relationship exists between critical depth and critical flow at the<br />
dam crest, making it a convenient control section.<br />
Identification <strong>of</strong> subcritical or supercritical flow is required to continue the analysis <strong>of</strong> free<br />
surface flow conditions. The example using the dam <strong>of</strong> Figure I-12 depicts both flow regimes.<br />
Subcritical flow characteristics, such as depth and velocity, can be affected by downstream<br />
disturbances or restrictions. For example, if an obstruction is placed on the dam crest (control<br />
section), the water level upstream will rise. In the supercritical flow regime, flow characteristics<br />
are not affected by downstream disturbances. For example, an obstruction placed at the toe <strong>of</strong><br />
the dam does not affect upstream water levels.<br />
The same type <strong>of</strong> flow illustrated by the small dam may occur in a steep culvert flowing partly<br />
full (Figure I-13). In this situation, critical depth would occur at the culvert inlet, subcritical flow<br />
could exist in the upstream channel, and supercritical flow would exist in the culvert barrel.<br />
6
Figure I-13--Typical Inlet Control Flow Section<br />
A special type <strong>of</strong> free surface flow is called "just-full flow." This is a special condition where a<br />
pipe flows full with no pressure. The water surface just touches the crown <strong>of</strong> the pipe. The<br />
analysis <strong>of</strong> this type <strong>of</strong> flow is the same as for free surface flow.<br />
2. Types <strong>of</strong> Flow Control. Inlet and outlet control are the two basic types <strong>of</strong> flow control<br />
defined in the research conducted by the NBS and the BPR. The basis for the classification<br />
system was the location <strong>of</strong> the control section. The characterization <strong>of</strong> pressure, subcritical, and<br />
supercritical flow regimes played an important role in determining the location <strong>of</strong> the control<br />
section and thus the type <strong>of</strong> control. The hydraulic capacity <strong>of</strong> a culvert depends upon a different<br />
combination <strong>of</strong> factors for each type <strong>of</strong> control.<br />
a. Inlet Control. Inlet control occurs when the culvert barrel is capable <strong>of</strong> conveying more flow<br />
than the inlet will accept. The control section <strong>of</strong> a culvert operating under inlet control is located<br />
just inside the entrance. Critical depth occurs at or near this location, and the flow regime<br />
immediately downstream is supercritical. Figure I-13 shows one typical inlet control flow<br />
condition. <strong>Hydraulic</strong> characteristics downstream <strong>of</strong> the inlet control section do not affect the<br />
culvert capacity. The upstream water surface elevation and the inlet geometry represent the<br />
major flow controls. The inlet geometry includes the barrel shape, cross-sectional area, and the<br />
inlet edge (Table 1).<br />
b. Outlet Control. Outlet control flow occurs when the culvert barrel is not capable <strong>of</strong> conveying<br />
as much flow as the inlet opening will accept. The control section for outlet control flow in a<br />
culvert is located at the barrel exit or further downstream. Either subcritical or pressure flow<br />
exists in the culvert barrel under these conditions. Figure I-14 shows two typical outlet control<br />
flow conditions. All <strong>of</strong> the geometric and hydraulic characteristics <strong>of</strong> the culvert play a role in<br />
determining its capacity. These characteristics include all <strong>of</strong> the factors governing inlet control,<br />
the water surface elevation at the outlet, and the slope, length, and hydraulic roughness <strong>of</strong> the<br />
culvert barrel (Table 1).<br />
7
Table 1--Factors Influencing Culvert Performance.<br />
Factor<br />
8<br />
Inlet<br />
Control<br />
Outlet<br />
Control<br />
Headwater Elevation X X<br />
Inlet Area X X<br />
Inlet Edge Configuration X X<br />
Inlet Shape X X<br />
Barrel Roughness X<br />
Barrel Area X<br />
Barrel Shape X<br />
Barrel Length X<br />
Barrel Slope * X<br />
Tailwater Elevation X<br />
*Barrel slope affects inlet control performance to a small<br />
degree, but may be neglected.<br />
Figure I-14--Typical Outlet Control Flow Conditions
3. Headwater. Energy is required to force flow through a culvert. This energy takes the form <strong>of</strong><br />
an increased water surface elevation on the upstream side <strong>of</strong> the culvert. The depth <strong>of</strong> the<br />
upstream water surface measured from the invert at the culvert entrance is generally referred to<br />
as headwater depth (Figures I-13 and I-14).<br />
A considerable volume <strong>of</strong> water may be ponded upstream <strong>of</strong> a culvert installation under high fills<br />
or in areas with flat ground slopes. The pond which is created may attenuate flood peaks under<br />
such conditions. This peak discharge attenuation may justify a reduction in the required culvert<br />
size.<br />
4. Tailwater. Tailwater is defined as the depth <strong>of</strong> water downstream <strong>of</strong> the culvert measured<br />
from the outlet invert. Figure I-14 It is an important factor in determining culvert capacity under<br />
outlet control conditions. Tailwater may be caused by an obstruction in the downstream channel<br />
or by the hydraulic resistance <strong>of</strong> the channel. In either case, backwater calculations from the<br />
downstream control point are required to precisely define tailwater. When appropriate, normal<br />
depth approximations may be used instead <strong>of</strong> backwater calculations.<br />
5. Outlet Velocity. Since a culvert usually constricts the available channel area, flow velocities<br />
in the culvert are likely to be higher than in the channel. These increased velocities can cause<br />
streambed scour and bank erosion in the vicinity <strong>of</strong> the culvert outlet. Minor problems can<br />
Figure I-15--Culvert Performance<br />
Curve<br />
occasionally be avoided by increasing the barrel<br />
roughness. Energy dissipaters and outlet protection<br />
devices are sometimes required to avoid excessive<br />
scour at the culvert outlet. When a culvert is<br />
operating under inlet control and the culvert barrel is<br />
not operating at capacity, it is <strong>of</strong>ten beneficial to<br />
flatten the barrel slope or add a roughened section<br />
to reduce outlet velocities.<br />
6. Performance Curves. A performance curve is a<br />
plot <strong>of</strong> headwater depth or elevation versus flow<br />
rate. The resulting graphical depiction <strong>of</strong> culvert<br />
operation is useful in evaluating the hydraulic<br />
capacity <strong>of</strong> a culvert for various headwaters. Among<br />
its uses, the performance curve displays the<br />
consequences <strong>of</strong> higher flow rates at the site and the<br />
benefits <strong>of</strong> inlet improvements.<br />
In developing a culvert performance curve, both inlet<br />
and outlet control curves must be plotted. This is<br />
necessary because the dominant control at a given<br />
headwater is hard to predict. Also, control may shift<br />
from the inlet to the outlet, or vice-versa over a<br />
range <strong>of</strong> flow rates. Figure I-15 illustrates a typical<br />
culvert performance curve. At the design headwater,<br />
the culvert operates under inlet control. With inlet<br />
improvement the culvert performance can be<br />
increased to take better advantage <strong>of</strong> the culvert<br />
barrel capacity.<br />
9
D. Economics<br />
The hydraulic design <strong>of</strong> a culvert installation always includes an economic evaluation. A wide<br />
spectrum <strong>of</strong> flood flows with associated probabilities will occur at the culvert site during its<br />
service life. The benefits <strong>of</strong> constructing a large capacity culvert to accommodate all <strong>of</strong> these<br />
events with no detrimental flooding effects are normally outweighed by the initial construction<br />
costs. Thus, an economic analysis <strong>of</strong> the trade<strong>of</strong>fs is performed with varying degrees <strong>of</strong> effort<br />
and thoroughness.<br />
1. Benefits and Costs. The purpose <strong>of</strong> a highway culvert is to convey water through a<br />
roadway embankment. The major benefits <strong>of</strong> the culvert are decreased traffic interruption time<br />
due to roadway flooding and increased driving safety. The major costs are associated with the<br />
construction <strong>of</strong> the roadway embankment and the culvert itself. Maintenance <strong>of</strong> the facility and<br />
flood damage potential must also be factored into the cost analysis.<br />
Figure 1-16--Risk analysis benefit<br />
versus cost curve<br />
10<br />
2. Analysis. Traditional economic<br />
evaluations for minor stream crossings<br />
have been somewhat simplistic. Culvert<br />
design flows are based on the importance<br />
<strong>of</strong> the roadway being served with little<br />
attention given to other economic and site<br />
factors. A more rigorous investigation,<br />
termed a risk analysis, is sometimes<br />
performed for large culvert installations.<br />
The objective <strong>of</strong> the risk analysis is to find<br />
the optimum culvert capacity based on a<br />
comparison <strong>of</strong> benefits and costs (Figure I-<br />
16). The designer should be aware <strong>of</strong> the<br />
risk analysis process and consider using it<br />
to analyze alternatives where flood<br />
damage is large or culvert cost is<br />
significant.
A. Hydrology<br />
II. DESIGN CONSIDERATIONS<br />
1. General. Hydrologic analysis involves the estimation <strong>of</strong> a design flow rate based on<br />
climatological and watershed characteristics. This analysis is one <strong>of</strong> the most important aspects<br />
<strong>of</strong> culvert design. Since statistical uncertainties are inherent in hydrologic analysis, the results <strong>of</strong><br />
the analysis are not as accurate as the results <strong>of</strong> the hydraulic analysis <strong>of</strong> a culvert.<br />
Nonetheless, both <strong>of</strong> these analyses are required, and the hydrologic study must be performed<br />
first. FHWA <strong>Hydraulic</strong> <strong>Design</strong> Series (HDS) Number 2: <strong>Highway</strong> Hydrology is an excellent<br />
reference for gaining information and insight into most <strong>of</strong> the hydrologic methods mentioned in<br />
this publication (77).<br />
A statistical concept <strong>of</strong>ten associated with hydrologic analysis is the return period. The term<br />
return period is used when referring to the frequency <strong>of</strong> occurrence <strong>of</strong> rare events such as<br />
floods. Mathematically, the return period is the reciprocal <strong>of</strong> frequency. For example, the flood<br />
which has a 5 percent chance <strong>of</strong> occurring (frequency) in any given year also has a return<br />
period <strong>of</strong> 20 years; i.e., 1/0.05 = 20 years. In other words, this flood event will be exceeded on<br />
the average <strong>of</strong> once every 20 years over a long period <strong>of</strong> time. Hence, the 20- year flood event<br />
is likely to be exceeded five times during a 100-year period. These events will be randomly<br />
spaced over the 100 years.<br />
Large and expensive culvert installations may warrant extensive hydrologic analysis. This<br />
increased level <strong>of</strong> effort may be necessary in order to perform risk analysis and/or storage<br />
routing calculations. Risk analysis requires the computation <strong>of</strong> flows for several different return<br />
periods. Storage routing calculations require the definition <strong>of</strong> the entire flood event or<br />
hydrograph.<br />
Considerable study <strong>of</strong> the use <strong>of</strong> risk analysis in culvert design has occurred over the past 10 to<br />
20 years. Risk analysis balances the culvert cost with the damages associated with inadequate<br />
culvert performance. These studies have been fruitful in relating culvert design to economic<br />
theory and in defining the monetary consequences <strong>of</strong> both over-design and under-design. The<br />
limitations <strong>of</strong> culvert design based solely on arbitrary return periods have been duly exposed in<br />
the process.<br />
Storage routing is the attenuation <strong>of</strong> the flood flow due to the storage volume upstream <strong>of</strong> the<br />
culvert. Risk analysis studies <strong>of</strong>ten include storage routing as an integral part <strong>of</strong> the culvert<br />
sizing process. Consideration <strong>of</strong> storage routing in these studies <strong>of</strong>ten reduces the design<br />
culvert size. Hence, storage routing has been included as an optional part <strong>of</strong> the design<br />
procedure presented in this manual.<br />
2. Peak <strong>Design</strong> Flow. as a flood wave passes a point along a stream, the flow increases to a<br />
maximum and then recedes. The maximum flow rate is called the peak flow. The peak flow has<br />
been, and continues to be, a major factor in the culvert design process.<br />
In traditional culvert design, a structure is sized to pass a peak flow from one side <strong>of</strong> the<br />
roadway embankment to the other with an acceptable headwater elevation. The magnitude <strong>of</strong><br />
the peak flow is dependent upon the selection <strong>of</strong> a return period. The assignment <strong>of</strong> a return<br />
period is generally based on the importance <strong>of</strong> the roadway and flood damage potential.<br />
11
For gaged sites, statistical analyses can be performed on the recorded stream flow to provide<br />
an estimated peak design flow for a given return period. The accuracy <strong>of</strong> the estimate improves<br />
as the length <strong>of</strong> the record increases. For culvert sites significantly removed from the gage, the<br />
peak design flow may have to be adjusted.<br />
Figure II-1--Flood Hydrograph<br />
A typical statistical analysis for data from a gaged site proceeds as follows. First, the annual<br />
peak flows for the site are arranged in descending order. Then, the plotting position is calculated<br />
by one <strong>of</strong> several available formulas (11). The peak floods are then plotted on a probability<br />
paper to define the frequency relationship for the gage site. If Gumbel paper (Type I external<br />
distribution) is used to plot the data, the mean <strong>of</strong> the data (mean annual flood) will plot at a<br />
frequency <strong>of</strong> 0.429. This equates to a return period <strong>of</strong> 2.33 years. Other return periods can be<br />
read from the frequency plot, because the return period is the inverse <strong>of</strong> the frequency.<br />
Ungaged sites present more <strong>of</strong> a design problem. Stream gage data for particular regions have<br />
been utilized to develop statistical regression equations for most areas <strong>of</strong> the country. These<br />
equations generally require basic watershed parameters such as drainage area and average<br />
stream slope. Using the required data, peak design flows can be determined for ungaged sites<br />
within that region. Deterministic methods are also available which attempt to model the rainfallrun<strong>of</strong>f<br />
process. The key input parameter in these methods is rainfall which must be related to a<br />
return period. The amount <strong>of</strong> watershed data required is dependent upon the sophistication <strong>of</strong><br />
the model. Table 2 lists some <strong>of</strong> the commonly employed methods <strong>of</strong> peak flow generation for<br />
gaged and ungaged sites.<br />
12
Table 2--Peak Determination Methods.<br />
Gaged Sites Ungaged Sites<br />
1) Normal Distribution<br />
2) Log-Normal Distribution<br />
3) Gumbel Extreme Value Distribution<br />
4) Log-Pearson Type III Distribution<br />
13<br />
1) USGS Regression Equations<br />
2) FHWA Regression Equations<br />
3) Regional Peak Flow Methods<br />
4) SCS Peak Discharge Method<br />
5) Rational Method<br />
3. Check Flows. Culvert operation should be evaluated for flows other than the peak design<br />
flow because: (1) It is good design practice to check culvert performance through a range <strong>of</strong><br />
discharges to determine acceptable operating conditions, (2) flood plain regulations may require<br />
the delineation <strong>of</strong> the 100-year flood plain, (3) in performing flood risk analyses, estimates <strong>of</strong> the<br />
damages caused by headwater levels due to floods <strong>of</strong> various frequencies are required.<br />
Check flows are determined in the same manner as the peak design flow. The hydrologic<br />
procedures used should be consistent unless unusual circumstances dictate otherwise. For<br />
example, a stream gage record may be long enough to estimate a 10-year peak design flow but<br />
too short to accurately generate a 100-year check flow. Under these circumstances the check<br />
flow should be evaluated by another method.<br />
4. Hydrographs. The entire flood hydrograph at the culvert site must be defined if upstream<br />
storage is to be considered in culvert design. Passing the peak design flow through a culvert<br />
neglects the attenuating effects <strong>of</strong> upstream storage. If this storage is taken into account, the<br />
required culvert size may be substantially reduced. Since volume considerations are now<br />
involved, the flood hydrograph becomes an integral part <strong>of</strong> the design process.<br />
A flood hydrograph is a plot <strong>of</strong> discharge versus time. Figure II-1 depicts a typical flood<br />
hydrograph showing the rise and fall <strong>of</strong> stream flow over time as the flood passes. Actual flood<br />
hydrographs can be obtained using stream gage records. These measured storm events can<br />
then be used to develop design flood hydrographs. In the absence <strong>of</strong> stream gage data,<br />
empirical or mathematical methods, such as the Snyder and SCS synthetic hydrograph<br />
methods, are used to generate a design flood hydrograph.<br />
The unit hydrograph technique is a popular procedure for determining the response <strong>of</strong> a<br />
watershed to a specified design rainfall. A unit hydrograph represents the run<strong>of</strong>f response <strong>of</strong> a<br />
watershed to a uniform 1-inch rainfall <strong>of</strong> a given duration. A unit hydrograph may be generated<br />
from data for a gaged watershed or synthesized from rainfall and watershed parameters for an<br />
ungaged watershed. Both methods are briefly described below.<br />
a. Unit Hydrograph Formulation - Gaged Watershed. To develop a unit hydrograph for a gaged<br />
watershed, the designer should have streamflow and rainfall records for a number <strong>of</strong> storm<br />
events. The rainfall data must be representative <strong>of</strong> the rainfall over the watershed during each<br />
storm event. In addition, the rainfall events should have relatively constant intensities over the<br />
duration <strong>of</strong> the storm.<br />
Unit hydrograph generation involves four steps which are illustrated in Figure II-2. (1) The<br />
groundwater or low flow contribution <strong>of</strong> the gaged flood hydrograph is estimated and removed<br />
from volume consideration. This groundwater or low flow contribution is generally regarded as<br />
constant and estimated to be the amount <strong>of</strong> stream flow prior to the storm event. (2) The
volume <strong>of</strong> the remaining run<strong>of</strong>f hydrograph is calculated. This is termed the direct run<strong>of</strong>f volume.<br />
(3) The direct run<strong>of</strong>f volume is then distributed over the entire watershed (divided by the<br />
watershed area) to determine the equivalent run<strong>of</strong>f depth. (4) The ordinates <strong>of</strong> the run<strong>of</strong>f<br />
hydrograph are divided by this run<strong>of</strong>f depth to produce the unit hydrograph for the storm<br />
duration.<br />
Figure II-2--Unit hydrograph determination procedure<br />
The unit hydrograph can be used with the concepts <strong>of</strong> linearity and superposition to predict the<br />
watershed response to a design rainfall with a specified return period. <strong>Line</strong>arity implies that if<br />
the unit hydrograph represents a basin's response to 1-mm (1-inch) <strong>of</strong> run<strong>of</strong>f for a given storm<br />
duration, 2-mm (2-inches) <strong>of</strong> run<strong>of</strong>f over the same duration doubles the discharge at each point<br />
in time. Superposition allows for the accumulation <strong>of</strong> individual run<strong>of</strong>f responses. For example, if<br />
a storm event which generates 1-mm (1-inch) <strong>of</strong> run<strong>of</strong>f over a given duration is followed<br />
immediately by another 1-mm (1-inch) run<strong>of</strong>f storm event <strong>of</strong> the same duration, the basin<br />
response will be the accumulation <strong>of</strong> the individual effects over time (Figure II-3).<br />
A unit hydrograph is derived for a specified storm duration. Since storm durations vary, many<br />
different unit hydrographs exist for any particular watershed. Techniques exist to vary the<br />
duration <strong>of</strong> a unit hydrograph such as the "S" Curve (Summation Curve) approach (11). These<br />
methods are useful in matching the design unit hydrograph to the duration increment <strong>of</strong> a design<br />
rainfall. Methods are also available to formulate design rainfalls using U.S. Weather Service<br />
data. (12,13)<br />
b. Synthetic Unit Hydrograph. A synthetic unit hydrograph may be developed in the absence <strong>of</strong><br />
stream gage data. The methods used to develop synthetic unit hydrographs are generally<br />
empirical and depend upon various watershed parameters, such as watershed size, slope, land<br />
use, and soil type. Two synthetic procedures which have been widely used are the Snyder<br />
Method and the Soil Conservation Service (SCS) Method. The Snyder Method uses empirically<br />
defined terms and physiographic characteristics <strong>of</strong> the drainage basin as input for empirical<br />
equations which characterize the timing and shape <strong>of</strong> the unit hydrograph. The SCS method<br />
utilizes dimensionless hydrograph parameters based on the analysis <strong>of</strong> a large number <strong>of</strong><br />
watersheds to develop a unit hydrograph. The only parameters required by the method are the<br />
peak discharge and the time to peak. A variation <strong>of</strong> the SCS synthetic unit hydrograph is the<br />
SCS synthetic triangular hydrograph.<br />
14
Figure II-3--<strong>Line</strong>arity and Superposition Concepts<br />
c. Computer Models. Hydrologic computer models are becoming popular for generating flood<br />
hydrographs. Some computer models merely solve empirical hand methods more quickly. Other<br />
models are theoretical and solve the run<strong>of</strong>f cycle in its entirety using continuous simulation over<br />
short time increments. Results are obtained using mathematical equations to represent each<br />
phase <strong>of</strong> the run<strong>of</strong>f cycle such as interception, surface retention, infiltration, and overland flow.<br />
In most simulation models, the drainage area is divided into subareas with similar hydrologic<br />
characteristics. A design rainfall is synthesized for each subarea, and abstractions, such as<br />
interception and infiltration, are removed. An overland flow routine simulates the movement <strong>of</strong><br />
the remaining surface water. Adjacent channels receive this overland flow from the subareas.<br />
The channels <strong>of</strong> the watershed are linked together and the channel flow is routed through them<br />
to complete the basin's response to the design rainfall.<br />
Computer models are available which simulate a single storm event or continuous run<strong>of</strong>f over a<br />
long period <strong>of</strong> time. The Stanford Watershed model was one <strong>of</strong> the earliest simulation models. It<br />
is a continuous simulation model using hourly rainfall and potential evapotranspiration as input<br />
data. The output is in the form <strong>of</strong> mean daily flows, hourly ordinates <strong>of</strong> the hydrograph, and<br />
monthly totals <strong>of</strong> the water balance. The EPA Sponsored Storm Water Management Model<br />
(SWMM) permits the Simulation <strong>of</strong> a single storm event. An assumption inherent in these<br />
models is that the return period <strong>of</strong> the computed flood is the same as that <strong>of</strong> the input rainfall. All<br />
simulation models require calibration <strong>of</strong> modeling parameters using measured historical events<br />
to increase their validity. Most simulation models require a significant amount <strong>of</strong> input data and<br />
user experience to assure reliable results.<br />
5. Basics <strong>of</strong> Storage Routing. Measurement <strong>of</strong> a flood hydrograph at a stream location is<br />
analogous to recording the passage <strong>of</strong> a high amplitude, low frequency wave. As this wave<br />
moves downstream, its shape broadens and flattens provided there is no additional inflow along<br />
the reach <strong>of</strong> the stream. This change in shape is due to the channel storage between the<br />
upstream and downstream locations. If the wave encounters a significant amount <strong>of</strong> storage at a<br />
given location in the stream, such as a reservoir, the attenuation <strong>of</strong> the flood wave is increased.<br />
Figure II-4 depicts the effects graphically.<br />
15
Figure II-4--Flood hydrograph shape modification<br />
Storage routing is the numerical translocation <strong>of</strong> a flood wave (hydrograph). This process is<br />
applicable to reservoirs, channels, and watersheds. The effects <strong>of</strong> the routing are threefold:<br />
volume conservation, peak reduction, and time lag. Reservoir routing is dependent only upon<br />
storage in modifying a flood wave. Channel routing is dependent upon inflow and outflow as well<br />
as storage in a stream reach. Watershed routing incorporates the run<strong>of</strong>f attenuating effects <strong>of</strong><br />
the watershed and is <strong>of</strong> importance in some hydrograph generation methods. Reservoir routing<br />
is <strong>of</strong> special interest in culvert design, and it will be discussed further in Chapter 5.<br />
B. Site Data<br />
1. General. The hydraulic design <strong>of</strong> a culvert installation requires the evaluation <strong>of</strong> a large<br />
amount <strong>of</strong> data including culvert location, waterway data, roadway data, and the design<br />
headwater. Each <strong>of</strong> these items and its importance is discussed in the following paragraphs.<br />
2. Culvert Location. A culvert should ideally be located in the existing channel bed to<br />
minimize costs associated with structural excavation and channel work. However, this is not<br />
always possible. Some streambeds are sinuous and cannot accommodate a straight culvert. In<br />
other situations, a stream channel may have to be relocated to avoid the installation <strong>of</strong> an<br />
inordinately long culvert. When relocating a stream channel, it is best to avoid abrupt stream<br />
transitions at either end <strong>of</strong> the culvert. Figure II-5 displays two examples <strong>of</strong> culvert location<br />
procedures (14). In one case, the culvert follows the natural channel alignment. In the second<br />
case, the channel has been relocated to reduce the culvert length. Brice concluded that minor<br />
channel relocations for culvert alignments have been successful unless the natural channel was<br />
already unstable (15).<br />
16
Figure II-5—Culvert location methods<br />
3. Waterway Data. The installation <strong>of</strong> a culvert to convey surface water through a highway<br />
embankment significantly constricts the flood plain. To predict the consequences <strong>of</strong> this<br />
alteration, accurate preconstruction waterway data must be collected. These data include crosssectional<br />
information, stream slope, the hydraulic resistance <strong>of</strong> the stream channel and<br />
floodplain, any condition affecting the downstream water surface elevation, and the storage<br />
capacity upstream <strong>of</strong> the culvert. Photographs <strong>of</strong> site conditions are <strong>of</strong>ten beneficial.<br />
a. Cross Sections. Stream cross sectional data acquired from a field survey at the site are<br />
highly desirable. At least three cross sections should be taken to establish the stream slope, the<br />
culvert inlet, the culvert outlet, and the configuration <strong>of</strong> the natural channel (Figure II-6).<br />
Sections should be taken: (1) about 30 m (100 ft) upstream from the crossing, (2) at the<br />
centerline <strong>of</strong> the roadway, and (3) about 30 m (100 ft) downstream from the crossing. The<br />
natural streambed width and side slopes, and the floodplain width may be obtained from these<br />
cross sections. The cross-sectional data will also help to verify the accuracy <strong>of</strong> existing<br />
topographic maps. If significant ponding is likely, additional sections may be necessary to<br />
determine the storage capacity upstream <strong>of</strong> the culvert. Likewise, additional downstream<br />
sections may be necessary to establish downstream water level (tailwater) conditions.<br />
If only one cross section <strong>of</strong> the natural channel is available, it will be used as the typical cross<br />
section. This assumption should be checked using topographic maps and aerial photos.<br />
Additional information on stream slope and upstream storage volume should also be obtained<br />
from the topographic maps.<br />
17
Figure II-6--Cross section locations<br />
b. Stream Slope. The longitudinal slope <strong>of</strong> the existing channel in the vicinity <strong>of</strong> the proposed<br />
culvert should be defined in order to properly position the culvert in vertical pr<strong>of</strong>ile and to define<br />
flow characteristics in the natural stream. Often, the proposed culvert is positioned at the same<br />
longitudinal slope as the streambed. Cross sections will provide streambed elevations at the<br />
deepest point <strong>of</strong> the stream. From these elevations and the distances between the cross<br />
sections the stream slope may be calculated.<br />
c. Resistance. The hydraulic resistance coefficient <strong>of</strong> the natural channel must be evaluated in<br />
order to calculate preproject flow conditions. This resistance coefficient is usually taken to be<br />
the Manning’s n value. Various methods are available to evaluate resistance coefficients for<br />
natural streams, including comparisons with photographs <strong>of</strong> streams with known resistance<br />
values or tabular methods based on stream characteristics (16, 17, and 18). Table 11 and<br />
Appendix D, provides Manning’s n values for selected natural channels.<br />
d. Tailwater. Culvert performance is likely to be affected by the downstream water surface<br />
elevation or tailwater. Therefore, conditions which might promote high tailwater elevations<br />
during flood events should be investigated. Downstream impoundments, obstructions, channel<br />
constrictions, tidal effects, and junctions with other watercourses should be investigated, based<br />
on field observations and maps, in order to evaluate their impact on the resultant tailwater<br />
elevation. Lacking these conditions, tailwater elevations should be based on water surface<br />
elevations in the natural channel. These elevations can be accurately determined from water<br />
surface elevation calculations or estimated using simplified approximations <strong>of</strong> water depth. For<br />
most culvert installations, an approximation is sufficient.<br />
18
e. Upstream Storage. The storage capacity available upstream from a culvert may have an<br />
impact upon its design. Upstream storage capacity can be obtained from large scale contour<br />
maps <strong>of</strong> the upstream area, but a 0.5 m (2-foot) contour interval map is desirable. If such maps<br />
are not available, a number <strong>of</strong> cross sections should be obtained upstream <strong>of</strong> the proposed<br />
culvert. These sections must be referenced horizontally as well as vertically. The length <strong>of</strong><br />
upstream channel to be cross-sectioned will depend on the headwater expected and the stream<br />
slope. The cross sections can be used to develop contour maps or the cross sectional areas<br />
can be used to compute storage. The topographic information should extend from the channel<br />
bed upward to an elevation equal to at least the design headwater elevation in the area<br />
upstream <strong>of</strong> the culvert.<br />
4. Roadway Data. The proposed or existing roadway affects the culvert cost, hydraulic<br />
capacity, and alignment. Roadway pr<strong>of</strong>ile and the roadway cross section information can be<br />
obtained from preliminary roadway drawings or from standard details on roadway sections.<br />
When the culvert must be sized prior to the development <strong>of</strong> preliminary plans, a best estimate <strong>of</strong><br />
the roadway section can be used, but the culvert design must be checked after the roadway<br />
plans are completed.<br />
a. Cross Section. The roadway cross section normal to the centerline is typically available from<br />
highway plans. However, the cross section needed by the culvert designer is the section at the<br />
stream crossing. This section may be skewed with reference to the roadway centerline. For a<br />
proposed culvert, the roadway plan, pr<strong>of</strong>ile, and cross-sectional data should be combined as<br />
necessary to obtain this desired section. A schematic roadway plan and section with important<br />
elevations is shown in Figure II-7.<br />
Figure II-7--Roadway cross section and culvert length<br />
19
. Culvert Length. Important dimensions and features <strong>of</strong> the culvert will become evident when<br />
the desired roadway cross section is measured or established. The dimensions are obtained by<br />
superimposing the estimated culvert barrel on the roadway cross section and the streambed<br />
pr<strong>of</strong>ile (Figure II-7). This superposition establishes the inlet and outlet invert elevations. These<br />
elevations and the resulting culvert length are approximate since the final culvert barrel size<br />
must still be determined.<br />
c. Longitudinal Roadway Pr<strong>of</strong>ile. The roadway pr<strong>of</strong>ile represents the obstruction encountered by<br />
the flowing stream. The embankment containing the culvert acts much like a dam. The culvert is<br />
similar to the normal release structure, and the roadway crest acts as an emergency spillway in<br />
the event that the upstream pool (headwater) attains a sufficient elevation. The location <strong>of</strong> initial<br />
overtopping is dependent upon the roadway geometry (Figure II-8).<br />
Figure II-8--Road pr<strong>of</strong>ile – valley section<br />
The pr<strong>of</strong>ile contained in highway plans generally represents the roadway centerline pr<strong>of</strong>ile.<br />
These elevations may not represent the high point in the highway cross section. The culvert<br />
designer should extract the pr<strong>of</strong>ile which establishes roadway flooding and roadway overflow<br />
elevations from the highway plans available. The low point <strong>of</strong> the pr<strong>of</strong>ile is <strong>of</strong> critical importance,<br />
since this is the point at which roadway overtopping will first occur.<br />
5. <strong>Design</strong> Headwater. The most economical culvert is one which would use all <strong>of</strong> the available<br />
headwater to pass the design discharge. Since the discharge capacity increases with increasing<br />
head, the available headwater elevation must be determined. This design headwater elevation<br />
generally hinges on one <strong>of</strong> three factors; economic considerations, regulatory constraints, or<br />
arbitrary constraints.<br />
An increase in available headwater can be obtained at some sites by depressing (burying) the<br />
culvert inlet. This procedure is advantageous for steep culverts which operate under inlet<br />
control. Additional information on this procedure is contained in Chapter 3.<br />
20
a. Economic Considerations. As ponding elevations increase upstream from a culvert,<br />
detrimental economic consequences can occur. Although for major structures it may be<br />
advantageous to perform a flood risk analysis (Chapter 6), site-specific constraints are<br />
sometimes adopted in lieu <strong>of</strong> a full risk analysis. Such constraints are based on some<br />
designated elevation that is not to be exceeded within a specified return period. This elevation<br />
may correspond to some critical point on the roadway such as the roadway shoulder or the<br />
roadway overtopping elevation. Another criteria might be the flood damage elevation <strong>of</strong> an<br />
upstream building. Possible loss <strong>of</strong> life and the importance <strong>of</strong> the highway are likewise<br />
considered. While all <strong>of</strong> these factors pertain to risk analysis, a detailed risk analysis is generally<br />
not performed.<br />
b. Regulatory Constraints. The requirements <strong>of</strong> the National Flood Insurance Program are a<br />
major consideration in culvert design. Most communities are now participating in this program.<br />
The limitation on flood plain construction as it affects the base (100-year) flood elevation is <strong>of</strong><br />
primary importance. Depending upon the culvert location, existing floodway encroachments,<br />
and whether there is a specified floodway, the allowable water surface elevation increase varies<br />
from 0 to 0.3 m (1 foot). Regardless <strong>of</strong> the return period utilized in the culvert design for the<br />
particular roadway, the 100-year return period flood must be checked to ascertain the effects <strong>of</strong><br />
the culvert on the base flood elevation (19).<br />
c. Arbitrary Constraints. Some state or local agencies place arbitrary constraints on the<br />
headwater produced by a culvert. For example, the headwater depth may not be allowed to<br />
exceed the barrel height or some multiple <strong>of</strong> the barrel height. Although these constraints will<br />
severely limit the flexibility inherent in culvert design, they must be followed unless the<br />
controlling agency can be convinced to relax the restrictions or grant an exemption.<br />
C. Summary <strong>of</strong> Data Needs. Table 3 summarizes the various data needed for culvert design.<br />
21
HYDROLOGY<br />
Peak Flow<br />
Check Flows<br />
Table 3--Data Requirements for Culvert <strong>Design</strong>.<br />
DATA SOURCE<br />
Hydrographs (if storage routing is<br />
utilized)<br />
SITE DATA<br />
Culvert Location<br />
Waterway Data<br />
Cross Sections<br />
Longitudinal Slope<br />
Resistance<br />
Tailwater Field<br />
Upstream storage<br />
Roadway Data<br />
Cross Section<br />
Pr<strong>of</strong>ile<br />
Culvert Length<br />
<strong>Design</strong> Headwater<br />
Critical points on roadway<br />
Surrounding buildings or<br />
structures<br />
Regulatory Constraints<br />
Arbitrary Constraints<br />
Stream gage analysis or calculated using<br />
Rational formula, SCS Method,<br />
regression equations, etc.<br />
Same as for peak flow<br />
From stream gage information or synthetic<br />
development methods such as SCS, Method,<br />
Snyder Method, or computer models<br />
Based on site characteristics including natural<br />
stream section, slope, and alignment<br />
Field survey or topographic maps<br />
Field survey or topographic maps<br />
Observation, photographs, or calculation<br />
methods<br />
Field survey, maps<br />
Field survey, maps<br />
Roadway plans<br />
Roadway plans<br />
Roadway plans<br />
Roadway plans<br />
Aerial photographs, surveys, or topographic<br />
maps<br />
Floodplain and flood insurance regulations for<br />
stream reach <strong>of</strong> interest<br />
State or local regulations for culvert installations<br />
22
A. Culvert Flow<br />
III. CULVERT DESIGN<br />
1. General. An exact theoretical analysis <strong>of</strong> culvert flow is extremely complex because the flow<br />
is usually nonuniform with regions <strong>of</strong> both gradually varying and rapidly varying flow. An exact<br />
analysis involves backwater and drawdown calculations, energy and momentum balance, and<br />
application <strong>of</strong> the results <strong>of</strong> hydraulic model studies. For example, the U.S. Geological Survey<br />
has defined 18 different culvert flow types based on inlet and outlet submergence, the flow<br />
regime in the barrel, and the downstream brink depth. (20) Often, hydraulic jumps form inside or<br />
downstream <strong>of</strong> the culvert barrel. In addition, the flow types change in a given culvert as the flow<br />
rate and tailwater elevations change.<br />
In order to systematically analyze culvert flow, the procedures <strong>of</strong> this publication have been<br />
developed, wherein the various types <strong>of</strong> flow are classified and analyzed on the basis <strong>of</strong> control<br />
section. A control section is a location where there is a unique relationship between the flow rate<br />
and the upstream water surface elevation. Many different flow conditions exist over time, but at<br />
a given time the flow is either governed by the inlet geometry (inlet control); or by a combination<br />
<strong>of</strong> the culvert inlet configuration, the characteristics <strong>of</strong> the barrel, and the tailwater (outlet<br />
control). Control may oscillate from inlet to outlet; however, in this publication, the concept <strong>of</strong><br />
"minimum performance" applies. That is, while the culvert may operate more efficiently at times<br />
(more flow for a given headwater level), it will never operate at a lower level <strong>of</strong> performance<br />
than calculated.<br />
The culvert design method presented in this publication is based on the use <strong>of</strong> design charts<br />
and nomographs. These charts and nomographs are, in turn, based on data from numerous<br />
hydraulic tests and on theoretical calculations. At each step <strong>of</strong> the process, some error is<br />
introduced. For example, there is scatter in the test data and the selection <strong>of</strong> a best fit design<br />
equation involves some error. Also, the correlation between the design equations and the<br />
design nomographs is not exact. Reproduction <strong>of</strong> the design charts introduces additional error.<br />
Therefore, it should be assumed that the results <strong>of</strong> the procedure are accurate to within plus or<br />
minus ten percent, in terms <strong>of</strong> head. Additional information on the precision <strong>of</strong> the design charts<br />
is provided in Appendix A.<br />
Table 1 in Chapter 1 shows the factors which must be considered in culvert design for inlet and<br />
outlet control. In inlet control, only the inlet area, the edge configuration, and the shape<br />
influence the culvert performance for a given headwater elevation. The headwater elevation is<br />
calculated with respect to the inlet invert, and the tailwater elevation has no influence on<br />
performance. In outlet control, all <strong>of</strong> the factors listed in Table 1 affect culvert performance.<br />
Headwater elevation is calculated with respect to the outlet invert, and the difference between<br />
headwater and tailwater elevation represents the energy which conveys the flow through the<br />
culvert.<br />
2. Types <strong>of</strong> Control. A general description <strong>of</strong> the characteristics <strong>of</strong> inlet and outlet control flow<br />
is given below. A culvert flowing in inlet control has shallow, high velocity flow categorized as<br />
"supercritical." For supercritical flow, the control section is at the upstream end <strong>of</strong> the barrel (the<br />
inlet). Conversely, a culvert flowing in outlet control will have relatively deep, lower velocity flow<br />
termed "subcritical" flow. For subcritical flow the control is at the downstream end <strong>of</strong> the culvert<br />
(the outlet). The tailwater depth is either critical depth at the culvert outlet or the downstream<br />
channel depth, whichever is higher. In a given culvert, the type <strong>of</strong> flow is dependent on all <strong>of</strong> the<br />
factors listed in Table 1.<br />
23
Figure III-1--Types <strong>of</strong> inlet control<br />
24
a. Inlet Control<br />
(1) Examples <strong>of</strong> Inlet Control. Figure III-1 depicts several different examples <strong>of</strong> inlet control<br />
flow. The type <strong>of</strong> flow depends on the submergence <strong>of</strong> the inlet and outlet ends <strong>of</strong> the culvert. In<br />
all <strong>of</strong> these examples, the control section is at the inlet end <strong>of</strong> the culvert. Depending on the<br />
tailwater, a hydraulic jump may occur downstream <strong>of</strong> the inlet.<br />
Figure III-1-A depicts a condition where neither the inlet nor the outlet end <strong>of</strong> the culvert are<br />
submerged. The flow passes through critical depth just downstream <strong>of</strong> the culvert entrance and<br />
the flow in the barrel is supercritical. The barrel flows partly full over its length, and the flow<br />
approaches normal depth at the outlet end.<br />
Figure III-1-B shows that submergence <strong>of</strong> the outlet end <strong>of</strong> the culvert does not assure outlet<br />
control. In this case, the flow just downstream <strong>of</strong> the inlet is supercritical and a hydraulic jump<br />
forms in the culvert barrel.<br />
Figure III-1-C is a more typical design situation. The inlet end is submerged and the outlet end<br />
flows freely. Again, the flow is supercritical and the barrel flows partly full over its length. Critical<br />
depth is located just downstream <strong>of</strong> the culvert entrance, and the flow is approaching normal<br />
depth at the downstream end <strong>of</strong> the culvert.<br />
Figure III-1-D is an unusual condition illustrating the fact that even submergence <strong>of</strong> both the inlet<br />
and the outlet ends <strong>of</strong> the culvert does not assure full flow. In this case, a hydraulic jump will<br />
form in the barrel. The median inlet provides ventilation <strong>of</strong> the culvert barrel. If the barrel were<br />
not ventilated, sub-atmospheric pressures could develop which might create an unstable<br />
condition during which the barrel would alternate between full flow and partly full flow.<br />
(2) Factors Influencing Inlet Control. Since the control is at the upstream end in inlet control,<br />
only the headwater and the inlet configuration affect the culvert performance (Table 1). The<br />
headwater depth is measured from the invert <strong>of</strong> the inlet control section to the surface <strong>of</strong> the<br />
upstream pool. The inlet area is the cross-sectional area <strong>of</strong> the face <strong>of</strong> the culvert. Generally,<br />
the inlet face area is the same as the barrel area, but for tapered inlets the face area is<br />
enlarged, and the control section is at the throat. The inlet edge configuration describes the<br />
entrance type. Some typical inlet edge configurations are thin edge projecting, mitered, square<br />
edges in a headwall, and beveled edge. The inlet shape is usually the same as the shape <strong>of</strong> the<br />
culvert barrel; however, it may be enlarged as in the case <strong>of</strong> a tapered inlet. Typical shapes are<br />
rectangular, circular, and elliptical. Whenever the inlet face is a different size or shape than the<br />
culvert barrel, the possibility <strong>of</strong> an additional control section within the barrel exists.<br />
An additional factor which influences inlet control performance is the barrel slope. The effect is<br />
small, however, and it can be ignored or a small slope correction factor can be inserted in the<br />
inlet control equations (Appendix A).<br />
The inlet edge configuration is a major factor in inlet control performance, and it can be modified<br />
to improve performance. Various inlet edges are shown in Figure III-2. Figure III-2-A is a thin<br />
edge projecting inlet typical <strong>of</strong> metal pipe, Figure III-2-B is a projecting thick-walled inlet (about<br />
the same performance as a square edge in a headwall) which is typical <strong>of</strong> concrete pipe without<br />
a groove end, and Figure III-2-C is a groove end or socket inlet which is typical <strong>of</strong> a concrete<br />
pipe joint. Note that as the inlet edge condition improves (from Figure III-2-A to Figure III-2-C),<br />
the flow contraction at the inlet decreases. This reduced flow contraction indicates increased<br />
inlet performance and more flow through the barrel for the same headwater.<br />
25
Figure II-2--Flow contractions for various culvert inlets<br />
26
Figure III-3--Beveled Edges<br />
A method <strong>of</strong> increasing inlet performance is the use <strong>of</strong> beveled edges at the entrance <strong>of</strong> the<br />
culvert. Beveled edges reduce the contraction <strong>of</strong> the flow by effectively enlarging the face <strong>of</strong> the<br />
culvert. Although any beveling will help the hydraulics, design charts are available for two bevel<br />
angles, 45 degrees and 33.7 degrees, as shown in Figure III-3.<br />
The larger, 33.7-degree bevels require some structural modification, but they provide slightly<br />
better inlet performance than the 45-degree bevels. The smaller, 45-degree bevels require very<br />
minor structural modification <strong>of</strong> the culvert headwall and increase both inlet and outlet control<br />
performances. Therefore, the use <strong>of</strong> 45 degree bevels is recommended on all culverts, whether<br />
in inlet or outlet control, unless the culvert has a groove end. (The groove end provides about<br />
the same performance as a beveled edge.)<br />
(3) <strong>Hydraulic</strong>s <strong>of</strong> Inlet Control. Inlet control performance is defined by the three regions <strong>of</strong> flow<br />
shown in Figure III-4: unsubmerged, transition and submerged. For low headwater conditions,<br />
as shown in Figure III-1-A and Figure III-1-B, the entrance <strong>of</strong> the culvert operates as a weir. A<br />
weir is an unsubmerged flow control section where the upstream water surface elevation can be<br />
predicted for a given flow rate. The relationship between flow and water surface elevation must<br />
be determined by model tests <strong>of</strong> the weir geometry or by measuring prototype discharges.<br />
These tests or measurements are then used to develop equations for unsubmerged inlet control<br />
flow. Appendix A contains the equations which were developed from the NBS model test data.<br />
For headwaters submerging the culvert entrance, as are shown in Figure III-1-C and Figure III-<br />
1-D, the entrance <strong>of</strong> the culvert operates as an orifice. An orifice is an opening, submerged on<br />
the upstream side and flowing freely on the downstream side, which functions as a control<br />
section. The relationship between flow and headwater can be defined based on results from<br />
model tests. Appendix A contains the submerged flow equations which were developed from<br />
the NBS test data.<br />
27
The flow transition zone between the low headwater (weir control) and the high headwater flow<br />
conditions (orifice control) is poorly defined. This zone is approximated by plotting the<br />
unsubmerged and submerged flow equations and connecting them with a line tangent to both<br />
curves, as shown in Figure III-4.<br />
Figure III-4--Inlet Control Curves<br />
The inlet control flow versus headwater curves which are established using the above<br />
procedure are the basis for constructing the inlet control design nomographs. Note that<br />
approach velocity head can be included as a part <strong>of</strong> the available headwater in the inlet<br />
relationships.<br />
(4) Inlet Depressions. The inlet control equations or nomographs provide the depth <strong>of</strong><br />
headwater above the inlet invert required to convey a given discharge through the inlet. This<br />
relationship remains constant regardless <strong>of</strong> the elevation <strong>of</strong> the inlet invert. If the entrance end<br />
<strong>of</strong> the culvert is depressed below the stream bed, more head can be exerted on the inlet for the<br />
same headwater elevation.<br />
Two methods <strong>of</strong> depressing the entrance ends <strong>of</strong> culverts are shown in Figure III-5 and Figure<br />
III-6. Figure III-5 depicts the use <strong>of</strong> a depressed approach apron with the fill retained by<br />
wingwalls. Paving the apron is desirable. Figure III-6 shows a sump constructed upstream <strong>of</strong><br />
the culvert face. Usually the sump is paved, but for small depressions, an unpaved excavation<br />
may be adequate.<br />
28
Figure III-5--Culvert with Depressed Apron and Wingwalls<br />
29
Figure III-6--Culvert with Inlet Sump<br />
When a culvert is depressed below the stream bed at the inlet, the depression is called the<br />
FALL. For culverts without tapered inlets, the FALL is defined as the depth from the natural<br />
stream bed at the face to the inlet invert. For culverts with tapered inlets, the FALL is defined as<br />
the depth from the natural stream bed at the face to the throat invert. Tapered inlets will be<br />
discussed further in Chapter 4.<br />
b. Outlet Control<br />
(1) Examples <strong>of</strong> Outlet Control. Figure III-7 illustrates various outlet control flow conditions. In<br />
all cases, the control section is at the outlet end <strong>of</strong> the culvert or further downstream.<br />
For the partly full flow situations, the flow in the barrel is subcritical.<br />
30
Figure III-7--Types <strong>of</strong> Outlet Control<br />
31
Condition III-7-A represents the classic full flow condition, with both inlet and outlet submerged.<br />
The barrel is in pressure flow throughout its length. This condition is <strong>of</strong>ten assumed in<br />
calculations, but seldom actually exists.<br />
Condition III-7-B depicts the outlet submerged with the inlet unsubmerged. For this case, the<br />
headwater is shallow so that the inlet crown is exposed as the flow contracts into the culvert.<br />
Condition III-7-C shows the entrance submerged to such a degree that the culvert flows full<br />
throughout its entire length while the exit is unsubmerged. This is a rare condition. It requires an<br />
extremely high headwater to maintain full barrel flow with no tailwater. The outlet velocities are<br />
usually high under this condition.<br />
Condition III-7-D is more typical. The culvert entrance is submerged by the headwater and the<br />
outlet end flows freely with a low tailwater. For this condition, the barrel flows partly full over at<br />
least part <strong>of</strong> its length (subcritical flow) and the flow passes through critical depth just upstream<br />
<strong>of</strong> the outlet.<br />
Condition III-7-E is also typical, with neither the inlet nor the outlet end <strong>of</strong> the culvert submerged.<br />
The barrel flows partly full over its entire length, and the flow pr<strong>of</strong>ile is subcritical.<br />
(2) Factors Influencing Outlet Control. All <strong>of</strong> the factors influencing the performance <strong>of</strong> a culvert<br />
in inlet control also influence culverts in outlet control. In addition, the barrel characteristics<br />
(roughness, area, shape, length, and slope) and the tailwater elevation affect culvert<br />
performance in outlet control (Table 1).<br />
The barrel roughness is a function <strong>of</strong> the material used to fabricate the barrel. Typical materials<br />
include concrete and corrugated metal. The roughness is represented by a hydraulic resistance<br />
coefficient such as the Manning’s n value. Typical Manning’s n values for culverts are<br />
presented in Table 4. Additional discussion on the sources and derivations <strong>of</strong> the Manning’s n<br />
values are contained in Appendix B.<br />
The barrel area and barrel shape are self-explanatory.<br />
The barrel length is the total culvert length from the entrance to the exit <strong>of</strong> the culvert. Because<br />
the design height <strong>of</strong> the barrel and the slope influence the actual length, an approximation <strong>of</strong><br />
barrel length is usually necessary to begin the design process.<br />
The barrel slope is the actual slope <strong>of</strong> the culvert barrel. The barrel slope is <strong>of</strong>ten the same as<br />
the natural stream slope. However, when the culvert inlet is raised or lowered, the barrel slope<br />
is different from the stream slope.<br />
The tailwater elevation is based on the downstream water surface elevation. Backwater<br />
calculations from a downstream control, a normal depth approximation, or field observations are<br />
used to define the tailwater elevation.<br />
(3) <strong>Hydraulic</strong>s <strong>of</strong> Outlet Control. Full flow in the culvert barrel, as depicted in Figure III-7-A, is<br />
the best type <strong>of</strong> flow for describing outlet control hydraulics.<br />
32
Table 4--Manning’s n Values for <strong>Culverts</strong>.*<br />
Type <strong>of</strong> Culvert Roughness or<br />
Corrugation<br />
33<br />
Manning's n Reference<br />
Concrete Pipe Smooth 0.010-0.011 (64, 66, 67, 70)<br />
Concrete Boxes Smooth 0.012-0.015 (23)<br />
Spiral Rib Metal Pipe Smooth 0.012-0.013 (65, 69)<br />
Corrugated Metal Pipe,<br />
Pipe-Arch and Box<br />
(Annular and Helical<br />
corrugations -- see Figure B-3,<br />
Manning's n varies with barrel<br />
size)<br />
68 by 13 mm<br />
2-2/3 by 1/2 in<br />
Annular<br />
68 by 13 mm<br />
2-2/3 by 1/2 in<br />
Helical<br />
150 by 25 mm<br />
6 by 1 in<br />
Helical<br />
125 by 25 mm<br />
5 by 1 in<br />
75 by 25 mm<br />
3 by 1 in<br />
150 by 50 mm<br />
6 by 2 in<br />
Structural Plate<br />
230 by 64 mm<br />
9 by 2-1/2 in<br />
Structural Plate<br />
0.022-0.027<br />
0.011-0.023<br />
0.022-0.025<br />
0.025-0.026<br />
0.027-0.028<br />
0.033-0.035<br />
0.033-0.037<br />
(25)<br />
(25, 68)<br />
Corrugated Polyethylene Smooth 0.009-0.015 (71, 72)<br />
Corrugated Polyethylene Corrugated 0.018-0.025 (73, 74)<br />
Polyvinyl chloride (PVC) Smooth 0.009-0.011 (75, 76)<br />
*NOTE: The Manning's n values indicated in this table were obtained in the laboratory and are<br />
supported by the provided reference. Actual field values for culverts may vary depending on<br />
the effect <strong>of</strong> abrasion, corrosion, deflection, and joint conditions.<br />
(25)<br />
(25)<br />
(25)<br />
(25)<br />
(25)
Outlet control flow conditions can be calculated based on energy balance. The total energy (HL)<br />
required to pass the flow through the culvert barrel is made up <strong>of</strong> the entrance loss (He), the<br />
friction losses through the barrel (Hf), and the exit loss (Ho). Other losses, including bend losses<br />
(Hb), losses at junctions (Hj), and loses at grates (Hg) should be included as appropriate. These<br />
losses are discussed in Chapter 6.<br />
H = H + H + H + H + H + H<br />
(1)<br />
L<br />
e<br />
f<br />
o<br />
The barrel velocity is calculated as follows:<br />
b<br />
j<br />
g<br />
Q<br />
V = (2)<br />
A<br />
V is the average velocity in the culvert barrel, m/s (ft/s)<br />
Q is the flow rate, m 3 /s (ft 3 /s)<br />
A is the full cross sectional area <strong>of</strong> the flow, m 2 (ft 2 )<br />
The velocity head is:<br />
2<br />
V<br />
HV<br />
= (3)<br />
2g<br />
g is the acceleration due to gravity, 9.8 m/s/s (32.2 ft/s/s)<br />
The entrance loss is a function <strong>of</strong> the velocity head in the barrel, and can be expressed as a<br />
coefficient times the velocity head.<br />
2<br />
⎛ V ⎞<br />
H = ⎜<br />
⎟<br />
e k e<br />
(4a)<br />
⎝ 2g<br />
⎠<br />
Values <strong>of</strong> ke based on various inlet configurations are given in Table 12, Appendix D.<br />
The friction loss in the barrel is also a function <strong>of</strong> the velocity head. Based on the Manning<br />
equation, the friction loss is:<br />
H<br />
f<br />
⎡ 2<br />
K n L ⎤ 2<br />
U V<br />
= ⎢ ⎥<br />
(4b)<br />
1.<br />
33<br />
⎢⎣<br />
R ⎥⎦<br />
2g<br />
KU is 19.63 (29 in English Units)<br />
n is the Manning roughness coefficient (Table 4)<br />
L is the length <strong>of</strong> the culvert barrel, m (ft)<br />
R is the hydraulic radius <strong>of</strong> the full culvert barrel = A/p, m (ft)<br />
A is the cross-sectional area <strong>of</strong> the barrel, m m 2 (ft 2 )<br />
p is the perimeter <strong>of</strong> the barrel, m (ft)<br />
V is the velocity in the barrel, m/s (ft/s)<br />
The exit loss is a function <strong>of</strong> the change in velocity at the outlet <strong>of</strong> the culvert barrel. For a<br />
sudden expansion such as an endwall, the exit loss is:<br />
34
H<br />
2 2<br />
⎡ V V ⎤ d<br />
= 1.<br />
0 ⎢ − ⎥<br />
⎣ 2g<br />
2g<br />
⎦<br />
o (4c)<br />
Vd is the channel velocity downstream <strong>of</strong> the culvert, m/s (ft/s)<br />
Equation (4c) may overestimate exit losses, and a multiplier <strong>of</strong> less than 1.0 can be used. (40)<br />
The downstream velocity is usually neglected, in which case the exit loss is equal to the full flow<br />
velocity head in the barrel, as shown in Equation (4d).<br />
H<br />
o<br />
2<br />
V<br />
= Hv<br />
=<br />
(4d)<br />
2g<br />
Bend losses, junction losses, grate losses and other losses are discussed in Chapter VI. These<br />
other losses are added to the total losses using Equation (1).<br />
Inserting the above relationships for entrance loss, friction loss, and exit loss (Equation 4d) into<br />
Equation (1), the following equation for loss is obtained:<br />
⎡<br />
2<br />
K n L ⎤ 2<br />
U V<br />
H = ⎢1+<br />
k e + ⎥<br />
(5)<br />
1.<br />
33<br />
⎢⎣<br />
R ⎥⎦<br />
2g<br />
Figure III-8--Full Flow Energy and <strong>Hydraulic</strong> Grade <strong>Line</strong>s<br />
Figure III-8 depicts the energy grade line and the hydraulic grade line for full flow in a culvert<br />
barrel. The energy grade line represents the total energy at any point along the culvert barrel.<br />
HW is the depth from the inlet invert to the energy grade line. The hydraulic grade line is the<br />
depth to which water would rise in vertical tubes connected to the sides <strong>of</strong> the culvert barrel. In<br />
full flow, the energy grade line and the hydraulic grade line are parallel straight lines separated<br />
by the velocity head lines except in the vicinity <strong>of</strong> the inlet where the flow passes through a<br />
contraction.<br />
The headwater and tailwater conditions as well as the entrance, friction, and exit losses are also<br />
shown in Figure III-8. Equating the total energy at sections 1 and 2, upstream and downstream<br />
<strong>of</strong> the culvert barrel in Figure III-8, the following relationship results:<br />
35
2<br />
2<br />
Vu<br />
Vd<br />
HW o + = TW + + HL<br />
(6)<br />
2g<br />
2g<br />
HWo is the headwater depth above the outlet invert, m (ft)<br />
Vu is the approach velocity, m/s (ft/s)<br />
TW is the tailwater depth above the outlet invert, m (ft)<br />
Vd is the downstream velocity, m/s (ft/s)<br />
HL is the sum <strong>of</strong> all losses including entrance (He), friction (Hf), exit (Ho) and<br />
other losses, (Hb), (Hj), etc., m (ft)<br />
Note: the total available upstream energy (HW) includes the depth <strong>of</strong> the upstream water<br />
surface above the outlet invert and the approach velocity head. In most instances, the approach<br />
velocity is low, and the approach velocity head is neglected. However, it can be considered to<br />
be a part <strong>of</strong> the available headwater and used to convey the flow through the culvert.<br />
Likewise, the velocity downstream <strong>of</strong> the culvert (Vd) is usually neglected. When both approach<br />
and downstream velocities are neglected, Equation 6 becomes:<br />
HW = TW + H<br />
(7)<br />
o<br />
L<br />
In this case, HL is the difference in elevation between the water surface elevation at the outlet<br />
(tailwater elevation) and the water surface elevation at the inlet (headwater elevation). If it is<br />
desired to include the approach and/or downstream velocities, use Equation (4c) for exit losses<br />
and Equation (6) instead <strong>of</strong> Equation (7) to calculate the headwater.<br />
Equations (1) through (7) were developed for full barrel flow, shown in Figure III-7-A. The<br />
equations also apply to the flow situations shown in Figures III-7-B and C, which are effectively<br />
full flow conditions. Backwater calculations may be required for the partly full flow conditions<br />
shown in Figures III-7-D and E. These calculations begin at the water surface at the<br />
downstream end <strong>of</strong> the culvert and proceed upstream to the entrance <strong>of</strong> the culvert. The<br />
downstream water surface is based on critical depth at the culvert outlet or on the tailwater<br />
depth, whichever is higher. If the calculated backwater pr<strong>of</strong>ile intersects the top <strong>of</strong> the barrel, as<br />
in Figure III-7-D, a straight, full flow hydraulic grade line extends from that point upstream to the<br />
culvert entrance. From Equation (4b), the full flow friction slope is:<br />
S<br />
n<br />
Hf<br />
=<br />
L<br />
K<br />
=<br />
R<br />
2<br />
U n<br />
1.<br />
33<br />
2<br />
V<br />
2g<br />
In order to avoid tedious backwater calculations, approximate methods have been developed to<br />
analyze partly full flow conditions. Based on numerous backwater calculations performed by the<br />
FHWA staff, it was found that a downstream extension <strong>of</strong> the full flow hydraulic grade line for the<br />
flow condition shown in Figure III-9-B pierces the plane <strong>of</strong> the culvert outlet at a point one-half<br />
way between critical depth and the top <strong>of</strong> the barrel. Therefore, it is possible to begin the<br />
hydraulic grade line at a depth <strong>of</strong> (dc+D)/2 above the outlet invert and extend the straight, full<br />
flow hydraulic grade line upstream to the inlet <strong>of</strong> the culvert at a slope <strong>of</strong> Sn.(Figure III-9-D) If the<br />
tailwater exceeds (dc+D)/2, the tailwater is used to set the downstream end <strong>of</strong> the extended full<br />
flow hydraulic grade line. The inlet losses and the velocity head are added to the elevation <strong>of</strong><br />
the hydraulic grade line at the inlet to obtain the headwater elevation.<br />
36
Figure III-9--Outlet Control Energy and <strong>Hydraulic</strong> Grade <strong>Line</strong>s<br />
37
This approximate method works best when the barrel flows full over at least part <strong>of</strong> its length<br />
(Figure III-9-B). When the barrel is partly full over its entire length (Figure III-9-C), the method<br />
becomes increasingly inaccurate as the headwater falls further below the top <strong>of</strong> the barrel at the<br />
inlet. Adequate results are obtained down to a headwater <strong>of</strong> 0.75D. For lower headwaters,<br />
backwater calculations are required to obtain accurate headwater elevations.<br />
The outlet control nomographs in Appendix D provide solutions for Equation (5) for entrance,<br />
friction, and exit losses in full barrel flow. Using the approximate backwater method, the losses<br />
(H) obtained from the nomographs can be applied for the partly full flow conditions shown in<br />
Figures III-7 and III-9. The losses are added to the elevation <strong>of</strong> the extended full flow hydraulic<br />
grade line at the barrel outlet in order to obtain the headwater elevation. The extended hydraulic<br />
grade line is set at the higher <strong>of</strong> (dc+ D)/2 or the tailwater elevation at the culvert outlet. Again,<br />
the approximation works best when the barrel flows full over at least part <strong>of</strong> its length.<br />
Figure III-10--Roadway Overtopping<br />
3. Roadway Overtopping. Overtopping will begin when the headwater rises to the elevation <strong>of</strong><br />
the roadway (Figure III-10). The overtopping will usually occur at the low point <strong>of</strong> a sag vertical<br />
curve on the roadway. The flow will be similar to flow over a broad crested weir. Flow<br />
coefficients for flow overtopping roadway embankments are found in HDS No. 1, <strong>Hydraulic</strong>s <strong>of</strong><br />
Bridge Waterways (21), as well as in the documentation <strong>of</strong> HY-7, the Bridge Waterways<br />
Analysis Model (22). Curves from reference (22) are shown in Figure III-11. Figure III-11-A is for<br />
deep overtopping, Figure III-11-B is for shallow overtopping, and Figure III-11-C is a correction<br />
factor for downstream submergence. Equation (8) defines the flow across the roadway.<br />
Qo= CdL HWr 1.5 (8)<br />
Qo is the overtopping flow rate in m³/s (ft³/s)<br />
*Cd is the overtopping discharge coefficient (*for use in SI units, see note)<br />
L is the length <strong>of</strong> the roadway crest, m (ft)<br />
HWr is the upstream depth, measured from the roadway crest to the water surface<br />
upstream <strong>of</strong> the weir drawdown, m (ft)<br />
*Note: Cd determined from Figure III-11 and other English unit research must be corrected by<br />
a factor <strong>of</strong> 0.552 [Cd (SI) = 0.552 (Cd English)]<br />
38
Figure III-11--English Discharge Coefficients for Roadway Overtopping<br />
The length and elevation <strong>of</strong> the roadway crest are difficult to determine when the crest is defined<br />
by a roadway sag vertical curve. The sag vertical curve can be broken into a series <strong>of</strong> horizontal<br />
segments as shown in Figure III-12-A. Using Equation (8), the flow over each segment is<br />
calculated for a given headwater. Then, the incremental flows for each segment are added<br />
together, resulting in the total flow across the roadway.<br />
Representing the sag vertical curve by a single horizontal line (one segment) is <strong>of</strong>ten adequate<br />
for culvert design (Figure III-12-B). The length <strong>of</strong> the weir can be taken as the horizontal length<br />
<strong>of</strong> this segment or it can be based on the roadway pr<strong>of</strong>ile and an acceptable variation above<br />
and below the horizontal line. In effect, this method utilizes an average depth <strong>of</strong> the upstream<br />
pool above the roadway crest for the flow calculation.<br />
39
Figure III-12--Weir Crest Length Determinations for Roadway Overtopping<br />
It is a simple matter to calculate the flow across the roadway for a given upstream water surface<br />
elevation using Equation (8). The problem is that the roadway overflow plus the culvert flow<br />
must equal the total design flow. A trial and error process is necessary to determine the amount<br />
<strong>of</strong> the total flow passing through the culvert and the amount flowing across the roadway.<br />
Performance curves may also be superimposed for the culvert flow and the road overflow to<br />
yield an overall solution as is discussed later in this chapter.<br />
4. Outlet Velocity. Culvert outlet velocities should be calculated to determine the need for<br />
erosion protection at the culvert exit. <strong>Culverts</strong> usually result in outlet velocities which are higher<br />
than the natural stream velocities. These outlet velocities may require flow readjustment or<br />
energy dissipation to prevent downstream erosion.<br />
In inlet control, backwater (also called drawdown) calculations may be necessary to determine<br />
the outlet velocity. These calculations begin at the culvert entrance and proceed downstream to<br />
the exit. The flow velocity is obtained from the flow and the cross-sectional area at the exit<br />
(Equation (2)).<br />
An approximation may be used to avoid backwater calculations in determining the outlet velocity<br />
for culverts operating in inlet control. The water surface pr<strong>of</strong>ile converges toward normal depth<br />
as calculations proceed down the culvert barrel. Therefore, if the culvert is <strong>of</strong> adequate length,<br />
normal depth will exist at the culvert outlet. Even in short culverts, normal depth can be<br />
assumed and used to define the area <strong>of</strong> flow at the outlet and obtain the outlet velocity (Figure<br />
III-13). The velocity calculated in this manner may be slightly higher than the actual velocity at<br />
40
the outlet. Normal depth in common culvert shapes may be calculated using a trial and error<br />
solution <strong>of</strong> the Manning equation. The known inputs are flow rate, barrel resistance, slope and<br />
geometry. Normal depths may also be obtained from design aids in publications such as HDS<br />
NO. 3. (23).<br />
Figure III-13--Outlet Velocity - Inlet Control<br />
In outlet control, the cross sectional area <strong>of</strong> the flow is defined by the geometry <strong>of</strong> the outlet and<br />
either critical depth, tailwater depth, or the height <strong>of</strong> the conduit (Figure III-14).<br />
Figure III-14--Outlet Velocity - Outlet Control<br />
41
Critical depth is used when the tailwater is less than critical depth and the tailwater depth is<br />
used when tailwater is greater than critical depth but below the top <strong>of</strong> the barrel. The total barrel<br />
area is used when the tailwater exceeds the top <strong>of</strong> the barrel.<br />
B. Performance Curves<br />
Performance curves are representations <strong>of</strong> flow rate versus headwater depth or elevation for a<br />
given flow control device, such as a weir, an orifice, or a culvert. A weir constricts open channel<br />
flow so that the flow passes through critical depth just upstream <strong>of</strong> the weir. An orifice is a flow<br />
control device, fully submerged on the upstream side, through which the flow passes.<br />
Performance curves and equations for these two basic types <strong>of</strong> flow control devices are shown<br />
in Figure III-15.<br />
Figure III-15--Performance Curves and Equations for Weirs and Orifices<br />
42
When a tailwater exists, the control device may be submerged so that more than one flowversus-elevation<br />
relationship exists. Then, the performance curve is dependent on the variation<br />
<strong>of</strong> both tailwater and headwater. In the case <strong>of</strong> a weir or orifice, the device is called a<br />
submerged weir or a submerged orifice, respectively. For some cases, submergence effects<br />
have been analyzed and correction factors have been developed. (21,22,24)<br />
Culvert performance curves are similar to weir and/or orifice performance curves. In fact,<br />
culverts <strong>of</strong>ten behave as weirs or orifices. However, due to the fact that a culvert has several<br />
possible control sections (inlet, outlet, throat), a given installation will have a performance curve<br />
for each control section and one for roadway overtopping. The overall culvert performance<br />
curve is made up <strong>of</strong> the controlling portions <strong>of</strong> the individual performance curves for each<br />
control section.<br />
1. Inlet Control. The inlet control performance curves are developed using either the inlet<br />
control equations <strong>of</strong> Appendix A or the inlet control nomographs <strong>of</strong> Appendix D. If the equations<br />
<strong>of</strong> Appendix A are used, both unsubmerged (weir) and submerged (orifice) flow headwaters<br />
must be calculated for a series <strong>of</strong> flow rates bracketing the design flow. The resultant curves are<br />
then connected with a line tangent to both curves (the transition zone). If the inlet control<br />
nomographs are used, the headwaters corresponding to the series <strong>of</strong> flow rates are determined<br />
and then plotted. The transition zone is inherent in the nomographs.<br />
2. Outlet Control. The outlet control performance curves are developed using Equations (1)<br />
through (7) <strong>of</strong> this chapter, the outlet control nomographs <strong>of</strong> Appendix D, or backwater<br />
calculations. Flows bracketing the design flow are selected. For these flows, the total losses<br />
through the barrel are calculated or read from the outlet control nomographs. The losses are<br />
added to the elevation <strong>of</strong> the hydraulic grade line at the culvert outlet to obtain the headwater.<br />
If backwater calculations are performed beginning at the downstream end <strong>of</strong> the culvert, friction<br />
losses are accounted for in the calculations. Adding the inlet loss to the energy grade line in the<br />
barrel at the inlet results in the headwater elevation for each flow rate.<br />
3. Roadway Overtopping. A performance curve showing the culvert flow as well as the flow<br />
across the roadway is a useful analysis tool. Rather than using a trial and error procedure to<br />
determine the flow division between the overtopping flow and the culvert flow, an overall<br />
performance curve can be developed. The performance curve depicts the sum <strong>of</strong> the flow<br />
through the culvert and the flow across the roadway.<br />
The overall performance curve can be determined by performing the following steps.<br />
1. Select a range <strong>of</strong> flow rates and determine the corresponding headwater elevations for the<br />
culvert flow alone. These flow rates should fall above and below the design discharge and cover<br />
the entire flow range <strong>of</strong> interest. Both inlet and outlet control headwaters should be calculated.<br />
2. Combine the inlet and outlet control performance curves to define a single performance<br />
curve for the culvert.<br />
3. When the culvert headwater elevations exceed the roadway crest elevation, overtopping will<br />
begin. Calculate the equivalent upstream water surface depth above the roadway (crest <strong>of</strong> weir)<br />
for each selected flow rate. Use these water surface depths and Equation (8) to calculate flow<br />
rates across the roadway.<br />
43
4. Add the culvert flow and the roadway overtopping flow at the corresponding headwater<br />
elevations to obtain the overall culvert performance curve.<br />
Using the combined culvert performance curve, it is an easy matter to determine the headwater<br />
elevation for any flow rate, or to visualize the performance <strong>of</strong> the culvert installation over a range<br />
<strong>of</strong> flow rates. When roadway overtopping begins, the rate <strong>of</strong> headwater increase will flatten<br />
severely. The headwater will rise very slowly from that point on. Figure III-16 depicts an overall<br />
culvert performance curve with roadway overtopping. Example problem III-4 illustrates the<br />
development <strong>of</strong> an overall culvert performance curve.<br />
Figure III-16--Culvert Performance Curve with Roadway Overtopping<br />
C. Culvert <strong>Design</strong> Method<br />
The culvert design method provides a convenient and organized procedure for designing<br />
culverts, considering inlet and outlet control. While it is possible to follow the design method<br />
without an understanding <strong>of</strong> culvert hydraulics, this is not recommended. The result could be an<br />
inadequate and possibly unsafe structure.<br />
1. Culvert <strong>Design</strong> Form. The Culvert <strong>Design</strong> Form, shown in Figure III-17, has been<br />
formulated to guide the user through the design process. Summary blocks are provided at the<br />
top <strong>of</strong> the form for the project description, and the designer's identification. Summaries <strong>of</strong><br />
hydrologic data <strong>of</strong> the form are also included. At the top right is a small sketch <strong>of</strong> the culvert with<br />
blanks for inserting important dimensions and elevations.<br />
44
The central portion <strong>of</strong> the design form contains lines for inserting the trial culvert description and<br />
calculating the inlet control and outlet control headwater elevations. Space is provided at the<br />
lower center for comments and at the lower right for a description <strong>of</strong> the culvert barrel selected.<br />
The first step in the design process is to summarize all known data for the culvert at the top <strong>of</strong><br />
the Culvert <strong>Design</strong> Form. This information will have been collected or calculated prior to<br />
performing the actual culvert design. The next step is to select a preliminary culvert material,<br />
shape, size, and entrance type. The user then enters the design flow rate and proceeds with the<br />
inlet control calculations.<br />
Figure III-17--Culvert <strong>Design</strong> Form<br />
2. Inlet Control. The inlet control calculations determine the headwater elevation required to<br />
pass the design flow through the selected culvert configuration in inlet control. The approach<br />
velocity head may be included as part <strong>of</strong> the headwater, if desired. The inlet control<br />
nomographs <strong>of</strong> Appendix D are used in the design process. For the following discussion, refer<br />
to the schematic inlet control nomograph shown in Figure III-18.<br />
a. Locate the selected culvert size (point 1) and flow rate (point 2) on the appropriate scales <strong>of</strong><br />
the inlet control nomograph. (Note that for box culverts, the flow rate per foot <strong>of</strong> barrel width is<br />
used.)<br />
b. Using a straightedge, carefully extend a straight line from the culvert size (point 1) through<br />
the flow rate (point 2) and mark a point on the first headwater/culvert height (HW/D) scale (point<br />
3). The first HW/D scale is also a turning line.<br />
45
NOTE: If the nomographs are put into a notebook, a clean plastic sheet with a matte finish can<br />
be used to mark on so that the nomographs can be preserved.<br />
c. If another HW/D scale is required, extend a horizontal line from the first HW/D scale (the<br />
turning line) to the desired scale and read the result.<br />
d. Multiply HW/D by the culvert height, D, to obtain the required headwater (HW) from the invert<br />
<strong>of</strong> the control section to the energy grade line. If the approach velocity is neglected, HW equals<br />
the required headwater depth (HWi). If the approach velocity is included in the calculations,<br />
deduct the approach velocity head from HW to determine HWi.<br />
e. Calculate the required depression (FALL) <strong>of</strong> the inlet control section below the stream bed as<br />
follows:<br />
HW = EL − EL<br />
d<br />
hd<br />
i<br />
sf<br />
FALL = HW − HW<br />
d<br />
HWd is the design headwater depth, m (ft)<br />
ELhd is the design headwater elevation, m (ft)<br />
ELsf is the elevation <strong>of</strong> the streambed at the face, m (ft)<br />
HWi is the required headwater depth, m (ft)<br />
Possible results and consequences <strong>of</strong> this calculation are:<br />
(1) If the FALL is negative or zero, set FALL equal to zero and proceed to step f.<br />
(2) If the FALL is positive, the inlet control section invert must be depressed below the<br />
streambed at the face by that amount. If the FALL is acceptable, proceed to step f.<br />
(3) If the FALL is positive and greater than is judged to be acceptable, select another culvert<br />
configuration and begin again at step a.<br />
f. Calculate the inlet control section invert elevation as follows:<br />
ELi = EL sf − FALL<br />
where ELi is the invert elevation at the face <strong>of</strong> a culvert (ELf) or at the throat <strong>of</strong> a culvert with a<br />
tapered inlet (ELt).<br />
3. Outlet Control. The outlet control calculations result in the headwater elevation required to<br />
convey the design discharge through the selected culvert in outlet control. The approach and<br />
downstream velocities may be included in the design process, if desired. The critical depth<br />
charts and outlet control nomographs <strong>of</strong> Appendix D are used in the design process. For<br />
illustration, refer to the schematic critical depth chart and outlet control nomograph shown in<br />
Figures III-19 and III-20, respectively.<br />
a. Determine the tailwater depth above the outlet invert (TW) at the design flow rate. This is<br />
obtained from backwater or normal depth calculations, or from field observations.<br />
46
Figure III-18--Inlet Control Nomograph (schematic)<br />
47
Figure III-19--Critical Depth Chart (schematic)<br />
b. Enter the appropriate critical depth chart (Figure III-19) with the flow rate and read the critical<br />
depth (dc). dc cannot exceed D!<br />
Note: The dc curves are truncated for convenience when they converge. If an accurate dc is<br />
required for dc > .9D consult the Handbook <strong>of</strong> <strong>Hydraulic</strong>s or other hydraulic references.<br />
c. Calculate (dc + D)/2<br />
d. Determine the depth from the culvert outlet invert to the hydraulic grade line (ho).<br />
ho = TW or (dc + D)/2 whichever is larger<br />
e. From Table 12, Appendix D, obtain the appropriate entrance loss coefficient, ke, for the<br />
culvert inlet configuration.<br />
f. Determine the losses through the culvert barrel, H, using the outlet control nomograph<br />
(Figure III-20) or Equations (5) or (6) if outside the range <strong>of</strong> the nomograph.<br />
48
Figure III-20--Outlet Control Nomograph (schematic)<br />
49
(1) If the Manning’s n value given in the outlet control nomograph is different than the Manning’s<br />
n for the culvert, adjust the culvert length using the formula:<br />
2<br />
⎛ n1<br />
⎞<br />
L1 L⎜<br />
⎟<br />
n ⎠<br />
= (9)<br />
⎝<br />
L1 is the adjusted culvert length, m (ft)<br />
L is the actual culvert length, m (ft)<br />
n1 is the desired Manning's n value<br />
n is the Manning's n value from the outlet control chart<br />
Then, use L1 rather than the actual culvert length when using the outlet control nomograph.<br />
(2) Using a straightedge, connect the culvert size (point 1) with the culvert length on the<br />
appropriate ke scale (point 2). This defines a point on the turning line (point 3).<br />
(3) Again using the straightedge, extend a line from the discharge (point 4) through the point on<br />
the turning line (point 3) to the Head Loss (H) scale. Read H. H is the energy loss through the<br />
culvert, including entrance, friction, and outlet losses.<br />
Note: Careful alignment <strong>of</strong> the straightedge in necessary to obtain good results from the outlet<br />
control nomograph.<br />
g. Calculate the required outlet control headwater elevation.<br />
EL = EL + H + h<br />
(10)<br />
ho<br />
o<br />
o<br />
where ELo is the invert elevation at the outlet. (If it is desired to include the approach and<br />
downstream velocities in the calculations, add the downstream velocity head and subtract the<br />
approach velocity head from the right side <strong>of</strong> Equation (10). Also, use Equation (4c) instead <strong>of</strong><br />
Equation (4d) to calculate the exit losses and Equation (1) to calculate total losses.)<br />
h. If the outlet control headwater elevation exceeds the design headwater elevation, a new<br />
culvert configuration must be selected and the process repeated. Generally, an enlarged barrel<br />
will be necessary since inlet improvements are <strong>of</strong> limited benefit in outlet control.<br />
4. Evaluation <strong>of</strong> Results. Compare the headwater elevations calculated for inlet and outlet<br />
control. The higher <strong>of</strong> the two is designated the controlling headwater elevation. The culvert can<br />
be expected to operate with that higher headwater for at least part <strong>of</strong> the time.<br />
The outlet velocity is calculated as follows:<br />
a. If the controlling headwater is based on inlet control, determine the normal depth and velocity<br />
in the culvert barrel. The velocity at normal depth is assumed to be the outlet velocity.<br />
b. If the controlling headwater is in outlet control, determine the area <strong>of</strong> flow at the outlet based<br />
on the barrel geometry and the following:<br />
(1) Critical depth if the tailwater is below critical depth.<br />
(2) Tailwater depth if the tailwater is between critical depth and the top <strong>of</strong> the barrel.<br />
(3) Height <strong>of</strong> the barrel if the tailwater is above the top <strong>of</strong> the barrel.<br />
50
Repeat the design process until an acceptable culvert configuration is determined. <strong>On</strong>ce the<br />
barrel is selected it must be fitted into the roadway cross section. The culvert barrel must have<br />
adequate cover, the length should be close to the approximate length, and the headwalls and<br />
wingwalls must be dimensioned.<br />
If outlet control governs and the headwater depth (referenced to the inlet invert) is less than<br />
1.2D, it is possible that the barrel flows partly full though its entire length. In this case, caution<br />
should be used in applying the approximate method <strong>of</strong> setting the downstream elevation based<br />
on the greater <strong>of</strong> tailwater or (dc + D)/2. If an accurate headwater is necessary, backwater<br />
calculations should be used to check the result from the approximate method. If the headwater<br />
depth falls below 0.75D, the approximate method should not be used.<br />
If the selected culvert will not fit the site, return to the culvert design process and select another<br />
culvert. If neither tapered inlets nor flow routing are to be applied, document the design. An<br />
acceptable design should always be accompanied by a performance curve which displays<br />
culvert behavior over a range <strong>of</strong> discharges. If tapered inlets are to be investigated, proceed to<br />
Chapter VI.<br />
If storage routing will be utilized, proceed to Chapter V.<br />
Special culvert installations, such as culverts with safety grates, junctions, or bends are<br />
discussed in Chapter VI. Unusual culvert configurations such as "broken-back" culverts,<br />
siphons, and low head installations are also discussed.<br />
5. Example Problems. The following example problems illustrate the use <strong>of</strong> the design<br />
methods and charts for selected culvert configurations and hydraulic conditions. The problems<br />
cover the following situations.<br />
Problem No. 1: Circular pipe culvert, standard 68 by 13 cm (2-2/3 by 1/2) in CMP with beveled<br />
edge and reinforced concrete pipe with groove end. No FALL.<br />
Problem No. 2: Reinforced cast-in-place concrete box culvert with square edges and with<br />
bevels. No FALL.<br />
Problem No. 3: Elliptical pipe culvert with groove end and a FALL.<br />
Problem No. 4: Analysis <strong>of</strong> an existing reinforced concrete box culvert with square edges.<br />
51
Example Problem #1 (SI Units)<br />
A culvert at a new roadway crossing must be designed to pass the 25-year flood. Hydrologic<br />
analysis indicates a peak flow rate <strong>of</strong> 5.663 m³/s. Use the following site information:<br />
Elevation at Culvert Face: 30.480 m<br />
Natural Stream Bed Slope: 1 percent = 0.01 m/m<br />
Tailwater for 25-Year Flood: 1.067 m<br />
Approximate Culvert Length: 60.960 m<br />
Shoulder Elevation: 33.528m<br />
<strong>Design</strong> a circular pipe culvert for this site. Consider the use <strong>of</strong> a corrugated metal pipe with<br />
standard 68 x 13 mm in corrugations and beveled edges and concrete pipe with a groove end.<br />
Base the design headwater on the shoulder elevation with a 0.61 m freeboard (elevation 32.918<br />
m). Set the inlet invert at the natural streambed elevation (no FALL).<br />
Note: <strong>Design</strong> charts used in this example are reproduced on the following pages.<br />
52
Example Problem #1 (English Units)<br />
A culvert at a new roadway crossing must be designed to pass the 25-year flood. Hydrologic<br />
analysis indicates a peak flow rate <strong>of</strong> 200 ft³/s. Use the following site information:<br />
Elevation at Culvert Face: 100 ft<br />
Natural Stream Bed Slope: 1 percent = 0.01 ft/ft<br />
Tailwater for 25-Year Flood: 3.5 ft<br />
Approximate Culvert Length: 200 ft<br />
Shoulder Elevation: 110 ft<br />
<strong>Design</strong> a circular pipe culvert for this site. Consider the use <strong>of</strong> a corrugated metal pipe with<br />
standard 2-2/3 by 1/2 in corrugations and beveled edges and concrete pipe with a groove end.<br />
Base the design headwater on the shoulder elevation with a two ft freeboard (elevation 108.0 ft).<br />
Set the inlet invert at the natural streambed elevation (no FALL).<br />
Note: <strong>Design</strong> charts used in this example are reproduced on the following pages.<br />
56
Example Problem #2 (SI Units)<br />
A new culvert at a roadway crossing is required to pass a 50-year flow rate <strong>of</strong> 8.5 m³/s. Use the<br />
following site conditions:<br />
ELhd: 33.528 m based on adjacent structures<br />
Shoulder Elev: 34.595 m<br />
Elevation <strong>of</strong> Stream Bed at Culvert Face: 30.48 m<br />
Natural Stream Slope: 2 percent<br />
Tailwater Depth: 1.219 m<br />
Approximate Culvert Length: 76.200 m<br />
<strong>Design</strong> a reinforced concrete box culvert for this installation. Try both square edges and 45degree<br />
beveled edges in a headwall. Do not depress the inlet (no FALL).<br />
Note: Hardcopy <strong>Design</strong> Chart 8A, 10A, 14A, and 15A are used in this solution.<br />
60
Example Problem #2 (English Units)<br />
A new culvert at a roadway crossing is required to pass a 50-year flow rate <strong>of</strong> 300 ft³/s. Use the<br />
following site conditions:<br />
ELhd: 110 ft based on adjacent structures<br />
Shoulder Elev: 113.5 ft<br />
Elevation <strong>of</strong> Stream Bed at Culvert Face: 100.0 ft.<br />
Natural Stream Slope: 2 percent<br />
Tailwater Depth: 4.0 ft<br />
Approximate Culvert Length: 250 ft<br />
<strong>Design</strong> a reinforced concrete box culvert for this installation. Try both square edges and 45degree<br />
beveled edges in a headwall. Do not depress the inlet (no FALL).<br />
Note: Hardcopy <strong>Design</strong> Chart 8B, 10B, 14B, and 15B are used in this solution.<br />
61
Example Problem #3 (SI Units)<br />
<strong>Design</strong> a culvert to pass a 25-year flow <strong>of</strong> 6.229 m³/s. Minimum depth <strong>of</strong> cover for this culvert is<br />
0.6 m.<br />
ELhd: 32.004 m based on adjacent structures<br />
Shoulder Elev.: 32.156 m<br />
Elevation <strong>of</strong> Stream Bed at Culvert<br />
Face (ELsf): 30.48 m<br />
Original Stream Slope: 5 percent<br />
Tailwater Depth: 1.22 m<br />
Approximate Culvert Length: 45.720 m<br />
Due to the low available cover over the conduit, use an elliptical concrete pipe. Use <strong>of</strong> a small<br />
depression (FALL) <strong>of</strong> about 0.3 m at the inlet is acceptable.<br />
NOTE: Hardcopy <strong>Design</strong> Chart 29A, 31A, and 33A are used in this solution.<br />
62
Example Problem #3 (English Units)<br />
<strong>Design</strong> a culvert to pass a 25-year flow <strong>of</strong> 220 ft³/s. Minimum depth <strong>of</strong> cover for this culvert is 2<br />
ft.<br />
ELhd: 105 ft based on adjacent structures<br />
Shoulder Elev.: 105.5 ft<br />
Elevation <strong>of</strong> Stream Bed at Culvert<br />
Face (ELsf): 100 ft<br />
Original Stream Slope: 5 percent<br />
Tailwater Depth: 4 ft<br />
Approximate Culvert Length: 150 ft<br />
Due to the low available cover over the conduit, use an elliptical concrete pipe. Use <strong>of</strong> a small<br />
depression (FALL) <strong>of</strong> about 1 ft at the inlet is acceptable.<br />
NOTE: Hardcopy <strong>Design</strong> Chart 29B, 31B, and 33B are used in this solution.<br />
63
Example Problem #4 (SI Units)<br />
An existing 2134 mm by 2134 mm concrete box culvert was designed for a 50-year flood <strong>of</strong><br />
16.990 m³/s and a design headwater elevation <strong>of</strong> 34.747 m. Upstream development has<br />
increased the 50-year run<strong>of</strong>f to 28.317 m³/s. The roadway is gravel with a width <strong>of</strong> 12.19 m. The<br />
roadway pr<strong>of</strong>ile may be approximated as a broad crested weir 60.96 m long. Use Figure III-11 to<br />
calculate overtopping flows, and the following site data:<br />
Inlet Invert Elevation: 30.480 m Entrance Condition: Square Edges<br />
Slope: 5 percent Roadway Centerline Elevation: 35.357 m<br />
Culvert Length: 60.96 m<br />
Tailwater Information:<br />
Flow, m³/s TW, m<br />
11.327<br />
16.990<br />
22.654<br />
28.317<br />
0.793<br />
0.945<br />
1.158<br />
1.250<br />
Prepare a performance curve for this installation, including any roadway overtopping, up to a<br />
flow rate <strong>of</strong> 28.317 m 3 /s.<br />
NOTE: <strong>Design</strong> Chart 8A, 14A, 15A, and Figure III-11 are used in this solution.<br />
64
Example Problem #4 (English Units)<br />
An existing 7 ft by 7 ft concrete box culvert was designed for a 50-year flood <strong>of</strong> 600 ft³/s and a<br />
design headwater elevation <strong>of</strong> 114 ft. Upstream development has increased the 50-year run<strong>of</strong>f<br />
to 1,000 ft³/s. The roadway is gravel with a width <strong>of</strong> 40 ft. The roadway pr<strong>of</strong>ile may be<br />
approximated as a broad crested weir 200 ft long. Use Figure III-11 to calculate overtopping<br />
flows, and the following site data:<br />
Inlet Invert Elevation: 100 ft Entrance Condition: Square Edges<br />
Slope: 5 percent Roadway Centerline Elevation: 116 ft<br />
Culvert Length: 200 ft<br />
Prepare a performance curve for this<br />
installation, including any roadway overtopping,<br />
up to a flow rate <strong>of</strong> 1,000 ft 3 /s.<br />
NOTE: <strong>Design</strong> Charts 8B, 14B, 15B, and Figure<br />
III-11 are used in this solution.<br />
66<br />
Tailwater Information:<br />
Flow, ft³/s TW, ft<br />
400<br />
600<br />
800<br />
1000<br />
2.6<br />
3.1<br />
3.8<br />
4.1
CHART 51A<br />
Figure III-21--Inlet Control Curves - Circular or Elliptical Structural Plate<br />
Corrugated Metal Conduits (SI Units)<br />
D. <strong>Design</strong> Methods for <strong>Culverts</strong> without Standard <strong>Design</strong> Charts<br />
Some culvert sizes, shapes, and materials do not have design nomographs and critical depth<br />
charts. For example, long span, structural plate, corrugated metal conduits do not have<br />
standard design charts. Developing design charts for all possible conduit shapes and sizes is<br />
not practical because they are so numerous and new shapes are constantly being produced.<br />
Also, the large size conduits tend to fall outside the nomograph scales. With some modification,<br />
usual culvert hydraulic techniques can be used to analyze these culverts.<br />
For outlet control, the analysis includes pressure flow and backwater calculations to determine<br />
the headwater. Since the inlet has not been modeled, the inlet control equations are necessarily<br />
based on hydraulic test results from similar tested conduit shapes. Appendix A contains<br />
approximate inlet control equations for nonrectangular conduits with a variety <strong>of</strong> edge<br />
conditions.<br />
1. Inlet Control. In order to facilitate the design process, the appropriate inlet control<br />
equations <strong>of</strong> Appendix A have been used to develop dimensionless inlet control design curves<br />
for selected conduit shapes and edge configurations. The curves <strong>of</strong> Figures III-21 and III-22 are<br />
for nonrectangular, structural plate corrugated metal conduits <strong>of</strong> two basic shapes and four inlet<br />
edge conditions. Figure III-21 is for circular or elliptical conduits with the long horizontal axis at<br />
the mid-point <strong>of</strong> the barrel. Figure III-22 is used for high and low pr<strong>of</strong>ile structural plate arches.<br />
Note that these figures are copies <strong>of</strong> Charts 51b and 52b and are for English Units. For SI<br />
Units, see Chart 51a and 51b, respectively in Appendix D.<br />
68
CHART 52A<br />
Figure III-22--Inlet Control Curves - High and Low Pr<strong>of</strong>ile<br />
Structural Plate Arches (SI Units)<br />
The curves in these figures are for four different inlet edge conditions: thin edge projecting,<br />
mitered, square-edge, and 45-degree bevels. The horizontal axis <strong>of</strong> the chart is flow rate divided<br />
by the area times the square root <strong>of</strong> barrel height (Q/AD 0.5 ) and the vertical axis is headwater<br />
depth divided by barrel height (HW/D). Figure III-21 will provide adequate results for any<br />
conduit with curved surfaces, including pipe-arches and underpasses. Figure III-22 is used for<br />
conduits similar to arches with flat bottoms.<br />
To use the figures, perform the following steps:<br />
a. From manufacturers' information, select a barrel size, shape and inlet edge configuration.<br />
Obtain the area, A, and the interior height, D, for the selected barrel.<br />
b. Calculate AD 0.5.<br />
c. Divide the design flow rate, Q, by AD 0.5.<br />
d. Enter the appropriate design chart with Q/AD 0.5 , and for the selected edge condition, read<br />
HW/D.<br />
e. Multiply HW/D by D to obtain the face control headwater, HW.<br />
f. If it is desired to take credit for the approach velocity (Vu) in the calculations, deduct the<br />
approach velocity head (Vu 2 /2g) from HW to obtain the face control headwater, HWf. If Vu is<br />
neglected, set HWf equal to HW.<br />
g. If the inlet control headwater is higher than the design headwater, or if the conduit is<br />
oversized, select another conduit size and/or inlet edge condition and return to step a.<br />
69
2. Outlet Control.<br />
a. Partly Full Flow. Large conduits, such as long span culverts, usually flow partly full<br />
throughout their lengths. In addition, the invert <strong>of</strong> the culvert is <strong>of</strong>ten unlined. In these situations<br />
it is advisable to perform backwater calculations to determine the headwater elevation.<br />
The backwater calculations begin at the tailwater level or at critical depth at the culvert exit,<br />
whichever is higher. <strong>Hydraulic</strong> resistance values for the backwater calculations are contained in<br />
<strong>Hydraulic</strong> Flow Resistance Factors for Corrugated Metal Conduit. (25) Data from that reference<br />
are included in Appendix B. Selected resistance values for natural channels are found in Table<br />
11 <strong>of</strong> Appendix D. Note that when the perimeter <strong>of</strong> the conduit is constructed <strong>of</strong> two or more<br />
materials, a composite resistance value should be used. Methods <strong>of</strong> calculating composite<br />
resistance values are discussed in Appendix B.<br />
b. Full Flow. If the conduit flows full or nearly full throughout its length, Equation (7) may be<br />
used to calculate the outlet control headwater depth.<br />
HW = TW + H<br />
(7)<br />
o<br />
L<br />
HL is the total loss through the culvert barrel which is calculated using Equation (1) or Equation<br />
(5). TW is either the tailwater depth or (dc + D)/2, whichever is larger. Values <strong>of</strong> critical depth for<br />
most conduits are provided in the manufacturers' information. In Equation (5), the hydraulic<br />
radius and velocity are full flow values. The Manning’s n value is a composite value when more<br />
than one material is used in the perimeter <strong>of</strong> the conduit.<br />
3. Discussion <strong>of</strong> Results<br />
The inlet control headwater obtained from Figures III-21 or III-22 includes the approach velocity<br />
head. Therefore, credit may be taken for the approach velocity head in determining the required<br />
headwater pool depth.<br />
In outlet control, the same limitations on use <strong>of</strong> the approximate backwater method apply as for<br />
culverts with design charts. That is, if the headwater (referenced to the inlet invert) falls between<br />
1.2D and 0.75D, use the results with caution. For large, expensive installations, check the<br />
results using backwater calculations. If the headwater falls below 0.75D do not use the<br />
approximate method. Perform backwater calculations as illustrated in the following example<br />
problem.<br />
4. Example Problem<br />
Problem No. 5: <strong>Design</strong> <strong>of</strong> a long span structural plate corrugated metal elliptical culvert.<br />
Use a long span culvert to pass the 25-year flood <strong>of</strong> 155.744 m 3 /s (5,500 ft³/s) under a high<br />
roadway fill. The design flow should be below the crown <strong>of</strong> the conduit at the inlet, but the check<br />
flow (100-year flow) <strong>of</strong> 212.378 m 3 /s (7,500 ft³/s) may exceed the crown by not more than 1.524<br />
m (5 feet). Use the following site conditions:<br />
ELhd: 73.152 m (240 ft)<br />
Elevation <strong>of</strong> Stream Bed at Culvert Face (ELsf): 67.056 m (220 ft)<br />
70
Shoulder Elevation: 79.248 m (260 ft)<br />
Stream Slope (So): 1.0 percent<br />
Approximate Culvert Length: 60.960 m (200 ft)<br />
Tailwater Depth: 4.877 m for Q = 155.744 m 3 /s (16 ft for Q = 5500 ft³/s)<br />
5.791 m for Q = 212.378 m 3 /s (19 ft for Q = 7500 ft³/s)<br />
<strong>Design</strong> an elliptical structural plate corrugated metal conduit for this site. Use a headwall to<br />
provide a square edge condition. Corrugations are 150 mm x 50 mm (6-in by 2-in).<br />
Solution to Example Problem No. 5<br />
Try a 9144 mm (30 foot) (span) by a 6096 mm (20 foot) (rise) elliptical structural plate conduit<br />
for this site. From manufacturer's information, A = 45.289 m 2 (487.5 ft²) and D = 6.096 m (20 ft).<br />
Neglect the approach velocity.<br />
SI Units<br />
INLET CONTROL:<br />
AD<br />
0.<br />
5<br />
Q / AD<br />
= ( 45.<br />
298)<br />
( 6.<br />
096)<br />
0<br />
. 5<br />
155.<br />
744<br />
= =<br />
111.<br />
841<br />
0<br />
. 5<br />
1.<br />
39<br />
=<br />
111.<br />
841<br />
Based on Chart 51A, HW/D = 0.90, therefore:<br />
HW = HWf<br />
= ( 0.<br />
90)(<br />
6.<br />
096)<br />
= 5.<br />
486m<br />
= 67.<br />
056 + 5.<br />
486 = 72.<br />
542m<br />
EL hi<br />
For the check flow:<br />
Q /<br />
AD<br />
0.<br />
5<br />
212.<br />
378<br />
= =<br />
111.<br />
819<br />
1.<br />
90<br />
Based on Chart 51A, HW/D = 1.13, therefore:<br />
HW = HWf<br />
= ( 1.<br />
13)(<br />
6.<br />
096)<br />
= 6.<br />
888 m<br />
= 67.<br />
056 + 6.<br />
888 = 73.<br />
944 m<br />
EL hi<br />
OUTLET CONTROL:<br />
Backwater calculations will be necessary to check Outlet Control.<br />
71
Backwater Calculations<br />
From hydraulic tables for elliptical conduits (60):<br />
for Q = 155.744 m³/s, dc = 3.780 m<br />
for Q = 212.378 m³/s, dc = 4.450 m<br />
Since TW > dc, start backwater calculations at TW depth.<br />
Determine normal depths (dn) using hydraulic tables.<br />
for Q = 155.744 m³/s, n = 0.034;<br />
dn = 3.993 m<br />
for Q = 212.378 m³/s, n = 0.034;<br />
dn = 5.090 m<br />
since dn > dc, flow is subcritical<br />
since TW > dn, water surface has an M-1 pr<strong>of</strong>ile<br />
Plot Area and <strong>Hydraulic</strong> Radius vs. depth from data obtained from tables.<br />
d/D d A/BD A R/D R<br />
0.65 3.962 0.5537 30.864 0.3642 2.220<br />
0.70 4.267 0.6013 33.518 0.3781 2.305<br />
0.75 4.572 0.6472 36.076 0.3886 2.369<br />
0.80 4.877 0.6908 38.506 0.3950 2.408<br />
0.85 5.182 0.7313 40.764 0.3959 2.413<br />
0.90 5.486 0.7671 42.760 0.3870 2.359<br />
0.95 5.791 0.7953 44.331 0.3649 2.224<br />
1.00 6.096 0.8108 45.195 0.3060 1.865<br />
Complete Water Surface Computations (see attached calculation sheet).<br />
HW = specific head (H) + ke (V²/2g)<br />
Neglecting approach velocity head:<br />
for Q = 155,744 m³/s:<br />
HW = 5.481 + 0.5 (.970) = 5.966 m<br />
ELho = 67.056 + 5.966b = 73.022 m<br />
for Q = 212.378 m³/s:<br />
HWf = 6.90 + (0.5) (1.19) = 7.495 m<br />
ELho = 67.056 + 7.495 = 74.551 m<br />
72
SUMMARY:<br />
DESIGN Q: CHECK Q:<br />
ELhd ELhi ELho ELhd ELhi ELho<br />
73.152 m 72.942 m 73.022 m 74.676 m 73.944 m 74.551 m<br />
This culvert design meets the requirements stated in the problem.<br />
<strong>Hydraulic</strong> Radius<br />
Area<br />
2.5<br />
2<br />
1.5<br />
46<br />
44<br />
42<br />
40<br />
38<br />
36<br />
34<br />
32<br />
30<br />
3<br />
1<br />
Depth - <strong>Hydraulic</strong> Radius Relationship<br />
3 3.5 4 4.5 5 5.5 6 6.5<br />
Depth <strong>of</strong> Flow<br />
Depth - Area Relationship<br />
3 3.5 4 4.5 5 5.5 6 6.5<br />
Depth <strong>of</strong> Flow<br />
73
English Units<br />
INLET CONTROL:<br />
AD<br />
0.<br />
5<br />
Q / AD<br />
= ( 487.<br />
5)(<br />
20)<br />
0.<br />
5<br />
5,<br />
500<br />
= =<br />
2,<br />
180<br />
0.<br />
5<br />
=<br />
2.<br />
52<br />
2,<br />
180<br />
Based on Chart 51b, HW/D = 0.90, therefore:<br />
HW = HWf<br />
= ( 0.<br />
90)(<br />
20)<br />
= 18 ft<br />
= 220 + 18 = 238.<br />
0 ft<br />
EL hi<br />
For the check flow:<br />
Q / AD<br />
0 . 5<br />
=<br />
3.<br />
44<br />
Based on Chart 51b, HW/D = 1.13, therefore:<br />
HW = HWf<br />
= ( 1.<br />
13)(<br />
20)<br />
= 22.<br />
6 ft<br />
= 220 + 22.<br />
6 = 242.<br />
6 ft<br />
EL hi<br />
OUTLET CONTROL:<br />
Backwater calculations will be necessary to check Outlet Control.<br />
Backwater Calculations<br />
From hydraulic tables for elliptical conduits (60):<br />
for Q = 5,500 ft³/s, dc = 12.4 ft<br />
for Q = 7,500 ft³/s, dc = 14.6 ft<br />
Since TW > dc, start backwater calculations at TW depth.<br />
Determine normal depths (dn) using hydraulic tables.<br />
for Q = 5,500 ft³/s, n = 0.034 ;<br />
dn = 13.1 ft<br />
for Q = 7,500 ft³/s, n = 0.034 ;<br />
dn = 16.7 ft<br />
since dn > dc, flow is subcritical<br />
since TW > dn, water surface has an M-1 pr<strong>of</strong>ile<br />
Plot Area and <strong>Hydraulic</strong> Radius vs. depth from data obtained from tables.<br />
75
d/D d A/BD A R/D R<br />
0.65 13.0 0.5537 332.2 0.3642 7.28<br />
0.70 14.0 0.6013 360.8 0.3781 7.56<br />
0.75 15.0 0.6472 388.3 0.3886 7.77<br />
0.80 16.0 0.6908 414.5 0.3950 7.90<br />
0.85 17.0 0.7313 438.8 0.3959 7.92<br />
0.90 18.0 0.7671 460.3 0.3870 7.74<br />
0.95 19.0 0.7953 477.2 0.3649 7.30<br />
1.00 20.0 0.8108 486.5 0.3060 6.12<br />
Complete Water Surface Computations (see attached calculation sheet).<br />
HW = specific head (H) + ke (V²/2g)<br />
Neglecting approach velocity head :<br />
for Q = 5,500 ft³/s:<br />
HW = 18.004 + (0.5)(3.208) = 19.6 ft<br />
ELho = 220 + 19.6 = 239.6 ft<br />
for Q = 7,500 ft³/s:<br />
HWf = 22.627 + (0.5)(3.89) = 24.6 ft<br />
ELho = 220 + 24.6 = 244.6 ft<br />
SUMMARY:<br />
DESIGN Q:<br />
CHECK Q<br />
ELhd ELhi ELho<br />
240.0 238.0 239.6<br />
ELha ELhi ELho<br />
245.0 242.6 244.6<br />
This culvert design meets the requirements stated in the problem.<br />
76
A. Introduction<br />
IV. TAPERED INLETS<br />
A tapered inlet is a flared culvert inlet with an enlarged face section and a hydraulically efficient<br />
throat section. A tapered inlet may have a depression, or FALL, incorporated into the inlet<br />
structure or located upstream <strong>of</strong> the inlet. The depression is used to exert more head on the<br />
throat section for a given headwater elevation. Therefore, tapered inlets improve culvert<br />
performance by providing a more efficient control section (the throat). Tapered inlets with FALLs<br />
also improve performance by increasing the head on the throat.<br />
Inlet edge configuration is one <strong>of</strong> the prime factors influencing the performance <strong>of</strong> a culvert<br />
operating in inlet control. Inlet edges can cause a severe contraction <strong>of</strong> the flow, as in the case<br />
<strong>of</strong> a thin edge projecting inlet. In a flow contraction, the effective cross-sectional area <strong>of</strong> the<br />
barrel may be reduced to about one half <strong>of</strong> the actual available barrel area. As the inlet edge<br />
configuration is improved, the flow contraction is reduced, thus improving the performance <strong>of</strong><br />
the culvert. As an example, inlet edge improvement can be achieved by the installation <strong>of</strong> a<br />
concrete headwall with a square edged entrance on a thin edge projecting inlet. Additional<br />
performance increases are possible by the installation <strong>of</strong> beveled edges or by retaining the<br />
groove end on a concrete pipe culvert.<br />
In outlet control, the inlet edge configuration is just one <strong>of</strong> many factors affecting culvert<br />
performance. Improved edge conditions reduce the inlet loss coefficient, ke, which is multiplied<br />
by the velocity head to determine the energy losses at the culvert inlet as shown in Equation<br />
(4a).<br />
Values <strong>of</strong> ke vary from 0.9 for thin edge projecting entrances to 0.2 for beveled edges or groove<br />
ends. Still lower ke values can be obtained by using specially designed inlets with rounded<br />
edges. Unfortunately, the construction difficulties for these inlets <strong>of</strong>ten outweigh the hydraulic<br />
benefits.<br />
The entrance <strong>of</strong> any culvert operating in inlet control can be depressed to obtain better<br />
performance, regardless <strong>of</strong> the inlet configuration. However, edge conditions are normally<br />
improved first and then an inlet depression is applied. The purpose is to provide more head on<br />
the inlet control section for a given headwater elevation. This design technique utilizes part <strong>of</strong><br />
the available elevation head to force the flow into the culvert entrance. Otherwise, the head is<br />
expended in accelerating the flow down the steep culvert barrel, possibly causing erosion at the<br />
downstream end <strong>of</strong> the culvert.<br />
Tapered inlets improve culvert performance primarily by reducing the contraction at the inlet<br />
control section which is located at the throat. Secondarily, some tapered inlet configurations<br />
also depress the inlet control section below the stream bed. The hydraulic performance <strong>of</strong><br />
tapered inlets is better than the performance <strong>of</strong> beveled edges for culverts operating in inlet<br />
control. In outlet control the performance <strong>of</strong> tapered inlets is effectively the same as for inlets<br />
with beveled edges. An entrance loss coefficient (ke) <strong>of</strong> 0.2 is used for both tapered inlets and<br />
beveled edges. Tapered inlets are not recommended for use on culverts flowing in outlet control<br />
because the simple beveled edge is <strong>of</strong> equal benefit.<br />
<strong>Design</strong> criteria and methods have been developed for two basic tapered inlet designs: the sidetapered<br />
inlet and the slope-tapered inlet. Tapered inlet design charts are available for<br />
79
ectangular box culverts and circular pipe culverts. The same principles apply to other culvert<br />
barrel shapes, but no design charts are presently available for other shapes. The side-tapered<br />
inlet can be installed with or without a depression upstream <strong>of</strong> the face. There are two<br />
configurations <strong>of</strong> the slope-tapered inlet, one with a vertical face and one with its face mitered to<br />
the fill slope.<br />
The inlet configurations presented in this manual are based on research conducted at the<br />
National Bureau <strong>of</strong> Standards (NBS) under the sponsorship <strong>of</strong> the Bureau <strong>of</strong> Public Roads. (7,<br />
9, 10) Many improved inlet configurations were tested; however, only those determined to best<br />
satisfy the criteria <strong>of</strong> hydraulic efficiency, economy <strong>of</strong> materials, simplicity <strong>of</strong> construction, and<br />
minimization <strong>of</strong> maintenance problems were selected. For example, while the use <strong>of</strong> curved<br />
surfaces rather than plane surfaces might result in slightly improved hydraulic efficiency at<br />
times, the advantages are outweighed by the construction difficulties. Therefore, only plane<br />
surfaces are utilized in the recommended designs.<br />
B. Descriptions <strong>of</strong> Tapered Inlets<br />
Figure IV-1--Side-Tapered Inlet<br />
1. Side-Tapered. The side-tapered inlet has an enlarged face section with the transition to the<br />
culvert barrel accomplished by tapering the side walls (Figure IV-1). The face section is about<br />
the same height as the barrel height and the inlet floor is an extension <strong>of</strong> the barrel floor. The<br />
inlet ro<strong>of</strong> may slope upward slightly, provided that the face height does not exceed the barrel<br />
80
height by more than 10 percent (1.1D). The intersection <strong>of</strong> the tapered sidewalls and the barrel<br />
is defined as the throat section.<br />
There are two possible control sections, the face and the throat. HWf, shown in Figure IV-1, is<br />
the headwater depth measured from the face section invert and HWt is the headwater depth<br />
measured from the throat section invert.<br />
The throat <strong>of</strong> a side-tapered inlet is a very efficient control section. The flow contraction is nearly<br />
eliminated at the throat. In addition, the throat is always slightly lower than the face so that more<br />
head is exerted on the throat for a given headwater elevation.<br />
Figure IV-2--Side-Tapered Inlet with Upstream Depression Contained Between Wingwalls<br />
The beneficial effect <strong>of</strong> depressing the throat section below the stream bed can be increased by<br />
installing a depression upstream <strong>of</strong> the side-tapered inlet. Figure IV-2 and Figure IV-3 show two<br />
methods <strong>of</strong> constructing the depression. Figure IV-2 depicts a side-tapered inlet with the<br />
81
depression contained between wingwalls. For this type <strong>of</strong> depression, the floor <strong>of</strong> the barrel<br />
should extend upstream from the face a minimum distance <strong>of</strong> D/2 before sloping upward more<br />
steeply. Figure IV-3 shows a side-tapered inlet with a sump upstream <strong>of</strong> the face. Dimensional<br />
limitations for the designs are shown. In both cases, the length <strong>of</strong> the resultant upstream crest<br />
where the slope <strong>of</strong> the depression meets the stream bed should be checked to assure that the<br />
crest will not control the flow at the design flow and headwater. If the crest length is too short,<br />
the crest may act as a weir control section. For depressed side-tapered inlets, both the face<br />
section and the throat section have more head exerted on them for a given headwater elevation.<br />
The increased head results in a smaller required throat section. Likewise, the required size <strong>of</strong><br />
the face is reduced by the increased head. Beveled edges or other favorable edge conditions<br />
also reduce the required size <strong>of</strong> the face.<br />
Figure IV-3--Side-Tapered Inlet with Upstream Sump<br />
2. Slope-Tapered. The slope-tapered inlet, like the side-tapered inlet, has an enlarged face<br />
section with tapered sidewalls meeting the culvert barrel walls at the throat section (Figure IV-4).<br />
In addition, a vertical FALL is incorporated into the inlet between the face and throat sections.<br />
This FALL concentrates more head on the throat section. At the location where the steeper<br />
slope <strong>of</strong> the inlet intersects the flatter slope <strong>of</strong> the barrel, a third section, designated the bend<br />
section, is formed.<br />
82
A slope-tapered inlet has three possible control sections, the face, the bend, and the throat. Of<br />
these, only the dimensions <strong>of</strong> the face and the throat section are determined by the design<br />
procedures <strong>of</strong> this manual. The size <strong>of</strong> the bend section is established by locating it a minimum<br />
distance upstream from the throat.<br />
Figure IV-4--Slope-Tapered Inlet with Vertical Face<br />
83
The slope-tapered inlet combines an efficient throat section with additional head on the throat.<br />
The face section does not benefit from the FALL between the face and throat; therefore, the<br />
face sections <strong>of</strong> these inlets are larger than the face sections <strong>of</strong> equivalent depressed sidetapered<br />
inlets. The required face size can be reduced by the use <strong>of</strong> bevels or other favorable<br />
edge configurations. The vertical face slope-tapered inlet design is shown in Figure IV-4 and the<br />
mitered face design is shown in Figure IV-5.<br />
Figure IV-5--Slope-Tapered Inlet with Mitered Face<br />
84
The mitered face slope-tapered inlet design is more complicated than the vertical face design. A<br />
hypothetical face section is located downstream <strong>of</strong> the weir crest formed where the extension <strong>of</strong><br />
the fill slope meets the stream bed. The face section is defined by a perpendicular line<br />
extending to the FALL slope from the top edge <strong>of</strong> the inlet, neglecting bevels.<br />
The slope-tapered inlet is the most complex inlet improvement recommended in this manual.<br />
Construction difficulties are inherent, but the benefits in increased performance can be great.<br />
With proper design, a slope-tapered inlet passes more flow at a given headwater elevation than<br />
any other configuration.<br />
Slope-tapered inlets can be applied to both box culverts and circular pipe culverts. For the latter<br />
application, a square to round transition is normally used to connect the rectangular slopetapered<br />
inlet to the circular pipe.<br />
C. <strong>Hydraulic</strong>s<br />
1. Inlet Control. Tapered inlets have several possible control sections including the face, the<br />
bend (for slope-tapered inlets), and the throat. In addition, a depressed side-tapered inlet has a<br />
possible control section at the crest upstream <strong>of</strong> the depression. Each <strong>of</strong> these inlet control<br />
sections has an individual performance curve. The headwater depth for each control section is<br />
referenced to the invert <strong>of</strong> the section. <strong>On</strong>e method <strong>of</strong> determining the overall inlet control<br />
performance curve is to calculate performance curves for each potential control section, and<br />
then select the segment <strong>of</strong> each curve which defines the minimum overall culvert performance<br />
(Figure IV-6).<br />
Figure IV-6—Inlet control<br />
performance curves (schematic)<br />
If the dimensional criteria <strong>of</strong> this publication are<br />
followed, the crest and the bend sections will not<br />
function as control sections over the normal<br />
range <strong>of</strong> headwaters and discharges. The crest<br />
<strong>of</strong> the depression may function as a control<br />
section for very low flows and headwaters but<br />
this is generally not <strong>of</strong> importance in design.<br />
Figure IV-6 depicts performance curves for each<br />
<strong>of</strong> the potential inlet control sections and the<br />
overall inlet control performance curves.<br />
The design procedures for tapered inlets include<br />
checks on crest lengths for both depressed sidetapered<br />
inlets and slope-tapered inlets with<br />
mitered faces. As long as) the actual crest<br />
length exceeds a certain minimum value, there<br />
is no need to construct a crest performance<br />
curve. Also, if the bend section is located a<br />
minimum distance <strong>of</strong> D/2 upstream <strong>of</strong> the throat<br />
section, the bend will not control and the bend<br />
section performance curve does not need to be<br />
calculated.<br />
85
The inlet control equations for tapered inlets are given in Appendix A. The coefficients and<br />
exponents for each control section were developed based on the NBS hydraulic tests. All <strong>of</strong> the<br />
previously described control sections function in a manner similar to weirs for unsubmerged flow<br />
conditions, and in a manner similar to orifices for submerged flow conditions. For each section,<br />
there is a transition zone defined by an empirical curve connecting the unsubmerged and<br />
submerged curves.<br />
a. Side-tapered Inlet. The side-tapered inlet throat should be designed to be the primary control<br />
section for the design range <strong>of</strong> flows and headwaters. Since the throat is only slightly lower than<br />
the face, it is likely that the face section will function as a weir or an orifice with downstream<br />
submergence within the design range. At lower flow rates and headwaters, the face will usually<br />
control the flow.<br />
b. Slope-tapered Inlet. The slope-tapered inlet throat can be the primary control section with the<br />
face section submerged or unsubmerged. If the face is submerged, the face acts as an orifice<br />
with downstream submergence. If the face is unsubmerged, the face acts as a weir, with the<br />
flow plunging into the pool formed between the face and the throat. As previously noted, the<br />
bend section will not act as the control section if the dimensional criteria <strong>of</strong> this publication are<br />
followed. However, the bend will contribute to the inlet losses which are included in the inlet loss<br />
coefficient, ke.<br />
2. Outlet Control. When a culvert with a tapered inlet performs in outlet control, the hydraulics<br />
are the same as described in Chapter III for all culverts. The factors influencing flow in outlet<br />
control are shown in Table 1 (Chapter 1). The inlet area is the area <strong>of</strong> the face section, the inlet<br />
edge configuration describes the type <strong>of</strong> tapered inlet as well as the face edge conditions, and<br />
the shape is either circular or rectangular. The barrel characteristics refer to the barrel portion <strong>of</strong><br />
the culvert, downstream <strong>of</strong> the throat section, except that the barrel length includes the length <strong>of</strong><br />
the tapered inlet, and the barrel slope may be flatter than the natural stream bed slope.<br />
Equation (5) in Chapter III describes the losses in outlet control. The tapered inlet entrance loss<br />
coefficient (ke) is 0.2 for both side-tapered and slope-tapered inlets. This loss coefficient<br />
includes contraction and expansion losses at the face, increased friction losses between the<br />
face and the throat, and the minor expansion and contraction losses at the throat.<br />
The headwater depth in outlet control is measured from the invert <strong>of</strong> the culvert exit. Equation<br />
(5) or the outlet control nomograph for the appropriate barrel size is used to determine the total<br />
losses through the culvert. Equation (7) is then used to calculate the headwater depth, where<br />
the tailwater (TW) is taken to be either (dc + D)/2 or the downstream channel depth, whichever<br />
is larger.<br />
3. Outlet Velocity. Outlet velocities for culverts with tapered inlets are determined in the same<br />
manner as described in Chapter III. Note that when a FALL is used at the inlet, the barrel slope<br />
is flatter than the stream slope and is calculated as follows.<br />
S<br />
EL − EL<br />
t o = (11)<br />
La<br />
− L1<br />
S is the approximate barrel slope, m/m (ft/ft)<br />
ELt is the invert elevation at the throat, m (ft)<br />
ELo is the invert elevation at the outlet, m (ft)<br />
86
La is the approximate length <strong>of</strong> the culvert, m (ft)<br />
L1 is the overall length <strong>of</strong> the tapered-inlet, m (ft)<br />
D. Performance Curves<br />
Performance curves are <strong>of</strong> utmost importance in understanding the operation <strong>of</strong> a culvert with a<br />
tapered inlet. Each potential control section (face, throat, and outlet) has a performance curve,<br />
based on the assumption that that particular section controls the flow. Calculating and plotting<br />
the various performance curves results in a graph similar to Figure IV-7, containing the face<br />
control, throat control and outlet control curves. The overall culvert performance curve is<br />
represented by the hatched line. In the range <strong>of</strong> lower discharges face control governs; in the<br />
intermediate range, throat control governs; and in the higher discharge range, outlet control<br />
governs. The crest and bend performance curves are not calculated since they do not govern in<br />
the design range.<br />
Figure IV-7--Culvert Performance Curve (schematic)<br />
Constructing performance curves for culverts with tapered inlets helps to assure that the<br />
designer is aware <strong>of</strong> how the culvert will perform over a range <strong>of</strong> discharges. For high<br />
discharges, the outlet control curve may have a very steep slope which means that the<br />
headwater will increase rapidly with increasing discharge. Since there is a probability that the<br />
design discharge will be exceeded over the life <strong>of</strong> the culvert, the consequences <strong>of</strong> that event<br />
should be considered. This will help to evaluate the potential for damage to the roadway and to<br />
adjacent properties.<br />
87
Figure IV-8--Performance Curves for 6 ft by 6 ft Box Culvert<br />
with 90-degree Wingwall<br />
Performance curves provide a basis for the selection <strong>of</strong> the most appropriate culvert design. For<br />
example, culvert designs with and without tapered inlets can be compared and evaluated using<br />
performance curves (Figure IV-8).<br />
Performance curves are useful in optimizing the performance <strong>of</strong> a culvert. By manipulating the<br />
depressions <strong>of</strong> the face and throat sections, it is <strong>of</strong>ten possible to achieve a higher flow rate for<br />
a given headwater elevation, or to pass the same flow at a lower headwater. A more detailed<br />
description <strong>of</strong> the use <strong>of</strong> performance curves in improved inlet design is presented in Appendix<br />
C.<br />
88
E. <strong>Design</strong> Methods<br />
Figure IV-9--Tapered Inlet <strong>Design</strong> Form<br />
Tapered inlet design begins with the selection <strong>of</strong> the culvert barrel size, shape, and material.<br />
These calculations are performed using the Culvert <strong>Design</strong> Form shown in Figure III-17. The<br />
tapered-inlet design calculation forms and the design nomographs contained in Appendix D are<br />
used to design the tapered inlet. The result will be one or more culvert designs, with and without<br />
tapered inlets, all <strong>of</strong> which meet the site design criteria. The designer must select the best<br />
design for the site under consideration.<br />
In the design <strong>of</strong> tapered inlets, the goal is to maintain control at the efficient throat section in the<br />
design range <strong>of</strong> headwater and discharge. This is because the throat section has the same<br />
geometry as the barrel, and the barrel is the most costly part <strong>of</strong> the culvert. The inlet face is then<br />
sized large enough to pass the design flow without acting as a control section in the design<br />
discharge range. Some slight oversizing <strong>of</strong> the face is beneficial because the cost <strong>of</strong><br />
constructing the tapered inlet is usually minor compared with the cost <strong>of</strong> the barrel.<br />
The required size <strong>of</strong> the face can be reduced by use <strong>of</strong> favorable edge configurations, such as<br />
beveled edges, on the face section. <strong>Design</strong> nomographs are provided for favorable and less<br />
favorable edge conditions.<br />
89
The following steps outline the design process for culverts with tapered inlets. Steps 1 and 2 are<br />
the same for all culverts, with and without tapered inlets.<br />
1. Preliminary Culvert Sizing. Estimate the culvert barrel size to begin calculations.<br />
2. Culvert Barrel <strong>Design</strong>. Complete the Culvert <strong>Design</strong> Form (Figure III-17). These<br />
calculations yield the required FALL at the culvert entrance. For the inlet control calculations,<br />
the appropriate inlet control nomograph is used for the tapered inlet throat. The required FALL is<br />
upstream <strong>of</strong> the inlet face section for side-tapered inlets and is between the face section and<br />
throat section for slope tapered inlets. The Culvert <strong>Design</strong> Form should be completed for all<br />
barrels <strong>of</strong> interest. Plot outlet control performance curves for the barrels <strong>of</strong> interest and inlet<br />
control performance curves for the faces <strong>of</strong> culverts with nonenlarged inlets and for the throats<br />
<strong>of</strong> tapered inlets.<br />
3. Tapered Inlet <strong>Design</strong>. Use the Tapered Inlet <strong>Design</strong> Form (Figure IV-9) for selecting the<br />
type <strong>of</strong> tapered inlet to be used and determining its dimensions. If a slope-tapered inlet with<br />
mitered face is selected, use the special design form shown in Figure IV-10. A separate form is<br />
provided for the mitered inlet because <strong>of</strong> its dimensional complexity.<br />
To use the Tapered Inlet <strong>Design</strong> Form (Figure IV-9) or the design form for a slope-tapered inlet<br />
with mitered face (Figure IV-10), perform the following steps:<br />
Figure IV-10--<strong>Design</strong> Form-Slope-Tapered Inlet with Mitered Face<br />
90
a. Complete <strong>Design</strong> Data. Fill in the required design data on the top <strong>of</strong> the form.<br />
1) Flow, Q, is the selected design flow rate, from the Culvert <strong>Design</strong> Form,<br />
Figure III-17.<br />
2) ELhi is the inlet control headwater elevation.<br />
3) The elevation <strong>of</strong> the throat invert (ELt) is the inlet invert elevation (ELi) from<br />
Figure II-17.<br />
4) The elevation <strong>of</strong> the stream bed at the face (ELsf), the stream slope (So), and the slope <strong>of</strong> the<br />
barrel (S) are from Figure III-17. (For the slope-tapered inlet with mitered face, estimate the<br />
elevation <strong>of</strong> the stream bed at the crest. This point is located upstream <strong>of</strong> the face section).<br />
5) The FALL is the difference between the stream bed elevation at the face and the throat invert<br />
elevation.<br />
6) Select a side taper (TAPER) between 4:1 and 6:1 and a fall slope (Sf) between IV:2H and<br />
IV:3H. The TAPER may be modified during the calculations.<br />
7) Enter the barrel shape and material, the size, and the inlet edge configuration from Figure III-<br />
17. Note that for tapered inlets, the inlet edge configuration is designated the "tapered inlet<br />
throat."<br />
b. Calculate the Face Width.<br />
1) Enter the flow rate, the inlet control headwater elevation (ELhi), and the throat invert elevation<br />
on the design forms. (For the slope-tapered inlet with mitered face, the face section is<br />
downstream <strong>of</strong> the crest. Calculate the vertical difference between the stream bed at the crest<br />
and the face invert (y). y includes part <strong>of</strong> the total inlet FALL.)<br />
2) Perform the calculations resulting in the face width (Bf). Face control design nomographs are<br />
contained in Appendix D.<br />
c. Calculate Tapered-Inlet Dimensions. If the FALL is less than D/4 (D/2 for a slope-tapered<br />
inlet with a mitered face), a side-tapered inlet must be used. Otherwise, either a side-tapered<br />
inlet with a depression upstream <strong>of</strong> the face or a slope-tapered inlet may be used.<br />
1) For a slope-tapered inlet with a vertical face, calculate L2, L3, and the TAPER. (For the slopetapered<br />
inlet with a mitered face, calculate the horizontal distance between the crest and the<br />
face section invert L4. These dimensions are shown on the small sketches in the top center <strong>of</strong><br />
the forms).<br />
2) Calculate the overall tapered inlet length, L1.<br />
3) For a side-tapered inlet, check to assure that the FALL between the face section and the<br />
throat section is one foot or less. If not, return to step b. with a revised face invert elevation.<br />
d. Calculate the Minimum Crest Width. For a side-tapered inlet with FALL upstream <strong>of</strong> the face<br />
or for a slope-tapered inlet with a mitered face, calculate the minimum crest width and check it<br />
against the proposed crest width. In order to obtain the necessary crest length for a depressed<br />
91
side-tapered inlet, it may be necessary to increase the flare angle <strong>of</strong> the wingwalls for the type<br />
<strong>of</strong> depression shown in Figure IV-2, or to increase the length <strong>of</strong> crest on the sump for the design<br />
shown in Figure IV-3. For a slope-tapered inlet with a mitered face, reduce the TAPER to<br />
increase crest width. Note that the TAPER must be greater than 4:1.<br />
e. Fit the <strong>Design</strong> into the Embankment Section. Using a sketch based on the derived<br />
dimensions, and a sketch <strong>of</strong> the roadway section to the same scale, assure that the culvert<br />
design fits the site. Adjust inlet dimensions as necessary but do not reduce dimensions below<br />
the minimum dimensions on the design form.<br />
f. Prepare Performance Curves. Using additional flow rate values and the appropriate<br />
nomographs, calculate a performance curve for the selected face section. Do not adjust inlet<br />
dimensions at this step in the design process. Plot the face control performance curve on the<br />
same sheet as the throat control and the outlet control performance curves.<br />
g. Enter <strong>Design</strong> Dimensions. If the design is satisfactory, enter the dimensions at the lower<br />
right <strong>of</strong> the <strong>Design</strong> Form. Otherwise, calculate another alternative design by returning to step<br />
3a.<br />
4. Dimensional Limitations. The following dimensional limitations must be observed when<br />
designing tapered inlets using the design charts <strong>of</strong> this publication. Tapered inlets can only be<br />
used where the culvert width is less than three times its height, (B < 3 D).<br />
a. Side-Tapered Inlets.<br />
1) 4:1 < TAPER < 6:1<br />
Tapers less divergent than 6:1 may be used but performance will be underestimated. (9, 10)<br />
2) Wingwall flare angle range from 15-degrees to 26-degrees with top edge beveled or from 26degrees<br />
to 90-degrees with or without bevels (Figure IV-11).<br />
3) If a FALL is used upstream <strong>of</strong> the face, extend the barrel invert slope upstream from the face<br />
a distance <strong>of</strong> D/2 before sloping upward more steeply. The maximum vertical slope <strong>of</strong> the apron<br />
is: 1V:2H.<br />
4) D < E < 1.1D<br />
b. Slope-tapered Inlets.<br />
4:1 < TAPER < 6:1<br />
(Tapers > 6:1 may be used, but performance will be underestimated.)<br />
2) IV:3H > Sf > IV:2H<br />
If Sf > IV:3H, use side-tapered design.<br />
3) Minimum L3 = 0.5B<br />
4) D/4 < FALL < 1.5D<br />
92
H<br />
1<br />
i. For FALL < D/4, use side-tapered design<br />
ii. For FALL < D/2, do not use the slope-tapered inlet with mitered face<br />
iii. For FALL > 1.5D, estimate friction losses between the face and the throat by using<br />
Equation (12) and add the additional losses to HWt.<br />
⎡ 2<br />
2<br />
K n L ⎤<br />
U i Q<br />
= ⎢ ⎥<br />
(12)<br />
1.<br />
33<br />
2<br />
⎢⎣<br />
R ⎥⎦<br />
2gA<br />
where:<br />
KU is 19.63 (29 in English Units)<br />
H1 is the friction head loss in the tapered inlet, m (ft)<br />
n is the Manning's n for the tapered inlet material<br />
L1 is the length <strong>of</strong> the tapered inlet, m (ft)<br />
R is the average hydraulic radius <strong>of</strong> the tapered inlet = (Af + At))/(Pf + Pt), m (ft)<br />
Q is the flow rate, m 3 /s (ft 3 /s)<br />
g is the gravitational acceleration, m/s/s (ft/s/s)<br />
A is the average cross sectional area <strong>of</strong> the tepered inlet = (Af + At)/2, m 2 (ft 2 )<br />
5) Wingwall flare angles range from 15-degrees to 26-degrees with top edge beveled or from<br />
26-degrees to 90-degrees with or without bevels (Figure IV-11).<br />
F. Rectangular (Box) <strong>Culverts</strong><br />
1. <strong>Design</strong> Procedures. This section supplements the general design procedures described<br />
previously with information specifically related to rectangular box culverts. The design charts for<br />
throat and face control for tapered inlets are contained in Appendix D. There is a single throat<br />
control nomograph for side-or slope-tapered rectangular inlets.<br />
For determining the required face width, there are two nomographs in Appendix D, one for sidetapered<br />
inlets and one for slope-tapered inlets. Each nomograph has two scales, and each<br />
scale refers to a specific inlet edge condition. The edge conditions are depicted in Figure IV-11.<br />
Both the inlet edge condition and the wingwall flare angle affect the performance <strong>of</strong> the face<br />
section for box culverts.<br />
Scale 1 on the design nomographs refers to the less favorable edge conditions, defined as<br />
follows:<br />
a. wingwall flares <strong>of</strong> 15-degrees to 26-degrees and a 1:1 top edge bevel, or<br />
b. wingwall flares <strong>of</strong> 26-degrees to 90-degrees and square edges (no bevels). A 90-degree<br />
wingwall flare is a straight headwall.<br />
Scale 2 applies to the more favorable edge conditions, defined as follows:<br />
a. wingwall flares <strong>of</strong> 26-degrees to 45-degrees with 1:1 top edge bevel, or<br />
b. wingwall flares <strong>of</strong> 45-degrees to 90-degrees with a 1:1 bevel on the side and top edges.<br />
93
Figure IV-11--Inlet Edge Conditions, Face Section, Rectangular Tapered Inlets<br />
Note undesirable design features, such as wingwall flare angles less than 15-degrees, or 26degrees<br />
without a top bevel, are not covered by the charts. Although the large 33.7 degree<br />
bevels can be used, the smaller 45 degree bevels are preferred due to structural considerations.<br />
2. Multiple Barrel <strong>Design</strong>s. When designing side-or slope-tapered inlets for box culverts with<br />
double barrels, the required face width derived from the design procedures is the total clear<br />
width <strong>of</strong> the face. The thickness <strong>of</strong> the center wall must be added to this clear width to obtain the<br />
total face width. No design procedures are available for tapered inlets on box culverts with<br />
more than two barrels.<br />
94
3. Example Problems<br />
a. Example Problem #1 (SI Units). The 50-year flood at the design site has a peak flow <strong>of</strong><br />
11.327 m 3 /s. The ELhd <strong>of</strong> 59.436 m is selected so that overtopping <strong>of</strong> the road-way will not occur<br />
for the design discharge.<br />
Given:<br />
Elevation <strong>of</strong> Outlet Invert: 52.578 m<br />
Elevation <strong>of</strong> Shoulder: 59.741 m<br />
Stream Bed Slope: 5 percent<br />
Approximate Culvert Length: 91.440 m<br />
The Tailwater Variation is as Follows:<br />
Flow (m 3 /s) T.W. (m)<br />
8.495<br />
11.327<br />
14.159<br />
1.341<br />
1.494<br />
1.615<br />
Requirements: <strong>Design</strong> the smallest possible barrel to pass the peak flow rate without exceeding<br />
the ELhd. The culvert will be located in a rural area with a low risk <strong>of</strong> damage. Underground<br />
utilities limit the available FALL to 0.762 m below the standard stream bed elevation at the inlet.<br />
Use a reinforced concrete box culvert with n = 0.012.<br />
Note: Charts 10A, 14A, 15A, 57A, 58A, and 59A are used in this solution.<br />
95
Conclusions:<br />
Use a slope-tapered inlet with a vertical face since it is the smallest inlet in this case. Note that<br />
since the Fall is less than D/2, a slope-tapered inlet with a mitered face cannot be used at this<br />
site.<br />
Dimensions:<br />
B = 1.524 m D = 1.524 m<br />
Bf = 2.44 m<br />
TAPER = 4.32:1<br />
Sf = IV:2H<br />
L1 = 1.98 m<br />
L2 = 1.22 m<br />
L3 = 0.76 m<br />
Entrance: 26-degree to 90-degree wingwalls with no bevels.<br />
100
. Example Problem #1 (English Units). The 50-year flood at the design site has a peak flow <strong>of</strong><br />
400 ft 3 /s. The ELhd <strong>of</strong> 195 ft is selected so that overtopping <strong>of</strong> the road-way will not occur for the<br />
design discharge.<br />
Given:<br />
Elevation <strong>of</strong> Outlet Invert: 172.5 ft<br />
Elevation <strong>of</strong> Shoulder: 196 ft<br />
Stream Bed Slope: 5 percent<br />
Approximate Culvert Length: 300 ft<br />
The Tailwater Variation is as Follows:<br />
Flow (ft 3 /s) T.W. (ft)<br />
300<br />
400<br />
500<br />
4.4<br />
4.9<br />
5.3<br />
Requirements: <strong>Design</strong> the smallest possible barrel to pass the peak flow rate without exceeding<br />
the ELhd. The culvert will be located in a rural area with a low risk <strong>of</strong> damage. Underground<br />
utilities limit the available FALL to 2.5 ft. below the standard streambed elevation at the inlet.<br />
Use a reinforced concrete box culvert with n=0.012.<br />
Note: Charts 14B, 15B, 57B, 58B, and 59B are used in this solution.<br />
101
102
103
104
105
Conclusions:<br />
Use a slope-tapered inlet with a vertical face since it is the smallest inlet in this case. Note that<br />
since the Fall is less than D/2, a slope-tapered inlet with a mitered face cannot be used at this<br />
site.<br />
Dimensions:<br />
B = 5 ft D = 5 ft<br />
Bf = 8 ft<br />
TAPER = 4.33:1<br />
Sf = IV:2H<br />
L1 = 6.5 ft<br />
L2 = 4.0 ft<br />
L3 = 2.5 ft<br />
Entrance: 26-degree to 90-degree wingwalls with no bevels.<br />
106
c. Example Problem #2 (SI Units). From example problem no. 4, Chapter III, an existing 2134<br />
mm by 2134 mm concrete box culvert was originally designed for a 50-year flood <strong>of</strong> 16.990 m 3 /s<br />
and an ELhd <strong>of</strong> 34.747 m. Upstream development has increased the 50-year run<strong>of</strong>f to 28.317<br />
m 3 /s.<br />
Given:<br />
Inlet Invert Elevation: 30.480 m<br />
Existing Entrance Condition: Square edge<br />
Barrel Slope (S): 5 percent<br />
Roadway Centerline Elevation: 35.204 m<br />
Culvert Length: 60.960 m<br />
Flow, m 3 /sec T.W. (m)<br />
22.654<br />
28.317<br />
33.980<br />
1.16<br />
1.25<br />
1.37<br />
Requirements: In order to save the existing culvert barrel, design a new side-tapered inlet that<br />
will pass the new 50-year run<strong>of</strong>f <strong>of</strong> 28.317 m 3 /s at the original ELhd <strong>of</strong> 34.747 m. The sidetapered<br />
inlet will be constructed upstream <strong>of</strong> the existing barrel. Prepare outlet control, throat<br />
control, and face control performance for the new inlet.<br />
Note: Charts 14A, 15A, 57A, and 58A, are used in this solution.<br />
107
108
Conclusions:<br />
A side-tapered inlet added to the existing barrel will pass the increased 50-year run<strong>of</strong>f at the<br />
ELhd <strong>of</strong> 34.75 m.<br />
Dimensions<br />
B = 2134 mm D = 2134 mm<br />
Bf =3.66 m TAPER = 4:1<br />
L1 = 3.06 m<br />
Face section has 90-degree wingwalls and square edges.<br />
109
d. Example Problem #2 (English Units). From example problem no. 4, Chapter III, an existing 7<br />
ft by 7 ft concrete box culvert was originally designed for a 50-year flood <strong>of</strong> 600 ft³/s and an ELhd<br />
<strong>of</strong> 114 ft. Upstream development has increased the 50-year run<strong>of</strong>f to 1,000 ft³/s.<br />
Given:<br />
Inlet Invert Elevation: 100 ft<br />
Existing Entrance Condition: Square edge<br />
Barrel Slope (S): 5 percent<br />
Roadway Centerline Elevation: 115.5 ft<br />
Culvert Length: 200 ft<br />
Flow, ft 3 /s T.W. (ft)<br />
800<br />
1,000<br />
1,200<br />
3.8<br />
4.1<br />
4.5<br />
Requirements: In order to save the existing culvert barrel, design a new side-tapered inlet that<br />
will pass the new 50-year run<strong>of</strong>f <strong>of</strong> 1,000 ft 3 /S at the original ELhd <strong>of</strong> 114.0 ft. The side-tapered<br />
inlet will be constructed upstream <strong>of</strong> the existing barrel. Prepare outlet control, throat control,<br />
and face control performance for the new inlet.<br />
Note: Charts 14B, 15B, 57B, and 58B, are used in this solution.<br />
110
111
Conclusions:<br />
A side-tapered inlet added to the existing barrel will pass the increased 50-year run<strong>of</strong>f at the<br />
ELhd <strong>of</strong> 114 ft.<br />
Dimensions:<br />
B = 7 ft D = 7ft<br />
Bf = 12 ft<br />
TAPER = 4:1<br />
L1 = 10 ft<br />
Face section has 90-degree wingwalls and square edges.<br />
112
G. Circular Pipe <strong>Culverts</strong><br />
1. <strong>Design</strong> Procedures. <strong>Design</strong> procedures and criteria are available for side-and slopetapered<br />
inlets for circular pipe culverts. The inlet designs are shown in Figure IV-12. For the<br />
side-tapered inlet, either prefabricated inlets with nonrectangular cross sections or cast-in-place<br />
rectangular inlets are used. The rectangular inlets are joined to the circular pipe using a square<br />
to circular throat transition section.<br />
Figure IV-12--Tapered Inlets for Pipe <strong>Culverts</strong><br />
For slope-tapered inlets, the rectangular designs (vertical or mitered face) are the only option for<br />
which design charts are available. The square to circular transition section is used to join the<br />
slope-tapered inlet to the circular pipe.<br />
a. Side-Tapered Inlets. The throat and face control design nomographs for side-tapered inlets<br />
on circular pipe culverts are in Appendix D. For throat control, there are two scales on the<br />
nomograph: one for smooth inlets and one for rough inlets. The difference in headwater<br />
requirement is due to the hydraulic resistance between the face and the throat <strong>of</strong> the inlet.<br />
The design nomograph for sizing the face <strong>of</strong> a side-tapered inlet with a nonrectangular face<br />
includes three scales. Each scale is for a different edge condition, including thin-edge<br />
projecting, square edge, and bevel edged. The face area is larger than the barrel area and may<br />
be any nonrectangular shape, including an oval, a circle, a circular segment, or a pipe-arch. To<br />
113
design a rectangular side-tapered inlet for a circular pipe culvert, use the design nomographs in<br />
Appendix D for rectangular side-tapered inlets. Additional head can be provided on the throat<br />
control section <strong>of</strong> a side-tapered inlet by constructing a depression upstream <strong>of</strong> the face section.<br />
The depression designs are the same as for box culverts.<br />
b. Slope-Tapered Inlets. Rectangular inlets are adapted to pipe culverts as shown in Figure IV-<br />
13. The slope-tapered inlet is connected to the pipe culvert by use <strong>of</strong> a square to circular<br />
transition. The design <strong>of</strong> the slope-tapered inlet is the same as for box culverts. There are two<br />
throat sections, one square and one circular, but the circular throat section will control the flow<br />
because the area is much smaller than the square throat section.<br />
Figure IV-13--Slope-Tapered Inlet, Circular Pipe Culvert<br />
2. Multiple Barrel <strong>Design</strong>s. Each barrel <strong>of</strong> the culvert must have an individual side-tapered<br />
inlet with a non-rectangular face design. For rectangular side-tapered inlets with a square to<br />
round transition, double barrel designs are the same as for box culverts. However, the center<br />
wall at the transition must be flared to provide adequate space between the pipes for proper<br />
backfill and compaction. The amount <strong>of</strong> flare required will depend on the size <strong>of</strong> the pipes and<br />
the construction techniques used. No more than two circular barrels may be feed from the throat<br />
section <strong>of</strong> a rectangular side-tapered inlet.<br />
114
Double barrel slope-tapered inlets may be designed in the same manner as for rectangular sidetapered<br />
designs. Again, no more than two barrels may be feed from a single inlet structure.<br />
3. Dimensional Limitations. In addition to the dimensional limitations given previously for all<br />
tapered inlets, the following criteria apply to the application <strong>of</strong> a rectangular side- and slopetapered<br />
inlets to circular pipe culverts.<br />
a. The transition from the square throat section to the circular throat section must be > D/2. If<br />
excessive lengths are used, the frictional loss within the transition section <strong>of</strong> the culvert must be<br />
considered in the design using Equation (12).<br />
b. The square throat dimension must equal the diameter <strong>of</strong> the circular pipe culvert.<br />
4. Example Problem<br />
a. Example Problem #3 (SI Units)<br />
Given:<br />
Q50 = 4.248 m³/s<br />
ELhd = 29.261 m<br />
Outlet Invert Elevation = 22.860 m<br />
Approximate Culvert Length = 106.680 m<br />
So = 0.05 m/m<br />
Shoulder Elevation = 31.090 m<br />
The downstream channel approximates a 1.524 m bottom width trapezoid with IV:2H side<br />
slopes. The Manning’s n = 0.03<br />
Requirements:<br />
<strong>Design</strong> a culvert for the above conditions. Use corrugated metal pipe with standard (68 mm x 13<br />
mm) corrugations. Investigate both a corrugated side-tapered inlet and a concrete slope-tapered<br />
inlet. Use normal depth in the natural channel as the tailwater depth.<br />
NOTE: Charts 4A, 6A, 55A, 56A, and 59A are used in this solution.<br />
115
116
117
Conclusions: the selection <strong>of</strong> a side-tapered or a slope-tapered inlet would be based on<br />
economics since either design will pass the required Q at the ELhd <strong>of</strong> 29.261 m.<br />
Dimensions:<br />
Corrugated metal side-tapered inlet: Smooth Slope-tapered inlet, vertical face<br />
D = 1200 mm Bf = 1830 mm D = 1200 mm Bf = 2440 mm<br />
Taper = 4:1 L1 = 1.26 m Taper = 4:1 Sf = 1V:2H<br />
Face Edge Configuration: Beveled Edges L1 = 2.48 m L2 = 1.74 m L3 = 0.74 m<br />
Min W = 3.10 m Face Edge<br />
Configuration: 45 to 90 degree wingwalls<br />
with bevels on top and sides.<br />
118
. Example Problem #3 (English Units)<br />
Given:<br />
Q50 = 150 ft³/s<br />
ELhd = 96 ft<br />
Outlet Invert Elevation = 75 ft<br />
Approximate Culvert Length = 350 ft<br />
So = 0.05 ft/ft<br />
Shoulder Elevation = 102 ft<br />
The downstream channel approximates a 5-ft bottom width trapezoid with 2H:1V side slopes.<br />
The Manning’s n = 0.03<br />
Requirements:<br />
<strong>Design</strong> a culvert for the above conditions. Use corrugated metal pipe with standard (2-2/3 by 1/2<br />
in) corrugations. Investigate both a corrugated side-tapered inlet and a concrete slope-tapered<br />
inlet. Use normal depth in the natural channel as the tailwater depth.<br />
NOTE: Charts 4B, 6B, 55B, 56B, and 59B are used in this solution.<br />
119
120
121
Conclusions: The selection <strong>of</strong> a side-tapered or a slope-tapered inlet would be based on<br />
economics since either design will pass the required Q at the ELhd <strong>of</strong> 96 ft.<br />
Dimensions:<br />
Corrugated metal side-tapered inlet: Smooth slope-tapered inlet, vertical face:<br />
D = 48 in D = 48 in<br />
Bf = 6 f t Bf = 6 ft<br />
TAPER = 4:1 Sf = IV:2H<br />
L1 = 4 ft L1 = 8 ft L2 = 5.6 ft L3 = 2.4 ft<br />
Face Edge Configuration: Beveled edges Face Edge Configuration: 45-degree<br />
Min W = 10 ft 90-degree wingwalls with bevels on the<br />
top and sides<br />
122
A. The Routing Concept<br />
V. STORAGE ROUTING<br />
Storage routing is the calculation <strong>of</strong> the change in shape <strong>of</strong> a flood wave over time. A<br />
pronounced shape change occurs in a flood wave when a significant storage volume such as a<br />
pond or a reservoir is encountered. The storage concept can be visualized by means <strong>of</strong> a<br />
hypothetical situation (27). In this situation, a spigot discharges water into an empty barrel<br />
which has an orifice (hole) at the bottom (Figure V-1). A plot <strong>of</strong> the inflow and the outflow<br />
reveals some important characteristics <strong>of</strong> the storage routing process.<br />
Figure V-1--Hole in the barrel analogy<br />
Figure V-2--Inflow and outflow<br />
hydrographs<br />
The spigot is turned on at t=0 and discharges a<br />
constant flow rate, Qi, until t=ti, at which time<br />
the spigot is turned <strong>of</strong>f. The flow rate entering<br />
the barrel exceeds the discharge capacity <strong>of</strong><br />
the hole. This results in the storage <strong>of</strong> water in<br />
the barrel. As the depth increases, the<br />
discharge <strong>of</strong> water through the hole increases<br />
due to the rising head on the hole. The<br />
maximum outflow is reached at a time when the<br />
depth is at a maximum. This peak outflow<br />
occurs when the spigot is turned <strong>of</strong>f since there<br />
is no additional inflow after that time. Figure V-2<br />
is a schematic representation <strong>of</strong> the inflow and<br />
outflow hydrographs.<br />
Additional information about the storage routing<br />
concept may be obtained by examining Figure<br />
V-2 more closely. An area on a graph <strong>of</strong><br />
discharge versus time represents a volume;<br />
that is, a discharge increment multiplied by a<br />
time increment. The area under the inflow<br />
hydrograph depicts the volume <strong>of</strong> water<br />
entering the barrel. The area under the outflow<br />
hydrograph depicts the volume <strong>of</strong> water leaving<br />
the barrel. The area between the two curves is<br />
the volume stored in the barrel. This volume<br />
(area) reaches a maximum when the spigot is<br />
closed. From that point on, the area under the<br />
outflow hydrograph represents the discharge <strong>of</strong><br />
the volume stored in the barrel. This equals the<br />
maximum storage area previously defined. The<br />
total area under the inflow and outflow curves<br />
should be equal since the volume <strong>of</strong> water<br />
entering and the volume <strong>of</strong> water leaving the<br />
barrel are the same.<br />
123
B. Methodology<br />
The mathematical solution <strong>of</strong> the preceding situation is referred to as a storage routing problem.<br />
Conservation <strong>of</strong> mass, as defined in the Continuity Equation, is essential in formulating the<br />
solution. Simply stated, the rate <strong>of</strong> change in storage is equal to the inflow minus the outflow.<br />
In differential form, the equation may be expressed as follows:<br />
ds / dt = I − O<br />
(13)<br />
ds/dt is the rate <strong>of</strong> change <strong>of</strong> storage<br />
I is the rate <strong>of</strong> inflow<br />
O is the rate <strong>of</strong> outflow<br />
An acceptable solution may be formulated using discrete time steps (∆t). Equation (13) may be<br />
restated in this manner:<br />
( ∆s / ∆t) i j = I - O (14)<br />
I and O equal the average rates <strong>of</strong> inflow and outflow for the time step ∆t from time i to time j.<br />
By assuming linearity <strong>of</strong> flow across a small time increment, the change <strong>of</strong> storage is expressed<br />
as:<br />
⎡⎛<br />
Ii + Ij<br />
⎞ ⎛ Oi<br />
+ O j ⎞⎤<br />
⎢⎜<br />
⎟ ⎜ ⎟<br />
⎜<br />
⎥ ∆t<br />
= ∆s<br />
⎢⎣<br />
2 ⎟<br />
−<br />
⎜ 2 ⎟<br />
⎝ ⎠ ⎝ ⎠⎥⎦<br />
"I" and "j" represent the time at the beginning and end <strong>of</strong> the time increment ∆t.<br />
Figure V-3 depicts an increment <strong>of</strong> storage across a typical time increment. Note: the smaller<br />
the time increment, the better the assumption <strong>of</strong> linearity <strong>of</strong> flows across the time increment.<br />
There are two unknowns represented in Equation (15); therefore, the equation cannot be solved<br />
directly. The two unknowns are the increment <strong>of</strong> storage, ∆s, and the outflow at the end <strong>of</strong> the<br />
time increment, Oj. Given a design inflow hydrograph, the known values include each inflow<br />
value, the time step which is selected, and the outflow at the beginning <strong>of</strong> the time step solved<br />
for during the previous time step. Equation (15) can be rewritten as:<br />
I + I + ( 2s<br />
/ ∆t<br />
− O)<br />
= ( 2s<br />
/ ∆t<br />
+ O)<br />
(16)<br />
i<br />
j<br />
i<br />
j<br />
where the two unknowns are grouped together on the right side <strong>of</strong> the equality. Because an<br />
equation cannot be solved with two unknowns, it is desirable to devise another equation with the<br />
same two unknowns. In this case, a relationship between storage and outflow is required.<br />
Since both storage and outflow can be related to water surface elevation, they can be related to<br />
one another. This second relationship provides a means for solving the routing equation. The<br />
method <strong>of</strong> solution is referred to as the storage indication working curve method. An example<br />
problem utilizing the method is presented later in this chapter.<br />
124<br />
(15)
C. Application to Culvert <strong>Design</strong><br />
Figure V-3--Graphical Representation <strong>of</strong> a Routing Step<br />
A significant storage capacity behind a highway embankment attenuates a flood hydrograph.<br />
Because <strong>of</strong> the reduction <strong>of</strong> the peak discharge associated with this attenuation, the required<br />
capacity <strong>of</strong> the culvert, and its size, may be reduced considerably. The reduced size may well<br />
justify some increase in the hydrologic design effort.<br />
1. Data Requirements. All reservoir routing procedures require three basic data inputs: an<br />
inflow hydrograph, an elevation versus storage relationship, and an elevation versus discharge<br />
relationship. A complete inflow hydrograph, not just the peak discharge, must be generated.<br />
Elevation, <strong>of</strong>ten denoted as stage, is the parameter which relates storage to discharge providing<br />
the key to the storage routing solution.<br />
Elevation versus storage data can be obtained from a topographic map <strong>of</strong> the culvert site. The<br />
area enveloped by each contour line is planimetered and recorded. The average area between<br />
each set <strong>of</strong> contour lines is obtained and multiplied by the contour interval to find the<br />
incremental volume. These incremental volumes are added together to find the accumulated<br />
volume at each elevation. These data can then be plotted, as shown in Figure V-4.<br />
125
Elevation versus discharge data can be<br />
computed from culvert data and the roadway<br />
geometry. Discharge values for the selected<br />
culvert and overtopping flows are tabulated<br />
with reference to elevation. The combined<br />
discharge is utilized in the formulation <strong>of</strong> a<br />
performance curve as depicted in Figure V-5.<br />
2. Initial Culvert Sizing. Despite the<br />
consideration <strong>of</strong> storage routing, the selection<br />
<strong>of</strong> an appropriate culvert size for a given set <strong>of</strong><br />
hydrologic and site conditions is the design<br />
objective. However, in order to perform the<br />
storage routing calculations, a culvert must<br />
first be selected. Storage routing calculations<br />
will then be required to verify the selected size.<br />
It is desirable to make a good first estimate <strong>of</strong><br />
culvert size to minimize the number <strong>of</strong> routing<br />
calculations performed.<br />
The selection <strong>of</strong> a tentative culvert size<br />
requires an estimate <strong>of</strong> peak flow reduction<br />
based on upstream storage capacity. A<br />
triangular inflow hydrograph may be<br />
formulated based on studies <strong>of</strong> run<strong>of</strong>f<br />
hydrographs by the SCS. (12) The formulation<br />
<strong>of</strong> the inflow hydrograph requires an estimate<br />
<strong>of</strong> peak inflow rate (Qp) and the time-to-peak<br />
parameter (tp). These data items are<br />
established using appropriate hydrologic<br />
techniques. Next, the available storage below<br />
the established design headwater elevation<br />
must be estimated based on relief upstream <strong>of</strong><br />
the culvert location. From the routing concept,<br />
a relationship exists between peak inflow,<br />
storage (S), and peak outflow (Qr) or the<br />
reduced peak. Figure V-6 graphically displays<br />
this relationship, assuming a triangular outflow<br />
hydrograph.<br />
126<br />
Figure V-4--Elevation versus<br />
storage curve<br />
Figure V-5--Performance curve<br />
The storage volume is represented by the area between the inflow and outflow hydrographs in<br />
Figure V-6. This area is determined by taking the difference in areas between two triangles with<br />
a common base (28). The resulting expression can be written:<br />
s p p<br />
p r<br />
= 1/<br />
2 ( 2.<br />
67 t Q ) − 1/<br />
2(<br />
2.<br />
67 t Q )<br />
(17)
Figure V-6--Peak Flow Reduction Based on Available Storage<br />
Rearranging and simplifying the equation provides a quick, direct solution for the reduced<br />
outflow based on the storage available.<br />
s<br />
Qr = Qp<br />
−<br />
(18)<br />
1.<br />
33 t<br />
p<br />
By expressing the volumes in cubic meters (cubic feet), the time-to-peak in minutes and the<br />
inflow peak in cubic meters per second (cubic feet per second); the reduced outflow in cubic<br />
meters per second (cubic feet per second) can be expressed as:<br />
s<br />
Qr = Qp<br />
−<br />
(19)<br />
80 t<br />
p<br />
A culvert, or culverts, may now be selected based on passing this reduced discharge at the<br />
design headwater elevation. At least two alternative culvert selections should be chosen, one<br />
larger and one smaller than the required capacity. A full routing calculation is necessary to<br />
verify the performance <strong>of</strong> the selected culvert.<br />
D. Storage Indication Method<br />
The storage indication routing method is outlined in the following steps. The Storage Routing<br />
Form shown in Figure V-7 is designed to facilitate the routing process. Space is provided to<br />
calculate the appropriate peak flow reduction due to routing and to document the method used<br />
to generate the inflow hydrograph. Tables are provided for the elevation-discharge relationship,<br />
the elevation-storage relationship, the storage-outflow relationship, and the storage-indication<br />
routing calculations. A reproducible copy <strong>of</strong> the Storage Routing Form is provided in Appendix<br />
D.<br />
127
Figure V-7--Storage Routing Form<br />
1. Generate an inflow hydrograph by an appropriate hydrologic procedure. See Chapter II,<br />
Section A, and HEC No. 19 (11) or Chapter 6 <strong>of</strong> HDS No. 2 (77).<br />
2. Select a time interval for routing (∆t). Remember that linearity over the time interval is<br />
assumed. Generally, a routing interval <strong>of</strong> one-tenth the time-to-peak is adequate.<br />
3. Determine the elevation-discharge and elevation-storage relationships for the site and outlet<br />
device(s) selected.<br />
4. For convenience in solving the routing equation, tabulate the storage-outflow relationship.<br />
5. Plot the (2s/∆t + O) versus (O) relationship from step 4.<br />
6. Using Equation (16):<br />
128
I + I + ( 2s<br />
/ ∆t<br />
− O)<br />
= ( 2s<br />
/ ∆t<br />
+ O)<br />
(16)<br />
i<br />
j<br />
i<br />
j<br />
perform the routing. A tabular format may prove convenient in performing the storage routing<br />
calculations. Such a format is provided on the Storage Routing Form.<br />
The storage-indication routing table is completed in the following manner:<br />
a. Tabulate the incremental time (col. 1) and inflow (col. 2) values from the inflow hydrograph<br />
utilizing the time step (∆t).<br />
b. Establish the initial row <strong>of</strong> values in the routing table.<br />
1. Assume an initial value for outflow (Oi) (col. 5) equal to the inflow (col. 2) to initiate the<br />
routing procedure.<br />
2. From the curve <strong>of</strong> (2s/∆t + O) plotted against outflow (O), determine the value <strong>of</strong> (2s/∆t - O)i<br />
and place it in col. 4.<br />
3. Calculate (2s/∆t - O)i as follows:<br />
( i<br />
i<br />
i<br />
2s<br />
/ ∆ t − O)<br />
= ( 2s<br />
/ ∆t<br />
+ O)<br />
− 2(<br />
O )<br />
(20)<br />
Place the result in col. 3. The initial row <strong>of</strong> values is now complete.<br />
c. From Equation (16), determine the value <strong>of</strong> (2s/∆t - O)j<br />
( 2s<br />
/ ∆ t + O)<br />
= I + I + ( 2s<br />
/ ∆t<br />
−<br />
j<br />
i<br />
j<br />
O)<br />
d. From the curve <strong>of</strong> (2s/∆t + O) plotted against outflow (O), determine the value <strong>of</strong> Oj using the<br />
value <strong>of</strong> (2s/∆t - O)j just calculated. Place the result in col. 5.<br />
e. Calculate the next value <strong>of</strong> (2s/∆t - O) from Equation (20) and continue the procedure. It<br />
may only be necessary to continue routing until the peak outflow and its associated headwater<br />
have been obtained.<br />
The following problem contains numeric examples <strong>of</strong> the operations outlined above.<br />
E. Example Problem<br />
i<br />
A primary road is being built which will cross a stream with an upstream drainage area <strong>of</strong><br />
101.175 ha (250 acres). <strong>Design</strong> a culvert which will pass the 25-year flood event without<br />
overtopping the road. The low point <strong>of</strong> the roadway is at 270.358 m (887 ft). The desirable<br />
freeboard is 0.3 m (1 ft). The streambed at the inlet is at elevation 267.614 m (878 ft).<br />
Maintain at least 1.219 m (4 ft) <strong>of</strong> cover over the culvert barrel. The natural channel is steep (5<br />
percent slope) and may be approximated as a trapezoidal channel with 1 vertical to 2 horizontal<br />
side slopes. The Manning’s n value is estimated to be 0.03. Upstream storage at the design<br />
headwater elevation <strong>of</strong> 269.748 m (885 ft) is 7,400 m 3 (6 acre-feet or 261,360 ft³). Use no FALL<br />
at the culvert inlet.<br />
129
SI Units Calculations<br />
By calculation, the design headwater depth, HWd, equals 269.748 - 267.614 = 2.134. The outlet<br />
invert elevation is:<br />
ELo = ELi - LSo<br />
= 267.614 - (60.960) (0.05) = 264.566 m<br />
1. Perform Hydrologic Calculations.<br />
Figure V-8--Inflow Hydrograph, Example Problem<br />
The SCS Tabular Method was used to generate the inflow hydrograph depicted in Figure V-8.<br />
The results are shown in tabular form in Table 5. The unrouted peak flow (Qp) is 6.230 m³/s.<br />
The time to peak is 75 minutes.<br />
For the routing interval, use tp/10.<br />
∆t = tp/10 = 75/10 = 7.5 minutes.<br />
2. Check Approximate Routing effects.<br />
The storage behind the highway embankment will reduce the flood peak. Calculate the routed<br />
peak flow using the approximate method. (See item 2 on the example Flood Routing Form,<br />
Figure V-9). The peak flow <strong>of</strong> 6.230 is reduced to 4.24 m³/s.<br />
130
Table 5--Inflow Hydrograph, Example Problem (from SCS Tabular Method) (SI Units).<br />
0<br />
-----<br />
0.255<br />
45<br />
------<br />
1.133<br />
90<br />
------<br />
5.692<br />
135<br />
--------<br />
1.982<br />
7.5<br />
-------<br />
0.283<br />
52.5<br />
----------<br />
2.265<br />
97.5<br />
----------<br />
4.814<br />
142.5<br />
----------<br />
1.699<br />
3. Select Trial Culvert Size.<br />
15<br />
--------<br />
0.311<br />
60<br />
-----<br />
3.851<br />
105<br />
-------<br />
3.964<br />
150<br />
-------<br />
1.501<br />
Time (minutes)<br />
----------------<br />
Flow (m 3 /s)<br />
131<br />
22.5<br />
----------<br />
0.368<br />
67.5<br />
----------<br />
5.380<br />
112.5<br />
----------<br />
3.398<br />
157.5<br />
----------<br />
1.331<br />
30<br />
------<br />
0.481<br />
75<br />
--------<br />
6.230<br />
120<br />
------<br />
2.775<br />
165<br />
-------<br />
1.161<br />
37.5<br />
--------<br />
0.793<br />
82.5<br />
----------<br />
6.230<br />
127.5<br />
----------<br />
2.322<br />
172.5<br />
----------<br />
1.048<br />
Enter the known information on the Culvert <strong>Design</strong> Form. For tailwater, use normal depth in the<br />
downstream channel, from HDS No. 3. (Refer to Figure V-10, Culvert <strong>Design</strong> Form for example<br />
problem.)<br />
Three 900 mm CMP's are required to convey 6.230 m³/s. Two 1050 mm CMP's will convey the<br />
routed peak flow. Two 900 mm CMP's might also work. Try two 900 mm CMP's and increase<br />
to the larger barrel size if the routing calculations dictate.<br />
Develop a performance curve for the two 900 mm CMP's (Figure V-11 and Figure V-12) and<br />
enter the data on the Flood Routing Form, item 3 (Figure V-9).<br />
4. Develop Elevation-Storage Relationship for Upstream Ponding.<br />
The relief upstream <strong>of</strong> the culvert location is depicted in Figure V-13. Planimetric<br />
determinations taken from the map are used to determine the elevation-storage relationship.<br />
Enter the results in item 4 <strong>of</strong> Figure V-9.<br />
5. Calculate the Storage-Outflow Relationship.<br />
Using the elevation-discharge and elevation-storage relationships developed previously, use<br />
Table 5 on Figure V-9 to calculate the storage-outflow relationship. The resultant curve is<br />
shown in Figure V-14.<br />
6. Perform the Storage Routing Procedure.<br />
Perform the Figure V-9, perform the storage indication routing as shown. Directional arrows are<br />
added in the example to indicate the calculation procedure.
Figure V-9--Storage Routing Form - Example Problem<br />
132
Figure V-10—Culvert <strong>Design</strong> Form for Example Problem<br />
Figure V-11--Performance Curve Calculations, 2-900 mm CMP Barrels<br />
133
Figure V-12--Performance Curves, Example Problem, 2-36 in CMP Barrels<br />
Figure V-13--Topographic map <strong>of</strong> site<br />
134
Figure V-14--Storage vs. Outflow Relationship<br />
7. Conclusions. Two 900 mm corrugated metal pipes with square edges in a headwall are<br />
adequate to satisfy the design conditions. <strong>On</strong>e 900 mm CMP was eliminated due to the routing<br />
procedure. The maximum outflow during the design flood is 4.24 m³/s. This creates a<br />
headwater elevation <strong>of</strong> 269.52 m according to the stage versus discharge data. Figure V-15 is<br />
a line drawing <strong>of</strong> the final culvert design.<br />
Figure V-15--Selected Culvert <strong>Design</strong><br />
135
English Units Calculations<br />
By calculation, the design headwater depth, HWd, equals 885 - 878 = 7 ft. The outlet invert<br />
elevation is:<br />
ELo = ELi - LSo<br />
= 878 - (200)(.05) = 868 ft<br />
Figure V-16--Inflow Hydrograph, Example Problem (English)<br />
1. Perform Hydrologic Calculations.<br />
The SCS Tabular Method was used to generate the inflow hydrograph depicted in Figure V-16.<br />
The results are shown in tabular form in Table 5 (English). The unrouted peak flow (Qp) is 220<br />
ft³/s. The time to peak is 75 minutes.<br />
For the routing interval, use tp/10.<br />
∆t = tp/10 = 75/10 = 7.5 minutes.<br />
2. Check Approximate Routing effects.<br />
The storage behind the highway embankment will reduce the flood peak. Calculate the routed<br />
peak flow using the approximate method. (See item 2 on the example Flood Routing Form,<br />
Figure V-17). The peak flow <strong>of</strong> 220 ft³/s is reduced to 176 ft³/s.<br />
136
Table 5 --Inflow Hydrograph, Example Problem (from SCS Tabular Method) (English)<br />
0<br />
-----<br />
9<br />
0.75<br />
------<br />
40<br />
1.5<br />
------<br />
201<br />
2.25<br />
--------<br />
70<br />
0.125<br />
-------<br />
10<br />
0.875<br />
----------<br />
80<br />
1.625<br />
----------<br />
170<br />
2.375<br />
----------<br />
60<br />
3. Select Trial Culvert Size.<br />
0.25<br />
--------<br />
11<br />
1.0<br />
-----<br />
136<br />
1.75<br />
-------<br />
140<br />
2.5<br />
-------<br />
53<br />
Time (hours)<br />
----------------<br />
Flow (ft 3 /s)<br />
0.375<br />
----------<br />
137<br />
13<br />
1.125<br />
----------<br />
190<br />
1.875<br />
----------<br />
120<br />
2.625<br />
----------<br />
47<br />
0.5<br />
------<br />
17<br />
1.25<br />
--------<br />
220<br />
2.0<br />
------<br />
98<br />
2.75<br />
-------<br />
41<br />
0.625<br />
--------<br />
28<br />
1.375<br />
----------<br />
220<br />
2.125<br />
----------<br />
82<br />
2.875<br />
----------<br />
37<br />
Enter the known information on the Culvert <strong>Design</strong> Form. For tailwater, use normal depth in the<br />
downstream channel, from HDS No. 3. (Refer to Figure V-18, Culvert <strong>Design</strong> Form<br />
for example problem.)<br />
Three 36-inch CMP's are required to convey 220 ft³/s. Two 42-inch CMP's will convey the<br />
routed peak flow. Two 36-inch CMP's might also work. Try two 36-inch CMP's and increase to<br />
the larger barrel size if the routing calculations dictate.<br />
Develop a performance curve for the two 36-inch CMP's (Figure V-19 and Figure V-20) and<br />
enter the data on the Flood Routing Form, item 3 (Figure V-17).<br />
4. Develop Elevation-Storage Relationship for Upstream Ponding.<br />
The relief upstream <strong>of</strong> the culvert location is depicted in Figure V-21. Planimetric<br />
determinations taken from the map are used to determine the elevation-storage relationship.<br />
Enter the results in item 4 <strong>of</strong> Figure V-17.<br />
5. Calculate the Storage-Outflow Relationship.<br />
Using the elevation-discharge and elevation-storage relationships developed previously, use<br />
Table 5 on Figure V-17 to calculate the storage-outflow relationship. The resultant curve is<br />
shown in Figure V-22.<br />
6. Perform the Storage Routing Procedure.<br />
Perform the Figure V-17, perform the storage indication routing as shown. Directional arrows<br />
are added in the example to indicate the calculation procedure.
Figure V-17--Storage Routing Form - Example Problem (English)<br />
138
Figure V-18--Culvert <strong>Design</strong> Form for Example Problem (English)<br />
Figure V-19--Performance Curve Calculations, 2-36 in CMP Barrels (English)<br />
139
Figure V-20--Performance Curves, Example Problem, 2-36 in CMP Barrels<br />
Figure V-21--Topographic Map <strong>of</strong> Site (English)<br />
140
Figure V-22--Storage vs. Outflow Relationship (English)<br />
7. Conclusions. Two 36-inch corrugated metal pipes with square edges in a headwall are<br />
adequate to satisfy the design conditions. <strong>On</strong>e 36-inch CMP was eliminated due to the routing<br />
procedure. The maximum outflow during the design flood is 150 ft³/s. This creates a headwater<br />
elevation <strong>of</strong> 884.8 ft according to the stage versus discharge data. Figure V-23 is a line drawing<br />
<strong>of</strong> the final culvert design.<br />
Figure V-23--Selected Culvert <strong>Design</strong> (English)<br />
141
(Page intentionally blank)<br />
142
A. Introduction<br />
VI. SPECIAL CONSIDERATIONS<br />
Culvert design may at times encompass almost every consideration and situation related to<br />
hydrologic analysis and hydraulic engineering. While these special conditions may only occur in<br />
a small percentage <strong>of</strong> culvert designs, or may be specifically related to culvert design in a<br />
particular geographic region, they are important and can have a major bearing on the design<br />
process. Special situations include the use <strong>of</strong> culverts for special applications such as flow<br />
measurement and control, erosion and debris control, site related modifications, and culvert<br />
durability in erosive or corrosive environments. In addition, the hydraulic designer will <strong>of</strong>ten<br />
need to consider economic, safety, and structural aspects <strong>of</strong> the culvert during the design<br />
process. The designer should also be aware <strong>of</strong> the existence <strong>of</strong> various calculator and<br />
computer programs which can serve as valuable design tools.<br />
The above special considerations and others are discussed in this final chapter. Due to the<br />
extensive range <strong>of</strong> topics covered, numerous references are cited to which the culvert designer<br />
may refer for further information. This chapter furnishes design guidelines and<br />
recommendations in an abbreviated fashion. It is the designer's responsibility to decide when<br />
further study <strong>of</strong> the specific design situation is necessary.<br />
B. Special Applications<br />
<strong>Culverts</strong> are occasionally designed to fulfill special functions in addition to their primary function<br />
as drainage structures. For example, culverts are used as flow control and measurement<br />
devices, and can be as effective as weirs and flumes. <strong>Culverts</strong> can be designed to operate<br />
under low heads and minimize energy losses as in roadway crossings for irrigation canals.<br />
Often, culverts must be modified in order to fulfill a secondary function. Such is the case with<br />
culverts containing bends in plan or pr<strong>of</strong>ile, culverts containing junctions within their barrels,<br />
certain culverts operating as siphons, and culverts designed to facilitate fish passage. These<br />
special applications are briefly discussed and design guidelines are presented in the following<br />
sections.<br />
Figure VI-1--Stormwater Management Pond with Culvert<br />
as Outflow Control Device<br />
143
1. Flow Control and Measurement. Flow control structures are used to measure and control<br />
the rate <strong>of</strong> discharge in open channels. <strong>Culverts</strong> are <strong>of</strong>ten used as flow control structures due to<br />
the in-depth understanding <strong>of</strong> culvert hydraulics, reliable and accessible design techniques, and<br />
the availability <strong>of</strong> economical construction materials and methods. Discharge measurement and<br />
control are required in irrigation canals, stormwater management ponds, and cooling water<br />
channels for power plants, among others (Figure VI-1). In all three applications, a culvert could<br />
be used to control water flow rates or flow distribution. The flow rates through the culvert are<br />
easily calculated based on the geometry <strong>of</strong> the structure and coordinated records <strong>of</strong> headwater<br />
and tailwater elevations. The routing procedures <strong>of</strong> Chapter V must be applied to determine the<br />
corresponding inflow into the storage pond upstream <strong>of</strong> the culvert.<br />
<strong>Culverts</strong> located on small watersheds can be utilized as flow measurement structures to provide<br />
streamflow records. Shortly after a flood event, high water marks upstream and downstream <strong>of</strong><br />
a culvert installation can be measured and documented. Temporary staff gages placed at the<br />
site would simplify these efforts. The peak discharge at the culvert site can then be<br />
determined. These data help to improve run<strong>of</strong>f calculation methods and aid in verifying<br />
computer models. If discharges for the entire flood event are required, a recording stage gage<br />
is required. Harris details techniques and procedures for obtaining peak run<strong>of</strong>fs using culverts<br />
as flow measurement structures (29).<br />
2. Low Head Installations. Low head installations are culverts which convey water under a<br />
roadway with a minimum headwater buildup and energy loss. These installations are typically<br />
found in irrigation systems where the discharge is usually steady, and the available channel<br />
freeboard and slope are small. Often the installations flow partly full over the length <strong>of</strong> the<br />
culvert. Energy losses must be minimized to transport the water efficiently. The hydraulic<br />
solution imposing the least energy loss would be to bridge the conveyance channel. However,<br />
economic considerations may require the use <strong>of</strong> a low head culvert installation.<br />
Reduction <strong>of</strong> energy loss and headwater at a culvert installation requires an understanding <strong>of</strong><br />
the background and theory utilized in the culvert design procedures discussed in Chapter III.<br />
The minimal headwater rise, small barrel slope, and high tailwaters associated with these<br />
installations usually result in outlet control. Therefore, minimizing entrance, exit, and friction<br />
losses will reduce the required headwater (Equation (7)). Alignment <strong>of</strong> the culvert barrel with the<br />
upstream channel helps to minimize entrance loss and takes advantage <strong>of</strong> the approach<br />
velocity head. Inlet improvements, such as beveled edges, will further reduce entrance loss.<br />
However, the hydraulic effects <strong>of</strong> further entrance improvements, such as side- and slopetapered<br />
inlets are small in outlet control. Thus, the use <strong>of</strong> these inlets is usually not justified in<br />
low head installations. The exit loss can be reduced by smoothly transitioning the flow back into<br />
the downstream channel to take advantage <strong>of</strong> the exit velocity. Friction loss is reduced by the<br />
utilization <strong>of</strong> a smooth culvert barrel.<br />
In analyzing low head installations flowing partly full in outlet control, backwater calculations<br />
may be necessary. Beginning at the downstream water surface (tailwater), the hydraulic and<br />
energy grade lines are defined. Outlet losses are calculated using Equation (4c), considering<br />
the downstream velocity. Thus, the calculations proceed upstream through the barrel, until the<br />
upstream end <strong>of</strong> the culvert is reached. At that point, inlet losses are calculated using Equation<br />
(4a) with the appropriate inlet loss coefficient, ke. The inlet loss is added to the calculated<br />
energy grade line at the inlet to define the upstream energy grade line. Deducting the approach<br />
velocity head from the upstream energy grade line results in the upstream water surface<br />
elevation (hydraulic grade line).<br />
144
With minor modifications, the culvert design procedures <strong>of</strong> this publication are adequate for the<br />
design <strong>of</strong> low head installations. In the usual case <strong>of</strong> outlet control, the entrance, friction, and<br />
exit losses can be obtained from the outlet control nomographs in Appendix D. If the<br />
downstream velocity is significant compared with the barrel velocity, the losses should be<br />
calculated using Equations (4a), (4b), and (4c) instead <strong>of</strong> the outlet control nomograph. Use <strong>of</strong><br />
Equation (4c) will reduce the exit losses.<br />
Figure VI-2--Sag Culvert<br />
Figure VI-3--"Broken-Back" Culvert<br />
145
It is also advantageous to consider approach and downstream velocities in the design <strong>of</strong> low<br />
head installations. Equation (6) should be used instead <strong>of</strong> Equation (7) to calculate headwater<br />
depth (HWo) in outlet control. In inlet control, the approach velocity head should be considered<br />
to be a part <strong>of</strong> the available headwater when using the inlet control nomographs.<br />
Sag culverts, called "inverted siphons," are <strong>of</strong>ten used to convey irrigation waters under<br />
roadways (Figure VI-2). This type <strong>of</strong> culvert <strong>of</strong>fers the advantage <strong>of</strong> providing adequate vertical<br />
clearance for the pipe under the roadway pavement and subgrade. A possible disadvantage <strong>of</strong><br />
a sag culvert is clogging due to sediment. The design is not recommended for use on streams<br />
with high sediment loads. Sag culverts require the use <strong>of</strong> bends and inclusion <strong>of</strong> their related<br />
energy losses. Losses due to bends are covered in the next section.<br />
3. Bends. A straight culvert alignment is desirable to avoid clogging, increased construction<br />
costs, and reduced hydraulic efficiency. However, site conditions may dictate a change <strong>of</strong><br />
alignment, either in plan or in pr<strong>of</strong>ile. A change <strong>of</strong> alignment in pr<strong>of</strong>ile to avoid costly excavation<br />
is generally referred to as a "broken back" culvert. (Figure VI-3). Horizontal bends may also be<br />
used to avoid obstacles or realign the flow (Figure VI-4). When considering a nonlinear culvert<br />
alignment, particular attention should be given to erosion, sedimentation, and debris control.<br />
In designing a nonlinear culvert, the energy losses due to the bends must be considered. If the<br />
culvert operates in inlet control, no increase in headwater occurs. If the culvert operates in<br />
outlet control, a slight increase in energy losses and headwater will result due to the bend<br />
losses. To minimize these losses, the culvert should be curved or have bends not exceeding<br />
15-degrees at intervals <strong>of</strong> not less than 50 feet (15m) (30). Under these conditions, bend losses<br />
can normally be ignored.<br />
Figure VI-4--Culvert with a Horizontal Bend (Contech)<br />
146
If headwater and flow considerations are critical, accurate hydraulic analysis <strong>of</strong> bend losses may<br />
be required. Bend losses are a function <strong>of</strong> the velocity head in the culvert barrel. To calculate<br />
bend losses, use the following equation.<br />
2<br />
⎛ V ⎞<br />
H =<br />
⎜<br />
⎟<br />
b K b<br />
(21)<br />
⎝ 2g<br />
⎠<br />
Hb is added to the other outlet losses in Equation (1). Bend loss coefficients (Kb) are found in<br />
various references (24, 31, 32). Reference (32) suggests the coefficients in Table 6 for bend<br />
losses in conduits flowing full.<br />
The broken back culvert shown in Figure VI-3 has four possible control sections: the inlet, the<br />
outlet, and the two bends.<br />
The upstream bend may act as a control section, with the flow passing through critical depth just<br />
upstream <strong>of</strong> the bend. In this case, the upstream section <strong>of</strong> the culvert operates in outlet control<br />
and the downstream section operates in inlet control. Outlet control calculation procedures can<br />
be applied to the upstream barrel, assuming critical depth at the bend, to obtain a headwater<br />
elevation. This elevation is then compared with the inlet and outlet control headwater elevations<br />
for the overall culvert. These headwaters are determined using the design procedures <strong>of</strong><br />
Chapter III. The controlling flow condition produces the highest headwater elevation. Control at<br />
the lower bend is very unlikely and that possible control section can be ignored except for the<br />
bend losses in outlet control. Broken-back culverts can also be analyzed in detail using<br />
standard backwater and draw down calculation methods (31).<br />
4. Junctions. Flow from two or more separate culverts or storm sewers may be combined at a<br />
junction into a single culvert barrel. For example, a tributary and a main stream intersecting at a<br />
roadway crossing can be accommodated by a culvert junction (Figure VI-5). A drainage pipe<br />
collecting run<strong>of</strong>f from the overlying roadway surface and discharging into a culvert barrel is an<br />
example <strong>of</strong> a storm sewer/culvert junction. Loss <strong>of</strong> head may be important in the hydraulic<br />
design <strong>of</strong> a culvert containing a junction. Attention should be given to streamlining the junction<br />
to minimize turbulence and head loss. Also, timing <strong>of</strong> peak flows from the two branches should<br />
be considered in analyzing flow conditions and control. Loss <strong>of</strong> head due to a junction is not <strong>of</strong><br />
concern if the culvert operates in inlet control.<br />
⎛ Radius <strong>of</strong> Bend<br />
⎜<br />
⎝ Equivalent Diameter<br />
1<br />
2<br />
4<br />
6<br />
8<br />
Table 6--Loss Coefficients for Bends.<br />
⎞<br />
⎟<br />
⎠<br />
147<br />
Angle <strong>of</strong> Bend Degrees<br />
90 o 45 o 22.5 o<br />
.50<br />
.30<br />
.25<br />
.15<br />
.15<br />
.37<br />
.22<br />
.19<br />
.11<br />
.11<br />
.25<br />
.15<br />
.12<br />
.08<br />
.08
Figure VI-5--Culvert Junction<br />
For a culvert barrel operating in outlet control and flowing full, the junction loss is calculated<br />
using Equations (22) and (23) given below. Reference (33) provides the derivations <strong>of</strong> these<br />
equations. The loss is then added to the other outlet control losses in Equation (1).<br />
H = y′<br />
+ H − H<br />
(22)<br />
j<br />
v2<br />
v1<br />
Hi is the head loss through the junction in the main conduit, m (ft)<br />
y'1 is the change in hydraulic grade line through the junction, m (ft)<br />
Hv2 is the velocity head in the upstream conduit, m (ft)<br />
Hv1 is the velocity head in the downstream conduit, m (ft)<br />
The formula for y' is based on momentum considerations and is as follows:<br />
Q1V1<br />
− Q2V2<br />
− Q3V3<br />
cos θ j<br />
y′<br />
=<br />
(23)<br />
0.<br />
5(<br />
A + A ) g<br />
1<br />
2<br />
subscripts 1, 2, and 3 refer to the outlet pipe, the upstream pipe, and the lateral pipe<br />
respectively<br />
Q is the flow rate, m 3 /s (ft 3 /s)<br />
V is the velocity, m/s (ft/s)<br />
A is the area <strong>of</strong> the barrel, m 2 (ft 2 )<br />
Θj is the angle <strong>of</strong> the lateral with respect to the outlet conduit<br />
148
Figure VI-6--Subatmospheric Pressure in <strong>Culverts</strong><br />
Jens also provides additional equations for losses in the lateral conduit under full flow<br />
conditions (33). Laboratory modeling may be necessary for particularly sensitive installations.<br />
Partly full flow is analyzed by using backwater calculations. If supercritical flow is possible, the<br />
flow at the junction is very complex, and an appropriate reference on the subject should be<br />
consulted (31, 34). However, in this case the culvert will operate in inlet control, and the losses<br />
are not needed to calculate the headwater.<br />
Erosion may be a problem at the junctions <strong>of</strong> culverts with natural bottoms. In this case,<br />
protection <strong>of</strong> culvert foundations and anchorage is very important. This can be accomplished by<br />
proper alignment, selective invert paving, and strategically placed energy dissipaters within the<br />
culvert.<br />
5. Siphons. A siphon is a water conveyance conduit which operates at subatmospheric<br />
pressure over part <strong>of</strong> its length. Some culverts act as true siphons under certain headwater and<br />
tailwater conditions, but culverts are rarely designed with that intention. Figure VI-6 shows two<br />
culverts acting as true siphons.<br />
149
Contrary to general belief, a culvert <strong>of</strong> constant section on a uniform grade may act as a true<br />
siphon under certain conditions (Figure VI-6A). This was demonstrated by tests at the<br />
University <strong>of</strong> Iowa and later in the NBS research (5, 35). However, the additional capacity<br />
generated by the siphoning action was sporadic and could be interrupted by any number <strong>of</strong><br />
changing flow conditions. Such conditions which would permit the admission <strong>of</strong> air include<br />
rapidly declining headwater or tailwater levels, vortices, and entrapment <strong>of</strong> debris. Since the<br />
added capacity was not dependable, the minimum performance criteria would not allow its<br />
inclusion in design. Therefore, added capacity due to siphoning may increase culvert<br />
performance above design estimates in some situations.<br />
<strong>Culverts</strong> with vortex suppressors may act as siphons under conditions <strong>of</strong> high headwater. The<br />
dependability <strong>of</strong> such devices under most culvert flow conditions is open to question, and vortex<br />
suppressors may be a safety hazard. Therefore, the use <strong>of</strong> vortex suppression in culvert design<br />
applications is not recommended.<br />
Broken-back culverts may act as true siphons within some range <strong>of</strong> submerged headwater and<br />
tailwater (Figure VI-6B). However, the hydraulic characteristics <strong>of</strong> the culvert will not markedly<br />
differ from a uniform barrel between end points. When primed, the culvert will perform as<br />
efficiently as the uniform grade alternative. When not primed, the culvert may not perform as<br />
well as a culvert on a uniform grade (35). Broken-back culverts are constructed to produce a<br />
savings in excavation and not for hydraulic reasons.<br />
Flared-siphon culverts may also act as true siphons. A flared-siphon culvert has an outlet which<br />
diverges, much like a side-tapered inlet. The Venturi (expanding tube) principle is used to<br />
salvage a large part <strong>of</strong> the kinetic energy and thereby increase the culvert capacity. The State<br />
<strong>of</strong> California was experimenting with these designs in the early 1950s (35). Obviously,<br />
submergence <strong>of</strong> the outlet is necessary to achieve the siphoning action. Presumably, the added<br />
capacity was not dependable, and their design is rare. However, Cottman and Apelt have<br />
combined this concept with the slope-tapered inlet concept to produce hydraulically efficient<br />
minimum energy culverts and bridges (36, 37).<br />
Sag culverts are <strong>of</strong>ten referred to as "inverted siphons" even though the hydraulic grade line<br />
does not intersect the crown <strong>of</strong> the conduit at any point when the conduit is flowing full. Hence,<br />
no portion <strong>of</strong> the barrel is operating below atmospheric pressure and the name is a misnomer.<br />
Sag culverts are covered under an earlier section entitled, "Low Head Installations." Figure VI-2<br />
depicts a sag culvert.<br />
6. Fish Passage. At some culvert locations, the ability <strong>of</strong> the structure to accommodate<br />
migrating fish is an important design consideration. For such sites, state fish and wildlife<br />
agencies should be included early in the roadway planning process. In particularly sensitive<br />
streams, relocation <strong>of</strong> the highway may be necessary and economical. Other situations may<br />
require the construction <strong>of</strong> a bridge spanning the natural stream. However, culvert modifications<br />
can <strong>of</strong>ten be constructed to meet the design criteria established by the fish and wildlife agencies<br />
(Figure VI-7).<br />
150
Figure VI-7--Fish Baffles in Culvert<br />
Early in the planning process, fish migration data should be collected including pertinent field<br />
data. If the stream crossing is located on a known, suspected, or potential fish migration route,<br />
the following data are desirable: (38)<br />
• Species <strong>of</strong> migrating fish.<br />
• Size and swimming speed <strong>of</strong> fish.<br />
• Locations <strong>of</strong> spawning beds, rearing habitat, and food-producing areas upstream<br />
and downstream <strong>of</strong> the site.<br />
• Description <strong>of</strong> fish habitat at the proposed crossing.<br />
• Dates <strong>of</strong> start, peak, and end <strong>of</strong> migration.<br />
• Average flow depths during periods <strong>of</strong> migration.<br />
An understanding <strong>of</strong> some design inadequacies which will inhibit natural migration patterns is<br />
desirable. Excessive velocities and shallow depths in the culvert or on paved aprons for the<br />
migration design discharge should be avoided. High outlet elevations, <strong>of</strong>ten resulting from the<br />
formation <strong>of</strong> a scour hole, may prevent fish from entering the culvert. High outlet velocities also<br />
dislodge sediment which fills in small pools further downstream, smothering eggs and foodproducing<br />
areas in the process. High upstream invert elevations produce a large unnatural pool<br />
above the culvert which will trap sediment. Depressing the upstream invert elevation is also<br />
harmful.<br />
Simulating the natural stream bottom conditions in a culvert is the most desirable design option<br />
to accommodate fish passage. Open bottom culverts, such as arches, have obvious<br />
advantages if adequate foundation support exists for the culvert. Oversized depressed culverts<br />
have the advantage <strong>of</strong> a natural bottom while overcoming the problem <strong>of</strong> poor foundation<br />
material (Figure VI-8). However, on steep slopes, provisions may be necessary to hold bottom<br />
material in place. Another option is to construct baffles in the bottom <strong>of</strong> culverts to help simulate<br />
natural conditions. Figure VI-9 depicts a baffle arrangement used by several States in the<br />
Pacific Northwest (30).<br />
When the simulation <strong>of</strong> natural stream bottom conditions is unrealistic or unnecessary, criteria<br />
for maintaining minimum depths and maximum velocities is most important. The high<br />
roughness coefficient <strong>of</strong> corrugated metal may be all that is required at some locations to<br />
maintain desirable depths and velocities. When maintaining a minimum depth in a culvert is a<br />
problem, downstream weirs can be constructed. However, provisions must be made for fish to<br />
bypass the weirs.<br />
151
Figure VI-8--Culvert Barrel Partially Buried to Preserve Natural Stream Bed<br />
Figure VI-9--Baffle Arrangement for Fish Passage<br />
152
A popular method <strong>of</strong> providing for fish passage is to provide dual culverts, one culvert designed<br />
for hydraulic capacity and one culvert designed for fish passage. The latter culvert would have<br />
a flatter slope, higher roughness, and could contain fish baffles. In this case, the hydraulically<br />
efficient barrel would convey most <strong>of</strong> the flow. To design parallel, dissimilar culverts, it is<br />
necessary to construct separate performance curves (elevation versus discharge) for each<br />
culvert. The two performance curves are added together at equal elevations to obtain the<br />
combined performance curve. A similar technique is described later in this chapter for multiple<br />
barrel culverts with unequal invert elevations.<br />
The hydraulic design <strong>of</strong> culverts with fish baffles is accomplished by modifying the friction<br />
resistance <strong>of</strong> the barrel in outlet control to account for the high resistance imposed by the<br />
baffles. Reference (39) provides design curves and procedures for estimating the hydraulic loss<br />
due to fish baffles using a modified version <strong>of</strong> Equation (4b). The remainder <strong>of</strong> the outlet control<br />
calculations are the same as outlined in Chapter III. For inlet control, only the reduced area <strong>of</strong><br />
the entrance due to the baffles and any edge modifications need to be considered in the<br />
procedure.<br />
C. Erosion, Sedimentation, and Debris Control<br />
Natural streams and manmade channels are subject to the forces <strong>of</strong> moving water. Pressure,<br />
velocity, and centrifugal forces can be significant depending on the depth <strong>of</strong> flow, and the slope<br />
and sinuosity <strong>of</strong> the water course. An evolutionary process is the result with the continuous<br />
occurrence and dynamic interplay <strong>of</strong> erosion, sedimentation, and debris movement. This<br />
process, referred to as fluvial geomorphology, is accelerated during storm events when stream<br />
depths and velocities are high. Inserting a culvert into this dynamic environment requires<br />
special attention to the effects <strong>of</strong> these natural phenomena on the culvert and the effects <strong>of</strong> the<br />
culvert on the stream channel. Past experience has shown significant problems, including<br />
erosion at the inlet and outlet, sediment buildup in the barrel, and clogging <strong>of</strong> the barrel with<br />
debris.<br />
1. Scour at Inlets. A culvert barrel normally constricts the natural channel, thereby forcing the<br />
flow through a reduced opening. As the flow contracts, vortices and areas <strong>of</strong> high velocity flow<br />
impinge against the upstream slopes <strong>of</strong> the fill and may tend to scour away the embankment<br />
adjacent to the culvert. In many cases, a scour hole also forms upstream <strong>of</strong> the culvert floor as<br />
a result <strong>of</strong> the acceleration <strong>of</strong> the flow as it leaves the natural channel and enters the culvert.<br />
Upstream slope paving, channel paving, headwalls, wingwalls, and cut<strong>of</strong>f walls help to protect<br />
the slopes and channel bed at the upstream end <strong>of</strong> the culvert. Figure VI-10 depicts a culvert<br />
with a headwall and wingwall protecting the inlet against scour.<br />
153
Figure VI-10--Culvert with Metal Headwall and Wingwalls (Contech)<br />
2. Scour at Outlets. Scour at culvert outlets is a common occurrence (Figure VI-11). The<br />
natural channel flow is usually confined to a lesser width and greater depth as it passes through<br />
a culvert barrel. An increased velocity results with potentially erosive capabilities as it exits the<br />
barrel. Turbulence and erosive eddies form as the flow expands to conform to the natural<br />
channel. However, the velocity and depth <strong>of</strong> flow at the culvert outlet and the velocity<br />
distribution upon reentering the natural channel are not the only factors which need<br />
consideration. The characteristics <strong>of</strong> the channel bed and bank material, velocity and depth <strong>of</strong><br />
flow in the channel at the culvert outlet, and the amount <strong>of</strong> sediment and other debris in the flow<br />
are all contributing factors to scour potential. Due to the variation in expected flows and the<br />
difficulty in evaluating some <strong>of</strong> these factors, scour prediction is subjective.<br />
Figure VI-11--Scour at Culvert Outlet<br />
Scour in the vicinity <strong>of</strong> a culvert outlet can be classified into two separate types (38). The first<br />
type is called local scour and is typified by a scour hole produced at the culvert outlet (Figure VI-<br />
12). This is the result <strong>of</strong> high exit velocities, and the effects extend only a limited distance<br />
downstream. Coarse material scoured from the circular or elongated hole is deposited<br />
immediately downstream, <strong>of</strong>ten forming a low bar. Finer material is transported further<br />
downstream. The dimensions <strong>of</strong> the scour hole change due to sedimentation during low flows<br />
and the varying erosive effects <strong>of</strong> storm events. The scour hole is generally deepest during<br />
154
passage <strong>of</strong> the peak flow. Methods for predicting scour hole dimensions are found in Chapter 5<br />
<strong>of</strong> HEC No. 14, "<strong>Hydraulic</strong> <strong>Design</strong> <strong>of</strong> Energy Dissipaters for <strong>Culverts</strong> and Channels" (40). The<br />
second type <strong>of</strong> scour is classified as general stream degradation. This phenomenon is<br />
independent <strong>of</strong> culvert performance. Natural causes produce a lowering <strong>of</strong> the stream bed over<br />
time (Figure VI-13). The identification <strong>of</strong> a degrading stream is an essential part <strong>of</strong> the original<br />
site investigation. Both types <strong>of</strong> scour can occur simultaneously at a culvert outlet.<br />
Figure VI-12--Scour Hole at Culvert Outlet<br />
Since prediction <strong>of</strong> scour at culvert outlets is difficult, and protection is expensive, a prudent<br />
approach involves providing a minimum amount <strong>of</strong> protection followed by periodic site<br />
inspection. As part <strong>of</strong> the field investigation, scour and outlet protection at similar culverts in the<br />
vicinity will provide guidance. The initial level <strong>of</strong> protection should be sufficient to withstand<br />
extensive damage from one storm event. <strong>On</strong>ce the initial minimum outlet protection is<br />
constructed, an assessment <strong>of</strong> its performance after a number <strong>of</strong> storm events should be<br />
evaluated and reviewed. If the outlet protection is insufficient, additional protection should be<br />
provided. If the outlet protection is sufficient, inspection is required only after larger storm<br />
events.<br />
Protection against scour at culvert outlets varies from limited riprap placement to complex and<br />
expensive energy dissipation devices (Figure VI-14). At some locations, use <strong>of</strong> a rougher<br />
culvert material or a flatter slope alleviates the need for a special outlet protection device.<br />
Preformed scour holes, approximating the configuration <strong>of</strong> naturally formed holes, dissipate<br />
energy while providing a protective lining to the stream bed. Riprapped channel expansions<br />
and concrete aprons protect the channel and redistribute or spread the flow. Barrel outlet<br />
155
expansions operate in a similar manner. Headwalls and cut<strong>of</strong>f walls protect the integrity <strong>of</strong> the<br />
fill. When outlet velocities are high enough to create excessive downstream problems,<br />
consideration should be given to more complex energy dissipation devices. These include<br />
hydraulic jump basins, impact basins, drop structures, and stilling wells. <strong>Design</strong> information for<br />
the general types <strong>of</strong> energy dissipaters is provided in HEC No. 14 (40). Other references may<br />
also prove useful (41,42,43).<br />
Figure VI-13--Stream Degradation<br />
at Culvert Outlet<br />
156<br />
Figure VI-14--Riprap Protection at Culvert<br />
Outlet<br />
3. Sedimentation. The companion problem to erosion is sedimentation. Most streams carry a<br />
sediment load and tend to deposit this load when their velocities decrease. Therefore, barrel<br />
slope and roughness are key indicators <strong>of</strong> potential problems at culvert sites. Other important<br />
factors in sedimentation processes are the magnitude <strong>of</strong> the discharge and the characteristics <strong>of</strong><br />
the channel material.<br />
<strong>Culverts</strong> which are located on and aligned with the natural channel generally do not have a<br />
sedimentation problem. A stable channel is expected to balance erosion and sedimentation<br />
over time; a culvert resting on such a channel bed behaves in a similar manner. In a degrading<br />
channel, erosion, not sedimentation, is a potential problem. However, a culvert located in an<br />
agrading channel may encounter some sediment accumulation (Figure VI-15). Stream channel<br />
aggradation and degradation, and characteristics <strong>of</strong> each type <strong>of</strong> stream are discussed in<br />
reference (44). Fortunately, storm events tend to cleanse culverts <strong>of</strong> sediment when increased<br />
velocities are experienced. Helical corrugations tend to promote this cleansing effect if the<br />
culvert is flowing full.
Figure VI-15--Sediment Deposition in Culvert<br />
Certain culvert installations may encounter sedimentation problems. The most common <strong>of</strong><br />
these are multibarrel installations and culverts built with depressions at the entrance. <strong>Culverts</strong><br />
with more than one barrel may be necessary for wide shallow streams and for low fills. It is well<br />
documented that one or more <strong>of</strong> the barrels will accumulate sediment, particularly the inner<br />
barrel in a curved stream alignment. It is desirable for these installations to be straight and<br />
aligned with the upstream channel. <strong>Culverts</strong> built with an upstream depression possess a barrel<br />
slope which is less than that <strong>of</strong> the natural channel. Sedimentation is the likely result, especially<br />
during times <strong>of</strong> low flow. However, self-cleansing usually occurs during periods <strong>of</strong> high<br />
discharge. Both design situations should be approached cautiously with an increased effort in<br />
the field investigation stage to obtain a thorough knowledge <strong>of</strong> stream characteristics and bedbank<br />
materials.<br />
4. Debris Control. Debris is defined as any material moved by a flowing stream. This<br />
normally includes some combination <strong>of</strong> floating material, suspended sediment, and bed load. A<br />
stream's propensity for carrying debris is based upon watershed land uses and certain stream<br />
and floodplain characteristics. A field investigation <strong>of</strong> the following conditions is warranted.<br />
• Stream velocity, slope, and alignment.<br />
• Presence <strong>of</strong> shrubs and trees on eroding banks.<br />
• Watershed land uses, particularly logging, cultivation, and construction.<br />
• Stream susceptibility to flash flooding.<br />
• Storage <strong>of</strong> debris and materials within the flood plain (logs, lumber, solid waste, etc.).<br />
Debris can accumulate at a culvert inlet or become lodged in the inlet or barrel. When this<br />
happens, the culvert will fail to perform as designed. Flooding may occur, causing damage to<br />
upstream property. Roadway overtopping will create a hazard and an inconvenience to traffic<br />
and may lead to roadway and culvert washouts. Maintenance costs will accrue as a result <strong>of</strong><br />
these circumstances.<br />
157
Routine design and maintenance precautions may be taken if the debris accumulation potential<br />
is minimal. Provision for a smooth, well-designed inlet and avoidance <strong>of</strong> multiple barrels and<br />
skewed inlets will help to align and pass most floating debris. Periodic maintenance at culvert<br />
entrances will reduce the chances <strong>of</strong> severe problems and identify culverts which may require<br />
structural solutions.<br />
Three debris control methods are available for culvert sites with more serious risks: interception<br />
at or above the culvert inlet protecting culvert performance; deflection <strong>of</strong> debris away from the<br />
entrance to a holding area for eventual removal; and passage <strong>of</strong> the debris through the culvert.<br />
The latter may be accomplished by oversizing the culvert or utilizing a bridge as a replacement<br />
structure. The costs <strong>of</strong> this solution should be closely compared with other solution methods.<br />
Regardless <strong>of</strong> the solution method employed, it may be desirable to provide a relief opening<br />
either in the form <strong>of</strong> a vertical riser or a relief culvert placed higher in the embankment.<br />
Debris control structures <strong>of</strong>ten provide a cost effective solution. Debris interceptors functioning<br />
upstream <strong>of</strong> the culvert entrance include debris racks, floating drift booms, and debris basins.<br />
Debris interceptors functioning at the culvert inlet include debris risers and debris cribs. Debris<br />
deflectors vary from a simple inclined steel bar or rail placed in front <strong>of</strong> the inlet to more complex<br />
V-shaped debris deflectors (Figure VI-16). Debris fins are built to help align floating debris with<br />
the axis <strong>of</strong> the culvert to assist in passage <strong>of</strong> the debris. <strong>Design</strong> information for commonly<br />
employed debris control structures can be found in HEC No. 9, "Debris Control Structures" (45).<br />
D. Site Related Modifications<br />
Figure VI-16--Debris Deflector<br />
A good culvert design is one that limits the hydraulic and environmental stress placed on the<br />
existing natural water course. This stress can be minimized by utilizing a culvert which closely<br />
conforms to the natural stream in alignment, grade, and width. Often the culvert barrel must be<br />
skewed with respect to the roadway centerline to accomplish these goals. Alterations to the<br />
normal inlet alignment are also quite common. Multiple barrels are used in wide, shallow<br />
streams to accommodate the natural width <strong>of</strong> the stream.<br />
158
1. Skewed Barrels. The alignment <strong>of</strong> a culvert barrel with respect to the roadway centerline is<br />
referred to as the barrel skew angle. A culvert aligned normal to the roadway centerline has a<br />
zero barrel skew angle. For any other alignment, the barrel skew angle is the angle from a line<br />
normal to the highway to the culvert centerline. Directions (right or left) must accompany the<br />
barrel skew angle (Figure VI-17).<br />
Figure VI-17--Barrel Skew Angle<br />
It is common design practice to place the culvert barrel on an alignment and grade that<br />
conforms to the existing stream channel. The barrel skew is established from the stream<br />
location and the proposed or existing roadway plan. The advantages <strong>of</strong> this design practice<br />
include a reduction <strong>of</strong> entrance loss, equal depths <strong>of</strong> scour at the footings, less sedimentation in<br />
multibarrel culverts, and less excavation. A disadvantage <strong>of</strong> this design procedure is that the<br />
inlet may be skewed with respect to the culvert barrel and the culvert will be longer<br />
It is not always prudent to allow the existing stream bed alignment to dictate the barrel skew<br />
angle. Modifications to reduce the barrel skew angle and shorten the culvert barrel may<br />
produce a more economical solution in some situations. Chapter II contains a discussion <strong>of</strong><br />
alternative culvert location procedures as related to culvert length.<br />
2. Skewed Inlets. The angle from the culvert face to a line normal to the culvert barrel is<br />
referred to as the inlet skew angle (Figure VI-18). The inlet skew angle varies from 0-degrees to<br />
a practical maximum <strong>of</strong> about 45-degrees. The upper limit is dictated by the difficulty in<br />
transitioning the flow from the stream into the culvert.<br />
159
Figure VI-18--Inlet Skew Angle<br />
<strong>Culverts</strong> which have a barrel skew angle <strong>of</strong>ten have an inlet skew angle as well. This is<br />
because headwalls are generally constructed parallel to a roadway centerline to avoid warping<br />
<strong>of</strong> the embankment fill (Figure VI-19).<br />
Figure VI-19--Barrel and Inlet Skew<br />
160
Skewed inlets slightly reduce the hydraulic performance <strong>of</strong> the culvert under inlet control<br />
conditions. The differences are minor and are incorporated into the inlet control nomographs for<br />
box culverts (Charts 11 and 12). As an illustration <strong>of</strong> the minor effects <strong>of</strong> inlet skew,<br />
comparisons <strong>of</strong> flow capacity were made on a single barrel 1829 mm by 1829 mm (6 ft by 6 ft)<br />
box culvert with various inlet skew angles operating in inlet control (Table 7).<br />
Table 7a--Effect <strong>of</strong> Inlet Skew Angle on Flow Capacity <strong>of</strong><br />
1829 mm x 1829 mm Box Culvert. 1<br />
(Flow in m 3 /s (ft 3 /s))<br />
SKEW ANGLE, DEGREES<br />
HEADWATER 0 o 15 o 30 o 45 o<br />
0.91 m<br />
1.83 m<br />
2.74 m<br />
2.40 m 3 /s<br />
6.796 m 3 /s<br />
11.214 m 3 /s<br />
1 Values from Chart 11A, Appendix D<br />
2.407 m 3 /s<br />
6.626 m 3 / s<br />
8.382 m 3 /s<br />
161<br />
2.322 m 3 /s<br />
6.456 m 3 /s<br />
11.044 m 3 /s<br />
Table 7b--Effect <strong>of</strong> Inlet Skew Angle on Flow Capacity <strong>of</strong><br />
(6 ft by 6 ft) Box Culvert. 1<br />
(Flow in ft 3 /s)<br />
2.265 m 3 /s<br />
6.286 m 3 /s<br />
10.874 m 3 /s<br />
SKEW ANGLE, DEGREES<br />
HEADWATER 0 o 15 o 30 o 45 o<br />
3 ft<br />
6 ft<br />
9 ft<br />
85 ft 3 /s<br />
240 ft 3 /s<br />
396 ft 3 /s<br />
1 Values from Chart 11B, Appendix D<br />
85 ft 3 /s<br />
234 ft 3 /s<br />
296 ft 3 /s<br />
82 ft 3 /s<br />
228 ft 3 /s<br />
390 ft 3 /s<br />
80 ft 3 /s<br />
222 ft 3 /s<br />
384 ft 3 /s<br />
Inlet skew should be avoided for culverts with tapered inlets and for multiple barrel culverts.<br />
Structural design complications result when a tapered inlet is skewed (26). Both tapered inlets<br />
and multiple barrel culverts perform better with the inlet face oriented normal to the barrel. The<br />
interior walls <strong>of</strong> multiple barrel culverts may promote sedimentation and unequal flow in some<br />
barrels when the inlet is skewed. The embankment fill should be warped to fit the culvert when<br />
avoiding inlet skew (Figure VI-20).<br />
3. Multiple Barrels. Multiple barrel culverts may be necessary due to certain site conditions,<br />
stream characteristics, or economic considerations (Figure VI-21). Roadway pr<strong>of</strong>iles with low<br />
fills <strong>of</strong>ten dictate the use <strong>of</strong> a series <strong>of</strong> small culverts. Multiple barrel culverts are also used in<br />
wide, shallow channels to limit the flow constriction. To accommodate overbank flood flows,<br />
relief culverts with inverts at the flood plain elevation are occasionally used. Multiple barrel box<br />
culverts are more economical than a single wide span because the structural requirements for<br />
the ro<strong>of</strong> <strong>of</strong> the long span are costly.
Figure VI-20--Fill Warped to Avoid Inlet Skew<br />
Figure VI-21--Double Barrel Box Culvert<br />
There are problems associated with the use <strong>of</strong> multiple barrel culverts. The most significant<br />
problems involve sedimentation and debris. In alluvial channels, normal flows will tend to pass<br />
through one <strong>of</strong> the barrels, while sediment and debris collect in the others. To reduce this<br />
problem, it is good practice to install one barrel at the flow line <strong>of</strong> the stream and the others at<br />
higher elevations (Figure VI-22). This will encourage the flow to follow the lower barrel.<br />
Sediment and debris accumulation in the other barrels will be reduced since the barrels will only<br />
be used to convey higher than normal flows.<br />
The nomographs <strong>of</strong> this publication can be used to determine the capacity <strong>of</strong> multiple barrel<br />
culverts with only minor alterations. The nomographs provide the culvert discharge rate per<br />
162
arrel for pipes or the flow per meter (foot) <strong>of</strong> span width for box culverts. For multiple barrels<br />
with identical hydraulic characteristics, the total discharge is assumed to be divided equally<br />
among the barrels. An iterative procedure or development <strong>of</strong> a combined performance curve is<br />
required for culverts with dissimilar barrels or invert elevations. The discharge <strong>of</strong> the component<br />
barrels must add up to the total peak design flow at a common headwater elevation. For<br />
multiple barrel installations with bevel-edged inlets, the bevels are sized on the basis <strong>of</strong> the total<br />
clear width <strong>of</strong> the barrels. No more than two barrels may be used with tapered inlets using the<br />
design procedures <strong>of</strong> this manual.<br />
E. Economics<br />
The ideal culvert selection process minimizes the total annual cost <strong>of</strong> the installation over the life<br />
<strong>of</strong> the roadway. The annual cost includes capital expenditures, maintenance costs, and risks<br />
associated with flooding. An initial analysis <strong>of</strong> the choice between a culvert and a bridge is<br />
necessary. If a culvert is selected, a comparison <strong>of</strong> the available shapes and materials would<br />
follow. Durability, maintenance, and replacement costs are factored into the selection process<br />
along with the initial in-place construction cost. The results are then utilized to evaluate the<br />
design flood based on total annual cost. This procedure is referred to as a risk analysis.<br />
Unfortunately, many <strong>of</strong> the factors required in such an analysis are not well defined, making it<br />
difficult to justify and perform except for expensive installations.<br />
Figure VI-22--Multiple Barrel <strong>Culverts</strong> with <strong>On</strong>e Low Flow Barrel<br />
1. Service Life. The desired service life <strong>of</strong> the culvert should be considered in the selection<br />
process. If the culvert is in a location where replacement or relining would be impractical, the<br />
service life <strong>of</strong> the culvert should equal the service life <strong>of</strong> the highway. If rehabilitation is feasible,<br />
or if it is determined that the highway will be rebuilt in a relatively short time, a culvert with a<br />
shorter service life should be selected. The service life <strong>of</strong> the culvert should match the<br />
installation. There is no need to pay for an "eternal" culvert where a short lived one would<br />
suffice, and vice-versa.<br />
163
2. Comparisons Between <strong>Culverts</strong> and<br />
Bridges. Economic considerations are <strong>of</strong><br />
primary importance in deciding between the<br />
use <strong>of</strong> a bridge or a culvert at stream<br />
crossings where either will satisfy hydraulic<br />
and structural requirements. The initial cost<br />
for a culvert is usually much less than for a<br />
bridge. The use <strong>of</strong> increased headwater at a<br />
culvert installation normally permits the use<br />
<strong>of</strong> a smaller opening (Figure VI-23). This<br />
advantage must be balanced with the<br />
possible flood damages associated with an<br />
increased headwater, especially at higher<br />
discharges. Maintenance costs for culverts<br />
may result from erosion at the inlet and<br />
outlet, sedimentation and debris buildup, and<br />
embankment repair in case <strong>of</strong> overtopping.<br />
Bridge maintenance is more costly, however,<br />
including such aspects as maintenance <strong>of</strong><br />
the bridge deck and superstructure, erosion<br />
around piers and abutments, and possible<br />
sediment and debris accumulation.<br />
164<br />
Figure VI-23--Bridge versus culvert<br />
at same location<br />
Safety, aesthetics, and environmental considerations are also involved in the choice <strong>of</strong> a bridge<br />
or culvert. Safety considerations for culverts include the use <strong>of</strong> guardrails or safety grates.<br />
Bridge decks <strong>of</strong>ten constrict shoulder and median widths and are subject to icing which can<br />
present traffic safety problems. A bridge may be considered more aesthetically pleasing in<br />
traversing a scenic valley or canyon. Environmental considerations such as fish and wildlife<br />
passage may also favor a bridge over a culvert.<br />
<strong>Hydraulic</strong> <strong>Design</strong> Series Number 1, "<strong>Hydraulic</strong>s <strong>of</strong> Bridge Waterways," (21) may be used in the<br />
hydraulic analysis <strong>of</strong> highway bridges to approximate backwater on floodplains with sparse<br />
vegetation. For bridges on wide heavily vegetated floodplains, other techniques developed by<br />
the United States Geological Survey and the United States Corps <strong>of</strong> Engineers should be used.<br />
3. Comparisons Between Materials and Shapes. Cost comparisons between various<br />
materials and shapes vary with region and with time. It is recommended that costs for culverts<br />
<strong>of</strong> equal hydraulic capacity be compared periodically to help guide material selection.<br />
Requesting alternative bids for several acceptable materials is economically beneficial on most<br />
projects.<br />
Detailed economic analysis <strong>of</strong> culvert material selection requires site-specific considerations.<br />
Structural strength is a concern under high fills. Steep channel slopes produce high exit<br />
velocities which are further accelerated by using smooth pipes. Acidic drainage will promote<br />
corrosion <strong>of</strong> some materials. Certain materials can not withstand the attack <strong>of</strong> abrasive bed<br />
loads. Water tightness at joints may be an important consideration. All <strong>of</strong> these factors have an<br />
impact on the annual cost <strong>of</strong> the culvert based upon the selected material.
Culvert shapes are as important in cost evaluations as culvert materials (Figure I-4). Many<br />
shapes can be produced from a variety <strong>of</strong> materials; other shapes require certain materials.<br />
Circular culverts are the most common shape. They are generally reasonably priced, can<br />
support high structural loads, and are hydraulically efficient. However, limited fill height may<br />
necessitate the use <strong>of</strong> a pipe-arch, ellipse, or an arch. Pipe-arches and ellipses are more<br />
expensive than circular pipes, especially if the fill height is substantial. Arches require special<br />
attention to their foundations, and failure due to scour is a concern. However, arches do<br />
provide a natural stream bed which is an advantage for fish passage. Structural plate conduits<br />
can be constructed in a variety <strong>of</strong> shapes, quickly, with low transport and handling costs (Figure<br />
VI-24). Box culverts also possess flexibility in rise to span ratios by using multiple cells (Figure<br />
VI-25). Precast box sections overcome the disadvantage <strong>of</strong> longer construction times which are<br />
associated with cast-in-place installations; however handling costs are increased.<br />
Inlet improvements on culverts provide an opportunity for additional cost savings. When a<br />
culvert is operating in inlet control, the barrel does not flow full. By improving the inlet<br />
configuration, a decrease in barrel size and overall culvert cost is possible. The savings on the<br />
reduced barrel size usually outweighs the construction costs <strong>of</strong> the improved inlet. However,<br />
the cost <strong>of</strong> excavation through rock or difficult material for enlarged slope-tapered inlets or<br />
depressed side-tapered inlets should be considered.<br />
Figure VI-24--Corrugated Metal Box Culvert (Contech)<br />
165
Figure VI-25--Precast Double Barrel Box Culvert<br />
4. Risk Analysis. Risk analysis is a means <strong>of</strong> assessing the economic behavior <strong>of</strong> different<br />
design alternatives. The construction <strong>of</strong> a culvert represents a flood plain encroachment with<br />
the associated flood risks and initial construction costs. Each design strategy can be evaluated<br />
for an annual capital cost and an annual economic risk (cost), the sum <strong>of</strong> which is called the<br />
total expected cost (TEC). Optimization <strong>of</strong> the economic and engineering analyses will produce<br />
the least total expected cost (LTEC) design alternative (46).<br />
The influence <strong>of</strong> risk (cost) in the decision-making process represents the major distinction<br />
between traditional and LTEC design. In traditional design, the level <strong>of</strong> risk is an integral part <strong>of</strong><br />
the establishment <strong>of</strong> design standards such as a specified design frequency flood or limitations<br />
on backwater. The influence <strong>of</strong> risk in the design <strong>of</strong> a specific culvert based on these design<br />
standards will vary with site conditions. In LTEC design, there is no arbitrary design frequency.<br />
The design process determines the response <strong>of</strong> each alternate design to discrete points on the<br />
entire flood frequency curve. The flood frequency at which road overtopping occurs is more<br />
meaningful than design flood frequency.<br />
A necessary part <strong>of</strong> the risk analysis process is the establishment <strong>of</strong> acceptable design<br />
alternatives. Engineering, legislative, and policy constraints may limit the range <strong>of</strong> alternatives.<br />
Examples <strong>of</strong> such constraints include:<br />
• Prescribed minimum design flood criteria as in the case <strong>of</strong> interstate highways.<br />
• Limitations imposed by roadway geometrics such as maximum or minimum<br />
grade lines, site distance, and vertical curvature.<br />
166
• Flood plain ordinances or other legislative mandates limiting backwater or<br />
encroachment on the flood plain.<br />
• Channel stability considerations which would limit culvert velocity or the amount<br />
<strong>of</strong> constriction.<br />
Data collection and analysis to perform a LTEC design requires more effort than traditional<br />
culvert design. Data collection efforts include land use information, flood plain geometry,<br />
hydrologic and hydraulic data, geologic and soils investigation, construction cost, traffic data,<br />
and cost <strong>of</strong> embankment and pavement repair. Hydrologic and hydraulic analyses comprise<br />
flood frequency determination, water surface pr<strong>of</strong>ile generation, stage-discharge relationship,<br />
preparation, overtopping analysis, and hydrograph generation.<br />
Based on the hydrologic and hydraulic analyses, a full accounting <strong>of</strong> economic losses is<br />
required. These costs include but are not limited to:<br />
• Embankment damage<br />
• Traffic restoration time<br />
• Increased running cost (detour)<br />
• Time losses<br />
• Accident costs<br />
• Backwater damage losses<br />
• Damage to culvert<br />
• Erosion and sedimentation damage<br />
The final step <strong>of</strong> the LTEC analysis requires the computation <strong>of</strong> TEC's over the range <strong>of</strong> flood<br />
frequencies and design alternatives. An optimum design referred to as the LTEC is the end<br />
result. A sensitivity analysis may be performed on the LTEC and the overtopping frequency can<br />
be determined. Figure VI-26 depicts the design process. Figure VI-27 represents a typical<br />
solution surface with the optimum culvert size and embankment height highlighted.<br />
F. Safety<br />
The primary safety considerations in the design and construction <strong>of</strong> a culvert are its structural<br />
and hydraulic adequacy. Assuming that these major considerations are appropriately<br />
addressed, attention should be directed toward supplementary safety considerations. These<br />
considerations include traffic safety and child safety. The safety <strong>of</strong> errant vehicles should be<br />
provided for by the appropriate location and design <strong>of</strong> culvert inlets and outlets. Safety barriers<br />
and grates may substitute or add to this protection. Safety grates also provide a degree <strong>of</strong><br />
protection against inquisitive youngsters by inhibiting access to a culvert.<br />
1. Inlet and Outlet Location and <strong>Design</strong>. The exposed end <strong>of</strong> a culvert or culvert headwall<br />
represents an unyielding barrier to vehicles leaving the roadway. Safety provisions must be<br />
made to protect occupants <strong>of</strong> such vehicles against injury or death. <strong>On</strong>e technique employed is<br />
to locate the culvert ends outside <strong>of</strong> the safe recovery area. Traffic safety standards provide<br />
distance from pavement limitations based on speed limits. <strong>Culverts</strong> should also extend through<br />
medians unless safe distances can be maintained.<br />
167
Figure VI-26--LTEC <strong>Design</strong> Process<br />
Figure VI-27--LTEC Solution Surface<br />
When culvert ends are not outside the safe recovery area, appropriate inlet and outlet design<br />
may reduce the danger they represent. Inlets and outlets can be mitered to conform to the fill<br />
slope reducing the obstruction to a vehicle. For culvert ends with headwalls, fill should be<br />
warped behind them to limit their exposure. (Markers should be placed on concealed culvert<br />
ends to protect roadside maintenance personnel.)<br />
2. Safety Barriers and Grates. Additional traffic safety can be achieved by the installation <strong>of</strong><br />
safety barriers and grates. Safety barriers should be considered in the form <strong>of</strong> guardrails along<br />
the roadside near a culvert when adequate recovery distance cannot be achieved, or for<br />
abnormally steep fill slopes (Figure VI-28). Traversable grates placed over culvert openings will<br />
reduce vehicle impact forces and the likelihood <strong>of</strong> overturning (Figure VI-29).<br />
168
Figure VI-28--Guardrail Adjacent to Culvert Headwall<br />
(American Concrete Pipe Association)<br />
Figure VI-29--Endwall for Safety Grate<br />
169
Figure VI-30--Safety Grate Flush with Culvert Entrance<br />
Safety grates promote debris buildup and the subsequent reduction <strong>of</strong> hydraulic performance.<br />
Thorough analysis <strong>of</strong> this potential should be undertaken prior to the selection <strong>of</strong> this safety<br />
alternative. Good design practice provides an open area between bars <strong>of</strong> 1.5 to 3.0 times the<br />
area <strong>of</strong> the culvert entrance depending on the anticipated volume and size <strong>of</strong> debris. Bar grates<br />
placed against the entrance <strong>of</strong> the culvert are unacceptable (Figure VI-30). Reference (47)<br />
indicates that the head loss due to a bar grate can be estimated as follows.<br />
H<br />
2 ⎛ Vg<br />
− V<br />
= 1.<br />
5⎜<br />
⎜<br />
⎝ 2g<br />
⎞<br />
⎟<br />
⎠<br />
g<br />
2<br />
u<br />
(24)<br />
Hg is the head loss due to the bar grate, m (ft)<br />
Vg is the velocity between the bars, m/s (ft/s)<br />
Vu is the approach velocity, m/s (ft/s)<br />
g is acceleration <strong>of</strong> gravity 9.81 m/s 2 (32.2 ft/s 2 )<br />
Another formula for the head loss in bar racks with vertical bars is found in reference (48) (49).<br />
2<br />
⎛ W ⎞⎛<br />
V ⎞ u<br />
Hg = K g ⎜ ⎟⎜<br />
⎟ sinθ<br />
g<br />
⎝ X ⎠<br />
⎜ 2g<br />
⎟<br />
(25)<br />
⎝ ⎠<br />
Kg is a dimensionless bar shape factor, equal to:<br />
2.42 - sharp-edged rectangular bars<br />
1.83 - rectangular bars with semi-circular upstream face<br />
1.79 - circular bars<br />
1.67 - rectangular bars with semi-circular upstream and downstream faces<br />
w is the maximum cross-sectional width <strong>of</strong> the bars facing the flow, m (ft)<br />
x is the minimum clear spacing between bars, m (ft)<br />
θg is the angle <strong>of</strong> the grate with respect to the horizontal, degrees<br />
170
Both <strong>of</strong> the above equations are empirical and should be used with caution. Research on loss<br />
coefficients in safety grates is documented in reference (47). In all cases, the head losses are<br />
for clean grates and they must be increased to account for debris buildup.<br />
<strong>Culverts</strong> have always attracted the attention and curiosity <strong>of</strong> children. In high population areas<br />
where hazards could exist, access to culverts should be prevented. Safety grates can serve<br />
this function. If clogging by debris is a problem, fencing around the culvert ends is an<br />
acceptable alternative to grates.<br />
G. Structural Considerations<br />
Proper structural design is critical to the performance and service life <strong>of</strong> a culvert. The structural<br />
design <strong>of</strong> a highway culvert begins with the analysis <strong>of</strong> moments, thrusts, and shears caused by<br />
embankment and traffic loads, and by hydrostatic and hydrodynamic forces. The culvert barrel,<br />
acting in harmony with the bedding and fill, must be able to resist these sizeable<br />
forces. Anchorage devices, endwalls, and wingwalls are <strong>of</strong>ten required to maintain the structural<br />
integrity <strong>of</strong> a culvert barrel by resisting flotation and inlet or outlet movement and distortion.<br />
1. General Structural Analysis. Loads affecting culvert barrel design include the culvert<br />
weight, fluid loads, earth and pavement loads, and the weight and impact <strong>of</strong> surface<br />
vehicles. Culvert weights per unit length are available from culvert manufacturers. The weight <strong>of</strong><br />
fluid per unit length can be obtained from the culvert barrel geometry and the unit weight <strong>of</strong><br />
water.<br />
Figure VI-31--Culvert installation<br />
The magnitude <strong>of</strong> the earth and pavement load<br />
(dead load) is dependent upon the weight <strong>of</strong> the<br />
prism above the barrel and the soil-structure<br />
interaction factor. The soil-structure interaction<br />
factor is the ratio <strong>of</strong> the earth prism load on the<br />
culvert to the earth prism weight. Conditions<br />
which affect this factor include soil type, backfill<br />
compaction, culvert m aterial (rigid or flexible),<br />
and the type <strong>of</strong> culvert installation.<br />
Two common types <strong>of</strong> culvert installations are<br />
depicted in Figure VI-31. In the positive<br />
projecting embankment installation, the culvert<br />
barrel is supported on the original streambed or<br />
compacted fill and covered by the embankment<br />
material. A negative projecting embankment is<br />
similar except that additional load support is<br />
gained from the existing banks <strong>of</strong> a deep<br />
stream bed. Each <strong>of</strong> these installations<br />
requires the establishment <strong>of</strong> an appropriate<br />
soil structure interaction factor or the<br />
determination <strong>of</strong> the load by appropriate tests,<br />
finite element analysis, or previous experience.<br />
171
The weight and impact <strong>of</strong> surface vehicles is sometimes referred to as the live load. This load is<br />
greatest when the depth <strong>of</strong> fill (cover) over the top <strong>of</strong> the culvert barrel is small. As the cover<br />
increases, the live load decreases and eventually becomes negligible. Pavement designed for<br />
heavy duty traffic can significantly reduce the live load imposed on the culvert.<br />
The distribution <strong>of</strong> dead and live load pressures on culvert barrels is dependent upon the shape<br />
and culvert material. The pressure distribution on three rigid culvert shapes is depicted in Figure<br />
VI-32. In contrast, circular culvert barrels made <strong>of</strong> flexible material receive the vertical load<br />
which pushes the barrel sides against the compacted fill material and mobilizes the passive<br />
earth pressure. The result is approximately uniform radial pressure distribution on the<br />
barrel. Pipe arches made <strong>of</strong> flexible material act similarly, but produce increased pressures at<br />
the corners (haunches) <strong>of</strong> the pipe-arch. Special attention to the bearing capacity <strong>of</strong> the soil at<br />
these locations is critical and may dictate embankment heights.<br />
Moments, thrusts, and shears at critical locations in the culvert barrel can be determined by<br />
elastic structural analysis once the loads and pressure distributions are defined. Reinforced<br />
concrete box sections are <strong>of</strong>ten analyzed as rigid frames utilizing moment distribution. Rigid<br />
circular and elliptical pipe sections require load coefficients based on bedding conditions to<br />
properly analyze moments, thrusts, and shears. Flexible culverts are generally designed by<br />
semiempirical methods which implicitly include structural analysis aspects within the design<br />
method.<br />
Figure VI-32--Pressure Distribution-Rigid <strong>Culverts</strong><br />
Structural design <strong>of</strong> the culvert barrel must provide adequate strength to resist the moments,<br />
thrusts, and shears determined in the structural analysis. For reinforced concrete barrels, a trial<br />
wall thickness is selected, and reinforcing is sized to meet the design requirements. Corrugated<br />
metal structures are required to resist ring compression and seam strength. An additional<br />
requirement is sufficient stiffness to resist installation loads. A standard wall thickness and<br />
corrugation shape are selected to meet these design requirements.<br />
172
Tables, charts, and formulas are available from manufacturers to streamline the process <strong>of</strong><br />
structural design. The "Structural <strong>Design</strong> Manual for Improved Inlets and <strong>Culverts</strong>," published by<br />
FHWA, is an excellent reference (26). Methods for hand calculation and computer solution are<br />
presented for reinforced concrete box culverts, and for circular and elliptical pipe culverts. The<br />
structural design <strong>of</strong> improved inlets is included, along with standard plans for headwalls,<br />
wingwalls, side-tapered and slope-tapered culverts.<br />
2. Floatation and Anchorage. Flotation is the term used to describe the failure <strong>of</strong> a culvert<br />
due to the tremendous uplift forces caused by buoyancy. The buoyant force is produced when<br />
the pressure outside the culvert is greater than the pressure in the barrel. This occurs in a<br />
culvert in inlet control with a submerged upstream end. The phenomenon can also be caused<br />
by debris blocking the culvert end or by damage to the inlet. The resulting uplift may cause the<br />
outlet or inlet ends <strong>of</strong> the barrel to rise and bend. Occasionally, the uplift force is great enough<br />
to dislodge the embankment. Generally, only flexible barrel materials are vulnerable to failure <strong>of</strong><br />
this type because <strong>of</strong> their light weight and lack <strong>of</strong> resistance to longitudinal bending (38). Large,<br />
projecting or mitered corrugated metal culverts are the most susceptible (Figure VI-33). In<br />
some instances, high entrance velocities will pull the unanchored inlet edges into the culvert<br />
barrel, causing blockage and additional damage. Events have been recorded in which the<br />
culvert barrel has been turned inside out by the forces <strong>of</strong> the flow.<br />
Figure VI-33--Unanchored Mitered End<br />
A number <strong>of</strong> precautions can be taken by the designer to guard against flotation and damages<br />
due to high inlet velocities. Steep fill slopes which are protected against erosion by slope paving<br />
help inlet and outlet stability (Figure VI-34). Large skews under shallow fills should be<br />
avoided. Rigid pipe susceptible to separation at the joints can be protected with commercially<br />
available tie bars.<br />
173
Figure VI-34--Slope Paving Around a Mitered Inlet<br />
Figure VI-35--Long Span Culvert (Contech)<br />
When these precautions are not practical or sufficient, anchorage at the culvert ends may be the<br />
only recourse. Anchorage is a means <strong>of</strong> increasing the dead load at the end <strong>of</strong> a culvert to<br />
protect against floatation. Concrete and sheet pile cut<strong>of</strong>f walls and headwalls are common<br />
forms <strong>of</strong> anchorage. The culvert barrel end must be securely attached to the anchorage device<br />
to be effective. Protection against inlet bending, inlet warping, and erosion to fill slopes<br />
represent additional benefits <strong>of</strong> some anchorage techniques.<br />
174
3. Endwalls and Wingwalls. Culvert barrels are commonly constructed with endwalls and<br />
wingwalls. These appurtenances are <strong>of</strong>ten made <strong>of</strong> cast-in-place concrete but can also be<br />
constructed <strong>of</strong> precast concrete, corrugated metal, timber, steel sheet piling, gabions, or bagged<br />
concrete. Endwalls are used to shorten the culvert length, maintain the fill material, and reduce<br />
erosion <strong>of</strong> the embankment slope. Endwalls also provide structural protection to inlets and<br />
outlets and act as a counterweight to <strong>of</strong>fset buoyant forces. Endwalls tend to inhibit flow <strong>of</strong> water<br />
along the outside surface <strong>of</strong> the conduit (piping).<br />
Wingwalls can be used to hydraulic advantage for box culverts by maintaining the approach<br />
velocity and alignment, and improving the inlet edge configuration. However, their major<br />
advantage is structural in eliminating erosion around a headwall. Additional protection against<br />
flotation is provided by the weight <strong>of</strong> the wingwalls.<br />
H. Long Span <strong>Culverts</strong><br />
Long span culverts are better defined on the basis <strong>of</strong> structural design aspects than on the basis<br />
<strong>of</strong> hydraulic considerations. According to the AASHTO Specifications for <strong>Highway</strong> Bridges, long<br />
span structural plate structures:<br />
(1) exceed certain defined maximum sizes for pipes, pipe-arches, and arches, or<br />
(2) may be special shapes <strong>of</strong> any size that involve a long radius <strong>of</strong> curvature in the crown or<br />
side plates (50).<br />
Special shapes include vertical and horizontal ellipses, underpasses, low and high pr<strong>of</strong>ile<br />
arches, and inverted pear shapes. Generally, the spans <strong>of</strong> long span culverts range from 7m to<br />
14m (20 ft to 40 ft). Some long span installations are shown in Figures VI-35 and VI-36, and<br />
typical long span culvert shapes are shown in Figure VI-37.<br />
Figure VI-36--Long Span Culvert (Contech)<br />
175
Figure VI-37--Typical Long Span Culvert Shapes<br />
1. Structural Aspects. Long span culverts depend on interaction with the earth embankment<br />
for structural stability. Therefore, proper bedding and selection and compaction <strong>of</strong> backfill are <strong>of</strong><br />
utmost importance. For multiple barrel structures, care must be taken to avoid unbalanced loads<br />
during backfilling. Some manufacturers <strong>of</strong> long span culverts will not sell their products to a<br />
client unless the design and installation is supervised by their engineers. If this is not required,<br />
the project should be coordinated with the manufacturer's engineering staff.<br />
Various manufacturers utilize different techniques to achieve the desired long span<br />
configuration. In some instances, reinforcing ribs are used to strengthen the structure. In other<br />
cases, specially designed longitudinal structural stiffeners are installed on the top arch. Ribs and<br />
stiffeners which project into the barrel may increase the hydraulic resistance, particularly if the<br />
elements are perpendicular to the flow.<br />
Anchorage <strong>of</strong> the ends <strong>of</strong> long span culverts is required to prevent flotation or damage due to<br />
high velocities at the inlet. This is especially true for mitered inlets. Severe miters and skews are<br />
not recommended.<br />
176
2. <strong>Hydraulic</strong> Considerations. Long span culverts generally are hydraulically short (low length<br />
to equivalent diameter ratio) and flow partly full at the design discharge. The same hydraulic<br />
principles apply to the design <strong>of</strong> long span culverts as to other culverts. However, due to their<br />
large size and variety <strong>of</strong> shapes, it is very possible that design nomographs are not available for<br />
the barrel shape <strong>of</strong> interest. For these cases, dimensionless inlet control design curves have<br />
been prepared (Chapter III). For outlet control, backwater calculations are usually appropriate,<br />
since design headwaters exceeding the crowns <strong>of</strong> these conduits are rare. The bridge design<br />
techniques <strong>of</strong> HDS No. 1 are appropriate for the hydraulic design <strong>of</strong> most long span culverts, but<br />
the long span shapes are not included in that publication (21).<br />
I. Culvert Durability<br />
Culvert material longevity is as important a consideration to a culvert installation as proper<br />
hydraulic and structural design. At most locations, the commonly used culvert materials are very<br />
durable. However, there are hostile environmental conditions which will deteriorate all culvert<br />
materials. The two problems affecting the longevity <strong>of</strong> culverts due to adverse environmental<br />
conditions are abrasion and corrosion (Figure VI-38). Proper attention must be given to these<br />
problems in the design phase. Field inspection <strong>of</strong> existing culverts on the same or similar<br />
streams will prove invaluable in assessing potential problems.<br />
The annual cost <strong>of</strong> a culvert installation is very dependent on its service life. All other conditions<br />
being equal, the most durable culvert material should be selected to minimize annual<br />
costs. Measures are available to increase the service life <strong>of</strong> a culvert, such as lining the barrel<br />
with a more durable material. When considered, these measures should be included in an<br />
economic analysis comparing other culvert materials or other alternatives, including periodic<br />
replacement. Periodic replacement <strong>of</strong> culverts under low fills on secondary roads with light<br />
traffic may prove cost effective.<br />
1. Abrasion. Abrasion is defined as the erosion <strong>of</strong> culvert material due primarily to the natural<br />
movement <strong>of</strong> bedload in the stream. The characteristics <strong>of</strong> the bedload material and the<br />
frequency, velocity, and quantities which can be expected are factors to be considered in the<br />
design phase. The resistance <strong>of</strong> various culvert materials to the expected abrasion is then<br />
analyzed. Most materials are subject to abrasion when exposed to high velocity, rock laden<br />
flows over a period <strong>of</strong> time. Performance data on other installations in the vicinity may prove to<br />
be the most reliable indicator <strong>of</strong> abrasion potential and culvert material durability.<br />
When abrasion problems are expected, several options are available to the designer. Debris<br />
control structures can <strong>of</strong>ten be used to advantage, although they require periodic<br />
maintenance. A liner or bottom reinforcement utilizing excess structural material is another<br />
option. Concrete or bituminous lining <strong>of</strong> the invert <strong>of</strong> corrugated metal pipe is a commonly<br />
employed method to minimize abrasion. Concrete culverts may require additional cover over<br />
reinforcing bars or high strength concrete mixes. The use <strong>of</strong> metal or wooden planks attached to<br />
the culvert bottom normal to the flow will trap and hold bedload materials, thereby providing<br />
invert protection. Oversized culvert barrels which are partially buried accomplish the same<br />
purpose.<br />
177
Figure VI-38--Abrasion and Corrosion in <strong>Culverts</strong><br />
2. Corrosion. No culvert material exists which is not subject to deterioration when placed in<br />
certain corrosive environments. Galvanized steel culverts are generally subject to deterioration<br />
when placed in soils or water where the pH falls outside the range <strong>of</strong> 6 to 10; aluminum<br />
deteriorates outside the range <strong>of</strong> 4 to 9. (51) Clay and organic mucks with low electrical<br />
resistivities have also proven corrosive to metal culverts. Concrete is adversely affected by<br />
alternate wetting and drying with seawater and when exposed to sulfates and certain<br />
magnesium salts, and acidic flow with a pH less than 5. Steel deteriorates in saltwater<br />
environments. In general, metal culverts are adversely affected by acidic and alkaline<br />
conditions in the soil and water, and by high electrical conductivity <strong>of</strong> the soil. Concrete culverts<br />
are sensitive to saltwater environments and to soils containing sulfates and carbonates.<br />
A variety <strong>of</strong> measures can be taken to prevent the reduction <strong>of</strong> culvert service life in these<br />
hostile environments. These measures are generally categorized as appropriate material<br />
selection for the environment or the application <strong>of</strong> protective coatings. For example, aluminum<br />
appears to be resistant to corrosion in salt water installations. Experience has been favorable<br />
for fiber-bonded galvanized steel culverts in brackish environments. (52) <strong>Culverts</strong> and linings<br />
made <strong>of</strong> vitrified clay, stainless steel, and bituminized fiber perform well in highly acidic<br />
178
conditions. Variations in the concrete mix, such as higher cement content, help to reduce the<br />
deterioration <strong>of</strong> concrete culverts subject to alkaline soils and water. Concrete tends to perform<br />
better than metal in clay or organic muck. In areas <strong>of</strong> severe acidity, such as acid mine<br />
drainage, concrete box culverts have been protected by fiberglass linings.<br />
Bituminous or fiber-bonded coatings on metal culverts may require special consideration. The<br />
designer should ascertain that the this coating will in fact increase the service life. Delamination<br />
is the primary mode <strong>of</strong> failure and can occur due to sunlight exposure and abrasion. Damage to<br />
the coatings during handling and placing is another consideration. Polymer coatings appear to<br />
overcome some <strong>of</strong> these deficiencies. They have excellent corrosion resistance properties and<br />
are generally more abrasion-resistant, less subject to damage in handling and placement, and<br />
have fewer manufacturing flaws.<br />
J. Culvert <strong>Hydraulic</strong> Programs<br />
Numerous calculator and computer programs now exist to aid in the design and analysis <strong>of</strong><br />
highway culverts. These programs possess distinct advantages over traditional hand calculation<br />
methods. The increased accuracy <strong>of</strong> programmed solutions represents a major benefit over the<br />
inaccuracies inherent in the construction and use <strong>of</strong> charts and nomographs. In addition,<br />
programmed solutions are less time consuming. This feature allows the designer to compare<br />
alternative sizes and inlet configurations very rapidly so that the final culvert selection can be<br />
based on economics. Interactive capabilities in some programs can be used to change certain<br />
input parameters or constraints and analyze their effects on the final design. Familiarity with<br />
culvert hydraulics and the traditional methods <strong>of</strong> solution provides a solid basis for designers to<br />
take advantage <strong>of</strong> the speed, accuracy, and increased capabilities available in culvert hydraulics<br />
programs.<br />
The logic, capability, and output <strong>of</strong> programmed solutions vary depending mainly upon<br />
computer storage capacity and design function. Most programs analyze the performance <strong>of</strong> a<br />
given culvert, although some are capable <strong>of</strong> design. Generally, the desired result <strong>of</strong> either type<br />
<strong>of</strong> program is to obtain a culvert which satisfies hydrologic data and site conditions by<br />
considering both inlet and outlet control. Results usually include the barrel size, inlet<br />
dimensions, performance data, and outlet velocity. Some programs are capable <strong>of</strong> analyzing<br />
side-tapered and slope-tapered inlets. Often the analysis or design <strong>of</strong> the barrel size is for one<br />
barrel only; multiple barrels are designed by apportioning the design discharge between<br />
barrels. The larger computer programs may contain such desirable features as<br />
backwater calculations, performance curves, hydrologic routines, and capabilities for routing<br />
based on upstream storage considerations.<br />
The various culvert design hydraulic programs now available will not be covered in this manual.<br />
It would be impossible to cover all <strong>of</strong> the available culvert hydraulics programs because they are<br />
numerous and many are proprietary. However, users should be cautioned to review all<br />
programs and design procedures for conformance with the culvert design processes<br />
outlined in this manual and particularly in Appendix A.<br />
See the FHWA website, http://www.fhwa.dot.gov/bridge/hyds<strong>of</strong>t.htm, for calculator and culvert<br />
design computer programs available to the public.<br />
179
(Page intentionally blank)<br />
180
REFERENCES<br />
(www.fhwa.dot.gov/bridge/hydpub.htm)<br />
1. "<strong>Hydraulic</strong> Charts for the Selection <strong>of</strong> <strong>Highway</strong> <strong>Culverts</strong>," L.A. Herr and H.G. Bossy,<br />
HEC No. 5, <strong>Hydraulic</strong>s Branch, Bridge Division, Office <strong>of</strong> Engineering, FHWA, Washington,<br />
D.C. 20590, 1965.<br />
2. "Capacity Charts for the <strong>Hydraulic</strong> <strong>Design</strong> <strong>of</strong> <strong>Highway</strong> <strong>Culverts</strong>," Lester A. Herr and<br />
Herbert G. Bossy, <strong>Hydraulic</strong> Engineering Circular (HEC) No. 10, <strong>Hydraulic</strong>s Branch, Bridge<br />
Division, Office <strong>of</strong> Engineering, FHWA, Washington, D.C. 20590, November 1972.<br />
3. "<strong>Hydraulic</strong> <strong>Design</strong> <strong>of</strong> Improved Inlets for <strong>Culverts</strong>," L.J. Harrison, J.L. Morris,<br />
J.M. Normann and F.L. Johnson, HEC No. 13, <strong>Hydraulic</strong>s Branch, Bridge Division, Office <strong>of</strong><br />
Engineering, FHWA, Washington, D.C. 20590, August 1972.<br />
4. "<strong>Hydraulic</strong>s <strong>of</strong> Short Pipes, <strong>Hydraulic</strong> Characteristics <strong>of</strong> Commonly Used Pipe<br />
Entrances, First Progress Report," John L. French, NBS Report No. 4444, National Bureau<br />
<strong>of</strong> Standards, Washington D.C., December 1955.<br />
5. "<strong>Hydraulic</strong>s <strong>of</strong> <strong>Culverts</strong>, Second Progress Report, Pressure and Resistance<br />
Characteristics <strong>of</strong> a Model Pipe Culvert," John L. French, NBS Report No. 4911, National<br />
Bureau <strong>of</strong> Standards, Washington, D.C., October 1956.<br />
6. "<strong>Hydraulic</strong>s <strong>of</strong> <strong>Culverts</strong>, Third Progress Report, Effects <strong>of</strong> Approach Channel<br />
Characteristics on Model Pipe Culvert Operation," John L. French, NBS Report 5306,<br />
National Bureau <strong>of</strong> Standards, Washington, D.C., June 1957.<br />
7. "<strong>Hydraulic</strong>s <strong>of</strong> Improved Inlet Structures for Pipe <strong>Culverts</strong>, Fourth Progress Report,"<br />
John L. French, NBS Report 7178, National Bureau <strong>of</strong> Standards, Washington, D.C., August<br />
1961.<br />
8. "<strong>Hydraulic</strong>s <strong>of</strong> <strong>Culverts</strong>, Fifth Progress Report, Non-enlarged Box Culvert Inlets," John<br />
L. French, NBS Report 9327, National Bureau <strong>of</strong> Standards, Washington, D.C., June 1966.<br />
9. "<strong>Hydraulic</strong>s <strong>of</strong> <strong>Culverts</strong>, Sixth Progress Report, Tapered Box Culvert Inlets," John<br />
L. French, NBS Report 9355, National Bureau <strong>of</strong> Standards, Washington, D.C., June 1966.<br />
10. "<strong>Hydraulic</strong>s <strong>of</strong> <strong>Culverts</strong>, Seventh Progress Report, Tapered Box Inlets with Fall<br />
Concentration in the Inlet Structure," John L. French and Herbert G. Bossy, NBS Report<br />
No. 9528, National Bureau <strong>of</strong> Standards, Washington, D.C., July 1967.<br />
11. "Hydrology," Frank D. Masch, HEC No. 19, FHWA-IP-84-15, <strong>Hydraulic</strong>s Branch, Bridge<br />
Division, Office <strong>of</strong> Engineering, FHWA, Washington, D.C. 20590<br />
12. "Hydrology," Victor Mockus, National Engineering Handbook - Section 4, Soil<br />
Conservation Service, U.S. Department <strong>of</strong> Agriculture, Washington, D.C., 1964.<br />
13. "Local <strong>Design</strong> Storm," Ben Chie Yen and Ven Te Chow, Report No. FHWA/RD-82/063,<br />
Office <strong>of</strong> Research, FHWA, Washington, D.C., May 1983.<br />
181
14. "Flood Routing - Culvert <strong>Design</strong>," B.P. Durow, The South African Institution <strong>of</strong><br />
Engineers, March 1982.<br />
15. "Stability <strong>of</strong> Relocated Stream Channels," J. C. Brice, Report No. FHWA/RD-80/158,<br />
U.S. Geological Survey, March 1981. Available from the National Technical Information<br />
Service, Springfield, VA 22161.<br />
16. "Roughness Characteristics <strong>of</strong> Natural Channels," Harry H. Barnes, Jr., Water Supply<br />
Paper 1849, U.S. Geological Survey, Reston, VA, 1967.<br />
17. "Estimating <strong>Hydraulic</strong> Roughness Coefficients," Woody L. Cowan, Agricultural<br />
Engineering, Vol. 37, No. 7, pp. 473-475, July 1956.<br />
18. "Guide for Selecting Manning's Roughness Coefficients for Natural Channels and Flood<br />
Plains," G.J. Arcement, Jr. and V.R. Schneider, U.S. Geological Survey, Baton Rouge<br />
Louisiana, 70896, Available from the National Technical Information Service, Springfield, VA<br />
22161., April 1984.<br />
19. "Assessment <strong>of</strong> the Impacts <strong>of</strong> the National Flood Insurance Program on <strong>Highway</strong>s,"<br />
George Davis, Report No. FHWA/RD-80/015, <strong>Hydraulic</strong>s Branch, Bridge Division, Office <strong>of</strong><br />
Engineering, FHWA, Washington, D.C. 20590, April 1980.<br />
20. "Culvert <strong>Design</strong> System," FHWA-TS-80-245, <strong>Hydraulic</strong>s Section, Wyoming <strong>Highway</strong><br />
Department, Cheyenne, WY 82001, December 1980.<br />
21. "<strong>Hydraulic</strong>s <strong>of</strong> Bridge Waterways," J.N. Bradley, HDS No. 1, Second Edition, <strong>Hydraulic</strong>s<br />
Branch, Bridge Division, Office <strong>of</strong> Engineering, FHWA, Washington, D.C. 20590, September<br />
1973.<br />
22. "Bridge Waterways Analysis Model: Research Report," J.O. Shearman, W.H. Kirby,<br />
V.R. Schneider, and H.N. Flippo, FHWA-RD-86-108, Washington, D.C. 20590.<br />
23. "<strong>Design</strong> Charts For Open Channel Flow," HDS No. 3, <strong>Hydraulic</strong>s Branch, Bridge<br />
Division, Office <strong>of</strong> Engineering, FHWA, Washington, D.C. 20590, 1973.<br />
24. "Handbook <strong>of</strong> <strong>Hydraulic</strong>s," Horace Williams King and Ernest F. Brater, Sixth Edition,<br />
McGraw-Hill Book Co., 1976.<br />
25. "<strong>Hydraulic</strong> Flow Resistance Factors for Corrugated Metal Conduits," J.M. Normann,<br />
FHWA-TS-80-216, <strong>Hydraulic</strong>s Branch, Bridge Division, Office <strong>of</strong> Engineering, FHWA,<br />
Washington, D.C. 20590, January 1980. Available from the National Technical Information<br />
Service, Springfield, VA 22161.<br />
26. "Structural <strong>Design</strong> Manual for Improved Inlets and <strong>Culverts</strong>," Timothy J. McGrath and<br />
Frank J. Heger, FHWA-IP-83-6, Bridge Division, Office <strong>of</strong> Engineering, FHWA, Washington,<br />
D.C., 20590, June 1983.<br />
27. "Basic Stormwater Management in Virginia - Course C Training Notebook,"<br />
Jerome M. Normann and Robert J. Houghtalen, Virginia Soil and Water Conservation<br />
Commission, Richmond, VA, January 1985.<br />
182
28. "<strong>Design</strong> Approaches for Stormwater Management in Urban Areas," H. R. Malcom, Jr.,<br />
North Carolina State University, Raleigh, N.C., 1975.<br />
29. "Peak Run<strong>of</strong>fs From Small Basins Using Culvert Flood Measurements," J. D. Harris,<br />
<strong>On</strong>tario MTC Drainage and Hydrology Section, Downsville, <strong>On</strong>tario, 1975.<br />
30. "Guidelines for the <strong>Hydraulic</strong> <strong>Design</strong> <strong>of</strong> <strong>Culverts</strong>," Task Force on Hydrology and<br />
<strong>Hydraulic</strong>s AASHTO <strong>Highway</strong> Subcommittee on <strong>Design</strong>, American Association <strong>of</strong> State<br />
<strong>Highway</strong> and Transportation Officials, 341 National Press Bldg., Washington, D.C. 20045,<br />
1975.<br />
31. "Open Channel <strong>Hydraulic</strong>s," V.T. Chow, McGraw-Hill-Civil Engineering Series, New<br />
York, 1959.<br />
32. "Water Resources Engineering," Ray F. Linsley and Joseph B. Franzini, McGraw-Hill<br />
Book Company, 1972.<br />
33. "<strong>Design</strong> <strong>of</strong> Urban <strong>Highway</strong> Drainage - The State <strong>of</strong> the Art," Stifel W. Jens, FHWA-TS-<br />
79-225, <strong>Hydraulic</strong>s Branch, Bridge Division, Office <strong>of</strong> Engineering, FHWA, Washington,<br />
D.C. 20590, August 1979.<br />
34. "The <strong>Design</strong> <strong>of</strong> Supercritical Flow Channel Junctions," C. E. Behike and H. D. Pritchett,<br />
Research Record Number 123, <strong>Highway</strong> Research Board, Washington, D.C., 1966.<br />
35. "California Culvert Practice," 2nd Edition, California Department <strong>of</strong> Public Works,<br />
Division <strong>of</strong> <strong>Highway</strong>s, Sacramento, CA, 1956.<br />
36. "Experiences in the Use <strong>of</strong> Minimum and Constant Energy Bridges and <strong>Culverts</strong>,"<br />
N.H. Cottman, Institution <strong>of</strong> Engineers, Australia, 11 National Circuit Barton A.C.T. 26000<br />
Australia 0 85825 157 4, October 1981.<br />
37. "<strong>Hydraulic</strong>s <strong>of</strong> Minimum Energy <strong>Culverts</strong> and Bridge Waterways," C.J. Apelt, Institute <strong>of</strong><br />
Engineers, Australia, 11 National Circuit, Barton A.C.T. 2600 Australia 0 85825 157 4,<br />
October 1981.<br />
38. "<strong>Hydraulic</strong> <strong>Design</strong> <strong>of</strong> <strong>Culverts</strong> - <strong>On</strong>tario Ministry <strong>of</strong> Transportation and Communication<br />
Drainage Manual, Chapter D," J.D. Harris, <strong>On</strong>tario Ministry <strong>of</strong> Transportation and<br />
Communications, Dawnsview, <strong>On</strong>tario, August 1982.<br />
39. "<strong>Design</strong> Considerations and Calculations for Fishways Through Box <strong>Culverts</strong>," Fred<br />
F.M. Chang and J. M. Normann, Unpublished Text, <strong>Hydraulic</strong>s Branch, Bridge Division,<br />
FHWA, Office <strong>of</strong> Engineering, Washington, D.C. 20590, September 1976.<br />
40. "<strong>Hydraulic</strong> <strong>Design</strong> <strong>of</strong> Energy Dissipators for <strong>Culverts</strong> and Channels," M. L. Corry,<br />
P.L. Thompson, F.J. Watts, J.S. Jones and D.L. Richards, HEC No. 14, <strong>Hydraulic</strong>s Branch,<br />
Bridge Division, Office <strong>of</strong> Engineering, FHWA, Washington, D.C. 20590, September 1983<br />
41. "Evaluating Scour at Culvert Outlets," J.F. Ruff and S.R. Abt, Transportation Research<br />
Board Record N785, Transportation Research Board, <strong>Publications</strong> Office, 2101 Constitution<br />
Avenue, NW Washington, D.C. 20418, 1980.<br />
183
42. "Field and Laboratory Evaluation <strong>of</strong> Energy Dissipators for <strong>Culverts</strong> and Storm Drain<br />
Outlets. Volume I - Modular Energy Dissipators, Internal Energy Dissipators and Rock<br />
Channel Protection," S. Sarikelle and A.L. Simon, FHWA-OH-79-03, Akron University<br />
Department <strong>of</strong> Civil Engineering, Akron, Ohio 44325, December 1980. Available from the<br />
National Technical Information Service, Springfield, VA 22161.<br />
43. "Field and Laboratory Evaluation <strong>of</strong> Energy Dissipators for Culvert and Storm Outlets.<br />
Volume II--Field Performance <strong>of</strong> Corrugated Metal <strong>Culverts</strong>," S. Sarikelle and A.L. Simon,<br />
FHWA-OH-79-04, Akron University, 302 East Buchtel Avenue, Akron, Ohio 44325,<br />
December 1980. Available from the National Technical Information Service, Springfield, VA<br />
22161.<br />
44. "<strong>Highway</strong>s in the River Environment - <strong>Hydraulic</strong> and Environmental <strong>Design</strong><br />
Considerations," Civil Engineering Department, Colorado State University, Fort Collins, CO,<br />
May 1975.<br />
45. "Debris Control Structures," G. Reihsen and L. J. Harrison, HEC No. 9, <strong>Hydraulic</strong>s<br />
Branch, Bridge Division, Office <strong>of</strong> Engineering, FHWA, Washington, D.C. 20590, 1971.<br />
46. "The <strong>Design</strong> <strong>of</strong> Encroachments on Flood Plains Using Risk Analysis," M.L. Corry,<br />
J.S. Jones and P.L. Thompson, HEC No. 17, <strong>Hydraulic</strong>s Branch, Bridge Division, Office <strong>of</strong><br />
Engineering, FHWA, Washington, D.C. 20590, October 1980.<br />
47. "Handbook <strong>of</strong> Applied <strong>Hydraulic</strong>s," Calvin V. Davis, McGraw-Hill Book Co., Inc., New<br />
York, N.Y., 1952.<br />
48. "Wastewater Engineering," Metcalf & Eddy, Inc., McGraw-Hill Book Co., New York, N.Y.,<br />
1972<br />
49. "<strong>Hydraulic</strong> Performance <strong>of</strong> <strong>Culverts</strong> with Safety Grates," L.W. Mays, M.E. Walker,<br />
M.S. Bennet, and R.P. Arbuckle, FHWA/TX-82/55T301-1F; PB83-219626, Texas University,<br />
Austin Center for Transportation Research, Austin, Texas 78712, March 1983. Available<br />
from the National Technical Information Service, Springfield, VA 22161.<br />
50. "Standard Specifications for <strong>Highway</strong> Bridges," 13th Edition, American Association <strong>of</strong><br />
State <strong>Highway</strong> and Transportation Officials, 1983.<br />
51. "Corrosion Performance <strong>of</strong> Aluminum Culvert," T.A. Lowe and A.H. Koepf, <strong>Highway</strong><br />
Research Record No. 56, <strong>Highway</strong> Research Board, National Research Council,<br />
Washington, D.C., 1964, pp. 98-115.<br />
52. "Evaluation <strong>of</strong> the Durability <strong>of</strong> Metal Drainage Pipe," R.W. Kinchen, Transportation<br />
Research Record N762, pp. 25-32, Transportation Research Board <strong>Publications</strong> Office,<br />
2101 Constitution Avenue, NW Washington, D.C. 20418, 1980.<br />
53. "<strong>Hydraulic</strong> <strong>Design</strong> <strong>of</strong> Improved Inlets for <strong>Culverts</strong> Using Programmable Calculations,"<br />
P.D. Wlaschin, M.M. Chatfield, A.H. Lowe, R.G. Magalong, Calculator <strong>Design</strong> Series 1, 2, &<br />
3 for the Compucorp-325 Scientist, the HP-65, and the TI-59 programmable calculators,<br />
<strong>Hydraulic</strong>s Branch, Bridge Division, Office <strong>of</strong> Engineering, FHWA, Washington, D.C. 20590,<br />
October 1980.<br />
184
54. "<strong>Hydraulic</strong> Analysis <strong>of</strong> Pipe-Arch and Elliptical Shape <strong>Culverts</strong> Using Programmable-<br />
Calculators," Calculator <strong>Design</strong> Series 4, <strong>Hydraulic</strong>s Branch, Bridge Division, Office <strong>of</strong><br />
Engineering, FHWA, Washington, D.C. 20590, March 1982.<br />
55. "Electronic Computer Program for <strong>Hydraulic</strong> Analysis <strong>of</strong> Pipe - Arch <strong>Culverts</strong>," HY-2,<br />
<strong>Hydraulic</strong>s Branch, Bridge Division, Office <strong>of</strong> Engineering, FHWA, Washington, D.C. 20590,<br />
May 1969.<br />
56. "<strong>Hydraulic</strong> <strong>Design</strong> <strong>of</strong> <strong>Highway</strong> <strong>Culverts</strong>," Herbert G. Bossy, Draft HDS, Unpublished<br />
notes furnished by <strong>Hydraulic</strong>s Branch, Bridge Division, Office <strong>of</strong> Engineering, FHWA,<br />
Washington, D.C. 20590, April 1963.<br />
57. "<strong>Hydraulic</strong> <strong>Design</strong> <strong>of</strong> Large Structural Plate Corrugated Metal <strong>Culverts</strong>,"<br />
Jerome M. Normann, <strong>Hydraulic</strong>s Branch, Bridge Division, Office <strong>of</strong> Engineering, FHWA,<br />
Washington, D.C. 20590, January 1974.<br />
58. "<strong>Hydraulic</strong> <strong>Design</strong> Detail," DP-131, Edition 1, Kaiser Aluminum and Chemical<br />
Corporation, Oakland, CA, 1984.<br />
59. "Electronic Computer Program for <strong>Hydraulic</strong> Analysis <strong>of</strong> <strong>Culverts</strong>," Mario Marques, HY-6,<br />
<strong>Hydraulic</strong>s Branch, Bridge Division, Office <strong>of</strong> Engineering, FHWA, Washington, D.C. 20590,<br />
1979.<br />
60. "Computation <strong>of</strong> Uniform and Nonuniform Flow in Prismatic Channels,"<br />
Paul N. Zelensky, Office <strong>of</strong> Research, FHWA, Washington, D.C. 20590, November 1972.<br />
61. "Handbook <strong>of</strong> Steel Drainage and <strong>Highway</strong> Construction Products," American Iron and<br />
Steel Institute, 1000 - 16th, N.W., Washington, D.C. 20036, 1983.<br />
62. "Applied <strong>Hydraulic</strong>s in Engineering," Henry M. Morris and James M. Wiggert, John Wiley<br />
& Sons, 1972.<br />
63. "Concrete Pipe Handbook," American Concrete Pipe Association (ACPA), 8320 Old<br />
Courthouse Road, Vienna, VA 22180, June 1980.<br />
64. "Resistance to Flow in Two Types <strong>of</strong> Concrete Pipe," Technical Paper No. 22, Series B,<br />
Lorenz G. Straub, Charles E. Bowers, and Meir Pilch, University <strong>of</strong> Minnesota, St. Anthony<br />
Falls <strong>Hydraulic</strong> Laboratory, Minneapolis, MN, December 1960.<br />
65. "Friction Factor Tests on Spiral Rib Pipes," <strong>Hydraulic</strong> Program Report No. 83, J. Paul<br />
Tullis, Utah Water Research Laboratory, Utah State University, Logan, UT, April 1983.<br />
66. "A Study <strong>of</strong> Manning's Roughness Coefficient for Commercial Concrete and Plastic<br />
Pipes," D. K. May, A. W. Peterson and N. Rajaratnam, T. Blench <strong>Hydraulic</strong>s Laboratory,<br />
University <strong>of</strong> Alberta, Edmonton, Alberta, January 26, 1986.<br />
67. "Friction Factor Tests on Concrete Pipe," <strong>Hydraulic</strong>s Report No. 157 J. Paul Tullis,<br />
Utah Water Research Laboratory, Utah State University, Logan, UT, October 1986.<br />
185
68. "Friction Factor Test on 24-Inch Helical Corrugated Pipe," <strong>Hydraulic</strong>s Report No. 279, J.<br />
Paul Tullis, Utah Water Research Laboratory, Utah State University, Logan, UT, April 1991.<br />
69. "Friction Factor Test on 24 and 48-Inch Spiral Rib Pipe," <strong>Hydraulic</strong>s Report No. 280, J.<br />
Paul Tullis, Utah Water Research Laboratory, Utah State University, Logan, UT, April 1991.<br />
70. "Friction Factor Test <strong>of</strong> 36-Inch Concrete Pipe," <strong>Hydraulic</strong>s Report No 281, J. Paul Tullis,<br />
Utah Water Research Laboratory, Utah State University, Logan, UT, April 1991.<br />
71. "Friction Factor Test on High Density Polyethylene Pipe," <strong>Hydraulic</strong>s Report No. 208,<br />
Steven Barfuss and J. Paul Tullis, Utah Water Research Laboratory, Utah State University,<br />
Logan, UT, 1988.<br />
72. "Innovative New Drainage Pipe," J. Paul Tullis, R.K. Watkins, S.L. Barfuss, ASCE<br />
Proceedings <strong>of</strong> the International Conference Pipeline <strong>Design</strong> and Installation, March 25-27,<br />
1990.<br />
73. "Manning Friction Coefficient Testing <strong>of</strong> 4-, 10-, 12-, and 15-inch Corrugated Plastic<br />
Pipe," <strong>Hydraulic</strong>s Report No. 36, C.G. Clyde, Utah Water Research Laboratory, Utah State<br />
University, Logan, UT, 1980.<br />
74. "Test for Friction Factors in 18- and 24-Diameter Corrugated Tubing," U.S. Bureau <strong>of</strong><br />
Reclamation, Engineering and Research Center letter and test results, October 25, 1985.<br />
75. "Flow Characteristics <strong>of</strong> PVC Sewer Pipe," Neale, L.C. and R.E. Price, ASCE Journal <strong>of</strong><br />
the Sanitary Engineering Division, Div. Proc 90SA3, p 109-129, 1964.<br />
76. "<strong>Hydraulic</strong> Characteristics <strong>of</strong> PVC Sewer Pipe in Sanitary Sewers," R.R. Bishop, R.W.<br />
Jeppson, Utah State University, Logan, UT, September 1975.<br />
77. "<strong>Highway</strong> Hydrology," R. H. McCuen, P.A. Johnson, and R.M. Ragan, <strong>Hydraulic</strong> <strong>Design</strong><br />
Series No. 2, FHWA-SA-96-067, Office <strong>of</strong> Engineering and Office <strong>of</strong> Technology<br />
Applications, FHWA, Washington, D.C. 20590, September 1996.<br />
186
ADDITIONAL REFERENCES<br />
(In Alphabetic Order)<br />
"A Commentary and Bibliography on The <strong>Hydraulic</strong>s <strong>of</strong> Culvert <strong>Design</strong>, Chapter 4,"<br />
N. H. Cottman, Australian Road Research Board, 500 Burwood Hwy, Vermont South, Victoria,<br />
May 1980.<br />
"A Study <strong>of</strong> Detention in Urban Stormwater Management," H.R. Malcom, PB80-220577; UNC-<br />
WRRI-80-156; OWRT-B-093-NC(2), North Carolina Water Resources Research Institute, 124<br />
Riddick Bldg., N.C. State University, Raleigh, NC 27650, July 1980. Available from the National<br />
Technical Information Service, Springfield, VA 22161.<br />
"Approximate Method for Computing Backwater Pr<strong>of</strong>iles in Corrugated Metal Pipes,"<br />
P.N. Zelensky, FHWA-RD-76-42, Office <strong>of</strong> Research, FHWA, Washington, D.C. 20590, April<br />
1976.<br />
"Comparative Study <strong>of</strong> Coatings on Corrugated Metal Culvert Pipe," David K. Curtice and John<br />
E. Funnell, Southwest Research Institute Project No. 07-2733, Southwest Research Institute,<br />
P.O. Drawer 28510, 8500 Culebra Road, San Antonio, TX 78228, March 15, 1971.<br />
"Concrete Pipe <strong>Design</strong> Manual," American Concrete Pipe Association (ACPA), 8320 Old<br />
Courthouse Road, Vienna, VA 22180, February, 1985.<br />
"Concrete Pipe Handbook," American Concrete Pipe Association (ACPA), 8320 Old Courthouse<br />
Road, Vienna, VA 22180, April 1981.<br />
"Culvert <strong>Design</strong> Aids: An Application <strong>of</strong> US - BPR Culvert Capacity Charts," Portland Cement<br />
Association, Chicago, Illinois, 1962.<br />
"Culvert <strong>Design</strong> and Analysis Using a Micro-Computer," A.C. Miller, <strong>Hydraulic</strong>s Branch, Bridge<br />
Division, Office <strong>of</strong> Engineering, FHWA, Washington, D.C. 20590, 1985.<br />
"<strong>Culverts</strong> - Hydrology and <strong>Hydraulic</strong>s," Gerard P. Lennon, Jerome M. Normann, and Richard<br />
N. Weisman, Lehigh University, Bethlehem, PA, June 1982.<br />
"Culvert Outlet Protection <strong>Design</strong>: Computer Program Documentation," M.G. Schilling, FHWA-<br />
RD-74-501, Wyoming State <strong>Highway</strong> Department, P.O. Box 1708, Cheyenne, WY 82001.<br />
Available from the National Technical Information Service, Springfield, VA 22161.<br />
"Determining <strong>Design</strong> Flows for <strong>Culverts</strong> and Bridges on Ungauged Streams," John F. Orsborn,<br />
TRB/TRR-685; PB-298102/5ST, Transportation Research Board, Washington, D.C., 1978,<br />
p. 32.<br />
"Drainage Structures for Low-Cost Roads in Desert Areas," T.D. Raikes, Vol. P-208, Planning<br />
and Transport Research and Computation (PTRC) Education and Research Services Limited,<br />
110 Strand, London WC2 England, 0143-4446 08650-090-X, July 1981.<br />
187
"Effective Minor Drainage <strong>Design</strong> Overseas," R. J. Freer-Hewish, P-208, Planning and<br />
Transport Research and Computation (PTRC) Education Research Services Limited, 110<br />
Strand London WC2 England, 0143-4446 086050-090-X, July 1981.<br />
"Evaluation <strong>of</strong> the Flood Risk Factor in the <strong>Design</strong> <strong>of</strong> Box <strong>Culverts</strong>," FHWA-RD75-54,<br />
G.K. Young; R.S. Taylor, and L.S. Costello, <strong>Hydraulic</strong>s Branch, Bridge Division, Office <strong>of</strong><br />
Engineering, FHWA, Washington, D.C. 20590, September 1970.<br />
"Fish Passage Through <strong>Highway</strong> <strong>Culverts</strong>," T.J. McClellan, PB 204 983, Federal <strong>Highway</strong><br />
Administration, Region 8, Portland, OR, October 1971 (Reprinted July 1980). Available from the<br />
National Technical Information Service, Springfield, VA 22161.<br />
"<strong>Hydraulic</strong> Aspects <strong>of</strong> Fish-Ladder Baffles in Box <strong>Culverts</strong>," Jerome M. Normann, <strong>Hydraulic</strong>s<br />
Branch, Bridge Division, Office <strong>of</strong> Engineering, FHWA, Washington, D.C. 20590, Draft Report,<br />
January 1974.<br />
"The <strong>Hydraulic</strong>s <strong>of</strong> <strong>Culverts</strong>," F.T. Mavis, Bulletin No. 56, The Pennsylvania State College<br />
Bulletin, State College, PA, February 1943.<br />
"<strong>Hydraulic</strong>s <strong>of</strong> Box <strong>Culverts</strong> with Fish Ladders," R.H. Shoemaker, Proceedings <strong>of</strong> the 35th<br />
Annual Meeting, <strong>Highway</strong> Research Board, National Academy <strong>of</strong> Sciences, <strong>Highway</strong> Research<br />
Board, Washington, D.C., January 1956.<br />
"<strong>Hydraulic</strong> Tests on Pipe <strong>Culverts</strong>," C.R. Neill, Report 62-1, Alberta Cooperative <strong>Highway</strong><br />
Research Program, Research Council <strong>of</strong> Alberta, 87th Street Edmonton, Alberta, Canada, 1962.<br />
"The Impact <strong>of</strong> Stream Relocation on Fish Populations and Bottom Fauna with Emphasis on<br />
Movement <strong>of</strong> Fishes Through Long <strong>Culverts</strong>," E.L. Cooper, FHWA/PA 81-019; PB82-202524,<br />
Pennsylvania State University, University Park Institute for Research on Land and Water,<br />
University Park, PA 16802, May 1981.<br />
"Improved Inlets for Concrete Pipe <strong>Culverts</strong>," <strong>Hydraulic</strong> Research Group - Office <strong>of</strong> Research<br />
and Development - Bureau <strong>of</strong> Public Roads (now the FHWA), Washington, D.C., unpublished<br />
paper, November 1964<br />
"Improved Inlets for <strong>Highway</strong> <strong>Culverts</strong>," Jerome M. Normann, Civil Engineering, Vol. 45,<br />
Number 3, American Society <strong>of</strong> Civil Engineers, New York, New York, March 1975.<br />
"Optimal <strong>Design</strong> <strong>of</strong> <strong>Culverts</strong> Under Uncertainties," Larry W. Mays, Journal <strong>of</strong> the <strong>Hydraulic</strong>s<br />
Division, Vol. 105, American Society <strong>of</strong> Civil Engineers, 345 East 47th Street, New York, NY<br />
10017, May 1979.<br />
"Optimal <strong>Design</strong> for <strong>Highway</strong> Drainage <strong>Culverts</strong>," G. Young, M. Childrey; R. Trent, Journal <strong>of</strong><br />
the <strong>Hydraulic</strong>s Division, Vol. 100 No. HY-7 (Proc Paper 10676), American Society <strong>of</strong> Civil<br />
Engineers, 345 East 47th Street, New York, NY 10017, 1974.<br />
"Optimal Risk-Based <strong>Design</strong> <strong>of</strong> Water Resource Engineering Projects," Y.K. Tung, L.W. Mays,<br />
CRWR-171 (420 pages), University <strong>of</strong> Texas, Center for Research in Water Resource, Austin,<br />
TX 87812, August 1980.<br />
188
"Risk Analysis For <strong>Hydraulic</strong> <strong>Design</strong>," Y.K. Tung and L.W. Mays, <strong>Hydraulic</strong>s Division Journal,<br />
Vol. 106, American Society <strong>of</strong> Civil Engineers, 345 East 47th Street, New York, NY 10017, May<br />
1980, pp. 893-913.<br />
"Some Sample Calculations For Oversize <strong>Culverts</strong>," G. Fiala, Portland Regional Office, FHWA,<br />
Portland, OR, Unpublished paper, April 1976.<br />
"Theory, Development and Application <strong>of</strong> a Perfect Curvilinear Flow Net for Transitioning Open<br />
Channels," N.H. Cottman and D.J. Treloar, Institution <strong>of</strong> Engineers, Australia, 11 National Circuit<br />
Barton A.C.T. 2600 Australia 0 85825 157 4, 1980.<br />
"Translation <strong>of</strong> Japanese <strong>Highway</strong> <strong>Design</strong> Manual: Part 3, Drainage," O.G. Ingles, ARR No. 55,<br />
Australian Road Research Board, 506 Burwood Road, Vermont South Victoria 3133 Australia<br />
0313-3842, May 1979.<br />
"Usefulness <strong>of</strong> the Storage Parameter," Alfred R. Pagan, Civil Engineering, American Society <strong>of</strong><br />
Civil Engineers, 345 East 47th Street, New York, NY 10017, October 1975.<br />
189
(This page is intentionally left blank.)<br />
190
A. Introduction<br />
APPENDIX A<br />
DESIGN METHODS AND EQUATIONS<br />
This appendix contains explanations <strong>of</strong> the equations and methods used to develop the design<br />
charts <strong>of</strong> this publication, where those equations and methods are not fully described in the<br />
main text. The following topics are discussed: the design equations for the unsubmerged and<br />
submerged inlet control nomographs, the dimensionless design curves for culvert shapes and<br />
sizes without nomographs, and the dimensionless critical depth charts for long span culverts<br />
and corrugated metal box culverts.<br />
B. Inlet Control Nomograph Equations<br />
The design equations used to develop the inlet control nomographs are based on the research<br />
conducted by the National Bureau <strong>of</strong> Standards (NBS) under the sponsorship <strong>of</strong> the Bureau <strong>of</strong><br />
Public Roads (now the Federal <strong>Highway</strong> Administration). Seven progress reports were<br />
produced as a result <strong>of</strong> this research. Of these, the first and fourth through seventh reports<br />
dealt with the hydraulics <strong>of</strong> pipe and box culvert entrances, with and without tapered inlets (4, 7,<br />
to 10). These reports were one source <strong>of</strong> the equation coefficients and exponents, along with<br />
other references and unpublished FHWA notes on the development <strong>of</strong> the nomographs (56 and<br />
57).<br />
The two basic conditions <strong>of</strong> inlet control depend upon whether the inlet end <strong>of</strong> the culvert is or is<br />
not submerged by the upstream headwater. If the inlet is not submerged, the inlet performs as<br />
a weir. If the inlet is submerged, the inlet performs as an orifice. Equations are available for<br />
each <strong>of</strong> the above conditions.<br />
Between the unsubmerged and the submerged conditions, there is a transition zone for which<br />
the NBS research provided only limited information. The transition zone is defined empirically<br />
by drawing a curve between and tangent to the curves defined by the unsubmerged and<br />
submerged equations. In most cases, the transition zone is short and the curve is easily<br />
constructed.<br />
Table 8 contains the unsubmerged and submerged inlet control design equations. Note that<br />
there are two forms <strong>of</strong> the unsubmerged equation. Form (1) is based on the specific head at<br />
critical depth, adjusted with two correction factors. Form (2) is an exponential equation similar<br />
to a weir equation. Form (1) is preferable from a theoretical standpoint, but Form (2) is easier to<br />
apply and is the only documented form <strong>of</strong> equation for some <strong>of</strong> the inlet control nomographs.<br />
The constants and the corresponding equation form are given in Table 9. Table 9 is arranged in<br />
the same order as the design nomographs in Appendix D, and provides the unsubmerged and<br />
submerged equation coefficients for each shape, material, and edge configuration. For the<br />
unsubmerged equations, the form <strong>of</strong> the equation is also noted.<br />
191
UNSUBMERGED 1<br />
Table 8--Inlet Control <strong>Design</strong> Equations.<br />
M<br />
HWi<br />
Hc<br />
⎡ KuQ<br />
⎤<br />
2<br />
Form( 1)<br />
= + K − 0.<br />
5S<br />
D D<br />
⎢ 0.<br />
5 ⎥<br />
(26)<br />
⎣ AD ⎦<br />
M<br />
HWi<br />
⎡ K uQ<br />
⎤<br />
Form( 2)<br />
= K<br />
D<br />
⎢ 0.<br />
5 ⎥ (27)<br />
⎣ AD ⎦<br />
SUBMERGED 3<br />
HW<br />
D<br />
I<br />
Definitions<br />
2<br />
⎡ K uQ<br />
⎤<br />
2<br />
= c ⎢ + Y − 0.<br />
5S<br />
0.<br />
5 ⎥<br />
(28)<br />
⎣ AD ⎦<br />
HWi Headwater depth above inlet control section invert, m (ft)<br />
D Interior height <strong>of</strong> culvert barrel, m (ft)<br />
Hc Specific head at critical depth (dc + Vc 2 /2g), m (ft)<br />
Q Discharge, m 3 /s (ft 3 /s)<br />
A Full cross sectional area <strong>of</strong> culvert barrel, m 2 (ft 2 )<br />
S Culvert barrel slope, m/m (ft/ft)<br />
K,,M,c,Y Constants from Table 9<br />
1.811 SI (1.0 English)<br />
Ku<br />
NOTES: 1 Equations (26) and (27) (unsubmerged) apply up to about Q/AD 0.5 = 1.93<br />
(3.5 English)<br />
2 For mitered inlets use +0.7S instead <strong>of</strong> -0.5S as the slope correction factor<br />
3 Equation (28) (submerged) applies above about Q/AD 0.5 = 2.21 (4.0. English)<br />
The equations may be used to develop design curves for any conduit shape or size. Careful<br />
examination <strong>of</strong> the equation constants for a given form <strong>of</strong> equation reveals that there is very little<br />
difference between the constants for a given inlet configuration. Therefore, given the necessary<br />
conduit geometry for a new shape from the manufacturer, a similar shape is chosen from Table<br />
9, and the constants are used to develop new design curves. The curves may be quasidimensionless,<br />
in terms <strong>of</strong> Q/AD 0.5 and HWi /D, or dimensional, in terms <strong>of</strong> Q and HWi for a<br />
particular conduit size. To make the curves truly dimensionless, Q/AD 0.5 must be divided by<br />
g 0.5 , but this results in small decimal numbers. Note that coefficients for rectangular (box)<br />
shapes should not be used for nonrectangular (circular, arch, pipe-arch, etc.) shapes and viceversa.<br />
A constant slope value <strong>of</strong> 2 percent (0.02) is usually selected for the development <strong>of</strong><br />
design curves. This is because the slope effect is small and the resultant headwater is<br />
conservatively high for sites with slopes exceeding 2 percent (except for mitered inlets).<br />
192
Chart<br />
No.<br />
1<br />
Shape<br />
and Material<br />
Circular Concrete<br />
Nomograph<br />
Scale<br />
1<br />
2<br />
3<br />
2 Circular CMP 1<br />
2<br />
3<br />
3 Circular A<br />
B<br />
8 Rectangular Box 1<br />
2<br />
3<br />
9 Rectangular Box 1<br />
2<br />
10 Rectangular Box 1<br />
2<br />
3<br />
11 Rectangular Box 1<br />
2<br />
3<br />
4<br />
12 Rectangular Box<br />
3/4" chamfers<br />
13 Rectangular Box<br />
Top Bevels<br />
1<br />
2<br />
3<br />
1<br />
2<br />
3<br />
16-19 C M Boxes 2<br />
3<br />
5<br />
Table 9--Constants for Inlet Control <strong>Design</strong> Equations.<br />
Inlet Edge<br />
Description<br />
Square edge w/headwall<br />
Groove end w/headwall<br />
Groove end projecting<br />
Headwall<br />
Mitered to slope<br />
Projecting<br />
Beveled ring, 45° bevels<br />
Beveled ring, 33.7° bevels*<br />
30° to 75° wingwall flares<br />
90° and 15° wingwall flares<br />
0° wingwall flares<br />
45° wingwall flare d = .043D<br />
18° to 33.7° wingwall flare d = .083D<br />
90° headwall w/3/4" chamfers<br />
90° headwall w/45° bevels<br />
90° headwall w/33.7° bevels<br />
3/4" chamfers; 45° skewed headwall<br />
3/4" chamfers; 30° skewed headwall<br />
3/4" chamfers; 15° skewed headwall<br />
45° bevels; 10°-45° skewed headwall<br />
45° non-<strong>of</strong>fset wingwall flares<br />
18.4° non-<strong>of</strong>fset wingwall flares<br />
18.4° non-<strong>of</strong>fset wingwall flares<br />
30° skewed barrel<br />
45° wingwall flares - <strong>of</strong>fset<br />
33.7° wingwall flares - <strong>of</strong>fset<br />
18.4° wingwall flares - <strong>of</strong>fset<br />
90° headwall<br />
Thick wall projecting<br />
Thin wall projecting<br />
193<br />
Equation<br />
Form<br />
1<br />
K<br />
Unsubmerged Submerged<br />
.0098<br />
.0018<br />
.0045<br />
1 .0078<br />
.0210<br />
.0340<br />
1 .0018<br />
.0018<br />
1 .026<br />
.061<br />
.061<br />
2 .510<br />
.486<br />
2 .515<br />
.495<br />
.486<br />
2 .545<br />
.533<br />
.522<br />
.498<br />
2 .497<br />
.493<br />
.495<br />
2 .497<br />
.495<br />
.493<br />
1 .0083<br />
.0145<br />
.0340<br />
M<br />
2.0<br />
2.0<br />
2.0<br />
2.0<br />
1.33<br />
1.50<br />
2.50<br />
2.50<br />
1.0<br />
.75<br />
.75<br />
.667<br />
.667<br />
.667<br />
.667<br />
.667<br />
.667<br />
.667<br />
.667<br />
.667<br />
.667<br />
.667<br />
.667<br />
.667<br />
.667<br />
.667<br />
2.0<br />
1.75<br />
1.5<br />
c<br />
.0398<br />
.0292<br />
.0317<br />
.0379<br />
.0463<br />
.0553<br />
.0300<br />
.0243<br />
.0347<br />
.0400<br />
.0423<br />
.0309<br />
.0249<br />
.0375<br />
.0314<br />
.0252<br />
.04505<br />
.0425<br />
.0402<br />
.0327<br />
.0339<br />
.0361<br />
.0386<br />
.0302<br />
.0252<br />
.0227<br />
.0379<br />
.0419<br />
.0496<br />
Y<br />
.67<br />
.74<br />
.69<br />
.69<br />
.75<br />
.54<br />
.74<br />
.83<br />
.81<br />
.80<br />
.82<br />
.80<br />
.83<br />
.79<br />
.82<br />
.865<br />
.73<br />
.705<br />
.68<br />
.75<br />
.803<br />
.806<br />
.71<br />
.835<br />
.881<br />
.887<br />
.69<br />
.64<br />
.57<br />
References<br />
56/57<br />
56/57)<br />
57<br />
56<br />
56<br />
8<br />
8<br />
8<br />
8<br />
8<br />
8<br />
57
Chart<br />
No.<br />
29<br />
Shape<br />
and Material<br />
Horizontal<br />
Ellipse<br />
Concrete<br />
30 Vertical<br />
Ellipse<br />
Concrete<br />
34 Pipe Arch<br />
18" Corner<br />
Radius CM<br />
35 Pipe Arch<br />
18" Corner<br />
Radius CM<br />
36 Pipe Arch<br />
31" Corner<br />
Radius CM<br />
Table 9 (continued) Constants for Inlet Control <strong>Design</strong> Equations<br />
Nomograph<br />
Scale<br />
1<br />
2<br />
3<br />
1<br />
2<br />
3<br />
1<br />
2<br />
3<br />
1<br />
2<br />
3<br />
41-43 Arch CM 1<br />
2<br />
3<br />
55 Circular 1<br />
2<br />
56 Elliptical<br />
Inlet Face<br />
1<br />
1<br />
2<br />
3<br />
Inlet Edge<br />
Description<br />
Square edge w/headwall<br />
Groove end w/headwall<br />
Groove end projecting<br />
Square edge w/headwall<br />
Groove end w/headwall<br />
Groove end projecting<br />
90° headwall<br />
Mitered to slope<br />
Projecting<br />
Projecting<br />
No Bevels<br />
33.7° Bevels<br />
Projecting<br />
No Bevels<br />
33.7° Bevels<br />
90° headwall<br />
Mitered to slope<br />
Thin wall projecting<br />
Smooth tapered inlet throat<br />
Rough tapered inlet throat<br />
Tapered inlet-beveled edges<br />
Tapered inlet-square edges<br />
Tapered inlet-thin edge projecting<br />
194<br />
Equation<br />
Form<br />
1<br />
K<br />
Unsubmerged Submerged<br />
.0100<br />
.0018<br />
.0045<br />
1 .0100<br />
.0018<br />
.0095<br />
1 .0083<br />
.0300<br />
.0340<br />
1 .0300<br />
.0088<br />
.0030<br />
1 .0300<br />
.0088<br />
.0030<br />
1 .0083<br />
.0300<br />
.0340<br />
2 .534<br />
.519<br />
2 .536<br />
.5035<br />
.547<br />
57 Rectangular 1 Tapered inlet throat 2 .475 .667 .0179 .97 3<br />
58 Rectangular<br />
Concrete<br />
59 Rectangular<br />
Concrete<br />
1<br />
2<br />
Side tapered-less favorable edges<br />
Side tapered-more favorable edges<br />
1 Slope tapered-less favorable edges<br />
Slope tapered-more favorable edges<br />
2 .56<br />
.56<br />
2 .50<br />
.50<br />
M<br />
2.0<br />
2.5<br />
2.0<br />
2.0<br />
2.5<br />
2.0<br />
2.0<br />
1.0<br />
1.5<br />
1.5<br />
2.0<br />
2.0<br />
1.5<br />
2.0<br />
2.0<br />
2.0<br />
1.0<br />
1.5<br />
.555<br />
.64<br />
.622<br />
.719<br />
.80<br />
.667<br />
.667<br />
.667<br />
.667<br />
c<br />
.0398<br />
.0292<br />
.0317<br />
.0398<br />
.0292<br />
.0317<br />
.0379<br />
.0463<br />
.0496<br />
.0496<br />
.0368<br />
.0269<br />
.0496<br />
.0368<br />
.0269<br />
.0379<br />
.0463<br />
.0496<br />
.0196<br />
.0210<br />
.0368<br />
.0478<br />
.0598<br />
.0446<br />
.0378<br />
.0446<br />
.0378<br />
Y<br />
.67<br />
.74<br />
.69<br />
.67<br />
.74<br />
.69<br />
.69<br />
.75<br />
.57<br />
.57<br />
.68<br />
.77<br />
.57<br />
.68<br />
.77<br />
.69<br />
.75<br />
.57<br />
.90<br />
.90<br />
.83<br />
.80<br />
.75<br />
.85<br />
.87<br />
.65<br />
.71<br />
References<br />
57<br />
57<br />
57<br />
56<br />
56<br />
57<br />
3<br />
3<br />
3<br />
3
NOTE: The rest <strong>of</strong> this Appendix A is only given in English units since it<br />
only describes the procedures used to develop a dimensionless design curve.<br />
Example: Develop a dimensionless design curve for elliptical structural plate corrugated metal<br />
culverts, with the long axis horizontal. Assume a thin wall projecting inlet. Use the coefficients<br />
and exponents for a corrugated metal pipe-arch, a shape similar to an ellipse.<br />
From Table 9, Chart 34, Scale 3:<br />
Unsubmerged: equation Form (1)<br />
K = .0340<br />
M = 1.5<br />
Submerged: c = .0496<br />
Y = 0.53<br />
From Table 8:<br />
Unsubmerged, equation Form 1 (Equation 49):<br />
HWi<br />
Hc<br />
⎛ Q<br />
= + . 0340 ⎜ 0<br />
D D ⎝ AD<br />
. 5<br />
Submerged (Equation 28):<br />
HWi<br />
⎛ Q<br />
= 0.<br />
0496 ⎜ 0<br />
D ⎝ AD<br />
. 5<br />
⎞<br />
⎟<br />
⎠<br />
2<br />
+<br />
⎞<br />
⎟<br />
⎠<br />
1.<br />
5<br />
−<br />
0.<br />
53<br />
( 0.<br />
5)(<br />
0.<br />
02)<br />
−<br />
(. 5)(<br />
0.<br />
02)<br />
A direct relationship between HWi/D and Q/AD 0.5 may be obtained for the submerged condition.<br />
For the unsubmerged condition, it is necessary to obtain the flow rate and equivalent specific<br />
head at critical depth. At critical depth, the critical velocity head is equal to one-half the<br />
hydraulic depth.<br />
2<br />
Vc<br />
y A h p<br />
= =<br />
2g<br />
2 2T<br />
Therefore:<br />
Hc h<br />
D<br />
p<br />
dc<br />
y<br />
= +<br />
(29)<br />
D 2D<br />
Also, at critical depth, the Froude number equals 1.0.<br />
Vc<br />
=<br />
( gy )<br />
Fr 0.<br />
5<br />
h<br />
= 1<br />
Setting: V c =<br />
Qc<br />
/ A p<br />
195
Q<br />
c =<br />
Q<br />
AD<br />
c<br />
0.<br />
5<br />
A<br />
p<br />
( gy<br />
A<br />
A<br />
h<br />
)<br />
0.<br />
5<br />
, or<br />
0.<br />
5<br />
p ⎛ y h ⎞<br />
= g •<br />
(30)<br />
⎜<br />
⎝<br />
⎟<br />
D ⎠<br />
From geometric data supplied by the manufacturer for a horizontal ellipse (58), the necessary<br />
geometry is obtained to calculate Hc/D and Qc/AD 5.0 .<br />
dc/D<br />
0.1<br />
0.2<br />
0.4<br />
0.6<br />
0.8<br />
0.9<br />
1.0<br />
yh/D<br />
0.04<br />
0.14<br />
0.30<br />
0.49<br />
0.85<br />
1.27<br />
--<br />
(From Equation 29)<br />
Hc/D<br />
0.12<br />
0.27<br />
0.55<br />
0.84<br />
1.22<br />
1.53<br />
--<br />
Ap/A<br />
0.04<br />
0.14<br />
0.38<br />
0.64<br />
0.88<br />
0.97<br />
1.00<br />
196<br />
(From Equation 30)<br />
Qc/AD 0.5<br />
0.05<br />
0.30<br />
1.18<br />
2.54<br />
4.60<br />
6.20<br />
--<br />
From unsubmerged Equation (26) with the appropriate constants for unsubmerged flow:<br />
Qc/AD 0.5<br />
0.05<br />
0.30<br />
1.18<br />
2.54<br />
4.60<br />
6.20<br />
--<br />
.0340 x<br />
(Qc/AD 0.5 ) 1.5<br />
0.0004<br />
0.0054<br />
0.044<br />
0.138<br />
0.336<br />
0.525<br />
--<br />
+Hc/D<br />
0.12<br />
0.27<br />
0.55<br />
0.84<br />
1.22<br />
1.53<br />
-0.5S=<br />
0.01<br />
0.01<br />
0.01<br />
0.01<br />
0.01<br />
0.01<br />
HWi /D<br />
0.11<br />
0.27<br />
0.58<br />
0.55<br />
1.54<br />
2.05<br />
For the submerged equation, any value <strong>of</strong> Q/AD 0.5 may be selected, since critical depth is not<br />
involved. From Equation (28), with the appropriate constants:<br />
Qc/AD 0.5<br />
1.0<br />
2.0<br />
4.0<br />
6.0<br />
8.0<br />
.0496 x<br />
(Qc/AD 0.5 ) 2<br />
0.05<br />
0.20<br />
0.79<br />
1.79<br />
3.17<br />
+Y<br />
0.53<br />
0.53<br />
0.53<br />
0.53<br />
0.53<br />
-0.5S=<br />
0.01<br />
0.01<br />
0.01<br />
0.01<br />
0.01<br />
HWi /D<br />
*0.57<br />
*0.72<br />
1.31<br />
2.31<br />
3.69<br />
*Obviously Unsubmerged<br />
Note that overlapping values <strong>of</strong> HWi/D were calculated in order to define the transition zone<br />
between the unsubmerged and the submerged states <strong>of</strong> flow.
Figure A-1--Dimensionless Performance Curve for Structural Plate Elliptical Conduit,<br />
Long Axis Horizontal, Thin Wall Projecting Entrance<br />
The results <strong>of</strong> the above calculations are plotted in Figure A-1. A transition line is drawn<br />
between the unsubmerged and the submerged curves. The scales are dimensionless in Figure<br />
A-1, but the figures could be used to develop dimensional curves for any selected size <strong>of</strong><br />
elliptical conduit by multiplying: Q/AD 0.5 by AD 0.5 HWi /D by D.<br />
Similar calculations were used to develop the dimensionless inlet control design curves for the<br />
long span arches and elliptical pipe in Chapter III.<br />
To derive overall inlet control equations for use on a computer, it is necessary to plot the<br />
unsubmerged and submerged curves from these equations and draw the connecting transition<br />
line. Then, the coordinates <strong>of</strong> selected points can be read from the curve and a best fit<br />
statistical analysis performed. A polynomical curve <strong>of</strong> the following form has been found to<br />
provide an adequate fit.<br />
HW<br />
D<br />
i<br />
⎡ Q<br />
= A + B ⎢ 1<br />
⎣BD<br />
. 5<br />
⎤ ⎡ Q<br />
⎥ + C ⎢ 1<br />
⎦ ⎣BD<br />
. 5<br />
⎤<br />
⎥<br />
⎦<br />
2<br />
⎡ Q<br />
+ ... + X⎢<br />
1<br />
⎣BD<br />
. 5<br />
197<br />
⎤<br />
⎥<br />
⎦<br />
n<br />
−<br />
0.<br />
5 S<br />
The flow factor could be based on AD 0.5 rather than BD. 1.5 The constants for the best fit<br />
equations are found in the user's manuals for various computer programs (20, 53, 54, 55, 59).<br />
C. Development <strong>of</strong> Dimensionless Inlet Control <strong>Design</strong> Charts.<br />
The dimensionless inlet control design charts provided for long span arches, circular and<br />
elliptical pipes were derived using the equations presented in Table 8, selected constants from
Table 9, conduit geometry obtained from various tables, and manufacturer's information (58, 60,<br />
61). There are several inlet edge configurations for which no hydraulic tests have been<br />
performed. In lieu <strong>of</strong> such tests, the selected edge conditions should approximate the untested<br />
configurations and lead to a good estimate <strong>of</strong> culvert performance. In some cases, it will be<br />
necessary to evaluate the inlet edge configuration at a specific flow depth. For example, some<br />
inlets may behave as mitered inlets at low headwaters and as thin wall projecting inlets at high<br />
headwaters. The designer must apply engineering judgment in selection <strong>of</strong> the proper<br />
relationships for these major structures.<br />
1. Unsubmerged Conditions. Equation (26) was used to calculate HWi/D for selected inlet<br />
edge configurations. The following constants were taken from Table 9, Chart 34 for pipe-arches,<br />
except for the 45 degree beveled edge inlet. These constants were taken from Chart 3, Scale<br />
A, for circular pipe. No constants were available from tests on pipe-arch models with beveled<br />
edges.<br />
Inlet Edge K M Slope Correction<br />
Thin Wall Projecting<br />
Mitered to Embankment<br />
Square Edge in Headwall<br />
Beveled Edge (45 o Bevels)<br />
0.0340<br />
.0300<br />
.0083<br />
.0018<br />
1.5<br />
1.0<br />
2.0<br />
2.5<br />
198<br />
-0.01<br />
+0.01<br />
-0.01<br />
-0.01<br />
Geometric relationships for the circular and elliptical (long axis horizontal) conduits were<br />
obtained from reference (60), Tables 4 and 7, respectively. Geometric relationships for the high<br />
and low pr<strong>of</strong>ile long span arches were obtained from reference (58) and the results were<br />
checked against tables in reference (61).<br />
2. Submerged Conditions. Equation (28) was used to calculate HWi/D for the same inlet<br />
configurations using the following constants:<br />
Inlet Edge c Y Slope Correction<br />
Thin Wall Projecting<br />
Mitered to Embankment<br />
Square Edge in Headwall<br />
Beveled Edge (45 o Bevels)<br />
0.0496<br />
.0463<br />
.0496<br />
.0300<br />
0.53<br />
.75<br />
.57<br />
.74<br />
-0.01<br />
+ .01<br />
- .01<br />
- .01<br />
In terms <strong>of</strong> Q/AD 0.5 , all non-rectangular shapes have practically the same dimensionless curves<br />
for submerged, inlet control flow.<br />
This is not true if Q/BD 1.5 is used as the dimensionless flow parameter.<br />
To convert Q/BD 1.5 to Q/AD 0.5 , divide by A/BD for the particular shape <strong>of</strong> interest as shown in<br />
Equation (31). This assumes that the shape is geometrically similar, so that A/BD is nearly<br />
constant for a range <strong>of</strong> sizes.<br />
Q /<br />
BD<br />
1.<br />
5<br />
( A / BD)<br />
⎛ Q ⎞⎛<br />
BD ⎞ Q<br />
= ⎜ ⎟⎜<br />
⎟ =<br />
(31)<br />
1.<br />
5<br />
0.<br />
5<br />
⎝ BD ⎠⎝<br />
A ⎠ AD<br />
3. Dimensionless Curves. By plotting the results <strong>of</strong> the unsubmerged and submerged<br />
calculations and connecting the resultant curves with transition lines, the dimensionless design<br />
curves shown in Charts 51 and 52 were developed. All high and low pr<strong>of</strong>ile arches can be<br />
represented by a single curve for each inlet edge configuration. A similar set <strong>of</strong> curves was
developed for circular and elliptical shapes. It is recommended that the high and low pr<strong>of</strong>ile<br />
arch curves in Chart 52 be used for all true arch shapes (those with a flat bottom) and that the<br />
curves in Chart 51 be used for curved shapes including circles, ellipses, pipe-arches, and pear<br />
shapes.<br />
D. Dimensionless Critical Depth Charts<br />
Some <strong>of</strong> the long span culverts and special culvert shapes had no critical depth charts. These<br />
special shapes are available in numerous sizes, making it impractical to produce individual<br />
critical depth curves for each culvert size and shape. Therefore, dimensionless critical depth<br />
curves were developed for the shapes which have adequate geometric relationships in the<br />
manufacturer's literature. (58) It should be noted that these special shapes are not truly<br />
geometrically similar, and any generalized set <strong>of</strong> geometric relationships will involve some<br />
degree <strong>of</strong> error. The amount <strong>of</strong> error is unknown since the geometric relationships were<br />
developed by the manufacturers.<br />
The manufacturers' literature contains geometric relationships which include the hydraulic depth<br />
divided by the rise (inside height) <strong>of</strong> the conduit (yh/D) and area <strong>of</strong> the flow prism divided by the<br />
barrel area (Ap/A) for various partial depth ratios, y/D. From Equation (30):<br />
Q<br />
AD<br />
0.<br />
5<br />
A<br />
⎜<br />
A ⎝<br />
0.<br />
5<br />
p ⎛ y h ⎞<br />
= g •<br />
(32)<br />
⎟<br />
D ⎠<br />
Setting y/D equal to dc/D, it is possible to determine Ap/A and yh/D at a given relative depth and<br />
then to calculate Qc/AD 0.5 .<br />
Dimensionless plots <strong>of</strong> dc/D versus Qc/AD 0.5 have been developed for the following culvert<br />
materials and shapes:<br />
1. Structural plate corrugated metal box culverts with the following span to rise (B/D) ratios:<br />
B/D < 0.3<br />
0.3 < B/D < 0.4<br />
0.4 < B/D < 0.5<br />
B/D > 0.5<br />
199
2. Structural plate corrugated metal arches with the following B/D ratios:<br />
0.3 < B/D < 0.4<br />
0.4 < B/D < 0.5<br />
B/D > 0.5<br />
3. Structural plate corrugated metal ellipses, long axis horizontal.<br />
4. Low pr<strong>of</strong>ile, long span, structural plate corrugated metal arches.<br />
5. High pr<strong>of</strong>ile, long span, structural plate corrugated metal arches with the following B/D ratios:<br />
B/D < 0.56<br />
B/D > 0.56<br />
E. Precision <strong>of</strong> Nomographs<br />
In formulating inlet and outlet control design nomographs, a certain degree <strong>of</strong> error is introduced<br />
into the design process. This error is due to the fact that the nomograph construction involves<br />
graphical fitting techniques resulting in scales which do not exactly match the equations.<br />
Checks by the authors and others indicate that all <strong>of</strong> the nomographs from HEC No. 5 have<br />
precisions <strong>of</strong> + 10 percent <strong>of</strong> the equation values in terms <strong>of</strong> headwater (inlet control) or head<br />
loss (outlet control).<br />
Extensive checking <strong>of</strong> the corrugated aluminum structural plate conduit nomographs provided<br />
by Kaiser aluminum indicates that most are within + 5 percent, except for the outlet control<br />
nomograph for structural plate corrugated metal box culverts. This nomograph is within the +<br />
10 percent range <strong>of</strong> precision.<br />
The new nomographs constructed for tapered inlets have errors <strong>of</strong> less than 5%, again in terms<br />
<strong>of</strong> headwater or head loss.<br />
200
APPENDIX B<br />
HYDRAULIC RESISTANCE OF CULVERT BARRELS<br />
NOTE: Since Appendix B is presented as a summary <strong>of</strong> a research report, it is only<br />
presented in English Units.<br />
A. General<br />
In outlet control, the hydraulic resistance <strong>of</strong> the culvert barrel must be calculated using a friction<br />
loss equation. Numerous equations, both theoretical and empirical, are available, including the<br />
Darcy equation and the Manning equation. The Darcy equation, shown in Equation (33), is<br />
theoretically correct, and is described in most hydraulic texts.<br />
h<br />
2<br />
⎛ L ⎞ ⎛ V ⎞<br />
= f ⎜ ⎟ ⎜<br />
⎟<br />
⎝ D ⎠ ⎝ 2g<br />
⎠<br />
f (33)<br />
hf is the friction head loss, ft<br />
f is the Darcy resistance factor<br />
L is the conduit length, ft<br />
D is the conduit diameter, ft<br />
V is the mean velocity, ft/s<br />
g is the acceleration due to gravity, 32.2 ft/s/s<br />
The Darcy friction factor, f, is selected from a chart commonly referred to as the Moody diagram,<br />
which relates f to Reynolds number (flow velocity, conduit size, and fluid viscosity) and relative<br />
roughness (ratio <strong>of</strong> roughness element size to conduit size). To develop resistance coefficients<br />
for new and untested wall roughness configurations, the Darcy f value can be derived<br />
theoretically and then converted to a Manning’s n value through use <strong>of</strong> the relationship shown in<br />
Equation (34).<br />
1/<br />
6 1/<br />
2<br />
n = 0.<br />
0926 R f<br />
(34)<br />
R is the hydraulic radius, ft<br />
A comprehensive discussion <strong>of</strong> the Darcy f, its derivation, and its relationship to other resistance<br />
coefficients is given in reference (62).<br />
The Manning equation, an empirical relationship, is commonly used to calculate the barrel<br />
friction losses in culvert design. The usual form <strong>of</strong> the Manning equation is as follows:<br />
1.<br />
486<br />
n<br />
R<br />
S<br />
2 / 3 1/<br />
2<br />
V = (35)<br />
V is the mean velocity <strong>of</strong> flow, ft/s<br />
R is the hydraulic radius, ft<br />
S is the slope <strong>of</strong> the conduit, ft/ft, equal to the slope <strong>of</strong> the water surface in uniform flow<br />
201
Substituting Hf/L for S and rearranging Equation (35) results in Equation (4b).<br />
The Manning’s n value in Equation (35) is based on either hydraulic test results or resistance<br />
values calculated using a theoretical equation such as the Darcy equation and then converting<br />
to the Manning’s n. As is seen from Equation (34), the Manning’s n varies with the conduit size<br />
(hydraulic radius) to the 1/6 power and has dimensions <strong>of</strong> ft 1/6 . Therefore, for very large or very<br />
small conduits, the Manning’s n should be adjusted for conduit size. Most hydraulic tests for<br />
Manning’s n values have been conducted on moderate size conduits, with pipes in the range <strong>of</strong><br />
2 to 5 ft in diameter or on open channels with hydraulic radii in the range <strong>of</strong> 1 to 4 ft. For large<br />
natural channels, backwater calculations are used to match observed water surface pr<strong>of</strong>iles by<br />
varying the Manning’s n. The resultant Manning’s n accounts for channel size and roughness.<br />
Using a constant value <strong>of</strong> Manning’s n regardless <strong>of</strong> conduit size or flow rate assumes that the<br />
Manning’s n is a function <strong>of</strong> only the absolute size <strong>of</strong> the wall roughness elements and is<br />
independent <strong>of</strong> conduit size and Reynolds number. This assumption is best for rough conduits<br />
where Reynolds number has little influence and the inherent variation with conduit size to the<br />
1/6 power holds true. Thus, the Manning equation has found wide acceptance for use in natural<br />
channels and conduits with rough surfaces. For smooth pipes, other empirical resistance<br />
equations, such as the Hazen-Williams equation, are more <strong>of</strong>ten used.<br />
Extensive tables <strong>of</strong> Manning’s n values are provided in references (23) and (31). For natural<br />
channels, the designer is referred to Table 11 in Appendix D as well as to references 16, 17,<br />
and 18. Manning’s n values for commonly used culvert materials are discussed in the following<br />
sections.<br />
B. Concrete Pipe <strong>Culverts</strong><br />
Concrete pipes are manufactured (pre-cast) using various methods, including centrifugally spun,<br />
dry cast, packerhead, tamp, and wet cast (63). The interior finish (wall roughness) varies with<br />
the method <strong>of</strong> manufacture. For instance, the tamped process generally results in a rougher<br />
interior finish than the wet cast process. The quality <strong>of</strong> the joints and aging (abrasion and<br />
corrosion) also affect the hydraulic resistance <strong>of</strong> concrete pipe. Laboratory tests on tamped<br />
pipe (24 to 36 in., average to good joints) resulted in Manning’s n values <strong>of</strong> about 0.009 (64).<br />
These values are increased to 0.011 to 0.013 based on field installation and aging. Suggested<br />
values <strong>of</strong> Manning’s n for concrete pipes are shown in Table 10.<br />
C. Concrete Box Culvert<br />
The hydraulic resistance <strong>of</strong> concrete box culverts is based on the method <strong>of</strong> manufacture,<br />
installation practices, and aging. Concrete box culverts are either pre-cast or cast-in-place. For<br />
pre-cast boxes, the smoothness <strong>of</strong> the walls, the quality <strong>of</strong> the joints, and aging affect the<br />
Manning’s n values. For cast-in-place boxes, the quality <strong>of</strong> the formwork, construction<br />
practices, and aging are factors. Suggested Manning’s n values range from 0.012 to 0.018 for<br />
concrete box culverts (23).<br />
202
D. Corrugated Metal <strong>Culverts</strong><br />
The hydraulic resistance coefficients for corrugated metal conduits are based on the size and<br />
shape <strong>of</strong> the corrugations, spacing <strong>of</strong> the corrugations, type <strong>of</strong> joints, bolt or rivet roughness,<br />
method <strong>of</strong> manufacture, size <strong>of</strong> conduit, flow velocity, and aging. A complete description <strong>of</strong> the<br />
hydraulic resistance <strong>of</strong> corrugated metal conduits is presented in the publication, "<strong>Hydraulic</strong><br />
Flow Resistance Factors for Corrugated Metal Conduits" (25). Information from that report has<br />
been condensed and included herein. The resistance values provided in this Appendix are<br />
based on specific criteria, including the use <strong>of</strong> a typical culvert flow rate (Q/D 2.5 = 4.0). Bolt and<br />
joint effects, where appropriate, are included.<br />
Figure B-1--Shapes <strong>of</strong> Annular Corrugations<br />
203
1. Annular Corrugations. In reference (25), resistance factors are developed for the annular<br />
corrugation shapes shown in Figure B-1. Methods are also presented for estimating the<br />
hydraulic resistance <strong>of</strong> new or untested corrugation types. Those methods have been used to<br />
estimate the resistance <strong>of</strong> 5- by 1-inch corrugations, shown in Figure B-2, for which no test<br />
results are yet available (61).<br />
Figure B-2--Shape <strong>of</strong> 5- by 1-inch Corrugation<br />
A series <strong>of</strong> charts were developed in reference (25) depicting the Manning’s n resistance value<br />
for various corrugation shapes over a range <strong>of</strong> conduit sizes. The charts show the variation <strong>of</strong><br />
Manning's n value with diameter, flow rate, and depth. The curves for structural plate conduits<br />
have discontinuities due to changes in the number <strong>of</strong> plates used to fabricate the conduits.<br />
Curves are presented for two flow rates, Q/D 2.5 = 2.0 and Q/D 2.5 = 4.0. Under design conditions,<br />
culvert flow rates approximate the Q/D 2.5 = 4.0 curves.<br />
2. Helical Corrugations. In pipes less than about 6 feet in diameter, helical corrugations may<br />
provide lower resistance values. This is due to the spiral flow which develops when such<br />
conduits flow full. As the pipe size increases, the helix angle approaches 90 degrees, and the<br />
Manning's n value is the same as for pipes with annular corrugations.<br />
For partial flow in circular metal pipes with 68 mm by 13 mm (2-2/3 by 1/2 inch) in helical<br />
corrugations, Manning's n should be 11% higher than that for the full flow. In the case <strong>of</strong> full<br />
flow in corrugated metal pipe-arches with 68 mm by 13 mm (2-2/3 by 1/2 inch), Manning's n is<br />
the same as an equivalent diameter pipe.<br />
3. <strong>Design</strong> Relationships. Based on the charts <strong>of</strong> reference (25) for annular and helical<br />
corrugations, Figure B-3 has been developed to assist the designer in the selection <strong>of</strong> a<br />
Manning’s n value for corrugated metal conduits. The figure is based on certain assumptions<br />
which reduce the complexity <strong>of</strong> the relationships.<br />
a. The curves are based on Q/D 2.5 = 4.0, which is typical <strong>of</strong> culvert design flow rates.<br />
b. The discontinuities inherent in the structural plate curves have been ignored in favor <strong>of</strong> a<br />
smooth curve.<br />
c. The only helically corrugated metal conduit curve shown is for 2-2/3 by 1/2 inch corrugations,<br />
with a 24 inch plate width.<br />
204
Curves are shown for 2-2/3 by 1/2 inch, 3 by 1 inch, 6 by 1 inch, 6 by 2 inch, and 9 by 2-1/2 inch<br />
corrugations. A curve has also been developed for annular 5 by 1 inch corrugated metal<br />
conduits.<br />
To use Figure B-3, enter the horizontal scale with the circular conduit diameter and read the<br />
Manning's n from the curve for the appropriate corrugation.<br />
Figure B-3--Manning’s n versus Diameter for Corrugated Metal Conduits<br />
E. Composite Roughness<br />
Corrugated metal culverts are <strong>of</strong>ten fabricated using different materials for portions <strong>of</strong> the<br />
perimeter. Examples are corrugated metal arches with unlined bottoms and corrugated metal<br />
box culverts with concrete bottoms. In order to derive a composite Manning’s n value for the<br />
above situations, a common practice is to derive a weighted n value based on the estimated<br />
205
Manning’s n value for each material and the perimeter <strong>of</strong> the pipe composed <strong>of</strong> each material.<br />
The method assumes a constant Manning’s n value for each material (no variation with size or<br />
flow velocity). In addition, the perimeters should be adjusted for partly full flow. The method<br />
ignores the dynamic interaction between the flow prisms affected by each roughness.<br />
A better method is based on the assumption that the conveyance section can be broken into G<br />
parts with associated wetted perimeters (p) and Manning’s n values.<br />
Each part <strong>of</strong> the conveyance section is then assumed to have a mean velocity equal to the<br />
mean velocity <strong>of</strong> the entire flow section. These assumptions lead to Equation (36).<br />
⎡<br />
⎢<br />
n = ⎢<br />
⎢<br />
⎣<br />
G<br />
∑<br />
i=<br />
1<br />
( p<br />
i<br />
p<br />
n<br />
1.<br />
5<br />
i<br />
0.<br />
67<br />
)<br />
⎤<br />
⎥<br />
⎥<br />
⎥<br />
⎦<br />
n is the weighted Manning’s n value<br />
G is the number <strong>of</strong> different roughness' in the perimeter<br />
p1 is the wetted perimeter in ft. influenced by the material 1<br />
p2 is the perimeter influenced by material 2, etc.<br />
n1 is the Manning’s n value for material 1, n2 is for material 2, etc.<br />
p is the total wetted perimeter, ft<br />
Example: Compute the Manning’s n value for a 6 ft. diameter corrugated metal pipe with 5 by 1<br />
in annular corrugations, and a smooth lining over 40 percent <strong>of</strong> the perimeter.<br />
1. Determine the Manning’s n for the 6 ft corrugated metal pipe with 5 by 1 in corrugations.<br />
n = 0.026 (Figure B-3)<br />
2. Determine the Manning’s n for smooth lining.<br />
n = 0.013 (assume concrete lining)<br />
3. Determine the relative perimeters composed <strong>of</strong> each material.<br />
p = D = (3.14)(6) = 18.84 ft (total wetted perimeter)<br />
p1 (corrugated) = (0.60)(18.84) = 11.30 ft<br />
p2 (smooth) = (0.40)(18.84) = 7.54 ft<br />
4. Use Equation (36) to calculate the Manning’s n value<br />
1.<br />
5<br />
1.<br />
5<br />
⎡ ( 11.<br />
30)(<br />
0.<br />
026)<br />
+ ( 7.<br />
54)(<br />
0.<br />
013)<br />
⎤<br />
n = ⎢<br />
⎥<br />
⎣<br />
18.<br />
84<br />
⎦<br />
=<br />
0.<br />
021<br />
0.<br />
67<br />
206<br />
(36)
F. Spiral Rib Pipe<br />
Spiral rib pipe is smooth walled metal pipe fabricated using helical seams. Roughness<br />
elements include the joints and a helical, recessed rib running spirally around the pipe. Based<br />
on tests <strong>of</strong> 2 and 3 feet diameter spiral rib pipe (65), the pipe has essentially the same hydraulic<br />
resistance as smooth steel pipe, plus joint and aging effects. The laboratory test results indicate<br />
Manning’s n values <strong>of</strong> from 0.010 to 0.011. Allowing for aging and higher joint resistance,<br />
Manning’s n values in the range <strong>of</strong> 0.012 to 0.013 are recommended for design use. In using<br />
these low resistance values, the designer should ascertain that no large roughness elements<br />
such as projecting interior ribs or poor joints are present.<br />
G. Summary<br />
Table 10 summarizes the Manning's n values for materials commonly used in culvert<br />
construction. For the corrugated metal conduits, the specified range <strong>of</strong> n values is related to the<br />
size <strong>of</strong> the conduit. For other conduits, the range shown relates to the quality <strong>of</strong> the conduit<br />
construction. In all cases, judgment is necessary in selecting the proper Manning’s n value, and<br />
the designer is directed to other references for additional guidance in special situations.<br />
207
Table 10--Manning’s n Values for <strong>Culverts</strong>.*<br />
Type <strong>of</strong> Culvert Roughness or<br />
Corrugation<br />
208<br />
Manning's n Reference<br />
Concrete Pipe Smooth 0.010-0.011 (64, 66, 67, 70)<br />
Concrete Boxes Smooth 0.012-0.015 (23)<br />
Spiral Rib Metal Pipe Smooth 0.012-0.013 (65, 69)<br />
Corrugated Metal Pipe,<br />
Pipe-Arch and Box<br />
(Annular and Helical<br />
corrugations -- see Figure<br />
B-3, Manning's n varies with<br />
barrel size)<br />
68 by 13 mm<br />
2-2/3 by 1/2 in<br />
Annular<br />
68 by 13 mm<br />
2-2/3 by 1/2 in<br />
Helical<br />
150 by 25 mm<br />
6 by 1 in<br />
Helical<br />
125 by 25 mm<br />
5 by 1 in<br />
75 by 25 mm<br />
3 by 1 in<br />
150 by 50 mm<br />
6 by 2 in<br />
Structural Plate<br />
230 by 64 mm<br />
9 by 2-1/2 in<br />
Structural Plate<br />
0.022-0.027<br />
0.011-0.023<br />
0.022-0.025<br />
0.025-0.026<br />
0.027-0.028<br />
0.033-0.035<br />
0.033-0.037<br />
(25)<br />
(25, 68)<br />
Corrugated Polyethylene Smooth 0.009-0.015 (71, 72)<br />
Corrugated Polyethylene Corrugated 0.018-0.025 (73, 74)<br />
Polyvinyl chloride (PVC) Smooth 0.009-0.011 (75, 76)<br />
*NOTE: The Manning's n values indicated in this table were obtained in the laboratory and are<br />
supported by the provided reference. Actual field values for culverts may vary depending on<br />
the effect <strong>of</strong> abrasion, corrosion, deflection, and joint conditions.<br />
(25)<br />
(25)<br />
(25)<br />
(25)<br />
(25)
APPENDIX C<br />
CULVERT DESIGN OPTIMIZATION USING PERFOREMANCE CURVES<br />
NOTE: Figures in this Appendix are only provided in English Units since they are only<br />
illustrating a concept and are not example problems.<br />
A. Introduction<br />
Performance curves are an integral part <strong>of</strong> the culvert design process and can be used to<br />
optimize the selected culvert design, particularly when using tapered inlets and/or upstream<br />
depressions. This optimization may involve further reduction in the barrel size required to pass<br />
the design flow at the design headwater, provision <strong>of</strong> a factor <strong>of</strong> safety against damages, or a<br />
more balanced design. The visualization <strong>of</strong> culvert performance provided by performance<br />
curves may lead to a further reduction in the size <strong>of</strong> the culvert barrel. At many culvert sites,<br />
designers provide a safety factor in the design. The safety factor may compensate for: (1)<br />
uncertainty in the design discharge estimate, (2) potentially disastrous results in property<br />
damage or damage to the highway from headwater elevations which exceed the design<br />
headwater, (3) the potential for development upstream or downstream <strong>of</strong> the culvert, or (4) the<br />
chance that the design frequency flood will be exceeded during the life <strong>of</strong> the installation. The<br />
procedures described here enable the designer to maximize the performance <strong>of</strong> the selected<br />
culvert or to optimize the design in accordance with his evaluation <strong>of</strong> site constraints, design<br />
parameters, and costs for construction and maintenance.<br />
B. Outlet Control Performance Curves<br />
The outlet control performance curves for various barrel sizes and inlet configurations are used<br />
first to evaluate the operation <strong>of</strong> the selected barrel. The full flow outlet control performance<br />
curve for a given culvert (size, inlet edge configuration, barrel shape, material) defines its<br />
maximum performance. Inlet improvements beyond the beveled edge or changes in inlet invert<br />
elevations will not reduce the required outlet control headwater elevation. Therefore, the outlet<br />
control performance curve is an ideal minimum limit for culvert design.<br />
When the barrel size is increased, the outlet control curve is shifted to the right, indicating a<br />
higher capacity for a given head. Also, it is generally true that increasing the barrel size will<br />
flatten the slope <strong>of</strong> the outlet control curve (Figure C-1).<br />
The outlet control curve passing closest to and below the design point (design Q and design<br />
headwater elevation) on the performance curve graph defines the smallest possible barrel which<br />
meets the hydraulic design criteria. The curve for the smallest possible barrel may be very<br />
steep (rapidly increasing headwater requirements for discharges higher than the design<br />
discharge) and use <strong>of</strong> such a small barrel may not be practical due to high outlet velocities or<br />
flooding from flows exceeding the design flow.<br />
To define the outlet control performance curves, perform the following steps:<br />
1. Calculate the headwater elevations at the design discharge for a selected series <strong>of</strong> culvert<br />
sizes, inlet configurations, shapes, and materials.<br />
209
Figure C-1--Outlet Control Performance Curves<br />
2. Calculate the required headwater elevations at discharges above and below the design<br />
discharge, to obtain at least three points on each performance curve.<br />
3. Plot the outlet control performance curves.<br />
4. Select a culvert barrel size, shape and material based on the series <strong>of</strong> performance curves.<br />
This selection is based on the design headwater and flow rate (the design point), the slope <strong>of</strong><br />
the performance curve and the site considerations discussed previously.<br />
A typical series <strong>of</strong> outlet control performance curves is shown in Figure C-2.<br />
210
C. Inlet Control Performance Curves<br />
Next, inlet control performance curves should be drawn for the inlet edge configurations<br />
selected. These edges may include square edges, beveled edges, or the throat section <strong>of</strong> a<br />
tapered inlet. A depression may also be incorporated upstream <strong>of</strong> the inlet control section to<br />
lower the inlet control headwater elevation. To construct the inlet control performance curves,<br />
perform the following steps:<br />
Figure C-2--Box Culvert Outlet Control Performance Curves<br />
1. Calculate the inlet control headwater for the culvert barrel selected based on outlet control.<br />
2. Determine the required face invert elevation to pass the design discharge by subtracting the<br />
headwater depth from the design headwater elevation.<br />
a. If the inlet invert elevation is above the stream bed elevation at the control section, the invert<br />
should be lowered to the stream bed. The culvert will then have a capacity exceeding the<br />
design flow with the headwater at the design headwater elevation.<br />
b. If the required invert elevation is below the stream bed elevation at the face, the invert must<br />
be depressed using a FALL.<br />
c. If, in the designer's judgment, the required FALL is excessive, the inlet geometry must be<br />
improved or a larger barrel must be used.<br />
211
Figure C-3--Inlet Control Performance Curves Various Inlet Configurations<br />
d. If the FALL is acceptable, plot the inlet control performance curve. Again, at least three<br />
points are necessary; one at the design flow rate and one on either side <strong>of</strong> the design flow rate.<br />
Figure C-3 depicts a series <strong>of</strong> inlet edge configurations, along with the outlet control<br />
performance curve for the selected barrel. Note that an inlet with square edges and no FALL<br />
will not meet the design conditions. Either square edges with a FALL or beveled edges with no<br />
FALL satisfy the design criteria.<br />
D. Analyze the Effects <strong>of</strong> Additional Fall<br />
From Figure C-3, one can see that additional FALL or inlet improvements such as a taperedinlet<br />
would increase the culvert capacity in inlet control. The inlet control performance curve<br />
would be closer to the outlet control curve for the selected culvert barrel, which passes below<br />
the design point. Of course, all such considerations are limited by the designer's appraisal <strong>of</strong><br />
the acceptable FALL.<br />
212
Figure C-4--Optimization <strong>of</strong> Performance in Inlet Control<br />
Some possibilities are illustrated in Figure C-4. The minimum inlet control performance which<br />
will meet the design point is illustrated by curve A. In this design, the cost for inlet<br />
improvements and/or FALL is at a minimum and the inlet will pass a flood exceeding the design<br />
flow before performance is governed by outlet control. This performance is adequate in many<br />
locations, including those where headwaters in excess <strong>of</strong> the allowable would be tolerable.<br />
Curve B illustrates the performance <strong>of</strong> a design which takes full advantage <strong>of</strong> the potential<br />
capacity <strong>of</strong> the selected culvert and the site to pass the maximum possible flow at the design<br />
headwater elevation. A safety factor in capacity is thereby incorporated by geometric<br />
improvements at the inlet, by a FALL, or by a combination <strong>of</strong> the two. Additional inlet<br />
improvements and/or FALL will not increase the capacity at or above the design headwater<br />
elevation.<br />
Curve C illustrates the performance <strong>of</strong> a design which passes the design flow at the lowest<br />
possible headwater. Additional inlet improvements and/or FALL will not reduce the required<br />
headwater elevation at the design flow rate.<br />
The water surface elevation in the natural stream may be a limiting factor in design. The<br />
reduction in headwater elevation illustrated by curve C is limited by the natural water surface<br />
213
elevation in the stream The reduction is also limited by the outlet control performance curve. If<br />
the water surface elevations in the natural stream had fallen below curve D, curve D gives the<br />
maximum reduction in headwater elevation at the design flow. Flow depths calculated by<br />
assuming normal depth in the stream channel may be used to estimate natural water surface<br />
elevations in the stream at the culvert inlet.<br />
Curve A has been previously established for the inlet control section. To define any other inlet<br />
control performance curve such as curve B, C, or D for the inlet control section:<br />
1. Select the point <strong>of</strong> interest on the outlet control performance curve.<br />
2. Measure the vertical distance from that point to curve A. This is the difference in FALL<br />
between curve A and the curve to be established. For example, the FALL on the control section<br />
for curve A plus the distance between curves A and B is the FALL on the control section for<br />
curve B.<br />
Figure C-5--Possible Face <strong>Design</strong> Selections Tapered Inlet<br />
214
E. Tapered Inlet Face Control Performance Curves<br />
Either a side-tapered inlet with an upstream sump or slope-tapered inlet design may be used if a<br />
FALL is required at the throat control section <strong>of</strong> a tapered inlet. The minimum face design for<br />
the tapered inlet is one with a performance curve which does not exceed the design point.<br />
However, a "balanced" design requires that full advantage be taken <strong>of</strong> the increased capacity<br />
and/or lower headwater gained through use <strong>of</strong> various FALLs. This suggests a face<br />
performance curve which intersects the throat control curve either: (1) at the design headwater<br />
elevation, (2) at the design flow rate, (3) at its intersection with the outlet control curve, or (4) at<br />
other points selected by the designer. These options are illustrated in Figure C-5 by points a<br />
through e representing various points on the throat control performance curves. The options<br />
are:<br />
1. Intersection <strong>of</strong> face and throat control performance curves at the design headwater<br />
elevation (points a or b).<br />
2. Intersection <strong>of</strong> face and throat control performance curves at the design flow rate (points a, c<br />
or d). This option makes full use <strong>of</strong> the FALL to increase capacity and reduce headwater<br />
requirements at flows equal to or greater than the design flow rate.<br />
3. Intersection <strong>of</strong> the face control performance curve with throat control performance curve at<br />
its intersection with the outlet control performance curve (points b or e). This option results in<br />
the minimum face size which can be used to make full use <strong>of</strong> the increased capacity available<br />
from the FALL at the throat.<br />
4. Variations in the above options are available to the designer. For example, the culvert face<br />
can be designed so that culvert performance will change from face control to throat control at<br />
any discharge at which inlet control governs. Options 1 through 3, however, appear to fulfill<br />
most design objectives. Generally, the design objective will be to design either the minimum<br />
face size to achieve the maximum increase in capacity possible for a given FALL, or the<br />
maximum possible decrease in the required headwater for a given depression for any discharge<br />
equal to or greater than the design discharge.<br />
Figure C-6 illustrates some <strong>of</strong> the possible tapered inlet designs for a specific design situation.<br />
The dimensions <strong>of</strong> the side-tapered inlet are the same for all options. This is because<br />
performance <strong>of</strong> the side-tapered inlet face nearly parallels the performance <strong>of</strong> the throat and an<br />
increase in headwater on the throat by virtue <strong>of</strong> an increased FALL results in an almost equal<br />
increase in headwater on the face. Depressing the throat <strong>of</strong> a culvert with a side-tapered inlet<br />
requires additional barrel length.<br />
Face dimensions and inlet length increase for the slope-tapered inlet as the capacity <strong>of</strong> the<br />
culvert is increased by additional FALL on the throat. No additional headwater depth is created<br />
at the face by placing additional depression on the throat. However, use <strong>of</strong> a greater<br />
depression at the throat <strong>of</strong> a culvert with a slope-tapered inlet does not increase the barrel<br />
length.<br />
215
Figure C-6--Tapered Inlet <strong>Design</strong> Options for 8 ft by 6 ft Reinforced Concrete Box Culvert<br />
216
APPENDIX D<br />
DESIGN CHARTS, TABLES, AND FORMS<br />
Table Reference Tables<br />
11 Manning’s n For Small Natural Stream Channels<br />
12 Entrance Loss Coefficients<br />
Note: <strong>Design</strong> Charts are given in SI and English Units. For example, Chart 1A is in SI<br />
Units and Chart 1B is in English Units. English design charts have a small symbol in<br />
the upper outside corner representing the shape involved. SI charts have the chart<br />
number in a box.<br />
Chart Circular <strong>Culverts</strong><br />
1A, 1B Headwater Depth for Concrete Pipe <strong>Culverts</strong> With Inlet Control<br />
2A, 2B Headwater Depth for C.M. Pipe With Inlet Control<br />
3A, 3B Headwater Depth for Circular Pipe <strong>Culverts</strong> with Beveled Ring Control<br />
4A, 4B Critical Depth - Circular Pipe<br />
5A, 5B Head for Concrete Pipe <strong>Culverts</strong> Flowing Full, n = 0.012<br />
6A, 6B Head for Standard C.M. Pipe <strong>Culverts</strong> Flowing Full, n = 0.024<br />
7A, 7B Head for Structural Plate Corrugated Metal Pipe <strong>Culverts</strong> Flowing Full,<br />
n = 0.0328 to 0.0302<br />
Concrete Box <strong>Culverts</strong><br />
8A, 8B Headwater Depth for Box <strong>Culverts</strong> with Inlet Control<br />
9A, 9B Headwater Depth for Inlet Control Rectangular Box <strong>Culverts</strong>, Flared<br />
Wingwalls 18° to 33.7° and 45<br />
10A, 10B Headwater Depth for Inlet Control Rectangular Box <strong>Culverts</strong>, 90° Headwall<br />
Chamfered or Beveled Edges<br />
217
Chart Concrete Box <strong>Culverts</strong> (Continued)<br />
11A, 11B Headwater Depth for Inlet Control, Single Barrel Box <strong>Culverts</strong>, Skewed<br />
Headwalls, Chamfered or Beveled Inlet Edges<br />
12A, 11B Headwater Depth for Inlet Control, Rectangular Box <strong>Culverts</strong>, Flared<br />
Wingwalls, Normal and Skewed Inlets 19 mm (12A - 3/4-inch) (12B - 3/4-inch)<br />
Chamfer at Top <strong>of</strong> Opening<br />
13A, 13B Headwater Depth for Inlet Control, Rectangular Box <strong>Culverts</strong>, Offset Flared<br />
Wingwalls and Beveled Edge at Top <strong>of</strong> Inlet<br />
14A, 14B Critical Depth, Rectangular Section<br />
15A, 15B Head for Concrete Box <strong>Culverts</strong> Flowing Full, n = 0.012<br />
Corrugated Metal Box <strong>Culverts</strong><br />
16A, 16B Inlet Control, Corrugated Metal Box <strong>Culverts</strong>, Rise/Span < 0.3<br />
17A, 17B Inlet Control, Corrugated Metal Box <strong>Culverts</strong>, 0.3 ≤ Rise/Span < 0.4<br />
18A, 18B Inlet Control, Corrugated Metal Box <strong>Culverts</strong>, 0.4 ≤ Rise/Span < 0.5<br />
19A, 19B Inlet Control, Corrugated Metal Box <strong>Culverts</strong>, Rise/Span ≥ 0.5<br />
20A, 20B Dimensionless Critical Depth Chart, Corrugated Metal Boxes<br />
21A, 21B Head for Corrugated Metal Box <strong>Culverts</strong> Flowing Full with Concrete Bottom,<br />
Rise/Span < 0.3<br />
22A, 22B Head for Corrugated Metal Box <strong>Culverts</strong> Flowing Full with Concrete Bottom,<br />
0.3 ≤ Rise/Span < 0.4<br />
23A, 23B Head for Corrugated Metal Box <strong>Culverts</strong> Flowing Full with Concrete Bottom,<br />
0.4 ≤ Rise/Span < 0.5<br />
24A, 24B Head for Corrugated Metal Box <strong>Culverts</strong> Flowing Full with Concrete Bottom,<br />
Rise/Span ≥ 0.5<br />
25A, 25B Head for Corrugated Metal Box <strong>Culverts</strong> Flowing Full with Corrugated Metal<br />
Bottom, Rise/Span < 0.3<br />
26A, 26B Head for Corrugated Metal Box <strong>Culverts</strong> Flowing Full with Corrugated Bottom,<br />
0.3 ≤ Rise/Span < 0.4<br />
27A, 27B Head for Corrugated Metal Box <strong>Culverts</strong> Flowing Full with Corrugated Bottom,<br />
0.4 ≤ Rise/Span < 0.5<br />
218
Chart Corrugated Metal Box <strong>Culverts</strong> (Continued)<br />
28A, 28B Head for Corrugated Metal Box <strong>Culverts</strong> Flowing Full with Corrugated Bottom,<br />
Rise/Span ≥ 0.5<br />
Elliptical <strong>Culverts</strong><br />
29A, 29B Headwater for Oval Concrete Pipe <strong>Culverts</strong> Long Axis Horizontal with Inlet<br />
Control<br />
30A, 30B For Oval Concrete Pipe <strong>Culverts</strong> Long Axis Vertical with Inlet Control<br />
31A, 31B Critical Depth - Oval Concrete Pipe Long Axis Horizontal<br />
32A, 32B Critical Depth - Oval Concrete Pipe Long Axis Vertical<br />
33A, 33B Head for Oval Concrete Pipe <strong>Culverts</strong> Long Axis Horizontal or Vertical<br />
Flowing Full, n = 0.012<br />
Pipe/Arch <strong>Culverts</strong><br />
34A, 34B Headwater Depth for C.M. Pipe-Arch <strong>Culverts</strong> with Inlet Control<br />
35A, 35B Headwater Depth for Inlet Control Structural Plate Pipe-Arch <strong>Culverts</strong>,<br />
35A - 457 mm (18-inch - 35B) Radius Corner Plate, Projecting or Headwall<br />
Inlet, Headwall with or without Edge Bevel<br />
36A, 36B Headwater Depth for Inlet Control Structural Plate Pipe-Arch <strong>Culverts</strong>,<br />
787 mm (Chart 36A (31-inch - Chart 36B) Radius Corner Plate, Projecting or<br />
Headwall Inlet, Headwall with or without Edge Bevel<br />
37A, 37B Critical Depth - Standard Corrugated Metal Pipe-Arch<br />
38A, 38B Critical Depth - Structural Plate Corrugated Metal Pipe-Arch<br />
39A, 39B Head for Standard C.M. Pipe-Arch <strong>Culverts</strong> Flowing Full, n = 0.024<br />
40A, 40B Head for Structural Plate Corrugated Metal Pipe-Arch <strong>Culverts</strong>, 457 mm - 40A<br />
(18-inch - 40B) Corner Radius Flowing Full, n = 0.0327 - 0.0306<br />
219
Chart Arch <strong>Culverts</strong><br />
41A, 41B Headwater Depth for Corrugated Metal Arch <strong>Culverts</strong> with Inlet Control<br />
0.3 ≤ Rise/Span < 0.4<br />
42A, 42B Headwater Depth for Corrugated Metal Arch <strong>Culverts</strong> with Inlet Control<br />
0.4 ≤ Rise/Span < 0.5<br />
43A, 43B Headwater Depth for Corrugated Metal Arch <strong>Culverts</strong> with Inlet Control<br />
Rise/Span ≥ 0.5<br />
44A, 44B Dimensionless Critical Depth Chart, Corrugated Metal Arches<br />
45A, 45B Head for Corrugated Metal Arch <strong>Culverts</strong>, Flowing Full with Concrete Bottom,<br />
0.3 ≤ Rise/Span < 0.4<br />
46A, 46B Head for Corrugated Metal Arch <strong>Culverts</strong>, Flowing Full with Concrete Bottom,<br />
0.4 ≤ Rise/Span < 0.5<br />
47A, 47B Head for Corrugated Metal Arch <strong>Culverts</strong>, Flowing Full with Concrete Bottom,<br />
Rise/Span ≥ 0.5<br />
48A, 48B Head for Corrugated Metal Arch <strong>Culverts</strong>, Flowing Full with Earth Bottom,<br />
0.3 ≤ Rise/Span < 0.4<br />
49A, 49B Head for Corrugated Metal Arch <strong>Culverts</strong>, Flowing Full with Earth Bottom,<br />
0.4 ≤ Rise/Span < 0.5<br />
50A, 50B Head for Corrugated Metal Arch <strong>Culverts</strong>, Flowing Full with Earth Bottom,<br />
Rise/Span ≥ 0.5<br />
Long Span <strong>Culverts</strong><br />
51A, 51B Circular or Elliptical Structural Plate CMP with Inlet Control<br />
52A, 52B High and Low Pr<strong>of</strong>ile Structural Plate Arches with Inlet Control<br />
53A, 53B Dimensionless Critical Depth Chart, Structural Plate Ellipse Long Axis<br />
Horizontal<br />
54A, 54B Dimensionless Critical Depth Chart, Structural Plate Low and High Pr<strong>of</strong>ile<br />
Arches<br />
220
Chart Circular Tapered Inlets<br />
55A, 55B Throat Control for Side-Tapered Inlets to Pipe Culvert (Circular Section <strong>On</strong>ly)<br />
56A, 56B Face Control for Side-Tapered Inlets to Pipe <strong>Culverts</strong> (Non-Rectangular<br />
Section <strong>On</strong>ly)<br />
Rectangular Tapered Inlets<br />
57A, 57B Throat Control for Box <strong>Culverts</strong> with Tapered Inlets<br />
58A, 58B Face Control for Box <strong>Culverts</strong> with Side-Tapered Inlets<br />
59A, 59B Face Control for Box <strong>Culverts</strong> with Slope-Tapered Inlets<br />
<strong>Design</strong> Forms<br />
Culvert <strong>Design</strong> Form<br />
Tapered Inlet <strong>Design</strong> Form<br />
Slope-Tapered Inlet With Mitered Face - <strong>Design</strong> Form<br />
Storage Routing Calculation Form<br />
Water Surface Pr<strong>of</strong>ile Computation Form<br />
221
1. Fairly regular section:<br />
Table 11--Manning’s n for Small Natural Stream Channels.<br />
Surface width at flood stage less than 30 m (100 ft)<br />
a. Some grass and weeds, little or no brush ..............................................0.030--0.035<br />
b. Dense growth <strong>of</strong> weeds, depth <strong>of</strong> flow materially greater<br />
than weed height .......................................................................................0.035-0.05<br />
c. Some weeds, light brush on banks...........................................................0.035--0.05<br />
d. Some weeds, heavy brush on banks..........................................................0.05--0.07<br />
e. Some weeds, dense willows on banks .......................................................0.06--0.08<br />
f. For trees within channel, with branches submerged at high stage,<br />
increase all above values by ......................................................................0.01--0.02<br />
2. Irregular sections, with pools, slight channel meander; increase values<br />
given above about ...........................................................................................0.01--0.02<br />
3. Mountain streams, no vegetation in channel, banks usually steep, trees<br />
and brush along banks submerged at high stage:<br />
a. Bottom <strong>of</strong> gravel, cobbles, and few boulders..............................................0.04--0.05<br />
b. Bottom <strong>of</strong> cobbles, with large bounders .....................................................0.05--0.07<br />
222
Table 12--Entrance Loss Coefficients.<br />
Outlet Control, Full or Partly Full Entrance Head Loss<br />
⎡ 2<br />
V ⎤<br />
He<br />
= Ke⎢<br />
⎥<br />
⎢⎣<br />
2g<br />
⎥⎦<br />
Type <strong>of</strong> Structure and <strong>Design</strong> <strong>of</strong> Entrance Coefficient Ke<br />
• Pipe, Concrete<br />
Projecting from fill, socket end (groove-end) 0.2<br />
Projecting from fill, sq. cut end 0.5<br />
Headwall or headwall and wingwalls<br />
Socket end <strong>of</strong> pipe (groove-end 0.2<br />
Square-edge 0.5<br />
Rounded (radius = D/12 0.2<br />
Mitered to conform to fill slope 0.7<br />
*End-Section conforming to fill slope 0.5<br />
Beveled edges, 33.7 0 or 45 0 bevels 0.2<br />
Side- or slope-tapered inlet 0.2<br />
• Pipe. or Pipe-Arch. Corrugated Metal<br />
Projecting from fill (no headwall) 0.9<br />
Headwall or headwall and wingwalls square-edge 0.5<br />
Mitered to conform to fill slope, paved or unpaved slope 0.7<br />
*End-Section conforming to fill slope 0.5<br />
Beveled edges, 33.7 0 or 45 0 bevels 0.2<br />
Side- or slope-tapered inlet 0.2<br />
• Box, Reinforced Concrete<br />
Headwall parallel to embankment (no wingwalls)<br />
Square-edged on 3 edges 0.5<br />
Rounded on 3 edges to radius <strong>of</strong> D/12 or B/12<br />
or beveled edges on 3 sides 0.2<br />
Wingwalls at 30 0 to 75 0 to barrel<br />
Square-edged at crown 0.4<br />
Crown edge rounded to radius <strong>of</strong> D/12 or beveled top edge 0.2<br />
Wingwall at 10 0 to 25 0 to barrel<br />
Square-edged at crown 0.5<br />
Wingwalls parallel (extension <strong>of</strong> sides)<br />
Square-edged at crown 0.7<br />
Side- or slope-tapered inlet 0.2<br />
*Note: "End Sections conforming to fill slope," made <strong>of</strong> either metal or concrete, are<br />
the sections commonly available from manufacturers. From limited hydraulic tests<br />
they are equivalent in operation to a headwall in both inlet and outlet control. Some<br />
end sections, incorporating a closed taper in their design have a superior hydraulic<br />
performance. These latter sections can be designed using the information given for<br />
the beveled inlet.<br />
223
CHART 1A<br />
224
CHART 1B<br />
225
226
227
CHART 3A<br />
228
229
230
231
232
233
CHART 6A<br />
234
235
236
237
CHART 8A<br />
238
239
CHART 9A<br />
240
241
242
243
244
245
246
247
248
249
250
251
252
253
CHART 16A<br />
254
255
CHART 17A<br />
256
257
CHART 18A<br />
258
259
CHART 19A<br />
260
261
262
263
CHART 21A<br />
264
265
266
267
CHART 23A<br />
268
269
270
271
272
273
CHART 26A<br />
274
275
276
277
CHART 28A<br />
278
279
280
281
CHART 30A<br />
282
283
284
285
CHART 32A<br />
286
287
288
289
CHART 34A<br />
290
291
292
293
CHART 36A<br />
294
295
CHART 37A<br />
296
297
298
299
CHART 39A<br />
300
301
CHART 40A<br />
302
303
CHART 41A<br />
304
305
CHART 42A<br />
306
307
CHART 43A<br />
308
309
310
311
CHART 45A<br />
312
313
314
315
CHART 47A<br />
316
317
CHART 48A<br />
318
319
CHART 49A<br />
320
321
322
323
(SI Units)<br />
324
325
CHART 52A<br />
(SI Units)<br />
326
327
CHART 53A<br />
328
329
330
331
CHART 55A<br />
332
333
334
335
CHART 57A<br />
336
337
338
339
340
341
342
343
344
345
346
347
348