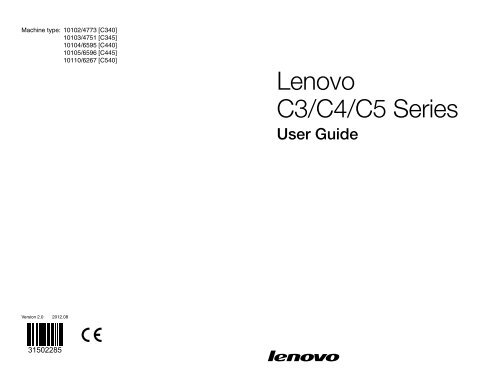
Lenovo C3/C4/C5 Series
Lenovo C3/C4/C5 Series
Lenovo C3/C4/C5 Series

You also want an ePaper? Increase the reach of your titles
YUMPU automatically turns print PDFs into web optimized ePapers that Google loves.
Machine type: 10102/4773 [<strong>C3</strong>40]<br />
10103/4751 [<strong>C3</strong>45]<br />
10104/6595 [<strong>C4</strong>40]<br />
10105/6596 [<strong>C4</strong>45]<br />
10110/6267 [<strong>C5</strong>40]<br />
Version 2.0<br />
2012.08<br />
31502285<br />
<strong>Lenovo</strong><br />
<strong>C3</strong>/<strong>C4</strong>/<strong>C5</strong> <strong>Series</strong><br />
User Guide
Important Safety Information<br />
Before using this manual, it is important that you read and understand all of the<br />
related safety information for this product. Refer to the Safety and Warranty Guide<br />
that you received with this product for the latest safety information. Reading and<br />
understanding this safety information reduces the risk of personal injury or product<br />
damage.<br />
The interface and functions shown in this User Guide are provided for reference<br />
only and may differ from actual product appearance. Product design and<br />
specifications may be changed without notice.<br />
Danger: Be aware of extremely hazardous or potentially lethal situations.<br />
Attention: Be aware of possible damage to programs, devices, or data.<br />
Note: Pay attention to this important information.<br />
© Copyright <strong>Lenovo</strong> 2012. All rights reserved.<br />
LIMITED AND RESTRICTED RIGHTS NOTICE: If data or software is delivered<br />
pursuant a General Services Administration “GSA” contract, use, reproduction, or<br />
disclosure is subject to restrictions set forth in Contract No. GS-35F-05925.
Contents<br />
Important Safety Information<br />
Using the Computer Hardware ................................................. 1<br />
Front view of the computer .........................................................................2<br />
Left and right views of the computer ..........................................................3<br />
Rear view of the computer .........................................................................4<br />
Installing the computer stand .....................................................................5<br />
Computer stand .........................................................................................6<br />
Connecting your computer .........................................................................7<br />
Connecting the power cord ........................................................................8<br />
Important information about using the computer ........................................9<br />
Wired keyboard (selected models only) ....................................................10<br />
Connecting to the Internet ........................................................................10<br />
Using Windows 8 ...................................................................... 11<br />
Switching between the main Windows 8 interfaces ..................................12<br />
The Charms Bar .......................................................................................12<br />
Shutting down the computer ....................................................................12<br />
Switching between apps ..........................................................................12<br />
Closing an app .........................................................................................13<br />
Opening other system programs ..............................................................13<br />
Windows Help and Support .....................................................................13<br />
Using the Rescue System ........................................................ 15<br />
OneKey Recovery ....................................................................................16<br />
Driver and Application Installation .............................................................17<br />
Contents<br />
i
Troubleshooting and Confirming Setup ................................. 19<br />
ii Contents<br />
Troubleshooting Display Problems ............................................................20<br />
Troubleshooting Audio Problems ..............................................................21<br />
Troubleshooting Software Problems .........................................................22<br />
Troubleshooting Problems with Optical Drives and Hard Disks .................23<br />
Special considerations for troubleshooting Windows ................................24<br />
Windows Help and Support .....................................................................24<br />
BIOS setup utility ......................................................................................25<br />
Performing Daily Maintenance Tasks ........................................................26<br />
Hardware Replacement Guide ................................................ 27<br />
Overview ..................................................................................................28<br />
Replacing hardware .................................................................................31<br />
Appendix. .................................................................................. 41<br />
Declaration ...............................................................................................41<br />
Trademarks ..............................................................................................42<br />
Energy Star Statement .............................................................................43<br />
Enabling ErP compliance mode ................................................................44
Using the Computer Hardware<br />
This chapter contains the following<br />
topics:<br />
� Introduction to the computer hardware<br />
� Information on computer connections<br />
Note: The descriptions in this chapter<br />
might be different from what you see on<br />
your computer, depending on the computer<br />
model and configuration.<br />
User Guide 1
Front view of the computer<br />
Attention: Be careful not to block any air vents on the computer. Blocked<br />
air vents can cause overheating.<br />
10<br />
2 User Guide<br />
1 2<br />
3 4 5<br />
6 7 8 9<br />
Built-in microphone Built-in camera<br />
Hard disk drive indicator Wi-Fi status indicator<br />
Monitor On/Off indicator Menu button<br />
Direction button Direction button<br />
Monitor On/Off button Built-in IR receiver (Only<br />
functional on models equipped<br />
with a IR receiver module)<br />
Attention: The effective range of the Built-in IR Emitter is 10 feet.
Left and right views of the computer<br />
Attention: Be sure not to block any air vents on the computer. Blocked<br />
air vents may cause thermal problems.<br />
1<br />
2<br />
3<br />
4<br />
5<br />
6<br />
USB connector Headphone connector<br />
Microphone connector USB connector<br />
Memory card reader Power button<br />
Optical drive eject button Optical drive<br />
Attention: Do not insert 3-inch discs into the optical drive.<br />
7<br />
8<br />
User Guide<br />
3
Rear view of the computer<br />
9<br />
TV tuner connector (selected<br />
models only, 2 connectors for<br />
Japan)<br />
4 User Guide<br />
1 2 3 4 5 6 7<br />
TV tuner connector (selected<br />
models only, 2 connectors for<br />
Japan)<br />
Power connector Ethernet connector<br />
USB connector USB connector<br />
HDMI-out connector<br />
(selected models only)<br />
Air vents<br />
Security cable slot<br />
8
Installing the computer stand<br />
1. Raise the stand holder.<br />
2. Line up the stand base with the mounting holes in the stand holder, then push<br />
the stand base into position.<br />
3. Pull the hand screw ring up, then secure the stand base to the stand holder<br />
with the hand screw.<br />
4. Press down the hand screw ring.<br />
1<br />
3<br />
2<br />
User Guide<br />
5
Computer stand<br />
Use the stand to position the display to your preference. It can be rotated 5°<br />
forward and 25° backward.<br />
6 User Guide
Connecting your computer<br />
Note: Your computer may not have all of the connectors described in this<br />
section.<br />
Connector Description<br />
Microphone Use this connector to attach a microphone to your<br />
computer when you want to record sound or if you use<br />
speech-recognition software.<br />
Headphone Use this connector to attach headphones to your<br />
computer when you want to listen to music or other<br />
sounds without disturbing anyone.<br />
USB connector Use this connector to attach a device that requires a USB<br />
connection.<br />
Ethernet connector Use this connector to attach the computer to an Ethernettype<br />
local area network.<br />
HDMI connector Connects to the HDMI connector on your display or TV.<br />
(optional)<br />
TV-Tuner connector<br />
(optional)<br />
Connects to an external antenna to view programs using<br />
the optional TV tuner card.<br />
Note: If your computer is equipped with a wireless keyboard or mouse,<br />
follow the installation instructions for those devices.<br />
User Guide<br />
7
Connecting the power cord<br />
8 User Guide
Important information about using the<br />
computer<br />
Press the power button on the side of the computer to turn on the computer.<br />
Hold the computer tightly when you carry it.<br />
User Guide<br />
9
Wired keyboard (selected models only)<br />
LVT —— After entering Windows, press this key to launch the LVT (<strong>Lenovo</strong><br />
Vantage Technology) program, <strong>Lenovo</strong>’s pre-loaded Home PC software.<br />
In addition to its own functions, the LVT program will allow you to start<br />
other Windows compatible software, specially configured to run on this<br />
model of computer.<br />
F2 —— Your computer has the <strong>Lenovo</strong> Rescue System installed. To learn more<br />
about this program, repeatedly press and release the F2 key once<br />
turning on the computer until the <strong>Lenovo</strong> Rescue System open.<br />
Connecting to the Internet<br />
To connect to the Internet, you’ll need a contract with an Internet Service Provider<br />
(ISP) and some hardware.<br />
IPSs and ISP offerings vary by country. Contact your ISP for offerings available in<br />
your country.<br />
Your computer is designed to support a wireless (selected models only) or wired<br />
network that connects your computer to other devices.<br />
Wired network connection<br />
For wired networks, connect one end of an Ethernet cable (purchased separately)<br />
to the Ethernet connector on your computer, and then connect the other end to<br />
the network router or broadband modem. Consult your ISP for detailed setup<br />
instructions.<br />
Note: Broadband modem and router installation procedures vary<br />
depending on the manufacturer. Follow the manufacturer’s instructions.<br />
Wireless network connection<br />
For wireless networks, you can use the built-in wireless LAN antenna to access<br />
your wireless home network.<br />
To connect your computer to the wireless network:<br />
1. Swipe in from the right edge of the screen, then tap Settings.<br />
(If you are using a mouse, point to the top right or bottom right corner of the<br />
screen, then click Settings.)<br />
2. Tap or click the network icon , then select the name of your router. Tap or<br />
click Connect, then follow the steps on the screen.<br />
Test the wireless network by opening your Web browser and accessing any Web<br />
site.<br />
10 User Guide
Using Windows 8<br />
This chapter contains the following<br />
topics:<br />
� Switching between the main Windows 8<br />
interfaces<br />
� The Charms Bar<br />
� Shutting down the computer<br />
� Switching between apps<br />
� Closing an app<br />
� Opening other system programs<br />
� Windows Help and Support<br />
Attention: The Windows 8 operating<br />
system is provided by Microsoft<br />
Corporation. Please use it in accordance<br />
with the End User License Agreement<br />
(EULA) between you and Microsoft. For<br />
any question related to the operating<br />
system, please contact Microsoft directly.<br />
User Guide 11
Switching between the main Windows 8<br />
interfaces<br />
Windows 8 comes with two main user interfaces: the Start Screen and the<br />
Windows desktop.<br />
To switch from the Start Screen to the Windows desktop, do one of the following:<br />
• Select the Windows desktop tile on the Start Screen.<br />
• Press the Windows key + D.<br />
To switch from the desktop to the Start Screen, do one of the following:<br />
• Select Start from the Charms Bar.<br />
• Move the cursor to the bottom left corner, then select the Start Screen<br />
thumbnail when it is displayed.<br />
• Press the Windows key .<br />
The Charms Bar<br />
Charms provide new and faster ways to perform many basic tasks.<br />
To display the charms, do one of the following:<br />
• Swipe in from the right edge of the screen.<br />
• If you are using a mouse, point to the top right or bottom right corner of the<br />
screen.<br />
• Press the Windows key + C.<br />
Shutting down the computer<br />
To shut down the computer:<br />
1. Swipe in from the right edge of the screen, then tap Settings. (If you are using<br />
a mouse, point to the top right or bottom right corner of the screen, then click<br />
Settings.)<br />
2. Select Power → Shutdown.<br />
Switching between apps<br />
Sometimes you want to get back to an app you were just using, or quickly switch<br />
through your recent apps.<br />
To switch between apps:<br />
Swipe in from the left edge of the screen or move the cursor to the top left corner,<br />
then click to bring in the next app.<br />
12 User Guide
Closing an app<br />
To close an app, do one of the following:<br />
• Move the cursor to the top left corner of the screen. When the thumbnail<br />
appears, drag it to the bottom of the screen.<br />
• Swipe in from the top edge of the screen. When the app page becomes<br />
smaller, drag it to the bottom of the screen.<br />
• Move the cursor to the top edge of the screen. When the cursor becomes a<br />
hand, drag the app page to the bottom of the screen.<br />
Opening other system programs<br />
There is a fast way to open other system programs.<br />
To open the menu, do one of the following:<br />
• Move the cursor to the bottom left corner of the screen. When the thumbnail<br />
appears, right-click with the mouse to open the menu.<br />
• Press the Windows key + X.<br />
Windows Help and Support<br />
If you have a problem with the operating system, see the Windows Help and<br />
Support file. To open the Windows Help and Support file, do one of the following:<br />
• Select the Settings charm, then select Help.<br />
• Press the Windows key + F1.<br />
You can read the Windows Help and Support file on your computer. You can also<br />
get online help and support by clicking on one of the two links listed under More<br />
to explore.<br />
User Guide<br />
13
14 User Guide
Using the Rescue System<br />
This chapter contains the following<br />
topics:<br />
� OneKey Recovery<br />
� Driver and Application Installation<br />
Attention: Using OneKey Recovery will<br />
result in loss of data.<br />
• You can restore the C: drive of the computer<br />
to factory default settings or to the last<br />
system backup status using OneKey<br />
Recovery. If you do this, all of the existing<br />
data on drive C: will be lost, but the content<br />
and format of the other partitions of the hard<br />
disk drive will remain unchanged.<br />
• If you want to install an operating system<br />
and back it up with OneKey Recovery, you<br />
must format the C: partition in NTFS format<br />
and install the operating system on the C:<br />
partition. Otherwise, the OneKey Recovery<br />
system cannot run.<br />
User Guide 15
Note about the service partition:<br />
The files and relevant data used by the rescue system are saved in the service<br />
partition. Deleting this partition will make the rescue system unusable. For more<br />
detailed information, see the following instructions:<br />
From the Search charm, select Apps → Control Panel → Administrative Tools<br />
→ Computer Management → Disk Management, you can see the service<br />
partition, which must not be deleted.<br />
Note: The recovery files and relevant data used by the rescue system are<br />
saved in the service partition. If the service partition is deleted or damaged<br />
by someone other than authorized <strong>Lenovo</strong> service personnel, <strong>Lenovo</strong> will<br />
not be liable for any losses arising therefrom in any way.<br />
OneKey Recovery<br />
OneKey Recovery is an easy-to-use application. You can use it to restore your<br />
computer to the system default or to a previously backed up state.<br />
Detailed Operation Procedure<br />
1. Repeatedly press and release the F2 key after turning on the computer until the<br />
<strong>Lenovo</strong> Rescue System opens, then select OneKey Recovery.<br />
Note: System Recovery will overwrite all of the data on the C: drive. To<br />
prevent loss of data, be sure to back up relevant data before performing<br />
system recovery.<br />
2. Follow the on-screen instructions to select the backup task you want to restore<br />
from and the disk where you want to install the operating system, then press<br />
Next to start the restore.<br />
3. Please wait during the process of system recovery. Do not interrupt the<br />
operation during the recovery process.<br />
4. After the system is recovered successfully, the software will prompt you to<br />
restart the computer. Restart the computer and start the operating system.<br />
16 User Guide
Driver and Application Installation<br />
The Driver and Application Installation function in the rescue system provides a<br />
way for the user to conveniently reinstall all of the <strong>Lenovo</strong> applications and drivers<br />
that were shipped with your <strong>Lenovo</strong> hardware.<br />
Method 1: Automatic Installation<br />
Repeatedly press and release the F2 key after turning on the computer until the<br />
<strong>Lenovo</strong> Rescue System opens, then select Drivers and Application Installation.<br />
Follow the on-screen prompts to install the <strong>Lenovo</strong> drivers and applications. Click<br />
OK to start installing the <strong>Lenovo</strong> Drivers and Application Installation software.<br />
The system will restart. After the system has restarted, the drivers and application<br />
installation process will continue until it has completed.<br />
Method 2: Manual Installation<br />
In the Windows system, Click <strong>Lenovo</strong> Rescue System icon on the Windows<br />
desktop or Start screen. Then select Drivers and Application Installation in the<br />
pop-up dialog box.<br />
After starting the procedure, install all the drivers and software manually by<br />
following the prompts.<br />
Notes:<br />
1. Do not install software which is already installed on the computer.<br />
2. Make sure that the Drivers and Application Installation software has<br />
been automatically installed before starting the operating system. The<br />
manual installation function can only be used after the software has<br />
been installed.<br />
User Guide<br />
17
18 User Guide
Troubleshooting and<br />
Confirming Setup<br />
This chapter contains the following<br />
topic:<br />
� Troubleshooting and Problem Resolution<br />
Note: The description of the TV tuner card in<br />
this manual is only applicable to machines<br />
which have the TV tuner card. It does not<br />
apply to machines that do not have a TV<br />
tuner card.<br />
User Guide 19
Solving Problems<br />
Follow these tips when troubleshooting your computer:<br />
• If you added or removed a part before the problem started, review the<br />
installation procedures to ensure that the part is correctly installed.<br />
• If a peripheral device does not work, ensure that the device is properly<br />
connected.<br />
• If an error message appears on the screen, write down the exact message.<br />
This message may help support personnel diagnose and fix the problem(s).<br />
• If an error message occurs in a program, see the Help document of this program.<br />
Troubleshooting Display Problems<br />
Problem: Blank screen or no image is displayed on the monitor.<br />
Troubleshooting and problem resolution:<br />
Check that the LCD screen has been turned on; If not, press the LCD On/Off<br />
button to turn on the LCD.<br />
If still cannot solve the problem, contact <strong>Lenovo</strong> Customer Service.<br />
Problem: You need to change the display property settings.<br />
Setting display background and icon properties:<br />
1. Right-click the desktop anywhere except over an icon, then select Personalize<br />
from the pop-up menu.<br />
2. From here, select the appropriate options to:<br />
• Change the desktop background<br />
• Select a screen saver<br />
• Select Windows color options for borders and taskbar<br />
• Select a themes<br />
3. Right-click the desktop anywhere except over an icon, then select Screen<br />
resolution from the pop-up menu to change the appearance.<br />
20 User Guide
Problem: Ripple on screen.<br />
Troubleshooting and problem resolution:<br />
1. Check to see if any of the following devices are located less than one meter<br />
from the computer: refrigerators, electric fans, electric dryers, UPS systems,<br />
regulators, fluorescent lamps or other computers that may be generating<br />
magnetic interference.<br />
2. Move any interfering devices away from the computer.<br />
3. If the problem persists, contact <strong>Lenovo</strong> Service.<br />
Troubleshooting Audio Problems<br />
Problem: No sound from the integrated speakers.<br />
Troubleshooting and problem resolution:<br />
• Adjust the Windows volume control — select the speaker icon from the<br />
Settings Charm or click the arrow on taskbar to show the hidden icons in<br />
Windows desktop mode, then click the speaker icon. Ensure that the volume<br />
is turned up and the sound is not muted. Adjust the volume, bass, or treble<br />
controls to eliminate distortion.<br />
• Reinstall the audio driver.<br />
• Disconnect any headphones from the headphone connector — sound from<br />
the speakers is automatically disabled when headphones are connected to the<br />
computer’s side-panel headphone connector.<br />
Problem: No sound from headphones.<br />
Troubleshooting and problem resolution:<br />
• Check the headphone cable connection — ensure that the headphone cable is<br />
securely inserted into the headphone connector.<br />
• Adjust the Windows volume control — select the speaker icon from the<br />
Settings Charm or click the arrow on taskbar to show the hidden icons in<br />
Windows desktop mode, then click the speaker icon. Ensure that the volume is<br />
turned up and the sound is not muted.<br />
User Guide<br />
21
Troubleshooting Software Problems<br />
Problem: You are unable to exit a running program normally.<br />
Troubleshooting and problem resolution:<br />
1. Open the Task Manager window by pressing Ctrl, Alt and Delete at the same<br />
time.<br />
2. Select the problem program, then click the End Task button.<br />
Problem: You need to install or uninstall a program.<br />
Problem resolution:<br />
During installation never abort the install process by powering the system off or<br />
through other drastic means. This can cause system program problems or even<br />
failure during system initialization.<br />
During the uninstall process, never directly delete the files or folders. This is<br />
harmful to the operating system, and might cause a system-wide malfunction.<br />
Use the following procedure to properly uninstall programs:<br />
1. Back up all documents and system settings related to the program before<br />
removing it.<br />
2. If the program has its own uninstaller, run it directly to uninstall the program.<br />
3. If the program does not have its own uninstaller, then select Apps → Control<br />
Panel from the Search charm.<br />
4. From the Control Panel, choose Programs → Programs and Features.<br />
5. Find the applicable program from the Programs and Features dialog box and<br />
then select Uninstall/Change.<br />
6. Perform the instructions displayed to uninstall the software.<br />
22 User Guide
Troubleshooting Problems with Optical<br />
Drives and Hard Disks<br />
Problem: The Optical drive is unable to read a CD/DVD.<br />
Troubleshooting and problem resolution:<br />
1. Check to determine if there is an optical drive icon in the resource manager<br />
of the operating system. If not, restart your computer. If there is still no icon,<br />
contact <strong>Lenovo</strong> Service. Otherwise, continue with the next step of this<br />
procedure.<br />
2. Confirm that the CD/DVD has been properly placed in the drive. If not, reload<br />
the CD or DVD. Otherwise, continue with the next step of this procedure.<br />
3. Check the specifications that came with your computer to confirm that this<br />
optical drive is capable of reading this type of CD or DVD.<br />
4. If the CD/DVD cannot be read, replace it with a known good CD/DVD such as<br />
one that was shipped with the computer.<br />
5. If the known good CD cannot be read, visually check the operating side of the<br />
CD/DVD for defects.<br />
Problem: The capacity of the hard disk, as indicated by the system, is less than<br />
the nominal capacity.<br />
Troubleshooting and problem resolution: For computers equipped with the<br />
OneKey Recovery feature, the system recovery feature needs to occupy some<br />
hard disk space. This may account for the apparent hard disk capacity deficit.<br />
Further Technical Explanation: The nominal capacity of the hard disk is<br />
expressed in the decimal system as 1000 bytes. But the actual hard disk capacity<br />
is expressed in the binary system as 1024 bytes (For example, the nominal<br />
capacity 1G is 1000M, while the actual capacity 1G is 1024M).<br />
The capacity of the hard disk shown in Windows can be calculated according to<br />
the calculations in the following example:<br />
The nominal capacity of the hard disk is 40G, while its actual capacity should<br />
be: 40 x 1000 x 1000 x 1000/(1024 x 1024 x 1024) = 37G.<br />
If the Service partition of 3G - 3 x 1000 x 1000 x 1000/(1024 x 1024 x 1024) =<br />
2.79G is subtracted, the capacity of the hard disk shown in the system can<br />
be obtained.<br />
User Guide<br />
23
The capacity of the hard disk as calculated using this method may be slightly<br />
different from the actual capacity due to the rounding of totals.<br />
Special considerations for troubleshooting<br />
Windows<br />
Record the following information as it may be useful later when troubleshooting<br />
system problems:<br />
1. The drivers for this computer model only support the Windows 8 system.<br />
2. When you use the Windows Media Center to watch TV, be particularly attentive<br />
to the following:<br />
• In the following two situations, you must re-save a channel list:<br />
a. When you change your TV signal from digital to analog, your saved<br />
channel list for digital TV is deleted. When you want to watch digital TV<br />
again, you must create and save a new channel list.<br />
b. When you change your TV signal from analog to digital, your saved<br />
channel list for analog TV is deleted. When you want to watch analog<br />
TV again, you must create and save a new channel list.<br />
• You must set the TV tuner input signal to analog before you can watch<br />
Teletext programming.<br />
Windows Help and Support<br />
If you have a problem with the operating system, see the Windows Help and<br />
Support file. To open the Windows Help and Support file, do one of the following:<br />
• Select the Settings charm, then select Help.<br />
• Press Windows key + F1.<br />
You can read the Windows Help and Support file on your computer. You can also<br />
get online help and support by clicking on one of the two links listed under More<br />
to explore.<br />
24 User Guide
BIOS setup utility<br />
What is the BIOS setup utility?<br />
The BIOS setup utility is ROM-based software. It communicates basic computer<br />
information and provides options for setting boot devices, security, hardware<br />
mode, and other preferences.<br />
How can I start the BIOS setup utility?<br />
To start the BIOS setup utility:<br />
1. Shut down the computer.<br />
2. Repeatedly press and release the F1 key after turning on the computer, then<br />
select Startup → Boot Priority.<br />
How can I change the boot mode?<br />
There are two boot modes: UEFI and Legacy. To change the boot mode, start the<br />
BIOS setup utility and set boot mode to UEFI or Legacy support on the boot menu.<br />
When do I need to change the boot mode?<br />
The default boot mode for your computer is the UEFI mode. If you need to install<br />
a legacy Windows operating system (any operating system before Windows 8) on<br />
your computer, you must change the boot mode to Legacy support. The legacy<br />
Windows operating system cannot be installed if you don’t change the boot mode.<br />
User Guide<br />
25
Performing Daily Maintenance Tasks<br />
Cleaning the computer components<br />
Because many of the computer components consist of sophisticated integrated<br />
circuit boards, it is very important to periodically clean the computer to prevent<br />
dust buildup. The cleaning supplies you need to clean the components include:<br />
a vacuum cleaner, a soft cotton cloth, pure water (preferably purified or distilled<br />
water) and cotton swabs.<br />
Attention: Before you clean your computer, disconnect the computer<br />
from the electrical outlet. Clean your computer with a soft cloth<br />
dampened with water. Do not use liquid or aerosol cleaners, which may<br />
contain flammable substances.<br />
Note: To avoid damaging the computer or display, do not spray cleaning<br />
solution directly onto the display. Only use products specifically designed<br />
for cleaning displays, and follow the instructions included with the product.<br />
The following are general methods for cleaning the components:<br />
• You can use a soft cloth to remove dust on the surface of the computer, the<br />
monitor, the printer, the speakers and the mouse.<br />
• You can use a vacuum cleaner to clean in otherwise inaccessible corners.<br />
• To clean the keyboard thoroughly, shut down the computer and scrub it gently<br />
with a wet cloth. Do not use the keyboard until it is dry.<br />
Do not do any of the following:<br />
• Allow water to enter the computer.<br />
• Use a heavily dampened cloth.<br />
• Spray water directly onto the surface of the monitor or inside the computer.<br />
LCD monitor should be cleaned daily. Use a dry cloth to brush dust from the<br />
monitor and keyboard every day. Keep all surfaces clean and free of grease stains.<br />
26 User Guide
Hardware Replacement Guide<br />
This chapter contains the following<br />
topics:<br />
� Removing the stand base<br />
� Removing the foot cover<br />
� Replacing a memory module<br />
� Replacing the hard disk drive<br />
� Replacing the optical drive<br />
� Replacing the adapter<br />
� Replacing the keyboard and mouse<br />
User Guide 27
Overview<br />
This guide is intended to be used by customers who are replacing Customer<br />
Replaceable Units (CRUs) as well as trained service personnel who are replacing<br />
Field Replaceable Units (FRUs). In this guide, CRUs and FRUs will often be referred<br />
to as parts.<br />
Note: Trained service personnel should refer to the Hardware Maintenance<br />
Manual (HMM) for parts ordering information.<br />
This guide does not include procedures for all parts. It is expected that cables,<br />
switches, and certain mechanical parts can be replaced by trained service<br />
personnel without the need for step-by-step procedures.<br />
Note: Use only parts provided by <strong>Lenovo</strong>®.<br />
The description of the TV-Tuner card in this manual applies only to those computer<br />
models that have the TV-Tuner card installed. It does not apply to those computer<br />
models that do not have the TV-Tuner card installed.<br />
This guide contains procedures for replacing the following parts:<br />
• Memory modules<br />
• Hard disk drive<br />
• Optical drive<br />
• Adapter<br />
• Keyboard, mouse (wired)<br />
Safety information for replacing CRUs<br />
Do not open your computer or attempt any repairs before reading the “Important<br />
safety information” in the Safety and Warranty Guide that was included with your<br />
computer. If you no longer have this copy of the Safety and Warranty Guide, you<br />
can obtain one online from the Support Web site at http://support.lenovo.com.<br />
28 User Guide
Additional information resources<br />
If you have Internet access, the most up-to-date information for your computer is<br />
available from the World Wide Web.<br />
You can find the following information:<br />
• CRU removal and installation information<br />
• Publications<br />
• Troubleshooting information<br />
• Parts information<br />
• Links to other useful sources of information<br />
To access this information, go to: http://support.lenovo.com<br />
Tools required<br />
To disassemble the computer, you need the following tools:<br />
• Wrist grounding strap and conductive mat for preventing electrostatic discharge<br />
• Flat screwdriver<br />
• Phillips screwdriver<br />
• Hex screwdriver<br />
• Plastic flat screwdriver<br />
• Plastic tweezers<br />
Note: The screws for the different components vary in size. During the<br />
disassembly procedure, group the screws with their corresponding<br />
components to avoid a mismatch when replacing the components.<br />
User Guide<br />
29
Handling static-sensitive devices<br />
Static electricity, although harmless to you, can seriously damage computer<br />
components.<br />
When you are replacing a part, do not open the anti-static package containing the<br />
new part until the defective part has been removed from the computer and you are<br />
ready to install the new part.<br />
When you handle parts and other computer components, take these precautions<br />
to avoid static electricity damage:<br />
• Limit your movement. Movement can cause static electricity to build up around<br />
you.<br />
• Always handle parts and other computer components carefully. Handle<br />
adapters, memory modules, system boards, and microprocessors by the<br />
edges. Never touch any exposed circuitry.<br />
• Prevent others from touching the parts and other computer components.<br />
• Before you replace a new part, touch the anti-static package containing the<br />
part to a metal expansion slot cover or other unpainted metal surface on<br />
the computer for at least two seconds. This reduces static electricity in the<br />
package and your body.<br />
• When possible, remove the new part from the anti-static packaging, and install<br />
it directly in the computer without setting the part down. When this is not<br />
possible, place the anti-static package that the part came in on a smooth, level<br />
surface and place the part on it.<br />
• Do not place the part on the computer cover or other metal surface.<br />
30 User Guide
Replacing hardware<br />
Attention: Do not remove the computer cover or attempt any repairs<br />
before reading the “Important safety information” in the Safety and<br />
Warranty Guide that was included with your computer or in the Hardware<br />
Maintenance Manual (HMM) for the computer. To obtain copies of the<br />
Safety and Warranty Guide or HMM, go to the Support Web site at:<br />
http://support.lenovo.com<br />
Note: Use only parts provided by <strong>Lenovo</strong>.<br />
General information<br />
Pre-disassembly instructions<br />
Before proceeding with the disassembly procedure, make sure that you do the<br />
following:<br />
1. Turn off the power to the system and all peripherals.<br />
2. Unplug all power and signal cables from the computer.<br />
3. Place the system on a flat, stable surface.<br />
Removing the stand base<br />
Attention: Turn off the computer and wait 3 to 5 minutes to let it cool<br />
down before removing the cover.<br />
Note: It may be helpful to place the computer face-down on a soft flat<br />
surface for this procedure. <strong>Lenovo</strong> recommends that you use a blanket,<br />
towel, or other soft cloth to protect the touch screen from scratches or<br />
other damage.<br />
1. Remove any media (disks, CDs, or memory cards) from the drives, shut down<br />
the operating system, and turn off the computer and all attached devices.<br />
2. Unplug all power cords from electrical outlets.<br />
3. Disconnect all cables attached to the computer. This includes power cords,<br />
input/output (I/O) cables, and any other cables that are connected to the<br />
computer. Refer to “Left and right views” and “Rear view” for help with locating<br />
the various connectors.<br />
User Guide<br />
31
4. To release the stand base from the stand holder, twist the hand screw ring<br />
counter-clockwise until the base comes loose.<br />
5. Slide the stand base out from the holder then put it aside.<br />
6. Refer to “Installing the computer stand” to reinstall the stand base.<br />
Removing the foot cover<br />
Attention: Turn off the computer and wait 3 to 5 minutes to let it cool<br />
down before removing the cover.<br />
Note: It may be helpful to place the computer face-down on a soft flat<br />
surface for this procedure. <strong>Lenovo</strong> recommends that you use a blanket,<br />
towel, or other soft cloth to protect the touch screen from scratches or<br />
other damage.<br />
1. Remove any media (disks, CDs, or memory cards) from the drives, shut down<br />
the operating system, and turn off the computer and all attached devices.<br />
2. Unplug all power cords from electrical outlets.<br />
3. Disconnect all cables attached to the computer. This includes power cords,<br />
input/output (I/O) cables, and any other cables that are connected to the<br />
computer. Refer to “Left and right views” and “Rear view” for help with locating<br />
the various connectors.<br />
4. Remove the foot base. Refer to “Removing the foot base”.<br />
32 User Guide
5. Lift up the stand holder then slide out the foot cover as shown.<br />
6. To reattach the foot cover:<br />
a. Lift up the stand holder.<br />
b. Line up the foot cover with mounting holes on the back of the computer,<br />
then slide it back into position.<br />
Replacing a memory module<br />
Attention: Turn off the computer and wait 3 to 5 minutes to let it cool<br />
down before removing the cover.<br />
Note: It may be helpful to place the computer face-down on a soft flat<br />
surface for this procedure. <strong>Lenovo</strong> recommends that you use a blanket,<br />
towel, or other soft cloth to protect the touch screen from scratches or<br />
other damage.<br />
1. Remove any media (disks, CDs, or memory cards) from the drives, shut down<br />
the operating system, and turn off the computer and all attached devices.<br />
2. Unplug all power cords from electrical outlets.<br />
3. Disconnect all cables attached to the computer. This includes power cords,<br />
input/output (I/O) cables, and any other cables that are connected to the<br />
computer. Refer to “Left and right views” and “Rear view” for help with locating<br />
the various connectors.<br />
4. Remove the stand base. Refer to “Removing the stand base”.<br />
5. Remove the foot cover. Refer to “Removing the foot cover”.<br />
User Guide<br />
33
6. Push out the latches on both sides of the memory socket to release the<br />
memory module and gently pull the memory module upward to remove it<br />
from its socket. All of the memory modules can be removed using the same<br />
procedure.<br />
7. To install a memory module:<br />
Align the new memory module with the memory socket, then insert it and push<br />
down on the top edge. Make sure the latches lock the memory module in place.<br />
8. Reattach the foot cover and stand base.<br />
Replacing the hard disk drive<br />
Attention: Turn off the computer and wait 3 to 5 minutes to let it cool<br />
down before removing the cover.<br />
Note: It may be helpful to place the computer face-down on a soft flat<br />
surface for this procedure. <strong>Lenovo</strong> recommends that you use a blanket,<br />
towel, or other soft cloth to protect the touch screen from scratches or<br />
other damage.<br />
1. Remove any media (disks, CDs, or memory cards) from the drives, shut down<br />
the operating system, and turn off the computer and all attached devices.<br />
2. Unplug all power cords from electrical outlets.<br />
3. Disconnect all cables attached to the computer. This includes power cords,<br />
input/output (I/O) cables, and any other cables that are connected to the<br />
computer. Refer to “Left and right views” and “Rear view” for help with locating<br />
the various connectors.<br />
34 User Guide
4. Remove the stand base. Refer to “Removing the stand base”.<br />
5. Remove the foot cover. Refer to “Removing the foot cover”.<br />
6. Push the hard disk drive bracket , then slide the hard disk drive and bracket<br />
out of the chassis as shown.<br />
7. Push the lock pins outward to release the hard disk drive from the bracket.<br />
8. To install the new hard disk drive:<br />
a. Line up the new hard disk drive with the bracket and secure it with the pins.<br />
b. Slide the hard disk drive and bracket back into position.<br />
9. Reattach the foot cover and stand base.<br />
1<br />
1<br />
User Guide<br />
35
Replacing the optical drive<br />
Attention: Turn off the computer and wait 3 to 5 minutes to let it cool<br />
down before removing the cover.<br />
Note: It may be helpful to place the computer face-down on a soft flat<br />
surface for this procedure. <strong>Lenovo</strong> recommends that you use a blanket,<br />
towel, or other soft cloth to protect the touch screen from scratches or<br />
other damage.<br />
1. Remove any media (disks, CDs, or memory cards) from the drives, shut down<br />
the operating system, and turn off the computer and all attached devices.<br />
2. Unplug all power cords from electrical outlets.<br />
3. Disconnect all cables attached to the computer. This includes power cords,<br />
input/output (I/O) cables, and any other cables that are connected to the<br />
computer. Refer to “Left and right views” and “Rear view” for help with locating<br />
the various connectors.<br />
4. Remove the stand base. Refer to “Removing the stand base”.<br />
5. Remove the foot cover. Refer to “Removing the foot cover”.<br />
6. Push the optical drive pin downward to push out the optical drive as shown.<br />
36 User Guide
7. Push a small iron stick (paper clip) into the small hole on the optical drive cover<br />
so that the disk springs out as shown.<br />
8. Remove the two screws that secure the optical drive to the metal bracket.<br />
9. Use a small flat head screwdriver to press and push out the pins that secure<br />
the cover to the disk.<br />
10. Separate the cover from the defective optical drive.<br />
User Guide<br />
37
11. To install the new optical drive:<br />
a. Align the new optical drive with the cover, and then push the cover back<br />
into position.<br />
b. Screw the metal bracket back onto the new optical drive.<br />
c. Slide the new optical drive into the drive bay.<br />
12. Reattach the foot cover and stand base.<br />
Replacing the adapter<br />
Attention: Turn off the computer and wait 3 to 5 minutes to let it cool<br />
down before removing the cover.<br />
1. Remove any media (disks, CDs, or memory cards) from the drives, shut down<br />
the operating system, and turn off the computer and all attached devices.<br />
2. Disconnect the adapter cable from the computer , then unplug the power<br />
cord from electrical outlet.<br />
38 User Guide
3. Connect the new adapter as shown.<br />
User Guide<br />
39
Replacing the keyboard and mouse<br />
Note: Your keyboard will be connected to a USB connector at either side<br />
or at the rear of the computer.<br />
To replace the keyboard:<br />
1. Remove any media (disks, CDs, or memory cards) from the drives, shut down<br />
the computer, and turn off all attached devices.<br />
2. Unplug all power cords from electrical outlets.<br />
3. Locate the connector for the keyboard. Refer to “Side view of the computer”<br />
and “Rear view of the computer”.<br />
4. Disconnect the defective keyboard cable from the computer and connect the<br />
new keyboard cable to the same connector.<br />
* The mouse can be replaced using the same method.<br />
40 User Guide
Appendix.<br />
Declaration<br />
Thank you for using <strong>Lenovo</strong> products.<br />
Carefully read all documents shipped with your computer before you install and<br />
use the product for the first time. <strong>Lenovo</strong> is not responsible for any loss except<br />
when caused by installation and operations performed by <strong>Lenovo</strong> professional<br />
service personnel. You are responsible if you fail to operate the product according<br />
to instructions and requirements in the manuals included with your computer, or<br />
operate the product inappropriately.<br />
This manual could include technical inaccuracies or typographical errors. Changes<br />
are made periodically to the information herein; these changes will be incorporated<br />
in new editions of the publication.To provide better service, <strong>Lenovo</strong> reserves the<br />
right to improve and/or modify the products and software programs described in<br />
the manuals included with your computer, and the content of the manual, at any<br />
time without additional notice.<br />
The manuals included with your computer are provided to help you use <strong>Lenovo</strong>’s<br />
products appropriately. For the configuration of the product, refer to the related<br />
contract (if any) or product packing list, or consult the distributor for the product<br />
sales.<br />
The content of the manuals included with your computer is protected by copyright<br />
laws and rules. None of the manuals included with your computer may be<br />
reproduced or transcribed by any means or translated into any language without<br />
prior written permission of <strong>Lenovo</strong>.<br />
The software interface and function and hardware configuration described in<br />
the manuals included with your computer might not match exactly the actual<br />
configuration of the computer that you purchase.You are welcome to contact us<br />
about the manuals included with your computer. For the latest information or any<br />
questions or comments, contact or visit the <strong>Lenovo</strong> Web site:<br />
Service Web site: http://support.lenovo.com<br />
User Guide<br />
41
Trademarks<br />
<strong>Lenovo</strong> and the <strong>Lenovo</strong> logo, IdeaCentre and IdeaCentre logo are trademarks of<br />
<strong>Lenovo</strong> in the United States, other countries, or both.<br />
Microsoft, Windows, and Windows Vista are trademarks of the Microsoft group of<br />
companies.<br />
Intel Inside is a trademark of Intel Corporation in the U.S. and/or other countries.<br />
AMD, the AMD Arrow logo, ATI, AMD Athlon, AMD LIVE!, AMD Opteron, AMD<br />
Phenom, AMD Sempron, Catalyst, Cool ‘n’ Quiet, CrossFire, PowerPlay, Radeon,<br />
and The Ultimate Visual Experience are trademarks of Advanced Micro Devices,<br />
Inc.<br />
Other company, product, or service names referred to herein or in other <strong>Lenovo</strong><br />
publications may be trademarks or service marks of others.<br />
All rights reserved.<br />
Names or marks of certain companies mentioned in the manuals included with<br />
your computer or this document do not necessarily indicate that related software<br />
or hardware is included. The actual configuration of the product depends on the<br />
packing list description.<br />
42 User Guide
Energy Star Statement<br />
ENERGY STAR® is a joint program of the U.S. Environmental Protection Agency<br />
and the U.S. Department of Energy aimed at saving money and protecting the<br />
environment through energy efficient products and practices.<br />
<strong>Lenovo</strong> is proud to offer our customers products with an ENERGY STAR compliant<br />
designation. The following machine types have been designed and tested to<br />
conform to the ENERGY STAR program requirement for computers at the time<br />
of manufacture. For more information about ENERGY STAR ratings for <strong>Lenovo</strong><br />
computers, go to http://www.lenovo.com.<br />
• 10102/4773<br />
• 10103/4751<br />
• 10104/6595<br />
• 10105/6596<br />
• 10110/6267<br />
By using ENERGY STAR compliant products and taking advantage of the powermanagement<br />
features of your computer, you reduce the consumption of electricity.<br />
Reduced electrical consumption contributes to potential financial sayings, a cleaner<br />
environment, and the reduction of greenhouse gas emissions.<br />
For more information about ENERGY STAR, go to: http://www.energystar.gov.<br />
<strong>Lenovo</strong> encourages you to make efficient use of energy an integral part of your<br />
day-to-day operations. To help in this endeavor, <strong>Lenovo</strong> has preset the following<br />
power-management features to take effect when your computer has been inactive<br />
for a specified duration:<br />
ENERGY STAR power-management features, by operating system.<br />
Microsoft Windows Vista, Windows 7 and Windows 8<br />
Power plan: Balanced<br />
• Turn off the display: After 10 minutes<br />
• Put the computer to sleep: After 25 minutes<br />
• Advanced power settings:<br />
- Turn off hard disk drives: After 20 minutes<br />
- Hibernate: Never<br />
User Guide<br />
43
To awaken your computer from a Sleep or System Standby mode, press any<br />
key on your keyboard. For more information about these settings, refer to your<br />
Windows Help and Support information system.<br />
Enabling ErP compliance mode<br />
You can enable the energy-related products directive (ErP) compliance mode<br />
through the Power menu in the Setup Utility program. This mode reduces<br />
electricity consumption when your computer is in standby mode or turned off.<br />
To enable ErP compliance mode in the Setup Utility program, do the following:<br />
1. Repeatedly press and release the F1 key when turning on the computer to start<br />
the Setup Utility program.<br />
2. From the Setup Utility program main menu, select Power → ErP and press<br />
Enter.<br />
3. Select Enabled and press Enter.<br />
4. Press F10 to save changes and exit the Setup Utility program. Press Enter<br />
when prompted to confirm.<br />
Note: When ErP compliance mode is enabled, you only can wake up your<br />
computer by pressing the power switch.<br />
44 User Guide