LCD-Farbmonitore, VMC-17LCD-PW, VMC-23LCD-PW ... - Videor
LCD-Farbmonitore, VMC-17LCD-PW, VMC-23LCD-PW ... - Videor
LCD-Farbmonitore, VMC-17LCD-PW, VMC-23LCD-PW ... - Videor

Sie wollen auch ein ePaper? Erhöhen Sie die Reichweite Ihrer Titel.
YUMPU macht aus Druck-PDFs automatisch weboptimierte ePaper, die Google liebt.
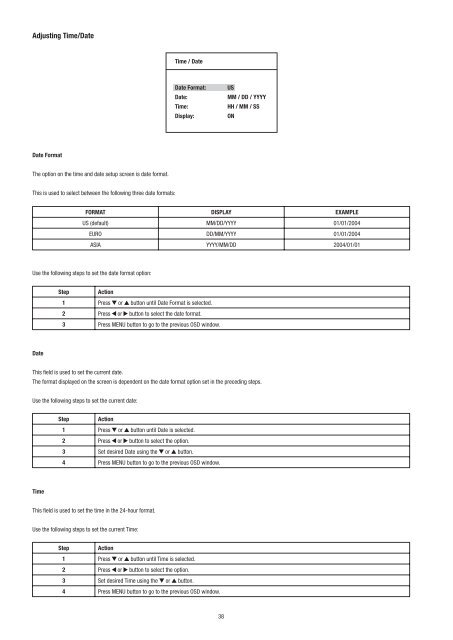
Adjusting Time/Date<br />
Date Format<br />
The option on the time and date setup screen is date format.<br />
This is used to select between the following three date formats:<br />
Step Action<br />
Time / Date<br />
1 Press or button until Date Format is selected.<br />
2 Press or button to select the date format.<br />
Date Format: US<br />
3 Press MENU button to go to the previous OSD window.<br />
Date: MM / DD / YYYY<br />
Time: HH / MM / SS<br />
Display: ON<br />
FORMAT DISPLAY EXAMPLE<br />
US (default) MM/DD/YYYY 01/01/2004<br />
EURO DD/MM/YYYY 01/01/2004<br />
ASIA YYYY/MM/DD 2004/01/01<br />
Use the following steps to set the date format option:<br />
Date<br />
This field is used to set the current date.<br />
The format displayed on the screen is dependent on the date format option set in the preceding steps.<br />
Use the following steps to set the current date:<br />
Time<br />
Step Action<br />
1 Press or button until Date is selected.<br />
2 Press or button to select the option.<br />
3 Set desired Date using the or button.<br />
4 Press MENU button to go to the previous OSD window.<br />
This field is used to set the time in the 24-hour format.<br />
Use the following steps to set the current Time:<br />
Step Action<br />
1 Press or button until Time is selected.<br />
2 Press or button to select the option.<br />
3 Set desired Time using the or button.<br />
4 Press MENU button to go to the previous OSD window.<br />
38