Hai 2 - Pichler
Hai 2 - Pichler
Hai 2 - Pichler

Erfolgreiche ePaper selbst erstellen
Machen Sie aus Ihren PDF Publikationen ein blätterbares Flipbook mit unserer einzigartigen Google optimierten e-Paper Software.
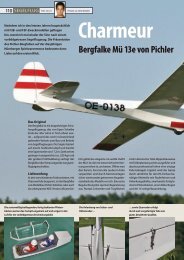
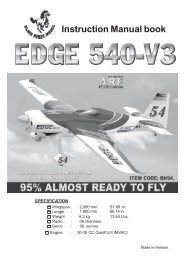
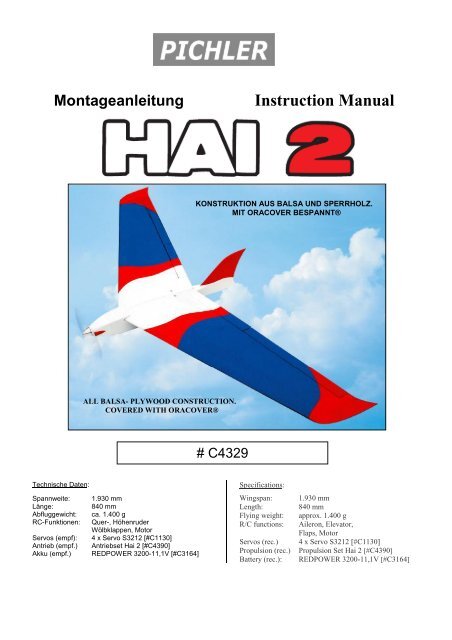
Montageanleitung<br />
Instruction Manual<br />
KONSTRUKTION AUS BALSA UND SPERRHOLZ.<br />
MIT ORACOVER BESPANNT®<br />
ALL BALSA- PLYWOOD CONSTRUCTION.<br />
COVERED WITH ORACOVER®<br />
# C4329<br />
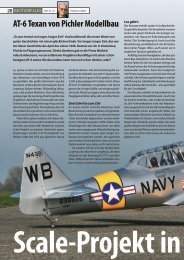
Technische Daten:<br />
Spannweite: 1.930 mm<br />
Länge:<br />
840 mm<br />
Abfluggewicht: ca. 1.400 g<br />
RC-Funktionen: Quer-, Höhenruder<br />
Wölbklappen, Motor<br />
Servos (empf): 4 x Servo S3212 [#C1130]<br />
Antrieb (empf.) Antriebset <strong>Hai</strong> 2 [#C4390]<br />
Akku (empf.) REDPOWER 3200-11,1V [#C3164]<br />
Specifications:<br />
Wingspan:<br />
Length:<br />
Flying weight:<br />
R/C functions:<br />
Servos (rec.)<br />
Propulsion (rec.)<br />
Battery (rec.):<br />
1.930 mm<br />
840 mm<br />
approx. 1.400 g<br />
Aileron, Elevator,<br />
Flaps, Motor<br />
4 x Servo S3212 [#C1130]<br />
Propulsion Set <strong>Hai</strong> 2 [#C4390]<br />
REDPOWER 3200-11,1V [#C3164]
Bedienungsanleitung<br />
Instruction Manual<br />
<strong>Hai</strong> 2<br />
Diese Montageanleitung soll Ihnen helfen, ein perfekt fliegendes<br />
Flugmodell zu bauen. Bitte lesen Sie die Anleitung aufmerksam<br />
durch, bevor Sie mit dem Bau des Modells <strong>Hai</strong> 2<br />
beginnen. Überprüfen Sie mit Hilfe der Liste der Einzelteile ob<br />
alle Bauteile vorhanden sind.<br />
WARNHINWEIS:<br />
Bitte beachten Sie, dass dieses Flugzeug kein Spielzeug<br />
ist. Gehen Sie beim Bau und beim Einsatz sehr umsichtig<br />
vor. Unvorsichtiges Handeln kann zur Gefahr für Personen<br />
und Gegenständen führen. Überfliegen Sie niemals Personen,<br />
setzen Sie das Modell keinesfalls in der Nähe von<br />
Gebäuden und Straßen ein. BEIM EINSATZ DES MO-<br />
DELLS TRAGEN SIE DIE ALLEINIGE VERANTWOR-<br />
TUNG UND DAS GESAMTE RISIKO.<br />
Sollten Sie keine Erfahrungen beim Bau und Fliegen eines<br />
RC-Modells besitzen, empfehlen wir Ihnen dringend sich<br />
von Ihrem Händler beraten zu lassen und sich an einen<br />
Modellflugverein zu wenden. Dort wird man Ihnen behilflich<br />
sein und Ihr Modell einfliegen. Wir weisen ausdrücklich<br />
darauf hin, dass für den Betrieb eines Flugmodells eine<br />
Haftpflichtversicherung gesetzlich vorgeschrieben ist<br />
BENÖTIGE WERKZEUGE & VORRICHTUNGEN:<br />
<br />
<br />
<br />
<br />
<br />
<br />
<br />
<br />
<br />
<br />
<br />
<br />
<br />
<br />
<br />
CA-Kleber (Dünnflüssiger Sekunden-Kleber)<br />
30-Min. Epoxydharz<br />
5-Min. Epoxydharz<br />
Hand- oder elektrische Bohrmaschine<br />
Bohrersortiment<br />
Hobbymesser<br />
Stahllineal<br />
2 mm starke Rundpfeile<br />
Kreuzschlitz Schraubendreher<br />
Schleifpapier Körnung 220er<br />
Rechtwinkeliges Dreieck<br />
Seitenschneider<br />
Klebeband & Stecknadeln<br />
Schraubensicherungslack<br />
Papier zum Abdecken<br />
This instruction manual is designed to help you build a<br />
great flying aeroplane. Please read this manual thoroughly<br />
before starting assembly of your <strong>Hai</strong> 2. Use the parts listing<br />
below to identify all parts.<br />
WARNING:<br />
Please be aware that this aeroplane is not a toy and if assembled<br />
or used incorrectly it is capable of causing injury<br />
to people or property. WHEN YOU FLY THIS AERO-<br />
PLANE YOU ASSUME ALL RISK & RESPONSIBIL-<br />
ITY.<br />
It you are inexperienced with basic R/C flight we strongly<br />
recommend you contact your R/C supplier and join your<br />
local R/C Model Flying Club. R/C Model Flying Clubs<br />
offer a variety of training procedures designed to help the<br />
new pilot an his way to successful R/C flight. They will<br />
also be able to advise on any insurance and safety regulations<br />
that may apply.<br />
TOOLS & SUPPLIES NEEDED:<br />
<br />
<br />
<br />
<br />
<br />
<br />
<br />
<br />
<br />
<br />
<br />
<br />
<br />
<br />
<br />
Thin Cyanoacrylate glue. (CA Glue)<br />
30 minute epoxy.<br />
5 minute epoxy.<br />
Hand or electric drill.<br />
Assorted drill bits.<br />
Modelling knife.<br />
Straight edge ruler.<br />
2 mm ball driver.<br />
Phillips head screwdriver.<br />
220 grit sandpaper.<br />
90° square or builder‘s triangle.<br />
Wire cutters.<br />
Masking tape & T-pins.<br />
Thread-lock.<br />
Paper towels.<br />
2
Bedienungsanleitung<br />
Instruction Manual<br />
<strong>Hai</strong> 2<br />
VORSCHLÄGE:<br />
Um Kratzer oder andere Beschädigungen beim Bau des<br />
Modells zu vermeiden, empfehlen wir Ihnen nur die Teile<br />
auszupacken, die Sie gerade benötigen. Decken Sie Ihre<br />
Werkbank mit einem alten Handtuch oder ähnlichem ab.<br />
Halten Sie einige kleine Gläser oder Schüsseln bereit um<br />
Kleinteile sicher aufzubewahren, damit sie nicht verloren<br />
gehen.<br />
TIPPS:<br />
Stellen Sie sicher, dass Sie immer die richtigen Teile auswählen,<br />
die Sie verbauen wollen. Richten Sie alles korrekt<br />
aus, bevor Sie es verkleben. Nur so erhalten Sie ein exakt<br />
fliegendes Modell <strong>Hai</strong> 2. Das Modell ist größtenteils in<br />
Handarbeit aus natürlichen Materialien hergestellt, jedes<br />
Modell ist ein Unikat. Halten Sie die Reihenfolge beim<br />
Zusammenbau ein.<br />
Die lackierten und die Kunststoffteile des Bausatzes sind<br />
resistent gegen Kraftstoff, allerdings nicht gegen andere<br />
aggressive Chemikalien, das gilt auch für Aktivatorspray,<br />
für Sekundenkleber und Aceton. Lassen Sie diese Chemikalien<br />
nicht in Kontakt mit den Farben der Bespannung und<br />
den Plastikteilen kommen.<br />
ALLGEMEINE SICHERHEITS HINWEISE:<br />
<br />
<br />
<br />
<br />
<br />
<br />
Das Modell ist kein Spielzeug<br />
Stellen Sie sicher, dass Ihre Kanalnummer frei ist,<br />
bevor Sie den Sender einschalten.<br />
Glühkerzenstecker müssen absolut sicher an der<br />
Glühkerze angebracht werden.<br />
Werfen Sie Verbrennungsmotoren nicht mit dem Finger<br />
an, setzen Sie Anlasser oder ein Holzstück ein.<br />
Halten Sie lose Kleidung und andere Gegenstände<br />
von der drehenden Luftschraube fern.<br />
Starten und betreiben Sie den Motor niemals in der<br />
Nähe von Personen. Halten Sie sich keinesfalls in der<br />
Propellerebene auf.<br />
HAUPTBESTANDTEILE<br />
SUGGESTION:<br />
To avoid scratching your new airplane, do not unwrap the<br />
pieces until they are needed for assembly. Cover your<br />
workbench with an old towel or brown paper, both to protect<br />
the aircraft and to protect the table. Keep a couple of<br />
jars or bowls handy to hold the small parts after you open<br />
the bag.<br />
NOTE:<br />
Please trial fit all the parts. Make sure you have the correct<br />
parts and that they fit and are aligned properly before gluing!<br />
This will assure proper assembly. <strong>Hai</strong> 2 ARF is hand<br />
made from natural materials, every plane is unique and<br />
minor adjustments may have to be made. However, you<br />
should find the fit superior and assembly simple.<br />
The painted and plastic parts used in this kit are fuel proof.<br />
However, they are not tolerant of many harsh chemicals<br />
including the following: paint thinner, C/A glue accelerator,<br />
C/A glue debonder and acetone. Do not let these<br />
chemicals come in contact with the colors on the covering<br />
and the plastic parts.<br />
COMMON SAFETY PRECAUTIONS:<br />
<br />
<br />
<br />
<br />
<br />
<br />
This is not a toy<br />
Be sure that no other flyers are using your radio frequency<br />
Glow plug clips must be securely attached to the glow<br />
plug<br />
Do not flip the propeller with your fingers<br />
Keep loose clothing and wires away from the propeller<br />
Do not start the motor if people are near. Do not stand<br />
in line with the side of the propeller.<br />
THE MAIN PARTS<br />
A: Motorhaube<br />
B: Tragflächenhälften<br />
C: Rumpf<br />
D: Seitenleitwerk<br />
E: Motorspant aus Holz<br />
D: Flächensteckungsrohre aus Aluminium<br />
A: Cowling<br />
B: Wing panel<br />
C: Fuselage<br />
D: Vertical stabilizer<br />
E: Wooden motor mount<br />
D: Aluminium wing joiners<br />
3
Bedienungsanleitung<br />
Instruction Manual<br />
<strong>Hai</strong> 2<br />
HAUPTBESTANDTEILE<br />
THE MAIN PARTS<br />
ANBRINGEN DER QUERRUDER- UND<br />
WÖLBKLAPPEN -SERVOS BZW. DER RUDER-<br />
HÖRNER MONTIEREN DER<br />
QUERRUDERSERVOS<br />
INSTALLING THE AILERON – FLAP SERVO<br />
CONTROL HORN.<br />
INSTALLING THE AILERON SERVO.<br />
4
Bedienungsanleitung<br />
Instruction Manual<br />
<strong>Hai</strong> 2<br />
EINBAU DES QUERRUDERSERVO.<br />
INSTALLING THE AILERON SERVO.<br />
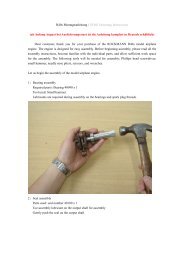
1. Das Modell HAI 2 wurde von uns mit den empfohlenen<br />
Servos S3212 getestet und wir empfehlen diese für maximale<br />
Leistung und Zuverlässigkeit.<br />
1. We have tested the HAI 2 with the suggested Servos S3212 and<br />
highly recommend you to use it for best performance and reliability.<br />
2. Bringen Sie die metallische Anlenkung auf dem Servohebel<br />
an.<br />
2. Install the metal connector onto servo arm.<br />
5<br />
3. Benutzen Sie ein Klingenmesser und schneiden Sie die<br />
Öffnung für den Servohebel aus der Bespannung aus, wie im<br />
folgenden Bild dargestellt.
Bedienungsanleitung<br />
Instruction Manual<br />
<strong>Hai</strong> 2<br />
3. Using a modeling knife, remove the covering at position show<br />
below.<br />
Montieren Sie den Anlenkung am Servohebel an. Sichern Sie die<br />
Mutter mit Sekundenkleber, allerdings muss sich die Anlenkung<br />
leicht drehen lassen.<br />
Attach the micro control connector to the servo arms. Be sure the lock tie<br />
but it could free rotation.<br />
Bringen Sie das Servo an der Abdeckung an und befestigen das<br />
Servo in der Fläche, ziehen Sie das Servokabel ein, wie auf den<br />
folgenden Bildern dargestellt.<br />
Install servo tray with aileron servo into the wing as same as picture<br />
below.<br />
6
Bedienungsanleitung<br />
Instruction Manual<br />
<strong>Hai</strong> 2<br />
Bringen Sie das Ruderhorn am Querruder an.<br />
RUDERHORN FÜR QUERRUDER ANBRINGEN<br />
Install aileron control horn to the aileron.<br />
INSTALLING THE AILERON CONTROL HORN<br />
1. Benutzen Sie ein Lineal und einen Stift und zeichnen Sie die<br />
Position des Ruderhorns an, wie auf dem folgenden Bild zu<br />
erkennen.<br />
1. Using a ruler & pen to draw a straight line as below picture<br />
7
Bedienungsanleitung<br />
Instruction Manual<br />
<strong>Hai</strong> 2<br />
ANBRINGEN DER QUERRUDERANLENKUNG<br />
INSTALLING THE AILERON PUSHROD<br />
EINBAU DER WÖLBKLAPPENSERVO.<br />
INSTALLING THE FLAP SERVO.<br />
8
Bedienungsanleitung<br />
Instruction Manual<br />
<strong>Hai</strong> 2<br />
RUDERHORN FÜR WÖLBKLAPPE ANBRINGEN<br />
INSTALLING THE FLAP CONTROL HORN<br />
ANBRINGEN DER WÖLBKLAPPENANLENKUNG<br />
INSTALLING THE FLAP PUSHROD<br />
9
Bedienungsanleitung<br />
Instruction Manual<br />
<strong>Hai</strong> 2<br />
Wiederholen Sie die gleichen Schritte für die andere Tragflächenhälfte.<br />
Erstellen Sie eine komplett identische zweite Flächenhälfte.<br />
Repeat the procedure fort he other wing half.<br />
10
Bedienungsanleitung<br />
Instruction Manual<br />
<strong>Hai</strong> 2<br />
FLÄCHENBEFESTIGUNG<br />
WING ATTACHMENT<br />
Legen Sie sich die beiden Aluminium Steckrohre zurecht.<br />
Überprüfen Sie ob beide Alu-Steckrohre in die Führungen beider<br />
Flächenhälften passen. Die Verbindungsrohre müssen sich leicht<br />
einschieben lassen. Sollte das nicht der Fall sein, benutzen Sie<br />
220er Schleifpapier und schleifen Sie die Rohre etwas ab, bis es<br />
richtig passt.<br />
Location the aluminium wing dihedral brace.<br />
Test fit the aluminium tube dihedral brace into each wing half. The brace<br />
should slide in easily. If not, use 220 grit sand down the edges and ends<br />
of the brace until it fits properly.<br />
ELEKTROMOTOR BOOST 30 MONTIEREN<br />
Für beste Leistung und Zuverlässigkeit empfehlen wir Ihnen den<br />
Motor PICHLER BOOST 30, damit haben wir den HAI 2 ausgiebig<br />
getestet. Motorwelle ggf. lösen und entgegengesetzt montieren<br />
damit es so aussieht wie auf den nachstehenden Abbildungen!<br />
INSTALLING BOOST 30 ELECTRIC MOTOR<br />
We highly suggest to use the BOOST 30 motor. It is best for HAI 2. The<br />
motor must be rear mounted as shown here. You probably have to loosen<br />
the motor shaft and install it the opposite way.<br />
11
Bedienungsanleitung<br />
Instruction Manual<br />
<strong>Hai</strong> 2<br />
MOTORHAUBE MONTIEREN<br />
INSTALLING THE COWLING<br />
1. Schieben Sie die Motorhaube über den Motor bis nach hinten<br />
auf den Rumpf und markieren Sie die Position.<br />
2. Während Sie die hintere Kante der Motorhaube anzeichnen,<br />
richten Sie die Haube exakt aus. Die Motorachse, bzw. die<br />
der Luftschrauben Mitnehmer muss sich mittig in der vorderen<br />
Öffnung der Haube befinden.<br />
3. Schieben Sie die Haube zurück über den Motor.<br />
Motorträger mit Epoxydharz<br />
einkleben<br />
Glue motor mount with Epoxy Glue<br />
1. Slide the cowl over the motor and line up the back edge of the cowl<br />
with the marks you made on the fuselage.<br />
2. While keeping the back edge of the cowl flush with the marks, align<br />
the front of the cowl with the crankshaft of the motor. The front of<br />
the cowl should be positioned so the crankshaft is in nearly the<br />
middle of the cowl opening. Hold the cowl firmly in place using<br />
pieces of masking tape.<br />
3. Slide the cowl back over the motor<br />
12
Bedienungsanleitung<br />
Instruction Manual<br />
<strong>Hai</strong> 2<br />
SEITENLEITWERK MONTIEREN<br />
INSTALLING THE RUDDER<br />
13
Bedienungsanleitung<br />
Instruction Manual<br />
<strong>Hai</strong> 2<br />
ANTRIEBSAKKU BEFESTIGEN<br />
Benutzen Sie ein Haken/Schlaufenband für die Akkumontage<br />
14
USE LOOP N LOCK TIE STRAP TO FASTEN<br />
THE FLIGHT BATTERY<br />
Bedienungsanleitung<br />
Instruction Manual<br />
<strong>Hai</strong> 2<br />
Montieren Sie die Tragfläche am Rumpf, wie auf den folgenden<br />
Bildern dargestellt.<br />
How to attach the wings to the fuselage<br />
15<br />
MODELL AUSWIEGEN<br />
BALANCING THE MODEL<br />
1. Es ist absolut wichtig, dass der Schwerpunkt bei Ihrem Modell<br />
korrekt eingestellt wird. Nur so fliegt das Modell exakt, andernfalls<br />
riskieren Sie ein nicht beherrschbares Modell, das<br />
sehr leicht abstürzt.<br />
DER SCHWERPUNKT LIEGT GENAU 188 mm HINTER der<br />
Tragflächenvorderkante (Von dem Punkt aus gemessen wo<br />
die Tragfläche auf die Rumpfseitenwand trifft)<br />
2. Montieren Sie die Fläche am Rumpf. Benutzen Sie zwei<br />
kleine Klebestreifen und markieren Sie damit den Schwerpunkt<br />
auf der Oberseite der Fläche, direkt am Rumpf.
Bedienungsanleitung<br />
Instruction Manual<br />
<strong>Hai</strong> 2<br />
3. Drehen Sie das Modell um und unterstützen Sie es mit Ihren<br />
Fingerspitzen an den markierten Stellen.<br />
Die Schwerpunktangabe von 188mm empfiehlt sich für die<br />
ersten Flüge. Später, wenn Sie mit dem Modell vertraut sind<br />
können Sie den Schwerpunkt nach eigenem Ermessen um<br />
bis zu 10 mm nach vorn oder nach hinten legen. Erfliegen Sie<br />
die für Sie beste Schwerpunktlage. Wenn Sie den Schwerpunkt<br />
weiter nach vorn verlegen, wird das Modell leichter<br />
steuerbar, braucht aber eine höhere Geschwindigkeit beim<br />
Start und lässt sich schwieriger landen. Wenn Sie den<br />
Schwerpunkt zurück verlegen, wird das Modell schneller und<br />
agiler. Wir empfehlen aber unbedingt die Vorgabe einzuhalten.<br />
Rüsten Sie das Modell komplett aus, machen Sie es flugfertig,<br />
mit eingesetztem Akku. Unterstützen Sie das Modell an<br />
den markierten Stellen. Wenn dabei das Heck nach unten<br />
hängt, ist Modell vorn zu leicht und Sie müssen dort ein entsprechendes<br />
Gewicht anbringen, oder besser den Akku nach<br />
vorn schieben. Wenn die Nase nach unten hängt, ist Modell<br />
hinten zu leicht und Sie müssen dort ein entsprechendes<br />
Gewicht anbringen, oder besser den Akku weiter nach hinten<br />
schieben *.<br />
* Sie können die richtige Schwerpunktlage auch durch<br />
Verschieben des Empfängerakkus und des Empfängers<br />
erreichen. Erst wenn das nicht gelingt bringen Sie Gewichte<br />
am Heck bzw. an der Spitze an.<br />
1. It is critical that your airplane be balanced correctly. Improper<br />
balance will cause your plane to lose control and crash.<br />
THE CENTER OF GRAVITY IS LOCATED 188mm BACK<br />
FROM THE LEADING EDGE OF THE WING (Where the wing<br />
meets the fuselage).<br />
RUDERAUSSCHLÄGE<br />
CONTROL THROWS<br />
1. Wir empfehlen Ihnen dringend die im Folgenden aufgeführten<br />
Ruderausschläge einzustellen.<br />
2. Die angegebenen Ruderausschläge messen Sie bitte jeweils<br />
beim größten Ausschlag.<br />
3. Stellen Sie sicher, dass die Ruder jeweils in die richtige Richtung<br />
ausschlagen.<br />
Querruder: 10 mm aufwärts 10 mm abwärts<br />
Wölbklappen: 12 mm aufwärts 12 mm abwärts<br />
We highly recommend setting up a plan using the control throws listed.<br />
1. The control throws should be measured at the widest point of each<br />
control surface.<br />
2. Check to be sure the control surfaces move in the correct direction.<br />
Ailerons:<br />
Flaps:<br />
10 mm up 10 mm down<br />
12 mm up 12 mm down<br />
2. Mount the wing to the fuselage. Using a couple of pieces of masking<br />
tape, place them an the top side of the wing l60 mm back from<br />
the leading edge, at the fuselage sides.<br />
3. Turn the airplane upside down. Place your fingers on the masking<br />
tape and carefully lift the plane.<br />
Accurately mark the C/G (center of gravity) on the top of the wing<br />
on both sides of the fuselage. The correct C/G is locate l60 mm<br />
back from the leading edge. This is the balance paint at which your<br />
model should balance for your first flights. Later, you may wish to<br />
experiment by shifting the balance up to l0 mm forward or back to<br />
change the flying characteristics. Moving the balance forward may<br />
improve the smoothness and arrow- like tracking, but it may then<br />
require more speed for take off and make it more difficult to slow<br />
down for landing. Moving the balance aft makes the model more<br />
agile with a lighter and snappier “feel“. In any case, please start at<br />
the location we recommend.<br />
With the wing attached to the fuselage, all parts of the model installed<br />
(ready to fly), and empty fuel tanks, hold the model at the<br />
marked balance paint with the stabilizer level. Lift the model. It the<br />
tail drops when you lift, the model is “tail heavy“ and you must add<br />
weigh* to the nose. If the nose drops, it is “nose heavy“ and you<br />
must add weight* to the tail to balance.<br />
* If possible, first attempt to balance the model by changing the<br />
position of the receiver battery and receiver. If you are unable<br />
to obtain good balance by doing so, then it will be necessary to<br />
add weight to the nose or tail to achieve the proper balance<br />
paint.<br />
ÜBERPRÜFUNGEN VOR DEM START<br />
PRE FLIGHT CHECK<br />
1. Laden Sie den Sender- und den Empfänger immer auf, bevor<br />
Sie das Modell zum ersten Mal am Tag fliegen.<br />
2. Überprüfen Sie sämtliche Schraub- und Klebeverbindungen<br />
und stellen Sie sicher, dass nur ein vollkommen intaktes Modell<br />
zum Einsatz kommt.<br />
16
Bedienungsanleitung<br />
Instruction Manual<br />
<strong>Hai</strong> 2<br />
3. Überprüfen Sie nochmals genau den Schwerpunkt des Modells.<br />
4. Überprüfen Sie die Ruderausschläge.<br />
5. Überprüfen Sie die Empfängerantenne. Sie muss ganz gestreckt<br />
verlegt sein und darf keinesfalls aufgerollt im Rumpf<br />
liegen.<br />
6. Die Luftschraube muss exakt ausgewuchtet sein.<br />
1. Completely charge your transmitter and receiver batteries before<br />
your first day of flying.<br />
2. Check every bolt and every glue joint in your plane to ensure that<br />
everything is tight and well bonded.<br />
3. Double check the balance of the airplane.<br />
4. Check the control surface.<br />
5. Check the receiver antenna. It should be fully extended and not<br />
coiled up inside the fuselage.<br />
6. Properly balance the propeller<br />
WEITERE HINWEISE<br />
FURTHER REFERENCES<br />
<br />
Ruderausschläge und Mischer<br />
Jede Tragflächenhälfte hat innen eine Wölbklappe und außen<br />
das kombinierte Quer/Höhenruder, das über einen Mischer<br />
angesteuert werden muss. Die Wölbklappe kann auch ohne<br />
Mischer betrieben werden, wenn man die Wölbklappe aber<br />
zur Landung verwenden will benötigt man einen Butterfly-<br />
Mischer. Dies lässt sich mit fast jedem Sender realisieren, da<br />
zwei Mischer in der Regel Standard eines modernen Senders<br />
sind.<br />
Mit einem höherwertigen Sender, z.B. einer MC 24 von<br />
Graupner mit Profi-Rom wählt man als Grundeinstellung einen<br />
Nurflügel mit 4 Flächenservos und hat dann folgende<br />
Möglichkeiten:<br />
- Mischer Quer-/Höhenruder<br />
- Mischer Wölbklappe, hier wird dem Querruder ein kleiner<br />
Anteil der Wölbklappe zu gemischt. Das heißt bei einem<br />
Querruderausschlag geht auch die Klappe leicht<br />
mit. Somit kann man generell mit kleineren Ausschlägen<br />
fliegen, dadurch wird der Luftwiderstand beim Kurvenflug<br />
geringer.<br />
- Mischer Butterfly, dabei wird die Wölbklappe zum Bremsen<br />
komplett nach unten gefahren und das negative<br />
Moment durch zumischen von etwas Höhenruder ausgeglichen.<br />
Each wing half has inside one flap and outside the combined aileron<br />
/ elevator, which will be controlled by a mixer, is. The Flap can be<br />
operated without a mixer, if you want to use the flaps for landing,<br />
but you need a butterfly mixer. You can do this with almost every<br />
R/C-transmitter , as two mixers are usually standards of a modern<br />
R/C-transmitter.<br />
- Mixer Aileron / Elevator<br />
- Mixer Flap, here a small portion of the aileron flaps to be<br />
mixed. That is, by an aileron throw is also the flap easily.<br />
Thus, one can generally fly with minor throws, thus the air resistance<br />
is decreased with the straight flight.<br />
- Mixer Butterfly, while the flaps on the brakes will be completely<br />
gone down and offset the negative moment with some<br />
admix of the elevator.<br />
Arranges we examine the various conditions of flight, setting the<br />
model becomes very comfortable and can be individually trimmed.<br />
- Condition 1 (Normal)<br />
Elevator slightly upward, Flaps down slightly, large twisting<br />
of the wing, max. impetus.<br />
- Condition 2 (Speed)<br />
Elevator a little upward, flaps slightly upward, low twisting of<br />
the wing, min. impetus<br />
- Condition 3 (Landing/Butterfly)<br />
Flaps full down, Elevator upward, max. twisting of the wing,<br />
max. resistance<br />
The different settings are shown on the below chart.<br />
But please do not hesitate to fly the <strong>Hai</strong> 2, the model fly very well<br />
without the elaborate settings and is also good to fly with a simple<br />
R/C-system.<br />
Ordnet man nun den verschiedenen Einstellungen Flugphasen<br />
zu wird das Ganze sehr komfortabel und kann einzeln<br />
getrimmt werden.<br />
- Phase 1: (Normal)<br />
Höhe leicht hoch, Wölbklappe leicht nach unten, große<br />
Verwindung des Flügels, max. Auftrieb<br />
- Phase 2: (Speed)<br />
Höhe ein wenig hoch, Wölbklappen leicht nach oben, geringe<br />
Verwindung des Flügels, min. Auftrieb<br />
- Phase 3: (Landung / Butterfly)<br />
Wölbklappen voll nach unten, Höhe nach oben, größte<br />
Verwindung des Flügels, max. Widerstand<br />
Die einzelnen Einstellungen sind der unten stehenden Abbildung<br />
zu entnehmen.<br />
Aber bitte keine Bedenken, der <strong>Hai</strong> 2 fliegt auch ohne diese aufwändigen<br />
Einstellungen schon sehr gut und lässt sich auch mit<br />
einer einfachen Anlage gut fliegen.<br />
<br />
Control throws und mixer<br />
17<br />
<br />
Erstflug<br />
Werden Komponenten mit ähnlichem Gewicht wie die oben<br />
angegebenen nach Plan positioniert, lässt sich der Schwer-
Bedienungsanleitung<br />
Instruction Manual<br />
<strong>Hai</strong> 2<br />
punkt durch geringfügiges Verschieben des Akkus einstellen.<br />
Bei schwereren Motoren kann der Akku auch weiter nach hinten<br />
geschoben werden, die Aussparung im Spant 3 ist groß<br />
genug. Bei leichteren Motoren ist sowieso genug Platz um<br />
den Akku nach vorne zu schieben.<br />
Ruderausschläge für den Erstflug:<br />
Die Werte können jeweils, ausgehend von den oben dargestellten<br />
Einstellungen, wie folgt geändert werden:<br />
Normal:<br />
- Höhenruder: nach oben 18 mm, nach unten 16 mm<br />
- Querruder: nach oben 20 mm, nach unten 18 mm<br />
- Wölbklappe zum Querruder beigemischt: nach oben<br />
6 mm, nach unten 3 mm.<br />
If the centre of gravity is too far forward, the gildings are worse. Is<br />
the centre of gravity too far back, he flies and turns restlessly in a<br />
Looping in the upper vertex out easily.<br />
Technische Änderungen und Irrtümer vorbehalten.<br />
Specifications subject to change without notice.<br />
Dies sind etwas abweichende Vorschläge von denen der Anleitung,<br />
aber damit fliegt der <strong>Hai</strong> 2 völlig unkritisch. Für max.<br />
Wendigkeit mit weichem Ansprechen, mischen Sie auf<br />
Höhen- und Querruder mind. 50 % Exponential zu. Für den<br />
Start werden die Höhenruder ausgehend von der Einstellung<br />
Normal noch mal um ca. 5 mm hoch getrimmt. Damit wird ein<br />
Durchsacken vermieden, dies ist hilfreich wenn man das Modell<br />
selber wirft. Das Modell wird mit laufendem Motor leicht<br />
nach oben geworfen.<br />
Nach ein paar Eingewöhnungsrunden sollte der Schwerpunkt<br />
überprüft werden. Geht der <strong>Hai</strong> 2 selbst mit leicht gezogenem<br />
Höhenruder stark nach unten und lässt sich nicht langsam<br />
machen ist der Schwerpunkt zu weit vorne. Wird das Modell<br />
mit leicht gezogenem Höhenruder unruhig oder kippt mit voll<br />
gezogenem Höhenruder ab, ist der Schwerpunkt zu weit hinten.<br />
Voraussetzung ist natürlich, dass das Modell auch um<br />
die Längsachse ausgewogen ist und die Höhenruderausschläge<br />
gleich groß sind.<br />
Wenn der Schwerpunkt zu weit vorne ist sind die Segeleigenschaften<br />
schlechter. Ist der Schwerpunkt zu weit hinten fliegt<br />
er unruhig und dreht bei einem Looping im oberen Scheitelpunkt<br />
leicht raus.<br />
<br />
First Flight<br />
Are components of a similar weight as the above and can be positioned<br />
according at the plan, the focus by slight displacement of the<br />
battery. For heavier motors, the battery can also be pushed further<br />
back, the cut out in the bulkhead 3 is large enough. For lighter engines<br />
anyway enough room to slide the battery forward.<br />
Control throws for the first flight<br />
The values can, based on the above settings, be amended as follows:<br />
- Elevator: upward 18 mm, downward 16 mm<br />
- Aileron: upward 20 mm, downward 18 mm<br />
- Flap added to the ailerons: upward 6 mm, downward<br />
3 mm<br />
These are somewhat different proposals with those of the Manual,<br />
but the <strong>Hai</strong> 2 flies very uncritical. For maximum agility with soft<br />
response, mix to the elevator and the aileron 50 % Expo. To start<br />
the elevator are trimmed based on the setting up normal again by<br />
about 5 mm. It is helpful to avoid a down flight, if you throw the<br />
model itself. The model is easily sues with the engine running after<br />
above.<br />
After a few rounds of acclimatization, the emphasis should be verified.<br />
Is the <strong>Hai</strong> 2 itself with a slightly drawn heavily elevator down<br />
and not be slow to make the centre of gravity too far forward. If the<br />
model with a slightly up elevator restless or tipping off the elevator<br />
with a fully drawn, the centre of gravity is too far back. Assuming,<br />
of course, that the model is well balanced around the longitudinal<br />
axis, and the elevator deflection are equal.<br />
18