Design Fleischwolf Pro M - Onyougo.
Design Fleischwolf Pro M - Onyougo.
Design Fleischwolf Pro M - Onyougo.
Sie wollen auch ein ePaper? Erhöhen Sie die Reichweite Ihrer Titel.
YUMPU macht aus Druck-PDFs automatisch weboptimierte ePaper, die Google liebt.
• Preparing Cookies<br />
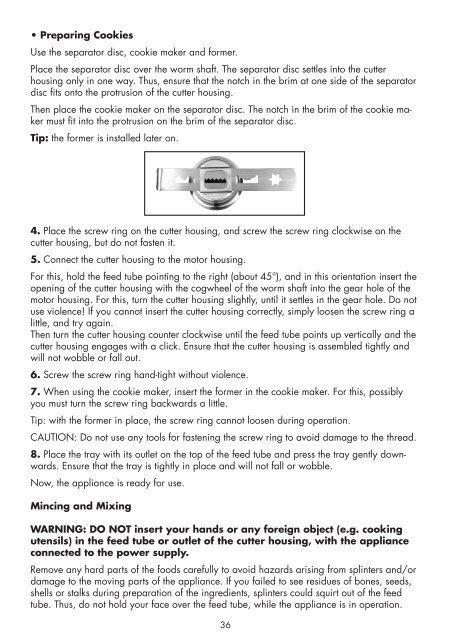
Use the separator disc, cookie maker and former.<br />
Place the separator disc over the worm shaft. The separator disc settles into the cutter<br />
housing only in one way. Thus, ensure that the notch in the brim at one side of the separator<br />
disc fits onto the protrusion of the cutter housing.<br />
Then place the cookie maker on the separator disc. The notch in the brim of the cookie maker<br />
must fit into the protrusion on the brim of the separator disc.<br />
Tip: the former is installed later on.<br />
4. Place the screw ring on the cutter housing, and screw the screw ring clockwise on the<br />
cutter housing, but do not fasten it.<br />
5. Connect the cutter housing to the motor housing.<br />
For this, hold the feed tube pointing to the right (about 45°), and in this orientation insert the<br />
opening of the cutter housing with the cogwheel of the worm shaft into the gear hole of the<br />
motor housing. For this, turn the cutter housing slightly, until it settles in the gear hole. Do not<br />
use violence! If you cannot insert the cutter housing correctly, simply loosen the screw ring a<br />
little, and try again.<br />
Then turn the cutter housing counter clockwise until the feed tube points up vertically and the<br />
cutter housing engages with a click. Ensure that the cutter housing is assembled tightly and<br />
will not wobble or fall out.<br />
6. Screw the screw ring hand-tight without violence.<br />
7. When using the cookie maker, insert the former in the cookie maker. For this, possibly<br />
you must turn the screw ring backwards a little.<br />
Tip: with the former in place, the screw ring cannot loosen during operation.<br />
CAUTION: Do not use any tools for fastening the screw ring to avoid damage to the thread.<br />
8. Place the tray with its outlet on the top of the feed tube and press the tray gently downwards.<br />
Ensure that the tray is tightly in place and will not fall or wobble.<br />
Now, the appliance is ready for use.<br />
Mincing and Mixing<br />
WARNING: DO NOT insert your hands or any foreign object (e.g. cooking<br />
utensils) in the feed tube or outlet of the cutter housing, with the appliance<br />
connected to the power supply.<br />
Remove any hard parts of the foods carefully to avoid hazards arising from splinters and/or<br />
damage to the moving parts of the appliance. If you failed to see residues of bones, seeds,<br />
shells or stalks during preparation of the ingredients, splinters could squirt out of the feed<br />
tube. Thus, do not hold your face over the feed tube, while the appliance is in operation.<br />
36


