Becker Centronic MemoControl MC511 Anleitung - auf enobi.de
Becker Centronic MemoControl MC511 Anleitung - auf enobi.de
Becker Centronic MemoControl MC511 Anleitung - auf enobi.de
- Keine Tags gefunden...

Sie wollen auch ein ePaper? Erhöhen Sie die Reichweite Ihrer Titel.
YUMPU macht aus Druck-PDFs automatisch weboptimierte ePaper, die Google liebt.
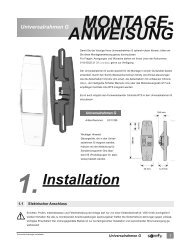
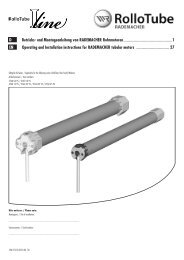
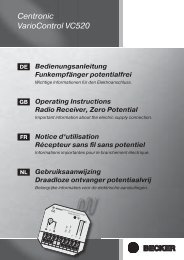
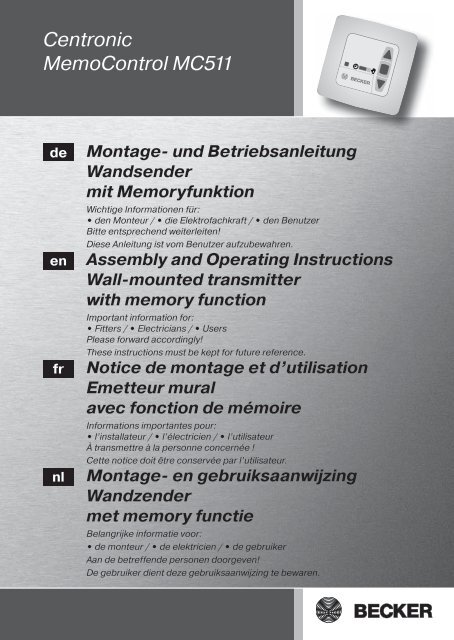
<strong>Centronic</strong><strong>MemoControl</strong> <strong>MC511</strong><strong>de</strong>enfrnlMontage- und BetriebsanleitungWandsen<strong>de</strong>rmit MemoryfunktionWichtige Informationen für:• <strong>de</strong>n Monteur / • die Elektrofachkraft / • <strong>de</strong>n BenutzerBitte entsprechend weiterleiten!Diese <strong>Anleitung</strong> ist vom Benutzer <strong>auf</strong>zubewahren.Assembly and Operating InstructionsWall-mounted transmitterwith memory functionImportant information for:• Fitters / • Electricians / • UsersPlease forward accordingly!These instructions must be kept for future reference.Notice <strong>de</strong> montage et d’utilisationEmetteur muralavec fonction <strong>de</strong> mémoireInformations importantes pour:• l’installateur / • l’électricien / • l’utilisateurÀ transmettre à la personne concernée !Cette notice doit être conservée par l’utilisateur.Montage- en gebruiksaanwijzingWandzen<strong>de</strong>rmet memory functieBelangrijke informatie voor:• <strong>de</strong> monteur / • <strong>de</strong> elektricien / • <strong>de</strong> gebruikerAan <strong>de</strong> betreffen<strong>de</strong> personen doorgeven!De gebruiker dient <strong>de</strong>ze gebruiksaanwijzing te bewaren.
InhaltsverzeichnisAllgemeines .............................................................................................. 4Gewährleistung ......................................................................................... 4Sicherheitshinweise .................................................................................. 4Bestimmungsgemäße Verwendung ............................................................ 5Anzeigen- und Tastenerklärung .................................................................. 6Funktionserklärung ................................................................................... 6Einlernen <strong>de</strong>s Funks .................................................................................. 8Montage Wandhalterung ........................................................................... 9Batteriewechsel ........................................................................................ 9Reinigung ................................................................................................. 9Technische Daten ....................................................................................10Was tun wenn ... ? ....................................................................................10Allgemeine Konformitätserklärung.............................................................11ContentsGeneral ...................................................................................................12Warranty ..................................................................................................12Safety Information ....................................................................................12Inten<strong>de</strong>d use ...........................................................................................13Displays and pushbuttons .........................................................................14Functions ................................................................................................14Programming the remote control ...............................................................16Installing the wall mount ...........................................................................17Changing the batterie ...............................................................................17Cleaning ..................................................................................................17Technical data..........................................................................................18What to do if ...? .......................................................................................18General conformity <strong>de</strong>claration .................................................................192
SommaireGénéralités ............................................................................................. 20Prestation <strong>de</strong> Garantie ............................................................................. 20Instructions <strong>de</strong> sécurité ........................................................................... 20Utilisation prévue .....................................................................................21Explication <strong>de</strong> l’afichage et <strong>de</strong>s touches ................................................... 22Explication <strong>de</strong>s fonctions ......................................................................... 22Programmation <strong>de</strong> la radio ....................................................................... 24Montage du support mural ....................................................................... 25Remplacement <strong>de</strong> la pile ......................................................................... 25Nettoyage .............................................................................................. 25Caractéristiques techniques .................................................................... 26Que faire quand... ? ................................................................................. 26Déclaration <strong>de</strong> conformité générale .......................................................... 27InhoudsopgaveAlgemeen ............................................................................................... 28Garantieverlening .................................................................................... 28Veiligheidsrichtlijnen ............................................................................... 28Doelmatig gebruik ................................................................................... 29Verklaring van display en toetsen.............................................................. 30Verklaring van <strong>de</strong> functies ........................................................................ 30Programmeren van <strong>de</strong> zen<strong>de</strong>r .................................................................. 32Montage van <strong>de</strong> wandhou<strong>de</strong>r ................................................................... 33Vervangen <strong>de</strong> batterij .............................................................................. 33Reiniging ................................................................................................ 33Technische gegevens .............................................................................. 34Wat te doen als ...? .................................................................................. 34Algemene conformiteitsverklaring ............................................................ 35<strong>de</strong>enfrnl3
Montage- und BetriebsanleitungAllgemeinesMit <strong>de</strong>m <strong>MC511</strong> können Sie einen o<strong>de</strong>r mehrere Rollla<strong>de</strong>nantriebe steuern. Desweiteren können Sie mit diesem Sen<strong>de</strong>r eine Schaltzeit für eine AUF- und AB-Bewegung programmieren.Eine einfache Bedienung zeichnet dieses Gerät aus.GewährleistungBauliche Verän<strong>de</strong>rungen und unsachgemäße Installationen entgegen dieser<strong>Anleitung</strong> und unseren sonstigen Hinweisen können zu ernsthaften Verletzungenvon Körper und Gesundheit <strong>de</strong>r Benutzer, z.B. Quetschungen, führen, sodass bauliche Verän<strong>de</strong>rungen nur nach Absprache mit uns und unserer Zustimmungerfolgen dürfen und unsere Hinweise, insbeson<strong>de</strong>re in <strong>de</strong>r vorliegen<strong>de</strong>nMontage- und Betriebsanleitung, unbedingt zu beachten sind.Eine Weiterverarbeitung <strong>de</strong>r Produkte entgegen <strong>de</strong>ren bestimmungsgemäßenVerwendung ist nicht zulässig.Endproduktehersteller und Installateur haben dar<strong>auf</strong> zu achten, dass bei Verwendungunserer Produkte alle, insbeson<strong>de</strong>re hinsichtlich Herstellung <strong>de</strong>sEndproduktes, Installation und Kun<strong>de</strong>nberatung, erfor<strong>de</strong>rlichen gesetzlichenund behördlichen Vorschriften, insbeson<strong>de</strong>re die einschlägigen aktuellenEMV-Vorschriften, beachtet und eingehalten wer<strong>de</strong>n.Sicherheitshinweise4VorsichtBitte bewahren Sie die <strong>Anleitung</strong> <strong>auf</strong>!• Nur in trockenen Räumen verwen<strong>de</strong>n.• Verwen<strong>de</strong>n Sie nur unverän<strong>de</strong>rte <strong>Becker</strong> Originalteile.• Halten Sie Personen aus <strong>de</strong>m Fahrbereich <strong>de</strong>r Anlagen fern.• Halten Sie Kin<strong>de</strong>r von Steuerungen fern.• Beachten Sie Ihre lan<strong>de</strong>sspeziischen Bestimmungen.• Verbrauchte Batterien fachgerecht entsorgen. Batterien nur durchi<strong>de</strong>ntischen Typ (CR 2032) ersetzen.• Wird die Anlage durch einen o<strong>de</strong>r mehrere Sen<strong>de</strong>r gesteuert, muss<strong>de</strong>r Fahrbereich <strong>de</strong>r Anlage während <strong>de</strong>s Betriebes einsehbar sein.
Bestimmungsgemäße VerwendungDer <strong>MC511</strong> darf nur für die Ansteuerung von <strong>Centronic</strong> kompatiblen Funk-Antriebenund Funk-Steuerungen für Rollla<strong>de</strong>nanlagen verwen<strong>de</strong>t wer<strong>de</strong>n.• Bitte beachten Sie, dass Funkanlagen nicht in Bereichen mit erhöhtem Störungsrisikobetrieben wer<strong>de</strong>n dürfen (z.B. Krankenhäuser, Flughäfen).• Die Fernsteuerung ist nur für Geräte und Anlagen zulässig, bei <strong>de</strong>nen eineFunktionsstörung im Wandsen<strong>de</strong>r o<strong>de</strong>r Empfänger keine Gefahr für Personen,Tiere o<strong>de</strong>r Sachen ergibt o<strong>de</strong>r dieses Risiko durch an<strong>de</strong>re Sicherheitseinrichtungenabge<strong>de</strong>ckt ist.• Der Betreiber genießt keinerlei Schutz vor Störungen durch an<strong>de</strong>re Fernmel<strong>de</strong>anlagenund En<strong>de</strong>inrichtungen (z.B. auch durch Funkanlagen, dieordnungsgemäß im gleichen Frequenzbereich betrieben wer<strong>de</strong>n).• Funkempfänger nur mit vom Hersteller zugelassenen Geräten und Anlagenverbin<strong>de</strong>n.HinweisAchten Sie dar<strong>auf</strong>, dass die Steuerung nicht im Bereich metallischerFlächen o<strong>de</strong>r magnetischer Fel<strong>de</strong>r installiert und betrieben wird.Funkanlagen, die <strong>auf</strong> <strong>de</strong>r gleichen Frequenz sen<strong>de</strong>n, können zur Störung<strong>de</strong>s Empfangs führen.Es ist zu beachten, dass die Reichweite <strong>de</strong>s Funksignals durch <strong>de</strong>n Gesetzgeberund die baulichen Maßnahmen begrenzt ist.<strong>de</strong>enfrnl5
Montage- und BetriebsanleitungAnzeigen- und TastenerklärungAUF-TasteSTOPP-TasteAB-Taste<strong>MC511</strong>BatteriefachEinlerntasteSen<strong>de</strong>kontrollleuchteSchiebeschalter++FunktionserklärungSchiebeschalterJe<strong>de</strong>r Rohrantrieb vom Typ PRF+ kann Schaltzeiten für eine AUF- und für eineAB-Bewegung speichern.In <strong>de</strong>r Betriebsart „ “ wird diese Rollla<strong>de</strong>nbewegung alle 24 Stun<strong>de</strong>n wie<strong>de</strong>rholt.Die Stellung <strong>de</strong>s Schiebeschalters ist beim Lernen <strong>de</strong>r Schaltzeit unerheblich.Zuvor gespeicherte Schaltzeiten wer<strong>de</strong>n ggf. überschrieben.6
Programmieren <strong>de</strong>r Fahrzeiten1. Ggf. <strong>de</strong>n Rollla<strong>de</strong>n in die entgegengesetzte Endlage steuern.2. Warten bis zur gewünschten Zeit, zu <strong>de</strong>r <strong>de</strong>r automatische Fahrbefehl ausgeführtwer<strong>de</strong>n soll.3. Zum gewünschten Zeitpunkt die entsprechen<strong>de</strong> Richtungstaste betätigenund gedrückt halten bis <strong>de</strong>r Rollla<strong>de</strong>nantrieb nach ca. 6 Sekun<strong>de</strong>n kurzstoppt und anschließend bis zur Endlage weiterläuft.4. Richtungstaste loslassen.Der Rohrantrieb hat <strong>de</strong>n aktuellen Zeitpunkt für diese Bewegungsrichtung gespeichert.Mit <strong>de</strong>r an<strong>de</strong>ren Bewegungsrichtung genauso verfahren.In <strong>de</strong>r Schiebeschalterstellung Hand wer<strong>de</strong>n keine automatischen Fahrbefehleausgeführt. Die eingespeicherten Fahrzeiten bleiben erhalten.Löschen <strong>de</strong>r FahrzeitenHinweisBeim Löschvorgang wer<strong>de</strong>n immer bei<strong>de</strong> Fahrzeiten gelöscht.Um die AUF- und AB-Fahrzeit zu löschen, drücken Sie die STOPP-Taste für10 Sekun<strong>de</strong>n. Die Quittierung erfolgt durch ein „Klack-Klack“ <strong>de</strong>s Rohrantriebes.Die Fahrzeiten sind gelöscht.Sen<strong>de</strong>kontrollleuchteEin Funksignal wird durch das Auleuchten <strong>de</strong>r Sen<strong>de</strong>kontrollleuchte signalisiert.Lässt die Leistung <strong>de</strong>r Batterie nach, blinkt die Sen<strong>de</strong>kontrollleuchte beim Sen<strong>de</strong>n.Die Sen<strong>de</strong>leistung bzw. Funkreichweite wird durch Abnahme <strong>de</strong>r Batterieleistungreduziert. Leuchtet die Sen<strong>de</strong>kontrollleuchte bei Tastendruck nicht mehr,müssen die Batterien gewechselt wer<strong>de</strong>n.KanalDer Kanal eines Handsen<strong>de</strong>rs kann in einen o<strong>de</strong>r mehrere Empfänger eingelerntwer<strong>de</strong>n. Die Ansteuerung eines Empfängers ist ein Individualbefehl, diemehrerer Empfänger ein Gruppenbefehl.<strong>de</strong>enfrnl7
Montage- und Betriebsanleitung1) Mastersen<strong>de</strong>r einlernenEinlernen <strong>de</strong>s Funksa) Empfänger in Lernbereitschaft bringenHinweisBeachten Sie die Betriebsanleitung <strong>de</strong>s Empfängers.• Schalten Sie die Spannungsversorgung <strong>de</strong>s Empfängers aus und nach 5 Sekun<strong>de</strong>nwie<strong>de</strong>r ein.o<strong>de</strong>r• Betätigen Sie die Lerntaste bzw. <strong>de</strong>n Funkschalter <strong>de</strong>s Empfängers.Der Empfänger bein<strong>de</strong>t sich nun für 3 Minuten in Lernbereitschaft.b) Mastersen<strong>de</strong>r einlernenDrücken Sie die Einlerntaste innerhalb <strong>de</strong>r Lernbereitschaft, bis <strong>de</strong>r Empfängerdas erfolgreiche Einlernen quittiert.Damit ist <strong>de</strong>r Einlernvorgang been<strong>de</strong>t.2) weitere Sen<strong>de</strong>r einlernena) Drücken Sie die Einlerntaste <strong>de</strong>s Mastersen<strong>de</strong>rs, bis <strong>de</strong>r Empfänger quittiert.b) Drücken Sie nun die Einlerntaste <strong>de</strong>s neuen Sen<strong>de</strong>rs, bis <strong>de</strong>r Empfängerquittiert.c) Jetzt drücken Sie die Einlerntaste <strong>de</strong>s neu einzulernen<strong>de</strong>n Sen<strong>de</strong>rs noch einmal.Der Empfänger quittiert das erfolgreiche Einlernen.Die maximale Funkreichweite beträgt im Gebäu<strong>de</strong> bis zu 25 m und im freienFeld bis zu 350 m.8
7Montage Wandhalterung1626• Prüfen Sie vor <strong>de</strong>r Montage an <strong>de</strong>rgewünschten Montageposition dieeinwandfreie Funktion von Sen<strong>de</strong>rund Empfänger.• Befestigen Sie die Halterung mit<strong>de</strong>n zwei beigelegten Schrauben an<strong>de</strong>r Wand.32+Batteriewechsel1. Schieben Sie <strong>de</strong>n Wandsen<strong>de</strong>r nachoben aus <strong>de</strong>r Wandhalterung heraus.2. Entnehmen Sie die Batterie.3. Setzen Sie die neue Batterielagerichtig ein.<strong>de</strong>enfrnl+ReinigungReinigen Sie das Gerät nur mit einem feuchten Tuch. Verwen<strong>de</strong>n Sie kein Reinigungsmittel,da dieses <strong>de</strong>n Kunststoff angreifen kann.9
Montage- und BetriebsanleitungTechnische DatenNennspannung3 V DCBatterietypCR2032Schutzart IP 20Zulässige Umgebungstemperatur -10 bis +55 °CFunkfrequenz868,3 MHzWas tun wenn ... ?Störung Ursache AbhilfeAntrieb läuft nicht,Sen<strong>de</strong>kontrollleuchtebleibt aus.Antrieb läuft nicht,Sen<strong>de</strong>kontrollleuchtebleibt an.Sen<strong>de</strong>kontrollleuchteblinkt.Rohrantrieb läuft nichtim 24 Stun<strong>de</strong>nrhythmusFahrzeiten weichen von<strong>de</strong>r Programmierung ab1. Batterie ist leer.2. Batterie ist falscheingelegt.1. Empfänger außerhalb<strong>de</strong>r Funkreichweite.2. Sen<strong>de</strong>r ist nicht imEmpfänger eingelernt.Batterie ist schwach1. Schiebeschaltersteht <strong>auf</strong> Hand2. keine SchaltzeitengespeichertStromausfall am Rohrantrieb1. Neue Batterie einlegen.2. Batterie richtig einlegen.1. Entfernung zumEmpfänger verringern.2. Sen<strong>de</strong>r einlernen.Neue Batterie einlegen.1. Schiebeschalter <strong>auf</strong>Uhr stellen2. Schaltzeiten programmierenSchaltzeiten neu programmieren10
Assembly and Operating InstructionsGeneralThe <strong>MC511</strong> can be used to operate one or more roller shutter drives. This transmittercan also be used to program switching times for UP and DOWN commands.This <strong>de</strong>vice is excellent because it is so easy to operate.WarrantyStructural modiications and incorrect installation which are not in accordancewith these and our other instructions can result in serious injuries, e.g. crushingof limbs. Therefore, structural modiications should only be carried out with ourprior approval and in accordance with our instructions, particularly the informationcontained in these Assembly and Operating Instructions.Any further processing of the products which does not comply with their inten<strong>de</strong>duse is not permitted.The end product manufacturer and itter have to ensure that all the current statutory,oficial regulations and, in particular, EMC regulations are adhered to duringutilisation of our products, especially with regard to end product assembly,installation and customer advice.Safety Information12CautionPlease keep the instructions in a safe place!• Use in dry rooms only.• Use unmodiied <strong>Becker</strong> original parts only.• Keep persons away from the system gui<strong>de</strong> track.• Keep children away from controls.• Please comply with national stipulations.• Dispose of used batteries properly.Replace batteries with an i<strong>de</strong>ntical type (CR 2032) only.• If the system is controlled using one or several transmitters, the systemgui<strong>de</strong> track must be visible during operation.
Inten<strong>de</strong>d useThe <strong>MC511</strong> is to be used for operation of <strong>Centronic</strong> compatible radio controlleddrives and radio controls for roller shutter applications only.• Please note that radio sets cannot be operated in areas with increased risk ofinterference (e.g. hospitals, airports).• The remote control is only permitted for equipment and systems with which amalfunction in the transmitter or receiver does not present a risk to persons,animals or objects, or this risk is covered by other safety <strong>de</strong>vices.• The operator does not enjoy any protection from disturbances by other remotesignalling equipment and terminal equipment (for example, also byradio sets operated in the same frequency range in accordance with regulations).• Use radio receivers in conjunction only with <strong>de</strong>vices and systems permittedby the manufacturer.NoteEnsure that the controls are not installed and operated in the vicinity ofmetal surfaces or magnetic ields.Radio sets transmitting at the same frequency could interfere with reception.It should be noted that the range of the radio signal is restricted by legislationand constructional measures.<strong>de</strong>enfrnl13
Assembly and Operating InstructionsDisplays and pushbuttonsUP pushbuttonSTOP pushbuttonDOWN pushbutton<strong>MC511</strong>Battery compartmentProgramming pushbuttonTransmission control light+Sliding Switch+FunctionsSliding SwitchEvery PRF+ tubular drive can store switching times for one UP and one DOWNcommand.In the „ “ operating mo<strong>de</strong> this roller shutter command is repeated every 24hours.The sliding switch setting is not important when learning the switching time. Allpreviously stored switching times are <strong>de</strong>leted.14
Programming the switching times1. Adjust the roller shutters, if necessary, until they are in the opposite end positionto the <strong>de</strong>sired running direction.2. Wait for the automatic control commands are to be executed.3. At the preset time, activate the <strong>de</strong>sired direction key and hold down until theroller shutter system has stopped after approximately 6 seconds and thenmoved into the end position.4. Release direction key.The tubular drive will store the given time of this direction command.Follow the same procedure for the opposite direction.When the sliding switch is set to manual, no automatic control commands areexecuted. The stored command times remain unaltered.Deleting the switching timesNoteBoth switching times are always <strong>de</strong>leted in this process.In or<strong>de</strong>r to <strong>de</strong>lete the times the UP and DOWN control commands are to be triggered,press the STOP button for 10 seconds. This is acknowledged by a doubleclick of the tubular drive.The switching times have been <strong>de</strong>leted.Transmission control lightA radio signal is indicated by the transmission control light being lit.If the battery starts running out, the transmission control light lashes duringtransmission.The transmitter power and/or radio range is reduced when the battery is runninglow. If the transmission control light is no longer lit when the pushbutton ispressed, the batteries must be changed.ChannelThe channel of a handheld transmitter can be programmed into one or severalreceivers. One or several receivers are controlled via an individual or group commandrespectively.<strong>de</strong>enfrnl15
Assembly and Operating InstructionsProgramming the remote control1) Learning the master transmittera) Put receiver into learn mo<strong>de</strong>NotePlease refer to the operating instructions for the receiver.• Switch off the receiver’s power supply and reconnect after 5 seconds.or• Activate the “Learn” key or the radio-controlled receiver switch.The receiver will then be in “Learn” mo<strong>de</strong> for 3 minutes.b) Learn master transmitterWhen the receiver is in “Learn” mo<strong>de</strong>, the learn button is to be pressed untilthe receiver indicates that the learn process has been successfully completed.The learn process is now complete.2) Learning additional transmittersa) Press the learn button of the master transmitter until acknowledgement isgiven by the receiver.b) Now press the learn button of the new transmitter until acknowledgement isgiven by the receiverc) Then press the learn button of the new transmitter to be learnt once again.The receiver will indicate when the learn process has been successfully completed.The maximum radio range is up to 25 m indoors and up to 350 m in the open.16
7Installing the wall mount1626• Before installing in the position required,check that the transmitterand receiver are functioning properly.• Fix the mount to the wall with the twoscrews provi<strong>de</strong>d.32Changing the batterie1. Lift the wall transmitter out of thehol<strong>de</strong>r in upward direction.2. Take out the batterie.3. Insert the new batterie in the correctposition.<strong>de</strong>enfrnl++CleaningClean the <strong>de</strong>vice with a damp cloth only. Do not use a cleansing agent since thiscould damage the plastic.17
Assembly and Operating InstructionsTechnical dataNominal voltage3 V DCType of batteryCR2032Protection class IP 20Permissible surrounding temperature -10 to +55 °CRadio frequency868.3 MHzWhat to do if ...?Problem Cause RemedyDrive is not functioning,transmission controllight is not lit.Drive is not functio-ning,transmission controllight is lit.Transmission controllight is lashing.Drive does operate in a24 hour cycle.Switching times differfrom those programmed1. Battery is discharged.2. Battery is incorrectlyinserted.1. Receiver outsi<strong>de</strong> theradio range.2. Transmitter is notprogrammed in thereceiver.Battery is running out.1. Sliding switch not inthe manual position2. Operating time notprogrammedPower failure affectingthe tubular drive1. Insert new battery.2. Insert battery correctly.1. Reduce distance tothe receiver.2. Programme transmitter.Insert new batterie.1. Set sliding switch tothe clock position2. Programme operatingtimeReprogramme theswitching times18
General conformity <strong>de</strong>claration<strong>Becker</strong>-Antriebe GmbH hereby <strong>de</strong>clares that the <strong>de</strong>vice <strong>Centronic</strong> <strong>MemoControl</strong><strong>MC511</strong> complies with the basic requirements and other relevant regulationsof the EC Directive R&TTE 1999/5/EC.For use in the following countries: EU, CH<strong>de</strong>enfrnlSubject to technical changes without notice.19
Notice <strong>de</strong> montage et d’utilisationGénéralitésLe <strong>MC511</strong> permet <strong>de</strong> comman<strong>de</strong>r un ou un groupe <strong>de</strong> moteurs <strong>de</strong> volets roulants.A l’ai<strong>de</strong> <strong>de</strong> cet émetteur, vous pouvez programmer en plus <strong>de</strong>s horaires<strong>de</strong> MONTEE et un mouvement <strong>de</strong> DESCENTE.Cet appareil se distingue par une manipulation simple.Prestation <strong>de</strong> GarantieToute modiication du moteur et toute installation inappropriée allant à l’encontre<strong>de</strong> cette notice et <strong>de</strong> nos autres consignes peuvent causer <strong>de</strong>s blessurescorporelles graves ou représenter un risque pour la santé <strong>de</strong>s utilisateurs,par ex. <strong>de</strong>s contusions ; c’est pourquoi toute modiication <strong>de</strong> la constructionne peut être effectuée qu‘après nous en avoir informés et après obtention <strong>de</strong>notre accord ; nos consignes, notamment celles <strong>de</strong> cette notice <strong>de</strong> montage etd’utilisation, doivent être impérativement respectées. Toute modiication <strong>de</strong>sproduits allant à l’encontre <strong>de</strong> leur utilisation conforme n’est pas autorisée.Lorsqu’ils utilisent nos produits, les fabricants <strong>de</strong>s produits inis et les installateursdoivent veiller à tenir compte et à respecter toutes les dispositions légaleset administratives nécessaires, en particulier les dispositions relatives àla compatibilité électromagnétique actuellement en vigueur, notamment en cequi concerne la production du produit ini, l’installation et le service-clientèle.Pru<strong>de</strong>nceInstructions <strong>de</strong> sécuritéPrière <strong>de</strong> conserver cette notice d’utilisation!• A utiliser uniquement dans <strong>de</strong>s locaux secs.• Utilisez uniquement <strong>de</strong>s pièces originales <strong>de</strong> <strong>Becker</strong> qui n’ont subiaucune modiication.• Veillez à ce que personne ne se tienne dans la zone <strong>de</strong> déploiement<strong>de</strong>s installations.• Tenez les enfants à l’écart <strong>de</strong>s comman<strong>de</strong>s.• Observez les directives spéciiques <strong>de</strong>s pays.• Remplacez toujours les piles usagées par <strong>de</strong>s piles <strong>de</strong> type i<strong>de</strong>ntique(CR 2032).• Lorsque l’installation est pilotée par un ou plusieurs émetteurs, lazone <strong>de</strong> fonctionnement <strong>de</strong> l’installation doit être visible pendantl’utilisation.20
Utilisation prévueLe <strong>MC511</strong> doit être utilisé avec les moteurs radio et les récepteurs pour voletsroulants uniquement.• Sachez qu’il est interdit d’utiliser les installations radio dans les zones risquant<strong>de</strong> provoquer <strong>de</strong>s perturbations (p. ex. hôpitaux, aéroports).• La télécomman<strong>de</strong> n’est autorisée que pour les appareils et installations pourlesquels une perturbation fonctionnelle dans l’émetteur ou dans le récepteurne constitue aucun danger pour les personnes, les animaux ou les choses ouque ce risque est éliminé par d’autres dispositifs <strong>de</strong> sécurité.• L’exploitant n’est en aucun cas protégé contre les perturbations par d’autresinstallations <strong>de</strong> télécommunication et dispositifs terminaux (p. ex. par <strong>de</strong>sinstallations <strong>de</strong> radio qui sont utilisées <strong>de</strong> manière conforme dans la mêmeplage <strong>de</strong> fréquence).• Combinez les récepteurs radio uniquement à <strong>de</strong>s appareils et installationsautorisés par le fabricant.RemarquesVeillez à ce que la comman<strong>de</strong> ne soit pas installée et utilisée dans unezone avec <strong>de</strong>s surfaces métalliques ou <strong>de</strong> champs magnétiques.Les installations <strong>de</strong> radio qui émettent sur la même fréquence peuventcauser une perturbation <strong>de</strong> la réception.Sachez que la portée du signal radio est limitée par la législation et parles bâtiments.<strong>de</strong>enfrnl21
Notice <strong>de</strong> montage et d’utilisationExplication <strong>de</strong> l’afichage et <strong>de</strong>s touchesTouche MontéeTouche StopTouche Descente<strong>MC511</strong>Compartiment à pilesTouche <strong>de</strong> programmationTouche <strong>de</strong> contrôle d’émissionCurseur++Explication <strong>de</strong>s fonctionsCurseurChaque moteur tubulaire <strong>de</strong> type PRF+ peut mémoriser <strong>de</strong>s horaires <strong>de</strong> MON-TEE et un mouvement <strong>de</strong> DESCENTE.En mo<strong>de</strong> « », ce mouvement du volet roulant se reproduit toutes les 24 heures.La position du curseur ne joue aucun rôle pour la programmation <strong>de</strong>s horaires.Les horaires mémorisés auparavant sont écrasés.22
Programmation <strong>de</strong>s horaires1. Si nécessaire, piloter le volet roulant dans la position inale opposée.2. Attendre que l’heure désirée à laquelle l’ordre <strong>de</strong> mouvement automatiquedoit être exécuté soit arrivée.3. Lorsque l’heure désirée est arrivée, actionner la touche <strong>de</strong> direction correspondanteet la maintenir enfoncée jusqu’à ce que le moteur du volet roulants’arrête au bout <strong>de</strong> 6 secon<strong>de</strong>s environ et continue ensuite sa marchejusqu’en position inale.4. Lâcher la touche <strong>de</strong> direction.Le moteur tubulaire a enregistré l’heure actuelle pour ce sens <strong>de</strong> mouvement.Procé<strong>de</strong>r <strong>de</strong> la même manière pour l’autre sens <strong>de</strong> mouvement.Lorsque le curseur est sur «Manuel», les horaires ne sont pas exécutés. Leshoraires restent maintenus.Effacement <strong>de</strong>s horairesRemarquesLors <strong>de</strong> l’effacement, les <strong>de</strong>ux horaires sont toujours effacés.Pour effacer l’horaire <strong>de</strong> MONTEE et <strong>de</strong> DESCENTE, appuyez sur la toucheSTOP pendant 10 secon<strong>de</strong>s. L’acquittement se manifeste par un « clac-clac »du moteur tubulaire.Les horaires sont effacés.Témoin <strong>de</strong> contrôle d’émissionLe témoin <strong>de</strong> contrôle d’émission s’allume pour visualiser un signal radio.Lorsque la puissance <strong>de</strong> la pile baisse, le témoin <strong>de</strong> contrôle d’émission clignotelors <strong>de</strong> l’émission.La baisse <strong>de</strong> la puissance <strong>de</strong> la pile entraîne une réduction <strong>de</strong> la puissanced’émission et <strong>de</strong> la portée <strong>de</strong> la radio. Lorsque le témoin <strong>de</strong> contrôle d’émissionne s’allume plus après pression sur la touche, les piles doivent être remplacées.CanalLe canal d’une télécomman<strong>de</strong> peut être programmé dans un ou plusieurs récepteurs.La comman<strong>de</strong> d’un récepteur est un ordre individuel, celle <strong>de</strong> plusieursrécepteurs est un ordre <strong>de</strong> groupe.<strong>de</strong>enfrnl23
Notice <strong>de</strong> montage et d’utilisationProgrammation <strong>de</strong> la radio1) Programmation <strong>de</strong> l’émetteur maîtrea) Préparer le récepteur en mo<strong>de</strong> <strong>de</strong> programmation.RemarquesSuivez la notice <strong>de</strong> service du récepteur.• Coupez la tension d’alimentation du récepteur et connectez-la <strong>de</strong> nouveauau bout <strong>de</strong> 5 secon<strong>de</strong>s.ou• Actionnez la touche <strong>de</strong> programmation ou le commutateur radio du récepteur.Le récepteur est alors en mo<strong>de</strong> <strong>de</strong> programmation pendant 3 minutes.b) Programmation <strong>de</strong> l’émetteur maîtreAppuyez sur la touche <strong>de</strong> programmation pendant que le récepteur est en mo<strong>de</strong><strong>de</strong> programmation jusqu’à ce que le récepteur ait acquitté la programmation.La programmation est alors terminée.2) Programmation d’autres émetteursa) Appuyez sur la touche <strong>de</strong> programmation <strong>de</strong> l’émetteur maître jusqu’à ce quele récepteur ait acquitté.b) Appuyez ensuite sur la touche <strong>de</strong> programmation du nouvel émetteur jusqu’àce que le récepteur ait acquitté.c) Appuyez encore une fois sur la touche <strong>de</strong> programmation <strong>de</strong> l’émetteur àprogrammer.Le récepteur acquitte la programmation.La portée maximum <strong>de</strong> la radio est <strong>de</strong> 25 m dans les bâtiments. Elle peut atteindre350 m à l’extérieur.24
7Montage du support mural1626• Assurez-vous avant <strong>de</strong> monterl’appareil à l’endroit désiré du bonfonctionnement <strong>de</strong> l’émetteur et durécepteur.• Fixez le support au mur au moyen<strong>de</strong>s <strong>de</strong>ux vis jointes à la fourniture.32Remplacement <strong>de</strong> la pile1. Soulevez l‘émetteur mural du supportvers le haut.2. Enlevez la pile.3. Mettez la pile neuve en place dans labonne position.<strong>de</strong>enfrnl++NettoyageNettoyez l’appareil uniquement avec un chiffon humi<strong>de</strong>. N’utilisez aucun détergent,celui-ci risquant d’attaquer la matière synthétique.25
Notice <strong>de</strong> montage et d’utilisationCaractéristiques techniquesTension nominale3 V DCType <strong>de</strong> pileCR2032Indice <strong>de</strong> protection IP 20Température ambiante admissible -10 à +55 °CFréquence radio868,3 MHzQue faire quand... ?Anomalie Cause Mesure à prendreLe moteur ne marchepas, le témoin <strong>de</strong>contrôle d’émission nes’allume pas.Le moteur ne marchepas, le témoin <strong>de</strong>contrôle d’émission nes’éteint pas.Le témoin <strong>de</strong> contrôled’émission clignote.Le moteur tubulaire nerépète pas les comman<strong>de</strong>saprès 24 hrsLes horaires diffèrent <strong>de</strong>la programmation1. La pile est vi<strong>de</strong>.2. La pile n’est pas placéecorrectement.1. Récepteur hors <strong>de</strong> laportée radio.2. L’émetteur n’est pasprogrammé dans lerécepteur.La pile est trop faible.1. Le commutateur àcoulisse se trouve enposition « manuelle »2. Il n‘y a pas d‘heures<strong>de</strong> commutationprogrammées“Panne <strong>de</strong> courantau niveau du moteurtubulaire1. Mettre une pile neuve.2. Placer la pile correctement.1. Réduire la distanceentre l’émetteur et lerécepteur.2. Programmer l’émetteur.Mettre une nouvellepile.1. Mettre le commutateurà coulisse enposition « horloge »2. Programmer lesheures <strong>de</strong> commutationReprogrammer lestemps <strong>de</strong> déclenchement26
Déclaration <strong>de</strong> conformité généraleLa société <strong>Becker</strong>-Antriebe GmbH déclare par la présente que l’appareil <strong>Centronic</strong><strong>MemoControl</strong> <strong>MC511</strong> est en conformité avec les exigences fondamentaleset les autres prescriptions pertinentes <strong>de</strong> la directive R&TTE 1999/5/CE.Est <strong>de</strong>stiné à une utilisation dans les pays suivants: EU, CH<strong>de</strong>enfrnlSous réserve <strong>de</strong> modiications techniques.27
Montage- en gebruiksaanwijzingAlgemeenMet <strong>de</strong> <strong>MC511</strong> kunt u één of meer<strong>de</strong>re buismotoren sturen. Ver<strong>de</strong>r kunt u met<strong>de</strong>ze zen<strong>de</strong>r een schakeltijd voor een OP- en NEER-beweging programmeren.Een eenvoudige bediening kenmerkt dit toestel.GarantieverleningConstructieve wijzigingen en on<strong>de</strong>skundige installatie die in strijd zijn met <strong>de</strong>zegebruiksaanwijzing en an<strong>de</strong>re instructies onzerzijds, kunnen lei<strong>de</strong>n tot ernstiglichamelijk letsel van <strong>de</strong> gebruiker en kunnen een ernstig risico vormen voordiens gezondheid, zoals kneuzingen. Constructieve wijzigingen mogen <strong>de</strong>rhalveuitsluitend na overleg met ons en met onze toestemming plaatsvin<strong>de</strong>n,waarbij onze instructies en vooral <strong>de</strong> instructies in <strong>de</strong> voorliggen<strong>de</strong> gebruiksaanwijzingbeslist in acht moeten wor<strong>de</strong>n genomen.Afwijkend gebruik, toepassingen en/of verwerking van <strong>de</strong> producten die in strijdis met het bedoel<strong>de</strong> gebruik, is niet toegestaan.De fabrikant van het eindproduct en <strong>de</strong> installateur dienen erop te letten dat bijgebruik van onze producten aan alle noodzakelijke wettelijke en oficiële voorschriftenaandacht wordt besteed en dat <strong>de</strong>ze wor<strong>de</strong>n opgevolgd. Dit betreft<strong>de</strong> fabricage van het eindproduct, <strong>de</strong> installatie en het advies aan <strong>de</strong> klant engeldt vooral voor <strong>de</strong> daarop betrekking hebben<strong>de</strong> actuele EMC-voorschriften.VeiligheidsrichtlijnenVoorzichtigBewaar <strong>de</strong>ze gebruiksaanwijzing goed!• Uitsluitend in droge ruimtes gebruiken.• Maakt u uitsluitend gebruik van ongewijzig<strong>de</strong> <strong>Becker</strong> originele <strong>de</strong>len.• Houd personen buiten het bereik van <strong>de</strong> installaties.• Laat kin<strong>de</strong>ren niet met <strong>de</strong> installatie spelen.• Houdt u rekening met <strong>de</strong> landspeciieke bepalingen.• Gebruikte batterijen wegbrengen voor <strong>de</strong>skundige verwerking alsafval. Batterijen alleen door het zelf<strong>de</strong> type (CR 2032) vervangen.• Wordt <strong>de</strong> installatie door één of meer<strong>de</strong>re zen<strong>de</strong>rs bestuurt, moethet bereik van <strong>de</strong> installatie geduren<strong>de</strong> het bedrijf kunnen wor<strong>de</strong>noverzien.28
Doelmatig gebruikDe <strong>MC511</strong> mag enkel wor<strong>de</strong>n gebruikt voor het aansturen van <strong>Centronic</strong> compatibeledraadloze buismotoren en –besturingen voor rolluiktoepassingen.• Houdt u er alstublieft rekening mee, dat radio-installaties niet in bereiken meteen verhoogd storingsrisico mogen wor<strong>de</strong>n geëxploiteerd (bv ziekenhuizen,vliegvel<strong>de</strong>n).• De afstandsbediening is uitsluitend voor toestellen en installaties toegelaten,bij die een storing van <strong>de</strong> functie in <strong>de</strong> zen<strong>de</strong>r of ontvanger geen gevaar voorpersonen, dieren of dingen veroorzaakt of dit risico door an<strong>de</strong>re veiligheidsvoorzieningenis ge<strong>de</strong>kt.• De exploitant geniet generlei bescherming voor storingen door an<strong>de</strong>re telecommunicatie-installatiesen eindvoorzieningen (bv ook door radiozendinstallaties,die reglementair in hetzelf<strong>de</strong> frequentiebereik wor<strong>de</strong>n geëxploiteerd).• Ontvangers alleen met door <strong>de</strong> fabrikant toegelaten toestellen en installatiesverbin<strong>de</strong>n.AanwijzingLet u er alstublieft op dat <strong>de</strong> besturing niet in het bereik van metalenvlakken of magnetische vel<strong>de</strong>n wordt geïnstalleerd en geëxploiteerd.Radiozendinstallaties die op <strong>de</strong>zelf<strong>de</strong> frequentie zen<strong>de</strong>n, kunnen totstoring bij het ontvangst lei<strong>de</strong>n.Er dient rekening te wor<strong>de</strong>n gehou<strong>de</strong>n met het feit, dat <strong>de</strong> reikwijdtevan het radiosignaal door <strong>de</strong> wetgever en <strong>de</strong> bouwkundige maatregelenis beperkt.<strong>de</strong>enfrnl29
Montage- en gebruiksaanwijzingVerklaring van display en toetsenOpwaarts-toetsStop-toetsNeerwaarts-toets<strong>MC511</strong>BatterijvakProgrammeringstoetsZendcontrolelampjeSchuifschakelaar++Verklaring van <strong>de</strong> functiesSchuifschakelaarIe<strong>de</strong>re buismotor van het type PRF+ kan schakeltij<strong>de</strong>n voor een OP- en NEERbewegingopslaan.In het bedrijfstoestand « » wordt <strong>de</strong>ze beweging alle 24 uren herhaald.De positie van <strong>de</strong> schuifschakelaar is bij het programmeren van <strong>de</strong> schakeltijdonbelangrijk. Van tevoren opgeslagen schakeltij<strong>de</strong>n wor<strong>de</strong>n evt. overgeschreven.30
Programmeren van <strong>de</strong> looptij<strong>de</strong>n1. Eventueel <strong>de</strong> rolluiken in <strong>de</strong> tegengestel<strong>de</strong> eindpositie sturen.2. Tot <strong>de</strong> gewenste tijd, wanneer het automatisch commando dient te wor<strong>de</strong>nuitgevoerd, wachten.3. Op het gewenst tijdpunt <strong>de</strong> passen<strong>de</strong> richtingstoets bedienen en ingedrukthou<strong>de</strong>n tot dat <strong>de</strong> buismotor na ca. 6 secon<strong>de</strong>n kort stopt en vervolgens tot<strong>de</strong> eindpositie ver<strong>de</strong>r loopt.4. Richtingstoets loslaten.De buismotor heeft het actueel tijdpunt voor <strong>de</strong>ze bewegingsrichting opgeslagen.Met <strong>de</strong> an<strong>de</strong>re bewegingsrichting op <strong>de</strong>zelf<strong>de</strong> manier te werk gaan.In <strong>de</strong> schakelaarpositie Hand wor<strong>de</strong>n geen automatische commando’s uitgevoerd.De ingevoer<strong>de</strong> tij<strong>de</strong>n blijven bewaard.Wissen van <strong>de</strong> looptij<strong>de</strong>nAanwijzingBij het wissen wor<strong>de</strong>n altijd bei<strong>de</strong> looptij<strong>de</strong>n gewist.Om <strong>de</strong> OP- en NEER-looptijd te wissen, <strong>de</strong> STOP-toets geduren<strong>de</strong> 10 secon<strong>de</strong>nindrukken. De bevestiging volgt door een „Klak-Klak“ van <strong>de</strong> buismotor.De looptij<strong>de</strong>n zijn gewist.ZendcontrolelampjeEen commando versturen wordt door het oplikkeren van <strong>de</strong> zendcontrolelampdui<strong>de</strong>lijk gemaakt.Neemt het vermogen van <strong>de</strong> batterij af, knippert het zendcontrolelampje bij hetzen<strong>de</strong>n.Het zendvermogen resp. <strong>de</strong> reikwijdte wordt door daling van het batterijvermogengereduceerd. Brandt het zendcontrolelampje bij toetsendruk niet meer,moeten <strong>de</strong> batterijen wor<strong>de</strong>n vervangen.KanaalHet kanaal van een handzen<strong>de</strong>r kan in één of meer<strong>de</strong>re ontvangers wor<strong>de</strong>ngeprogrammeerd. De aansturing van één ontvanger vindt plaats door een individueelcommando, voor <strong>de</strong> aansturing van meer<strong>de</strong>re ontvangers wordt eengroepscommando gebruikt.<strong>de</strong>enfrnl31
Montage- en gebruiksaanwijzingProgrammeren van <strong>de</strong> zen<strong>de</strong>r1) Masterzen<strong>de</strong>r programmerena) Ontvanger in programmeergereedheid brengenAanwijzingHoudt u alstublieft rekening met <strong>de</strong> gebruiksaanwijzing van <strong>de</strong> ontvanger.• Schakelt u <strong>de</strong> voedingsspanning van <strong>de</strong> ontvanger uit en na 5 secon<strong>de</strong>n weerin.of• Druk op <strong>de</strong> programmeertoets resp. <strong>de</strong> schakelaar van <strong>de</strong> ontvanger.De ontvanger bevindt zich nu 3 minuten lang in programmeergereedheid.b) Masterzen<strong>de</strong>r programmerenDrukt u <strong>de</strong> programmeertoets geduren<strong>de</strong> <strong>de</strong> programmeergereedheid in tot <strong>de</strong>ontvanger het succesvol programmeren bevestigd.Hiermee is het programmeerproces beëindigd.2) ver<strong>de</strong>re zen<strong>de</strong>rs programmerena) Drukt u <strong>de</strong> programmeertoets van <strong>de</strong> masterzen<strong>de</strong>r in tot <strong>de</strong> ontvanger bevestigt.b) Drukt u nu <strong>de</strong> programmeertoets van <strong>de</strong> nieuwe zen<strong>de</strong>r tot <strong>de</strong> ontvanger bevestigt.c) Nu drukt u <strong>de</strong> programmeertoets van <strong>de</strong> nieuw te programmeren zen<strong>de</strong>r opnieuwin.De ontvanger bevestigt het succesvol programmeren.De maximale reikwijdte bedraagt in gebouwen tot en met 25 m en buiten tot enmet 350 m.32
7Montage van <strong>de</strong> wandhou<strong>de</strong>r1626• Controleert u vóór <strong>de</strong> montage terplekke van <strong>de</strong> gewenste montagepositie<strong>de</strong> foutloze werking van zen<strong>de</strong>ren ontvanger.• Bevestigt u <strong>de</strong> hou<strong>de</strong>r met <strong>de</strong> tweeingesloten schroeven aan <strong>de</strong> wand.32Vervangen <strong>de</strong> batterij1. Schuif <strong>de</strong> wandzen<strong>de</strong>r naar bovenuit <strong>de</strong> wandhou<strong>de</strong>r2. Verwij<strong>de</strong>rt u <strong>de</strong> batterij.3. Plaats <strong>de</strong> nieuwe batterij in <strong>de</strong> juisterichting.<strong>de</strong>enfrnl++ReinigingReinigt u het toestel uitsluitend met een vochte doek. Maakt u geen gebruik vanreinigingsmid<strong>de</strong>len, omdat <strong>de</strong>ze <strong>de</strong> kunststof kunnen aantasten.33
Montage- en gebruiksaanwijzingTechnische gegevensNominale spanning3 V DCBatterijtypeCR2032Beschermingsklasse IP 20Toegestane omgevingstemperatuur -10 tot +55 °CRadiofrequentie868,3 MHzWat te doen als ...?Storing Oorzaak RemedieMotor draait niet, zendcontrolelampjeblijft uit.Motor draait niet, zendcontrolelampjeblijft aan.Zendcontrolelampjeknippert.De buismotor loopt nietin <strong>de</strong> 24-uur cyclusSchakeltij<strong>de</strong>n wijken afvan <strong>de</strong> programmering1. Batterij is leeg.2. Batterij is verkeerdgeplaatst.1. Ontvanger buiten <strong>de</strong>reikwijdte.2. Zen<strong>de</strong>r is niet in <strong>de</strong>ontvanger geprogrammeerdBatterij is zwak.1. Schuifschakelaarstaat op “hand”2. Geen schakeltij<strong>de</strong>ngeprogrammeerdStroomuitval aanbuismotor1. Nieuwe batterij plaatsen.2. Batterij juist plaatsen.1. Afstand t.o.v. <strong>de</strong> ontvangerreduceren.2. Zen<strong>de</strong>r programmerenNieuwe batterij plaatsen.1. Schuifschakelaar op“klok” zetten2. Schakeltij<strong>de</strong>n programmerenSchakeltij<strong>de</strong>n opnieuwprogrammeren34
Algemene conformiteitsverklaringHierbij verklaart <strong>de</strong> irma <strong>Becker</strong>-Antriebe GmbH, dat het apparaat <strong>Centronic</strong><strong>MemoControl</strong> <strong>MC511</strong> in overeenstemming is met <strong>de</strong> basisvereisten en an<strong>de</strong>rerelevante voorschriften van <strong>de</strong> richtlijn R&TTE 1999/5/EG.Bepaalt voor het gebruik in <strong>de</strong> volgen<strong>de</strong> lan<strong>de</strong>n: EU, CH<strong>de</strong>enfrnlTechnische wijzigingen voorbehou<strong>de</strong>n.35
<strong>Becker</strong>-Antriebe GmbH35764 Sinn/Germanywww.becker-antriebe.com4034 630 081 0a 05/09 309341 01