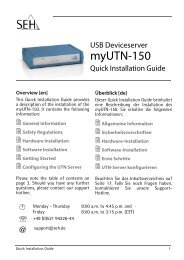
Quick Installation Guide - myUTN-50 - SEH Computertechnik GmbH
Quick Installation Guide - myUTN-50 - SEH Computertechnik GmbH
Quick Installation Guide - myUTN-50 - SEH Computertechnik GmbH

Sie wollen auch ein ePaper? Erhöhen Sie die Reichweite Ihrer Titel.
YUMPU macht aus Druck-PDFs automatisch weboptimierte ePaper, die Google liebt.
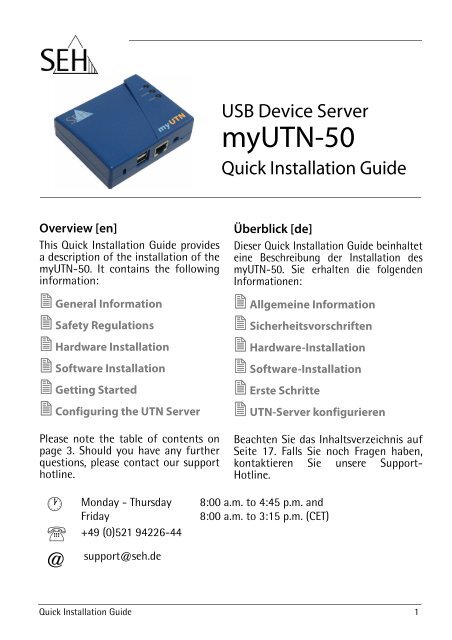
Overview [en]<br />
This <strong>Quick</strong> <strong>Installation</strong> <strong>Guide</strong> provides<br />
a description of the installation of the<br />
<strong>myUTN</strong>-<strong>50</strong>. It contains the following<br />
information:<br />
� General Information<br />
� Safety Regulations<br />
� Hardware <strong>Installation</strong><br />
� Software <strong>Installation</strong><br />
� Getting Started<br />
� Configuring the UTN Server<br />
Please note the table of contents on<br />
page 3. Should you have any further<br />
questions, please contact our support<br />
hotline.<br />
�<br />
℡<br />
@<br />
Monday - Thursday<br />
Friday<br />
+49 (0)521 94226-44<br />
support@seh.de<br />
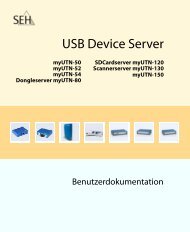
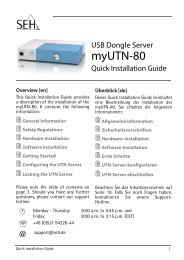
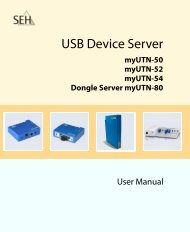
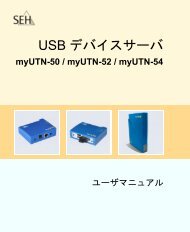
USB Device Server<br />
<strong>myUTN</strong>-<strong>50</strong><br />
<strong>Quick</strong> <strong>Installation</strong> <strong>Guide</strong><br />
Überblick [de]<br />
Dieser <strong>Quick</strong> <strong>Installation</strong> <strong>Guide</strong> beinhaltet<br />
eine Beschreibung der <strong>Installation</strong> des<br />
<strong>myUTN</strong>-<strong>50</strong>. Sie erhalten die folgenden<br />
Informationen:<br />
� Allgemeine Information<br />
� Sicherheitsvorschriften<br />
� Hardware-<strong>Installation</strong><br />
� Software-<strong>Installation</strong><br />
� Erste Schritte<br />
� UTN-Server konfigurieren<br />
Beachten Sie das Inhaltsverzeichnis auf<br />
Seite 17. Falls Sie noch Fragen haben,<br />
kontaktieren Sie unsere Support-<br />
Hotline.<br />
8:00 a.m. to 4:45 p.m. and<br />
8:00 a.m. to 3:15 p.m. (CET)<br />
<strong>Quick</strong> <strong>Installation</strong> <strong>Guide</strong> 1
Date of Manufacture<br />
The serial number includes the date of manufacture.<br />
The serial number can be found on the type plate.<br />
2 <strong>Quick</strong> <strong>Installation</strong> <strong>Guide</strong>
� Table of Contents<br />
2 General Information . . . . . . . . . . . . . . . . . . . . . . . . . . . . . . 4<br />
Purpose . . . . . . . . . . . . . . . . . . . . . . . . . . . . . . . . . . . . . . . . . . . . . . . . . .4<br />
Scope of Supply . . . . . . . . . . . . . . . . . . . . . . . . . . . . . . . . . . . . . . . . . .4<br />
Technical Data . . . . . . . . . . . . . . . . . . . . . . . . . . . . . . . . . . . . . . . . . . .5<br />
2 Safety Regulations . . . . . . . . . . . . . . . . . . . . . . . . . . . . . . . 6<br />
2 Hardware <strong>Installation</strong>. . . . . . . . . . . . . . . . . . . . . . . . . . . . . 7<br />
2 Software <strong>Installation</strong> . . . . . . . . . . . . . . . . . . . . . . . . . . . . . 8<br />
2 Getting Started: <strong>SEH</strong> UTN Manager . . . . . . . . . . . . . . . . 9<br />
Starting the <strong>SEH</strong> UTN Manager . . . . . . . . . . . . . . . . . . . . . . . . . . 10<br />
Assigning an IP Address to the UTN Server . . . . . . . . . . . . . . 11<br />
Adding the UTN Server to the Selection List . . . . . . . . . . . . . 12<br />
Connecting the USB Device to the Client . . . . . . . . . . . . . . . . 13<br />
2 Configuring the UTN Server . . . . . . . . . . . . . . . . . . . . . . 14<br />
<strong>Quick</strong> <strong>Installation</strong> <strong>Guide</strong> [en] 3
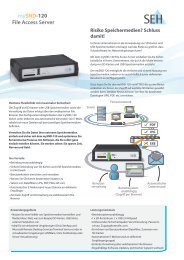
� General Information<br />
Purpose<br />
The <strong>myUTN</strong>-<strong>50</strong> allows you to access non-network-ready USB devices (e.g. hard<br />
disks, etc.) in the network. The USB devices will be connected to the USB port of<br />
the <strong>myUTN</strong>-<strong>50</strong>. The software tool ’<strong>SEH</strong> UTN Manager’ handles the access of the<br />
USB devices.<br />
The <strong>SEH</strong> UTN Manager is installed on all clients that are intended to access a USB<br />
device in the network. The <strong>SEH</strong> UTN Manager shows the availability of all USB<br />
devices in the network and establishes a connection between the client and the<br />
USB device.<br />
Scope of Supply<br />
Please check the package content before getting started:<br />
UTN server USB Device Server (<strong>myUTN</strong>-<strong>50</strong>)<br />
<strong>Quick</strong><br />
<strong>Installation</strong><br />
<strong>Guide</strong><br />
The <strong>Quick</strong> <strong>Installation</strong> <strong>Guide</strong> provides a brief<br />
description of the installation of the <strong>myUTN</strong>-<strong>50</strong>.<br />
(This document)<br />
Power pack External power pack<br />
4 [en] <strong>Quick</strong> <strong>Installation</strong> <strong>Guide</strong>
Technical Data<br />
*The shield connection of the RJ-45 network connector is connected to the shield of the device port.<br />
This connection must be taken into account when arranging your network cabling. For more<br />
information, please consult your retailer.<br />
Properties Values<br />
Device connection - 2 x USB 2.0 HS (may be extended to 5 ports)<br />
Network connection<br />
logical:<br />
physical:<br />
- IEEE 802.3<br />
- RJ-45 (STP Cat. 5)<br />
Operating environment - Ambient temperature: 5 - 40 °C<br />
- Relative humidity: 20 - 80 %<br />
Dimensions - Length: 98 mm<br />
- Width: 81 mm<br />
- Height: 31 mm<br />
- Weight: 100 g<br />
1) Link LED (green):<br />
The link LED shows an existing connection to<br />
the network.<br />
2) Activity LED (yellow):<br />
The LED indicates the reception of data<br />
packets from the network.<br />
3) Status LED (green):<br />
The LED indicates that the device is<br />
operational.<br />
4) Reset button<br />
5) Connector for the included power pack.<br />
6) Network connector (RJ-45) for 100BaseTX and<br />
10BaseT *<br />
7) USB port 2 (may be extended using a USB hub)<br />
8) USB Port 1<br />
9) Kensington security slot<br />
<strong>Quick</strong> <strong>Installation</strong> <strong>Guide</strong> [en] 5
� Safety Regulations<br />
UTN servers are network devices for use in office environments. They are<br />
designed for the integration of USB devices into networks.<br />
Before starting the initial setup procedure and during the operation of the UTN<br />
server, please note the following safety regulations. Their purpose is to protect<br />
yourself and others from personal injuries, and avoid damage to the equipment.<br />
� Read the documentation and make sure that your system meets the<br />
requirements listed therein.<br />
� Avoid contact with humidity or liquids.<br />
� The device must only be connected and operated if it is in perfect condition.<br />
� Make sure that no-one steps on or stumbles over the cables.<br />
� Do not connect a telephone cable to the RJ-45 connector. The RJ-45<br />
connector may only be connected to SELV voltages. For the connection to the<br />
RJ-45 connector only STP cabling (category 5 or better) may be used. The<br />
shielding must fit flushly to the connector.<br />
� The device must only be operated using the power pack included in the<br />
package.<br />
� Only use a certified USB Hi-Speed cable for the connection to the UTN server.<br />
You will find a list of certified cables at www.usb.org.<br />
6 [en] <strong>Quick</strong> <strong>Installation</strong> <strong>Guide</strong>
� Hardware <strong>Installation</strong><br />
You can directly connect two USB devices to the UTN server (<strong>myUTN</strong>-<strong>50</strong>). If you use a<br />
USB hub at the USB port 2, you can connect up to five USB devices.<br />
Clients with the software tool ’<strong>SEH</strong> UTN Manager‘<br />
No device with power supply solely via the USB port should be<br />
connected to the UTN server.<br />
Proceed as follows:<br />
1. Connect the UTN server and the USB device to the USB data<br />
cable. (Repeat this step if you want to connect more than one<br />
USB device.)<br />
2. Connect the network cable (RJ-45) to the UTN server.<br />
3. Connect the power cord to the UTN server.<br />
<strong>Quick</strong> <strong>Installation</strong> <strong>Guide</strong> [en] 7
� Software <strong>Installation</strong><br />
The software tool <strong>SEH</strong> UTN Manager organizes the access of the USB devices. The<br />
<strong>SEH</strong> UTN Manager is installed on all clients that are intended to access a USB<br />
device in the network.<br />
The <strong>SEH</strong> UTN Manager is available in two versions:<br />
� Single-User Version (<strong>SEH</strong> UTN Manager)<br />
� Multi-User Version (<strong>SEH</strong> UTN Manager + <strong>SEH</strong> UTN Service)<br />
A major difference between the single-user version and the multi-user version is<br />
the Windows service ’<strong>SEH</strong> UTN Service’. A detailed description can be found in the<br />
<strong>myUTN</strong> User Manual.<br />
Make sure that:<br />
- The installation of the <strong>SEH</strong> UTN Manager is suitable for Windows XP and<br />
later.<br />
- The installation can only be carried out by Windows users with<br />
administrative rights.<br />
First, you have to download the installation file for the <strong>SEH</strong> UTN Manager from<br />
the homepage of <strong>SEH</strong> <strong>Computertechnik</strong> <strong>GmbH</strong>:<br />
http://www.seh-technology.com/products/usb-device-servers/products/<br />
myutn-<strong>50</strong>-downloads.html<br />
Scan this QR code using your smart phone to get direct access to the homepage.<br />
Proceed as follows:<br />
1. Start the installation file.<br />
2. Follow the installation routine.<br />
� The <strong>SEH</strong> UTN Manager is installed on your client.<br />
8 [en] <strong>Quick</strong> <strong>Installation</strong> <strong>Guide</strong>
� Getting Started: <strong>SEH</strong> UTN Manager<br />
After the <strong>SEH</strong> UTN Manager is started, the network will be scanned for connected<br />
UTN servers. The network range to be scanned is freely definable.<br />
After the network scan all UTN servers found – together with the connected<br />
devices – will be shown in the 'network list'. The preferred devices will be selected<br />
and added to the 'selection list'. The devices in the selection list can be connected<br />
to the client.<br />
This chapter describes the first steps with the program.<br />
� ’Starting the <strong>SEH</strong> UTN Manager’ ��10<br />
� ’Assigning an IP Address to the UTN Server’ ��11<br />
� ’Adding the UTN Server to the Selection List’ ��12<br />
� ’Connecting the USB Device to the Client’ ��13<br />
�<br />
Detailed information on how to use the <strong>SEH</strong> UTN Manager can be found<br />
in the Online Help. To start the Online Help, select Help – Online Help<br />
from the menu bar.<br />
Client and UTN server communicate via the UTN port 9200. This port must not be<br />
blocked by a firewall. If necessary, you can change the port number and/or use a<br />
secure UTN SSL port. A detailed description can be found in the <strong>myUTN</strong> User<br />
Manual.<br />
<strong>Quick</strong> <strong>Installation</strong> <strong>Guide</strong> [en] 9
Starting the <strong>SEH</strong> UTN Manager<br />
Start the <strong>SEH</strong> UTN Manager on your client via the Windows start menu.<br />
(Start --> Programs --> <strong>SEH</strong> <strong>Computertechnik</strong> <strong>GmbH</strong> --> <strong>SEH</strong> UTN Manager)<br />
During the initial configuration, client and UTN server must be assigned to the<br />
same local network segment.<br />
10 [en] <strong>Quick</strong> <strong>Installation</strong> <strong>Guide</strong>
Assigning an IP Address to the UTN Server<br />
Once the UTN server is connected to the network, it checks whether an IP address<br />
can be obtained from the boot protocols BOOTP or DHCP. If this is not the case,<br />
the UTN server assigns itself an IP address via ZeroConf from the address range<br />
(169.254.0.0/16) which is reserved for ZeroConf.<br />
The UTN servers found by the program will be displayed in the network list. You can<br />
change the TCP/IP parameters of the UTN server.<br />
Proceed as follows:<br />
1. Confirm the note dialog ’Your Selection List seems to be empty’ by clicking<br />
Yes.<br />
If no note dialog is available and the main dialog appears, select Selection List – Edit<br />
from the menu bar.<br />
The Edit Selection List dialog appears.<br />
2. Select the UTN server from the network list.<br />
3. Select Set IP Address from the shortcut menu.<br />
The Set IP Address dialog appears.<br />
4. Enter the relevant TCP/IP parameters.<br />
5. Click OK.<br />
� The settings are saved.<br />
<strong>Quick</strong> <strong>Installation</strong> <strong>Guide</strong> [en] 11
Adding the UTN Server to the Selection List<br />
In order to connect a UTN server to a client, you must assign the UTN server to<br />
the selection list. Put together a selection list with your preferred UTN servers.<br />
Proceed as follows:<br />
1. Select Selection List – Edit from the menu bar.<br />
The Edit Selection List dialog appears.<br />
2. Select the UTN server from the network list.<br />
3. Click Add.<br />
4. Click OK.<br />
� The UTN servers are shown in the selection list.<br />
You can extend the search for UTN servers to any network range. To do this, change the<br />
search parameters for the network scan via the Options dialog in the Program menu.<br />
12 [en] <strong>Quick</strong> <strong>Installation</strong> <strong>Guide</strong>
Connecting the USB Device to the Client<br />
The USB devices in the selection list can be connected to the client.<br />
Make sure that:<br />
- All provisions (driver installation, etc.) necessary to operate the device locally<br />
(i.e. connected directly to the client) have been met on the client. Ideally, the<br />
device has been connected and operated on the client locally according to<br />
the instructions of the manufacturer.<br />
- The device is not connected to another client. A device that was made<br />
available by the UTN server can only be used by one network participant at a<br />
time.<br />
Proceed as follows:<br />
1. Mark the relevant USB device in the selection list.<br />
2. Select Device – Activate from the menu bar.<br />
� The connection will be established.<br />
Close the connection to the device when the device is no longer needed. Select<br />
Device – Deactivate from the menu bar.<br />
<strong>Quick</strong> <strong>Installation</strong> <strong>Guide</strong> [en] 13
� Configuring the UTN Server<br />
The UTN server can be configured and monitored via the ‘<strong>myUTN</strong> Control Center‘.<br />
The <strong>myUTN</strong> Control Center is stored in the UTN server and can be launched by<br />
means of a browser (Internet Explorer, Firefox, Safari).<br />
Proceed as follows:<br />
1. Open your browser.<br />
2. Enter the IP address of the UTN server as the URL.<br />
� The <strong>myUTN</strong> Control Center appears in the browser.<br />
If the <strong>myUTN</strong> Control Center is not displayed, check the proxy settings of your browser.<br />
�<br />
Detailed information about the configuration of the UTN server<br />
can be found in the Online Help of the <strong>myUTN</strong> Control Center.<br />
To start the Online Help, click the ‘?‘ icon.<br />
14 [en] <strong>Quick</strong> <strong>Installation</strong> <strong>Guide</strong>
<strong>Quick</strong> <strong>Installation</strong> <strong>Guide</strong> [en] 15
16 [en] <strong>Quick</strong> <strong>Installation</strong> <strong>Guide</strong>
� Inhaltsverzeichnis<br />
2 Allgemeine Information . . . . . . . . . . . . . . . . . . . . . . . . . 18<br />
Verwendungszweck . . . . . . . . . . . . . . . . . . . . . . . . . . . . . . . . . . . . 18<br />
Lieferumfang. . . . . . . . . . . . . . . . . . . . . . . . . . . . . . . . . . . . . . . . . . . 18<br />
Technische Daten . . . . . . . . . . . . . . . . . . . . . . . . . . . . . . . . . . . . . . 19<br />
2 Sicherheitsvorschriften . . . . . . . . . . . . . . . . . . . . . . . . . . 20<br />
2 Hardware-<strong>Installation</strong> . . . . . . . . . . . . . . . . . . . . . . . . . . . 21<br />
2 Software-<strong>Installation</strong> . . . . . . . . . . . . . . . . . . . . . . . . . . . . 22<br />
2 Erste Schritte mit dem <strong>SEH</strong> UTN Manager . . . . . . . . . 23<br />
<strong>SEH</strong> UTN Manager starten. . . . . . . . . . . . . . . . . . . . . . . . . . . . . . . 24<br />
UTN-Server eine IP-Adresse zuweisen . . . . . . . . . . . . . . . . . . . 25<br />
UTN-Server der Auswahlliste hinzufügen . . . . . . . . . . . . . . . . 26<br />
USB-Gerät mit Client verbinden . . . . . . . . . . . . . . . . . . . . . . . . . 27<br />
2 UTN-Server konfigurieren. . . . . . . . . . . . . . . . . . . . . . . . 28<br />
<strong>Quick</strong> <strong>Installation</strong> <strong>Guide</strong> [de]<br />
17
� Allgemeine Information<br />
Verwendungszweck<br />
Das <strong>myUTN</strong>-<strong>50</strong> erlaubt das Bereitstellen von nicht-netzwerkfähigen USB-Geräten<br />
(z.B. Festplatten usw.) für mehrere Netzwerkteilnehmer. Dazu werden die USB-<br />
Geräte an den USB-Port des <strong>myUTN</strong>-<strong>50</strong> angeschlossen. Die Zugriffsverteilung der<br />
USB-Geräte erfolgt über das Software-Tool ’<strong>SEH</strong> UTN Manager’.<br />
Der <strong>SEH</strong> UTN Manager wird auf alle Clients installiert, die auf ein im Netzwerk<br />
bereitgestelltes USB-Gerät zugreifen sollen. Der <strong>SEH</strong> UTN Manager zeigt die<br />
Verfügbarkeit aller am Netzwerk eingebundenen USB-Geräte an und stellt die<br />
Verbindung zwischen Client und USB-Gerät her.<br />
Lieferumfang<br />
Bitte überprüfen Sie den Packungsinhalt auf Vollständigkeit, bevor Sie die<br />
<strong>Installation</strong> beginnen:<br />
UTN-Server USB Device Server (<strong>myUTN</strong>-<strong>50</strong>)<br />
<strong>Quick</strong><br />
<strong>Installation</strong><br />
<strong>Guide</strong><br />
Der <strong>Quick</strong> <strong>Installation</strong> <strong>Guide</strong> beinhaltet eine kurze<br />
Beschreibung der <strong>Installation</strong> des <strong>myUTN</strong>-<strong>50</strong>.<br />
(Dieses Dokument)<br />
Netzteil Externes Netzteil<br />
18 [de] <strong>Quick</strong> <strong>Installation</strong> <strong>Guide</strong>
Technische Daten<br />
* Der Schirmanschluss des RJ-45-Netzwerk-Steckverbinders ist mit dem Schirm des Geräteanschlusses<br />
verbunden. Diese Verbindung muss bei Ihrer Netzwerkverkabelung berücksichtigt<br />
werden. Fragen Sie hierzu Ihren Fachhändler.<br />
Eigenschaften Werte<br />
Geräteanschluss - 2 x USB 2.0 HS (erweiterbar auf 5 Anschlüsse)<br />
Netzwerkanschluss<br />
Logisch:<br />
Physikalisch:<br />
- IEEE 802.3<br />
- RJ-45 (STP Cat. 5)<br />
Betriebsumgebung - Umgebungstemperatur: 5 - 40 °C<br />
- Relative Luftfeuchtigkeit: 20 - 80 %<br />
Abmessungen - Länge: 98 mm<br />
- Breite: 81 mm<br />
- Höhe: 31 mm<br />
- Gewicht: 100 g<br />
<strong>Quick</strong> <strong>Installation</strong> <strong>Guide</strong> [de]<br />
1) Link-LED (grün):<br />
Die LED signalisiert eine vorhandene<br />
Verbindung zum Netzwerk.<br />
2) Netzwerkaktivität-LED (gelb):<br />
Die LED signalisiert den Empfang von<br />
Datenpaketen aus dem Netzwerk.<br />
3) Status-LED (grün):<br />
Die LED signalisiert die Betriebsbereitschaft<br />
des Gerätes.<br />
4) Reset-Taster<br />
5) Anschluss für die Stromversorgung über das<br />
mitgelieferte Netzteil.<br />
6) Netzwerkanschluss (RJ-45) für 100BaseTX und<br />
10BaseT *<br />
7) USB-Anschluss 2 (erweiterbar durch USB-Hub)<br />
8) USB-Anschluss 1<br />
9) Schlitz für Kensington-Verriegelung<br />
19
� Sicherheitsvorschriften<br />
UTN-Server sind Netzwerkgeräte für den Gebrauch in Büroumgebungen. Sie<br />
dienen dem Einbinden von USB-Geräten in Netzwerken.<br />
Beachten Sie vor Inbetriebnahme und beim Betrieb des UTN-Servers die<br />
folgenden Sicherheitsvorschriften, um sich und andere vor Personenschäden zu<br />
schützen sowie Beschädigungen am Gerät zu vermeiden.<br />
� Lesen Sie die Dokumentation und stellen Sie sicher, dass Ihr System den<br />
aufgeführten Anforderungen entspricht.<br />
� Das Gerät darf nicht mit Feuchtigkeit oder Flüssigkeiten in Berührung<br />
kommen.<br />
� Das Gerät darf nur in unversehrtem Zustand angeschlossen und betrieben<br />
werden.<br />
� Verlegen Sie alle Kabel so, dass niemand darauf treten oder darüber stolpern<br />
kann.<br />
� Schließen Sie keine Telefonleitungen an den RJ-45 Stecker an. An diesen darf<br />
nur Sicherheitskleinspannung angeschlossen werden. Verwenden Sie für den<br />
Anschluss an den RJ-45 Stecker nur STP-Kabel (Kategorie 5 oder besser).<br />
Kabelschirm und Steckerschirm des Kabels müssen flächig verbunden sein.<br />
� Das Gerät darf nur mit dem mitgelieferten Netzteil betrieben werden.<br />
� Verwenden Sie für die Verbindung zum UTN-Server ein zertifiziertes USB-Hi-<br />
Speed-Kabel. Eine Liste der zertifizierten Kabel finden Sie unter www.usb.org.<br />
20 [de] <strong>Quick</strong> <strong>Installation</strong> <strong>Guide</strong>
� Hardware-<strong>Installation</strong><br />
Am UTN-Server (<strong>myUTN</strong>-<strong>50</strong>) können zwei USB-Geräte direkt angeschlossen werden.<br />
Durch Verwendung eines USB-Hubs am USB-Anschluss 2 können bis zu fünf USB-<br />
Geräte anschlossen werden.<br />
Clients mit Software-Tool ’<strong>SEH</strong> UTN Manager‘<br />
Schließen Sie am UTN-Server kein Gerät an, dessen Stromversorgung<br />
ausschließlich über den USB-Anschluss erfolgt.<br />
Gehen Sie wie folgt vor:<br />
1. Verbinden Sie den UTN-Server und das USB-Gerät mit dem<br />
USB-Datenkabel. (Wiederholen Sie diesen Schritt je nach<br />
Anzahl der anzuschließenden USB-Geräte.)<br />
2. Verbinden Sie das Netzwerkkabel (RJ-45) mit dem UTN-Server.<br />
3. Verbinden Sie das Netzkabel mit dem UTN-Server.<br />
<strong>Quick</strong> <strong>Installation</strong> <strong>Guide</strong> [de]<br />
21
� Software-<strong>Installation</strong><br />
Die Zugriffsverteilung der USB-Geräte wird über das Software-Tool <strong>SEH</strong> UTN<br />
Manager organisiert. Der <strong>SEH</strong> UTN Manager wird auf alle Clients installiert, die<br />
auf ein im Netzwerk bereitgestelltes USB-Gerät zugreifen sollen.<br />
Der <strong>SEH</strong> UTN Manager ist in zwei Varianten verfügbar:<br />
� Single-User-Variante (<strong>SEH</strong> UTN Manager)<br />
� Multi-User-Variante (<strong>SEH</strong> UTN Manager + <strong>SEH</strong> UTN Service)<br />
Wesentlicher Unterschied zwischen der Single-User- und der Multi-User-Variante<br />
ist der Windows-Dienst ’<strong>SEH</strong> UTN Service’. Detaillierte Beschreibungen finden Sie<br />
in der <strong>myUTN</strong>-Benutzerdokumentation.<br />
Stellen Sie folgende Punkte sicher:<br />
- Die <strong>Installation</strong> des <strong>SEH</strong> UTN Managers ist für Windows XP und höher<br />
geeignet.<br />
- Die <strong>Installation</strong> kann ausschließlich durch Windows-Benutzer mit<br />
administrativen Rechten durchgeführt werden.<br />
Bitte laden Sie zuerst die <strong>Installation</strong>sdatei für den <strong>SEH</strong> UTN Manager von der<br />
<strong>SEH</strong> <strong>Computertechnik</strong> <strong>GmbH</strong>-Homepage:<br />
http://www.seh.de/produkte/usb-device-server/products/<br />
myutn-<strong>50</strong>-downloads.html<br />
Scannen Sie diesen QR-Code mit Ihrem Smartphone, um direkt zur Homepage zu gelangen.<br />
Gehen Sie wie folgt vor:<br />
1. Starten Sie die <strong>Installation</strong>sdatei.<br />
2. Folgen Sie der <strong>Installation</strong>sroutine.<br />
� Der <strong>SEH</strong> UTN Manager wird auf Ihrem Client installiert.<br />
22 [de] <strong>Quick</strong> <strong>Installation</strong> <strong>Guide</strong>
� Erste Schritte mit dem <strong>SEH</strong> UTN Manager<br />
Nach dem Start des <strong>SEH</strong> UTN Managers wird das Netzwerk nach angeschlossenen<br />
UTN-Servern gescannt. Der zu scannende Netzwerkbereich ist frei definierbar.<br />
Nach dem Netzwerkscan werden alle gefundenen UTN-Server und deren<br />
angeschlossene Geräte in der 'Netzwerkliste' angezeigt. Die benötigten Geräte<br />
werden ausgewählt und der 'Auswahlliste' hinzugefügt. Die in der Auswahlliste<br />
aufgeführten Geräte können dann mit dem Client verbunden werden.<br />
Dieses Kapitel informiert über die ersten Handlungsschritte mit dem Programm.<br />
� ’<strong>SEH</strong> UTN Manager starten’ ��24<br />
� ’UTN-Server eine IP-Adresse zuweisen’ ��25<br />
� ’UTN-Server der Auswahlliste hinzufügen’ ��26<br />
� ’USB-Gerät mit Client verbinden’ ��27<br />
�<br />
Detaillierte Informationen zur Bedienung des <strong>SEH</strong> UTN Managers<br />
entnehmen Sie der Online Hilfe. Um die Online Hilfe zu starten wählen<br />
Sie im Menü Hilfe den Befehl Online Hilfe.<br />
Client und UTN-Server kommunizieren über den UTN-Port 9200. Dieser Port darf<br />
nicht durch eine Sicherheitssoftware (Firewall) blockiert werden. Bei Bedarf kann die<br />
Portnummer geändert werden und/oder ein sicherer UTN-SSL-Port verwendet<br />
werden. Detaillierte Beschreibungen finden Sie in der <strong>myUTN</strong>-<br />
Benutzerdokumentation.<br />
<strong>Quick</strong> <strong>Installation</strong> <strong>Guide</strong> [de]<br />
23
<strong>SEH</strong> UTN Manager starten<br />
Starten Sie auf Ihrem Client den <strong>SEH</strong> UTN Manager über das Windows-<br />
Startmenü.<br />
(Start --> Programme --> <strong>SEH</strong> <strong>Computertechnik</strong> <strong>GmbH</strong> --> <strong>SEH</strong> UTN Manager)<br />
Während der Erstkonfiguration müssen Client und UTN-Server demselben lokalen<br />
Netzwerksegment zugeordnet sein.<br />
24 [de] <strong>Quick</strong> <strong>Installation</strong> <strong>Guide</strong>
UTN-Server eine IP-Adresse zuweisen<br />
Nachdem der UTN-Server an das Netzwerk angeschlossen ist, überprüft der UTN-<br />
Server, ob er eine IP-Adresse über die Bootprotokolle BOOTP oder DHCP erhält. Ist<br />
das nicht der Fall, gibt sich der UTN-Server über ZeroConf selbst eine IP-Adresse<br />
aus dem für ZeroConf reservierten Adressbereich (169.254.0.0/16).<br />
Die vom Programm gefundenen UTN-Server werden in der Netzwerkliste angezeigt.<br />
Sie haben die Möglichkeit, die TCP/IP-Parameter am UTN-Server zu ändern.<br />
Gehen Sie wie folgt vor:<br />
1. Bestätigen Sie den Hinweisdialog ’Auswahlliste ist leer’ mit Ja.<br />
Falls kein Hinweisdialog vorhanden ist und der Hauptdialog angezeigt wird, wählen Sie<br />
im Menü Auswahlliste den Befehl Bearbeiten.<br />
Der Dialog Auswahlliste bearbeiten erscheint.<br />
2. Markieren Sie den UTN-Server in der Netzwerkliste.<br />
3. Wählen Sie IP-Adresse definieren im Kontextmenü.<br />
Der Dialog IP-Adresse definieren erscheint.<br />
4. Geben Sie die entsprechenden TCP/IP-Parameter ein.<br />
5. Wählen Sie die Schaltfläche OK an.<br />
� Die Einstellungen werden gespeichert.<br />
<strong>Quick</strong> <strong>Installation</strong> <strong>Guide</strong> [de]<br />
25
UTN-Server der Auswahlliste hinzufügen<br />
Um einen UTN-Server mit dem Client zu verbinden, muss der UTN-Server der<br />
Auswahlliste zugeordnet werden. Stellen Sie die Auswahlliste mit Ihren bevorzugt<br />
genutzten UTN-Servern zusammen.<br />
Gehen Sie wie folgt vor:<br />
1. Wählen Sie im Menü Auswahlliste den Befehl Bearbeiten.<br />
Der Dialog Auswahlliste bearbeiten erscheint.<br />
2. Markieren Sie den UTN-Server in der Netzwerkliste.<br />
3. Wählen Sie die Schaltfläche Hinzufügen an.<br />
4. Wählen Sie die Schaltfläche OK an.<br />
� Die UTN-Server werden in der Auswahlliste angezeigt.<br />
Die Suche nach UTN-Servern kann auf beliebige Netzbereiche erweitert werden. Ändern<br />
Sie hierzu die Suchparameter für den Netzwerkscan im Menü Programm über den<br />
Dialog Optionen.<br />
26 [de] <strong>Quick</strong> <strong>Installation</strong> <strong>Guide</strong>
USB-Gerät mit Client verbinden<br />
Die in der Auswahlliste aufgeführten USB-Geräte können mit dem Client<br />
verbunden werden.<br />
Stellen Sie folgende Punkte sicher:<br />
- Auf dem Client sind alle Vorbereitungen (Treiberinstallation usw.) getroffen<br />
worden, die notwendig wären, um das Gerät lokal (also direkt an dem Client<br />
angeschlossen) zu betreiben. Idealerweise ist das Gerät zuvor lokal am Client<br />
nach der Anleitung des Herstellers angeschlossen und betrieben worden.<br />
- Das Gerät ist nicht bereits mit einem anderen Client verbunden. Ein über den<br />
UTN-Server zur Verfügung gestelltes Gerät kann zeitgleich nur von einem<br />
Netzwerkteilnehmer genutzt werden.<br />
Gehen Sie wie folgt vor:<br />
1. Markieren Sie in der Auswahlliste das USB-Gerät.<br />
2. Wählen Sie im Menü Gerät den Befehl Aktivieren.<br />
� Die Verbindung wird hergestellt.<br />
Deaktivieren Sie die Verbindung zum Gerät, sobald Sie es nicht mehr benötigen.<br />
Wählen Sie hierzu im Menü Gerät den Befehl Deaktivieren.<br />
<strong>Quick</strong> <strong>Installation</strong> <strong>Guide</strong> [de]<br />
27
� UTN-Server konfigurieren<br />
Über das ’<strong>myUTN</strong> Control Center’ kann der UTN-Server konfiguriert und<br />
überwacht werden. Das <strong>myUTN</strong> Control Center ist in dem UTN-Server<br />
gespeichert und kann mit einem Internet-Browser (Internet Explorer, Firefox,<br />
Safari) aufgerufen werden.<br />
Gehen Sie wie folgt vor:<br />
1. Öffnen Sie Ihren Browser.<br />
2. Geben Sie als URL die IP-Adresse des UTN-Servers ein.<br />
� Das <strong>myUTN</strong> Control Center wird im Browser dargestellt.<br />
Falls das <strong>myUTN</strong> Control Center nicht angezeigt wird, überprüfen Sie die Proxy-<br />
Einstellungen Ihres Browsers.<br />
�<br />
Detaillierte Informationen zur Konfiguration des UTN Servers<br />
entnehmen Sie der Online Hilfe des <strong>myUTN</strong> Control Centers.<br />
Um die Online Hilfe zu starten wählen Sie das ‘?‘ Symbol an.<br />
28 [de] <strong>Quick</strong> <strong>Installation</strong> <strong>Guide</strong>
<strong>Quick</strong> <strong>Installation</strong> <strong>Guide</strong> [de]<br />
29
The latest version of the EC declaration of conformity can be downloaded from<br />
the homepage of <strong>SEH</strong> <strong>Computertechnik</strong> <strong>GmbH</strong>:<br />
http://www.seh-technology.com/services/ce-notification.html<br />
30 [de] <strong>Quick</strong> <strong>Installation</strong> <strong>Guide</strong>
<strong>Quick</strong> <strong>Installation</strong> Gudie 31
Manufactured by:<br />
<strong>SEH</strong> <strong>Computertechnik</strong> <strong>GmbH</strong><br />
Suedring 11<br />
33647 Bielefeld<br />
Germany<br />
Phone: +49 (0)521 94226-29<br />
Fax: +49 (0)521 94226-99<br />
Support: +49 (0)521 94226-44<br />
Email: info@seh.de<br />
Web: http://www.seh.de<br />
Scan this QR code (meCard)<br />
using your smart phone.<br />
Document:<br />
Type: <strong>Quick</strong> <strong>Installation</strong> <strong>Guide</strong><br />
Title: <strong>myUTN</strong>-<strong>50</strong><br />
Version: 1.3<br />
Order number: MHAB-QI-<strong>myUTN</strong><strong>50</strong><br />
Online Links to important Internet Resources:<br />
Free Guarantee Extension: http://www.seh-technology.com/guarantee<br />
Support Contacts and Information: http://www.seh-technology.com/support<br />
Sales Contacts and Information: http://www.seh-technology.com/sales<br />
Downloads: http://www.seh-technology.com/services/<br />
downloads.html<br />
Recycling notes according to the Electric and Electronic Equipment Act as well<br />
as the European directive ’WEEE’. Dispose of the device separately at the end of<br />
its life cycle. Do not dispose of the product together with your domestic waste.<br />
You can return the device free of charge to your local collection point.<br />
© 2011 <strong>SEH</strong> <strong>Computertechnik</strong> <strong>GmbH</strong><br />
All trademarks, registered trademarks, logos and product names are property of their respective owners.<br />
This product uses ’Open Source Software’. For further information, please contact http://www.seh.de.<br />
The product documentation gives you valuable information about your product.<br />
Keep the documentation for further reference during the life cycle of the product.<br />
32 <strong>Quick</strong> <strong>Installation</strong> <strong>Guide</strong>