PDF Star Effects User Guide. - Topaz Labs
PDF Star Effects User Guide. - Topaz Labs
PDF Star Effects User Guide. - Topaz Labs

You also want an ePaper? Increase the reach of your titles
YUMPU automatically turns print PDFs into web optimized ePapers that Google loves.
<strong>Topaz</strong> <strong>Star</strong> <strong>Effects</strong><br />
<strong>User</strong> Manual<br />
I. Installation<br />
A. How to Install 3<br />
B. Entering Your Key 3<br />
C. Host-Specific Installation 3<br />
1. Paint Shop Pro 4<br />
2. Photo Impact 5<br />
3. Irfanview 6<br />
D. Uninstalling 7<br />
II. Introduction<br />
A. About <strong>Topaz</strong> <strong>Star</strong> <strong>Effects</strong> 8<br />
1. Primary Functions 8<br />
B. Program Features 9<br />
III. New Features<br />
A. <strong>Star</strong> Brush 10<br />
B. <strong>Star</strong> Type 10<br />
C. Mode 11<br />
D. Apply Button 12<br />
E. Auto Light Detection 12<br />
F. Split Screen View 13<br />
G. Interface Style 14<br />
IV. Work Area<br />
A. Interface 15<br />
B. Preview 19<br />
C. Presets 21<br />
1. Applying Presets 21<br />
2. Adding Presets 21<br />
3. Deleting Presets 22<br />
4. Importing Presets 23<br />
5. Exporting Presets 23<br />
6. Sharing Presets 23<br />
D. Tools 24<br />
E. Menu 25<br />
1. Preferences 25<br />
2. Check for Update 25<br />
3. Enter Key 26<br />
4. What’s This? 26<br />
5. <strong>User</strong> <strong>Guide</strong> 26<br />
6. Tech Support 26<br />
7. Product Info 26<br />
8. Gallery 26<br />
9. My<strong>Topaz</strong> 26<br />
10. Tutorials 26<br />
11. About 26<br />
IV. Settings & Parameters<br />
A. Presets 27<br />
B. <strong>Star</strong> Settings 28<br />
C. Main Adjustments 29<br />
D. Color Adjustments 30<br />
E. Additional <strong>Effects</strong> 30<br />
VI. Work Flow<br />
A. Sample Project #1 31<br />
B. Sample Project #2 38<br />
VII. Additional Resources<br />
A. Glossary 46<br />
B. FAQ’s 48<br />
C. Connect 50<br />
D. Company Info 51<br />
Contents<br />
2
<strong>Topaz</strong> <strong>Star</strong> <strong>Effects</strong><br />
<strong>User</strong> Manual<br />
<strong>Topaz</strong> <strong>Star</strong> <strong>Effects</strong> is a Photoshop plug-in, which means<br />
it won’t run by itself and requires a compatible host<br />
program for use.<br />
To Install<br />
1. Close Photoshop or other image editing program if<br />
you are using it.<br />
2. Double-click on the <strong>Topaz</strong> <strong>Star</strong> <strong>Effects</strong> folder to<br />
access the installer, and then follow the on-screen<br />
instructions.<br />
Mac Dmg Windows exe<br />
3. Your <strong>Topaz</strong> <strong>Star</strong> <strong>Effects</strong> plug-in will automatically be<br />
installed in your Photoshop plug-ins folder.<br />
4. After the installation, you will need to enter your<br />
license or trial key.<br />
Important for Mac <strong>User</strong>s:<br />
After installation, <strong>Topaz</strong> <strong>Star</strong> <strong>Effects</strong> will be installed in<br />
the following folder: “ Macintosh HD -> Library -> Application<br />
Support -> <strong>Topaz</strong> <strong>Labs</strong> -> <strong>Star</strong> <strong>Effects</strong>”.<br />
If your Photoshop is installed in a customized location,<br />
you will need to manually create a shortcut (alias) link<br />
inside folder “ -> Plug-ins”<br />
that links to “ Macintosh HD -> Library -> Application<br />
Support -> <strong>Topaz</strong> <strong>Labs</strong> -> <strong>Star</strong> <strong>Effects</strong> -> Plug-ins”.<br />
Entering Your Key<br />
Entering your trial key allows you to save your projects<br />
and print them during your evaluation period. Entering<br />
your license key allows you do the same, except without<br />
any time limitations.<br />
1. <strong>Star</strong>t by opening up an image in Photoshop.<br />
2. Go to Filters -> <strong>Topaz</strong> <strong>Labs</strong> -> <strong>Star</strong> <strong>Effects</strong> -> Menu<br />
-> Enter key.<br />
3. You can then copy and paste or type your key in.<br />
Important: To install the product on a second computer,<br />
you will need to download <strong>Topaz</strong> <strong>Star</strong> <strong>Effects</strong> and<br />
then enter your same license key.<br />
Host-Specific Installation<br />
<strong>Topaz</strong> <strong>Star</strong> <strong>Effects</strong> is also compatible with Lightroom,<br />
Aperture and iPhoto. To use <strong>Star</strong> <strong>Effects</strong> in any of these<br />
programs you will need to download and install the<br />
free <strong>Topaz</strong> Fusion Express compatibility add on. You<br />
can get it online at: www.topazlabs.com/downloads<br />
In Windows, <strong>Topaz</strong> <strong>Star</strong> <strong>Effects</strong> is supported by most<br />
host applications that support Photoshop plug-ins.<br />
This includes Paint Shop Pro, Photo Impact and Irfanview,<br />
although there are additional host programs that<br />
may also support <strong>Topaz</strong> <strong>Star</strong> <strong>Effects</strong>.<br />
To install <strong>Star</strong> <strong>Effects</strong> in either Paint Shop Pro, Photo<br />
Impact, or Irfanview first download <strong>Topaz</strong> <strong>Star</strong> <strong>Effects</strong><br />
to the default location. Then, to configure it into each<br />
program, follow the host-specific instructions on the<br />
next page.<br />
Installation<br />
3
<strong>Topaz</strong> <strong>Star</strong> <strong>Effects</strong><br />
<strong>User</strong> Manual<br />
How to install <strong>Topaz</strong> <strong>Star</strong> <strong>Effects</strong> in Paintshop Pro<br />
1. First launch PaintShop Pro / Photo Impact.<br />
2. Go to Menu file -> Preferences -> File Locations.<br />
Select “Plug-ins” from the “File Types” list and click<br />
“Add”.<br />
3. Choose C: \ Program Files \ <strong>Topaz</strong> <strong>Labs</strong> \ <strong>Topaz</strong> <strong>Star</strong><br />
<strong>Effects</strong> plug-ins and click “OK”.<br />
4. <strong>Topaz</strong> <strong>Star</strong> <strong>Effects</strong> is now available to use. Simply go<br />
to <strong>Effects</strong> -> Plug-ins and select “<strong>Star</strong> <strong>Effects</strong>”.<br />
Installation<br />
4
<strong>Topaz</strong> <strong>Star</strong> <strong>Effects</strong><br />
<strong>User</strong> Manual<br />
How to install <strong>Topaz</strong> <strong>Star</strong> <strong>Effects</strong> in Photo Impact<br />
1. First launch Photo Impact.<br />
2. Go to File -> Preferences -> General or use shortcut<br />
key F6.<br />
3. Select Plug-ins from the Categories list.<br />
Then click on the button and browse to find the<br />
<strong>Star</strong> <strong>Effects</strong> plug-in folder located in: C:\Program Files\<br />
<strong>Topaz</strong> <strong>Labs</strong>\<strong>Topaz</strong> <strong>Star</strong> <strong>Effects</strong> plug-ins and click “OK”.<br />
4. Restart Photo Impact. Go to Menu -> Effect to access<br />
the plug-in.<br />
Installation<br />
5
<strong>Topaz</strong> <strong>Star</strong> <strong>Effects</strong><br />
<strong>User</strong> Manual<br />
How to install <strong>Topaz</strong> <strong>Star</strong> <strong>Effects</strong> in Irfanview<br />
1. Make sure that you have downloaded and installed<br />
the 8bf plug-in add-on, available on the Irfanview<br />
webpage. (http://www.software.com/irfanview-plugin)<br />
2. Open Irfanview and go to Image -> <strong>Effects</strong> -> Adobe<br />
8BF filters.<br />
3. In the screen that pops up, select “Add 8BF filters”<br />
and navigate to the C:\Program Files\<strong>Topaz</strong> <strong>Labs</strong>\<strong>Topaz</strong><br />
<strong>Star</strong> <strong>Effects</strong> \Plug-ins folder and click “OK”. You<br />
will then see “<strong>Topaz</strong> <strong>Star</strong> <strong>Effects</strong>” in the Available/<br />
Loadable 8BF Filters section.<br />
4. To use <strong>Topaz</strong> <strong>Star</strong> <strong>Effects</strong> in the future, simply go to<br />
Image -> <strong>Effects</strong>> Adobe 8BF filters again and select<br />
“<strong>Topaz</strong> <strong>Star</strong> <strong>Effects</strong>”.<br />
Installation<br />
6
<strong>Topaz</strong> <strong>Star</strong> <strong>Effects</strong><br />
<strong>User</strong> Manual<br />
To uninstall <strong>Topaz</strong> <strong>Star</strong> <strong>Effects</strong> follow these instructions:<br />
Mac<br />
1. Quit Photoshop (or other editing program).<br />
2. Navigate to the <strong>Topaz</strong> <strong>Labs</strong> support files and frames<br />
located at: Macintosh HD -> Library -> Application Support<br />
-> <strong>Topaz</strong> <strong>Labs</strong>.<br />
3. Locate the <strong>Topaz</strong> <strong>Star</strong> <strong>Effects</strong> file and move it to the<br />
trash. You will need to enter your system password to<br />
OK this change.<br />
4. Navigate to your Photoshop plug-ins folder located<br />
at: Applications -> Photoshop -> Plug-ins<br />
5. Locate any leftover <strong>Topaz</strong> <strong>Star</strong> <strong>Effects</strong> files and<br />
move it to the trash.<br />
Windows XP *<br />
1. Quit Photoshop (or other editing program).<br />
2. Click on the <strong>Star</strong>t Menu and select Control Panel.<br />
3. Double-click on Add / Remove programs.<br />
4. Select <strong>Topaz</strong> <strong>Star</strong> <strong>Effects</strong> and click remove.<br />
Windows Vista *<br />
1. Quit Photoshop (or other editing program).<br />
2. Click on the <strong>Star</strong>t Menu and select Control Panel.<br />
3. Select Programs, then Uninstall a Program.<br />
4. Select <strong>Topaz</strong> <strong>Star</strong> <strong>Effects</strong> and click remove.<br />
Windows 7 *<br />
1. Quit Photoshop (or other editing program).<br />
2. Click on the <strong>Star</strong>t Menu and select Control Panel -><br />
Programs -> Programs and Features.<br />
3. Select <strong>Topaz</strong> <strong>Star</strong> <strong>Effects</strong> and click uninstall.<br />
*Please note that if you also have the 64-bit version of<br />
<strong>Star</strong> <strong>Effects</strong> installed, then you will need to first uninstall<br />
this version before you can uninstall the regular<br />
version.<br />
Image by <strong>Topaz</strong> <strong>User</strong> - Steve Rich<br />
Uninstalling<br />
7
<strong>Topaz</strong> <strong>Star</strong> <strong>Effects</strong><br />
<strong>User</strong> Manual<br />
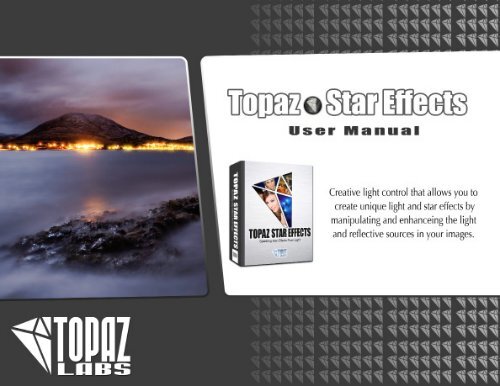
<strong>Topaz</strong> <strong>Star</strong> <strong>Effects</strong><br />
About <strong>Topaz</strong> <strong>Star</strong> <strong>Effects</strong><br />
<strong>Topaz</strong> <strong>Star</strong> <strong>Effects</strong> is a light enhancement program<br />
that offers creative control over the light and reflective<br />
sources in your image. You can easily manipulate and<br />
enhance these lighting sources to create unique light<br />
and star effects.<br />
The Primary Functions of <strong>Topaz</strong> <strong>Star</strong> <strong>Effects</strong> Include:<br />
1. Easily add sparkling, realistic star effects.<br />
2. Enhance or reorient the look of light from source<br />
points.<br />
3. Effortlessly add excitement and drama, or even<br />
change the entire mood of images.<br />
4. Add bling/sparkle, shimmering water effects, beams<br />
of light and more.<br />
5. Create unique backgrounds by extracting the created<br />
star effects.<br />
Visit the <strong>Topaz</strong> user Gallery to see more user<br />
examples: http://gallery.topazlabs.com/<br />
Introduction<br />
8
<strong>Topaz</strong> <strong>Star</strong> <strong>Effects</strong><br />
<strong>User</strong> Manual<br />
<strong>Star</strong> <strong>Effects</strong> Features<br />
1. <strong>Star</strong> Brush. Selective brush for quick and easy inclusion<br />
and exclusion of light sources.<br />
2. Apply Button. Offers the ability to stack a variety of<br />
star effects.<br />
3. Presets. Includes various presets for a quick and<br />
easy workflow.<br />
4. Mode Selection. Offers two viewing/editing modes<br />
– combined and <strong>Star</strong>s only.<br />
5. Split Screen. Use the 2-screen split view for easy<br />
before and after comparison.<br />
6. Undo / Redo buttons.<br />
7. Collapsible side panels. Expand and collapse the<br />
preset panel and the tool panel for an adjustable<br />
workspace.<br />
8. Snap / Recall buttons. Save up to 99 snapshot settings<br />
for comparison.<br />
9. Auto Updater. Get software updates instantly.<br />
10. Preset Navigation. Use the up / down arrow keys<br />
to navigate the preset list and display the selected<br />
preset thumbnail (in preset preview window). Use<br />
the return (Enter) key to apply the currently selected<br />
preset.<br />
11. Enable / Disable Tool Tips. Option to enable or disable<br />
the pop up tool tips.<br />
12. Quick Slider Reset. Double click on the slider name<br />
to reset default slider values.<br />
Introduction<br />
9
<strong>Topaz</strong> <strong>Star</strong> <strong>Effects</strong><br />
<strong>User</strong> Manual<br />
NEW: <strong>Star</strong> Brush<br />
<strong>Topaz</strong> <strong>Star</strong> <strong>Effects</strong> includes a star brush for quick<br />
selection of light sources. The easy-to-use brush is<br />
designed to help you individually select which light<br />
sources in your image to include/exclude.<br />
Adding Light Sources<br />
Select the Add option and then click on (or brush<br />
over) the light sources in your image that you want to<br />
add the effect to.<br />
Removing Light Sources<br />
Select the Remove option and then click on (or brush<br />
over) the light sources in your image that you want to<br />
remove the added effects from.<br />
NEW: <strong>Star</strong> Type<br />
Located in the <strong>Star</strong> Settings tab is a drop down box<br />
that allows you to choose the type of star effect that<br />
you want to apply – choose from options like traditional,<br />
starburst, cross star, hollywood star and more!<br />
Using the various adjustment sliders in the Main, Color<br />
and Additional adjustment tabs, you can create<br />
completely customized variations of the star types.<br />
New Features<br />
10
<strong>Topaz</strong> <strong>Star</strong> <strong>Effects</strong><br />
<strong>User</strong> Manual<br />
NEW: Mode<br />
There are two viewing/editing modes (located in the<br />
<strong>Star</strong> Settings tab) – combined and <strong>Star</strong>s only. The<br />
combined mode allows you to see your base image<br />
along with the applied star effects.<br />
The <strong>Star</strong>s only mode allows you to view just your<br />
added star effects (on a black background) without<br />
your base image.<br />
What’s unique about this is that you also have the<br />
option of saving just the created star effects back to<br />
Photoshop (or your other host program) – just make<br />
sure that the <strong>Star</strong>s Only mode is selected before you<br />
click the OK button. This is great for creating your<br />
own unique backgrounds.<br />
New Features<br />
11
<strong>Topaz</strong> <strong>Star</strong> <strong>Effects</strong><br />
<strong>User</strong> Manual<br />
NEW: Apply Button<br />
The Apply button allows you to stack multiple star effects<br />
(with different characteristics) during the same<br />
workflow.<br />
NEW: Auto Light Detection<br />
When you open the program and select one of the<br />
default presets, it will automatically detect the light<br />
sources in your image and apply the effect to those<br />
light sources.<br />
To learn more about Effect Collections and other<br />
<strong>Topaz</strong> B&W Effect’s features sign up for one of our<br />
FREE webinars. www.topazlabs.com/webinars<br />
New Features<br />
12
<strong>Topaz</strong> <strong>Star</strong> <strong>Effects</strong><br />
<strong>User</strong> Manual<br />
NEW: Split Screen View<br />
<strong>Topaz</strong> <strong>Star</strong> <strong>Effects</strong> interface features a 2-screen split<br />
viewing option for easy before and after comparison.<br />
Use the single screen button<br />
to see the full image preview.<br />
Use the 2-split button to see<br />
before and after comparison.<br />
Use the preview navigator (top right of interface) to pan<br />
the preivew or drag the images around in the preview.<br />
New Features<br />
13
<strong>Topaz</strong> <strong>Star</strong> <strong>Effects</strong><br />
<strong>User</strong> Manual<br />
NEW: Interface Style<br />
By default, <strong>Star</strong> <strong>Effects</strong> uses the darker <strong>Topaz</strong> Style interface.<br />
However, you have the option in your <strong>Star</strong><strong>Effects</strong>’<br />
preferences menu to change this interface<br />
setting to a lighter color scheme.<br />
New Features<br />
Simply go to Menu -> Preferences from within the<br />
<strong>Star</strong> <strong>Effects</strong> program and uncheck the “Use <strong>Topaz</strong><br />
Style” box. The next time you restart <strong>Star</strong> <strong>Effects</strong> your<br />
program will feature the lighter-colored interface.<br />
Go to Menu -> Preferences and check the “Use <strong>Topaz</strong><br />
Style” box and restart <strong>Star</strong> <strong>Effects</strong> to re-enable the<br />
darker color scheme.<br />
14
<strong>Topaz</strong> <strong>Star</strong> <strong>Effects</strong><br />
<strong>User</strong> Manual<br />
Interface (Main View)<br />
Although the <strong>Topaz</strong> <strong>Star</strong> <strong>Effects</strong> interface may look intimidating at first glance, don’t worry: it’s actually quite simple<br />
and easy to use. You’ll soon be a pro after experimenting with it for a bit. In order to make sense of the function of<br />
each of the various controls, we have divided the interface into a few sections:<br />
1<br />
1. Presets<br />
Preview<br />
Displays previews of<br />
the included presets.<br />
2<br />
3<br />
2. Presets Panel<br />
Provides “snapshots”<br />
of pre-defined effects.<br />
3. Preview Window<br />
Displays the preview of the<br />
original and adjusted image.<br />
4. Preview Navigator<br />
Displays the region of the<br />
preview image you are<br />
currently focused on.<br />
Work Area<br />
5<br />
4<br />
5. Settings & Parameters<br />
Controls the editing using sliders<br />
to adjust the various effects.<br />
15
<strong>Topaz</strong> <strong>Star</strong> <strong>Effects</strong><br />
<strong>User</strong> Manual<br />
Interface (Tool Panel View)<br />
Use the small white arrows to expand and collapse the preset panel. You can click the white arrow or grab the<br />
edge of the panel and drag it in or out - note that tool selections will change depending on which effect is selected.<br />
Work Area<br />
16
<strong>Topaz</strong> <strong>Star</strong> <strong>Effects</strong><br />
<strong>User</strong> Manual<br />
Interface (No Panel View)<br />
Use the small white arrows to expand and collapse the preset and tool panels. You can click the white arrows<br />
or grab the edge of the panels and drag them in or out.<br />
Work Area<br />
17
<strong>Topaz</strong> <strong>Star</strong> <strong>Effects</strong><br />
<strong>User</strong> Manual<br />
Interface (Preset Panel View)<br />
Use the small white arrows to expand and collapse the tool panel. You can click the white arrow or grab the<br />
edge of the panel and drag it in or out.<br />
Work Area<br />
18
<strong>Topaz</strong> <strong>Star</strong> <strong>Effects</strong><br />
<strong>User</strong> Manual<br />
Preview Section<br />
The Preview section is the main window that is centered<br />
in the <strong>Star</strong> <strong>Effects</strong> interface. The preview section<br />
shows you the original image and the processed<br />
preview of the image. Click on the image in the<br />
preview window (or use the Original and Preview<br />
buttons) to switch between the Original and Preview<br />
tabs and compare the filtered and un-filtered images.<br />
To pan the preview image, click and hold the left<br />
mouse button on the preview image and drag it<br />
around. When you let go of the mouse button, the<br />
new portion of the image will be processed and the<br />
result will be displayed.<br />
You can also use SPACE bar or your numbered shortcut<br />
keys “1” and “2” to switch back and forth between your<br />
filtered and unfiltered image in the preview window.<br />
1<br />
Work Area<br />
19
<strong>Topaz</strong> <strong>Star</strong> <strong>Effects</strong><br />
<strong>User</strong> Manual<br />
You can zoom in or out of the preview image by clicking<br />
the “+”, or “-” buttons below the preview image.<br />
You can also resize the window as well by dragging<br />
the bottom right corner in and out.<br />
The “Fit” button will fit the entire image into the preview<br />
window.<br />
The “100%” button will zoom to 100% view.<br />
If zoomed below 100% the preview image will be internally<br />
resized in order to speed up preview updating.<br />
<strong>Star</strong> <strong>Effects</strong> presets offer a convenient 1-click<br />
workflow that is quick and simple.<br />
The “Ctrl +” and “Ctrl –” keys zoom in and out of the<br />
image, just like in Photoshop.<br />
You can use the arrow keys to adjust the value of the<br />
slider that is currently selected.<br />
A complete list of the shortcut keys can be found in<br />
the Shortcut Keys section later in this manual.<br />
Photoshop and other host software support many Image<br />
Modes, such as Grayscale, RGB, LAB, CMYK, etc. Images<br />
can also be 8, 16, or 32 bits per channel. <strong>Topaz</strong> <strong>Star</strong> <strong>Effects</strong><br />
supports both 8 bits per channel and 16 bits per channel.<br />
<strong>Star</strong> <strong>Effects</strong> supports RGB mode only. To work on blackand-white<br />
images, first convert them to RGB mode.<br />
Work Area<br />
20
<strong>Topaz</strong> <strong>Star</strong> <strong>Effects</strong><br />
<strong>User</strong> Manual<br />
Presets<br />
Presets are a great way to speed up and<br />
simplify the whole process of using <strong>Topaz</strong> <strong>Star</strong><br />
<strong>Effects</strong>. Presets are set previews with<br />
previously defined settings that you can recall and<br />
reapply at any time.<br />
We’ve included some default effects and presets for<br />
you and, although they won’t work for every single<br />
photograph, they serve as excellent starting points<br />
for customized tweaking.<br />
Applying Presets<br />
Applying a default preset is easy and intuitive. Simply<br />
clicking on a preset will change all the settings in <strong>Topaz</strong><br />
<strong>Star</strong> <strong>Effects</strong> to match those in the selected preset.<br />
To get the exact results you want, you may still want<br />
to go through the tabs and tweak the parameters.<br />
Adding Presets<br />
Sometimes it’s convenient to be able to define presets<br />
and save your settings for later use. To do this,<br />
first adjust the <strong>Topaz</strong> <strong>Star</strong> <strong>Effects</strong> parameters until<br />
you’re satisfied with the result. Then, click on “Save”.<br />
Remember that you can easily expand or collapse the presets<br />
panel by clicking on the small white arrow on the edge of the<br />
panel or by grabbing the panel edge and dragging it in or out.<br />
2<br />
1<br />
3<br />
Work Area<br />
1. Presets Preview<br />
The removable preview<br />
window displays<br />
preset previews. Click<br />
Hide / Show to expand or<br />
collapse the preset preview<br />
window at anytime<br />
during your workflow.<br />
2. Presets List<br />
Lists all of the saved presets<br />
available for use.<br />
3. Preset Options<br />
The preset options allow<br />
you to save your<br />
presets, delete presets<br />
(default presents cannot<br />
be deleted), import new<br />
presets and export your<br />
saved presets to share<br />
with your friends.<br />
21
<strong>Topaz</strong> <strong>Star</strong> <strong>Effects</strong><br />
<strong>User</strong> Manual<br />
Next, enter a preset name, select the type of image<br />
that it is good for and then enter a description and<br />
click “OK”. You can also select a second image category<br />
type that the preset is good for.<br />
Note that if the name you’ve entered is the same as a<br />
preset you’ve already defined then you will be asked if<br />
overwrite the previous one.<br />
Your preset will be automatically saved as a new file<br />
with a “.tpp” extension in the <strong>Topaz</strong> <strong>Star</strong> <strong>Effects</strong> Presets<br />
menu and the preview is automatically generated.<br />
To apply it later, just click it like any other preset.<br />
Deleting Presets<br />
If you’d like to delete a preset, use the Delete option<br />
with your desired preset selected.<br />
Please Note: Default presents cannot be overriden or<br />
deleted. Once you delete a preset it or overwrite it, it<br />
cannot be retrieved.<br />
Saved presets are located in the <strong>Topaz</strong> <strong>Star</strong> <strong>Effects</strong> “Presets”<br />
folder:<br />
C:\Program Files\<strong>Topaz</strong> <strong>Labs</strong> \ <strong>Topaz</strong> <strong>Star</strong> <strong>Effects</strong> \ Presets unless<br />
you’ve opted to install <strong>Topaz</strong> <strong>Star</strong> <strong>Effects</strong> into a different directory.<br />
Mac users have this folder at: HD / Library / ApplicationSupport /<br />
<strong>Topaz</strong><strong>Labs</strong> / <strong>Star</strong> <strong>Effects</strong> / Presets.<br />
Work Area<br />
22
<strong>Topaz</strong> <strong>Star</strong> <strong>Effects</strong><br />
<strong>User</strong> Manual<br />
Importing Presets<br />
To import a preset file, click the “Import” button.<br />
This will open up a “Browse” box to import a saved<br />
preset from your computer into <strong>Topaz</strong> <strong>Star</strong> <strong>Effects</strong>.<br />
This is useful if you have downloaded a preset file<br />
that you’d like to use.<br />
Sharing Presets<br />
Feel free to share your saved presets by emailing<br />
them to your friends and having them put it into their<br />
<strong>Topaz</strong> <strong>Star</strong> <strong>Effects</strong> Presets folder.<br />
Exporting Presets<br />
To export the preset file to a certain location, click<br />
“Export”.<br />
Name your preset and save it to your desktop or<br />
other specified location that you have reserved for<br />
saved presets.<br />
You can then share this preset file with others who<br />
may then import it.<br />
Visit the <strong>Topaz</strong> <strong>Labs</strong> Blog which features the latest<br />
Photography, software and design information including<br />
tutorials, videos, and thoughts about both <strong>Topaz</strong> and<br />
non-<strong>Topaz</strong> topics.<br />
Work Area<br />
23
<strong>Topaz</strong> <strong>Star</strong> <strong>Effects</strong><br />
<strong>User</strong> Manual<br />
Tools<br />
You will use the various tools in the tool panel during<br />
your workflow to make your image adjustments.<br />
1. Preview Navigator - Displays the region of the<br />
preview image you are currently focused on.<br />
2. Zoom Buttons - Use the zoom buttons to zoom in<br />
and out of your image. Or you can also set your image<br />
to fit the preview window or to view it at 100%.<br />
3. Undo and Redo buttons - move back and forward<br />
through previous adjustments.<br />
4. Snap and Recall buttons. Save up to 99 snapshot<br />
settings for comparison.<br />
5. Sliders and Parameters - Controls the editing process<br />
using sliders to adjust the various effects.<br />
6. Reset All. Reset all of the sliders values back to the<br />
default value.<br />
7. Apply Button. Allows you to stack multiple star<br />
effects during the same workflow.<br />
Have more questions about <strong>Topaz</strong><strong>Star</strong> <strong>Effects</strong> or<br />
any of the other <strong>Topaz</strong> software programs?<br />
Check out the new <strong>Topaz</strong> Knowledge Base online at:<br />
www.topazlabs.com/support/kb<br />
3<br />
6<br />
5<br />
1<br />
Work Area<br />
2<br />
4<br />
7<br />
24
<strong>Topaz</strong> <strong>Star</strong> <strong>Effects</strong><br />
<strong>User</strong> Manual<br />
Menu<br />
You can access <strong>Topaz</strong> <strong>Star</strong> <strong>Effects</strong>’ menu by clicking on<br />
the “Menu…” button at the bottom of the interface.<br />
Preferences<br />
Select this to enable or disable the program tool tips<br />
or the Auto-Update feature. You can also change your<br />
interface color scheme to a lighter/darker appearance.<br />
Check for Updates<br />
Checks for available <strong>Topaz</strong> <strong>Star</strong> <strong>Effects</strong> updates.<br />
Click the Show Details button to get find out what’s<br />
included in the update before you install.<br />
Enter Key<br />
Work Area<br />
25
<strong>Topaz</strong> <strong>Star</strong> <strong>Effects</strong><br />
<strong>User</strong> Manual<br />
Enter Key<br />
Select this to enter your trial or purchased license key.<br />
What’s This?<br />
Select this (or click F1) then click on a feature in the<br />
<strong>Star</strong> <strong>Effects</strong> interface to learn more about it.<br />
<strong>User</strong>s <strong>Guide</strong><br />
Select it to pull up this user guide.<br />
Tech Support<br />
Brings you to the <strong>Topaz</strong> <strong>Labs</strong> support page where<br />
you can request assistance from our support specialists,<br />
contact our customer service team, retrieve lost<br />
license keys, or browse through our Knowledge Base.<br />
Product Info<br />
Select this to go to the <strong>Topaz</strong> <strong>Star</strong> <strong>Effects</strong> web page to<br />
learn more about the <strong>Topaz</strong> <strong>Star</strong> <strong>Effects</strong> plug-in.<br />
Gallery<br />
Select this to open up your Internet browser and go<br />
to the <strong>Topaz</strong> <strong>Star</strong> <strong>Effects</strong> image gallery to see other<br />
user images enhanced with <strong>Topaz</strong> <strong>Star</strong> <strong>Effects</strong>.<br />
My<strong>Topaz</strong><br />
Brings you to the <strong>Topaz</strong> community where you can<br />
connect and interact with other <strong>Topaz</strong> users. Here<br />
you can also participate in discussions and contests,<br />
and share your favorite <strong>Topaz</strong> images.<br />
Tutorials<br />
Brings you to the <strong>Topaz</strong> <strong>Star</strong> <strong>Effects</strong> tutorials page<br />
where you can access a variety of helpful video and<br />
text tutorials. You can also submit tutorials that you<br />
created here as well.<br />
About<br />
Select this to see what version of B&W <strong>Effects</strong> you<br />
currently have.<br />
To connect with other <strong>Topaz</strong> users, participate in <strong>Topaz</strong><br />
contests and to see the latest tips, tricks and tutorials sign<br />
up for the new <strong>Topaz</strong> Forum online at:<br />
www.topazlabs.com/forum<br />
Work Area<br />
26
<strong>Topaz</strong> <strong>Star</strong> <strong>Effects</strong><br />
<strong>User</strong> Manual<br />
Presets<br />
<strong>Topaz</strong> <strong>Star</strong> <strong>Effects</strong> includes default presets to help you<br />
achieve quick and easy workflow.<br />
Need to reset your slider values?<br />
Simply double-click on the slider name above the slider<br />
control to instantly reset the slider value to 0.<br />
Settings & Parameters<br />
Before <strong>Topaz</strong><br />
After <strong>Topaz</strong><br />
27
<strong>Topaz</strong> <strong>Star</strong> <strong>Effects</strong><br />
<strong>User</strong> Manual<br />
<strong>Star</strong> Settings<br />
Allows you select the type of star effect that you want<br />
to apply, the mode you want to view/process in and also<br />
features a selective brush for adding/removing stars.<br />
Mode<br />
This parameter offers two viewing/editing modes<br />
(located in the <strong>Star</strong> Settings tab) – combined and<br />
<strong>Star</strong>s only.<br />
Settings & Parameters<br />
Combined<br />
Allows you to see your base image along with the<br />
applied star effects.<br />
<strong>Star</strong>s Only<br />
Allows you to view only your added star effects (on a<br />
black background) without your base image.<br />
<strong>Star</strong> Type<br />
Allows you to choose the type of star effect that you<br />
want to apply – choose from options like traditional,<br />
starburst, cross star, hollywood star and more!<br />
Add/Remove <strong>Star</strong>s<br />
Offers selective control over the affected light sources<br />
via the <strong>Star</strong> Selection Brush. This brush will allow you<br />
to individually select which light sources in your image<br />
to include/exclude.<br />
Add<br />
Select the Add option and then click on (or brush<br />
over) the light sources in your image that you want<br />
to add the effect to.<br />
Remove<br />
Select the Remove option and then click on (or brush<br />
over) the area in your image that you want to remove<br />
the added effects from.<br />
Brush Size<br />
Allows you set the size of your selective star brush.<br />
28
<strong>Topaz</strong> <strong>Star</strong> <strong>Effects</strong><br />
<strong>User</strong> Manual<br />
Main Adjustments<br />
Controls the main characteristics of the star effects.<br />
Threshold<br />
This sets the threshold for light sources to be considered.<br />
A higher value recognizes brighter light sources<br />
only, resulting in less star effects, while a lower value<br />
will include more light sources, resulting in more star<br />
effects.<br />
Luminance<br />
Increasing this parameter increases the overall brightness<br />
and transparency of the added star effects.<br />
Settings & Parameters<br />
Size<br />
Controls the length of the star points. A higher value<br />
will result in a larger star effect, while a lower value will<br />
result in a smaller star effect.<br />
Angle<br />
Adjust the angle of the stars. You can adjust the angle<br />
from 0 to 180 degrees.<br />
Number of Points<br />
Sets the number of points on the star. You can adjust<br />
the points from 1 to 32.<br />
Spread<br />
Controls the spread of the effects. Increasing the<br />
spread will result in softer, larger stars.<br />
29
<strong>Topaz</strong> <strong>Star</strong> <strong>Effects</strong><br />
<strong>User</strong> Manual<br />
Color Adjustments<br />
Controls the color characteristics of the star effects.<br />
Saturation<br />
Increases or decreases the saturation of the star effects.<br />
A setting of 0 will result in a pure white, desaturated<br />
effect, while a setting of 1 will saturate the effect<br />
with the light source color.<br />
Temperature<br />
Controls the overall temperature of the star effects -<br />
from cool (-1) to warm (1).<br />
Rainbow Strength<br />
Controls the appearance of rainbow effects in your<br />
stars. A higher value will produce a strong rainbow<br />
effect. A value of 0 disables the effect.<br />
Rainbow Frequency<br />
Controls the frequency of the rainbow pattern in the<br />
star effects. A higher value will produce more rainbows.<br />
Settings & Parameters<br />
Additional <strong>Effects</strong><br />
Allows you to add some neat finishing effects to your<br />
star effects for a customized look and feel.<br />
Secondary Points<br />
Controls the characteristics of the secondary spike. A<br />
higher value produces more spikes, while a lower value<br />
produces less spikes. A value of 0 disables this feature.<br />
Glow<br />
Creates a soft glow from the center point of the star<br />
effect. A higher value increases the radius of the glow,<br />
while a lower value lowers the radius of the glow<br />
effect.<br />
Ring Flare<br />
Creates and controls a circular flare around the spikes/<br />
points of the star effect. A higher value increases the<br />
strength of the flare. A lower value decreases the<br />
strength. A value of 0 disables this effect.<br />
30
<strong>Topaz</strong> <strong>Star</strong> <strong>Effects</strong><br />
<strong>User</strong> Manual<br />
Sample Project #1<br />
In this project, we will walk you through an example<br />
workflow to help you get acquainted with the tools<br />
and setup of the new <strong>Topaz</strong> <strong>Star</strong> <strong>Effects</strong>. For this example<br />
we will start our work in the presets panel and<br />
then make some manual adjustments to customize<br />
the effect. Our goal here is to enhance the light post<br />
to instantly draw the eye to that light source.<br />
Before <strong>Topaz</strong> <strong>Star</strong> <strong>Effects</strong><br />
After <strong>Topaz</strong> <strong>Star</strong> <strong>Effects</strong><br />
1. Open your image in Photoshop (or another compatible<br />
host program) and go to Filters -> <strong>Topaz</strong> <strong>Labs</strong><br />
-> <strong>Star</strong> <strong>Effects</strong>.<br />
2. Once your image loads, use the zoom tools to<br />
zoom in on a specific part of your image. Then you<br />
can click on the preview and drag it around until you<br />
find an area that you like.<br />
When fist getting into<strong>Topaz</strong> <strong>Star</strong> <strong>Effects</strong> you may want<br />
to explore all of the presets before jumping into the<br />
workflow. This will give you a better idea of the various<br />
lighting and star effects that you can create.<br />
3. Go to your Presets panel on the left side of the<br />
screen and select the Sun Flare I preset.<br />
This will automatically detect the available light<br />
sources in your image and apply the effect to those<br />
light sources.<br />
Don’t worry if too many or too little light sources<br />
are affected. We will be able to adjust this using the<br />
Threshold slider and also the selective star brush tool.<br />
We are going to work on two aspects of this image.<br />
The first is the light cast on the wall behind the light<br />
post and then the second will be the actual light post<br />
itself.<br />
Workflow<br />
31
<strong>Topaz</strong> <strong>Star</strong> <strong>Effects</strong><br />
<strong>User</strong> Manual<br />
Workflow<br />
32
<strong>Topaz</strong> <strong>Star</strong> <strong>Effects</strong><br />
<strong>User</strong> Manual<br />
4. Go to the <strong>Star</strong> Setting tab and select the Remove<br />
brush option and brush over the light post to remove<br />
the Sun Flare I effect.<br />
Once the effect is removed from the light post, we can<br />
focus on enhancing the light characteristics of the light<br />
reflection on the back wall.<br />
5. Go to the Main Adjustments tab and we are going<br />
to slightly lower the Luminance and Spread sliders,<br />
which is going to lower the intensity of the added<br />
effect to give it more of a natural look.<br />
6. Skip the Color Adjustments tab and go directly to<br />
the Additional <strong>Effects</strong> tab. Here we are going to also<br />
slightly lower the Glow and Flare sliders.<br />
Be sure to use the Original and Preview buttons to see<br />
your before and after for comparison. You can also<br />
use the spacebar shortcut key.<br />
Once you are happy with your adjustments you can<br />
either click OK to process your image or you can click<br />
Apply to add more effects.<br />
7. For this example we also want to enhance the<br />
actual light post. So we will click the Apply button to<br />
apply and save the changes we’ve made so far.<br />
Next we will focus on enhancing the lighting in the<br />
light post.<br />
8. Select the <strong>Star</strong> Flare I preset again.<br />
9. Go back to the <strong>Star</strong> Settings tab and select the Remove<br />
brush option. This time we are going to brush<br />
over the back wall to remove the effect. This will<br />
allow us to enhance only the light in the light post.<br />
Tip: If you want to reposition the selected light source<br />
in your image, then you can use the Remove brush to<br />
erase it and then switch to the Add brush to select a<br />
new light source or reposition the center point of a<br />
selected light source.<br />
Workflow<br />
33
<strong>Topaz</strong> <strong>Star</strong> <strong>Effects</strong><br />
<strong>User</strong> Manual<br />
To see only the added star effect(s), go to your <strong>Star</strong><br />
Settings tab and select the <strong>Star</strong>s Only Mode. This<br />
will display on the the created effect on a black background.<br />
Tip: Don’t forget to switch back to the combined mode.<br />
You also have the option of processing only the star<br />
effects without your base image. Just stay in the <strong>Star</strong>s<br />
only mode and then click the OK button.<br />
10. Go to the Stay Type option in the <strong>Star</strong> Settings tab<br />
and change this to Hyper <strong>Star</strong>.<br />
Workflow<br />
34
<strong>Topaz</strong> <strong>Star</strong> <strong>Effects</strong><br />
<strong>User</strong> Manual<br />
11. In the Main Adjustments tab we are going to lower<br />
the intensity of the effect by decreasing the value of<br />
the luminance and spread sliders.<br />
12. We are going to subtly enhance the color of the<br />
effect using the sliders in the Color Adjustments tab.<br />
Slightly increase the Temperature slider (for a warmer<br />
effect) and also the Rainbow Strength and Rainbow<br />
Frequency sliders.<br />
13. Finally we will go to the Additional <strong>Effects</strong> tab and<br />
increase the Secondary Points slider, while slightly lowering<br />
both the Flare and Glow sliders.<br />
14. Once you are happy with your adjustments, click the<br />
OK button to process your changes and save your image<br />
back to Photoshop.<br />
Workflow<br />
35
<strong>Topaz</strong> <strong>Star</strong> <strong>Effects</strong><br />
<strong>User</strong> Manual<br />
Before <strong>Topaz</strong> <strong>Star</strong> <strong>Effects</strong><br />
Workflow<br />
36
<strong>Topaz</strong> <strong>Star</strong> <strong>Effects</strong><br />
<strong>User</strong> Manual<br />
After <strong>Topaz</strong> <strong>Star</strong> <strong>Effects</strong><br />
Workflow<br />
37
<strong>Topaz</strong> <strong>Star</strong> <strong>Effects</strong><br />
<strong>User</strong> Manual<br />
Sample Project #2<br />
In this project, we will walk you through another quick<br />
example workflow to show you how to add a subtle<br />
star/glow enhancement to night photography.<br />
Before <strong>Topaz</strong> <strong>Star</strong> <strong>Effects</strong><br />
After <strong>Topaz</strong> <strong>Star</strong> <strong>Effects</strong><br />
1. Open your image in Photoshop (or another compatible<br />
host program) and go to Filters -> <strong>Topaz</strong> <strong>Labs</strong><br />
-> <strong>Star</strong> <strong>Effects</strong>.<br />
2. Once your image loads, use the zoom tools to<br />
zoom in on a specific part of your image. Then you<br />
can click on the preview and drag it around until you<br />
find an area that you like.<br />
3. Go to your Presets panel on the left side of the<br />
screen and select <strong>Star</strong>ry Night I preset.<br />
4. Go to the <strong>Star</strong> Settings tab and use the Remove<br />
brush to remove the effects from light reflection see<br />
in the water.<br />
When fist getting into<strong>Topaz</strong> <strong>Star</strong> <strong>Effects</strong> you may want<br />
to explore all of the effects and their associated presets<br />
before jumping into the workflow. This will give you a<br />
better idea of the various effects that you can create.<br />
Workflow<br />
38
<strong>Topaz</strong> <strong>Star</strong> <strong>Effects</strong><br />
<strong>User</strong> Manual<br />
5. We want to select some of the additional light<br />
posts in the far distance, so we will switch to the Add<br />
brush and then click on the center of the light posts.<br />
6. While still in the <strong>Star</strong> Settings tab, go to the <strong>Star</strong><br />
type drop down box and select the Burst <strong>Star</strong> Type.<br />
Workflow<br />
39
<strong>Topaz</strong> <strong>Star</strong> <strong>Effects</strong><br />
<strong>User</strong> Manual<br />
7. Next, we will go to the Main Adjustments tab and<br />
increase the Threshold slider. This will cause allow<br />
less light sources to be affected by the preset that we<br />
selected.<br />
8. We will also slightly decrease the Luminance, Size<br />
and Number of Points sliders which will reduce the<br />
strength of the added star effect.<br />
Workflow<br />
40
<strong>Topaz</strong> <strong>Star</strong> <strong>Effects</strong><br />
<strong>User</strong> Manual<br />
We won’t be making any adjustments in the Color Adjustments<br />
tab, however you are welcome to if you’d<br />
like.<br />
9. Click on the Additional <strong>Effects</strong> tab to open it and<br />
reveal the adjustment sliders. Here we are going to<br />
slightly increase both the Glow and Right Flare to help<br />
create a soft and diffused look.<br />
Be sure to use the Original and Preview buttons to see<br />
your before and after for comparison. You can also<br />
use the spacebar shortcut key.<br />
10. Once you are happy with your adjustments, click<br />
the OK button to process your changes and save your<br />
image back to Photoshop.<br />
Workflow<br />
41
<strong>Topaz</strong> <strong>Star</strong> <strong>Effects</strong><br />
<strong>User</strong> Manual<br />
Before <strong>Topaz</strong> <strong>Star</strong> <strong>Effects</strong><br />
Workflow<br />
42
<strong>Topaz</strong> <strong>Star</strong> <strong>Effects</strong><br />
<strong>User</strong> Manual<br />
After <strong>Topaz</strong> <strong>Star</strong> <strong>Effects</strong><br />
Workflow<br />
43
<strong>Topaz</strong> <strong>Star</strong> <strong>Effects</strong><br />
<strong>User</strong> Manual<br />
Before <strong>Topaz</strong> <strong>Star</strong> <strong>Effects</strong><br />
Workflow<br />
44
<strong>Topaz</strong> <strong>Star</strong> <strong>Effects</strong><br />
<strong>User</strong> Manual<br />
After <strong>Topaz</strong> <strong>Star</strong> <strong>Effects</strong><br />
Workflow<br />
45
<strong>Topaz</strong> <strong>Star</strong> <strong>Effects</strong><br />
<strong>User</strong> Manual<br />
Achromatic - Without color.<br />
Adjustment Layer – A layer that allows you to adjust the<br />
look of an original image with out making it permanent.<br />
With adjustment layers you can make various changes to<br />
a layer without damaging it and go back and readjust it at<br />
anytime.<br />
Algorithm - Any bit of code or programming that de-<br />
fines a process.<br />
Brightness - The degree to which a color sample appears<br />
to reflect light.<br />
Chroma - Purity or intensity of color. The difference<br />
of a color against the brightness of another color that<br />
appears white under similar viewing conditions.<br />
Color - The human perceptual response to different<br />
wavelengths of light impinging on the photo receptors<br />
in the retina.<br />
Color Cast - Tint or light hint of colour evenly covering<br />
an image - typcially an unwanted side effect. It is<br />
usually most visible in light or medium density neutral<br />
tones.<br />
Color Profile - defines the range of colors that can appear<br />
in a digital photo.<br />
Contrast - The difference between light and dark<br />
values.<br />
Download - The process of transmitting or transferring<br />
data from one device to another.<br />
Export - Outbound data transfer in a format that can<br />
be used by other programs.<br />
Filters - Transparent lens attachments used to change<br />
the color, or other characteristics, of an image.<br />
Hightlights - The bright to white range of tones in an<br />
image.<br />
Hue - One of the main properties of a color, described<br />
with names such as “red”, “yellow”, etc.<br />
Import - Inbound data transfer into a file or document.<br />
Parameter - A numerical or other measurable factor<br />
forming one of a set that defines a system or sets the<br />
conditions of its operation.<br />
Photo-editing or Imaging software – Programs in<br />
which you can alter your photos and / or create digital<br />
images. Depending on the software, you can improve<br />
exposure, color and other attributes of your picture,<br />
paint on it, add type, apply special effects, remove<br />
noise, resize it, combine it with other pictures, prepare<br />
it for e-mail or posting on the web, output it to a<br />
printer, or do any number of other manipulations or<br />
edits.<br />
Plug-in - A computing feature with the ability to be<br />
added to a system to give extra features or functions.<br />
Preset - A pre-defined combination of parameters and<br />
settings that is saved into a folder within <strong>Topaz</strong> Lens<br />
<strong>Effects</strong>. <strong>Topaz</strong> provides default presets. A preview of<br />
each preset can be seen in the preset preview win-<br />
Glossary<br />
46
<strong>Topaz</strong> <strong>Star</strong> <strong>Effects</strong><br />
<strong>User</strong> Manual<br />
dow located at the top left hand side of the interface<br />
above the preset list.<br />
Preview- Shows the processed preview of the image.<br />
RAW image - An image file format that contains un-<br />
touched, “raw” pixel information straight from the<br />
digital camera’s sensor. It has yet to translate the information<br />
in each pixel into the full color information,<br />
so this format offers more control over how the final<br />
JPEG or TIFF image is generated.<br />
RGB - Red, Green, Blue. The color model that is used<br />
in digital cameras and by computer monitors.<br />
Saturation - The difference of intensity within a specific<br />
hue.<br />
Glossary<br />
47
<strong>Topaz</strong> <strong>Star</strong> <strong>Effects</strong><br />
<strong>User</strong> Manual<br />
“I need a <strong>Topaz</strong> B&W <strong>Effects</strong> trial key.”<br />
Visit http://www.topazlabs.com/downloads for a trial<br />
key. Please check your Spam folder because your<br />
Spam filter sometimes filters out the automated email.<br />
If you need more time to evaluate, please contact us at:<br />
www.topazlabs.com/support for an extended trial key.<br />
“I can’t find <strong>Topaz</strong> <strong>Star</strong> <strong>Effects</strong> in the Photoshop<br />
Filters menu.”<br />
If Photoshop was open when you installed then you<br />
will need to restart Photoshop and then you should be<br />
able to access it. If it is still not listed in your Filter menu<br />
then do the following:<br />
For Windows:<br />
Please go to your preferences menu in Photoshop and<br />
select Plug-ins. Check / enable the Additional Plug-ins<br />
Folder option then click Choose. After that, please<br />
navigate to: C: \ Program Files and select the <strong>Topaz</strong><br />
<strong>Labs</strong> folder. Then click Choose (or it may say Save /<br />
OK) to save this back to Photoshop. Back in Photoshop<br />
click OK to save your changes, then restart Photoshop.<br />
Once Photoshop opens, go to your Filter menu and you<br />
should be able to access <strong>Topaz</strong>.<br />
For Mac:<br />
Please go to your preferences menu in Photoshop and<br />
select Plug-ins. Check / enable the Additional Plug-ins<br />
Folder option then click Choose. After that, please<br />
navigate to: Macintosh HD -> Library -> Application Support<br />
and select the <strong>Topaz</strong> <strong>Labs</strong> folder. Then click save /<br />
Frequently Asked Questions<br />
OK to save this back to Photoshop. Back in Photoshop<br />
click OK to save your changes, then restart Photoshop.<br />
Once Photoshop opens, go to your Filter menu and you<br />
should be able to access <strong>Topaz</strong>.<br />
“Do you have any other <strong>Star</strong> <strong>Effects</strong> tutorials?”<br />
Yes, please see pages 31 and 38 of this <strong>Topaz</strong> <strong>Star</strong><br />
<strong>Effects</strong> user guide.<br />
You can also visit: http://www.topazlabs.com/tutorials/<br />
stareffects or sign up for a free webinar at: http://www.<br />
topazlabs.com/webinars<br />
“I don’t have Photoshop, will <strong>Star</strong> <strong>Effects</strong> work with<br />
my Elements, Aperture, Lightroom, iPhoto Paint Shop<br />
Pro, Photo Impact or Irfanview?”<br />
Yes, you can use <strong>Topaz</strong> <strong>Star</strong> <strong>Effects</strong> with any of the<br />
above host programs. However, to use <strong>Star</strong> <strong>Effects</strong> in<br />
Aperture, Lightroom or iPhoto, you will need to download<br />
the free <strong>Topaz</strong> Fusion Express plug-in. For more<br />
information please visit: www.topazlabs.com/fusion<br />
“I already have Fusion Express installed for use with<br />
my other <strong>Topaz</strong> programs but <strong>Star</strong> <strong>Effects</strong> does not<br />
show up in the Fusion Express menu?”<br />
<strong>Star</strong> <strong>Effects</strong> requires the latest version of Fusion Express.<br />
You will need to download it online at: www.<br />
topazlabs.com/downloads and then install it. After that<br />
you will be able to access and use <strong>Star</strong> <strong>Effects</strong>.<br />
48
<strong>Topaz</strong> <strong>Star</strong> <strong>Effects</strong><br />
<strong>User</strong> Manual<br />
“What are the limitations of the trial version of your<br />
software?”<br />
The only limit on the trial versions of the <strong>Topaz</strong> plug-ins<br />
is time. The free trial versions are designed to enable<br />
you to experience the full functionality of our plug-ins<br />
for a 30-day trial period. After the trial period is up, you<br />
will only be able to use the <strong>Topaz</strong> software by purchasing<br />
it. You will then receive a license key to activate the<br />
plug-in, and the trial version will automatically become<br />
the full version with no time limitations.<br />
“If I use the 30-day trial version will I need to uninstall<br />
the trial version before I upgrade to a full version?”<br />
No, the <strong>Topaz</strong> trial software is designed to be unlocked<br />
to become the full version simply by entering a license<br />
key. The full license key will be e-mailed to you immediately<br />
after you purchase the software.<br />
“Where do I enter my key?”<br />
To enter your key please open an image in Photoshop.<br />
Go to Filter -> <strong>Topaz</strong> <strong>Labs</strong> -> <strong>Star</strong> <strong>Effects</strong>. Once the<br />
program opens go to Menu -> Enter Key. Then copy &<br />
paste or type in your license key and then select OK.<br />
“I had <strong>Topaz</strong> <strong>Star</strong> <strong>Effects</strong> as a trial, then I purchased.<br />
How do I enter my new license key?”<br />
You can enter your new license key by opening up an<br />
image in Photoshop and go to Filter -> <strong>Topaz</strong> <strong>Labs</strong> -><br />
<strong>Star</strong> <strong>Effects</strong> -> Menu -> Enter Key. Please remove the<br />
trial key and enter your new purchased license key,<br />
then select OK and you are all set.<br />
Frequently Asked Questions<br />
“My <strong>Topaz</strong> <strong>Star</strong> <strong>Effects</strong> key doesn’t work!”<br />
There are a couple of reasons why <strong>Topaz</strong> B&W <strong>Effects</strong><br />
might think your key is invalid.<br />
First, make sure that your key is in the proper format.<br />
It’ll be in the format “xxxxxx-xxxxxx-xxxxxx-xxxxxxxxxxxx”<br />
and will be all numbers in 30 digits in five<br />
groups of six (no letters).<br />
Second, make sure that as you’re entering the key<br />
there is nothing in the space beforehand. This means<br />
clicking, pressing Ctrl-A, and hitting delete to make sure<br />
that absolutely nothing is in that field before you paste<br />
in the key.<br />
If it doesn’t work when you copy and paste, try typing<br />
it out, and vice versa.<br />
My <strong>Topaz</strong> filters are grayed out in the filter menu.<br />
Please make sure that you are using a 8-bit or 16-bit<br />
image that is in RGB color mode. Also, if your project<br />
includes adjustment layers please make sure that you<br />
are not on an adjustment layer. You will need to select<br />
the image layer. This will allow you to access your <strong>Topaz</strong><br />
programs.<br />
I have a question not listed here.<br />
Please visit our knowledge base online at:<br />
http://www.topazlabs.com/support/kb/<br />
If you are not able to find the answer there then contact<br />
our support specialists online at: www.topazlabs.<br />
49
<strong>Topaz</strong> <strong>Star</strong> <strong>Effects</strong><br />
<strong>User</strong> Manual<br />
Connect with <strong>Topaz</strong><br />
Follow us on Twitter for notifications of<br />
recent news and easily get in touch with us<br />
whenever you feel like it!<br />
Participate in the entirely user-led <strong>Topaz</strong><br />
Flickr group for a helpful and highly active<br />
community for <strong>Topaz</strong> Photoshop plug-ins!<br />
Check out our new Forum and our blog for<br />
tutorials, tips and updates from <strong>Topaz</strong> <strong>Labs</strong>!<br />
Find us on our Facebook page and network<br />
with other <strong>Topaz</strong> users!<br />
Subscribe to our YouTube channel to keep<br />
up with any newly released product video<br />
tutorials!<br />
50
<strong>Topaz</strong> <strong>Star</strong> <strong>Effects</strong><br />
<strong>User</strong> Manual<br />
Contact Information<br />
<strong>Topaz</strong> <strong>Labs</strong> LLC<br />
4100 Spring Valley Road<br />
Suite 103<br />
Dallas, TX 75244<br />
Technical Support<br />
Visit: http://topazlabs.com/support/<br />
Email: help@topazlabs.com<br />
For more information<br />
info@topazlabs.com<br />
<strong>Topaz</strong> <strong>Labs</strong> LLC, a privately owned company in Dallas, Texas, focuses on developing advanced video and image enhancement<br />
technology. With today’s widespread use of digital still cameras, digital video cameras, and HDTV, the need for highquality<br />
digital images and videos has greatly increased. <strong>Topaz</strong> <strong>Labs</strong>’ mission is to bring practical state-of-the-art image and<br />
video enhancement technology to both professionals and consumers.<br />
Copyright © 2010 <strong>Topaz</strong> <strong>Labs</strong>, LLC. All rights reserved. http://www.topazlabs.com<br />
51
<strong>Topaz</strong> <strong>Star</strong> <strong>Effects</strong><br />
<strong>User</strong> Manual<br />
Be sure to check out the complete line up of <strong>Topaz</strong> products.<br />
<strong>Topaz</strong> Photoshop Plug-ins for digital photography.<br />
<strong>Topaz</strong> Adjust creates<br />
vibrant images that pop.<br />
Includes tools for creative<br />
exposure, detail, color and<br />
pseudo HDR.<br />
<strong>Topaz</strong> Lens <strong>Effects</strong> allows<br />
you to create bokeh, add<br />
vignettes and simulate a<br />
variety of filter, lens and<br />
specialty camera effects.<br />
<strong>Topaz</strong> InFocus offers tools<br />
for advanced sharpening<br />
and minor blur reduction<br />
to refine and improve<br />
overall image quality.<br />
<strong>Topaz</strong> DeJPEG eliminates jpeg<br />
artifacts and restores optimal JPEG<br />
image integrity, helping create<br />
high-quality jpeg images.<br />
<strong>Topaz</strong> B&W <strong>Effects</strong> is the<br />
most versatile black and<br />
white image converter.<br />
Designed specifically for<br />
creating and enhancing<br />
high-impact B&W images.<br />
<strong>Topaz</strong> ReMask is the<br />
quickest, easiest and best<br />
masking tool for complex<br />
masking and removing<br />
unwanted image backgrounds.<br />
<strong>Topaz</strong> Simplify is a digital<br />
art tool that makes it easy<br />
to transform digital images<br />
into works of art in just a<br />
few clicks.<br />
Bring the power of <strong>Topaz</strong> to your<br />
Aperture, iPhoto and<br />
Lightoom workflow with the new<br />
Fusion Express plug-in.<br />
Go to http://www.topazlabs.com/downloads to get your 30-day free trial!<br />
<strong>Topaz</strong> DeNoise offers highquality<br />
noise reduction<br />
tools that eliminate digital<br />
image noise and recover<br />
lost image detail.<br />
<strong>Topaz</strong> Detail features multilevel<br />
tools for control over<br />
detail enhancement and<br />
sharpening without edge<br />
artifacts or halos.<br />
<strong>Topaz</strong> Clean features<br />
unique smoothing, edge<br />
and texture control for<br />
enhancing portraits or stylizing<br />
images.<br />
52