the JB3 pin out install - Burger Motorsports
the JB3 pin out install - Burger Motorsports
the JB3 pin out install - Burger Motorsports

Create successful ePaper yourself
Turn your PDF publications into a flip-book with our unique Google optimized e-Paper software.
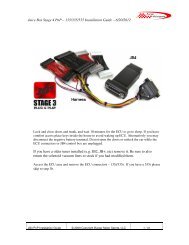
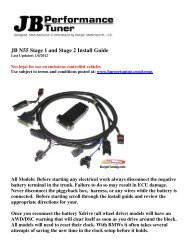
Juice Box Stage 3 Professional (Pin <strong>out</strong>) Installation Guide – 5/13/09<br />
<strong>JB3</strong> professional/<strong>pin</strong>-<strong>out</strong> is intended for experienced enthusiasts only. If this is your first<br />
<strong>install</strong> please have someone on hand who has performed an <strong>install</strong> before. You can also<br />
review <strong>the</strong> <strong>install</strong> video on our website ahead of time to prepare.<br />
The directions in this guide supersede <strong>the</strong> <strong>install</strong> video. Use <strong>the</strong> video for reference but follow<br />
this guide.<br />
1) Lock and close doors and trunk, and wait 10 minutes for <strong>the</strong> ECU to go to sleep. If you<br />
have comfort access place keys inside <strong>the</strong> house to avoid waking up ECU. Alternatively you<br />
may disconnect <strong>the</strong> negative battery terminal. Do not open <strong>the</strong> doors or unlock <strong>the</strong> car while<br />
<strong>the</strong> ECU connectors or <strong>JB3</strong> control box are unplugged.<br />
2) If you have a tuner <strong>install</strong>ed (e.g. JB2) remove it. Be sure to also return <strong>the</strong> solenoid<br />
vacuum lines to stock. If equipped with a downpipe fix or sim ensure <strong>the</strong> black wire<br />
(ground) is in <strong>the</strong> #23 spot on <strong>the</strong> small black subconnector and not shared with <strong>the</strong> <strong>JB3</strong>.<br />
3) Access <strong>the</strong> ECU area using <strong>the</strong> Stage 1 / Stage 2 <strong>install</strong> guide and remove both <strong>the</strong> left and<br />
right ECU connectors. Slide each of <strong>the</strong> subconnectors <strong>out</strong> one by one as you <strong>install</strong> <strong>the</strong> <strong>JB3</strong><br />
harness wires as indicated below. The small ECU connector requires you to remove <strong>the</strong> slider<br />
per <strong>the</strong> Stage 1 / Stage 2 <strong>install</strong> guide to access <strong>the</strong> small black and grey subconnectors.<br />
<strong>JB3</strong> Pin Out Installation Guide<br />
© 2009 Copyright <strong>Burger</strong> Motor Sports, LLC<br />
1 / 9