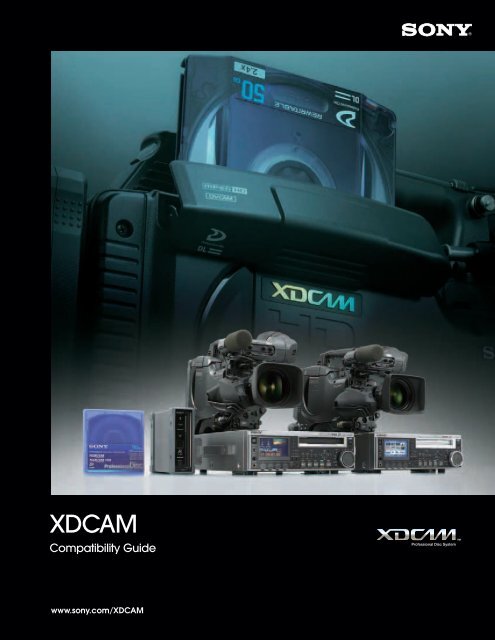
XDCAM Compatibility Guide - Sony
XDCAM Compatibility Guide - Sony
XDCAM Compatibility Guide - Sony

Create successful ePaper yourself
Turn your PDF publications into a flip-book with our unique Google optimized e-Paper software.
<strong>XDCAM</strong><br />
<strong>Compatibility</strong> <strong>Guide</strong><br />
www.sony.com/<strong>XDCAM</strong>
<strong>XDCAM</strong> Workflow <strong>Guide</strong><br />
Final Cut Studio 2<br />
Final Cut Studio 2 is the new standard for HD post-production, with<br />
integrated, real-time tools designed to help you deliver beautiful HD<br />
programming on impossibly tight deadlines. Start with Final Cut Pro for<br />
editing of virtually any format – DV, SD, HDV, DVCPRO HD, <strong>XDCAM</strong> HD, fully<br />
uncompressed HD as well as Apple’s new ProRes 422 production format.<br />
Add 3D motion graphics in real time with Motion, the fastest way to<br />
animate and express your creative vision. Sculpt, mix and repair audio<br />
using Soundtrack Pro, the only audio application designed from the<br />
ground up for HD production work. Finish with Color, the newest addition<br />
to the Studio, that allows professional color grading that can elevate the<br />
quality of any production. Finally, deliver your finished production in the<br />
format of your choice using Compressor.<br />
Final Cut Studio 2<br />
1. Connecting to <strong>XDCAM</strong><br />
You can choose two types of <strong>XDCAM</strong> Professional Disc device to use with Final Cut Pro:<br />
<strong>XDCAM</strong> decks and camcorders, connected through i.LINK to your Mac with File Access Mode (FAM) activated.<br />
PDW-U1 stand-alone <strong>XDCAM</strong> drive, connected through USB 2.0 to your Mac.<br />
In both cases, when a Professional Disc is inserted into the drive, it will show up in the Finder, just like any other removable storage.<br />
2. Import to Final Cut Pro<br />
Supported File Formats<br />
MPEG IMX (50/40/30 Mb/s)<br />
DVCAM<br />
MPEG HD (35/25/18 Mb/s),<br />
50/60i, 25p, 30p, 23.98p<br />
Select File>Import><strong>Sony</strong> <strong>XDCAM</strong>... to launch the import window of the <strong>XDCAM</strong> Transfer application, which will be connected to your Final Cut<br />
Pro project. Metadata will be automatically transferred from the <strong>XDCAM</strong> disc and thumbnails will be generated for each clip; this information is<br />
cached on your Mac enabling the disc contents to be viewed while the disc itself is not connected. Optionally, the proxy version of each clip<br />
can also be cached on your Mac. The clip metadata includes information about A/V format, bit-rate, number of audio channels and so on.
<strong>XDCAM</strong> Workflow <strong>Guide</strong><br />
Key workflow features of the <strong>XDCAM</strong> Transfer application are:<br />
1. Frame-accurate preview and sub-clip creation using proxy video<br />
2. Preview of clips and <strong>XDCAM</strong> clip lists (sequences)<br />
3. Full support for <strong>XDCAM</strong> essence marks and Final Cut Pro clip markers<br />
4. Full metadata searching capability<br />
5. Direct preview of full-quality material from <strong>XDCAM</strong> disc (full-screen mode)<br />
6. Metadata logging and write back to <strong>XDCAM</strong> disc<br />
7. Generation of printable shot lists<br />
Once entire or sub-clips have been selected, a single click will<br />
transfer the material to the connected Final Cut Pro project.<br />
While the transfer takes place, you are able to resume editing<br />
within Final Cut Pro - the transferred clips will drop into the<br />
project bin in the background. Support for arbitrary <strong>XDCAM</strong><br />
filenames and title metadata means that the clips will<br />
appear in the project bin with easily-recognised names.<br />
Note: Some of the functions described in this document will be available in the<br />
October ‘07 version of <strong>XDCAM</strong> Transfer Software after IBC2007.<br />
3. Export back to disc<br />
Once editing of your sequence is complete in Final Cut Pro, the high<br />
resolution content may be exported back to Professional Disc media as an<br />
<strong>XDCAM</strong>-compatible MXF file. Alternatively, the MXF file may be written to any<br />
connected storage device, for example, a video server.<br />
Select File>Export><strong>Sony</strong> <strong>XDCAM</strong>... to open the export window of the <strong>XDCAM</strong><br />
Transfer application. Here you can select the target location for the<br />
exported MXF file, as well as control the settings used during the export<br />
process.<br />
As with the import operation, once Final Cut Pro has completed any<br />
required rendering of your sequence, the transfer to your chosen destination<br />
takes place in the background - leaving you free to resume editing.<br />
Note: PDW-U1 Export Function will be implemented in the next available release of the Oct.‘07 version of<br />
<strong>XDCAM</strong> Transfer Software.<br />
Contact<br />
1,2<br />
Apple Computer<br />
1 Infinite Loop<br />
Cupertino, CA 95014<br />
Phone 408-974-1010<br />
Website www.apple.com/finalcutstudio<br />
5<br />
3<br />
* "<strong>XDCAM</strong> Transfer Software" is distributed by <strong>Sony</strong>.<br />
<strong>Sony</strong> Electronics Inc. (USA)<br />
Website www.sony.com/<strong>XDCAM</strong><br />
“<strong>XDCAM</strong> Plug-in Software for Final Cut Pro”<br />
Information is available on the above<br />
Web sites.<br />
The above information has been provided by Apple Computer.<br />
4<br />
6
<strong>XDCAM</strong> Workflow <strong>Guide</strong><br />
In the field or the edit suite, Avid editing systems give you the tools to work quickly and efficiently: <strong>XDCAM</strong> proxy media can be<br />
imported much faster than real-time so editing can begin almost immediately, while only the required high-resolution material is<br />
imported to complete the project, saving time and disk space.<br />
All <strong>XDCAM</strong> formats in SD and HD are supported natively* and can be mixed and played in a single sequence in real-time, even<br />
together with proxy media as well as other supported SD or HD video resolutions. And when the program is finished, it can be<br />
written back to the <strong>XDCAM</strong> disc with a single menu command.<br />
With Avid editors attached to an Avid Unity MediaNetwork or Avid Unity ISIS system, <strong>XDCAM</strong> media is instantly available in<br />
real-time to editors, journalists and producers. Furthermore, feed room operators, media logging assistants and reviewers can<br />
access the <strong>XDCAM</strong> media from their desktop and contribute without waiting for an edit suite.<br />
This is how Avid supports <strong>XDCAM</strong> and incorporates it into the most efficient end-to-end workflow available, with complete access,<br />
flexibility and control at any point.<br />
Avid ® NewsCutter ® family<br />
Avid Media Composer ® family<br />
Avid Symphony Nitris ®<br />
Avid Xpress Pro*<br />
Avid Liquid family<br />
* Avid Xpress Pro does not support IMX resolutions<br />
i.LINK workflow for all supported Avid editors, using File Access Mode<br />
Supported File Formats<br />
DVCAM<br />
MPEG IMX (30/40/50 Mb/s)<br />
MPEG HD (18/25/35 Mb/s)<br />
MPEG-4 proxy media<br />
Make sure the <strong>XDCAM</strong> device is set to FAM (File Access Mode) and is attached via i.LINK. The device will show up as a removable drive on<br />
the editor CPU.<br />
Proxy editing workflow (Avid Liquid workflow is similar)<br />
1. Select a bin and choose the Import <strong>XDCAM</strong> Proxy menu command to import all proxy media from the <strong>XDCAM</strong> disc.<br />
2. Edit the media in the normal way on the timeline. Other SD and HD resolutions can be edited and played together in real-time.<br />
3. When the editing is finished, select the Batch Import menu command. This will import the high-resolution <strong>XDCAM</strong> media from the disk, but only the<br />
media that is required for the edited sequence, plus a selectable handle length.<br />
High-resolution editing workflow (Avid Liquid workflow is similar)<br />
1. Select a bin and choose the Import menu command and navigate to the Clip folder on the <strong>XDCAM</strong> disc, or simply drag the media files from the<br />
Clip folder on the <strong>XDCAM</strong> disc into the required bin.<br />
2. Edit the media in the normal way on the timeline. Other SD and HD resolutions can be edited and played together in real-time.<br />
Write-back workflow (Avid Liquid workflow is similar, and only for SD)<br />
1. Select the finished sequence in the bin.<br />
2. Select the Export menu command and choose the <strong>XDCAM</strong> option. The edited program will now be written back to the <strong>XDCAM</strong> disc.
<strong>XDCAM</strong> Workflow <strong>Guide</strong><br />
Network-attached workflow for Avid NewsCutter, Avid Media Composer and Avid Symphony Nitris, using<br />
File Transfer Mode<br />
Make sure the <strong>XDCAM</strong> device and Avid editing system are connected via an Ethernet network to an Avid Unity TransferManager or<br />
Avid Interplay Transfer server; or the Avid Unity TransferManager or Avid Interplay Transfer running in standalone mode on the Avid<br />
editing system.<br />
Ingest workflow (proxy and HD import supported with Avid Interplay Transfer only)<br />
1. From the supported Avid editing system, select the FTPClipList Utility.<br />
2. From the list of <strong>XDCAM</strong> clips displayed, select the required ones, and if using Interplay Transfer whether proxies or hi-res media is<br />
required, and drag them to the bin. Confirm that the clips should be transferred now. The transfer will start.<br />
If required, the transfer status can be monitored from the Avid Unity TransferManager or Avid Interplay Transfer status window.<br />
Output workflow<br />
• To move the completed program to an Avid AirSpeed or other supported playback server, select the Send To Playback menu<br />
command and choose the appropriate device from the list of playback destinations.<br />
• To move the completed program to an Ethernet connected <strong>XDCAM</strong> device, select the Send To Playback menu command and<br />
choose the appropriate device from the list of playback destinations (Avid Interplay Transfer only).<br />
• To move a version of the complete program with associated news text to a web server, use the Post To Web function from the NRCS<br />
Tool (Avid NewsCutter only).<br />
Contact<br />
Avid Technology, Inc.<br />
Avid Technology Park<br />
One Park West<br />
Tewksbury, MA 01876<br />
United States<br />
Phone 978-640-6789<br />
Website www.avid.com<br />
The above information has been provided by Avid Technology.
<strong>XDCAM</strong> Workflow <strong>Guide</strong><br />
EDIUS Broadcast NLE software provides native editing and realtime processing of HD, HDV, DV, uncompressed SD, MPEG-2, and<br />
MPEG-1 formats. With its seamless realtime workflow, EDIUS lets professionals mix and share video content in multiple formats and<br />
work with unlimited video, audio and effects layers, while providing realtime, high-quality display. EDIUS delivers increased quality<br />
and realtime performance through the company’s acclaimed variable-bitrate Canopus HQ codec. EDIUS includes features such<br />
as batch capture from 1080i, 1080p and 720p HDV sources, advanced audio tools and precise color correction controls, to help<br />
editors create the highest quality productions.<br />
EDIUS Broadcast<br />
EDIUS and <strong>XDCAM</strong> Workflow<br />
Select & Register<br />
• Connected via i.LINK or an <strong>XDCAM</strong> FTP server, choose <strong>XDCAM</strong> Select<br />
from the Capture menu. Select the clips you would like to work with,<br />
right-click and select Register to Bin.<br />
Editing with proxies<br />
• To edit with proxy files only, from within the Download window select<br />
Download after register > Proxy Download. Choose the files you want<br />
to work with and press Register to Bin. Proxy data is indicated by a P<br />
on the thumbnail, and it can be edited in the timeline as you would<br />
any other footage.<br />
Auto-conforming from proxies<br />
• Edit your entire project using proxies,<br />
select <strong>XDCAM</strong> HD Exporter, give the<br />
project a name and location, and you<br />
will see a further dialog box relating to<br />
proxy clip handling<br />
Auto-conforming from proxies<br />
• Choose Export after Importing Hi-res Data<br />
and the hi-res data will be automatically<br />
inserted to create the final output.<br />
Supported File Formats<br />
MPEG IMX (50/40/30 Mb/s)<br />
DVCAM<br />
MPEG HD (35/25/18 Mb/s)<br />
Editing with hi-res data<br />
• If disc space is not an issue, you can check Hi-res Download and Proxy<br />
Download. Proxy files are copied in a matter of minutes, but the hi-res<br />
files will take some time. But you can still edit using proxy files while the<br />
hi-res data is transferred in the background. You will see a dynamically<br />
changing timeline as the data transfer plays catch-up.<br />
Contact<br />
Grass Valley<br />
Phone 888-899-EDIT<br />
Website www.canopus.com<br />
The above information has been provided by Thomson Grass Valley.
<strong>XDCAM</strong> Workflow <strong>Guide</strong><br />
Dayang’s editing systems are designed to link seamlessly with <strong>Sony</strong>’s <strong>XDCAM</strong> system, enabling fast and efficient editing. The two<br />
systems can be connected via i.LINK or Ethernet. For both post-production and news editing environment, the editors can browse clips<br />
and create the mark-in/out points of the content prior to importing, resulting in great reduction of importing time. The content can be<br />
imported into the Dayang system as Proxy Data where preliminary editing can commence immediately, resulting in an initial edit<br />
decision list. This EDL is used as the basis of precise editing and the metadata is subsequently written back to the <strong>XDCAM</strong> disc. The<br />
high-resolution AV content can then be edited precisely using the clip list as a guide, enabling the completion of the entire project.<br />
As such, the time taken to import the Proxy Data are reduced and save editor’s disc space.<br />
Alternatively, the high-resolution AV data can be ingested directly for final on-line editing. After editing, the content can be exported<br />
to any disc media as an MXF or any other formats file concurrently with the video content as well as the Metadata such as Essence<br />
Mark and Shot Mark. This process enables high operational efficiency.<br />
Dayang’s editing systems will support PDW-U1 to import low-res video with high-res audio.<br />
*Actual workflows will vary with different Dayang editing system. Please contact Dayang Technology Inc. for more information.<br />
D 3 -Edit HD series<br />
D 3 -Edit 7000 series<br />
D 3 -Edit 5000 series<br />
i.LINK (File Access Mode) - Import Proxy Data<br />
D 3 -Edit 3000 series<br />
D 3 -Edit 2000 series<br />
D 3 -Edit 1000 series<br />
1. Import Proxy Clips into the Dayang system through i.LINK (File Access Mode) interface<br />
To import Proxy Data, the following methods are available:<br />
• Can choose to indicate all clips or only clips that have Essence Mark and Shot Mark (which were added by users on the <strong>XDCAM</strong> device or a PC<br />
running the PDZ-1 software).<br />
• Support batch capture and the batch list can be exported to disc for further editing.<br />
• Proxy Audio Data can be converted from its original 8 kHz to 48 kHz for higher sound quality.<br />
• Metadata such as Essence Mark and Shot Mark can be imported together with AV data, allowing the users to search the material easily using the<br />
metadata as the track-down point during editing process.<br />
2. Edit Proxy Data<br />
The Proxy Data is edited using the editing functions available in the systems such as 2D&3D effects, caption overlay, quick composition, graphics &<br />
titling.<br />
3. Import the high-resolution MXF files corresponding with the Proxy Data on the timeline<br />
4. Edit the imported high-resolution material<br />
The imported materials are edited using the standard editing functions available on the systems.<br />
Supported File Formats<br />
MPEG IMX (50/40/30 Mb/s)<br />
DVCAM<br />
MPEG HD<br />
5. Write the created high-resolution sequences onto Professional Disc media as an MXF file in MPEG IMX, DVCAM or MPEG HD<br />
format
<strong>XDCAM</strong> Workflow <strong>Guide</strong><br />
i.LINK ® (File Access Mode) - Import MXF Files<br />
1. Import high-resolution MXF files into the Dayang system through i.LINK (File Access Mode) interface<br />
To import MXF files, the following methods are available:<br />
• Can choose to indicate all clips or only clips that have Essence Mark and Shot Mark (which were added by users on the <strong>XDCAM</strong> device or a PC<br />
running the PDZ-1 software).<br />
• Support batch capture and the batch list can be exported to disc for further editing.<br />
• Proxy Audio Data can be converted from its original 8 kHz to 48 kHz for higher sound quality.<br />
• Metadata such as Essence Mark and Shot Mark can be imported together with AV data, allowing the users to search the material easily using<br />
the metadata as the track-down point during editing process.<br />
2. Edit the imported high-resolution material<br />
The high-resolution material is edited using the standard editing functions available in the systems such as 2D&3D effects, caption overly, quick<br />
composition, graphics & titling.<br />
3. Write the created high-resolution sequences onto Professional Disc media as an MXF file in MPEG IMX, DVCAM or MPEG HD<br />
format<br />
Contact<br />
Dayang Technology Development Inc.<br />
Dayang Building,<br />
Zhongguancun Software Park,<br />
Haidian district, Beijing, 100094, China<br />
Phone 86-10-58985768<br />
Website www.dayang.com<br />
The above information has been provided by Dayang.
<strong>XDCAM</strong> Workflow <strong>Guide</strong><br />
EVS CleanEdit[Suite] is an end-to-end news and sport production system. The fully redundant modular design allows the system to<br />
be scaled to meet the most demanding workflow requirements and to be tailored to any newsroom environment. The editing tools<br />
allows journalists and editors to work intuitively and since no rendering is ever required, news can be broken to air in a flash.<br />
[CE]MediaImporter module allows the import of many different file types (video, audio or graphics) and natively integrates <strong>Sony</strong><br />
<strong>XDCAM</strong> formats. Thanks to the asset management functions, an operator can give a description, choose a category and subcategory<br />
for fast indexing in the CleanEdit Central Database. The thumbnail viewer as well as the low-res proxy speed up and ease<br />
the entire process. As an option, media Importer also allows the merging of several <strong>XDCAM</strong> clips and even offers transparent high<br />
quality audio browsing of <strong>XDCAM</strong> proxy content. The process of exchanging files directly with an <strong>XDCAM</strong> drive is fast and simple.<br />
CleanEdit[Suite] V 2.0.<br />
Supported File Formats<br />
MPEG IMX (50/40/30 Mb/s)<br />
DVCAM<br />
MPEG HD (35/25/18 Mb/s)<br />
Contact<br />
EVS<br />
EVS, Sales & Marketing<br />
Phone +32 4 361 7000<br />
Website www.evs.tv<br />
The above information has been provided by EVS.
<strong>XDCAM</strong> Workflow <strong>Guide</strong><br />
Geevs video servers support the capture and play-out of broadcast media in a wide range of formats, including MPEG-2 and DV25.<br />
MXF compliance built into Geevs allows files from <strong>XDCAM</strong> to be simply dragged and dropped into Geevs storage automatically<br />
updating the clip information database. Close integration between Geevs and <strong>XDCAM</strong> ensures that recorded material is captured<br />
transparently by Geevs and is then immediately available for editing or play-out. Interoperability could not be simpler.<br />
Geevs SD, SDE, MR and MR+<br />
1. Import full resolution media and Proxy Data through a 1GB Ethernet Interface<br />
2. Create Clips by browsing Proxy Data<br />
Supported File Formats<br />
Geevs ingest/playout servers allow for a highly flexible integration with <strong>XDCAM</strong> solutions.<br />
MPEG IMX (50/40/30 Mb/s)<br />
DVCAM<br />
3. Edit the Media using Geevs clients or any 3rd party <strong>XDCAM</strong> editing solution such as “Lightworks”, “<strong>Sony</strong>” or other mainstream<br />
editing applications.<br />
4. Export <strong>XDCAM</strong> media via standard networks, including 1GB Ethernet, directly to the Geevs play-out server for program<br />
production or transmission.<br />
Contact<br />
Gee Broadcast Systems Ltd<br />
Unit 9 Grafton Way<br />
Basingstoke, Hants<br />
RG22 6HY, UK<br />
Phone +44 1256 810 123<br />
Website www.geevs.co.uk<br />
The above information has been provided by Geevs.
<strong>XDCAM</strong> Workflow <strong>Guide</strong><br />
Lightworks Editors support the capture and play-out of broadcast media in a wide rage of formats including MPEG-2 and DV25.<br />
MXF compliance built into Lightworks allows files from <strong>XDCAM</strong> to be simply imported into Lightworks projects updating the clip<br />
information database. Close integration between Lightworks and <strong>XDCAM</strong> ensures that recorded material is imported transparently<br />
and is then immediately available for editing.<br />
Softworks and Alacrity<br />
Lightworks editors allow for a highly flexible integration with <strong>XDCAM</strong> solutions and provide a fast efficient<br />
editing solution.<br />
1. Import full resolution media and Proxy Data through a 1 GB Ethernet Interface<br />
2. Create Clips by browsing Proxy Data<br />
3. Edit the Media using Softworks or Alacrity and output in a range of formats including QT, AVI, OMF or AAF<br />
Supported File Formats<br />
MPEG IMX (50/40/30 Mb/s)<br />
DVCAM<br />
4. Export <strong>XDCAM</strong> media via standard networks, including 1 GB Ethernet, directly to the Lightworks editor for program production.<br />
Contact<br />
Lightworks UK Ltd<br />
Unit 9 Grafton Way<br />
Basingstoke, Hants<br />
RG22 6HY, UK<br />
Phone +44 1256 810 123<br />
Website www.lwks.com<br />
The above information has been provided by Lightworks.
<strong>XDCAM</strong> Workflow <strong>Guide</strong><br />
<strong>Sony</strong> <strong>XDCAM</strong> HD Workflow with Grass Valley Aurora Edit<br />
and Aurora Ingest with RMI<br />
Aurora Edit is a cost effective, user configurable editing solution that fits where you need it, as a cuts-only or as an effects rich<br />
powerhouse editor. Aurora Edit is a format-independent editing application that can be leveraged for both SD and HD editing, with<br />
built in transcoding for mixed media formats and aspect ratio conversion. Aurora Edit seamlessly handles any media for any project.<br />
Offering direct integration with <strong>XDCAM</strong> HD, Aurora Edit provides a direct view of high or low resolution content. All <strong>XDCAM</strong> HD media is<br />
protected once it is committed to the Aurora Edit timeline - allowing the <strong>XDCAM</strong> HD media to be safely removed and re-used. Several<br />
bulk ingest options are available, including automated removable ingest (RMI). <strong>XDCAM</strong> HD files appear in native format within Aurora<br />
Edit bins so your workflow is the same as with traditional sources.<br />
Using the <strong>XDCAM</strong> HD menu, there are two modes of operation:<br />
■ AV/C - treat <strong>XDCAM</strong> HD like a traditional fast linear tape deck - operates only in DV mode - for MPEG media, must use Bin Source<br />
mode.<br />
■ Bin Source (FAM) mode - <strong>XDCAM</strong> HD creates MPEG-HD media that is MXF encapsulated and broken into master clip files that can<br />
be seen in the bin trimmer / viewer - select DV or MPEG mode.<br />
Grass Valley Aurora Edit<br />
Workflow<br />
Note: Requires <strong>XDCAM</strong> HD firmware version 1.60 or higher<br />
Supported File Formats<br />
MPEG IMX (50/40/30 Mb/s)<br />
DVCAM<br />
MPEG HD (35/25/18 Mb/s)<br />
1. Field acquisition of media using an <strong>XDCAM</strong> HD system. Media can be used directly with any Aurora Edit with FireWire interface. The <strong>XDCAM</strong> HD device<br />
is seen as a disk drive and treated as a bin source in Aurora Edit. This special bin type will show each clip of <strong>XDCAM</strong> HD media as a Master Clip.<br />
2. Material can be viewed directly off of disk in bin trimmer, media view, and bin source of timeline. In / Out points can be selected and dropped to the<br />
timeline, just like any source. Files appear to be in native Aurora Edit bins.<br />
3. Committing the selected media to the timeline will cause media to be protected and imported to shared storage, enabling the <strong>XDCAM</strong> HD media to<br />
be safely removed and re-used.<br />
4. Record to timeline operation is also supported - where <strong>XDCAM</strong> HD source is pre-rolled and “laid back” to the timeline. Media is still protected with<br />
import after the edit.<br />
5. The user has immediate and direct access to high or low resolution media. High resolution media is brought into the system for protection when it is<br />
committed to timeline, so removal of <strong>XDCAM</strong> HD media will not invalidate your sequence. This import is performed during media selection to maximize<br />
predictability when sending finished story to air and maintains consistent workflow with other types of source material.
<strong>XDCAM</strong> Workflow <strong>Guide</strong><br />
From Field Acquisition<br />
<strong>Sony</strong> <strong>XDCAM</strong> HD and Grass Valley Aurora Edit<br />
...just like tape-to-timeline editing.<br />
IEEE 1394 Interface<br />
Use AV/C protocol for tape<br />
deck-like control<br />
Use SBP2 protocol for file<br />
folder/Bin source (virtual<br />
disk drive)<br />
Aurora Ingest - RMI<br />
Grass Valley Aurora Edit<br />
<strong>Sony</strong> <strong>XDCAM</strong> HD and Grass Valley Aurora Ingest with RMI<br />
From Field Acquisition<br />
File Access Mode (FAM)<br />
Grass Valley Aurora Edit & Aurora Ingest - RMI From Thomson<br />
Grass Valley Aurora Ingest with<br />
Removable Media Interface (RMI)<br />
Grass Valley’s Aurora Ingest - RMI from Thomson is an application that lets you simultaneously ingest files from multiple removable media devices.<br />
Using Aurora Ingest - RMI<br />
After you have configured Aurora Ingest - RMI and attached the removable media device, RMI is ready to use.<br />
To use RMI, follow these steps:<br />
1. Verify that the removable media device is plugged in and media is attached or inserted.<br />
2. Select Programs | Aurora 6.1 | Aurora Ingest - RMI.<br />
The detachable media option is seen automatically.<br />
3. To select the clips you want to ingest, check the box next to each of the clips.
<strong>XDCAM</strong> Workflow <strong>Guide</strong><br />
4. Click the Transfer icon.<br />
While the transfer is proceeding, the clip information has a red<br />
background, and the percentage of the transferred media is<br />
displayed. Once the clip has been transferred, the clip<br />
information has a green background.<br />
Aurora Ingest allows the user - from their point of view or<br />
judgment - to “select” good shots and bad shots from within<br />
the Aurora Ingest RMI application.<br />
Aurora Edit<br />
Grass Valley’s Aurora Edit from Thomson can import and use files from <strong>Sony</strong> <strong>XDCAM</strong> Professional Disc media (SD and HD).<br />
When previewing media, <strong>XDCAM</strong> HD files always use the low-resolution proxy. With SD files, you have the option of using proxies or high-resolution<br />
media.<br />
Aurora Edit supports shot status <strong>XDCAM</strong>. In addition, if a unique title was given to a clip in <strong>XDCAM</strong>, Aurora Edit will recognize that title and display the<br />
modified name.<br />
To import <strong>XDCAM</strong> files into Aurora Edit:<br />
1. Make sure you have the appropriate removable media driver(s) installed on your Aurora Edit. The drivers are located on the Aurora Suite CD-ROM.<br />
2. Insert the <strong>XDCAM</strong> removable media into the drive.<br />
3. In Aurora Edit, select View | Removable Media Bin.<br />
4. If you want to pre-cache proxies for quicker preview, click Cache All Proxies. Otherwise, proxy files are cached when the file is opened. Once<br />
cached, status is updated, represented by a yellow triangle in Thumbnail View or listed in the status column in Details View.<br />
5. Import the files into Aurora Edit using one of the following methods:<br />
- Double-click on a file to open it in the Trimmer, mark In and Out points to select the footage you want, and either create a sub-clip or copy to<br />
the Timeline.<br />
- Drag the clip into the viewing window of the Timeline or Source Tools; the footage becomes a clip source and can be used to mark clips.<br />
- Drag a clip (or a selection of clips) into the Aurora Edit Bin.<br />
- To view all clips on the removable media as one long file, click View as Tape in the Removable Bin toolbar, scrub the file as needed, and then<br />
import.<br />
<strong>XDCAM</strong> Proxy Editing<br />
Aurora Edit now allows for Proxy Preview, which is the ability to preview <strong>XDCAM</strong> HD material prior to import. This enhancement enables faster<br />
previewing of <strong>XDCAM</strong> media and supports the ‘View as Tape’ feature.<br />
Setup<br />
Proxies will always be imported and previewed for <strong>XDCAM</strong> HD material. For <strong>XDCAM</strong> material, the user has the option of using proxies or high-res<br />
for preview. This is configurable within the General Tab of the Options menu, found within the Tools pull-down menu (Tools/Options/General Tab).
<strong>XDCAM</strong> Workflow <strong>Guide</strong><br />
Caching of Proxies<br />
<strong>XDCAM</strong> clips that are opened prior to import must have their proxies cached (SD only if “use proxy media” is checked). This is done automatically<br />
or manually.<br />
Proxies are cached to the shared directory. This means that proxy media imported on one Aurora Edit system will be available for editors in other<br />
edit bays when that same disc is inserted in those bays. This greatly reduces the time spent on importing proxies.<br />
Once cached, the clip will display a yellow pie shaped icon in the thumbnail view, and the word “cached” will be displayed in the status column<br />
of the details view.<br />
View as Tape<br />
With <strong>XDCAM</strong> proxies now being used, View as Tape is an available option for this Removable Media type.<br />
View as Tape takes all of the available clips on an <strong>XDCAM</strong> or <strong>XDCAM</strong> HD disc and combines them to form one virtual clip. This combines the benefits<br />
of removable media (thumbnails for individual clips, easy access to individual clips, etc.) with the benefits of editing from tape (being able to freely<br />
and quickly scrub/shuttle through an entire piece in order to prepare for editing).<br />
Contact<br />
Grass Valley<br />
400 Providence Mine Road<br />
Nevada City, CA 95959<br />
Phone 530-478-3000<br />
Website www.grassvalley.com<br />
The above information has been provided by Thomson Grass Valley.
<strong>XDCAM</strong> Workflow <strong>Guide</strong><br />
<strong>XDCAM</strong> allows the Velocity NX craft editing system to speed up news promo editing by file transferring news footage from an<br />
<strong>XDCAM</strong> camera directly onto a NEXIO server rather than through traditional real-time ingest. News footage captured on <strong>XDCAM</strong><br />
Professional Disc in the field can be passed from camcorder or deck to shared storage via a Gigabit Ethernet connection. Using<br />
Gigabit Ethernet allows Harris broadcast equipment to share one <strong>XDCAM</strong> across many devices using your IT infrastructure. Unlike other<br />
vendor’s solutions, this does not tie down your <strong>XDCAM</strong> to one machine, saving you money.<br />
<strong>XDCAM</strong> files can be accessed by a Velocity NX editor immediately, even while the footage is transferring, allowing the fastest possible<br />
turnaround for breaking news. NEXIO server technology makes it possible for all bays to view and edit clips simultaneously without any<br />
transfers. This ‘true shared storage’ allows users to see material coming in from any source (including <strong>XDCAM</strong>) as it is being transferred<br />
or ingested. Within seconds of completing the edit, finished material can be played to air; transferring files in this way can cut the news<br />
footage acquisition time in half.<br />
Velocity NX<br />
Supported File Formats<br />
MPEG IMX (50/40/30 Mb/s)<br />
DVCAM<br />
MPEG HD (35/25/18 Mb/s)<br />
<strong>XDCAM</strong> HD/SD clips do not have to be imported right away, they can be browsed and edited in<br />
low-res before High Resolution transfer takes place.<br />
1. Choose the <strong>XDCAM</strong> viewer under the “View” pulldown in the GUI<br />
2. Right click in an empty space<br />
3. Set FTP address of <strong>XDCAM</strong> you would like to access<br />
4. Choose proxy mode<br />
5. Connect to <strong>XDCAM</strong> disc and add Proxy clips to the gallery<br />
6. Edit Proxy clips just as you would full resolution clips<br />
7. When edit is finished Hi-Res pieces of the edit will upload from the <strong>XDCAM</strong> disc<br />
8. When going back to <strong>XDCAM</strong> disc just choose EXPORT to <strong>XDCAM</strong> and clip is added back to <strong>XDCAM</strong> disc<br />
Harris can access <strong>XDCAM</strong> in Four ways:<br />
1. Gigabit Ethernet FTP file mode where we access the deck as an FTP location<br />
2. IEEE1394 Drive Mode where we mount the drive as a drive letter (exp: F:/)<br />
3. IEEE1394 baseband ingest<br />
4. Baseband SDI/RS422 ingest<br />
Contact<br />
Harris Corporation<br />
Broadcast Communications Division<br />
NEXIO Servers<br />
Phone 1-818-843-7004<br />
Website www.broadcast.harris.com<br />
The above information has been provided by Velocity NX.
<strong>XDCAM</strong> Workflow <strong>Guide</strong><br />
IMC Technologies has optimized the <strong>XDCAM</strong> system workflow for maximum flexibility as well as speed. Users can choose what<br />
to download from the <strong>XDCAM</strong> system, and whether to stay in native MXF format or to rewrap or transcode. We support<br />
access to multiple <strong>XDCAM</strong> system units at the same time and after the initial selection all the work is done in the background<br />
so the user can immediately start naming the shots, sub-clipping, and editing either in proxy mode or using hi-res files.<br />
Remote Producer (RP), Media Producer (MP),<br />
Newsmaker (N1) and Media Manager (M2).<br />
Work in native MXF mode.<br />
1. From M2, use the “Connect to <strong>XDCAM</strong>” function to download either by Ethernet or by i.LINK (FAM).<br />
2. In the background we will automatically download all the clip metadata, proxy files and then the hi-res files.<br />
3. Optionally, the user can choose to download the proxy files only and decide on the hi-res files later.<br />
4. Clips can immediately be organized in M2, metadata may be added, names changed.<br />
5. As the proxy files become available users can start Logging in M2 and Editing in RP/MP/N1.<br />
6. Once the hi-res files are downloaded, the user can switch M2 or RP/MP/N1 to hi-res mode and all the work done is transparently available in either<br />
mode.<br />
Work in AVI/WAV mode.<br />
1. From M2, use the “Connect to <strong>XDCAM</strong>” function to download either by Ethernet or by i.LINK (FAM).<br />
2. Select a template to rewrap MXF into AVI/WAV.<br />
3. In the background we will download the clip metadata, if proxy files and then hi-res files, and will start converting them.<br />
4. Clips can immediately be organized in M2, metadata may be added, names changed.<br />
5. Converted clips can be used as soon as they are created and they will grow dynamically as the conversion progresses.<br />
6. Like above the proxy/hi-res switch is available.<br />
Supported File Formats<br />
MPEG IMX (50/40/30 Mb/s)<br />
DVCAM<br />
MPEG HD (35/25/18 Mb/s)<br />
Every Incite editing product RP/MP/N1 includes Media Manager (M2) which helps to organize media<br />
on disc as well as in projects. M2 is also available as Standalone.<br />
Use <strong>XDCAM</strong> material with other NLEs.<br />
1. From M2 Standalone, use the “Connect to <strong>XDCAM</strong>” function to download either by Ethernet or by i.LINK (FAM).<br />
2. Select either native MXF, a template to rewrap MXF (eg. to AVI/WAV or to QT), or a template to convert to another format (eg. <strong>XDCAM</strong> IMX to<br />
DVCAM in AVI/WAV).<br />
3. In the background we will automatically download all the clip metadata and start downloading the selected files (proxy/hi-res) and convert them<br />
as specified in step 2.<br />
4. Converted files are written in read-while-writing mode so they may be accessed at all times and grow dynamically.<br />
Contact<br />
IMC Technologies Inc.<br />
30, rue des Voisins<br />
1205 Geneva, Switzerland<br />
Phone +41 22 321 9585<br />
Website www.incite-tech.com<br />
The above information has been provided by<br />
IMC Technologies.
<strong>XDCAM</strong> Workflow <strong>Guide</strong><br />
The Matrox Axio editing platforms combined with Adobe Premiere Pro provide realtime native editing of OP-1A standard MXF files<br />
captured using <strong>Sony</strong> <strong>XDCAM</strong> and <strong>XDCAM</strong> HD devices. DVCAM, MPEG IMX, and MPEG HD are all supported.<br />
Matrox Axio users can transfer native <strong>XDCAM</strong> and <strong>XDCAM</strong> HD MXF files into their editing system then mix them with a variety of<br />
other native HD and SD media and AVI files on an HD or SD timeline in real time. This smooth workflow and interoperability<br />
eliminates inefficient, time-consuming file and codec transcoding and effects rendering. It simplifies integration with various<br />
broadcast equipment and eases file management in networked environments by eliminating file recompression to match timeline<br />
formats.<br />
Matrox Axio LE<br />
Matrox Axio HD<br />
Matrox Axio SD<br />
Workflow steps:<br />
Supported File Formats<br />
MPEG IMX (50/40/30 Mb/s)<br />
DVCAM<br />
MPEG HD (35/25/18 Mb/s)<br />
1. Transfer full-resolution native <strong>XDCAM</strong> and <strong>XDCAM</strong> HD MXF files into the Matrox Axio editing system via Ethernet or FireWire.
<strong>XDCAM</strong> Workflow <strong>Guide</strong><br />
2. Edit multiple layers of video and graphics using the realtime engine of Matrox Axio; mixing MPEG IMX, DVCAM and MPEG HD<br />
material with other native HD and SD media and AVI files as needed on any HD or SD timeline.<br />
3. Apply effects in real time including color correction, chroma/luma keying, speed changes, blur/glow/soft focus, 3D DVE with soft<br />
edges and realistic shadows, and many more.<br />
4. Export your HD or SD timeline from within Adobe Premiere to an <strong>XDCAM</strong> or <strong>XDCAM</strong> HD compatible MXF file.<br />
5. (0ptional) Play out your project from the Axio timeline in realtime directly to <strong>XDCAM</strong> or <strong>XDCAM</strong> HD over SDI.<br />
Contact<br />
Matrox Electronic Systems Ltd.<br />
1055 St. Regis Blvd Dorval,<br />
Quebec Canada, H9P 2T4<br />
Phone 1-(800) 361-4903 (North America)<br />
Website www.matrox.com/video<br />
The above information has been provided by Matrox Electronic Systems Ltd.
<strong>XDCAM</strong> Workflow <strong>Guide</strong><br />
Newauto HIMALAYA NLE product line supports connectivity with different types of devices including <strong>Sony</strong> <strong>XDCAM</strong> systems. MXF files<br />
in an <strong>XDCAM</strong> system can be imported into the NLE system for native editing without conversion. The edited files can be written<br />
back onto an <strong>XDCAM</strong> disc, and the upload and download can be done via either i.LINK or Ethernet interfaces. The NLE system<br />
supports interoperable editing of both high-resolution and low-resolution files.<br />
HIMALAYA X3000, HIMALAYA A1500, HIMALAYA A1200,<br />
HIMALAYA A1000XS, HIMALAYA A1000XH,<br />
HIMALAYA A1000EX, HIMALAYA A1000SP, HIMALAYA A1000,<br />
HIMALAYA MOBILE<br />
i.LINK (File Access Mode) / Ethernet<br />
1. Import low-resolution MXF files with designated <strong>XDCAM</strong> file importing user interface.<br />
2. Edit the low-res files and create the sequence.<br />
3. Import high-resolution material according to the edited sequence with automatic recapture function.<br />
4. Fine-tune the high-resolution sequence.<br />
5. The finished sequence can be written back to an <strong>XDCAM</strong> system in MXF format.<br />
6. The high-resolution MXF files can also be imported and edited directly to create the final sequence, without low-res editing and<br />
recapture.<br />
i.LINK (AV/C)<br />
1. Capture DV material from an <strong>XDCAM</strong> device via the i.LINK Interface.<br />
2. Edit DV files and create the sequence.<br />
3. The finished sequence can be printed to an <strong>XDCAM</strong> device via the i.LINK Interface.<br />
Supported File Formats<br />
MPEG IMX (50/40/30 Mb/s)<br />
DVCAM<br />
Contact<br />
Newauto Silicon Valley<br />
Video-technology CO.,LTD<br />
Floor7,Beijing Silicon Valley Computer Plaza<br />
No,1,Xicaochang,Haidian District,Beijing<br />
Phone +86-10-62586666<br />
Website www.newautovideo.com<br />
The above information has been provided by Newauto.
<strong>XDCAM</strong> Workflow <strong>Guide</strong><br />
<strong>Sony</strong> <strong>XDCAM</strong> and Quantel Systems deliver the best production workflows today. Users are impressed with the speed and agility<br />
of the Quantel <strong>XDCAM</strong> interface, that allows direct access to the essence and metadata. This, combined with the easy to use,<br />
progressive Quantel editing interface has resulted in much faster operational workflows.<br />
With the launch of <strong>Sony</strong> <strong>XDCAM</strong> HD, Quantel continues its tradition of working closely with the leading edge companies such as<br />
<strong>Sony</strong>.<br />
Quantel products compatible with the <strong>Sony</strong> <strong>XDCAM</strong> family include: sQ Cut, sQ Edit, sQ Edit Plus. Paintbox, eQ, iQ, Newsbox, sQ,<br />
Picturebox sQ, all of the above working in standard definition, high definition, or if required, both.<br />
sQ Cut, sQ Edit, sQ Edit Plus<br />
sQ, Newsbox<br />
Paintbox<br />
eQ, iQ<br />
sQ editing series workflow - using network connection:<br />
1. <strong>XDCAM</strong> Proxy Clips are imported to the sQ edit seat through the network connection.<br />
2. Select segments of the Proxy using functions with the Quantel applications.<br />
3. After the Proxy selection, high-resolution files are imported using the “automated import” function. This can be to the edit seat,<br />
the sQ/Newsbox, or both.<br />
4. Content is available immediately to all users connected to the sQ or Newsbox server system, not just the edit seat that selected<br />
the content.<br />
sQ editing series workflow - using i.LINK (File Access Mode) interface.<br />
1. Proxy Clips on the <strong>XDCAM</strong> disc are viewed directly using the i.LINK connection.<br />
2. Selection of multiple clips or files is made within the Quantel application.<br />
3. Full resolution content is transferred at max possible speed into the editing seat, and/or the connected sQ/Newsbox servers.<br />
4. Content is available immediately to all users connected to the sQ or Newsbox server system, not just the edit seat that selected<br />
the content.<br />
Paintbox, eQ, iQ and non-server connected operation of sQ Edit, sQ Edit Plus.<br />
1. Proxy Clips imported to the edit seat through the network connection.<br />
2. Select segments of the Proxy Data using editing functions with the Quantel applications.<br />
3. Import the high-resolution files using the “automated import” function, direct to the local storage of the device.<br />
4. Content is now available to be edited alongside any other material already within these systems.<br />
Paintbox, eQ, iQ, sQ Edit, sQ Edit Plus using i.LINK (File Access Mode) interface.<br />
1. Proxy Clips on the <strong>XDCAM</strong> disc are viewed directly using the i.LINK connection.<br />
2. Selection of multiple clips or files is made.<br />
3. Full resolution content is transferred at max possible speed into the editing seat.<br />
4. Content is now available to be edited alongside any other material already within these systems.<br />
Supported File Formats<br />
MPEG IMX (50/40/30 Mb/s)<br />
MPEG HD under development
<strong>XDCAM</strong> Workflow <strong>Guide</strong><br />
Contact<br />
Quantel<br />
Phone +44 (0) 1635 48222<br />
Website www.quantel.com/products<br />
The above information has been provided by Quantel.
<strong>XDCAM</strong> Workflow <strong>Guide</strong><br />
<strong>Sony</strong> <strong>XDCAM</strong> + Sobey EditMax system; an integrated program editing workflow based on <strong>XDCAM</strong> non-linear medium. It can<br />
reduce editing time and cost, while realizing improved editing efficiency.<br />
After on-site shooting, the editor can edit Proxy AV data using Sobey Mobile Station in the field. When the Proxy Editing is complete,<br />
the Sobey system can ingest only necessary parts of high-resolution material which were selected in the proxy timeline. The editor<br />
can take the high-resolution timeline to studio and on air, or render the timeline to stream file such as WMV to transfer by network<br />
for the emergency news.<br />
i.LINK (File Access Mode) / Ethernet<br />
1. Direct access the disc to preview clips and mark IN/OUT in Disc Manager Window<br />
2. Background import proxy file AND/OR high-resolution (whole & IN/OUT partial) clip<br />
3. Editing while importing (proxy/high-resolution in MXF format)<br />
4. Saved EDL/Sequence in XML format to disc<br />
5. Write back final sequence to disc in MXF format while rendering<br />
6. Support <strong>XDCAM</strong>/<strong>XDCAM</strong> HD workflows<br />
Editmax 2000<br />
A mobile nonlinear editor<br />
Supported File Formats<br />
MPEG IMX (50/40/30 Mb/s)<br />
DVCAM<br />
MPEG HD (50/35/25/18 Mb/s)<br />
EditMax 2000 mobile nonlinear editing system is based on the front cell of Nonlinear Workflow network of <strong>Sony</strong> Professional Disc<br />
media technology, and it provides the following functions: low resolution clips uploading at high speed, highly efficient low<br />
resolution editing in the field, transmission of EDL, clip copy and remote transmission, which provide the powerful latest Nonlinear<br />
Workflow network.<br />
Function Description<br />
•Adopting high and powerful functions laptop, supporting real time and multi-layer time-line, multi-layer dynamic CG, even<br />
supporting the real time 3D special effects.<br />
•Supporting multi-rate editing at the same time.<br />
•Supporting i.LINK and Ethernet interfaces, and supporting AV data uploading at high speed based on SBP2.<br />
•Support <strong>XDCAM</strong>/<strong>XDCAM</strong> HD technology perfectly.<br />
•Support FTP, WLAN, cut transmission, and provides the fastest clip transmission.<br />
•Supporting real time 2D and 3D effects and the third party effects plug-in.<br />
Editmax2000
<strong>XDCAM</strong> Workflow <strong>Guide</strong><br />
Editmax 7<br />
Sobey’s new generation desktop system<br />
Editmax7 (E7) is a high performance NLE editing engine; it uses Windows desktop style, provides multiplicate operation modes,<br />
and supports flexible system transmutation. This workflow, not only edits conveniently, but also provides powerful functions at the<br />
same time. E7 makes use of open structure and CPU+GPU as the kernel; E7 cooperation with <strong>Sony</strong> <strong>XDCAM</strong> HD. And it can easily<br />
support future system development.<br />
Function Description<br />
•Open Structure Based on CPU+GPU<br />
•Desktop Style, Multiplicate Operation Modes<br />
•Easy, Stable, Efficient HD/SD Mix-editing<br />
•High quality HD CG system and real-time GPU effects<br />
•Flexible Product Transmutation<br />
•Skin and modularization design<br />
Editmax 1<br />
The direction of NLE technology in the future<br />
Supported File Formats<br />
MPEG IMX (50/40/30 Mb/s)<br />
DVCAM<br />
MPEG HD (50/35/25/18 Mb/s)<br />
Editmax1 non-linear editing system is based on CPU+GPU technology and high performance workstation. It adopts advanced<br />
“CPU+GPU+IO” system architecture to instead of traditional professional board; Editmax 1 in cooperation with <strong>Sony</strong> <strong>XDCAM</strong> systems,<br />
can provide more powerful and efficient functions for the editing workflow.<br />
Function Description<br />
•Broadcast level real-time SD program output<br />
•Supply real-time multi-format editing, including uncompressed, MPEG2 I frame,<br />
MPEG2 IBP, IMX, DV, WMV, etc.<br />
•Abundant and gorgeous real-time GPU effects<br />
•High efficiency render engine to realize high speed program render<br />
•Supports <strong>Sony</strong> <strong>XDCAM</strong> technology<br />
•High system stability<br />
Supported File Formats<br />
MPEG IMX (50/40/30 Mb/s)<br />
DVCAM<br />
Contact<br />
Sobey Digital Technology Co.,Ltd<br />
No.2,Xin Yuan Avenue<br />
RD.Xinjiapo Industrial Park, Gao Xin,<br />
Chengdu, China, 610041<br />
Phone +86-028-85121111<br />
Website www.sobey.com<br />
The above information has been provided by Sobey.
<strong>XDCAM</strong> Workflow <strong>Guide</strong><br />
Only Vegas Pro 8 software combines real-time DV, SD, and HD video editing with unrivaled audio tools to provide the ultimate all-inone<br />
environment for creative professionals. With its unique, visual approach to digital video and audio production, Vegas software<br />
delivers tremendous power, incredible speed, and maximum productivity in an uncomplicated, efficient platform.<br />
Vegas Pro 8 software provides all the tools needed to edit proxy and full resolution HD and SD <strong>XDCAM</strong> MXF files natively, no<br />
transcoding required. Vegas Pro 8 supports all HD and SD <strong>XDCAM</strong> compression types (MPEG HD, IMX 30,40,50, DVCAM), all framerates,<br />
all aspect ratios, multichannel audio, and essence marks. All proxy and full resolution <strong>XDCAM</strong> source file types can be mixed in a<br />
single timeline, edited, and transferred back to the <strong>XDCAM</strong> system via i.LINK, Network FTP, or SDI.<br />
<strong>XDCAM</strong> System Specific Features Include:<br />
● File access mode (FAM)<br />
● i.LINK transfer<br />
● Ethernet transfer<br />
● <strong>XDCAM</strong> Explorer pane<br />
● Essence marks support (all types)<br />
● Proxy editing<br />
● Master to disc (all formats)<br />
● SD Import (all modes supported, native .MXF editing)<br />
● HD Import (all modes supported, native .MXF editing)<br />
Vegas Pro 8 software<br />
Editing workflow:<br />
1. Browse proxy files via Vegas <strong>XDCAM</strong> integrated browser<br />
2. Add proxy/full MXF file directly to Vegas timeline for editing (or open proxy/full MXF source file in Vegas trimmer, use essence marks<br />
to quickly locate flagged moments)<br />
3. Program masters can be output to <strong>XDCAM</strong> disc via i.LINK, Network transfer, or SDI<br />
● Multichannel audio read (all supported channel configurations,<br />
full/proxy resolution)<br />
● PDZ list import, with proxy/full resolution conform capabilities<br />
● Conform proxy timeline to full resolution (with file trimming if<br />
supported by deck)<br />
● Conform all selected proxy media in Vegas database to full resolution<br />
● SD Render (all modes supported by format)<br />
● HD render (all modes supported by format)<br />
● Multichannel audio write (all supported channel configurations)<br />
● Smart rendering support for all full resolution <strong>XDCAM</strong> formats<br />
Supported MXF File Formats<br />
MPEG HD (35/25/18 Mb/s)<br />
MPEG IMX (50/40/30 Mb/s)<br />
DVCAM<br />
Contact<br />
<strong>Sony</strong> Creative Software<br />
1617 Sherman Avenue<br />
Madison, WI 53704<br />
Phone 800-577-6642<br />
Website www.sonycreativesoftware.com<br />
The above information has been provided by <strong>Sony</strong> Creative Software.
<strong>XDCAM</strong> Workflow <strong>Guide</strong><br />
Video Technics provides the highest level of interoperability with <strong>Sony</strong> <strong>XDCAM</strong> systems using plug-in technology embedded in<br />
Adobe ® Premiere Pro v2.0 and the VT Proxy Editor low-resolution editor. The VT <strong>XDCAM</strong> Browser connects via Ethernet directly to<br />
any <strong>XDCAM</strong> device on the network and allows the user to seamlessly browse the centralized database and sort media by ID, date,<br />
duration, and thumbnail picture. Files are copied as native MXF or automatically re-wrapped in an AVI format without transcoding,<br />
which preserves the original file quality.<br />
<strong>XDCAM</strong> media is dragged and dropped directly into the Adobe Project Bin and transferred much faster than real-time. Files are<br />
optionally imported to a non-proprietary SAN/NAS storage system along with associated metadata and proxies for shared access<br />
by any VT browse/edit client or craft editor, and are immediately available for playout on any HD/SD Apella video server<br />
channel. Managing collaborative broadcast media content has never been so fast and easy!<br />
Apella Media Server Family<br />
VT Proxy Editor<br />
Adobe Premiere Pro – VT <strong>XDCAM</strong> Plug-In<br />
Apella, VT Proxy Editor, Newsflow<br />
1. Launch the VT <strong>XDCAM</strong> application<br />
2. Select the <strong>XDCAM</strong> device from the drop down list or enter a new IP<br />
address.<br />
3. Once connected, the browser will display a list of clip IDs, metadata,<br />
and thumbnails on the <strong>XDCAM</strong> media.<br />
4. Select MXF or AVI format.<br />
Supported File Formats:<br />
MPEG IMX (50/40/30 Mb/s)<br />
(w/Matrox Axio)<br />
DVCAM<br />
MPEG HD (35/25/18 Mb/s)<br />
(w/Matrox Axio)<br />
5. Select one or more clips in the display and click Import to Apella.<br />
6. Log on with your username and password.<br />
7. Add a description for the clip and metadata in the dialog below<br />
and click Import.<br />
8. Media is transferred from the <strong>XDCAM</strong> system to the centralized media<br />
storage.
<strong>XDCAM</strong> Workflow <strong>Guide</strong><br />
VT <strong>XDCAM</strong> Browser Plug-In for Adobe ® Premiere ®<br />
1. In Adobe Premiere Pro, select File > New > VT <strong>XDCAM</strong> Browser<br />
2. Select the <strong>XDCAM</strong> device from the drop down list or enter a new IP address.<br />
3. Once connected, the browser will display a list of clip IDs, metadata, and thumbnails on the <strong>XDCAM</strong> media.<br />
4. Select one or more clips in the display and drag into the Adobe Premiere Pro project bin.<br />
5. Optionally, you can select multiple clips and import as a single AAF timeline by clicking AAF Combiner.<br />
6. Media is re-wrapped as AVI and then transferred to the current Adobe Project folder.<br />
Contact<br />
Video Technics Inc.<br />
Phone 1-(404) 327-8300 x308<br />
Website www.videotechnics.com<br />
The above information has been provided by Video Technics Inc.
<strong>Sony</strong> Electronics Inc.<br />
1 <strong>Sony</strong> Drive<br />
Park Ridge, NJ 07656<br />
www.sony.com/<strong>XDCAM</strong><br />
V-2331-A (MK10053V2)<br />
© 2007 <strong>Sony</strong> Electronics Inc. All rights reserved. Reproduction in whole or in part without written permission is prohibited.<br />
Features and specifications subject to change without notice.<br />
<strong>Sony</strong>, <strong>XDCAM</strong>, Professional Disc, DVCAM, MPEG IMX, i.LINK and EssenceMark are trademarks of <strong>Sony</strong>.<br />
HDV is a trademark of <strong>Sony</strong> Corporation and the Victor Company of Japan, Limited.<br />
Apple the Apple logo and i.Pod are registered trademarks of Apple Computer Inc. Avid, the Avid logo, NewsCutter,<br />
MediaComposer, Avid Unity, Avid Liquid and Avid Xpress are registered trademarks of Avid Technology, Inc. Canopus and the<br />
Canopus logo are registered trademarks of Canopus Co., Ltd. Dayang and the Dayang logo are registered trademarks of Dayang<br />
Technology Development Inc. VelocityNX, NEXIO and NewsFlash are registered trademarks of Harris Corporation. Adobe and<br />
Adobe Premiere are registered trademarks of Adobe Systems Incorporated. Matrox and Axio are registered trademarks of<br />
Matrox Electronic Systems Ltd. Windows and Windows Explorer are registered trademarks of the Microsoft Corporation.<br />
Printed in USA (11/07)