XDCAM Compatibility Guide - Sony
XDCAM Compatibility Guide - Sony
XDCAM Compatibility Guide - Sony

Create successful ePaper yourself
Turn your PDF publications into a flip-book with our unique Google optimized e-Paper software.
<strong>XDCAM</strong> Workflow <strong>Guide</strong><br />
Video Technics provides the highest level of interoperability with <strong>Sony</strong> <strong>XDCAM</strong> systems using plug-in technology embedded in<br />
Adobe ® Premiere Pro v2.0 and the VT Proxy Editor low-resolution editor. The VT <strong>XDCAM</strong> Browser connects via Ethernet directly to<br />
any <strong>XDCAM</strong> device on the network and allows the user to seamlessly browse the centralized database and sort media by ID, date,<br />
duration, and thumbnail picture. Files are copied as native MXF or automatically re-wrapped in an AVI format without transcoding,<br />
which preserves the original file quality.<br />
<strong>XDCAM</strong> media is dragged and dropped directly into the Adobe Project Bin and transferred much faster than real-time. Files are<br />
optionally imported to a non-proprietary SAN/NAS storage system along with associated metadata and proxies for shared access<br />
by any VT browse/edit client or craft editor, and are immediately available for playout on any HD/SD Apella video server<br />
channel. Managing collaborative broadcast media content has never been so fast and easy!<br />
Apella Media Server Family<br />
VT Proxy Editor<br />
Adobe Premiere Pro – VT <strong>XDCAM</strong> Plug-In<br />
Apella, VT Proxy Editor, Newsflow<br />
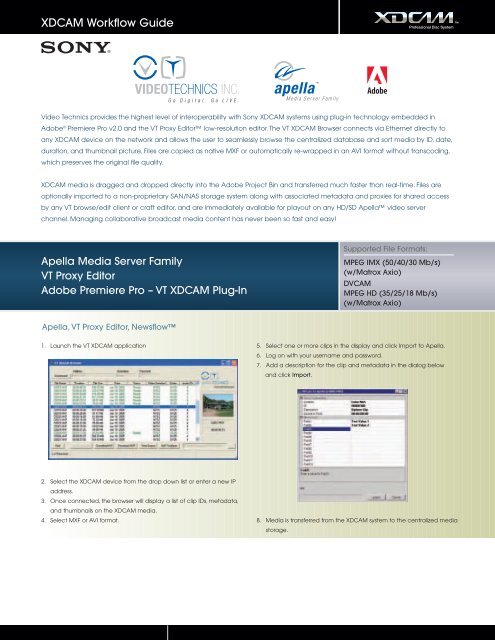
1. Launch the VT <strong>XDCAM</strong> application<br />
2. Select the <strong>XDCAM</strong> device from the drop down list or enter a new IP<br />
address.<br />
3. Once connected, the browser will display a list of clip IDs, metadata,<br />
and thumbnails on the <strong>XDCAM</strong> media.<br />
4. Select MXF or AVI format.<br />
Supported File Formats:<br />
MPEG IMX (50/40/30 Mb/s)<br />
(w/Matrox Axio)<br />
DVCAM<br />
MPEG HD (35/25/18 Mb/s)<br />
(w/Matrox Axio)<br />
5. Select one or more clips in the display and click Import to Apella.<br />
6. Log on with your username and password.<br />
7. Add a description for the clip and metadata in the dialog below<br />
and click Import.<br />
8. Media is transferred from the <strong>XDCAM</strong> system to the centralized media<br />
storage.