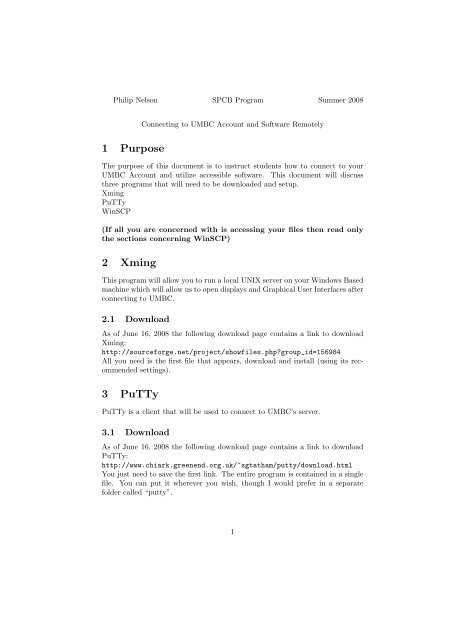
1 Purpose 2 Xming 3 PuTTy - Umbc
1 Purpose 2 Xming 3 PuTTy - Umbc
1 Purpose 2 Xming 3 PuTTy - Umbc
Create successful ePaper yourself
Turn your PDF publications into a flip-book with our unique Google optimized e-Paper software.
Philip Nelson SPCB Program Summer 2008<br />
1 <strong>Purpose</strong><br />
Connecting to UMBC Account and Software Remotely<br />
The purpose of this document is to instruct students how to connect to your<br />
UMBC Account and utilize accessible software. This document will discuss<br />
three programs that will need to be downloaded and setup.<br />
<strong>Xming</strong><br />
<strong>PuTTy</strong><br />
WinSCP<br />
(If all you are concerned with is accessing your files then read only<br />
the sections concerning WinSCP)<br />
2 <strong>Xming</strong><br />
This program will allow you to run a local UNIX server on your Windows Based<br />
machine which will allow us to open displays and Graphical User Interfaces after<br />
connecting to UMBC.<br />
2.1 Download<br />
As of June 16, 2008 the following download page contains a link to download<br />
<strong>Xming</strong>:<br />
http://sourceforge.net/project/showfiles.php?group_id=156984<br />
All you need is the first file that appears, download and install (using its recommended<br />
settings).<br />
3 <strong>PuTTy</strong><br />
<strong>PuTTy</strong> is a client that will be used to connect to UMBC’s server.<br />
3.1 Download<br />
As of June 16, 2008 the following download page contains a link to download<br />
<strong>PuTTy</strong>:<br />
http://www.chiark.greenend.org.uk/~sgtatham/putty/download.html<br />
You just need to save the first link. The entire program is contained in a single<br />
file. You can put it wherever you wish, though I would prefer in a separate<br />
folder called “putty”.<br />
1
3.2 Setup<br />
When you open the program, the configuaration window will pop-up.<br />
Let’s focus on the right pane for now entitled “Basic Options for your <strong>PuTTy</strong><br />
Session”.<br />
In the Host Name (or IP address) type gl.umbc.edu.<br />
The default settings Port: 22 and Connection Type: SSH should already by<br />
selected.<br />
Optional Step<br />
Now go to the left pane and click on Window, then Appearance (you might need<br />
to expand the branch first by clicking the plus sign.<br />
The right pane is now “Configure the appearance of <strong>PuTTy</strong>’s Window”.<br />
Go to Font Settings.<br />
Generally the font is pretty small to read in <strong>PuTTy</strong>, so if you click change you<br />
can change the default font. Normally I prefer Terminal, 14-pt.<br />
End of Optional Step<br />
The following step is very important.<br />
On the left pane, go to Connection→SSH→X11.<br />
The right pane should now say “Options controlling SSH X11 forwarding”.<br />
Click the box to Enable X11 Forwarding if there is no checkmark.<br />
In the X display location type in localhost:0.<br />
This will tell <strong>PuTTy</strong> to communicate with <strong>Xming</strong> whenever you open any windows<br />
while connected to UMBC.<br />
(Side Note: Make sure the default setting for Remote X11 authetication protocol<br />
MIT-Magic Cookie-1 is marked)<br />
All that’s left now is that we go back to the left pane and click on Session<br />
at the very top.<br />
To save all the settings we put in, go to the right pane and where it says Saved<br />
Sessions type in UMBC.<br />
Then click Save.<br />
UMBC should now appear in the window.<br />
Later on in this document when connecting to UMBC’s server, you will click on<br />
UMBC and then click Load to load up all the settings we put in earlier.<br />
2
4 WinSCP<br />
WinSCP is a program that will allow you to manage your files and copy them<br />
to and from your local machine and your remote UMBC account.<br />
4.1 Download<br />
As of June 16, 2008 the following download page contains a link to download<br />
WinSCP:<br />
http://winscp.net/eng/index.php<br />
Choose the latest non-beta version of WinSCP to download, which as of the<br />
date of this document is 4.0.7.<br />
Install using its recommended settings.<br />
4.2 Setup<br />
On the left pane, make sure Session is highlighted.<br />
Just like with <strong>PuTTy</strong>. Put in the information in the right pane.<br />
Host Name: gl.umbc.edu<br />
Port Number: 22<br />
Your user name and password.<br />
Leave the “Private key file” blank.<br />
Protocol should already be marked as SFTP(allow SCP fallback).<br />
When you are done click save on the bottom.<br />
Usually a name is already provided for you, so just click ok.<br />
3
5 Connecting to your UMBC account<br />
5.1 Starting <strong>Xming</strong><br />
First open XLaunch from Start→Programs→<strong>Xming</strong> menu<br />
Make sure Multiple Windows (default) is marked then click next.<br />
Make sure Start no Client (default) is marked then click next.<br />
Click Next again.<br />
Click Finish.<br />
At this point, in your system tray (area where your clock is displayed), an X<br />
with a circle around it should be visible. This is to indicate to you that <strong>Xming</strong><br />
is active, just right click the icon and choose exit to terminate the application<br />
at anytime.<br />
5.2 Starting <strong>PuTTy</strong><br />
Open <strong>PuTTy</strong> from wherever you saved the file.<br />
Click on the saved session “UMBC” that we created earlier and click load.<br />
Then click open.<br />
Click Yes or Ok to any pop-ups that may appear (usually this happens only for<br />
the first time)<br />
4
6 Launching software<br />
After connected, the following commands can be used:<br />
pwd - “present working directory”, where you are in the system<br />
ls - “lists” contents of your current directory (or folder)<br />
cd -folder name- changes to a new folder (or directory)<br />
pico -file name- opens up a basic text editor, you can use this to create mfiles.<br />
There are more basic commands, but it is easier to utilize them in the next<br />
section, WinSCP<br />
In the SPCB program it is likely the only program you will need to launch<br />
remotely will be MATLab.<br />
Within anywhere in the system, you can launch MATLab just by typing matlab<br />
& and pressing enter.<br />
You can also type in SAS & to run SAS remotely, but it does not run properly<br />
remotely (or may not run at all).<br />
To close your connection, just close the program or type exit at the command<br />
line and press enter.<br />
7 File Maintenance<br />
For this purpose we use the 3rd and final program, WinSCP.<br />
Note: It is not necessary to be running <strong>Xming</strong> nor <strong>PuTTy</strong> in order to use<br />
WinSCP.<br />
When you open WinSCP, go to the left pane and click Session→Stored Sessions.<br />
Click on the session we saved earlier and then click load.<br />
Go to the bottom of the page and click login.<br />
Click Yes, ok, etc to any pop-ups that appear (usually happens only on the first<br />
time).<br />
When login, the left pane represents your local machine. Where the right pane<br />
represents your remote UMBC account. From here you can manipulate files,<br />
copy, move, delete, etc just as you would in Windows Explorer.<br />
8 Conclusion<br />
That’s all you need to know about using UMBC software remotely in a nutshell.<br />
Remember running these programs locally in a computer lab (ENG or Library)<br />
is always most efficient. The contents of your account is accessible at any UMBC<br />
computer. If you ever need to access them remotely, make use of WinSCP.<br />
5


