Linear Height - Mitutoyo America Corporation
Linear Height - Mitutoyo America Corporation
Linear Height - Mitutoyo America Corporation
You also want an ePaper? Increase the reach of your titles
YUMPU automatically turns print PDFs into web optimized ePapers that Google loves.
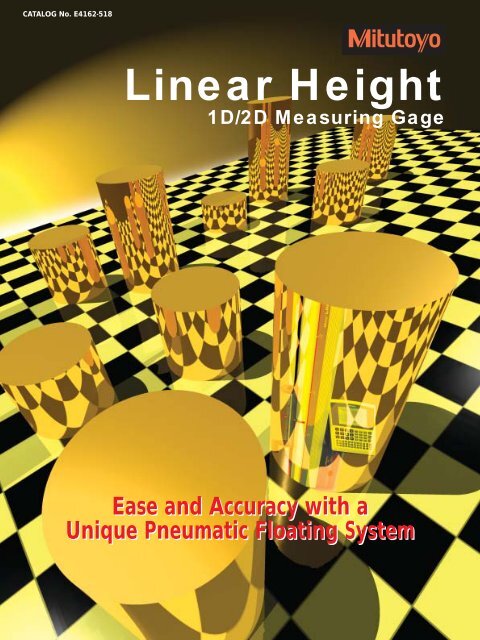
CATALOG No. E4162-518<br />
<strong>Linear</strong> <strong>Height</strong><br />
1D/2D Measuring Gage<br />
Ease and Accuracy with a<br />
Unique Pneumatic Floating System
The new <strong>Mitutoyo</strong> <strong>Linear</strong> <strong>Height</strong>, multifunctional single axis height<br />
gage, makes 2D measurement simple and accurate. It is possible to<br />
measure from simple 1D parameters of the surface height, circle<br />
diameter, distance, perpendicularity and straightness to sophisticated<br />
2D measurement.<br />
• Excellent accuracy of (2+L/600)µm with<br />
0.1µm/0.5µm resolution/repeatability.<br />
• Perpendicularity (frontal) of 6µm and<br />
straightness of 4µm are guaranteed.<br />
• Unique pneumatic full/semi-floating system<br />
makes it possible to adjust the height of the<br />
air-cushion according to the operation<br />
(movement/measurement). It achieves rapid<br />
inspection speed while maintaining the<br />
accuracy.<br />
• One-key operation for semiautomatic<br />
measuring run.<br />
• Automatic stand-by in the repeat<br />
measurement.<br />
The probe automatically moves to the next<br />
start position of measurement to stand-by.<br />
• Independent drive/measurement speed<br />
setting for quick moving (max. 40mm/s)<br />
and circumspect measuring.<br />
• Immediate GO/NG judgment at each<br />
measurement.<br />
• Complete stand-alone design with<br />
rechargeable battery pack and self-contained<br />
pneumatic system.<br />
• 24kg smart body for high mobility.<br />
• Large memory capacity for 50 measuring<br />
programs and 60,000 measured data.<br />
•Off-line part programming for increased<br />
measurement efficiency.<br />
2<br />
• In addition to the provided basic statistical<br />
processing, RS-232C data output allows you to<br />
evaluate the measurement data with an<br />
external PC and SPC software.<br />
• Data entry from a Digimatic tool.<br />
• Optional external battery charger and spare<br />
battery pack are available for continuous<br />
operation.<br />
• Choice of message language in English,<br />
German, French, Spanish, Italian and<br />
Japanese for user friendly operation.<br />
With power grip model
The LH-600B affords greater convenience and ease of use through the integration of sequential key<br />
operations for frequent measurement. The touch of a single key automatically runs the <strong>Linear</strong> <strong>Height</strong> until<br />
the last result display. This eliminates troublesome key operations at each step in the measurement process,<br />
allowing you to concentrate on workpiece inspection.<br />
[Measurement<br />
Command] keys<br />
Origin setting<br />
and probe setting<br />
[Character] keys<br />
[Suspension] key<br />
[Numeric] keys<br />
Calculation and other<br />
measurement functions<br />
[Cursor] keys<br />
Basic functions Other functions<br />
Measures the height<br />
of an upward-facing surface.<br />
Measures the height<br />
of a downward-facing surface.<br />
Measures the diameter<br />
and center of a hole.<br />
Measures the diameter<br />
and center of a shaft.<br />
Measures the width<br />
and center<br />
of an inner diameter.<br />
Measures the width<br />
and center<br />
of an outer diameter.<br />
Measures the maximum<br />
height of a downward<br />
or upward-facing surface.<br />
Measures the minimum<br />
height of an upward<br />
or downward-facing surface.<br />
Measures the difference between<br />
maximum height and minimum<br />
height of the upward or<br />
downward-facing surface.<br />
Measures the width and center<br />
position between two elements.<br />
Sets the ABS origin (absolute<br />
reference origin) or INC origin<br />
(incremental origin defined by a<br />
user), switches the ABS/INC origin,<br />
and sets the offset ABS origin<br />
Sets the probe type, measures the<br />
probe diameter, inputs the probe<br />
diameter, saves the probe,<br />
loads the probe and shifts<br />
the probe position.<br />
Performs calculation, including<br />
angle.<br />
Displays a comment when<br />
operations are paused, measures<br />
the position of a hole with a<br />
tapered probe, inputs measurement<br />
from a Digimatic measuring<br />
instrument and measures the<br />
perpendicularity.<br />
Suspends<br />
or resumes system operation.<br />
2D measurement<br />
• 2-D origin setting<br />
• X/Y axis setting<br />
• Coordinate system rotation<br />
• 2-D origin translation<br />
• Coordinate save<br />
• Coordinate recall<br />
• Element recall<br />
• Polar coordinate recall<br />
• Coordinate distance calculation<br />
• 2-D distance calculation<br />
•2 elements intersection-angle<br />
calculation<br />
•3 elements intersection-angle<br />
calculation<br />
• Pitch-circle calculation<br />
Tolerance judgment function<br />
• Tolerance/nominal value setting<br />
• Tolerance judgment result output<br />
• Warning function<br />
User-support function<br />
• Switching resolution<br />
• Power saving function<br />
• Switchable measurement speed<br />
• Semi-floating measurement<br />
Part-program functions<br />
•Creating/editing/executing a part<br />
program<br />
Statistical processing functions<br />
• Basic statistical processing<br />
• Histogram<br />
Accuracy-compensation functions<br />
• Temperature compensation<br />
• Scale factor<br />
• Setting of workpiece thermalexpansion<br />
coefficient<br />
<strong>Linear</strong> <strong>Height</strong><br />
3
Histogram<br />
4<br />
Width measurement<br />
(Outside)<br />
Width measurement<br />
(Inside)<br />
Circle Measurement<br />
SPC<br />
<strong>Height</strong> measurement<br />
(Upward)<br />
Circle measurement<br />
(Hole)<br />
<strong>Height</strong> measurement<br />
(Downward)<br />
An example of a printout<br />
A receipt printer, which can be set on the main unit of the<br />
<strong>Linear</strong> <strong>Height</strong>, is provided as an optional accessory. Printout can<br />
also be executed using a commercially available *A4-size printer.<br />
A4-size printer<br />
Receipt printer
SPC cable Mu-checker<br />
Touch signal<br />
probe<br />
CMM probes<br />
Probes<br />
Probes<br />
12AAA787 Block for calibrating<br />
probe diameter<br />
(applicable to taper<br />
probe)<br />
957261 ø2 ball probe<br />
957262 ø3 ball probe<br />
957263 ø4 ball probe<br />
12AAB552 ø10 ball probe<br />
12AAA788 ø4 ball offset probe<br />
12AAA789 ø6 ball offset probe<br />
957264 ø14 disk probe<br />
957265 ø20 disk probe<br />
226116 Test indicator (ø6<br />
stem) adapter<br />
226117 M2 CMM stylus<br />
adapter<br />
226118 M3 CMM stylus<br />
adapter<br />
12AAC072 Depth probe<br />
Lever head<br />
holder<br />
Connecting<br />
cable<br />
Auxiliary weight<br />
12AAC073 ø20 taper probe<br />
12AAB136 ø10 cylindrical<br />
probe<br />
12AAA793 Probe extension<br />
holder (84mm/3.3")<br />
12AAA792 Dial indicator (ø8<br />
stem) holder<br />
12AAA837 Dial indicator (ø3/8"<br />
stem) holder<br />
932361 Mu-checker lever<br />
head holder<br />
06AAN066 Touch signal probe<br />
12AAA794 Probe connecting<br />
cable<br />
———— CMM ball and disk<br />
hard probes are<br />
available<br />
12AAA798 Auxiliary weight<br />
Battery<br />
charger<br />
Thermal-receipt printer<br />
(with connecting cable<br />
and mounting bracket)<br />
Cable for page<br />
printer (2m/4m)<br />
RS-232C cable<br />
(2m/4m)<br />
Floppy disk drive unit<br />
(with connecting cable<br />
and mounting bracket)<br />
Page printer<br />
PC<br />
Battery<br />
Thermal-receipt printer,<br />
Floppy disk drive unit, Battery charger<br />
• Thermal receipt printer and page printer are available for recording of<br />
the measurement result.<br />
Thermal-receipt printer (220V): 12AAA796<br />
Thermal-receipt printer (120V): 12AAA797<br />
Thermal print paper (10pcs.): 12AAA802<br />
• Page printer recommended: EPSON LQ-300 or LX-300<br />
Cable for page printer (2m): 12AAA804<br />
Cable for page printer (4m): 12AAA805<br />
• Floppy disk drive unit allows for storage and retrieval of measuring<br />
programs, measurement results and measuring conditions.<br />
Floppy disk drive: 12AAA799<br />
• Battery charger: 12AAA800<br />
• RS-232C cable (2m/80"): 12AAA807<br />
RS-232C cable (4m/160"): 12AAA808<br />
• SPC cable (1m/40"): 936937<br />
• SPC cable (2m/80"): 965014<br />
<strong>Linear</strong> <strong>Height</strong><br />
5
Detailed Specification<br />
Order No. 518-321-20<br />
<strong>Linear</strong> <strong>Height</strong> 24 in w/o Manual<br />
& Power Grip<br />
518-321-20A<br />
<strong>Linear</strong> <strong>Height</strong> (in/mm)<br />
24 in, 120V<br />
Measuring range (stroke) 0 - 972mm (600mm)/0 - 38" (24")<br />
Resolution (selectable) 0.0001mm/0.001mm/0.01mm/<br />
0.1mm/.000001"/.00001"/<br />
.0001"/.001"<br />
Accuracy Measuring accuracy* 1 at 20˚C<br />
(2+L/600)µm<br />
L=Measuring length (mm)<br />
Repeatability (2σ)* 1 Plane: 0.5µm Bore: 1µm<br />
Perpendicularity* 2 6µm<br />
Straightness* 2 4µm<br />
Drive method Manual/Motor (5 - 40mm, 7 steps)<br />
Measuring force 1N<br />
Balancing method Counter balance<br />
Main unit floating method Full/semi-floating with air<br />
Air source Built-in air compressor<br />
LCD Graphic LCD<br />
(320x240 dot, with backlight)<br />
Language for display English/German/French/Spanish/<br />
Italian/Dutch/Portuguese/<br />
Swedish/Czech/Hungarian/<br />
Slovenian/Polish/Japanese<br />
Number of program 50 (max.)<br />
Number of data 60.000 (max.)<br />
Power supply AC adapter/Battery (Ni-MH)<br />
Power consumption 43VA<br />
Operation time Approx. 5hours<br />
Mass 24kg/52.8lbs<br />
Standard accessories ø5 stepped probe, block for<br />
calibrating probe diamater<br />
* 1 This accuracy is guaranteed when using the standard eccentric ø5 probe.<br />
* 2 This accuracy is guaranteed when using a lever head (MLH-321) or Mu-Checker (M-411)<br />
<strong>Mitutoyo</strong> <strong>Corporation</strong><br />
20-1, Sakado 1-Chome, Takatsu-ku, Kawasaki-shi,<br />
Kanagawa 213-0012, Japan<br />
Phone (044)813-8230 Fax (044)813-8231<br />
http://www.mitutoyo.co.jp<br />
DIMENSIONS<br />
1013 (39.88")<br />
140 (5.51")<br />
972 (38.27")<br />
372 (14.64")<br />
600 (23.62")<br />
262 (10.31")<br />
240 (9.45") 82.5<br />
(3.25")<br />
287 (11.30")<br />
Specifications are subject to change without notice.<br />
600<br />
24<br />
400<br />
16<br />
200<br />
8<br />
LINEAR HEIGHT<br />
Unit: mm (inch)<br />
LINEAR HEIGHT<br />
600<br />
Printed in Japan<br />
35.000207 (2) CBS


