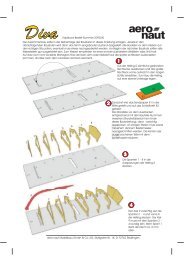
Building instructions Fournier RF-4D - Aero-naut
Building instructions Fournier RF-4D - Aero-naut
Building instructions Fournier RF-4D - Aero-naut

You also want an ePaper? Increase the reach of your titles
YUMPU automatically turns print PDFs into web optimized ePapers that Google loves.
<strong>Fournier</strong> <strong>RF</strong>-<strong>4D</strong> building <strong>instructions</strong><br />
<strong>Fournier</strong> <strong>RF</strong>-<strong>4D</strong><br />
completely, otherwise the PU adhesive might be forced inside them - this would be catastrophic! Please blow<br />
into the sleeves to check that they are sealed. Sand the sealed end of the sleeve to a taper over a length of<br />
about 5 mm, as this helps to distribute the adhesive when it is applied to the hole. Roughen the surface of<br />
the sleeve thoroughly using abrasive paper.<br />
The model can now be assembled “dry” (without glue). The wing dihedral should be 4° on each side,<br />
measured at the underside of the wing; this corresponds to 90 mm of packing under each wingtip. When the<br />
fuselage is resting on its skid, the packing should be about 100 mm high on each side.<br />
The next stage is to glue the joiner sleeves in the wings using PU adhesive, but the material is very difficult<br />
to remove, so certain protective measures are necessary. Apply Sellotape or similar to the root wing fairings<br />
of the fuselage, and cut through the openings neatly using a sharp balsa knife. Wipe Vaseline over the joiner<br />
tube (66), the inside of the joiner sleeves (inside only!), and the wing panel root ribs.<br />
Apply PU adhesive to the entire surface of the hole in each wing root using a length of hardwood dowel<br />
(approx. 5 - 6 mm Ø, 200 mm long); use a torch to check glue distribution. Apply a light coating of adhesive<br />
to the joiner sleeve (2). Spray a light mist of water into the hole in the wing and allow any excess water to run<br />
out again. Fit the joiner tube in the fuselage and slide one joiner sleeve onto it. Carefully slide the wing onto<br />
the joiner sleeve, working slowly and carefully. Remove excess PU adhesive as it is squeezed out, until the<br />
wing is resting against the fuselage root fairing.<br />
Now fix the wing to the fuselage thoroughly using adhesive tape, applied all round the root joint. Repeat the<br />
procedure with the second wing panel, then place the model in the established position and pack up the<br />
wingtips to the correct height.<br />
Important: the pot-life (working time) of the PU adhesive is about 30 - 45 minutes after application (i.e. after<br />
exposure to humidity). Initially the consistency of the adhesive is similar to honey, but humidity causes it to<br />
foam up and start to harden. At 20°C the adhesive sets in two hours; it reaches full strength in 24 hours.<br />
In an enclosed space the foaming action generates considerable pressure, and this is quite sufficient to push<br />
the wings away from the fuselage. Check the joints constantly for a period of at least an hour.<br />
The plywood air cylinder plate (6) bears a marking which denotes the centre of the holder for the retract air<br />
cylinder. Fix the holder to the plate using three M2.5 x 16 countersunk screws and nuts and fit the cylinder in<br />
the holder. Connect the air cylinder (5) to the retract unit as shown in Fig. 3, then re-install the assembly.<br />
Important: set the retract unit to the “extended” position (the air cylinder is under zero pressure in the “wheel<br />
down” position). Roughen the fuselage side and glue the air cylinder plate (6) in place as follows, facing foreand<br />
aft: first press the plate in position and run a pencil round it along the fuselage side, then drill a 2.2 mm<br />
Ø hole in the centre of the marked area. Apply adhesive tape to the outside of the fuselage to protect it.<br />
The plate (6) should now be held to the fuselage side from the outside using a 2.2 mm Ø self-tapping screw.<br />
To avoid the screw pulling the fuselage out of shape, cut a flat piece of 5 mm plywood about 100 x 50 mm in<br />
size, drill a 2.5 mm Ø hole in it and place it against the outside of the fuselage. Apply thickened epoxy to the<br />
plywood plate (6), position it carefully and fit the self-tapping screw into the plate from the outside. Don’t<br />
over-tighten the screw or you could distort the fuselage. Allow the epoxy to set hard, then remove the retract<br />
unit and air cylinder again.<br />
Now we turn to the motor mount. The <strong>instructions</strong> supplied with the mount describe in detail how to set the<br />
correct “hardness” to suit the motor you are using. In its standard form the motor / motor mount assembly<br />
may not fit under the cowl; to make the assembly as narrow as possible remove both “L”-section rails and<br />
remove about 3 mm from them. Fig. 6 shows how the rails are attached to the outriggers - see also Fig. 7.<br />
On the plan the overall length of the motor assembly to the front face of the propeller driver is stated as 130<br />
mm - please keep strictly to this. The motor and motor mount have no “visible” downthrust, but the geometry<br />
of the wing and tailplane produces an effective downthrust angle of about -2°. The tailplane is set at positive<br />
incidence, with the effect that the model flies tail-high - like the full-size machine.<br />
The original prototype was powered by a Saito FA-100T, and for this reason some of the photos exhibit<br />
obvious discrepancies compared to these <strong>instructions</strong> - please don’t let this confuse you. Both carburettors<br />
of this engine are mounted on top of the crankcase, so the fueltank has to be mounted higher than normal.<br />
The motor is also extremely short, so a plywood box has to be constructed, and this houses part of the<br />
4