Digipass Plug-In for IAS Getting Started - Vasco
Digipass Plug-In for IAS Getting Started - Vasco
Digipass Plug-In for IAS Getting Started - Vasco

You also want an ePaper? Increase the reach of your titles
YUMPU automatically turns print PDFs into web optimized ePapers that Google loves.
<strong>Digipass</strong> <strong>Plug</strong>-<strong>In</strong> <strong>for</strong> <strong>IAS</strong> <strong>Getting</strong> <strong>Started</strong> <strong>In</strong>itial Setup and Testing<br />
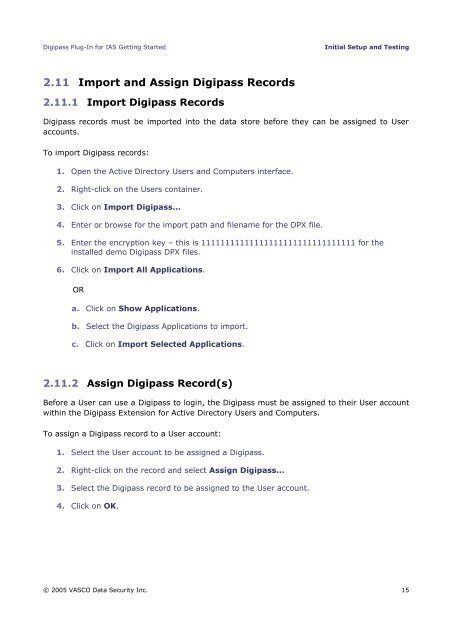
2.11 Import and Assign <strong>Digipass</strong> Records<br />
2.11.1 Import <strong>Digipass</strong> Records<br />
<strong>Digipass</strong> records must be imported into the data store be<strong>for</strong>e they can be assigned to User<br />
accounts.<br />
To import <strong>Digipass</strong> records:<br />
1. Open the Active Directory Users and Computers interface.<br />
2. Right-click on the Users container.<br />
3. Click on Import <strong>Digipass</strong>...<br />
4. Enter or browse <strong>for</strong> the import path and filename <strong>for</strong> the DPX file.<br />
5. Enter the encryption key – this is 11111111111111111111111111111111 <strong>for</strong> the<br />
installed demo <strong>Digipass</strong> DPX files.<br />
6. Click on Import All Applications.<br />
OR<br />
a. Click on Show Applications.<br />
b. Select the <strong>Digipass</strong> Applications to import.<br />
c. Click on Import Selected Applications.<br />
2.11.2 Assign <strong>Digipass</strong> Record(s)<br />
Be<strong>for</strong>e a User can use a <strong>Digipass</strong> to login, the <strong>Digipass</strong> must be assigned to their User account<br />
within the <strong>Digipass</strong> Extension <strong>for</strong> Active Directory Users and Computers.<br />
To assign a <strong>Digipass</strong> record to a User account:<br />
1. Select the User account to be assigned a <strong>Digipass</strong>.<br />
2. Right-click on the record and select Assign <strong>Digipass</strong>...<br />
3. Select the <strong>Digipass</strong> record to be assigned to the User account.<br />
4. Click on OK.<br />
© 2005 VASCO Data Security <strong>In</strong>c. 15


![KB [100006] - Vasco](https://img.yumpu.com/12539350/1/184x260/kb-100006-vasco.jpg?quality=85)