Digipass Plug-In for SBR Installation Guide - Vasco
Digipass Plug-In for SBR Installation Guide - Vasco
Digipass Plug-In for SBR Installation Guide - Vasco

You also want an ePaper? Increase the reach of your titles
YUMPU automatically turns print PDFs into web optimized ePapers that Google loves.
<strong>Digipass</strong> <strong>Plug</strong>-<strong>In</strong> <strong>for</strong> <strong>SBR</strong><br />
<strong>SBR</strong> <strong>Plug</strong>-<strong>In</strong><br />
<strong>SBR</strong><br />
Steel-Belted RADIUS<br />
<strong>In</strong>stallation G uide
Disclaimer of Warranties and Limitations of Liabilities<br />
Disclaimer of Warranties and Limitations of Liabilities<br />
The Product is provided on an 'as is' basis, without any other warranties, or conditions, express<br />
or implied, including but not limited to warranties of merchantable quality, merchantability of<br />
fitness <strong>for</strong> a particular purpose, or those arising by law, statute, usage of trade or course of<br />
dealing. The entire risk as to the results and per<strong>for</strong>mance of the product is assumed by you.<br />
Neither we nor our dealers or suppliers shall have any liability to you or any other person or<br />
entity <strong>for</strong> any indirect, incidental, special or consequential damages whatsoever, including but<br />
not limited to loss of revenue or profit, lost or damaged data of other commercial or economic<br />
loss, even if we have been advised of the possibility of such damages or they are <strong>for</strong>eseeable;<br />
or <strong>for</strong> claims by a third party. Our maximum aggregate liability to you, and that of our dealers<br />
and suppliers shall not exceed the amount paid by you <strong>for</strong> the Product. The limitations in this<br />
section shall apply whether or not the alleged breach or default is a breach of a fundamental<br />
condition or term, or a fundamental breach. Some states/countries do not allow the exclusion<br />
or limitation or liability <strong>for</strong> consequential or incidental damages so the above limitation may<br />
not apply to you.<br />
Copyright<br />
© 2006 VASCO Data Security <strong>In</strong>c. All rights reserved.<br />
No part of this publication may be reproduced, stored in a retrieval system, or transmitted, in<br />
any <strong>for</strong>m or by any means, electronic, mechanical, photocopying, recording, or otherwise,<br />
without the prior written permission of VASCO Data Security <strong>In</strong>c.<br />
Trademarks<br />
VACMAN and <strong>Digipass</strong> are registered trademarks of VASCO Data Security <strong>In</strong>ternational <strong>In</strong>c.<br />
Microsoft and Windows are registered trademarks of Microsoft Corporation.<br />
All other trademarks are the property of their respective holders.<br />
© 2006 VASCO Data Security <strong>In</strong>c. 2
<strong>Digipass</strong> <strong>Plug</strong>-<strong>In</strong> <strong>for</strong> <strong>SBR</strong> <strong>In</strong>stallation <strong>Guide</strong> Table of Contents<br />
Table of Contents<br />
1 <strong>In</strong>troduction..........................................................................................................5<br />
1.1 Available Reference <strong>Guide</strong>s.......................................................................................... 5<br />
1.2 System Requirements...................................................................................................6<br />
1.2.1 Requirements Specific to Active Directory.................................................................... 6<br />
1.2.2 Requirements Specific to ODBC Database.................................................................... 6<br />
1.3 Components and Options..............................................................................................7<br />
2 Pre-installation Tasks........................................................................................... 8<br />
2.1 Data Store.................................................................................................................... 8<br />
2.2 Active Directory............................................................................................................9<br />
2.2.1 Checklist – Decisions................................................................................................ 9<br />
2.2.2 Active Directory Setup.............................................................................................. 9<br />
2.2.2.1 Schema Extensions............................................................................................................9<br />
2.2.3 SSL Setup.............................................................................................................. 9<br />
2.3 ODBC Database...........................................................................................................11<br />
2.3.1 Checklist – Decisions.............................................................................................. 11<br />
2.3.2 Modify Database Structure...................................................................................... 11<br />
2.3.2.1 DPDBadmin Utility........................................................................................................... 11<br />
2.3.2.2 Permissions.................................................................................................................... 11<br />
2.3.3 PostgreSQL Database............................................................................................. 12<br />
2.4 System Clock.............................................................................................................. 12<br />
2.5 Serial Number and Maintenance ID............................................................................ 12<br />
2.6 Checklist – Active Directory........................................................................................13<br />
2.7 Checklist – ODBC Database.........................................................................................13<br />
3 <strong>In</strong>stalling <strong>Digipass</strong> <strong>Plug</strong>-<strong>In</strong> <strong>for</strong> <strong>SBR</strong>.....................................................................14<br />
3.1 Typical <strong>In</strong>stallation – Active Directory........................................................................ 14<br />
3.1.1 Scenario & Decisions.............................................................................................. 14<br />
3.1.2 Extend Schema..................................................................................................... 14<br />
3.1.3 Run <strong>In</strong>stall............................................................................................................ 15<br />
3.2 Typical <strong>In</strong>stallation – Embedded Database................................................................. 22<br />
3.2.1 Scenario & Decisions.............................................................................................. 22<br />
3.2.2 Run <strong>In</strong>stall............................................................................................................ 22<br />
3.3 Typical <strong>In</strong>stallation – ODBC Database.........................................................................28<br />
3.3.1 Scenario & Decisions.............................................................................................. 28<br />
3.3.2 Extend Schema..................................................................................................... 28<br />
3.3.3 Run <strong>In</strong>stall............................................................................................................ 29<br />
3.4 Multiple Product <strong>In</strong>stallation...................................................................................... 36<br />
3.5 Upgrading from <strong>Digipass</strong> <strong>Plug</strong>-<strong>In</strong> <strong>for</strong> Funk 2.0 or 2.1..................................................37<br />
3.6 Post-<strong>In</strong>stallation Tasks...............................................................................................38<br />
3.6.1 Licensing.............................................................................................................. 38<br />
3.6.1.1 Evaluation Serial Number..................................................................................................38<br />
3.6.1.2 Obtain License Key File.....................................................................................................38<br />
3.6.1.3 Load License Key.............................................................................................................38<br />
3.6.2 Encryption Settings................................................................................................ 39<br />
3.6.3 Backup Strategy.................................................................................................... 39<br />
3.6.4 Active Directory Tasks............................................................................................ 39<br />
© 2006 VASCO Data Security <strong>In</strong>c. 3
<strong>Digipass</strong> <strong>Plug</strong>-<strong>In</strong> <strong>for</strong> <strong>SBR</strong> <strong>In</strong>stallation <strong>Guide</strong> Table of Contents<br />
3.6.4.1 Additional Setup Steps <strong>for</strong> Multiple Domains........................................................................39<br />
3.6.4.2 Set up Active Directory SSL.............................................................................................. 39<br />
3.6.4.3 Active Directory Replication...............................................................................................39<br />
3.6.4.4 Active Directory Auditing.................................................................................................. 40<br />
3.6.5 ODBC Tasks.......................................................................................................... 40<br />
3.6.5.1 Configure User ID and Domain Handling............................................................................. 40<br />
3.6.5.2 Permissions <strong>for</strong> Group Check.............................................................................................41<br />
3.6.5.3 Configure Connection Parameters...................................................................................... 42<br />
3.6.5.4 Additional Databases........................................................................................................42<br />
3.6.5.5 Additional Setup Steps <strong>for</strong> Multiple <strong>SBR</strong> <strong>Plug</strong>-<strong>In</strong>s..................................................................42<br />
3.6.6 Configure Steel-Belted RADIUS to Use <strong>SBR</strong> <strong>Plug</strong>-<strong>In</strong>..................................................... 42<br />
4 Add Components to <strong>In</strong>stallation..........................................................................43<br />
5 Repair <strong>In</strong>stallation.............................................................................................. 44<br />
6 Uninstall <strong>Digipass</strong> <strong>Plug</strong>-<strong>In</strong> <strong>for</strong> <strong>SBR</strong>...................................................................... 45<br />
6.1 Manual Uninstall......................................................................................................... 45<br />
6.2 Active Directory..........................................................................................................45<br />
6.3 ODBC Database...........................................................................................................45<br />
7 DPADadmin Utility...............................................................................................46<br />
7.1 addschema command................................................................................................. 46<br />
7.2 upgradeprofiles command.......................................................................................... 48<br />
8 DPDBadmin Utility...............................................................................................49<br />
8.1 addschema command................................................................................................. 49<br />
8.1.1.1 Prerequisite <strong>In</strong><strong>for</strong>mation................................................................................................... 49<br />
8.1.1.2 Extend the Schema on the <strong>SBR</strong> Server............................................................................... 49<br />
8.1.1.3 Command Line Syntax......................................................................................................49<br />
8.2 upgradeprofiles command.......................................................................................... 51<br />
© 2006 VASCO Data Security <strong>In</strong>c. 4
<strong>Digipass</strong> <strong>Plug</strong>-<strong>In</strong> <strong>for</strong> <strong>SBR</strong> <strong>In</strong>stallation <strong>Guide</strong> <strong>In</strong>troduction<br />
1 <strong>In</strong>troduction<br />
1.1 Available Reference <strong>Guide</strong>s<br />
These Reference <strong>Guide</strong>s are available:<br />
Product <strong>Guide</strong><br />
The Product <strong>Guide</strong> will introduce you to the features of this product and the various options<br />
you have <strong>for</strong> using it.<br />
<strong>In</strong>stallation <strong>Guide</strong><br />
Use this guide when planning and working through an installation of the product.<br />
Getting Started<br />
To get you up and running quickly with a simple installation and setup of the product.<br />
Administrator Reference<br />
<strong>In</strong>-depth in<strong>for</strong>mation required <strong>for</strong> administration of the product.<br />
Data Migration Tool <strong>Guide</strong><br />
Takes you through a data migration from one VASCO product to another, using the VASCO<br />
Data Migration Tool.<br />
Help Files<br />
Accompany various utilities and the administration interfaces.<br />
© 2006 VASCO Data Security <strong>In</strong>c. 5
<strong>Digipass</strong> <strong>Plug</strong>-<strong>In</strong> <strong>for</strong> <strong>SBR</strong> <strong>In</strong>stallation <strong>Guide</strong> <strong>In</strong>troduction<br />
1.2 System Requirements<br />
<strong>SBR</strong> <strong>Plug</strong>-<strong>In</strong><br />
Steel-Belted RADIUS 5.0 or greater<br />
Operating System<br />
One of the following Windows versions:<br />
Language<br />
Windows Server 2003 (32-bit version only)<br />
Windows XP Professional (32-bit version only) with Service Pack 1 or above<br />
Windows 2000 with Service Pack 4 or above<br />
The <strong>Digipass</strong> <strong>Plug</strong>-<strong>In</strong> <strong>for</strong> <strong>SBR</strong> is designed to function on any language version of Windows.<br />
However, the product has only been comprehensively tested on English language versions of<br />
Windows, with some additional German language testing.<br />
1.2.1 Requirements Specific to Active Directory<br />
<strong>Digipass</strong> Extension <strong>for</strong> Active Directory Users and Computers<br />
Active Directory Users and Computers Snap-<strong>In</strong><br />
Active Directory set up <strong>for</strong> SSL<br />
<strong>In</strong> the following cases, SSL must be available <strong>for</strong> <strong>Digipass</strong> <strong>Plug</strong>-<strong>In</strong> <strong>for</strong> <strong>SBR</strong> components to<br />
connect to Active Directory:<br />
<strong>SBR</strong> <strong>Plug</strong>-<strong>In</strong> not installed on a Domain Controller.<br />
Administration <strong>In</strong>terfaces not installed on a Domain Controller.<br />
<strong>SBR</strong> <strong>Plug</strong>-<strong>In</strong> and/or Administration <strong>In</strong>terface(s) on a Domain Controller, but accessing<br />
data in another domain.<br />
An Enterprise Certificate Authority must be installed in the <strong>for</strong>est to enable SSL.<br />
Windows Certificate Services is available as an optional Windows component.<br />
1.2.2 Requirements Specific to ODBC Database<br />
The <strong>Digipass</strong> <strong>Plug</strong>-<strong>In</strong> <strong>for</strong> <strong>SBR</strong> will support most modern ODBC-compliant relational,<br />
transactional databases. It has been tested on the following databases:<br />
Oracle 9i<br />
Microsoft SQL Server 2000<br />
DB2 8.1<br />
Sybase Adaptive Server Anywhere 9.0<br />
PostgreSQL 8.1<br />
© 2006 VASCO Data Security <strong>In</strong>c. 6
<strong>Digipass</strong> <strong>Plug</strong>-<strong>In</strong> <strong>for</strong> <strong>SBR</strong> <strong>In</strong>stallation <strong>Guide</strong> <strong>In</strong>troduction<br />
1.3 Components and Options<br />
The following components make up the <strong>Digipass</strong> <strong>Plug</strong>-<strong>In</strong> <strong>for</strong> <strong>SBR</strong>. See the Product <strong>Guide</strong> <strong>for</strong><br />
more in<strong>for</strong>mation.<br />
<strong>SBR</strong> <strong>Plug</strong>-<strong>In</strong><br />
The <strong>SBR</strong> <strong>Plug</strong>-<strong>In</strong> is an Authentication Module <strong>for</strong> Steel-Belted RADIUS which permits an<br />
increase in <strong>SBR</strong> security by adding two-factor authentication.<br />
<strong>Digipass</strong> Extension <strong>for</strong> Active Directory Users and Computers<br />
<strong>Digipass</strong> Extension to the Active Directory Users and Computers interface. It allows integrated<br />
administration of additional User settings and <strong>Digipass</strong> records. The Extension is used only<br />
when Active Directory is selected as the data store <strong>for</strong> the <strong>Digipass</strong> <strong>Plug</strong>-<strong>In</strong> <strong>for</strong> <strong>SBR</strong>.<br />
Administration MMC <strong>In</strong>terface<br />
This interface allows easy administration of <strong>Digipass</strong>-related data. If the data store is Active<br />
Directory, the Administration MMC <strong>In</strong>terface will be used only to administer configuration<br />
settings such as Policies and Components. If the data store is an ODBC database, the interface<br />
will be used to administer all <strong>Digipass</strong>-related data.<br />
User Self Management Web Site<br />
Allows Users to make appropriate changes to their own <strong>Digipass</strong> User account, including<br />
password changes.<br />
Virtual <strong>Digipass</strong> Message Delivery Component<br />
Sends a One Time Password through a text message gateway to a User’s mobile phone.<br />
Virtual <strong>Digipass</strong> OTP Request Site<br />
Allows a User to specifically request an OTP to be sent to their mobile phone.<br />
© 2006 VASCO Data Security <strong>In</strong>c. 7
<strong>Digipass</strong> <strong>Plug</strong>-<strong>In</strong> <strong>for</strong> <strong>SBR</strong> <strong>In</strong>stallation <strong>Guide</strong> Pre-installation Tasks<br />
2 Pre-installation Tasks<br />
This section outlines the preparation that you need to do be<strong>for</strong>e installing the <strong>Digipass</strong> <strong>Plug</strong>-<strong>In</strong><br />
<strong>for</strong> <strong>SBR</strong>.<br />
2.1 Data Store<br />
Be<strong>for</strong>e starting other pre-install tasks, you must decide on the type of data store to be used.<br />
There are three options:<br />
Active Directory<br />
<strong>In</strong>tegrate <strong>Digipass</strong>-related data with Active Directory and Windows user accounts.<br />
ODBC Database<br />
<strong>In</strong>clude <strong>Digipass</strong>-related data in a new or existing ODBC database.<br />
Embedded PostgreSQL Database<br />
<strong>In</strong>clude an embedded PostgreSQL database in the installation of <strong>Digipass</strong> <strong>Plug</strong>-<strong>In</strong> <strong>for</strong> <strong>SBR</strong>, and<br />
use it as the data store.<br />
© 2006 VASCO Data Security <strong>In</strong>c. 8
<strong>Digipass</strong> <strong>Plug</strong>-<strong>In</strong> <strong>for</strong> <strong>SBR</strong> <strong>In</strong>stallation <strong>Guide</strong> Pre-installation Tasks<br />
2.2 Active Directory<br />
2.2.1 Checklist – Decisions<br />
The following checklist contains the key decisions to make be<strong>for</strong>e you start.<br />
Approve the Schema Extensions<br />
If your company has an approval process to go through <strong>for</strong> extensions to the Active<br />
Directory Schema, go through this process.<br />
Identify the <strong>Digipass</strong> Configuration Domain<br />
Either identify an existing Domain or sub-domain into which the <strong>Digipass</strong><br />
Configuration Container should be added, or plan to create a new one.<br />
Domain Administrator<br />
Select a Domain Administrator account in the <strong>Digipass</strong> Configuration Domain to use<br />
in installing the <strong>Digipass</strong> <strong>Plug</strong>-<strong>In</strong> <strong>for</strong> <strong>SBR</strong>.<br />
<strong>In</strong>stallation Location<br />
Decide where to install the <strong>Plug</strong>-<strong>In</strong>, if a choice of <strong>SBR</strong> server location exists.<br />
If you are installing with the purpose of going through a basic evaluation process,<br />
installing onto a Domain Controller is recommended. This will mean that SSL will not<br />
need to be set up in order <strong>for</strong> the <strong>Plug</strong>-<strong>In</strong> to function.<br />
2.2.2 Active Directory Setup<br />
2.2.2.1 Schema Extensions<br />
Run the addschema command:<br />
1. Log into the Schema Master as a member of the Schema Administrators group.<br />
2. Copy dpadadmin.exe onto the Schema Master<br />
3. Open a command prompt in the location to which it was copied.<br />
4. Type:<br />
dpadadmin addschema -v<br />
5. If DPADadmin detects that Schema extensions are not currently permitted, it will<br />
prompt you whether to enable them or not. Enter y to enable them, or n to cancel<br />
(see 7.1 addschema command <strong>for</strong> more in<strong>for</strong>mation).<br />
6. Wait several minutes <strong>for</strong> the Schema extensions to replicate to all the domains and <strong>for</strong><br />
the local Domain Controller to update its internal data caches.<br />
2.2.3 SSL Setup<br />
An Enterprise Certificate Authority must exist in the <strong>for</strong>est so that SSL may be used by the<br />
<strong>SBR</strong> <strong>Plug</strong>-<strong>In</strong> to connect to Active Directory. If one is not already installed, follow the<br />
instructions below to install the Certificate Authority included with Windows.<br />
The Certificate Authority may be installed on any server in the <strong>for</strong>est, if the server selected is<br />
available to the Domain Controller(s) used by the <strong>SBR</strong> <strong>Plug</strong>-<strong>In</strong>.<br />
© 2006 VASCO Data Security <strong>In</strong>c. 9
<strong>Digipass</strong> <strong>Plug</strong>-<strong>In</strong> <strong>for</strong> <strong>SBR</strong> <strong>In</strong>stallation <strong>Guide</strong> Pre-installation Tasks<br />
You may need the Windows CD in order to complete this process.<br />
1. Open Windows Add or Remove Programs.<br />
2. Click on the Add/Remove Windows Components button.<br />
The Windows Components Wizard will be displayed.<br />
3. Tick the Certificate Services checkbox and click Next.<br />
4. Select the Enterprise root CA option button and click Next.<br />
5. Enter the details required and click on Next.<br />
6. If required, modify the Data Storage Locations. Otherwise, leave these as the default<br />
values and click on Next.<br />
Certificate Server has now been installed. Wait several minutes to allow the Domain<br />
Controllers to enrol <strong>for</strong> Domain Controller certificates.<br />
© 2006 VASCO Data Security <strong>In</strong>c. 10
<strong>Digipass</strong> <strong>Plug</strong>-<strong>In</strong> <strong>for</strong> <strong>SBR</strong> <strong>In</strong>stallation <strong>Guide</strong> Pre-installation Tasks<br />
2.3 ODBC Database<br />
2.3.1 Checklist – Decisions<br />
The following checklist contains the key decisions to make be<strong>for</strong>e you start.<br />
Database Location and Setup<br />
A number of decisions are required <strong>for</strong> the ODBC database to be used:<br />
The server on which the database will be located.<br />
Will the data <strong>for</strong> the <strong>Digipass</strong> <strong>Plug</strong>-<strong>In</strong> <strong>for</strong> <strong>SBR</strong> will be stored in a new database, or<br />
added to an existing database.<br />
Will a new schema be used?<br />
Which database account will own the tables created?<br />
New Database<br />
Decide the collation sequence to be used – <strong>for</strong> example, case-sensitivity.<br />
Database User Accounts<br />
Create or select database user accounts <strong>for</strong>:<br />
Modifying the database schema (database administrator account required).<br />
<strong>SBR</strong> <strong>Plug</strong>-<strong>In</strong> (see the Administrator Reference <strong>for</strong> details on the permissions<br />
required)<br />
Administration MMC <strong>In</strong>terface (see the Administrator Reference <strong>for</strong> details on the<br />
permissions required)<br />
2.3.2 Modify Database Structure<br />
2.3.2.1 DPDBadmin Utility<br />
Run the addschema command:<br />
1. Copy dpdbadmin.exe from the Windows/Utilities directory on the installation CD or<br />
zip file onto the computer from which the database can be accessed.<br />
2. Create an ODBC Data Source <strong>for</strong> the database on the computer, if one does not<br />
currently exist.<br />
3. Open a command prompt in the location to which it was copied.<br />
4. Type:<br />
dpdbadmin addschema –u user_name –p password -d dsn<br />
Ensure that the User ID and password used are that of the database administrator<br />
account.<br />
2.3.2.2 Permissions<br />
If the database user account used by the <strong>SBR</strong> <strong>Plug</strong>-<strong>In</strong> is not the owner of the tables and is not<br />
a database administrator account, it must be granted permissions <strong>for</strong> the tables, or ownership<br />
of the tables transferred.<br />
© 2006 VASCO Data Security <strong>In</strong>c. 11
<strong>Digipass</strong> <strong>Plug</strong>-<strong>In</strong> <strong>for</strong> <strong>SBR</strong> <strong>In</strong>stallation <strong>Guide</strong> Pre-installation Tasks<br />
The database user account used by the Administration MMC <strong>In</strong>terface will require the same.<br />
Note<br />
Ensure that it is possible <strong>for</strong> the account(s) mentioned to reference the tables<br />
by name without a schema prefix. If this cannot be done, see the Administrator<br />
Reference <strong>for</strong> advanced setup instructions.<br />
2.3.3 PostgreSQL Database<br />
If you will be using a PostgreSQL database other than the embedded database (ie, selecting<br />
the <strong>Plug</strong>-<strong>In</strong> install using an ODBC-compliant database option during installation), ensure<br />
that the LF CR/LF conversion option is disabled. To do this:<br />
1. Open the ODBC Data Source Administrator.<br />
2. Select the data source.<br />
3. Click on Configure...<br />
4. Click on Datasource.<br />
5. Click on Page 2.<br />
6. Untick the LF CR/LF conversion checkbox.<br />
7. Click on OK.<br />
8. Click on Save.<br />
9. Click on OK.<br />
2.4 System Clock<br />
The <strong>SBR</strong> <strong>Plug</strong>-<strong>In</strong> requires that your server’s time is set correctly in relation to GMT, and that<br />
the time zone and daylight savings indicators are set correctly.<br />
All machines hosting components of the <strong>Digipass</strong> <strong>Plug</strong>-<strong>In</strong> <strong>for</strong> <strong>SBR</strong>, if not Domain Controllers,<br />
should be clock-synchronized with the Domain Controller(s) in the domain.<br />
2.5 Serial Number and Maintenance ID<br />
You must have a product Serial Number and a company Maintenance ID unless you are<br />
installing an evaluation version of the <strong>Digipass</strong> <strong>Plug</strong>-<strong>In</strong> <strong>for</strong> <strong>SBR</strong>. If these have not been issued<br />
to you, contact your VASCO Reseller.<br />
© 2006 VASCO Data Security <strong>In</strong>c. 12
<strong>Digipass</strong> <strong>Plug</strong>-<strong>In</strong> <strong>for</strong> <strong>SBR</strong> <strong>In</strong>stallation <strong>Guide</strong> Pre-installation Tasks<br />
2.6 Checklist – Active Directory<br />
<strong>Digipass</strong> Configuration Domain has been identified.<br />
Active Directory Schema extensions have been made.<br />
Active Directory changes have been replicated to all required Domain<br />
Controllers.<br />
System clock and time zone settings are accurate.<br />
Serial Number has been obtained.<br />
Enterprise Certificate Authority is installed, if SSL is required.<br />
2.7 Checklist – ODBC Database<br />
Database schema modifications have been made to a new or existing<br />
database.<br />
Database user account(s) <strong>for</strong> <strong>SBR</strong> <strong>Plug</strong>-<strong>In</strong> and administration have been<br />
created. Required permissions have been granted to the account(s).<br />
System clock and time zone settings are accurate.<br />
Serial Number and Maintenance ID have been obtained.<br />
© 2006 VASCO Data Security <strong>In</strong>c. 13
<strong>Digipass</strong> <strong>Plug</strong>-<strong>In</strong> <strong>for</strong> <strong>SBR</strong> <strong>In</strong>stallation <strong>Guide</strong> <strong>In</strong>stalling <strong>Digipass</strong> <strong>Plug</strong>-<strong>In</strong> <strong>for</strong> <strong>SBR</strong><br />
3 <strong>In</strong>stalling <strong>Digipass</strong> <strong>Plug</strong>-<strong>In</strong> <strong>for</strong> <strong>SBR</strong><br />
3.1 Typical <strong>In</strong>stallation – Active Directory<br />
3.1.1 Scenario & Decisions<br />
This 'typical installation' process uses the following decisions and scenario:<br />
Implementation Decisions<br />
The following decisions were taken <strong>for</strong> the purposes of this installation process:<br />
The Schema extensions have been approved.<br />
The <strong>Digipass</strong> Configuration Domain has been identified as the existing sub-domain,<br />
test.dm3.vasco.<br />
The member server SVR of the sub-domain test.dm3.vasco will be used to install<br />
<strong>Digipass</strong> <strong>Plug</strong>-<strong>In</strong> <strong>for</strong> <strong>SBR</strong>. This requires an Enterprise Certificate Authority to be installed<br />
in the <strong>for</strong>est, so that SSL is enabled. The instructions will take you through installing<br />
Windows Certificate Services onto a Domain Controller in the Forest Root domain.<br />
The scenario<br />
A Domain dm3.vasco (this is the Forest Root Domain).<br />
A sub-domain test.dm3.vasco of dm3.vasco. The sub-domain acts as the <strong>Digipass</strong><br />
Configuration Domain and contains all the configuration data, including Policies and<br />
Components.<br />
A single <strong>SBR</strong> Server SVR, a member server in the <strong>Digipass</strong> Configuration Domain.<br />
A Domain Controller DC-02 acting as the Schema Master on dm3.vasco.<br />
Certificate Server will be installed on DC-02.<br />
3.1.2 Extend Schema<br />
Run the addschema command:<br />
1. Log into the machine from which schema changes will be made (DC-02).<br />
2. Copy dpadadmin.exe onto the machine.<br />
3. Open a command prompt in the location to which it was copied.<br />
4. Type:<br />
dpadadmin addschema<br />
5. If DPADadmin detects that Schema extensions are not currently permitted, it will<br />
prompt you whether to enable them or not. Enter y to enable them, or n to cancel.<br />
6. Wait several minutes <strong>for</strong> the Schema extensions to replicate to the sub-domain and<br />
<strong>for</strong> the local Domain Controller to update its internal data caches.<br />
© 2006 VASCO Data Security <strong>In</strong>c. 14
<strong>Digipass</strong> <strong>Plug</strong>-<strong>In</strong> <strong>for</strong> <strong>SBR</strong> <strong>In</strong>stallation <strong>Guide</strong> <strong>In</strong>stalling <strong>Digipass</strong> <strong>Plug</strong>-<strong>In</strong> <strong>for</strong> <strong>SBR</strong><br />
3.1.3 Run <strong>In</strong>stall<br />
<strong>In</strong>stall the standard installation components on a single machine.<br />
1. Start the <strong>Digipass</strong> <strong>Plug</strong>-<strong>In</strong> <strong>for</strong> <strong>SBR</strong> install process on the <strong>SBR</strong> server (SVR).<br />
If you are not using the CD Autorun interface, locate and double-click on the<br />
<strong>Digipass</strong>_<strong>Plug</strong><strong>In</strong>_<strong>for</strong>_<strong>SBR</strong>_220_setup.exe file.<br />
The <strong>Digipass</strong> <strong>Plug</strong>-<strong>In</strong> <strong>for</strong> <strong>SBR</strong> splash screen will be displayed, followed by the License<br />
Agreement dialog.<br />
2. Read the agreement carefully.<br />
3. To accept the License Agreement, click I Agree.<br />
If you do not accept the License Agreement, and click Cancel, the install will<br />
terminate.<br />
© 2006 VASCO Data Security <strong>In</strong>c. 15
<strong>Digipass</strong> <strong>Plug</strong>-<strong>In</strong> <strong>for</strong> <strong>SBR</strong> <strong>In</strong>stallation <strong>Guide</strong> <strong>In</strong>stalling <strong>Digipass</strong> <strong>Plug</strong>-<strong>In</strong> <strong>for</strong> <strong>SBR</strong><br />
The <strong>In</strong>stallation Type dialog will be displayed.<br />
4. Select <strong>Plug</strong>-<strong>In</strong> install using Active Directory and click on Next.<br />
Note<br />
If you are evaluating or running a test install of the <strong>Digipass</strong> <strong>Plug</strong>-<strong>In</strong> <strong>for</strong> <strong>SBR</strong>, you may<br />
wish to use the embedded PostgreSQL database provided.<br />
The Select Components dialog will be displayed.<br />
5. Select the components you want to install. These components are required <strong>for</strong> the<br />
running and administration of the <strong>Digipass</strong> <strong>Plug</strong>-<strong>In</strong> <strong>for</strong> <strong>SBR</strong>:<br />
© 2006 VASCO Data Security <strong>In</strong>c. 16
<strong>Digipass</strong> <strong>Plug</strong>-<strong>In</strong> <strong>for</strong> <strong>SBR</strong> <strong>In</strong>stallation <strong>Guide</strong> <strong>In</strong>stalling <strong>Digipass</strong> <strong>Plug</strong>-<strong>In</strong> <strong>for</strong> <strong>SBR</strong><br />
6. Click Next.<br />
<strong>SBR</strong> <strong>Plug</strong>-<strong>In</strong><br />
<strong>Digipass</strong> Extension <strong>for</strong> Active Directory Users and Computers<br />
Administration MMC <strong>In</strong>terface<br />
The Customer <strong>In</strong><strong>for</strong>mation dialog will be displayed.<br />
7. Enter your user name and company name<br />
8. If you are installing an evaluation copy of the <strong>Digipass</strong> <strong>Plug</strong>-<strong>In</strong> <strong>for</strong> <strong>SBR</strong>, tick the Use<br />
an evaluation license checkbox.<br />
If not, enter the serial number <strong>for</strong> the product in the Serial Number field.<br />
9. If there are multiple IP addresses registered <strong>for</strong> the machine, you will be asked which<br />
IP address the <strong>Digipass</strong> <strong>Plug</strong>-<strong>In</strong> <strong>for</strong> <strong>SBR</strong> should use. Select an IP address and click on<br />
the Next button.<br />
10. Click on the Next button.<br />
© 2006 VASCO Data Security <strong>In</strong>c. 17
<strong>Digipass</strong> <strong>Plug</strong>-<strong>In</strong> <strong>for</strong> <strong>SBR</strong> <strong>In</strong>stallation <strong>Guide</strong> <strong>In</strong>stalling <strong>Digipass</strong> <strong>Plug</strong>-<strong>In</strong> <strong>for</strong> <strong>SBR</strong><br />
The Active Directory Pre-Requisites dialog will be displayed.<br />
11. If this is not the first <strong>SBR</strong> <strong>Plug</strong>-<strong>In</strong> to be installed:<br />
a. Ensure that Active Directory has had time to replicate changes to the Schema.<br />
b. Tick the This is not the first <strong>SBR</strong> <strong>Plug</strong>-<strong>In</strong> to be installed checkbox.<br />
12. If you have run the addschema command, click on Next. If not, run the command<br />
(see 7.1 addschema command <strong>for</strong> instructions), wait <strong>for</strong> the Schema changes to be<br />
replicated to the sub-domain then click on Next.<br />
The install program will check the Active Directory Schema.<br />
The <strong>Digipass</strong> Configuration Domain dialog will be displayed.<br />
© 2006 VASCO Data Security <strong>In</strong>c. 18
<strong>Digipass</strong> <strong>Plug</strong>-<strong>In</strong> <strong>for</strong> <strong>SBR</strong> <strong>In</strong>stallation <strong>Guide</strong> <strong>In</strong>stalling <strong>Digipass</strong> <strong>Plug</strong>-<strong>In</strong> <strong>for</strong> <strong>SBR</strong><br />
13. Enter the fully qualified name of the Domain in which <strong>Digipass</strong> <strong>Plug</strong>-<strong>In</strong> <strong>for</strong> <strong>SBR</strong> should<br />
store its data. This domain must currently exist.<br />
14. Click on Next.<br />
15. If you have chosen to install the User Self Management Web Site and IIS is installed<br />
on the machine, a pop-up dialog will ask if you wish to allow the install program to<br />
create a Virtual Directory on the default IIS web site on this machine, and install the<br />
User Self Management Web Site files there. Click Yes to allow this or No to set it up<br />
manually later.<br />
16. If you have chosen to install the OTP Request Site and IIS is installed on the<br />
machine, a pop-up dialog will ask if you wish to allow the install program to create a<br />
Virtual Directory on the default IIS web site on this machine, and install the OTP<br />
Request Site files there. Click Yes to allow this or No to set it up manually later.<br />
The <strong>In</strong>stallation Directory dialog will be displayed.<br />
17. To install to the default location (C:\Program Files\VASCO\<strong>Digipass</strong> <strong>Plug</strong>-<strong>In</strong> <strong>for</strong> <strong>SBR</strong> if<br />
Windows is installed on the C: drive), click on <strong>In</strong>stall. If you wish to install to a<br />
location other than the default, click on Browse, specify the installation location and<br />
click on <strong>In</strong>stall.<br />
The <strong>In</strong>stallation Progress dialog will be displayed, showing the progress of your install.<br />
Click Next when the install is complete.<br />
© 2006 VASCO Data Security <strong>In</strong>c. 19
<strong>Digipass</strong> <strong>Plug</strong>-<strong>In</strong> <strong>for</strong> <strong>SBR</strong> <strong>In</strong>stallation <strong>Guide</strong> <strong>In</strong>stalling <strong>Digipass</strong> <strong>Plug</strong>-<strong>In</strong> <strong>for</strong> <strong>SBR</strong><br />
The Activation Options dialog will be displayed.<br />
18. Select a licensing option:<br />
Note<br />
If you are using an evaluation license, you still need to go through the license<br />
activation process.<br />
Select the Go to the Activation Web page now option to immediately view the<br />
licensing page on the VASCO web site.<br />
Check any details which were automatically filled in, fill in any extra in<strong>for</strong>mation<br />
required, and select the method to receive the license key – either email or<br />
download.<br />
After the Activation Web Page has been submitted, the license key file will either<br />
start downloading, or be emailed to the email address you supplied.<br />
Save the license key file to a directory on the install machine, then go back to<br />
the installation screen. The screen will allow you to browse to the license key file<br />
<strong>for</strong> immediate loading.<br />
Select the Save a shortcut to the desktop <strong>for</strong> later option to save a shortcut on<br />
the desktop to use at a later time.<br />
If you already have a license file, select the Load the License Key from an<br />
existing License File option.<br />
Browse to the file location and select the license key file.<br />
The install program will load the license key during the installation progress.<br />
Select Just Continue to do nothing with the license at this time.<br />
© 2006 VASCO Data Security <strong>In</strong>c. 20
<strong>Digipass</strong> <strong>Plug</strong>-<strong>In</strong> <strong>for</strong> <strong>SBR</strong> <strong>In</strong>stallation <strong>Guide</strong> <strong>In</strong>stalling <strong>Digipass</strong> <strong>Plug</strong>-<strong>In</strong> <strong>for</strong> <strong>SBR</strong><br />
The Restart Required dialog will be displayed.<br />
19. Click the Yes option button to restart the machine, or No to add the license file or<br />
per<strong>for</strong>m other tasks be<strong>for</strong>e restarting.<br />
20. Click Finish when this process is complete.<br />
© 2006 VASCO Data Security <strong>In</strong>c. 21
<strong>Digipass</strong> <strong>Plug</strong>-<strong>In</strong> <strong>for</strong> <strong>SBR</strong> <strong>In</strong>stallation <strong>Guide</strong> <strong>In</strong>stalling <strong>Digipass</strong> <strong>Plug</strong>-<strong>In</strong> <strong>for</strong> <strong>SBR</strong><br />
3.2 Typical <strong>In</strong>stallation – Embedded Database<br />
3.2.1 Scenario & Decisions<br />
This 'typical installation' process uses the following decisions and scenario:<br />
The scenario<br />
The embedded PostgreSQL database will be used.<br />
A database administrator account will be created automatically, with UserID of digipass<br />
and password digipassword.<br />
The installation will be run on the Steel-Belted RADIUS server.<br />
A Data Source will be automatically created on the Steel-Belted RADIUS server <strong>for</strong> the<br />
new database.<br />
3.2.2 Run <strong>In</strong>stall<br />
<strong>In</strong>stall the standard installation components on a single machine.<br />
1. Start the <strong>Digipass</strong> <strong>Plug</strong>-<strong>In</strong> <strong>for</strong> <strong>SBR</strong> install process on the <strong>SBR</strong> server (SVR).<br />
If you are not using the CD Autorun interface, locate and double-click on the<br />
<strong>Digipass</strong>_<strong>Plug</strong><strong>In</strong>_<strong>for</strong>_<strong>SBR</strong>_220_setup.exe file.<br />
The <strong>Digipass</strong> <strong>Plug</strong>-<strong>In</strong> <strong>for</strong> <strong>SBR</strong> splash screen will be displayed, followed by the License<br />
Agreement dialog.<br />
2. Read the agreement carefully.<br />
3. To accept the License Agreement, click I Agree.<br />
If you do not accept the License Agreement, and click Cancel, the install will<br />
terminate.<br />
© 2006 VASCO Data Security <strong>In</strong>c. 22
<strong>Digipass</strong> <strong>Plug</strong>-<strong>In</strong> <strong>for</strong> <strong>SBR</strong> <strong>In</strong>stallation <strong>Guide</strong> <strong>In</strong>stalling <strong>Digipass</strong> <strong>Plug</strong>-<strong>In</strong> <strong>for</strong> <strong>SBR</strong><br />
The <strong>In</strong>stallation Type dialog will be displayed.<br />
4. Select <strong>Plug</strong>-<strong>In</strong> install with an embedded database.<br />
The Select Components dialog will be displayed.<br />
5. Select the components you want to install. These components are required <strong>for</strong> the<br />
running and administration of the <strong>Digipass</strong> <strong>Plug</strong>-<strong>In</strong> <strong>for</strong> <strong>SBR</strong>:<br />
<strong>SBR</strong> <strong>Plug</strong>-<strong>In</strong><br />
Administration MMC <strong>In</strong>terface<br />
© 2006 VASCO Data Security <strong>In</strong>c. 23
<strong>Digipass</strong> <strong>Plug</strong>-<strong>In</strong> <strong>for</strong> <strong>SBR</strong> <strong>In</strong>stallation <strong>Guide</strong> <strong>In</strong>stalling <strong>Digipass</strong> <strong>Plug</strong>-<strong>In</strong> <strong>for</strong> <strong>SBR</strong><br />
Note<br />
The Active Directory Users and Computers Extension option is unavailable<br />
when the Standard ODBC installation type is selected.<br />
<strong>In</strong>clusion of this option when the Custom installation type is selected will cause<br />
Active Directory to be used as the data store.<br />
6. Click Next.<br />
The Customer <strong>In</strong><strong>for</strong>mation dialog will be displayed.<br />
7. Enter your user name and company name.<br />
8. If you are installing an evaluation copy of the <strong>Digipass</strong> <strong>Plug</strong>-<strong>In</strong> <strong>for</strong> <strong>SBR</strong>, tick the Use<br />
an evaluation license checkbox.<br />
If not, enter the serial number <strong>for</strong> the product in the Serial Number field.<br />
9. If there are multiple IP addresses registered <strong>for</strong> the machine, you will asked which IP<br />
address the <strong>Digipass</strong> <strong>Plug</strong>-<strong>In</strong> <strong>for</strong> <strong>SBR</strong> should use. Select an IP address and click on<br />
the Next button.<br />
10. Click on the Next button.<br />
11. If you have chosen to install the User Self Management Web Site and IIS is installed<br />
on the machine, a pop-up dialog will ask if you wish to allow the install program to<br />
create a Virtual Directory on the default IIS web site on this machine, and install the<br />
User Self Management Web Site files there. Click Yes to allow this or No to set it up<br />
manually later.<br />
12. If you have chosen to install the OTP Request Site and IIS is installed on the<br />
machine, a pop-up dialog will ask if you wish to allow the install program to create a<br />
Virtual Directory on the default IIS web site on this machine, and install the OTP<br />
Request Site files there. Click Yes to allow this or No to set it up manually later.<br />
© 2006 VASCO Data Security <strong>In</strong>c. 24
<strong>Digipass</strong> <strong>Plug</strong>-<strong>In</strong> <strong>for</strong> <strong>SBR</strong> <strong>In</strong>stallation <strong>Guide</strong> <strong>In</strong>stalling <strong>Digipass</strong> <strong>Plug</strong>-<strong>In</strong> <strong>for</strong> <strong>SBR</strong><br />
The <strong>In</strong>stallation Directory dialog will be displayed.<br />
13. To install to the default location (C:\Program Files\VASCO\<strong>Digipass</strong> <strong>Plug</strong>-<strong>In</strong> <strong>for</strong> <strong>SBR</strong> if<br />
Windows is installed on the C: drive), click on <strong>In</strong>stall. If you wish to install to a<br />
location other than the default, click on Browse, specify the installation location and<br />
click on <strong>In</strong>stall.<br />
The <strong>In</strong>stallation Progress dialog will be displayed, showing the progress of your<br />
install.<br />
Click Next when the install is complete.<br />
The Activation Options dialog will be displayed.<br />
© 2006 VASCO Data Security <strong>In</strong>c. 25
<strong>Digipass</strong> <strong>Plug</strong>-<strong>In</strong> <strong>for</strong> <strong>SBR</strong> <strong>In</strong>stallation <strong>Guide</strong> <strong>In</strong>stalling <strong>Digipass</strong> <strong>Plug</strong>-<strong>In</strong> <strong>for</strong> <strong>SBR</strong><br />
14. Select a licensing option:<br />
Note<br />
If you are using an evaluation license, you still need to go through the<br />
license activation process.<br />
Select the Go to the Activation Web page now option to immediately view the<br />
licensing page on the VASCO web site.<br />
Check any details which were automatically filled in, fill in any extra in<strong>for</strong>mation<br />
required, and select the method to receive the license key – either email or<br />
download.<br />
After the Activation Web Page has been submitted, the license key file will either<br />
start downloading, or be emailed to the email address you supplied.<br />
Save the license key file to a directory on the install machine, then go back to<br />
the installation screen. The screen will allow you to browse to the license key file<br />
<strong>for</strong> immediate loading.<br />
Select the Save a shortcut to the desktop <strong>for</strong> later option to save a shortcut<br />
on the desktop to use at a later time.<br />
If you already have a license file, select the Load the License Key from an<br />
existing License File option.<br />
Browse to the file location and select the license key file.<br />
The install program will load the license key during the installation progress.<br />
Select Just Continue to do nothing with the license at this time.<br />
© 2006 VASCO Data Security <strong>In</strong>c. 26
<strong>Digipass</strong> <strong>Plug</strong>-<strong>In</strong> <strong>for</strong> <strong>SBR</strong> <strong>In</strong>stallation <strong>Guide</strong> <strong>In</strong>stalling <strong>Digipass</strong> <strong>Plug</strong>-<strong>In</strong> <strong>for</strong> <strong>SBR</strong><br />
The Restart Required dialog will be displayed.<br />
15. Click the Yes option button to restart the machine, or No to add the license file or<br />
per<strong>for</strong>m other tasks be<strong>for</strong>e restarting.<br />
16. Click Finish when this process is complete.<br />
© 2006 VASCO Data Security <strong>In</strong>c. 27
<strong>Digipass</strong> <strong>Plug</strong>-<strong>In</strong> <strong>for</strong> <strong>SBR</strong> <strong>In</strong>stallation <strong>Guide</strong> <strong>In</strong>stalling <strong>Digipass</strong> <strong>Plug</strong>-<strong>In</strong> <strong>for</strong> <strong>SBR</strong><br />
3.3 Typical <strong>In</strong>stallation – ODBC Database<br />
3.3.1 Scenario & Decisions<br />
This 'typical installation' process uses the following decisions and scenario:<br />
The scenario<br />
A new database has been created.<br />
A new database administrator account has been created and named DBAdmin. This<br />
account will own all tables and will be used:<br />
in running the addschema command<br />
by the <strong>SBR</strong> <strong>Plug</strong>-<strong>In</strong><br />
<strong>for</strong> administration<br />
The installation will be run on the Steel-Belted RADIUS server.<br />
A Data Source has been created on the Steel-Belted RADIUS server <strong>for</strong> the new<br />
database. The Data Source Name has been set to DBA.<br />
3.3.2 Extend Schema<br />
Run the addschema command:<br />
1. Copy dpdbadmin.exe from the Windows/Utilities directory on the installation CD or<br />
zip file onto the Steel-Belted RADIUS server.<br />
2. Create an ODBC Data Source <strong>for</strong> the database on the computer, if one does not<br />
currently exist.<br />
3. Open a command prompt in the location to which the executable was copied.<br />
4. Type:<br />
dpdbadmin addschema –u DBAdmin –p -d DBA<br />
Ensure that the User ID and password used are that of the database administrator<br />
account.<br />
© 2006 VASCO Data Security <strong>In</strong>c. 28
<strong>Digipass</strong> <strong>Plug</strong>-<strong>In</strong> <strong>for</strong> <strong>SBR</strong> <strong>In</strong>stallation <strong>Guide</strong> <strong>In</strong>stalling <strong>Digipass</strong> <strong>Plug</strong>-<strong>In</strong> <strong>for</strong> <strong>SBR</strong><br />
3.3.3 Run <strong>In</strong>stall<br />
<strong>In</strong>stall the standard installation components on a single machine.<br />
1. Start the <strong>Digipass</strong> <strong>Plug</strong>-<strong>In</strong> <strong>for</strong> <strong>SBR</strong> install process on the <strong>SBR</strong> server (SVR).<br />
If you are not using the CD Autorun interface, locate and double-click on the<br />
<strong>Digipass</strong>_<strong>Plug</strong><strong>In</strong>_<strong>for</strong>_<strong>SBR</strong>_220_setup.exe file.<br />
The <strong>Digipass</strong> <strong>Plug</strong>-<strong>In</strong> <strong>for</strong> <strong>SBR</strong> splash screen will be displayed, followed by the License<br />
Agreement dialog.<br />
2. Read the agreement carefully.<br />
3. To accept the License Agreement, click I Agree.<br />
If you do not accept the License Agreement, and click Cancel, the install will<br />
terminate.<br />
© 2006 VASCO Data Security <strong>In</strong>c. 29
<strong>Digipass</strong> <strong>Plug</strong>-<strong>In</strong> <strong>for</strong> <strong>SBR</strong> <strong>In</strong>stallation <strong>Guide</strong> <strong>In</strong>stalling <strong>Digipass</strong> <strong>Plug</strong>-<strong>In</strong> <strong>for</strong> <strong>SBR</strong><br />
The <strong>In</strong>stallation Type dialog will be displayed.<br />
4. Select <strong>Plug</strong>-<strong>In</strong> install using an ODBC-compliant database.<br />
Note<br />
If you are evaluating or running a test install of the <strong>Digipass</strong> <strong>Plug</strong>-<strong>In</strong> <strong>for</strong> <strong>SBR</strong>, you may<br />
wish to use the embedded PostgreSQL database provided instead.<br />
The Select Components dialog will be displayed.<br />
© 2006 VASCO Data Security <strong>In</strong>c. 30
<strong>Digipass</strong> <strong>Plug</strong>-<strong>In</strong> <strong>for</strong> <strong>SBR</strong> <strong>In</strong>stallation <strong>Guide</strong> <strong>In</strong>stalling <strong>Digipass</strong> <strong>Plug</strong>-<strong>In</strong> <strong>for</strong> <strong>SBR</strong><br />
5. Select the components you want to install. These components are required <strong>for</strong> the<br />
running and administration of the <strong>Digipass</strong> <strong>Plug</strong>-<strong>In</strong> <strong>for</strong> <strong>SBR</strong> where an ODBC database<br />
(including Access) is used as the data store:<br />
Note<br />
<strong>SBR</strong> <strong>Plug</strong>-<strong>In</strong><br />
Administration MMC <strong>In</strong>terface<br />
The Active Directory Users and Computers Extension option is unavailable<br />
when the Standard ODBC installation type is selected.<br />
<strong>In</strong>clusion of this option when the Custom installation type is selected will cause<br />
Active Directory to be used as the data store.<br />
6. Click Next.<br />
The Customer <strong>In</strong><strong>for</strong>mation dialog will be displayed.<br />
7. Enter your user name and company name.<br />
8. If you are installing an evaluation copy of the <strong>Digipass</strong> <strong>Plug</strong>-<strong>In</strong> <strong>for</strong> <strong>SBR</strong>, tick the Use<br />
an evaluation license checkbox.<br />
If not, enter the serial number <strong>for</strong> the product in the Serial Number field.<br />
9. If there are multiple IP addresses registered <strong>for</strong> the machine, you will asked which IP<br />
address the <strong>Digipass</strong> <strong>Plug</strong>-<strong>In</strong> <strong>for</strong> <strong>SBR</strong> should use. Select an IP address and click on<br />
the Next button.<br />
10. Click on the Next button.<br />
© 2006 VASCO Data Security <strong>In</strong>c. 31
<strong>Digipass</strong> <strong>Plug</strong>-<strong>In</strong> <strong>for</strong> <strong>SBR</strong> <strong>In</strong>stallation <strong>Guide</strong> <strong>In</strong>stalling <strong>Digipass</strong> <strong>Plug</strong>-<strong>In</strong> <strong>for</strong> <strong>SBR</strong><br />
The ODBC Pre-Requisites dialog will be displayed.<br />
11. If this is not the first <strong>SBR</strong> <strong>Plug</strong>-<strong>In</strong> to be installed, tick the This is not the first <strong>SBR</strong><br />
<strong>Plug</strong>-<strong>In</strong> to be installed checkbox.<br />
12. If you have run the addschema command, click on Next.<br />
If not, run the command (see 7.1 addschema command <strong>for</strong> instructions), then click<br />
on Next.<br />
The ODBC Connection Details window will be displayed.<br />
13. Enter the Data Source Name <strong>for</strong> the database and, if required, a Username and<br />
password to use in connecting to it.<br />
© 2006 VASCO Data Security <strong>In</strong>c. 32
<strong>Digipass</strong> <strong>Plug</strong>-<strong>In</strong> <strong>for</strong> <strong>SBR</strong> <strong>In</strong>stallation <strong>Guide</strong> <strong>In</strong>stalling <strong>Digipass</strong> <strong>Plug</strong>-<strong>In</strong> <strong>for</strong> <strong>SBR</strong><br />
The install program will check the database schema.<br />
14. If you have chosen to install the User Self Management Web Site and IIS is installed<br />
on the machine, a pop-up dialog will ask if you wish to allow the install program to<br />
create a Virtual Directory on the default IIS web site on this machine, and install the<br />
User Self Management Web Site files there. Click Yes to allow this or No to set it up<br />
manually later.<br />
15. If you have chosen to install the OTP Request Site and IIS is installed on the<br />
machine, a pop-up dialog will ask if you wish to allow the install program to create a<br />
Virtual Directory on the default IIS web site on this machine, and install the OTP<br />
Request Site files there. Click Yes to allow this or No to set it up manually later.<br />
The <strong>In</strong>stallation Directory dialog will be displayed.<br />
16. To install to the default location (C:\Program Files\VASCO\<strong>Digipass</strong> <strong>Plug</strong>-<strong>In</strong> <strong>for</strong> <strong>SBR</strong> if<br />
Windows is installed on the C: drive), click on <strong>In</strong>stall. If you wish to install to a<br />
location other than the default, click on Browse, specify the installation location and<br />
click on <strong>In</strong>stall.<br />
The <strong>In</strong>stallation Progress dialog will be displayed, showing the progress of your<br />
install.<br />
Click Next when the install is complete.<br />
© 2006 VASCO Data Security <strong>In</strong>c. 33
<strong>Digipass</strong> <strong>Plug</strong>-<strong>In</strong> <strong>for</strong> <strong>SBR</strong> <strong>In</strong>stallation <strong>Guide</strong> <strong>In</strong>stalling <strong>Digipass</strong> <strong>Plug</strong>-<strong>In</strong> <strong>for</strong> <strong>SBR</strong><br />
The Activation Options dialog will be displayed.<br />
17. Select a licensing option:<br />
Note<br />
If you are using an evaluation license, you still need to go through the<br />
license activation process.<br />
Select the Go to the Activation Web page now option to immediately view the<br />
licensing page on the VASCO web site.<br />
Check any details which were automatically filled in, fill in any extra in<strong>for</strong>mation<br />
required, and select the method to receive the license key – either email or<br />
download.<br />
After the Activation Web Page has been submitted, the license key file will either<br />
start downloading, or be emailed to the email address you supplied.<br />
Save the license key file to a directory on the install machine, then go back to<br />
the installation screen. The screen will allow you to browse to the license key file<br />
<strong>for</strong> immediate loading.<br />
Select the Save a shortcut to the desktop <strong>for</strong> later option to save a shortcut<br />
on the desktop to use at a later time.<br />
If you already have a license file, select the Load the License Key from an<br />
existing License File option.<br />
Browse to the file location and select the license key file.<br />
The install program will load the license key during the installation progress.<br />
Select Just Continue to do nothing with the license at this time.<br />
© 2006 VASCO Data Security <strong>In</strong>c. 34
<strong>Digipass</strong> <strong>Plug</strong>-<strong>In</strong> <strong>for</strong> <strong>SBR</strong> <strong>In</strong>stallation <strong>Guide</strong> <strong>In</strong>stalling <strong>Digipass</strong> <strong>Plug</strong>-<strong>In</strong> <strong>for</strong> <strong>SBR</strong><br />
The Restart Required dialog will be displayed.<br />
18. Click the Yes option button to restart the machine, or No to add the license file or<br />
per<strong>for</strong>m other tasks be<strong>for</strong>e restarting.<br />
19. Click Finish when this process is complete.<br />
© 2006 VASCO Data Security <strong>In</strong>c. 35
<strong>Digipass</strong> <strong>Plug</strong>-<strong>In</strong> <strong>for</strong> <strong>SBR</strong> <strong>In</strong>stallation <strong>Guide</strong> <strong>In</strong>stalling <strong>Digipass</strong> <strong>Plug</strong>-<strong>In</strong> <strong>for</strong> <strong>SBR</strong><br />
3.4 Multiple Product <strong>In</strong>stallation<br />
If another VASCO product is already installed on the machine, the installation process will run<br />
in Add Components mode, as most data and many components are shared between products.<br />
Typically, you will only need to add the <strong>SBR</strong> <strong>Plug</strong>-<strong>In</strong> component, but others may be added if<br />
not already installed. See the 4 Add Components to <strong>In</strong>stallation section <strong>for</strong> instructions<br />
after reading the in<strong>for</strong>mation below.<br />
These changes will affect your existing installation:<br />
Data Store Selection<br />
You will not be given a choice of data store. All <strong>Digipass</strong>-related data will be stored in the<br />
same data store as used by the currently-installed VASCO product.<br />
Start Menu Changes<br />
<strong>In</strong>stalling more than one VASCO product on a machine will cause VASCO Start menu options to<br />
be re-arranged, as components may be shared between products. Links to components and<br />
documentation specific to the product will be located under VASCO -> (eg.<br />
VASCO -> <strong>Digipass</strong> <strong>Plug</strong>-<strong>In</strong> <strong>for</strong> <strong>SBR</strong>). Links to shared components will be located in<br />
VASCO -> Common Components.<br />
Automatic Component Upgrade<br />
If the second product has a later version of any of the shared components, these components<br />
will be upgraded as part of the installation.<br />
Shared Components not Removed during Uninstall<br />
When uninstalling one of the products on a machine that has more than one, the uninstaller<br />
will only remove the specific plug-in component - it will leave all the shared components. They<br />
will only be removed when you uninstall the last product.<br />
Important Note<br />
If the second product had later versions of any components, ensure that you<br />
uninstall the second product last if you want to uninstall both products. The<br />
uninstaller <strong>for</strong> the original product may not possess all the necessary<br />
in<strong>for</strong>mation to completely remove newer components.<br />
Repairing Components<br />
When two products are installed on the same machine and a repair is attempted, the<br />
installation program will only be able to repair the components that are specific to it or are<br />
shared. For example, the <strong>Digipass</strong> <strong>Plug</strong>-<strong>In</strong> <strong>for</strong> IAS installation program will not repair the <strong>SBR</strong><br />
<strong>Plug</strong>-<strong>In</strong>.<br />
If the other product has a later version of one of the shared components, it will not be<br />
repaired. <strong>In</strong> that case, the other product's installer is needed to repair that shared component.<br />
<strong>In</strong> general, use the latest versioned product to repair shared components.<br />
© 2006 VASCO Data Security <strong>In</strong>c. 36
<strong>Digipass</strong> <strong>Plug</strong>-<strong>In</strong> <strong>for</strong> <strong>SBR</strong> <strong>In</strong>stallation <strong>Guide</strong> <strong>In</strong>stalling <strong>Digipass</strong> <strong>Plug</strong>-<strong>In</strong> <strong>for</strong> <strong>SBR</strong><br />
3.5 Upgrading from <strong>Digipass</strong> <strong>Plug</strong>-<strong>In</strong> <strong>for</strong> Funk 2.0 or 2.1<br />
If the <strong>Digipass</strong> <strong>Plug</strong>-<strong>In</strong> <strong>for</strong> Funk 2.0 or 2.1 is currently installed, it may be upgraded to version<br />
2.2 by following these steps:<br />
1. Ensure that your company has an upgraded license <strong>for</strong> version 2.2.<br />
2. Get and load an updated license file (see 3.6.1.2 Obtain License Key File and<br />
3.6.1.3 Load License Key <strong>for</strong> instructions).<br />
3. Check that the Administration MMC <strong>In</strong>terface and the <strong>SBR</strong> Administrator programs are<br />
not running.<br />
4. Start the <strong>Digipass</strong> <strong>Plug</strong>-<strong>In</strong> <strong>for</strong> <strong>SBR</strong> install process on the <strong>SBR</strong> server (SVR).<br />
If you are not using the CD Autorun interface, locate and double-click on the<br />
<strong>Digipass</strong>_<strong>Plug</strong><strong>In</strong>_<strong>for</strong>_<strong>SBR</strong>_220_setup.exe file.<br />
A window will be displayed, asking if you want to upgrade the installation.<br />
5. Click on Yes.<br />
The <strong>Digipass</strong> <strong>Plug</strong>-<strong>In</strong> <strong>for</strong> <strong>SBR</strong> installation will be updated to the production version.<br />
6. Reboot if required.<br />
7. If you were using RADIUS Profiles in the <strong>Digipass</strong> User accounts in <strong>Digipass</strong> <strong>Plug</strong>-<strong>In</strong> <strong>for</strong><br />
Funk 2.0 or 2.1, run the upgradeprofiles command to convert the old RADIUS Profiles<br />
in<strong>for</strong>mation to the new User Attributes <strong>for</strong>mat. See 7.2 upgradeprofiles command<br />
(Active Directory) or 8.2 upgradeprofiles command (ODBC database) <strong>for</strong> more<br />
in<strong>for</strong>mation.<br />
Note<br />
The data store used <strong>for</strong> the <strong>Digipass</strong> <strong>Plug</strong>-<strong>In</strong> <strong>for</strong> <strong>SBR</strong> may not be changed<br />
during an upgrade. If an ODBC database is to be used as the data store,<br />
version 2.0 or 2.1 of the <strong>Digipass</strong> <strong>Plug</strong>-<strong>In</strong> <strong>for</strong> Funk must be uninstalled from a<br />
machine be<strong>for</strong>e version 2.2 may be installed.<br />
If the <strong>Digipass</strong> <strong>Plug</strong>-<strong>In</strong> <strong>for</strong> IAS is installed on a machine, an ODBC database<br />
may not be used as the data store <strong>for</strong> the <strong>Digipass</strong> <strong>Plug</strong>-<strong>In</strong> <strong>for</strong> <strong>SBR</strong>.<br />
© 2006 VASCO Data Security <strong>In</strong>c. 37
<strong>Digipass</strong> <strong>Plug</strong>-<strong>In</strong> <strong>for</strong> <strong>SBR</strong> <strong>In</strong>stallation <strong>Guide</strong> <strong>In</strong>stalling <strong>Digipass</strong> <strong>Plug</strong>-<strong>In</strong> <strong>for</strong> <strong>SBR</strong><br />
3.6 Post-<strong>In</strong>stallation Tasks<br />
3.6.1 Licensing<br />
Each <strong>SBR</strong> <strong>Plug</strong>-<strong>In</strong> will require a license key to be loaded into its Component record – even if<br />
you are using an evaluation license. If this is not completed during the install process, it will<br />
need to be done be<strong>for</strong>e the <strong>SBR</strong> <strong>Plug</strong>-<strong>In</strong> can be used.<br />
3.6.1.1 Evaluation Serial Number<br />
If you do not obtain a license key file during installation of the <strong>SBR</strong> <strong>Plug</strong>-<strong>In</strong>, but wish to use an<br />
evaluation license, you will need to use this serial number on the VASCO licensing site:<br />
213DFFBDA5.<br />
3.6.1.2 Obtain License Key File<br />
Note<br />
An active internet connection is required to obtain a License Key.<br />
1. Open the Administration MMC <strong>In</strong>terface.<br />
2. Click on the Components node.<br />
The Component List will be displayed in the Result pane.<br />
3. Double-click on the required Component record.<br />
The Component property sheet will be displayed.<br />
4. Click on the License Key Details... button.<br />
The License Key Details window will be displayed.<br />
5. Click on the Request License Key... button.<br />
A browser window will be opened, with the VASCO Licensing site loaded. Any<br />
required in<strong>for</strong>mation which the <strong>SBR</strong> <strong>Plug</strong>-<strong>In</strong> has will be entered as the site is loaded.<br />
6. Enter any other required in<strong>for</strong>mation in the browser window.<br />
7. Click on the Request License Key button in the browser window.<br />
A download of your license key file should begin. Keep note of where you save the<br />
file, and its name.<br />
3.6.1.3 Load License Key<br />
1. Open the Administration MMC <strong>In</strong>terface.<br />
2. Click on the Components node.<br />
The Component List will be displayed in the Result pane.<br />
3. Double-click on the required Component record.<br />
The Component property sheet will be displayed.<br />
© 2006 VASCO Data Security <strong>In</strong>c. 38
<strong>Digipass</strong> <strong>Plug</strong>-<strong>In</strong> <strong>for</strong> <strong>SBR</strong> <strong>In</strong>stallation <strong>Guide</strong> <strong>In</strong>stalling <strong>Digipass</strong> <strong>Plug</strong>-<strong>In</strong> <strong>for</strong> <strong>SBR</strong><br />
4. Click on the License Key Details... button.<br />
The License Key Details window will be displayed.<br />
5. Click on the Load License Key... button.<br />
6. Browse to the download location and select the license key file.<br />
7. Click on Open.<br />
A message window will display the success or failure of loading the license key into<br />
the data store.<br />
3.6.2 Encryption Settings<br />
If you will be using a custom encryption key <strong>for</strong> sensitive data, this should be set be<strong>for</strong>e<br />
<strong>Digipass</strong> are imported to the 'live' version of the <strong>Digipass</strong> <strong>Plug</strong>-<strong>In</strong> <strong>for</strong> <strong>SBR</strong>. See the Sensitive<br />
Data Encryption topic in the Administrator Reference <strong>for</strong> more in<strong>for</strong>mation.<br />
3.6.3 Backup Strategy<br />
Consider a backup strategy to be put in place <strong>for</strong> files which will require backing up. For more<br />
in<strong>for</strong>mation, see the Administrator Reference.<br />
3.6.4 Active Directory Tasks<br />
3.6.4.1 Additional Setup Steps <strong>for</strong> Multiple Domains<br />
When using the <strong>SBR</strong> <strong>Plug</strong>-<strong>In</strong> in multiple domains, extra steps must be followed to ensure that<br />
the <strong>SBR</strong> <strong>Plug</strong>-<strong>In</strong> has permissions sufficient to access required data in other domains. See the<br />
Set Up Active Directory Permissions section of the Administrator Reference. The Multiple<br />
Domains topic in this section contains instructions <strong>for</strong> cross-domain scenarios, and can be<br />
used as follows:<br />
If the <strong>SBR</strong> <strong>Plug</strong>-<strong>In</strong> you have just installed is not in the <strong>Digipass</strong> Configuration Domain, follow<br />
the instructions in Scenario 1.<br />
If the <strong>SBR</strong> <strong>Plug</strong>-<strong>In</strong> you have just installed will be used to authenticate Users in domains other<br />
than its own, follow the instructions in Scenario 2.<br />
3.6.4.2 Set up Active Directory SSL<br />
If you need to set up SSL at this point, see 2.2.3 SSL Setup <strong>for</strong> instructions.<br />
3.6.4.3 Active Directory Replication<br />
Active Directory replication issues can cause problems in some installations of the <strong>Digipass</strong><br />
<strong>Plug</strong>-<strong>In</strong> <strong>for</strong> <strong>SBR</strong>. See the Active Directory Replication Issues topic in the Administrator<br />
Reference.<br />
© 2006 VASCO Data Security <strong>In</strong>c. 39
<strong>Digipass</strong> <strong>Plug</strong>-<strong>In</strong> <strong>for</strong> <strong>SBR</strong> <strong>In</strong>stallation <strong>Guide</strong> <strong>In</strong>stalling <strong>Digipass</strong> <strong>Plug</strong>-<strong>In</strong> <strong>for</strong> <strong>SBR</strong><br />
3.6.4.4 Active Directory Auditing<br />
Consider whether to include custom object classes and permission property sets in Active<br />
Directory's auditing. See the Active Directory Auditing topic in the Administrator Reference<br />
<strong>for</strong> more in<strong>for</strong>mation.<br />
3.6.5 ODBC Tasks<br />
3.6.5.1 Configure User ID and Domain Handling<br />
The <strong>SBR</strong> <strong>Plug</strong>-<strong>In</strong> has options to configure how User IDs and domain names are handled. It is<br />
important that these are set up be<strong>for</strong>e data is added to the database.<br />
Note<br />
<strong>SBR</strong> has limited support <strong>for</strong> extended (non-English) characters in User IDs. The<br />
<strong>SBR</strong> <strong>Plug</strong>-<strong>In</strong> must work within these limitations.<br />
Case-sensitivity<br />
The <strong>SBR</strong> <strong>Plug</strong>-<strong>In</strong> may be configured to save and retrieve User IDs and domain names in lower<br />
case, upper case or with no conversion – data is saved or searched on exactly as entered. The<br />
configuration required will depend on your company's requirements and the capabilities of the<br />
database used as the data store. See the Encoding and Case-Sensitivity topic in the<br />
Administrator Reference <strong>for</strong> more in<strong>for</strong>mation.<br />
Case-sensitivity configuration must be completed be<strong>for</strong>e User accounts and domain records are<br />
added to the database. However, the Master domain (named 'master') is created during<br />
installation, and is in lower case. This will not cause any problems if the <strong>SBR</strong> <strong>Plug</strong>-<strong>In</strong> is<br />
configured not to convert case, or to convert to lower case. If the <strong>SBR</strong> <strong>Plug</strong>-<strong>In</strong> will be<br />
configured to convert User IDs and domains to upper case, first follow these steps:<br />
1. Open the Administration MMC <strong>In</strong>terface and create a new domain. This new domain<br />
must have its name entirely in upper case (eg. MASTER).<br />
2. Open the <strong>SBR</strong> <strong>Plug</strong>-<strong>In</strong> Configuration GUI and set the new domain as the Master<br />
domain. Close the Configuration GUI.<br />
3. Delete the original 'master' domain.<br />
Windows name resolution<br />
Enable Windows Name Resolution to allow the <strong>SBR</strong> <strong>Plug</strong>-<strong>In</strong> to use Windows functionality to<br />
resolve a UserID – as entered during a login – into a User ID and Domain. This is highly<br />
recommended if Dynamic User Registration will be enabled.<br />
© 2006 VASCO Data Security <strong>In</strong>c. 40
<strong>Digipass</strong> <strong>Plug</strong>-<strong>In</strong> <strong>for</strong> <strong>SBR</strong> <strong>In</strong>stallation <strong>Guide</strong> <strong>In</strong>stalling <strong>Digipass</strong> <strong>Plug</strong>-<strong>In</strong> <strong>for</strong> <strong>SBR</strong><br />
3.6.5.2 Permissions <strong>for</strong> Group Check<br />
A list of Windows groups can be specified in the configuration GUI of the <strong>SBR</strong> <strong>Plug</strong>-<strong>In</strong>. The<br />
<strong>SBR</strong> <strong>Plug</strong>-<strong>In</strong> will only authenticate a User’s login if the User belongs to one of these specified<br />
groups.<br />
Add LocalSystem (“SYSTEM”) to either Administrators or the Account Operators Windows<br />
group on the <strong>SBR</strong> server to allow the <strong>SBR</strong> <strong>Plug</strong>-<strong>In</strong> to run a group check:<br />
1. Go to the desktop and right-click on My Computer.<br />
2. Click on Manage.<br />
3. Expand the Local Users and Groups node.<br />
4. Click on Groups.<br />
5. Right-click on Administrators or Account Operators.<br />
6. Click on Add to Group...<br />
7. Click on Add...<br />
8. Click on Locations...<br />
9. Select the local machine and click on OK.<br />
10. Enter SYSTEM in the object name memo.<br />
11. Click on OK.<br />
A new entry will be added to the Members list.<br />
© 2006 VASCO Data Security <strong>In</strong>c. 41
<strong>Digipass</strong> <strong>Plug</strong>-<strong>In</strong> <strong>for</strong> <strong>SBR</strong> <strong>In</strong>stallation <strong>Guide</strong> <strong>In</strong>stalling <strong>Digipass</strong> <strong>Plug</strong>-<strong>In</strong> <strong>for</strong> <strong>SBR</strong><br />
3.6.5.3 Configure Connection Parameters<br />
You may wish to increase the number of connections attempted to the database if:<br />
The load on the database will be high, and<br />
Changes to the connection settings will be efficient with the database and database<br />
driver in question.<br />
Setting an idle timeout will allow connections which are no longer required to be closed as<br />
soon as possible, which may lower the load on the database server. See the Administrator<br />
Reference <strong>for</strong> more in<strong>for</strong>mation.<br />
3.6.5.4 Additional Databases<br />
If additional databases are required <strong>for</strong> backup, failover or load-balancing purposes, configure<br />
the <strong>SBR</strong> <strong>Plug</strong>-<strong>In</strong> to use them now. See the Additional ODBC Databases topic in the Product<br />
<strong>Guide</strong> and the Database Connection Handling topic in the Administrator Reference <strong>for</strong> more<br />
in<strong>for</strong>mation.<br />
3.6.5.5 Additional Setup Steps <strong>for</strong> Multiple <strong>SBR</strong> <strong>Plug</strong>-<strong>In</strong>s<br />
If more than one <strong>SBR</strong> <strong>Plug</strong>-<strong>In</strong> are installed on the system, some additional setup may be<br />
required. See the Multiple <strong>SBR</strong> <strong>Plug</strong>-<strong>In</strong>s<br />
topic in the Product <strong>Guide</strong> <strong>for</strong> more in<strong>for</strong>mation.<br />
3.6.6 Configure Steel-Belted RADIUS to Use <strong>SBR</strong> <strong>Plug</strong>-<strong>In</strong><br />
Steel-Belted RADIUS must be configured to use the <strong>SBR</strong> <strong>Plug</strong>-<strong>In</strong>:<br />
1. Open the <strong>SBR</strong> Administrator.<br />
2. Click on Authentication Policies.<br />
3. Select <strong>Digipass</strong> Authentication.<br />
4. Use the arrow buttons to move <strong>Digipass</strong> Authentication to the top of the list box.<br />
5. Tick the Active checkbox <strong>for</strong> <strong>Digipass</strong> Authentication.<br />
6. Untick all other Authentication Methods.<br />
7. Click on Apply.<br />
© 2006 VASCO Data Security <strong>In</strong>c. 42
<strong>Digipass</strong> <strong>Plug</strong>-<strong>In</strong> <strong>for</strong> <strong>SBR</strong> <strong>In</strong>stallation <strong>Guide</strong> Add Components to <strong>In</strong>stallation<br />
4 Add Components to <strong>In</strong>stallation<br />
To add components to the installation:<br />
1. Start the <strong>Digipass</strong> <strong>Plug</strong>-<strong>In</strong> <strong>for</strong> <strong>SBR</strong> install process.<br />
If you are not using the CD Autorun interface, locate and double-click on the<br />
<strong>Digipass</strong>_<strong>Plug</strong><strong>In</strong>_<strong>for</strong>_<strong>SBR</strong>_220_setup.exe file.<br />
The <strong>Digipass</strong> <strong>Plug</strong>-<strong>In</strong> <strong>for</strong> <strong>SBR</strong> splash screen will be displayed, followed by the<br />
Maintenance Options dialog.<br />
2. Select the Add Components option button and click on Next.<br />
The Select Components dialog will be displayed.<br />
3. Select the components you want to add to the installation and click on Next.<br />
The <strong>In</strong>stallation Progress dialog will be displayed, showing the progress of your<br />
install.<br />
When completed, the Activation Options dialog will be displayed, prompting you to<br />
select a method of obtaining a license file.<br />
When the installation is complete, the Restart Required dialog will be displayed.<br />
4. Click the Yes option button to restart the machine, or No to per<strong>for</strong>m other tasks<br />
be<strong>for</strong>e restarting.<br />
5. Click Close when this process is complete.<br />
© 2006 VASCO Data Security <strong>In</strong>c. 43
<strong>Digipass</strong> <strong>Plug</strong>-<strong>In</strong> <strong>for</strong> <strong>SBR</strong> <strong>In</strong>stallation <strong>Guide</strong> Repair <strong>In</strong>stallation<br />
5 Repair <strong>In</strong>stallation<br />
The installation of the <strong>Digipass</strong> <strong>Plug</strong>-<strong>In</strong> <strong>for</strong> <strong>SBR</strong> may need to be repaired if files have been<br />
corrupted, deleted or lost.<br />
1. Start the <strong>Digipass</strong> <strong>Plug</strong>-<strong>In</strong> <strong>for</strong> <strong>SBR</strong> install process.<br />
If you are not using the CD Autorun interface, locate and double-click on the<br />
<strong>Digipass</strong>_<strong>Plug</strong><strong>In</strong>_<strong>for</strong>_<strong>SBR</strong>_220_setup.exe file.<br />
The <strong>Digipass</strong> <strong>Plug</strong>-<strong>In</strong> <strong>for</strong> <strong>SBR</strong> splash screen will be displayed, followed by the<br />
Maintenance Options dialog.<br />
2. Select the Repair <strong>In</strong>stallation option button and click on Next.<br />
A confirmation window will be displayed.<br />
3. Click on Yes.<br />
4. After installation, the system must be restarted.<br />
A screen will be displayed, asking whether you want to restart the machine now or<br />
later.<br />
Select the Yes, restart the machine now radio button (selected by default).<br />
Click on the Finish button.<br />
© 2006 VASCO Data Security <strong>In</strong>c. 44
<strong>Digipass</strong> <strong>Plug</strong>-<strong>In</strong> <strong>for</strong> <strong>SBR</strong> <strong>In</strong>stallation <strong>Guide</strong> Uninstall <strong>Digipass</strong> <strong>Plug</strong>-<strong>In</strong> <strong>for</strong> <strong>SBR</strong><br />
6 Uninstall <strong>Digipass</strong> <strong>Plug</strong>-<strong>In</strong> <strong>for</strong> <strong>SBR</strong><br />
6.1 Manual Uninstall<br />
See the Administrator Reference <strong>for</strong> a list of files installed <strong>for</strong> the <strong>Digipass</strong> <strong>Plug</strong>-<strong>In</strong> <strong>for</strong> <strong>SBR</strong>.<br />
6.2 Active Directory<br />
Additional data removal<br />
<strong>Digipass</strong>-specific in<strong>for</strong>mation is not removed from Active Directory when the <strong>Digipass</strong> <strong>Plug</strong>-<strong>In</strong><br />
<strong>for</strong> <strong>SBR</strong> is uninstalled from a computer. A custom VB script is available which will strip all<br />
in<strong>for</strong>mation related to the <strong>SBR</strong> <strong>Plug</strong>-<strong>In</strong> from a domain. See the Administrator Reference <strong>for</strong><br />
further in<strong>for</strong>mation and instructions.<br />
6.3 ODBC Database<br />
Remove Schema Modifications<br />
The dropschema command in the DPDBadmin command line utility can be used to remove all<br />
schema modifications from the database, deleting all data relating to the <strong>SBR</strong> <strong>Plug</strong>-<strong>In</strong>.<br />
© 2006 VASCO Data Security <strong>In</strong>c. 45
<strong>Digipass</strong> <strong>Plug</strong>-<strong>In</strong> <strong>for</strong> <strong>SBR</strong> <strong>In</strong>stallation <strong>Guide</strong> DPADadmin Utility<br />
7 DPADadmin Utility<br />
7.1 addschema command<br />
The addschema command is used to create all the Active Directory Schema extensions, if<br />
they are not already there. Each element will be checked individually to see if it is already<br />
there and if not, will be added.<br />
This command is intended to be run manually by a domain administrator be<strong>for</strong>e the main<br />
<strong>Digipass</strong> <strong>Plug</strong>-<strong>In</strong> <strong>for</strong> <strong>SBR</strong> installation is run, as recommended by Microsoft.<br />
It may be necessary to go through an approval process in your company be<strong>for</strong>e running this<br />
command, as it involves changes to Active Directory Schema. You may also need to have<br />
another administrator run the command <strong>for</strong> you, possibly in another part of your network. This<br />
depends on your company’s structure and rules <strong>for</strong> Active Directory control.<br />
Prerequisite <strong>In</strong><strong>for</strong>mation<br />
Schema Master Machine<br />
This command may technically be run on any Windows 2000, XP or 2003 machine, however it<br />
needs to contact the Domain Controller which has the Schema Master role. There can be only<br />
one Domain Controller in the Forest with that role. It may be simplest to run the command<br />
directly on the Schema Master, to avoid any potential connectivity or permission issues.<br />
Warning<br />
Warning: If you are passing the credentials to the command in the<br />
parameters, and you are not running the command on the Schema Master,<br />
check that you do not have any shares on the Schema Master open. This will<br />
cause the command to fail.<br />
Domain Administrator Account<br />
<strong>In</strong> order to successfully update the Schema, you must know the username and password of a<br />
Domain Administrator account that is able to log into the Schema Master. You must either run<br />
the command while logged in as that user, or pass the credentials to the command in the<br />
parameters. The Domain Administrator must have permission to extend the Schema – they<br />
must be a member of the Schema Admins group in the Forest-Root-Domain (the first Domain<br />
created in the Forest).<br />
Schema Changes Allowed<br />
By default, Active Directory does not permit Schema extensions to be made. There is a registry<br />
setting that must be changed to allow extensions. If this is not already set, DPADadmin will<br />
ask you whether it should change the setting itself or not. If you click on Yes, it will change<br />
the setting itself, make the extensions then change it back again.<br />
If you would prefer to change the setting manually, log into the Schema Master and change<br />
the value of the HKEY_LOCAL_MACHINE\System\CurrentControlSet\Services\NTDS\<br />
Parameters\Schema Update Allowed registry key to 1, adding it as a value of type<br />
DWORD if it does not already exist. Alternatively, if the Schema Manager MMC snap-in is<br />
installed on the machine, this can be used to enable or disable Schema extensions.<br />
© 2006 VASCO Data Security <strong>In</strong>c. 46
<strong>Digipass</strong> <strong>Plug</strong>-<strong>In</strong> <strong>for</strong> <strong>SBR</strong> <strong>In</strong>stallation <strong>Guide</strong> DPADadmin Utility<br />
If you have disabled the Schema extensions after removing a previous installation in the<br />
Forest, reactivate them be<strong>for</strong>e using this command. This can be done using the Schema<br />
Manager MMC snap-in used to deactivate them.<br />
Extend the Schema on the Schema Master<br />
1. Log into the Schema Master as a member of the Schema Administrators group.<br />
2. Copy dpadadmin.exe onto the Schema Master<br />
3. Open a command prompt in the location to which it was copied.<br />
4. Type:<br />
dpadadmin addschema<br />
5. If DPADadmin detects that Schema extensions are not currently permitted, it will<br />
prompt you whether to enable them or not. Enter y to enable them, or n to cancel.<br />
The progress and success/failure of the command will be displayed in the command prompt<br />
window. If there was a failure, it can be run again after the problem has been rectified.<br />
Extend the Schema on the <strong>SBR</strong> Server<br />
1. Open a command prompt and navigate to the installation’s bin directory by typing:<br />
cd \bin<br />
2. Type:<br />
dpadadmin addschema –master schema_master –u user_name –p password<br />
3. See 7.1 Command Line Syntax <strong>for</strong> more details regarding the required parameters.<br />
4. If DPADadmin detects that Schema extensions are not allowed, it will prompt you to<br />
enable them. Enter y to enable them, or n to cancel.<br />
The progress and success/failure of the command will be displayed in the command prompt<br />
window. If there was a failure, it can be run again after the problem has been rectified.<br />
Command Line Syntax<br />
dpadadmin addschema [–master schema_master] [–u user_name [–p password]] [-q]<br />
Option Description<br />
-master Fully qualified name of the Domain Controller with the Schema Master role. This option may be<br />
omitted if the command is run directly on the Schema Master.<br />
-u User name of a Domain Administrator in the Schema Administrators group. This option may be<br />
omitted if you are logged into the machine as that Domain Administrator when you run the command.<br />
-p Password of the Domain Administrator. This option may be omitted if you are logged in as that Domain<br />
Administrator or if they have a blank password.<br />
-q Quiet mode, will not output commentary text.<br />
Table 1: DPADadmin addschema Command Line Options<br />
DPADadmin addschema Command Sample<br />
dpadadmin addschema –master dc1.vasco.com –u schema_admin –p sa_password<br />
© 2006 VASCO Data Security <strong>In</strong>c. 47
<strong>Digipass</strong> <strong>Plug</strong>-<strong>In</strong> <strong>for</strong> <strong>SBR</strong> <strong>In</strong>stallation <strong>Guide</strong> DPADadmin Utility<br />
7.2 upgradeprofiles command<br />
The upgradeprofiles command is used to upgrade RADIUS profile in<strong>for</strong>mation from the<br />
<strong>for</strong>mat used in <strong>Digipass</strong> <strong>Plug</strong>-<strong>In</strong> <strong>for</strong> Funk 2.0 and 2.1, to the User Attributes <strong>for</strong>mat used in<br />
2.2. It must be run in each domain where User accounts with RADIUS Profile in<strong>for</strong>mation are<br />
located.<br />
Prerequisite <strong>In</strong><strong>for</strong>mation<br />
Attribute Group<br />
You may have a custom Attribute Group name set in the configuration of the new . If so, you<br />
will need to have the exact name available. Check the Configuration (<strong>SBR</strong> Settings tab) if you<br />
are unsure.<br />
Domain Administrator<br />
You must run the command as an administrator in that domain with sufficient administration<br />
rights to:<br />
Read User in<strong>for</strong>mation<br />
Read and write to the vasco-Profile attribute<br />
Upgrade Profile <strong>In</strong><strong>for</strong>mation<br />
1. Open a command prompt and navigate to the installation’s bin directory by typing:<br />
2. Type:<br />
cd \bin<br />
dpadadmin upgradeprofiles -domain <br />
The progress and success/failure of the command will be displayed in the command prompt<br />
window.<br />
Command Line Syntax<br />
dpadadmin upgradeprofiles [-attrgroup ] [-domain ] [-q]<br />
[-l] [-v]<br />
Table 2: DPADadmin upgradeprofiles Command Line Options<br />
Option Description<br />
-attrgroup OPTIONAL. Specifies the name of the Attribute Group to which the RADIUS Profile should be added. If<br />
this is not specified, the default RADIUS will be used.<br />
-domain OPTIONAL. Specifies the FQDN of the domain to set up. If omitted, the <strong>Digipass</strong> Configuration Domain<br />
will be used.<br />
-q Quiet mode, will not output commentary text.<br />
-l Record messages to a log file.<br />
-v Use verbose logging output.<br />
DPADadmin upgradeprofiles Command Sample<br />
dpadadmin upgradeprofiles -attrgroup RADIUS -domain test.vasco.com<br />
© 2006 VASCO Data Security <strong>In</strong>c. 48
<strong>Digipass</strong> <strong>Plug</strong>-<strong>In</strong> <strong>for</strong> <strong>SBR</strong> <strong>In</strong>stallation <strong>Guide</strong> DPDBadmin Utility<br />
8 DPDBadmin Utility<br />
8.1 addschema command<br />
The addschema command is used to create all required tables in an existing database, if they<br />
are not already there. The utility will check each table to see if it is already there and if not,<br />
will add the required table.<br />
This command is intended to be run manually by an administrator be<strong>for</strong>e the main <strong>Digipass</strong><br />
<strong>Plug</strong>-<strong>In</strong> <strong>for</strong> <strong>SBR</strong> installation is run.<br />
8.1.1.1 Prerequisite <strong>In</strong><strong>for</strong>mation<br />
Database Administrator Account<br />
<strong>In</strong> order to successfully modify the database schema, you will need the username and<br />
password of a database administrator account that is able to make changes to the database<br />
schema. You must pass these credentials to the command in the parameters.<br />
ODBC Data Source Name<br />
You will need the Data Source Name that can be used to connect to the database. If one does<br />
not exist, create it be<strong>for</strong>e continuing.<br />
8.1.1.2 Extend the Schema on the <strong>SBR</strong> Server<br />
1. Open a command prompt and navigate to the installation’s bin directory by typing:<br />
cd \bin<br />
2. Type:<br />
dpdbadmin addschema –u user_name –p password -d dsn<br />
3. See 8.1.1.3 Command Line Syntax <strong>for</strong> more details regarding the required<br />
parameters.<br />
The progress and success/failure of the command will be displayed in the command prompt<br />
window. If there was a failure, it can be run again after the problem has been rectified.<br />
Ensure that the database user account(s) to be used by the <strong>SBR</strong> <strong>Plug</strong>-<strong>In</strong> and <strong>for</strong> administration<br />
have the required permissions to access, modify, create and delete rows in the tables just<br />
created. See 2.3.2.2 Permissions <strong>for</strong> more in<strong>for</strong>mation.<br />
8.1.1.3 Command Line Syntax<br />
dpdbadmin addschema –u user_name [–p password] -d dsn [-nouser] [-domain<br />
domain_name] [-vdsuser alternatename] [-vdsdomain alternatename]<br />
[-vdscontrol alternatename] [-vdsdigipass alternatename]<br />
[-vdsdpapplication alternatename] [-vdspolicy] [-vdsbackend alternatename]<br />
[-vdscomponent alternatename] [-vdsorgunit alternatename] [-utf8factor] [-q]<br />
© 2006 VASCO Data Security <strong>In</strong>c. 49
<strong>Digipass</strong> <strong>Plug</strong>-<strong>In</strong> <strong>for</strong> <strong>SBR</strong> <strong>In</strong>stallation <strong>Guide</strong> DPDBadmin Utility<br />
Option Description<br />
-u User name of a database administrator.<br />
-p Password of the database administrator. This option may be omitted if they have a blank<br />
password.<br />
-d Database Name (DNS)<br />
-nouser Do not create <strong>Digipass</strong> User table.<br />
This option is not currently supported.<br />
-domain Specify the name of the master domain to be created.<br />
vdsuser Alternative name <strong>for</strong> the <strong>Digipass</strong> User table<br />
vdsdomain Alternative name <strong>for</strong> the Domain table<br />
vdscontrol Alternative name <strong>for</strong> the Controller table<br />
vdsdigipass Alternative name <strong>for</strong> the <strong>Digipass</strong> table<br />
vdsdpapplication Alternative name <strong>for</strong> the <strong>Digipass</strong> Application table<br />
vdspolicy Alternative name <strong>for</strong> the Policy table<br />
vdsbackend Alternative name <strong>for</strong> the Back-end Server table<br />
vdscomponent Alternative name <strong>for</strong> the Component table<br />
vdsorgunit Alternative name <strong>for</strong> the Organizational Unit table<br />
-utf8factor On certain databases (such as Oracle and DB2), column sizes are specified in bytes, not<br />
characters, by default. When UTF-8 encoding is used to store data, <strong>for</strong> full Unicode support, one<br />
character may be represented as more than one byte. Normally 2 or 3 characters are used,<br />
depending on the language, but some characters require 4. If your data will include a lot of non-<br />
English characters, you can increase the size of certain columns by a factor to allow <strong>for</strong> the extra<br />
bytes. The value of the parameter should be 2, 3 or 4. Typically, 3 is sufficient. The columns<br />
affected by this are the User Name (not User ID) and various Description fields.<br />
On other databases, column sizes are specified in characters, and this parameter is not needed.<br />
-q Quiet mode, will not output commentary text.<br />
Table 3: DPDBadmin addschema Command Line Options<br />
DPDBadmin addschema Command Sample<br />
dpdbadmin addschema –u db_admin –p dba_password -d db_users<br />
© 2006 VASCO Data Security <strong>In</strong>c. 50
8.2 upgradeprofiles command<br />
The upgradeprofiles command is used to upgrade RADIUS profile in<strong>for</strong>mation from the<br />
<strong>for</strong>mat used in <strong>Digipass</strong> <strong>Plug</strong>-<strong>In</strong> <strong>for</strong> Funk 2.0 and 2.1, to the User Attributes <strong>for</strong>mat used in<br />
2.2.<br />
Prerequisites<br />
These conditions must be met be<strong>for</strong>e this command can be run successfully:<br />
Must be run on the machine on which the is installed.<br />
The configuration file () must be in the default location (\Bin)<br />
Attribute Group<br />
You may have a custom Attribute Group name set in the Configuration. If so, you will need to<br />
have the exact name available. Check the Configuration (<strong>SBR</strong> Settings tab) if you are unsure.<br />
Upgrade Profile <strong>In</strong><strong>for</strong>mation<br />
1. Open a command prompt and navigate to the installation’s bin directory by typing:<br />
2. Type:<br />
cd \bin<br />
dpdbadmin upgradeprofiles<br />
The progress and success/failure of the command will be displayed in the command prompt<br />
window.<br />
Command Line Syntax<br />
dpdbadmin upgradeprofiles [-attrgroup ] [-q] [-l] [-v]<br />
Table 4: DPDBadmin upgradeprofiles Command Line Options<br />
Option Description<br />
-attrgroup OPTIONAL. Specifies the name of the Attribute Group to which the RADIUS Profile should be added. If<br />
this is not specified, the default RADIUS will be used.<br />
-q Quiet mode, will not output commentary text.<br />
-l Record messages to a log file.<br />
-v Use verbose logging output.<br />
DPDBadmin upgradeprofiles Command Sample<br />
dpdbadmin upgradeprofiles -attrgroup RADIUS -l c:\temp\upgrade.log
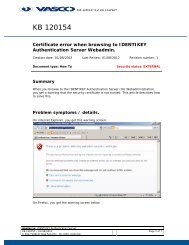


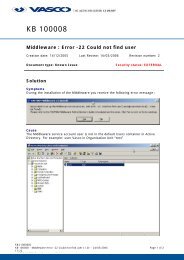


![KB [100006] - Vasco](https://img.yumpu.com/12539350/1/184x260/kb-100006-vasco.jpg?quality=85)