6.20A – AudioCodes Mediant 800 MSBG - Testlab
6.20A – AudioCodes Mediant 800 MSBG - Testlab
6.20A – AudioCodes Mediant 800 MSBG - Testlab

You also want an ePaper? Increase the reach of your titles
YUMPU automatically turns print PDFs into web optimized ePapers that Google loves.
<strong>AudioCodes</strong> <strong>Mediant</strong> <strong>800</strong> <strong>MSBG</strong> Installation and Configuration Guide Page 1 of 47<br />
<strong>6.20A</strong> <strong>–</strong> <strong>AudioCodes</strong> <strong>Mediant</strong> <strong>800</strong> <strong>MSBG</strong><br />
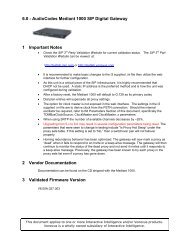
1. Important Notes<br />
• Check the SIP 3 rd Party Validation Website for current validation status.<br />
The SIP 3 rd party Validation Website can be viewed at:<br />
http://testlab.inin.com<br />
• Unlike other <strong>Mediant</strong> devices, no INI files will be provided with this<br />
document. The <strong>Mediant</strong> <strong>800</strong> requires two INIs to have a complete<br />
configuration. These INI files are interdependent and editing the DATA.INI<br />
file is not supported by <strong>AudioCodes</strong>.<br />
• As this unit is a critical piece of the SIP infrastructure, it is highly<br />
recommended that DHCP not be used. A static IP address is the preferred<br />
method and is how the unit was configured during validation.<br />
• The M<strong>800</strong> will require 3 IP Addresses as a base configuration. One for the<br />
WAN interface and two for the internal interfaces (VoIP & Data).<br />
• After a factory reset, the <strong>Mediant</strong> <strong>800</strong>’s default configuration has DHCP<br />
enabled, and the VOIP & Data IP addresses will be 192.168.0.1 and<br />
192.168.0.2 respectively. The IP Address of the VoIP interface is the<br />
address of the Web Interface.<br />
• If a configuration change is made that causes errors, the <strong>Mediant</strong> <strong>800</strong> will<br />
revert to the default IP & DHCP configuration. If this happens connect a<br />
PC to the <strong>Mediant</strong> <strong>800</strong> via crossover cable and undo any changes made.<br />
• The <strong>Mediant</strong> <strong>800</strong> <strong>MSBG</strong> has two configuration sections that are controlled<br />
by two different INI files. Board.INI contains the VoIP/Gateway<br />
configuration. Data.ini contains the Firewall/Routing configuration.<br />
• Any time you see -1 in a configuration this is mean “not configured”.<br />
• While this device supports IPv6, IPv4 was used in the certification tests.<br />
2. Vendor Documentation<br />
Documentation can be found on the CD shipped with the <strong>Mediant</strong> <strong>800</strong>.<br />
3. Validated Firmware Version<br />
<strong>6.20A</strong>.034.004
<strong>AudioCodes</strong> <strong>Mediant</strong> <strong>800</strong> <strong>MSBG</strong> Installation and Configuration Guide Page 2 of 47<br />
4. Install<br />
Download the <strong>Mediant</strong> <strong>800</strong> files form the 3 rd Party Validation Website:<br />
http://testlab.inin.com<br />
5. Configuration<br />
Methods:<br />
Contained in the zip file will be the validated version of firmware (.cmp), as<br />
well as any supplemental configuration files.<br />
• Manipulation of the supplied .ini file(s), then uploading it via the Web<br />
interface.<br />
o This method is not supported for the <strong>Mediant</strong> <strong>800</strong>. The <strong>Mediant</strong><br />
<strong>800</strong> requires two separate INI files that are interdependent and<br />
modifying the DATA.INI file manually is not supported by<br />
<strong>AudioCodes</strong>. As a result, no INI files have been provided with this<br />
document.<br />
• Web Interface<br />
o This method is the preferred method for all configuration needs.<br />
o Please note: Caution should be exercised and the <strong>AudioCodes</strong><br />
documentation should always be referenced when using the Web<br />
interface configuration option.<br />
• TFTP<br />
o This method of configuring the <strong>Mediant</strong> <strong>800</strong> has not been tested.<br />
Contents<br />
Initial Setup <strong>–</strong> LAN Settings: ..................................................................................................................... 3<br />
Initial Setup <strong>–</strong> VoIP Settings: .................................................................................................................... 9<br />
Initial Setup <strong>–</strong> SBC Routing: ................................................................................................................... 23<br />
Advanced Installation <strong>–</strong> TLS: .................................................................................................................. 26<br />
Advanced Installation <strong>–</strong> External User Agents: ................................................................................... 36
<strong>AudioCodes</strong> <strong>Mediant</strong> <strong>800</strong> <strong>MSBG</strong> Installation and Configuration Guide Page 3 of 47<br />
Initial Setup <strong>–</strong> LAN Settings:<br />
1. Connect a Laptop/Desktop with its NIC configured for DHCP to the<br />
<strong>Mediant</strong> <strong>800</strong> via a crossover cable or a switch<br />
2. Open a browser and navigate to 192.168.0.1 entering the default<br />
username and password<br />
a. User: Admin<br />
b. Pass: Admin<br />
3. After logging in, always make sure the radio button next to Full is<br />
selected. Without this radio button selected you do not have access to<br />
all the possible configuration options<br />
4. Select System > Application Settings<br />
5. Enter the appropriate information for your network
<strong>AudioCodes</strong> <strong>Mediant</strong> <strong>800</strong> <strong>MSBG</strong> Installation and Configuration Guide Page 4 of 47<br />
6. Select System > WEB User Accounts<br />
7. Change the Admin user password and, if necessary, the user name<br />
8. Select Data > WAN Access > Settings<br />
9. Change Connection Type to Manual IP Address Ethernet<br />
Connection<br />
10. Enter the settings necessary to fit your network design.
<strong>AudioCodes</strong> <strong>Mediant</strong> <strong>800</strong> <strong>MSBG</strong> Installation and Configuration Guide Page 5 of 47<br />
11. Select Data > Data System > Connections<br />
12. Select LAN Switch VLAN 1<br />
13. Select Settings
<strong>AudioCodes</strong> <strong>Mediant</strong> <strong>800</strong> <strong>MSBG</strong> Installation and Configuration Guide Page 6 of 47<br />
14. Enter the settings necessary to fit your network design.<br />
15. Click OK on this and the next page<br />
16. Select Data > Data Services > DHCP Server<br />
17. Select LAN switch VLAN 1
<strong>AudioCodes</strong> <strong>Mediant</strong> <strong>800</strong> <strong>MSBG</strong> Installation and Configuration Guide Page 7 of 47<br />
18. If you do not wish to use the <strong>Mediant</strong> <strong>800</strong>’s DHCP server then change<br />
the highlighted (see below) drop down to Disabled and click OK.<br />
Otherwise, modify the settings to fit your network design.<br />
19. Select VoIP > Network > IP Settings<br />
20. Click the radio button next to Index 0<br />
21. Click the Edit button that appears above the IP settings table
<strong>AudioCodes</strong> <strong>Mediant</strong> <strong>800</strong> <strong>MSBG</strong> Installation and Configuration Guide Page 8 of 47<br />
22. Enter the information necessary to fit your network design. Also ensure<br />
that the WAN Interface Name has the proper Interface selected in the<br />
drop down. Click Apply.<br />
23. Click Burn & then Yes on the following dialog prompt.<br />
24. Now that the configuration has been saved to memory and the <strong>Mediant</strong><br />
<strong>800</strong> is configured to be on your LAN, put it in place and we’ll continue in<br />
the next section with the configuration.
<strong>AudioCodes</strong> <strong>Mediant</strong> <strong>800</strong> <strong>MSBG</strong> Installation and Configuration Guide Page 9 of 47<br />
Initial Setup <strong>–</strong> VoIP Settings:<br />
In this section we’ll be configuring the <strong>Mediant</strong> <strong>800</strong> to accept & route calls.<br />
The <strong>Mediant</strong> <strong>800</strong> uses an organizational structure where groups of settings are<br />
contained in a Signaling Media Realm (SRD). For further description please see<br />
the Configuring SRD Table section of the <strong>Mediant</strong> <strong>800</strong> <strong>MSBG</strong> User’s Manual.<br />
There are several pieces that will need to be configured to construct the<br />
SRD. They are:<br />
1) Media Realm<br />
2) IP Group<br />
3) IP Profile<br />
4) Proxy Set<br />
We will also be configuring the VoIP Interface settings (ports, etc), and<br />
Routing. The Routing Table is where SRDs & IP Groups are used to ease the<br />
configuration of routing between networks.<br />
After the <strong>Mediant</strong> <strong>800</strong> has been connected to your LAN and you have<br />
established connectivity, continue below. The <strong>MSBG</strong> has built in diagnostic tools<br />
(PING, ARP, & Traceroute) you can use to verify successful configuration. They<br />
are located under Status & Diagnostics > Data Status > Diagnostics.<br />
1. Select VoIP > Media > Media Realm Configuration
<strong>AudioCodes</strong> <strong>Mediant</strong> <strong>800</strong> <strong>MSBG</strong> Installation and Configuration Guide Page 10 of 47<br />
3. The default configuration has no media realms configured. You will<br />
need at least two realms configured. One for WAN and one for Voice.<br />
Enter a number next to Add Index and click Add. For the purposes of<br />
this document, we will be considering Voice indexes to be between 1 &<br />
10 and WAN indexes to be between 11 & 20.<br />
4. Enter the following settings:<br />
a. Media Realm Name: Voice<br />
b. IPv4 Interface Name: Voice<br />
c. Port Range Start: This is as needed.<br />
i. If you configure Port Range Start, then Port Range End<br />
will be automatically calculated. Also, you will need to<br />
configure Port Range Start for all other media realms.<br />
These port ranges cannot overlap.<br />
d. Number of Media Session Legs: This will limit the number of<br />
active calls the Media Realm will allow. -1 = Unlimited<br />
5. Click Apply. A dialog box appears telling you that you’ve configured<br />
and offline parameter. Ignore this for now as we will be rebooting later.<br />
6. Add the WAN Media realm following the same steps.<br />
7. Click Apply. A dialog box may appear telling you that you’ve<br />
configured and offline parameter. Ignore this for now as we will be<br />
rebooting later.
<strong>AudioCodes</strong> <strong>Mediant</strong> <strong>800</strong> <strong>MSBG</strong> Installation and Configuration Guide Page 11 of 47<br />
8. Select VoIP > Media > IPMedia Settings<br />
9. Enter in the Number of Media Channels that were purchased with<br />
your feature key.<br />
Note: If you do not know the number, check in Maintenance ><br />
Software Update > Software Upgrade Key and on the right hand<br />
side look for the following value:
<strong>AudioCodes</strong> <strong>Mediant</strong> <strong>800</strong> <strong>MSBG</strong> Installation and Configuration Guide Page 12 of 47<br />
10. Select VoIP > Applications Enabling > Applications Enabling<br />
11. Change Enable SBC Application to Enable<br />
12. Click Submit<br />
13. Select VoIP > Control Network > SIP Interface Table<br />
14. Enter 1 in the box next to Add and then click Add.
<strong>AudioCodes</strong> <strong>Mediant</strong> <strong>800</strong> <strong>MSBG</strong> Installation and Configuration Guide Page 13 of 47<br />
15. Enter a Network Interface name, SIP Ports, SRD, and choose an<br />
application type (SBC) for the SIP Interface. Click Apply.<br />
Note: The Network Interface Name has to match, precisely, the name<br />
given to the VoIP Interface in VoIP > Network > IP Settings.<br />
16. Enter 11 in the box next to Add and then click Add.<br />
17. Enter a Network Interface name, SIP Ports, SRD, and choose an<br />
application type (SBC) for the SIP Interface. Click Apply.<br />
Note: WAN is the default Network Interface name for the WAN port. It<br />
is not recommended to try changing this.<br />
18. Select VoIP > Control Network > IP Group Table
<strong>AudioCodes</strong> <strong>Mediant</strong> <strong>800</strong> <strong>MSBG</strong> Installation and Configuration Guide Page 14 of 47<br />
19. In the IP Group Table select and/or enter the following values for the<br />
LAN & Wan Groups clicking Submit when settings are entered.<br />
a. LAN group:<br />
Index: 1<br />
Type: Server<br />
Description: Voice<br />
Proxy Set ID: 1<br />
SIP Group Name: <br />
Contact User: <br />
SRD: 1<br />
Media Realm: Voice<br />
IP Profile ID: 0<br />
Always Use Route Table: No<br />
Routing Mode: Not Configured<br />
SIP Re-Routing Mode: Standard<br />
Classify By Proxy Set: Enable<br />
Max Number of Registered Users: -1<br />
Inbound Message Manipulation Set: -1<br />
Outbound Message Manipulation Set: -1
<strong>AudioCodes</strong> <strong>Mediant</strong> <strong>800</strong> <strong>MSBG</strong> Installation and Configuration Guide Page 15 of 47<br />
b. WAN Group:<br />
Index: 11<br />
Type: Server<br />
Description: WAN<br />
Proxy Set ID: 11<br />
SIP Group Name: <br />
Contact User: <br />
SRD: 1<br />
Media Realm: WAN<br />
IP Profile ID: 0<br />
Always Use Route Table: No<br />
Routing Mode: Not Configured<br />
SIP Re-Routing Mode: Standard<br />
Classify By Proxy Set: Enable<br />
Max Number of Registered Users: -1<br />
Inbound Message Manipulation Set: -1<br />
Outbound Message Manipulation Set: -1
<strong>AudioCodes</strong> <strong>Mediant</strong> <strong>800</strong> <strong>MSBG</strong> Installation and Configuration Guide Page 16 of 47<br />
20. Select VoIP > Control Network > Proxy Sets<br />
21. You will need to create two proxy sets, one for the IC Server(s) and<br />
one for your WAN Side end point(s). Select and/or enter the following<br />
values for the LAN & Proxy Sets clicking Submit when settings are<br />
entered.<br />
Continues on next page.
<strong>AudioCodes</strong> <strong>Mediant</strong> <strong>800</strong> <strong>MSBG</strong> Installation and Configuration Guide Page 17 of 47<br />
a. LAN:<br />
Proxy Set ID: 1<br />
Proxy Address<br />
Enter the IP of the Primary IC Server in the first line<br />
and, if applicable, the IP of the Backup IC Server in<br />
the second line. Choose the appropriate Transport<br />
Type for each.<br />
Note: While not strictly necessary, it is<br />
recommended to put the appropriate SIP<br />
communications port on end of the IC Servers’ IP<br />
Addresses.<br />
Enable Proxy Keep Alive: Using Options<br />
Proxy Keep Alive Time: 60<br />
Proxy Load Balancing Method: Disable<br />
Is Proxy Hot Swap: Yes<br />
Proxy Redundancy Mode: Homing<br />
SRD Index: 1<br />
Classification Input: IP Only
<strong>AudioCodes</strong> <strong>Mediant</strong> <strong>800</strong> <strong>MSBG</strong> Installation and Configuration Guide Page 18 of 47<br />
b. WAN:<br />
Proxy Set ID: 11<br />
Proxy Address<br />
If you have redundant carrier endpoints enter their<br />
IPs here. Else, enter the IP of your carrier. Choose<br />
the appropriate Transport Type.<br />
Note: While not strictly necessary, it is<br />
recommended to put the appropriate SIP<br />
communications port on the IP Address(es).<br />
Enable Proxy Keep Alive: Using Options<br />
Proxy Keep Alive Time: 60<br />
Proxy Load Balancing Method:<br />
If your carrier allows for load balancing, pick the<br />
appropriate method.<br />
Is Proxy Hot Swap: Yes<br />
Proxy Redundancy Mode: Homing<br />
SRD Index: 11<br />
Classification Input: IP Only
<strong>AudioCodes</strong> <strong>Mediant</strong> <strong>800</strong> <strong>MSBG</strong> Installation and Configuration Guide Page 19 of 47<br />
22. Select VoIP > SIP Definitions > General Parameters<br />
23. There are many different combinations of settings you can use here.<br />
The main things that need configured are:<br />
Enable Early Media: Configure as needed<br />
Fax Signaling Method: T.38 Relay<br />
SIP Transport Type: Configure as needed<br />
SIP UDP Local Port: Same as Voice SIP Interface<br />
SIP TCP Local Port: Same as Voice SIP Interface<br />
SIP TLS Local Port: Same as Voice SIP Interface<br />
Enable Sips: Please see the section on Enabling TLS.<br />
SIP Destination Port: Matches protocol for SIP Transport Type<br />
24. Once your changes are complete, click Submit
<strong>AudioCodes</strong> <strong>Mediant</strong> <strong>800</strong> <strong>MSBG</strong> Installation and Configuration Guide Page 20 of 47<br />
25. Select VoIP > Coders and Profiles > IP Profile Settings<br />
26. Here you can configure various settings to handle variations on the<br />
default SIP parameters. You then assign these Profiles to their<br />
respective IP Groups to override the default SIP Parameters.<br />
These profiles can be used to handle:<br />
a. Differences in DSCP from one network to another<br />
b. If one network uses SRTP and another uses RTP if Media<br />
Security is Enabled<br />
c. If one network uses T.38 Relay and another does not allow faxing<br />
d. If you set up Coder Groups you can assign them to the IP Profile<br />
and then assign the IP Profile to the proper IP Groups.<br />
e. Etc.<br />
27. Once your configurations are complete, press Submit and, if<br />
necessary, assign them to the proper IP Groups.
<strong>AudioCodes</strong> <strong>Mediant</strong> <strong>800</strong> <strong>MSBG</strong> Installation and Configuration Guide Page 21 of 47<br />
28. Select VoIP > Control Network > SRD Table<br />
29. Select SRD Index: 1 <strong>–</strong> Not Exist<br />
30. Expand all sections by clicking the ^s next to their names. Configure as<br />
follows:<br />
SRD Name: Voice<br />
Media Realm: Voice<br />
Internal SRD Media Anchoring: Don’t Anchor Media<br />
31. After you have clicked Submit the SRD should look like this:
<strong>AudioCodes</strong> <strong>Mediant</strong> <strong>800</strong> <strong>MSBG</strong> Installation and Configuration Guide Page 22 of 47<br />
32. Select SRD Index: 11 <strong>–</strong> Not exist<br />
33. Expand all sections by clicking the ^s next to their names. Configure as<br />
follows:<br />
SRD Name: WAN<br />
Media Realm: WAN<br />
Internal SRD Media Anchoring: Don’t Anchor Media<br />
34. Select Device Actions > Reset<br />
35. Ensure Burn to Flash is set to Yes and then click Reset
<strong>AudioCodes</strong> <strong>Mediant</strong> <strong>800</strong> <strong>MSBG</strong> Installation and Configuration Guide Page 23 of 47<br />
Initial Setup <strong>–</strong> SBC Routing:<br />
Now that the SRDs & IP Groups have been configured we can move on to<br />
configuring routing between IP Groups. For more details see the Configuring<br />
SBC IP-to-IP Routing section of the <strong>Mediant</strong> <strong>800</strong> <strong>MSBG</strong> SIP User’s Manual.<br />
1. Select VoIP > SBC > General Settings<br />
2. Enter the WAN IP address configured earlier in the WAN IP Address<br />
field<br />
3. Click Submit
<strong>AudioCodes</strong> <strong>Mediant</strong> <strong>800</strong> <strong>MSBG</strong> Installation and Configuration Guide Page 24 of 47<br />
4. Select VoIP > SBC > Routing SBC > IP to IP Routing Table<br />
5. Enter a 10 in the text box next to Add. Click Add<br />
6. Enter the following settings:<br />
Source IP Group ID: 1<br />
Destination IP Group ID: 11<br />
7. Click Apply<br />
8. Enter 20 in the text box next to Add. Click Add
<strong>AudioCodes</strong> <strong>Mediant</strong> <strong>800</strong> <strong>MSBG</strong> Installation and Configuration Guide Page 25 of 47<br />
9. Enter the following settings:<br />
Source IP Group ID: 11<br />
Destination IP Group ID: 1<br />
10. Click Apply<br />
11. Select Device Actions > Reset<br />
12. Ensure Burn to Flash is set to Yes and then click Reset
<strong>AudioCodes</strong> <strong>Mediant</strong> <strong>800</strong> <strong>MSBG</strong> Installation and Configuration Guide Page 26 of 47<br />
Advanced Installation <strong>–</strong> TLS:<br />
Please note:<br />
• If you’re traffic is moving between TLS & Non-TLS networks it is very<br />
important to create two IP Profiles, one for NON-TLS and the other for<br />
TLS.<br />
1. Select System > Certificates<br />
2. Enter the FQDN of the <strong>Mediant</strong> <strong>800</strong> gateway in Subject Name. Click<br />
Generate CSR<br />
Note: It is necessary to use a Subject Name that is resolvable by all<br />
network elements, both Internal and External.<br />
3. Copy all text from -----BEGIN CERTIFICATE REQUEST----- to -----<br />
END CERTIFICATE REQUEST----- including the section headers.
<strong>AudioCodes</strong> <strong>Mediant</strong> <strong>800</strong> <strong>MSBG</strong> Installation and Configuration Guide Page 27 of 47<br />
4. Open Interaction Administrator and navigate to the System<br />
Configuration container:<br />
5. On right hand side double-click on Configuration<br />
6. Open the Certificate Management tab and click the Modify… button<br />
for the SIP/TLS Line Certificates Configuration
<strong>AudioCodes</strong> <strong>Mediant</strong> <strong>800</strong> <strong>MSBG</strong> Installation and Configuration Guide Page 28 of 47<br />
7. Click the Port-To-Certificate Mappings tab.<br />
8. Remove all entries in the Port-To-Certificate Mappings box<br />
9. Enter 5061 in the Port input box and choose in the Line Certificate drop down.<br />
10. Click Add and then do the same for 8061.
<strong>AudioCodes</strong> <strong>Mediant</strong> <strong>800</strong> <strong>MSBG</strong> Installation and Configuration Guide Page 29 of 47<br />
12. Click Third Party Certificate Signing<br />
13. Paste the CSR generated at step 3 into the Certificate to Sign input<br />
box.<br />
14. Click Sign<br />
15. You will need to save both the Signed and Signing Authority<br />
certificates for importing to the <strong>Mediant</strong> <strong>800</strong>.
<strong>AudioCodes</strong> <strong>Mediant</strong> <strong>800</strong> <strong>MSBG</strong> Installation and Configuration Guide Page 30 of 47<br />
16. Click Save As… and save both certificates then return to the <strong>Mediant</strong><br />
<strong>800</strong> Web Interface.<br />
17. Return to System > Certificates and click Browse… under the<br />
Trusted Root Certificate Store section of Certificate Files. Once<br />
you’ve selected the Signing Authority Certificate you saved from<br />
Interaction Administrator, click Send File<br />
18. Once the file has been uploaded do the same for Server Certificate.<br />
Note: It is exceedingly important that you upload the certificates in that<br />
order.
<strong>AudioCodes</strong> <strong>Mediant</strong> <strong>800</strong> <strong>MSBG</strong> Installation and Configuration Guide Page 31 of 47<br />
19. Once the file has been uploaded go to VoIP > Media > Media<br />
Security<br />
20. Change Media Security to Enable and put a check next to all<br />
applicable cipher suites in SRTP offered Suites<br />
21. Click Submit<br />
22. Click OK on the following prompt notifying you of the offline parameter<br />
change.
<strong>AudioCodes</strong> <strong>Mediant</strong> <strong>800</strong> <strong>MSBG</strong> Installation and Configuration Guide Page 32 of 47<br />
23. Select VoIP > SIP Definitions > General Parameters<br />
24. Change the following settings:<br />
SIP Transport Type: TLS<br />
Enable SIPS: Enable<br />
SIP Destination Port: 5061
<strong>AudioCodes</strong> <strong>Mediant</strong> <strong>800</strong> <strong>MSBG</strong> Installation and Configuration Guide Page 33 of 47<br />
25. Click Submit<br />
26. Select VoIP > SIP Definitions > Proxy & Registration<br />
27. Enter the Subject Name used in generating the CSR in the Gateway<br />
Name & Proxy Name fields
<strong>AudioCodes</strong> <strong>Mediant</strong> <strong>800</strong> <strong>MSBG</strong> Installation and Configuration Guide Page 34 of 47<br />
28. Click Submit<br />
29. Select Device Actions > Reset<br />
30. Ensure Burn to Flash is set to Yes and then click Reset<br />
31. Log back in after reboot<br />
32. Select VoIP > Control Network > Proxy Sets Table<br />
33. Ensure that the proper proxy set has the Transport Type set to TLS<br />
for each entry in its Proxy Address table. Also put the SIPS<br />
communication port on the end of each IP Address.<br />
34. If one of your proxy sets does not communicate using TLS ensure that<br />
that Proxy Set has the SIP communication port on the end of each of<br />
its IP Addresses.<br />
35. Select VoIP > Coders & Profiles > IP Profile Settings
<strong>AudioCodes</strong> <strong>Mediant</strong> <strong>800</strong> <strong>MSBG</strong> Installation and Configuration Guide Page 35 of 47<br />
36. Create one IP Profile for TLS and one for TCP/UDP.<br />
a. For TCP set:<br />
Gateway Parameters > Media Security Behavior to Disable<br />
SBC > Media Security Behavior to RTP<br />
b. For TLS set:<br />
Gateway Parameters > Media Security Behavior to<br />
Preferrable<br />
SBC > Media Security Behavior to SRTP<br />
37. Assign the IP Profiles to IP Groups as needed to control their Media<br />
Security behavior.<br />
38. Click Submit<br />
39. Click Burn
<strong>AudioCodes</strong> <strong>Mediant</strong> <strong>800</strong> <strong>MSBG</strong> Installation and Configuration Guide Page 36 of 47<br />
Advanced Installation <strong>–</strong> External User Agents:<br />
If you wish to have VoIP stations outside your network that connect back to<br />
IC and place calls without using VPN there are several things you will need to<br />
configure. Primarily you cannot use the <strong>Mediant</strong> <strong>800</strong> for your primary Data router.<br />
You will instead need a Secondary router that will handle the HTTP(S) traffic<br />
from the WAN Phones. See the diagram below:<br />
For IC to function properly with a WAN<br />
Phone & Switchover, all HTTP(S) traffic<br />
will need to be routed through a separate<br />
device than the M<strong>800</strong>. Ports 8088 and<br />
8089 will need sent through your firewall<br />
using port forwarding, static NATs, or a<br />
separate method of your choosing.<br />
The end result being that a WAN phone<br />
can contact either server for its<br />
configuration files, depending on which<br />
server is up at the time, and that the<br />
HTTP(S) traffic does not go through the<br />
M<strong>800</strong>.<br />
The reason for this is due to a limitation of<br />
the <strong>Mediant</strong> <strong>800</strong>. If a DNS record returns<br />
more than one IP, the first IP returned is<br />
the only IP Address used.<br />
One other thing to note is that this<br />
configuration disallows provisioning<br />
managed phones by end users, and<br />
rebooting the phones remotely. All<br />
phones will need their MAC addresses<br />
entered at time of creation.
<strong>AudioCodes</strong> <strong>Mediant</strong> <strong>800</strong> <strong>MSBG</strong> Installation and Configuration Guide Page 37 of 47<br />
There will need to be several changes in Interaction Administrator before<br />
changes are made to the <strong>Mediant</strong> <strong>800</strong>. There will need to be:<br />
• A line for phones to register on, either 5060 or 5061 depending on the<br />
usage of TLS<br />
• A registration group dedicated to WAN phones<br />
• A location dedicated to WAN phones<br />
1. Open Interaction Administrator and navigate to the Lines Container<br />
2. Click File > New and enter a meaningful name for the Line<br />
3. Enter the FQDN the WAN Phones will use to contact IC in the Domain<br />
Name field. Enter something in the Address field. This can be your<br />
main DID or another number.
<strong>AudioCodes</strong> <strong>Mediant</strong> <strong>800</strong> <strong>MSBG</strong> Installation and Configuration Guide Page 38 of 47<br />
4. Change any settings necessary in the Audio section<br />
5. Change any settings necessary in the Transport section<br />
6. Click OK<br />
7. Click [Server Name] > Managed IP Phones > Registration Groups
<strong>AudioCodes</strong> <strong>Mediant</strong> <strong>800</strong> <strong>MSBG</strong> Installation and Configuration Guide Page 39 of 47<br />
8. Click File > New and enter a name in the New Registration Group<br />
window<br />
9. Click Add.. in the Registrations section of the Registration Group<br />
Configuration window<br />
10. Click the Use the following registration settings: radio button.<br />
11. Enter the external FQDN of your <strong>Mediant</strong> <strong>800</strong>, the name entered in the<br />
Subject Name of the CSR, and change Port and Transport Protocol<br />
as necessary.
<strong>AudioCodes</strong> <strong>Mediant</strong> <strong>800</strong> <strong>MSBG</strong> Installation and Configuration Guide Page 40 of 47<br />
12. Click OK<br />
13. Click [Server Name] > Regionalization > Locations<br />
14. Click File > New<br />
15. Enter a meaningful Location Name and, if there is no way to route<br />
NTP back to your network from the WAN, choose Other for SNTP<br />
Server and enter the IP or FQDN of a public NTP server.<br />
16. Click Next
<strong>AudioCodes</strong> <strong>Mediant</strong> <strong>800</strong> <strong>MSBG</strong> Installation and Configuration Guide Page 41 of 47<br />
17. Select the other Location(s) this Location needs to be able to<br />
communicate with<br />
18. Click Next<br />
19. Choose the Codecs available at each Location<br />
20. Click Next<br />
21. Click Finish
<strong>AudioCodes</strong> <strong>Mediant</strong> <strong>800</strong> <strong>MSBG</strong> Installation and Configuration Guide Page 42 of 47<br />
22. Create some Managed Phones/Stations and place them in the WAN<br />
region.<br />
23. Open the <strong>Mediant</strong> <strong>800</strong>’s WEB Interface<br />
24. Change the URL replacing Index with AdminPage (this is case<br />
sensitive)<br />
25. Select ini Parameters<br />
26. Enter SBCKeepContactUserInRegister in the Parameter Name field<br />
and 1 in the Enter Value field, click Apply New Value
<strong>AudioCodes</strong> <strong>Mediant</strong> <strong>800</strong> <strong>MSBG</strong> Installation and Configuration Guide Page 43 of 47<br />
27. Click Back to Main to return to the regular configuration page.<br />
28. Select VoIP > Control Network > IP Group Table
<strong>AudioCodes</strong> <strong>Mediant</strong> <strong>800</strong> <strong>MSBG</strong> Installation and Configuration Guide Page 44 of 47<br />
29. Select Index 12 and enter the following settings:<br />
Type: USER<br />
Description: WAN Users (or something more meaningful)<br />
SRD: 11<br />
Media Realm: WAN<br />
IP Profile ID: Choose the appropriate IP Profile unless non used,<br />
then choose 0<br />
30. Click Submit
<strong>AudioCodes</strong> <strong>Mediant</strong> <strong>800</strong> <strong>MSBG</strong> Installation and Configuration Guide Page 45 of 47<br />
31. Select VoIP > SBC > Routing SBC > Classification Table<br />
32. Enter 12 in the text box next to Add and click Add<br />
33. Enter<br />
a. Source SRD ID: 11<br />
b. Source IP Group ID: 12<br />
34. Click Apply
<strong>AudioCodes</strong> <strong>Mediant</strong> <strong>800</strong> <strong>MSBG</strong> Installation and Configuration Guide Page 46 of 47<br />
35. Select VoIP > SBC > Routing SBC > IP to IP Routing Table<br />
36. Enter a 9 in the box next to Add<br />
37. Enter the following Settings:<br />
Source IP Group ID: 1<br />
Destination Username Prefix: WANPhoneXXX<br />
i. A strict naming convention will have to adopted for all<br />
phones that are going to be on the WAN so that this<br />
naming mask will be effective.<br />
ii. This naming mask will handle any phone named<br />
WANPHONE(001-999) as X is wild card for a single digit 0-<br />
9.<br />
Destination IP Group: 12<br />
38. Click Apply
<strong>AudioCodes</strong> <strong>Mediant</strong> <strong>800</strong> <strong>MSBG</strong> Installation and Configuration Guide Page 47 of 47<br />
39. Enter a 19 in the box next to Add<br />
40. Enter the following Settings:<br />
a. Source IP Group ID: 12<br />
b. Destination IP Group: 1<br />
41. Click Apply<br />
42. Select Device Actions > Reset<br />
43. Ensure Burn to Flash is set to Yes and then click Reset