EECE 259 - Lab 5 - Using The Assembler and Debug Monitor.pdf
EECE 259 - Lab 5 - Using The Assembler and Debug Monitor.pdf
EECE 259 - Lab 5 - Using The Assembler and Debug Monitor.pdf

You also want an ePaper? Increase the reach of your titles
YUMPU automatically turns print PDFs into web optimized ePapers that Google loves.
Rational: <strong>The</strong> purpose of this lab is<br />
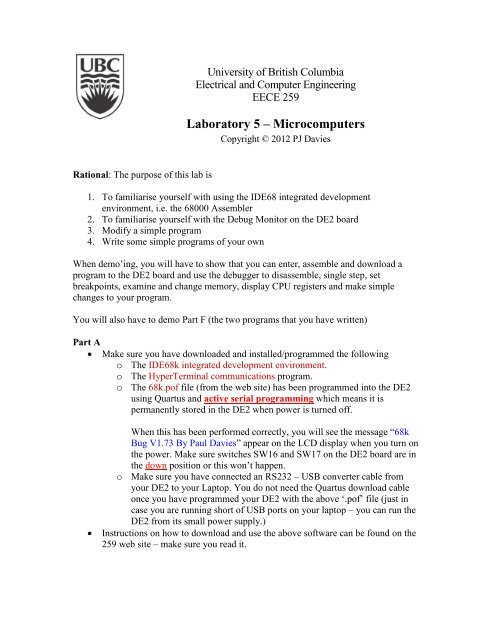
University of British Columbia<br />
Electrical <strong>and</strong> Computer Engineering<br />
<strong>EECE</strong> <strong>259</strong><br />
<strong>Lab</strong>oratory 5 – Microcomputers<br />
Copyright © 2012 PJ Davies<br />
1. To familiarise yourself with using the IDE68 integrated development<br />
environment, i.e. the 68000 <strong>Assembler</strong><br />
2. To familiarise yourself with the <strong>Debug</strong> <strong>Monitor</strong> on the DE2 board<br />
3. Modify a simple program<br />
4. Write some simple programs of your own<br />
When demo’ing, you will have to show that you can enter, assemble <strong>and</strong> download a<br />
program to the DE2 board <strong>and</strong> use the debugger to disassemble, single step, set<br />
breakpoints, examine <strong>and</strong> change memory, display CPU registers <strong>and</strong> make simple<br />
changes to your program.<br />
You will also have to demo Part F (the two programs that you have written)<br />
Part A<br />
Make sure you have downloaded <strong>and</strong> installed/programmed the following<br />
o <strong>The</strong> IDE68k integrated development environment.<br />
o <strong>The</strong> HyperTerminal communications program.<br />
o <strong>The</strong> 68k.pof file (from the web site) has been programmed into the DE2<br />
using Quartus <strong>and</strong> active serial programming which means it is<br />
permanently stored in the DE2 when power is turned off.<br />
When this has been performed correctly, you will see the message “68k<br />
Bug V1.73 By Paul Davies” appear on the LCD display when you turn on<br />
the power. Make sure switches SW16 <strong>and</strong> SW17 on the DE2 board are in<br />
the down position or this won’t happen.<br />
o Make sure you have connected an RS232 – USB converter cable from<br />
your DE2 to your Laptop. You do not need the Quartus download cable<br />
once you have programmed your DE2 with the above ‘.pof’ file (just in<br />
case you are running short of USB ports on your laptop – you can run the<br />
DE2 from its small power supply.)<br />
Instructions on how to download <strong>and</strong> use the above software can be found on the<br />
<strong>259</strong> web site – make sure you read it.
Part B<br />
<strong>Using</strong> the IDE68k Instructions:<br />
Setup the various IDE options, e.g. editor etc. as per the instructions in the<br />
h<strong>and</strong>out.<br />
Create a new assembly language program based on the source code found on Page<br />
12 of the Lecture “Introduction to 68000 <strong>and</strong> Assembly Language Programming –<br />
Part A”<br />
Build the program, i.e. assemble it – correct errors as required.<br />
Locate the listing file <strong>and</strong> the hex file produced. Examine them in an editor to see<br />
what they look like.<br />
Part C<br />
Make sure your RS232-USB dongle is plugged into the RS232 port on the DE2<br />
board (top right corner)<br />
Plug your USB extension cable (that came with the dongle) into the dongle <strong>and</strong><br />
the other end into a spare USB port on your Laptop. Make sure Windows has<br />
recognised <strong>and</strong> installed the drivers for the dongle. <strong>The</strong> image below shows the<br />
driver installed as COM5 under Ports.<br />
Start the HyperTerminal program <strong>and</strong> following the instructions posted on the <strong>259</strong><br />
web site about using this software, make sure you have established a serial<br />
communications link between the 68000 running on the DE2 <strong>and</strong> the<br />
HyperTerminal Program. (Note: Pressing the blue push button Key0 on the DE2<br />
will reset the 68000 processor at any time).<br />
Hit return, you will see a menu of debugger comm<strong>and</strong>s<br />
Read the instructions from the <strong>259</strong> web site “<strong>Using</strong> the 68000 soft core processor<br />
debug monitor with the DE2 board”
Enter the ‘L’ comm<strong>and</strong> to load a program into memory. <strong>The</strong> 68000 will wait for<br />
HyperTerminal to send it a program file (the HEX file you created in Part B<br />
above)<br />
In HyperTerminal, click the transfer menu button <strong>and</strong> locate the hex file<br />
containing the machine code<br />
<strong>The</strong> download will progress.(See below)<br />
At the ‘#’ prompt enter the ‘G’ comm<strong>and</strong> to the debugger to run the program.<br />
You should see that the program will copy the switches SW0-7 to the RED Leds<br />
0-7, i.e. as you change switches, the leds will change value.<br />
Press the reset button (Key0) on the DE2 to stop the program <strong>and</strong> return to the<br />
debug monitor prompt ‘#’.<br />
<strong>Using</strong> the instructions in the h<strong>and</strong>out “<strong>Using</strong> the 68000 soft core processor debug<br />
monitor with the DE2 board”, program the flash memory on the DE2 board to<br />
make a ROM based system (Enter the ‘P’ comm<strong>and</strong> – see below).<br />
If you have done this correctly, when you power up your DE2 with SW17 in the<br />
UP position, the 68000 will automatically run your program without you having<br />
to download it each time it is turned on.
Part D – <strong>Using</strong> the <strong>Debug</strong> <strong>Monitor</strong> Comm<strong>and</strong>s<br />
<strong>Using</strong> the ‘M’ comm<strong>and</strong> – Memory Examine <strong>and</strong> Change, enter the start address<br />
of your program in memory (hex 00800000). You should see your program<br />
(machine code) bytes located in memory. Compare these to the bytes created by<br />
the <strong>Assembler</strong> (as shown in the listing file produced by the assembler).<br />
<strong>Using</strong> the DU (Dump Memory) comm<strong>and</strong>, dump your program contents to the<br />
screen. This is another way to examine memory <strong>and</strong> view its contents, but<br />
displaying large blocks at a time instead of just 1 byte.<br />
<strong>The</strong> data is displayed in hex <strong>and</strong> over to the right of the screen, if each byte of<br />
data could be a printable ASCII character, it will attempt to display it as such,<br />
otherwise it puts out a ‘.’. This feature makes it easy to spot text strings in<br />
memory.<br />
<strong>Using</strong> the DI comm<strong>and</strong> – Disassemble Program, enter the start address of your<br />
program in memory. It should produce a disassembly of your program, i.e. it will<br />
try to convert the machine code bytes back into assembly code for you.
Note the debugger does not know where each instruction starts or where your<br />
program ends. It simply attempts to interpret bytes of data in memory at the<br />
address you specify as if they were instructions.<br />
Note also that the original assembly language labels cannot be recreated (why do<br />
you think that is?) so they are created as addresses. Can you see the 3 instructions<br />
from your program in the listing below? <strong>The</strong> rest is just the debugger trying to<br />
disassemble r<strong>and</strong>om bytes of data stored in memory into instructions.<br />
<strong>Using</strong> the ‘R’ – Register Dump comm<strong>and</strong>, display the 68000 internal registers.<br />
Now see if you can change them using the ‘.(reg)’ comm<strong>and</strong> e.g. ‘.D0’ etc. Notice<br />
that you are not really displaying or changing the actual 68000 registers with<br />
these comm<strong>and</strong>s. What you are doing is viewing <strong>and</strong> changing variables within<br />
the debug monitor that represent the 68000 registers. When you run your<br />
program, these variables are loaded into the real 68000 registers.<br />
o What is the default value for the program counter (PC)?
o Explain why your program will run when you enter ‘G’ without having to<br />
specify an address<br />
o What if you changed the value of the PC <strong>and</strong> pressed ‘G’? Try it; you<br />
cannot do any damage – press reset at any time.<br />
<strong>Debug</strong>ging Programs<br />
Press the reset button key0 on the DE2.<br />
We are now going to single step our program, one instruction at a time. Single<br />
stepping is a powerful debugging tool that allows us to slow down/pause the<br />
68000 so that we can observe the execution of each instruction – one at a time.<br />
After each instruction has executed the 68000 registers are displayed so we can<br />
see what effect that instruction has had on the 68000 <strong>and</strong> also on the outside<br />
world, (e.g. turning on an LED for example).<br />
To turn on/off single stepping mode, press the ‘S’ key. You should get<br />
confirmation that single stepping mode is [ON]. You should also see a register<br />
dump to the screen <strong>and</strong> a disassembly of the first instruction that you are about to<br />
execute, i.e. you can see what the next instruction is, i.e. MOVE.B $400000,D0<br />
Now press the ‘G’ comm<strong>and</strong> to start the program<br />
Hit the space key to single step (trace) the program one instruction at a time.
<strong>Using</strong> Break Points<br />
Breakpoints are another powerful debugging technique. A breakpoint can be set<br />
at an address in memory where a chosen instruction is stored. You can then run<br />
the program at full speed, but when that instruction (the one you have set a<br />
breakpoint at) is reached, the program will stop, display the 68000 registers <strong>and</strong><br />
enter single step mode so you can trace/single step the program from that point.<br />
Up to 8 separate breakpoints can be set at 8 different instructions (they are all<br />
cleared when you press reset or execute the breakpoint kill comm<strong>and</strong>)<br />
Let’s set a break point at the third instruction in our program, the JMP $00800000<br />
instruction that makes our programs loop. To do this, enter the debugger<br />
Breakpoint SET comm<strong>and</strong> ‘BS’ <strong>and</strong> enter the address 0080000C. You should see<br />
the following<br />
Now run the program by pressing ‘G’. When the program reaches the JMP<br />
instruction, it will print @BREAKPOINT <strong>and</strong> stop (see below).<br />
You can now single step the program from here by hitting the space bar
<strong>Using</strong> Watch Points<br />
Watch points are another powerful debugging technique. A watch point can be<br />
set at any address in memory (usually it is the address of data not an instruction).<br />
When you enter single step mode, a dump of the memory that you have set a<br />
watch point at is displayed.<br />
Up to 6 separate watch points can be set (they are all cleared when you press reset<br />
or execute the breakpoint kill comm<strong>and</strong>)<br />
To set a watch point, enter the Watchpoint SET comm<strong>and</strong> ‘WS’ <strong>and</strong> enter the<br />
address e.g. hex 00010000 which is where we might store our variables.<br />
Turn on single step mode with the ‘S’ comm<strong>and</strong>.<br />
Notice in the screen shot below, how the debug monitor displays the data at the<br />
chosen watch point (WP0) address (actually it display 16 bytes, starting at that<br />
address <strong>and</strong> rising to higher addresses).<br />
Now enter the comm<strong>and</strong> ‘G’ <strong>and</strong> then hit the space bar to single step the program.<br />
<strong>The</strong> program that we have loaded into memory <strong>and</strong> are running does not actually<br />
make any changes to the data at memory location $00010000, so we would not<br />
expect the data there to change, but if it did, we would see the change, one<br />
instruction at a time.
Part E – Modifying a Program<br />
Go back to the IDE68k/<strong>Assembler</strong> <strong>and</strong> open up the original program you typed in<br />
at the start of the <strong>Lab</strong>, the one that copies Switches to LEDS.<br />
Modify the program to do the following. For each change, download, disassemble<br />
<strong>and</strong> single step the new version of the program.<br />
o Read Port B (switches 8-15) <strong>and</strong> copy the data to the red leds 8-15 <strong>and</strong><br />
also the Hex0 Display (look up the addresses of these output ports in the<br />
lecture notes <strong>and</strong> h<strong>and</strong>outs on using the 68000 on the DE2 board).<br />
o Store the data you read from Port A <strong>and</strong> Port B to Static Memory at<br />
addresses $00010000 <strong>and</strong> $00010001. Single step this program <strong>and</strong> set up<br />
watch points on these two address to observe them change.<br />
Part F – Writing your own program<br />
Write an assembly language program to read in your 8 digit student number using the<br />
slider switches SW0-SW7 on the DE2 board (note these switches are connected to<br />
one of the input ports) <strong>and</strong> display them on the 8 digit hex displays. To make it<br />
simple, assume your student number only contains digits in the range 0-7 (not 8 or 9)<br />
as this means we do not have to read the other input port where switches 8 <strong>and</strong> 9 are<br />
connected.<br />
For example, if your student number was 56231447, then you would enter this by<br />
moving SW5 to the up position then back to the down position, followed similarly by<br />
Switches 6,2,3,1,4,4,7. Your software will have to read the switch port, detect when a<br />
switch has moved to the up <strong>and</strong> then down position <strong>and</strong> write data to the Hex<br />
displays.<br />
You should investigate the BNE (branch if not equal to zero instruction) <strong>and</strong> BEQ<br />
(branch if equal to zero instruction) to determine when the switch has been pushed up<br />
or returned to the down position (logic 0). This can be explained as follows.<br />
When the switch is in the up position (logic 1), <strong>and</strong> you read the value of the switches<br />
into 68000 register d0, it will clear the ‘Z’ bit in the 68000 condition code register.<br />
When the switches are in the down position (logic 0), reading the switches will set the<br />
‘Z’ bit. BNE <strong>and</strong> BEQ branch if the Z bit is 0 or 1 respectively.<br />
Note you can expect some occasional “contact bounce” on the switches leading to<br />
occasional incorrect detections of up/down movement (this is normal for a<br />
mechanical switch)<br />
When all 8 digits of your student number have been read, the program should stop<br />
<strong>and</strong> return to the debug monitor with a TRAP #15 instruction. Use the debugger to<br />
single step <strong>and</strong> debug the program.<br />
Write an assembly language program to read the 1st first 4 digits of your student<br />
number <strong>and</strong> convert them into a 16 bit (4 digit) BCD number. For example, if the first
4 digits of your student number are “1257”, then the resulting 16 bit BCD number<br />
should be 0001 0010 0101 0111. You should investigate the 68000 instruction set for<br />
arithmetic shift left operations. Store the resulting 16 bit BCD number as a word in<br />
memory (e.g. where there is some static memory such as at address $00010000).<br />
Question: How many bytes of data will be stored <strong>and</strong> what is the address of each byte<br />
<strong>and</strong> hence what is the address of the next free byte in memory.<br />
Now read the 2 nd 4 digits of your student number <strong>and</strong> convert them into a 2 nd 16 bit<br />
(4 digit BCD number) as above <strong>and</strong> store it somewhere else in memory (do not<br />
overwrite the first data stored at $00010000).<br />
Now, using Switch SW10, add or subtract the 2 nd four digits of your student number,<br />
from the 1 st four digits <strong>and</strong> display the result as a 4 digit number on the HEX display.<br />
That is, the program should run indefinitely, reading SW10 <strong>and</strong> performing addition<br />
or subtraction based on SW10 position (up or down). Investigate the ABCD <strong>and</strong><br />
SBCD instructions in the 68000 instruction set for adding <strong>and</strong> subtracting in BCD.<br />
Store the result in memory. Ignore negative results<br />
When SW11 is moved into the up position, the program should stop <strong>and</strong> return to the<br />
debug monitor using a Trap #15 instruction. Use the debugger to single step <strong>and</strong><br />
debug the program.