ch03 IP Addressing.pdf - The Cisco Learning Network
ch03 IP Addressing.pdf - The Cisco Learning Network
ch03 IP Addressing.pdf - The Cisco Learning Network

You also want an ePaper? Increase the reach of your titles
YUMPU automatically turns print PDFs into web optimized ePapers that Google loves.
28 Chapter 3: <strong>IP</strong> <strong>Addressing</strong><br />
Step 3: Figure Out the Subnet Mask<br />
Now that the hardest part is over, the rest of the four tasks is easy. At this point, you now<br />
know the number of subnet bits you need. However, when dealing with networking and<br />
subnet masks, a subnet mask’s network portion contains both network and subnet bits.<br />
Here’s a reminder of the default number of networking bits for a class address: A is 8, B<br />
is 16, and C is 24.<br />
Given this, just add the class address bits to the subnet bits, and this gives you<br />
the total number of networking bits. In our example, this would be 24 + 4 = 28. To<br />
make the remaining three steps easier, I recommend that you convert the number of<br />
bits of the subnet mask to a dotted decimal mask. Figures 3-8, 3-9, and 3-10 have<br />
the lists of subnet masks if you need help. However, this is not too hard of a process.<br />
First, remember that a subnet mask, just like an <strong>IP</strong> address, is represented in a dotted<br />
decimal format, where there are 8 bits in each octet. That means, for a Class C mask,<br />
the first 24 bits are set to 1. In other words, the mask at least begins with 255.255.255.<br />
Our job is to figure out the mask in the last octet. Remember that the four highest bits<br />
are for subnetting, so just add up these decimal values: 128 + 64 + 32 + 16 = 240.<br />
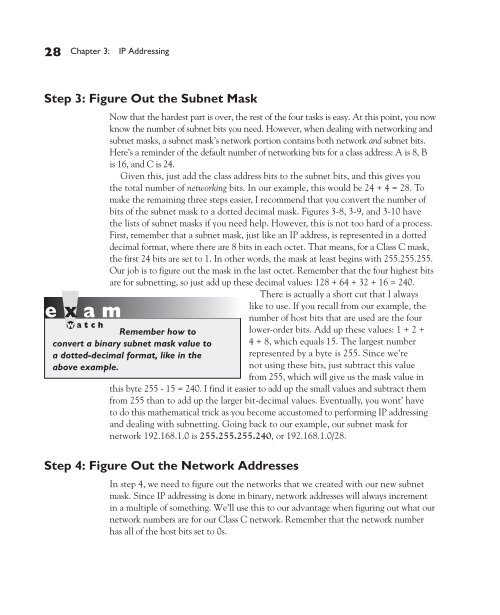
<strong>The</strong>re is actually a short cut that I always<br />
like to use. If you recall from our example, the<br />
number of host bits that are used are the four<br />
Remember how to<br />
convert a binary subnet mask value to<br />
a dotted-decimal format, like in the<br />
above example.<br />
lower-order bits. Add up these values: 1 + 2 +<br />
4 + 8, which equals 15. <strong>The</strong> largest number<br />
represented by a byte is 255. Since we’re<br />
not using these bits, just subtract this value<br />
from 255, which will give us the mask value in<br />
this byte 255 - 15 = 240. I find it easier to add up the small values and subtract them<br />
from 255 than to add up the larger bit-decimal values. Eventually, you wont’ have<br />
to do this mathematical trick as you become accustomed to performing <strong>IP</strong> addressing<br />
and dealing with subnetting. Going back to our example, our subnet mask for<br />
network 192.168.1.0 is 255.255.255.240, or 192.168.1.0/28.<br />
Step 4: Figure Out the <strong>Network</strong> Addresses<br />
In step 4, we need to figure out the networks that we created with our new subnet<br />
mask. Since <strong>IP</strong> addressing is done in binary, network addresses will always increment<br />
in a multiple of something. We’ll use this to our advantage when figuring out what our<br />
network numbers are for our Class C network. Remember that the network number<br />
has all of the host bits set to 0s.