HHPC-2 Handheld Airborne Particle Counter Operator Manual
HHPC-2 Handheld Airborne Particle Counter Operator Manual
HHPC-2 Handheld Airborne Particle Counter Operator Manual

Create successful ePaper yourself
Turn your PDF publications into a flip-book with our unique Google optimized e-Paper software.
14 of 46 Setting up the <strong>HHPC</strong>-2 - <strong>HHPC</strong>-2 <strong>Handheld</strong> <strong>Particle</strong> <strong>Counter</strong><br />
<strong>Operator</strong> <strong>Manual</strong><br />
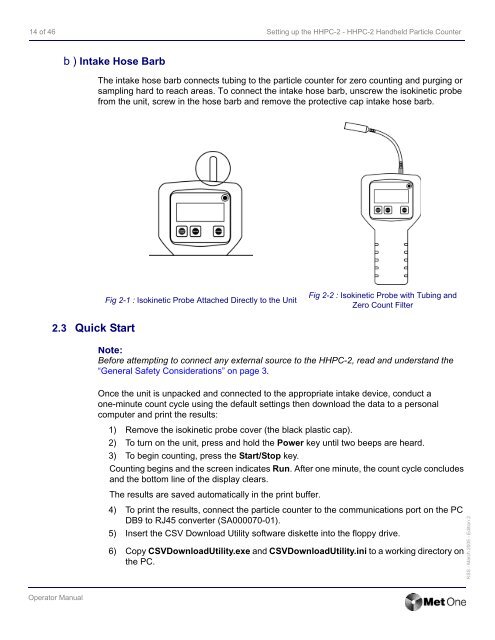
b ) Intake Hose Barb<br />
2.3 Quick Start<br />
The intake hose barb connects tubing to the particle counter for zero counting and purging or<br />
sampling hard to reach areas. To connect the intake hose barb, unscrew the isokinetic probe<br />
from the unit, screw in the hose barb and remove the protective cap intake hose barb.<br />
Fig 2-1 : Isokinetic Probe Attached Directly to the Unit<br />
Fig 2-2 : Isokinetic Probe with Tubing and<br />
Zero Count Filter<br />
Note:<br />
Before attempting to connect any external source to the <strong>HHPC</strong>-2, read and understand the<br />
“General Safety Considerations” on page 3.<br />
Once the unit is unpacked and connected to the appropriate intake device, conduct a<br />
one-minute count cycle using the default settings then download the data to a personal<br />
computer and print the results:<br />
1) Remove the isokinetic probe cover (the black plastic cap).<br />
2) To turn on the unit, press and hold the Power key until two beeps are heard.<br />
3) To begin counting, press the Start/Stop key.<br />
Counting begins and the screen indicates Run. After one minute, the count cycle concludes<br />
and the bottom line of the display clears.<br />
The results are saved automatically in the print buffer.<br />
4) To print the results, connect the particle counter to the communications port on the PC<br />
DB9 to RJ45 converter (SA000070-01).<br />
5) Insert the CSV Download Utility software diskette into the floppy drive.<br />
6) Copy CSVDownloadUtility.exe and CSVDownloadUtility.ini to a working directory on<br />
the PC.<br />
KSS - March 2005 - Edition 2