Smart Air Handler using ProMPT and the PIC18F2539 - Microchip
Smart Air Handler using ProMPT and the PIC18F2539 - Microchip
Smart Air Handler using ProMPT and the PIC18F2539 - Microchip

You also want an ePaper? Increase the reach of your titles
YUMPU automatically turns print PDFs into web optimized ePapers that Google loves.
INTRODUCTION<br />
In many heating, ventilation, <strong>and</strong> air conditioning<br />
(HVAC) applications, air h<strong>and</strong>ler motors are ei<strong>the</strong>r off,<br />
or on at full speed. However, by adding variable speed<br />
control to <strong>the</strong> air h<strong>and</strong>ler, significant energy savings<br />
over <strong>the</strong> st<strong>and</strong>ard on/off control can be realized,<br />
resulting in significantly reduced cost of operation.<br />
This application note discusses <strong>the</strong> implementation of<br />
a variable speed air h<strong>and</strong>ler that utilizes a single phase<br />
AC induction motor. The task of designing <strong>the</strong> variable<br />
speed air h<strong>and</strong>ler is greatly simplified by <strong>using</strong> <strong>the</strong><br />
<strong>Microchip</strong> Programmable Motor Control Processor<br />
Technology (<strong>ProMPT</strong>) Single Phase Induction Motor<br />
Control Evaluation Kit <strong>and</strong> <strong>the</strong> <strong>PIC18F2539</strong><br />
microcontroller.<br />
The <strong>PIC18F2539</strong> microcontroller is an Enhanced<br />
FLASH microcontroller that features <strong>the</strong> Single Phase<br />
Induction Motor Control (SPIMC) kernel. The SPIMC<br />
kernel enables open loop variable frequency (VF) control<br />
<strong>and</strong> features a programmable voltage versus frequency<br />
curve. The <strong>PIC18F2539</strong> microcontroller is a<br />
natural choice for adding variable speed control to an<br />
air h<strong>and</strong>ler application.<br />
The <strong>ProMPT</strong> Single Phase Induction Motor Control<br />
Evaluation Kit functions as an effective platform for<br />
application development. It can be used to control<br />
shaded pole <strong>and</strong> permanent magnet split capacitor<br />
type motors. Adding specific features to support <strong>the</strong> air<br />
h<strong>and</strong>ler application is accomplished by designing a<br />
custom daughter board. In this application, <strong>the</strong> daughter<br />
board merely adds a user interface <strong>and</strong> temperature<br />
sensor to <strong>the</strong> existing AC induction motor drive.<br />
AC single phase induction motors are used in many<br />
household applications, including HVAC, dishwashers,<br />
clo<strong>the</strong>s washers <strong>and</strong> dryers, garage door openers,<br />
lawn mowers, <strong>and</strong> so on. <strong>ProMPT</strong> technology from<br />
<strong>Microchip</strong> can greatly simplify design <strong>and</strong> reduce<br />
time-to-market for all of <strong>the</strong>se applications.<br />
APPLICATION OVERVIEW<br />
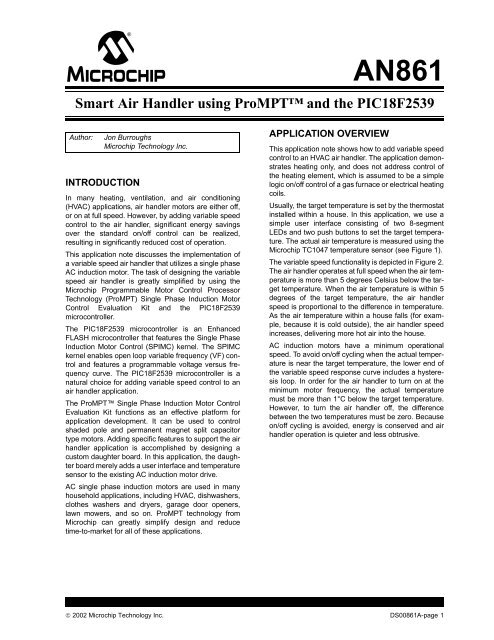
AN861<br />
<strong>Smart</strong> <strong>Air</strong> <strong>H<strong>and</strong>ler</strong> <strong>using</strong> <strong>ProMPT</strong> <strong>and</strong> <strong>the</strong> <strong>PIC18F2539</strong><br />
Author: Jon Burroughs<br />
<strong>Microchip</strong> Technology Inc.<br />
This application note shows how to add variable speed<br />
control to an HVAC air h<strong>and</strong>ler. The application demonstrates<br />
heating only, <strong>and</strong> does not address control of<br />
<strong>the</strong> heating element, which is assumed to be a simple<br />
logic on/off control of a gas furnace or electrical heating<br />
coils.<br />
Usually, <strong>the</strong> target temperature is set by <strong>the</strong> <strong>the</strong>rmostat<br />
installed within a house. In this application, we use a<br />
simple user interface consisting of two 8-segment<br />
LEDs <strong>and</strong> two push buttons to set <strong>the</strong> target temperature.<br />
The actual air temperature is measured <strong>using</strong> <strong>the</strong><br />
<strong>Microchip</strong> TC1047 temperature sensor (see Figure 1).<br />
The variable speed functionality is depicted in Figure 2.<br />
The air h<strong>and</strong>ler operates at full speed when <strong>the</strong> air temperature<br />
is more than 5 degrees Celsius below <strong>the</strong> target<br />
temperature. When <strong>the</strong> air temperature is within 5<br />
degrees of <strong>the</strong> target temperature, <strong>the</strong> air h<strong>and</strong>ler<br />
speed is proportional to <strong>the</strong> difference in temperature.<br />
As <strong>the</strong> air temperature within a house falls (for example,<br />
because it is cold outside), <strong>the</strong> air h<strong>and</strong>ler speed<br />
increases, delivering more hot air into <strong>the</strong> house.<br />
AC induction motors have a minimum operational<br />
speed. To avoid on/off cycling when <strong>the</strong> actual temperature<br />
is near <strong>the</strong> target temperature, <strong>the</strong> lower end of<br />
<strong>the</strong> variable speed response curve includes a hysteresis<br />
loop. In order for <strong>the</strong> air h<strong>and</strong>ler to turn on at <strong>the</strong><br />
minimum motor frequency, <strong>the</strong> actual temperature<br />
must be more than 1°C below <strong>the</strong> target temperature.<br />
However, to turn <strong>the</strong> air h<strong>and</strong>ler off, <strong>the</strong> difference<br />
between <strong>the</strong> two temperatures must be zero. Because<br />
on/off cycling is avoided, energy is conserved <strong>and</strong> air<br />
h<strong>and</strong>ler operation is quieter <strong>and</strong> less obtrusive.<br />
© 2002 <strong>Microchip</strong> Technology Inc. DS00861A-page 1
AN861<br />
FIGURE 1: APPLICATION BLOCK DIAGRAM<br />
User Interface<br />
FIGURE 2: VARIABLE SPEED<br />
RESPONSE<br />
Max Freq<br />
Motor<br />
Frequency<br />
Min Freq<br />
Min ∆T Max ∆T<br />
1°C<br />
5°C<br />
Blower<br />
Variable Speed Drive<br />
Target Temp - Actual Temp<br />
Temp<br />
Sensor<br />
Thermostat<br />
Thermocouple<br />
APPLICATION DESIGN WITH <strong>ProMPT</strong><br />
The application design is simplified enormously by<br />
<strong>using</strong> <strong>the</strong> <strong>ProMPT</strong> Single Phase Induction Motor Control<br />
Evaluation Kit (see Figure 3). With <strong>the</strong> <strong>ProMPT</strong><br />
board, <strong>the</strong> task of designing an efficient AC induction<br />
drive has already been accomplished. To create a variable<br />
speed air h<strong>and</strong>ler, it is necessary only to design a<br />
simple daughter board that connects to <strong>the</strong> <strong>ProMPT</strong><br />
board’s I/O expansion connector <strong>and</strong> write <strong>the</strong><br />
necessary firmware (see Figure 4).<br />
All information necessary to use <strong>the</strong> <strong>ProMPT</strong> board is<br />
published in <strong>the</strong> following documents:<br />
• <strong>ProMPT</strong> Single Phase Induction Motor Control<br />
Evaluation Kit User’s Guide<br />
• PIC18FXX39 Data Sheet<br />
Readers may refer to <strong>the</strong>se documents for more<br />
detailed information on <strong>the</strong> <strong>ProMPT</strong> evaluation kit <strong>and</strong><br />
<strong>the</strong> <strong>PIC18F2539</strong> microcontroller. These documents<br />
may be obtained from <strong>the</strong> <strong>Microchip</strong> web site.<br />
DS00861A-page 2 © 2002 <strong>Microchip</strong> Technology Inc.
AN861<br />
FIGURE 3: <strong>ProMPT</strong> SINGLE PHASE INDUCTION MOTOR CONTROL EVALUATION KIT<br />
FIGURE 4: BLOCK DIAGRAM OF APPLICATION COMPONENTS<br />
Application<br />
Specific<br />
Daughter Board<br />
Temperature<br />
Sensor<br />
User Interface<br />
ADC<br />
Digital I/O<br />
<strong>PIC18F2539</strong><br />
PWM1<br />
PWM2<br />
<strong>ProMPT</strong> Design<br />
Accelerator<br />
Voltage<br />
Monitor<br />
Current<br />
Monitor<br />
IGBT<br />
Driver<br />
Power<br />
Supply<br />
IGBT<br />
H-Bridge<br />
© 2002 <strong>Microchip</strong> Technology Inc. DS00861A-page 3<br />
L<br />
N<br />
G<br />
M1<br />
M2<br />
G<br />
1-Phase<br />
AC Input<br />
Motor
AN861<br />
APPLICATION SPECIFIC HARDWARE<br />
The features specific to <strong>the</strong> air h<strong>and</strong>ler application that<br />
are designed onto an application specific daughter<br />
board are described below:<br />
Display Module<br />
A 2x8 segment display is used to display <strong>the</strong> temperature<br />
in Celsius. To save on I/O pins, control of <strong>the</strong> two<br />
digits is multiplexed. Because of persistence of vision<br />
in <strong>the</strong> human eye, <strong>the</strong> digits will appear to be illuminated<br />
simultaneously, even though <strong>the</strong>y are actually<br />
illuminated one at a time. Because <strong>the</strong> two decimal<br />
segments are not required, a total of nine I/O pins are<br />
used to control 14 LED segments.<br />
Push Buttons<br />
Two push buttons are used to adjust <strong>the</strong> temperature.<br />
• Up - adjusts <strong>the</strong> target temperature upward.<br />
• Down - adjusts <strong>the</strong> target temperature downward.<br />
When ei<strong>the</strong>r <strong>the</strong> Up or Down button is pressed, <strong>the</strong><br />
temperature begins blinking to indicate that a new target<br />
temperature is being set. The blinking target temperature<br />
increments or decrements with each press of<br />
<strong>the</strong> up or down button. After five seconds elapse without<br />
a button press, <strong>the</strong> temperature display returns to<br />
<strong>the</strong> present temperature <strong>and</strong> stops blinking. Each<br />
button requires one I/O pin.<br />
Temperature Sensor<br />
Temperature measurement is made easy with a<br />
Precision Temperature-to-Voltage Converter. This solid<br />
state temperature sensor eliminates <strong>the</strong> need to<br />
perform calibration that is required when <strong>using</strong><br />
<strong>the</strong>rmocouples. <strong>Microchip</strong>’s TC1047A is a linear<br />
voltage output temperature sensor, whose output is<br />
directly proportional to <strong>the</strong> measured temperature.<br />
Temperature is easily calculated without having to<br />
construct calibrated lookup tables. The TC1047A can<br />
accurately measure temperature from -40°C to 125°C,<br />
a range more than adequate for a household HVAC<br />
application. Supply voltage can vary from 2.5V to 5.5V<br />
(see Figure 5). For more information, see <strong>the</strong> TC1047/<br />
TC1047A data sheet. The temperature sensor requires<br />
one analog input pin.<br />
FIGURE 5: PRECISION TEMPERATURE-<br />
TO-VOLTAGE CONVERTER<br />
+5 VDC<br />
TC1047A<br />
DS00861A-page 4 © 2002 <strong>Microchip</strong> Technology Inc.<br />
VDD<br />
VSS<br />
RA0<br />
+5 VDC<br />
<strong>PIC18F2539</strong><br />
Note: In this application, a low-pass filter <strong>and</strong><br />
shielded cable are used. See schematic<br />
in Appendix A.
APPLICATION FIRMWARE<br />
OVERVIEW<br />
<strong>ProMPT</strong> motor control functionality is accessed by<br />
<strong>using</strong> <strong>the</strong> pre-defined Application Program Interface<br />
(API) described in Appendix B of this document (this<br />
information is also available in Appendix E of <strong>the</strong><br />
<strong>ProMPT</strong> Design Accelerator Kit User’s Guide). By<br />
<strong>using</strong> <strong>the</strong> defined API, powerful motor control tasks can<br />
AN861<br />
be realized with no knowledge of <strong>the</strong> underlying<br />
microcontroller activities. Figure 6 illustrates how <strong>the</strong><br />
user developed application firmware interacts with <strong>the</strong><br />
<strong>ProMPT</strong> motor control module through <strong>the</strong> Application<br />
Program Interface (API). In essence, <strong>the</strong> API consists<br />
of <strong>the</strong> library of <strong>ProMPT</strong> firmware functions that<br />
enables control of <strong>the</strong> <strong>ProMPT</strong> module, without<br />
needing to know <strong>the</strong> details of its operation.<br />
FIGURE 6: MOTOR CONTROL ARCHITECTURE USING THE PIC18FXX39<br />
ADCs, I/Os,<br />
AUSART,<br />
MSSP,<br />
Timers<br />
Hardware<br />
REQUIRED FILES<br />
In order to take advantage of <strong>the</strong> pre-defined <strong>ProMPT</strong><br />
API, it is necessary to include several files when creating<br />
<strong>the</strong> project in MPLAB ® IDE v6.10 These files are<br />
described below.<br />
Application Specific Files:<br />
• <strong>Smart</strong><strong>Air</strong>.c Main source code listing<br />
• <strong>Smart</strong><strong>Air</strong>.h Definition file for application<br />
Required files when <strong>using</strong> <strong>the</strong> PIC18FXX39 device:<br />
• motor.h Definition file for <strong>the</strong> motor<br />
• <strong>ProMPT</strong>_c18.h Prototypes of <strong>the</strong> API methods<br />
used in <strong>the</strong> application<br />
• 18F2539.lkr Linker file<br />
PWMs<br />
<strong>Smart</strong> <strong>Air</strong> <strong>H<strong>and</strong>ler</strong> Application<br />
Application Program Interface (API)<br />
Parameter Values<br />
<strong>ProMPT</strong> Motor Control Module<br />
© 2002 <strong>Microchip</strong> Technology Inc. DS00861A-page 5
AN861<br />
APPLICATION FIRMWARE<br />
FUNCTIONS<br />
The firmware functions of <strong>the</strong> variable speed air<br />
h<strong>and</strong>ler application are outlined below.<br />
Note: Tasks denoted with an asterisk (*) are<br />
related to control of <strong>the</strong> AC induction<br />
motor.<br />
1. Initialize <strong>the</strong> motor control module.*<br />
2. Set <strong>the</strong> appropriate voltage frequency (VF)<br />
curve for <strong>the</strong> motor.*<br />
3. Execute a continuous loop that performs <strong>the</strong><br />
following tasks:<br />
a) Read <strong>the</strong> temperature sensor connected to<br />
ADC channel RA0.<br />
b) Read <strong>the</strong> motor current, DC bus voltage,<br />
<strong>and</strong> heatsink temperature.<br />
c) Read <strong>and</strong> debounce <strong>the</strong> button inputs.<br />
d) If a button is pressed, increment or decrement<br />
<strong>the</strong> target temperature as necessary.<br />
e) Check for faults.<br />
f) Compare <strong>the</strong> actual temperature to <strong>the</strong><br />
target temperature.<br />
g) Set <strong>the</strong> appropriate motor frequency.*<br />
h) Update <strong>the</strong> LED display with actual or target<br />
temperature.<br />
i) Continuously control <strong>the</strong> AC induction<br />
motor.*<br />
EXAMPLE 1: MOTOR INITIALIZATION API METHODS<br />
<strong>ProMPT</strong>_Init(0); //Initialize <strong>the</strong> <strong>ProMPT</strong> block<br />
//0 is <strong>the</strong> initial motor frequency<br />
for (i=0;i
FIGURE 7: APPLICATION FLOW CHART<br />
Initialization<br />
Start<br />
Initialize Direction bits (TRIS)<br />
to PORTA, PORTB <strong>and</strong><br />
PORTC<br />
Initialize <strong>ProMPT</strong> Module<br />
Set New VF Curve for <strong>the</strong><br />
Motor<br />
Set:<br />
Acceleration Rate,<br />
Deceleration Rate,<br />
Motor Voltage <strong>and</strong><br />
Input Line Voltage<br />
Set Boost Parameters:<br />
Boost Time, Boost Frequency,<br />
Start, End % Modulation<br />
<strong>and</strong> Enable Boost Mode<br />
Clear Fault bit<br />
Initialize Timer0<br />
Set ADC 'GO' bit<br />
Is GO<br />
bit = 0?<br />
IsTMR0IF<br />
bit = 1?<br />
Is<br />
<strong>ProMPT</strong>ick = 1?<br />
Service ADC<br />
Update Display<br />
Update<br />
TargetTemp<br />
Update Motor<br />
Frequency<br />
Clear <strong>ProMPT</strong>ick<br />
AN861<br />
Set ADCON<br />
GO bit<br />
Clear TMR0IF<br />
© 2002 <strong>Microchip</strong> Technology Inc. DS00861A-page 7<br />
N<br />
N<br />
N<br />
Y<br />
Y<br />
Y<br />
Button<br />
pressed?<br />
Y<br />
N<br />
Main Loop
AN861<br />
DEVELOPMENT TOOL SETUP<br />
The following development tools were used to develop<br />
this application:<br />
• MPLAB ® IDE v6.10 or later version<br />
• MPLAB ® C18 C Compiler<br />
• <strong>ProMPT</strong> Design Accelerator Kit with Single<br />
Phase Induction Motor<br />
• MPLAB ® ICD 2 Programmer/Debugger<br />
The MPLAB ICD 2 is connected to J4 for programming<br />
<strong>the</strong> <strong>PIC18F2539</strong> <strong>and</strong> to debug <strong>the</strong> program. The ICD 2<br />
should be disconnected when <strong>the</strong> <strong>ProMPT</strong> drive is<br />
powered from mains. Powering <strong>the</strong> <strong>ProMPT</strong> drive when<br />
ICD 2 is connected will damage <strong>the</strong> ICD 2 or <strong>the</strong> computer<br />
connected to it, unless an isolation transformer is<br />
used (see Figure 8).<br />
Application development <strong>using</strong> <strong>the</strong> ICD 2 <strong>and</strong> <strong>ProMPT</strong><br />
MC Eval Board is simplified by <strong>using</strong> <strong>the</strong> isolation transformer.<br />
The following steps can be followed to develop<br />
<strong>and</strong> debug an application program on <strong>the</strong> <strong>ProMPT</strong> MC<br />
Eval Kit with an ICD 2.<br />
Warning 1: Power electronics involve inherent risks,<br />
both to equipment <strong>and</strong> personnel. This<br />
document assumes that <strong>the</strong> user has<br />
experience with high voltage electronics.<br />
Incorrect use of <strong>the</strong> <strong>ProMPT</strong> drive can be<br />
hazardous to development staff as well<br />
as <strong>the</strong> user of <strong>the</strong> equipment.<br />
2: Always disconnect <strong>the</strong> <strong>ProMPT</strong> drive<br />
from power before making connections or<br />
jumper settings. After switching off power,<br />
wait until <strong>the</strong> “Power” LED is completely<br />
off before working on <strong>the</strong> drive or motor.<br />
Failure to comply with this warning could<br />
result in injury or death.<br />
Without <strong>the</strong> isolation transformer:<br />
1. Open a new project in MPLAB IDE v6.10 or<br />
later.<br />
2. Select MPLAB C18 C compiler as <strong>the</strong> tool suite.<br />
3. Add <strong>the</strong> application program <strong>and</strong> header files to<br />
<strong>the</strong> project.<br />
4. Add <strong>the</strong> appropriate linker file to <strong>the</strong> project.<br />
5. Compile <strong>and</strong> link <strong>the</strong> project.<br />
6. With mains power disconnected from <strong>the</strong><br />
<strong>ProMPT</strong> MC Eval Board, connect MPLAB ICD 2<br />
to J4 connector on <strong>the</strong> board.<br />
7. Enable “Power target circuit from MPLAB ICD 2”<br />
in menu programmer > settings > power.<br />
8. Program <strong>the</strong> target chip <strong>and</strong> debug <strong>the</strong> application<br />
code.<br />
9. Disconnect MPLAB ICD 2.<br />
10. Power up <strong>the</strong> <strong>ProMPT</strong> drive <strong>and</strong> continue testing.<br />
With <strong>the</strong> isolation transformer:<br />
1. Open a new project in <strong>the</strong> MPLAB IDE v6.10 or<br />
later.<br />
2. Select MPLAB C18 C compiler as <strong>the</strong> tool suite.<br />
3. Add <strong>the</strong> application program <strong>and</strong> header files to<br />
<strong>the</strong> project.<br />
4. Add <strong>the</strong> appropriate linker file to <strong>the</strong> project.<br />
5. Compile <strong>and</strong> link <strong>the</strong> project.<br />
6. Disable “Power target circuit from MPLAB<br />
ICD 2” in menu programmer > settings > power.<br />
MPLAB ICD 2 will be powered from <strong>the</strong> target<br />
board.<br />
7. With <strong>the</strong> MC Eval kit powered through an isolation<br />
transformer (see Figure 8), connect MPLAB<br />
ICD 2 to <strong>the</strong> J4 connector on <strong>the</strong> board.<br />
8. Program <strong>the</strong> target chip <strong>and</strong> debug <strong>the</strong> application<br />
code.<br />
9. If motor frequency is always ‘0’, or motor is left<br />
disconnected, MPLAB ICD 2 may be left<br />
connected during debugging.<br />
10. To test motor operation, program <strong>the</strong> target chip<br />
with Debug mode disabled, disconnect MPLAB<br />
ICD 2, <strong>and</strong> continue testing.<br />
DS00861A-page 8 © 2002 <strong>Microchip</strong> Technology Inc.
FIGURE 8: DEVELOPMENT TOOL SETUP WITH ISOLATION TRANSFORMER<br />
Computer Running<br />
MPLAB IDE<br />
Connect<br />
computer,<br />
ICD, <strong>and</strong><br />
isolation<br />
transformer<br />
to wall power.<br />
ICD 2<br />
Power<br />
Supply<br />
USB<br />
ICD 2<br />
Isolation<br />
Transformer<br />
Note: Even with <strong>the</strong> isolation transformer, <strong>the</strong><br />
<strong>ProMPT</strong> drive cannot be operated with<br />
MPLAB ICD 2 connected. To operate <strong>the</strong><br />
motor (motor frequency greater than zero),<br />
MPLAB ICD 2 must always be<br />
disconnected.<br />
The advantage of <strong>the</strong> isolation setup shown in Figure 8<br />
is that MPLAB ICD 2 or <strong>the</strong> computer will not be damaged<br />
if MPLAB ICD 2 is connected while <strong>the</strong> <strong>ProMPT</strong><br />
drive is powered up. This allows <strong>the</strong> user to step<br />
through code <strong>and</strong> use o<strong>the</strong>r debugging features without<br />
disconnecting <strong>the</strong> <strong>ProMPT</strong> board from <strong>the</strong> isolated AC<br />
power. In addition, an oscilloscope can be used to look<br />
at signals on <strong>the</strong> <strong>ProMPT</strong> board.<br />
The jumpers, JP1-4 on <strong>the</strong> <strong>ProMPT</strong> board, should be<br />
set to “INT” position to read <strong>the</strong> DC bus voltage<br />
(VSENSE), motor current (ISENSE), heat sink<br />
temperature (TSENSE) <strong>and</strong> clear <strong>the</strong> fault (/CLEAR).<br />
J3<br />
Blower<br />
AN861<br />
TABLE 1: SUMMARY OF<br />
MICROCONTROLLER<br />
RESOURCE USE<br />
Program Memory: 6184 Words (24%)<br />
Data Memory: 41 bytes (3%)<br />
Peripherals:<br />
ADC RA0 Temperature Sensor<br />
Input<br />
I/O Port Pins RB4, RB5 Up <strong>and</strong> Down<br />
Buttons<br />
RA5, RC0, RC3 - RC7, LED Display Control<br />
RB2, RB3<br />
Timers Timer0 used as a Delay<br />
Timer for LED Multiplexing<br />
SPIMC Kernel Motor Control Functions<br />
© 2002 <strong>Microchip</strong> Technology Inc. DS00861A-page 9<br />
J4<br />
<strong>ProMPT</strong><br />
Eval<br />
Board<br />
J2<br />
J1<br />
To maintain isolation,<br />
leave ground disconnected.<br />
Connect<br />
oscilloscope<br />
power to this<br />
side of <strong>the</strong><br />
isolation<br />
transformer.<br />
Temp<br />
Sensor
AN861<br />
CONCLUSION<br />
Variable speed control is easily added to an HVAC air<br />
h<strong>and</strong>ler by <strong>using</strong> <strong>the</strong> <strong>ProMPT</strong> Single Phase Induction<br />
Motor Control Evaluation Kit <strong>and</strong> <strong>the</strong> <strong>PIC18F2539</strong><br />
microcontroller. The Single Phase Induction Motor<br />
Control kernel greatly simplifies <strong>the</strong> design of a single<br />
phase induction motor control application. <strong>Microchip</strong>’s<br />
Programmable Motor Processor Technology allows <strong>the</strong><br />
user to develop applications around <strong>the</strong> Single Phase<br />
Induction Motor Control kernel with little or no<br />
knowledge of motor control.<br />
The <strong>PIC18F2539</strong> microcontroller is suitable for control<br />
of shaded pole <strong>and</strong> permanent magnet split capacitor<br />
type motors. These types of AC single phase induction<br />
motors are used in many household applications,<br />
including HVAC, dishwashers, clo<strong>the</strong>s washers <strong>and</strong><br />
dryers, garage door openers, lawn mowers, <strong>and</strong> so on.<br />
<strong>ProMPT</strong> technology from <strong>Microchip</strong> has <strong>the</strong> potential to<br />
greatly simplify design <strong>and</strong> reduce time-to-market for<br />
all of <strong>the</strong>se applications.<br />
DS00861A-page 10 © 2002 <strong>Microchip</strong> Technology Inc.
APPENDIX A: SCHEMATIC<br />
10nF<br />
C4<br />
10nF<br />
C3<br />
10nF<br />
C2<br />
0.1nF<br />
C1<br />
+5V<br />
R13<br />
10K<br />
RB4<br />
C5<br />
0.1uF<br />
R3<br />
330<br />
R4<br />
330<br />
R5<br />
AN861<br />
© 2002 <strong>Microchip</strong> Technology Inc. DS00861A-page 11<br />
330<br />
R6<br />
+5V<br />
330<br />
R7<br />
330<br />
R14<br />
R8<br />
10K<br />
330<br />
R9<br />
RB4<br />
RB5<br />
RB5<br />
330<br />
R10<br />
C6<br />
0.1uF<br />
Q1<br />
4.7K<br />
4.7K<br />
R11<br />
Q2<br />
R2<br />
4.7K<br />
4.7K<br />
R12
AN861<br />
Appendix B: <strong>ProMPT</strong> APPLICATION PROGRAM INTERFACE (API METHODS)<br />
There are 27 separate API methods for <strong>the</strong> <strong>ProMPT</strong> kernel:<br />
Note: The operation of <strong>the</strong> Motor Control module <strong>and</strong> its APIs is based on an assumed clock frequency of 20 MHz.<br />
Changing <strong>the</strong> oscillator frequency will change <strong>the</strong> timing used in <strong>the</strong> Motor Control module accordingly. To<br />
achieve <strong>the</strong> best results in motor control applications, a clock frequency of 20 MHz is highly recommended.<br />
void <strong>ProMPT</strong>_ClearTick(void)<br />
Resources used: 0 stack levels<br />
Description: This function clears <strong>the</strong> Tick (62.5 ms) timer flag returned by <strong>ProMPT</strong>_tick(). This function must be<br />
called by any routine that is used for timing purposes.<br />
void <strong>ProMPT</strong>_DisableBoostMode(void)<br />
Resources used: 0 stack levels<br />
Description: This function disables <strong>the</strong> Boost mode logic. This method should be called before changing any of <strong>the</strong><br />
Boost mode parameters.<br />
void <strong>ProMPT</strong>_EnableBoostMode(void)<br />
Resources used: 0 stack levels<br />
Description: This function enables <strong>the</strong> Boost mode logic. Boost mode is entered when a stopped drive is comm<strong>and</strong>ed<br />
to start. The drive will immediately go to Boost Frequency <strong>and</strong> ramp from Start Modulation to End Modulation over <strong>the</strong><br />
time period, Boost Time.<br />
unsigned char <strong>ProMPT</strong>_GetAccelRate(void)<br />
Resources used: 1 stack level<br />
Range of values: 0 to 255<br />
Description: Returns <strong>the</strong> current Acceleration Rate in Hz/second.<br />
unsigned char <strong>ProMPT</strong>_GetBoostEndModulation(void)<br />
Resources used: 1 stack level<br />
Range of values: 0 to 200<br />
Description: Returns <strong>the</strong> current End Modulation (in %) used in <strong>the</strong> Boost logic.<br />
unsigned char <strong>ProMPT</strong>_GetBoostFrequency(void)<br />
Resources used: 1 stack level<br />
Range of values: 0 to 127<br />
Description: Returns <strong>the</strong> current Boost Frequency in Hz.<br />
unsigned char <strong>ProMPT</strong>_GetBoostStartModulation(void)<br />
Resources used: 1 stack level<br />
Range of values: 0 to BoostEndModulation<br />
Description: Returns <strong>the</strong> Start Modulation (in %) used in <strong>the</strong> Boost logic.<br />
DS00861A-page 12 © 2002 <strong>Microchip</strong> Technology Inc.
unsigned char <strong>ProMPT</strong>_GetBoostTime()<br />
Resources used: 1 stack level<br />
Range of values: 0 to 255<br />
Description: Returns <strong>the</strong> time in seconds for Boost mode.<br />
unsigned char <strong>ProMPT</strong>_GetDecelRate()<br />
Resources used: 1 stack level<br />
Range of values: 0 to 255<br />
Description: Returns <strong>the</strong> current Deceleration Rate in Hz/second.<br />
AN861<br />
unsigned char <strong>ProMPT</strong>_GetFrequency(void)<br />
Resources used: 1 stack level<br />
Range of values: 0 to 127<br />
Description: Returns <strong>the</strong> current output frequency in Hz. This may not be <strong>the</strong> frequency comm<strong>and</strong>ed due to Boost or<br />
Accel/Decel logic.<br />
unsigned char <strong>ProMPT</strong>_GetModulation(void)<br />
Resources used: Hardware Multiplier; 1 stack level<br />
Range of values: 0 to 200<br />
Description: Returns <strong>the</strong> current output modulation in %.<br />
unsigned char <strong>ProMPT</strong>_GetParameter(unsigned char parameter)<br />
Resources used: 1 stack level<br />
Description: In addition to its pre-defined API methods, <strong>the</strong> <strong>ProMPT</strong> kernel allows <strong>the</strong> user to custom define up to 16<br />
functions for control or communication purposes not covered by <strong>the</strong> <strong>ProMPT</strong> APIs. These parameters are used to communicate<br />
with motor control GUI evaluation tools, such as <strong>Microchip</strong>’s DashDriveMPTM . This method returns <strong>the</strong> current<br />
value of any one of <strong>the</strong> parameters.<br />
unsigned char <strong>ProMPT</strong>_GetVFCurve(unsigned char point)<br />
Resources used: Hardware Multiplier; 1 stack level<br />
Description: This function returns one of <strong>the</strong> 17 modulation values (in %) of <strong>the</strong> V/F curve. Each point represents a<br />
frequency increment of 8 Hz, ranging from point 0 (0 Hz) to point 16 (128 Hz).<br />
void <strong>ProMPT</strong>_Init(unsigned char PWMfrequency)<br />
Resources used: 64 Bytes RAM; Timer2; PWM1 <strong>and</strong> PWM2; High Priority Interrupt Vector; Hardware Multiplier; fast<br />
call/return; FSR 0; TBLPTR; 2 stack levels<br />
PWMfrequency values: 0 or 1<br />
Description: This function must be called before all o<strong>the</strong>r <strong>ProMPT</strong> methods, <strong>and</strong> it must be called only once. This<br />
routine configures Timer2 <strong>and</strong> <strong>the</strong> PWM outputs.<br />
When PWMfrequency is ‘0’, <strong>the</strong> module’s operating frequency is 9.75 kHz. When PWMfrequency is ‘1’, <strong>the</strong> module’s<br />
operating frequency is 19.53 kHz.<br />
Note: Since <strong>the</strong> high priority interrupt is used, <strong>the</strong> fast call/return cannot be used by o<strong>the</strong>r routines.<br />
© 2002 <strong>Microchip</strong> Technology Inc. DS00861A-page 13
AN861<br />
void <strong>ProMPT</strong>_SetAccelRate(unsigned char rate)<br />
Resources used: 0 stack level<br />
rate range: 0 to 255<br />
Description: Sets <strong>the</strong> acceleration to <strong>the</strong> value of rate in Hz/second. The default setting is 10 Hz/s.<br />
void <strong>ProMPT</strong>_SetBoostEndModulation(unsigned char modulation)<br />
Resources used: Hardware Multiplier; 0 stack levels<br />
modulation range: 0 to 200<br />
Description: Sets <strong>the</strong> End Modulation (in %) for <strong>the</strong> Boost logic. Boost mode operates at Boost Frequency, <strong>and</strong> <strong>the</strong><br />
modulation ramps from BoostStartModulation to BoostEndModulation. This function should not be called while<br />
Boost is enabled.<br />
unsigned char <strong>ProMPT</strong>_SetBoostFrequency(unsigned char frequency)<br />
Resources used: 0 stack levels<br />
frequency range: 0 to 127<br />
Description: Sets <strong>the</strong> frequency <strong>the</strong> drive goes to in Boost mode. Frequency must be < 128. On exit, w = 0 if <strong>the</strong><br />
comm<strong>and</strong> is successful, or w = FFh if <strong>the</strong> frequency is out of range. This function should not be called while Boost is<br />
enabled.<br />
void <strong>ProMPT</strong>_SetBoostStartModulation(unsigned char modulation)<br />
Resources used: Hardware Multiplier; 0 stack levels<br />
modulation range: 0 to BoostEndModulation<br />
Description: Sets <strong>the</strong> Start Modulation (in %) for <strong>the</strong> Boost logic. Boost mode operates at Boost Frequency, <strong>and</strong> <strong>the</strong><br />
modulation ramps from BoostStartModulation to BoostEndModulation. This function should not be called while<br />
Boost is enabled.<br />
void <strong>ProMPT</strong>_SetBoostTime(unsigned char time)<br />
Resources used: Hardware Multiplier; 0 stack levels<br />
time range: 0 to 255<br />
Description: Sets <strong>the</strong> amount of time in seconds for <strong>the</strong> Boost mode. Boost mode operates at Boost Frequency, <strong>and</strong><br />
<strong>the</strong> modulation ramps from BoostStartModulation to BoostEndModulation over BoostTime. This function<br />
should not be called while Boost is enabled.<br />
void <strong>ProMPT</strong>_SetDecelRate(unsigned char rate)<br />
Resources used: 0 stack levels<br />
rate range: 0 to 255<br />
Description: Sets <strong>the</strong> deceleration to <strong>the</strong> value of rate in Hz per second. The default setting is 5 Hz/s.<br />
unsigned char <strong>ProMPT</strong>_SetFrequency(unsigned char frequency)<br />
Resources used: 2 stack levels<br />
frequency range: 0 to 127<br />
Description: Sets <strong>the</strong> output frequency of <strong>the</strong> drive if <strong>the</strong> drive is running. Frequency is limited to 0 to 127, but should be<br />
controlled within <strong>the</strong> valid operational range of <strong>the</strong> motor. Modulation is determined from <strong>the</strong> V/F curve, which is set up<br />
with <strong>the</strong> <strong>ProMPT</strong>_SetVFCurve method. If frequency = 0, <strong>the</strong> drive will stop. If <strong>the</strong> drive is stopped <strong>and</strong> frequency > 0,<br />
<strong>the</strong> drive will start.<br />
DS00861A-page 14 © 2002 <strong>Microchip</strong> Technology Inc.
AN861<br />
void <strong>ProMPT</strong>_SetLineVoltage(unsigned char voltage)<br />
Resources used: Hardware Multiplier; 0 stack levels<br />
voltage range: 0 to 255<br />
Description: Sets <strong>the</strong> line voltage for Automatic Voltage Compensation. The units for SetLineVoltage <strong>and</strong><br />
SetMotorVoltage must be <strong>the</strong> same for accurate operation. The values passed to SetMotorVoltage <strong>and</strong><br />
SetLineVoltage can be <strong>the</strong> same to disable voltage compensation.<br />
void <strong>ProMPT</strong>_SetMotorVoltage(unsigned char voltage)<br />
Resources used: Hardware Multiplier; 0 stack levels<br />
voltage range: 0 to 255<br />
Description: Sets <strong>the</strong> motor rating for Automatic Voltage Compensation. The units for SetLineVoltage <strong>and</strong><br />
SetMotorVoltage must be <strong>the</strong> same for accurate operation. The values passed to SetMotorVoltage <strong>and</strong><br />
SetLineVoltage can be <strong>the</strong> same to disable voltage compensation.<br />
void <strong>ProMPT</strong>_SetParameter(unsigned char parameter, unsigned char value)<br />
Resources used: 0 stack levels<br />
parameter range:<br />
Description: In addition to its pre-defined API methods, <strong>the</strong> <strong>ProMPT</strong> kernel allows <strong>the</strong> user to custom define up to 16<br />
functions for control or communication purposes not covered by <strong>the</strong> <strong>ProMPT</strong> APIs. This function sets <strong>the</strong> value of <strong>the</strong><br />
specified user defined function.<br />
void <strong>ProMPT</strong>_SetPWMfrequency(unsigned char PWMfrequency)<br />
PWMfrequency values: 0 or 1<br />
Resources used: Timer2; 1 stack level<br />
Description: This sets <strong>and</strong> changes <strong>the</strong> PWM switching frequency. Typically, this is set with <strong>the</strong> Init() function. When<br />
PWMfrequency is ‘0’, <strong>the</strong> module’s operating frequency is 9.75 kHz. When PWMfrequency is ‘1’, <strong>the</strong> module’s<br />
operating frequency is 19.53 kHz.<br />
void <strong>ProMPT</strong>_SetVFCurve(unsigned char point, unsigned char value)<br />
Resources used: Hardware Multiplier; 0 stack level<br />
point range: 0 to 16 (0 = 0 Hz, 1 = 8 Hz, 2 = 16 Hz……. 17 = 128 Hz)<br />
value range: 0 to 200<br />
Description: This sets one of <strong>the</strong> 17 modulation values (in %) for <strong>the</strong> V/F curve. Each point represents a frequency<br />
increment of 8 Hz, ranging from point 0 (0 Hz) to point 16 (128 Hz).<br />
unsigned char <strong>ProMPT</strong>_Tick(void)<br />
Resources used: 1 stack level<br />
Description: The value of <strong>the</strong> Tick timer flag becomes ‘1’ every 62.5 ms (1/16 second). This can be used for timing<br />
applications. clearTick must be called in <strong>the</strong> timing routine when this is serviced.<br />
© 2002 <strong>Microchip</strong> Technology Inc. DS00861A-page 15
AN861<br />
APPENDIX C: SOURCE CODE<br />
Due to size considerations, <strong>the</strong> complete source code<br />
for this application note is not included in <strong>the</strong> text. A<br />
complete version of <strong>the</strong> source code, with all required<br />
support files, is available for download as a Zip archive<br />
from <strong>the</strong> <strong>Microchip</strong> web site at:<br />
www.microchip.com<br />
DS00861A-page 16 © 2002 <strong>Microchip</strong> Technology Inc.
Note <strong>the</strong> following details of <strong>the</strong> code protection feature on <strong>Microchip</strong> devices:<br />
• <strong>Microchip</strong> products meet <strong>the</strong> specification contained in <strong>the</strong>ir particular <strong>Microchip</strong> Data Sheet.<br />
• <strong>Microchip</strong> believes that its family of products is one of <strong>the</strong> most secure families of its kind on <strong>the</strong> market today, when used in <strong>the</strong><br />
intended manner <strong>and</strong> under normal conditions.<br />
• There are dishonest <strong>and</strong> possibly illegal methods used to breach <strong>the</strong> code protection feature. All of <strong>the</strong>se methods, to our knowledge,<br />
require <strong>using</strong> <strong>the</strong> <strong>Microchip</strong> products in a manner outside <strong>the</strong> operating specifications contained in <strong>Microchip</strong>'s Data<br />
Sheets. Most likely, <strong>the</strong> person doing so is engaged in <strong>the</strong>ft of intellectual property.<br />
• <strong>Microchip</strong> is willing to work with <strong>the</strong> customer who is concerned about <strong>the</strong> integrity of <strong>the</strong>ir code.<br />
• Nei<strong>the</strong>r <strong>Microchip</strong> nor any o<strong>the</strong>r semiconductor manufacturer can guarantee <strong>the</strong> security of <strong>the</strong>ir code. Code protection does not<br />
mean that we are guaranteeing <strong>the</strong> product as “unbreakable.”<br />
Code protection is constantly evolving. We at <strong>Microchip</strong> are committed to continuously improving <strong>the</strong> code protection features of our<br />
products.<br />
Information contained in this publication regarding device<br />
applications <strong>and</strong> <strong>the</strong> like is intended through suggestion only<br />
<strong>and</strong> may be superseded by updates. It is your responsibility to<br />
ensure that your application meets with your specifications.<br />
No representation or warranty is given <strong>and</strong> no liability is<br />
assumed by <strong>Microchip</strong> Technology Incorporated with respect<br />
to <strong>the</strong> accuracy or use of such information, or infringement of<br />
patents or o<strong>the</strong>r intellectual property rights arising from such<br />
use or o<strong>the</strong>rwise. Use of <strong>Microchip</strong>’s products as critical components<br />
in life support systems is not authorized except with<br />
express written approval by <strong>Microchip</strong>. No licenses are conveyed,<br />
implicitly or o<strong>the</strong>rwise, under any intellectual property<br />
rights.<br />
Trademarks<br />
The <strong>Microchip</strong> name <strong>and</strong> logo, <strong>the</strong> <strong>Microchip</strong> logo, KEELOQ,<br />
MPLAB, PIC, PICmicro, PICSTART <strong>and</strong> PRO MATE are<br />
registered trademarks of <strong>Microchip</strong> Technology Incorporated<br />
in <strong>the</strong> U.S.A. <strong>and</strong> o<strong>the</strong>r countries.<br />
FilterLab, microID, MXDEV, MXLAB, PICMASTER, SEEVAL<br />
<strong>and</strong> The Embedded Control Solutions Company are<br />
registered trademarks of <strong>Microchip</strong> Technology Incorporated<br />
in <strong>the</strong> U.S.A.<br />
dsPIC, dsPICDEM.net, ECONOMONITOR, FanSense,<br />
FlexROM, fuzzyLAB, In-Circuit Serial Programming, ICSP,<br />
ICEPIC, microPort, Migratable Memory, MPASM, MPLIB,<br />
MPLINK, MPSIM, PICC, PICDEM, PICDEM.net, rfPIC, Select<br />
Mode <strong>and</strong> Total Endurance are trademarks of <strong>Microchip</strong><br />
Technology Incorporated in <strong>the</strong> U.S.A. <strong>and</strong> o<strong>the</strong>r countries.<br />
Serialized Quick Turn Programming (SQTP) is a service mark<br />
of <strong>Microchip</strong> Technology Incorporated in <strong>the</strong> U.S.A.<br />
All o<strong>the</strong>r trademarks mentioned herein are property of <strong>the</strong>ir<br />
respective companies.<br />
© 2002, <strong>Microchip</strong> Technology Incorporated, Printed in <strong>the</strong><br />
U.S.A., All Rights Reserved.<br />
Printed on recycled paper.<br />
<strong>Microchip</strong> received QS-9000 quality system<br />
certification for its worldwide headquarters,<br />
design <strong>and</strong> wafer fabrication facilities in<br />
Ch<strong>and</strong>ler <strong>and</strong> Tempe, Arizona in July 1999<br />
<strong>and</strong> Mountain View, California in March 2002.<br />
The Company’s quality system processes <strong>and</strong><br />
procedures are QS-9000 compliant for its<br />
PICmicro ® 8-bit MCUs, KEELOQ ® code hopping<br />
devices, Serial EEPROMs, microperipherals,<br />
non-volatile memory <strong>and</strong> analog products. In<br />
addition, <strong>Microchip</strong>’s quality system for <strong>the</strong><br />
design <strong>and</strong> manufacture of development<br />
systems is ISO 9001 certified.<br />
© 2002 <strong>Microchip</strong> Technology Inc. DS00861A - page 17
AMERICAS<br />
Corporate Office<br />
2355 West Ch<strong>and</strong>ler Blvd.<br />
Ch<strong>and</strong>ler, AZ 85224-6199<br />
Tel: 480-792-7200 Fax: 480-792-7277<br />
Technical Support: 480-792-7627<br />
Web Address: http://www.microchip.com<br />
Rocky Mountain<br />
2355 West Ch<strong>and</strong>ler Blvd.<br />
Ch<strong>and</strong>ler, AZ 85224-6199<br />
Tel: 480-792-7966 Fax: 480-792-4338<br />
Atlanta<br />
3780 Mansell Road, Suite 130<br />
Alpharetta, GA 30022<br />
Tel: 770-640-0034 Fax: 770-640-0307<br />
Boston<br />
2 Lan Drive, Suite 120<br />
Westford, MA 01886<br />
Tel: 978-692-3848 Fax: 978-692-3821<br />
Chicago<br />
333 Pierce Road, Suite 180<br />
Itasca, IL 60143<br />
Tel: 630-285-0071 Fax: 630-285-0075<br />
Dallas<br />
4570 Westgrove Drive, Suite 160<br />
Addison, TX 75001<br />
Tel: 972-818-7423 Fax: 972-818-2924<br />
Detroit<br />
Tri-Atria Office Building<br />
32255 Northwestern Highway, Suite 190<br />
Farmington Hills, MI 48334<br />
Tel: 248-538-2250 Fax: 248-538-2260<br />
Kokomo<br />
2767 S. Albright Road<br />
Kokomo, Indiana 46902<br />
Tel: 765-864-8360 Fax: 765-864-8387<br />
Los Angeles<br />
18201 Von Karman, Suite 1090<br />
Irvine, CA 92612<br />
Tel: 949-263-1888 Fax: 949-263-1338<br />
San Jose<br />
<strong>Microchip</strong> Technology Inc.<br />
2107 North First Street, Suite 590<br />
San Jose, CA 95131<br />
Tel: 408-436-7950 Fax: 408-436-7955<br />
Toronto<br />
6285 Northam Drive, Suite 108<br />
Mississauga, Ontario L4V 1X5, Canada<br />
Tel: 905-673-0699 Fax: 905-673-6509<br />
WORLDWIDE SALES AND SERVICE<br />
ASIA/PACIFIC<br />
Australia<br />
<strong>Microchip</strong> Technology Australia Pty Ltd<br />
Suite 22, 41 Rawson Street<br />
Epping 2121, NSW<br />
Australia<br />
Tel: 61-2-9868-6733 Fax: 61-2-9868-6755<br />
China - Beijing<br />
<strong>Microchip</strong> Technology Consulting (Shanghai)<br />
Co., Ltd., Beijing Liaison Office<br />
Unit 915<br />
Bei Hai Wan Tai Bldg.<br />
No. 6 Chaoyangmen Beidajie<br />
Beijing, 100027, No. China<br />
Tel: 86-10-85282100 Fax: 86-10-85282104<br />
China - Chengdu<br />
<strong>Microchip</strong> Technology Consulting (Shanghai)<br />
Co., Ltd., Chengdu Liaison Office<br />
Rm. 2401-2402, 24th Floor,<br />
Ming Xing Financial Tower<br />
No. 88 TIDU Street<br />
Chengdu 610016, China<br />
Tel: 86-28-86766200 Fax: 86-28-86766599<br />
China - Fuzhou<br />
<strong>Microchip</strong> Technology Consulting (Shanghai)<br />
Co., Ltd., Fuzhou Liaison Office<br />
Unit 28F, World Trade Plaza<br />
No. 71 Wusi Road<br />
Fuzhou 350001, China<br />
Tel: 86-591-7503506 Fax: 86-591-7503521<br />
China - Hong Kong SAR<br />
<strong>Microchip</strong> Technology Hongkong Ltd.<br />
Unit 901-6, Tower 2, Metroplaza<br />
223 Hing Fong Road<br />
Kwai Fong, N.T., Hong Kong<br />
Tel: 852-2401-1200 Fax: 852-2401-3431<br />
China - Shanghai<br />
<strong>Microchip</strong> Technology Consulting (Shanghai)<br />
Co., Ltd.<br />
Room 701, Bldg. B<br />
Far East International Plaza<br />
No. 317 Xian Xia Road<br />
Shanghai, 200051<br />
Tel: 86-21-6275-5700 Fax: 86-21-6275-5060<br />
China - Shenzhen<br />
<strong>Microchip</strong> Technology Consulting (Shanghai)<br />
Co., Ltd., Shenzhen Liaison Office<br />
Rm. 1812, 18/F, Building A, United Plaza<br />
No. 5022 Binhe Road, Futian District<br />
Shenzhen 518033, China<br />
Tel: 86-755-82901380 Fax: 86-755-82966626<br />
China - Qingdao<br />
Rm. B503, Fullhope Plaza,<br />
No. 12 Hong Kong Central Rd.<br />
Qingdao 266071, China<br />
Tel: 86-532-5027355 Fax: 86-532-5027205<br />
India<br />
<strong>Microchip</strong> Technology Inc.<br />
India Liaison Office<br />
Divyasree Chambers<br />
1 Floor, Wing A (A3/A4)<br />
No. 11, O’Shaugnessey Road<br />
Bangalore, 560 025, India<br />
Tel: 91-80-2290061 Fax: 91-80-2290062<br />
Japan<br />
<strong>Microchip</strong> Technology Japan K.K.<br />
Benex S-1 6F<br />
3-18-20, Shinyokohama<br />
Kohoku-Ku, Yokohama-shi<br />
Kanagawa, 222-0033, Japan<br />
Tel: 81-45-471- 6166 Fax: 81-45-471-6122<br />
Korea<br />
<strong>Microchip</strong> Technology Korea<br />
168-1, Youngbo Bldg. 3 Floor<br />
Samsung-Dong, Kangnam-Ku<br />
Seoul, Korea 135-882<br />
Tel: 82-2-554-7200 Fax: 82-2-558-5934<br />
Singapore<br />
<strong>Microchip</strong> Technology Singapore Pte Ltd.<br />
200 Middle Road<br />
#07-02 Prime Centre<br />
Singapore, 188980<br />
Tel: 65-6334-8870 Fax: 65-6334-8850<br />
Taiwan<br />
<strong>Microchip</strong> Technology (Barbados) Inc.,<br />
Taiwan Branch<br />
11F-3, No. 207<br />
Tung Hua North Road<br />
Taipei, 105, Taiwan<br />
Tel: 886-2-2717-7175 Fax: 886-2-2545-0139<br />
EUROPE<br />
Austria<br />
<strong>Microchip</strong> Technology Austria GmbH<br />
Durisolstrasse 2<br />
A-4600 Wels<br />
Austria<br />
Tel: 43-7242-2244-399<br />
Fax: 43-7242-2244-393<br />
Denmark<br />
<strong>Microchip</strong> Technology Nordic ApS<br />
Regus Business Centre<br />
Lautrup hoj 1-3<br />
Ballerup DK-2750 Denmark<br />
Tel: 45 4420 9895 Fax: 45 4420 9910<br />
France<br />
<strong>Microchip</strong> Technology SARL<br />
Parc d’Activite du Moulin de Massy<br />
43 Rue du Saule Trapu<br />
Batiment A - ler Etage<br />
91300 Massy, France<br />
Tel: 33-1-69-53-63-20 Fax: 33-1-69-30-90-79<br />
Germany<br />
<strong>Microchip</strong> Technology GmbH<br />
Steinheilstrasse 10<br />
D-85737 Ismaning, Germany<br />
Tel: 49-89-627-144 0 Fax: 49-89-627-144-44<br />
Italy<br />
<strong>Microchip</strong> Technology SRL<br />
Centro Direzionale Colleoni<br />
Palazzo Taurus 1 V. Le Colleoni 1<br />
20041 Agrate Brianza<br />
Milan, Italy<br />
Tel: 39-039-65791-1 Fax: 39-039-6899883<br />
United Kingdom<br />
<strong>Microchip</strong> Ltd.<br />
505 Eskdale Road<br />
Winnersh Triangle<br />
Wokingham<br />
Berkshire, Engl<strong>and</strong> RG41 5TU<br />
Tel: 44 118 921 5869 Fax: 44-118 921-5820<br />
DS00861A-page 18 © 2002 <strong>Microchip</strong> Technology Inc.<br />
12/05/02