Installing the Printer Driver - Ednord
Installing the Printer Driver - Ednord
Installing the Printer Driver - Ednord

You also want an ePaper? Increase the reach of your titles
YUMPU automatically turns print PDFs into web optimized ePapers that Google loves.
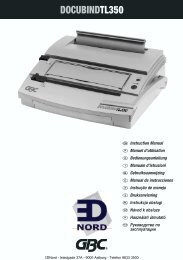
PagePro 1350W<br />
User’s Guide<br />
EDNord - Istedgade 37A - 9000 Aalborg - telefon 96333500<br />
1800715-001A(1)<br />
4136-7745-02A
EDNord - Istedgade 37A - 9000 Aalborg - telefon 96333500
Contents<br />
1 Introduction ....................................................................................................... 1<br />
Getting Acquainted with Your <strong>Printer</strong> 2<br />
<strong>Printer</strong> Parts 2<br />
Front View 2<br />
Rear View 2<br />
About <strong>the</strong> Indicator Functions 3<br />
Indicator Functions 3<br />
Continuing a Print Job after an Error Message 3<br />
Cancelling a Print Job 3<br />
Status Message 4<br />
2 Software Installation ......................................................................................... 7<br />
<strong>Installing</strong> <strong>the</strong> USB Device <strong>Driver</strong> 8<br />
<strong>Installing</strong> <strong>the</strong> USB Device <strong>Driver</strong> under Windows Me and 98SE 8<br />
<strong>Installing</strong> <strong>the</strong> <strong>Printer</strong> <strong>Driver</strong> 9<br />
<strong>Installing</strong> from <strong>the</strong> CD-ROM 9<br />
Contents i<br />
EDNord - Istedgade 37A - 9000 Aalborg - telefon 96333500
3 Working with <strong>the</strong> <strong>Printer</strong> <strong>Driver</strong> ......................................................................11<br />
Displaying <strong>Printer</strong> <strong>Driver</strong> Settings 12<br />
Displaying Settings under Windows XP 12<br />
Displaying Settings under Windows 2000/Me/98SE 12<br />
Using <strong>the</strong> <strong>Printer</strong> <strong>Driver</strong> 13<br />
Common Buttons 13<br />
OK 13<br />
Cancel 13<br />
Apply 13<br />
Help 13<br />
Easy Set 13<br />
Page Layout 13<br />
<strong>Printer</strong> Figure 13<br />
Setup Tab 14<br />
Paper Tab 14<br />
Quality Tab 14<br />
Device Options Setting Tab 14<br />
4 Working with <strong>the</strong> Status Display ....................................................................15<br />
Working with <strong>the</strong> Status Display 16<br />
Introduction 16<br />
Environment 16<br />
Opening <strong>the</strong> Status Display and Showing <strong>the</strong> Supplies Status 16<br />
Altering <strong>the</strong> Size of <strong>the</strong> Status Display Window 16<br />
Using <strong>the</strong> Status Display 16<br />
Recognizing Status Display Alerts 17<br />
Recovering from a Status Display Alert 17<br />
Closing <strong>the</strong> Status Display 18<br />
5 Using Media .....................................................................................................19<br />
About Media 20<br />
What sizes/weights of media can I use? 20<br />
What type and amount of media can I load? 21<br />
Media Storage 21<br />
Media Not Suitable for Printing 22<br />
What Is <strong>the</strong> guaranteed imageable (printable) area? 23<br />
Page Margins 23<br />
Loading Media 24<br />
How do I refill Tray 1? 24<br />
Printing on Media 25<br />
How do I load and print custom media? 25<br />
How do I load and print envelopes? 25<br />
How do I load and print labels? 27<br />
How do I load and print postcards? 28<br />
How do I load and print thick stock? 29<br />
How do I load and print transparencies? 30<br />
ii<br />
EDNord - Istedgade 37A - 9000 Aalborg - telefon 96333500<br />
Contents
Manual Duplexing 31<br />
How do I manually duplex? 31<br />
6 Replacing Consumables ................................................................................ 33<br />
Replacing <strong>the</strong> Toner Cartridge 34<br />
Replacing <strong>the</strong> Drum Cartridge 38<br />
7 Maintaining <strong>the</strong> <strong>Printer</strong> ................................................................................... 43<br />
Cleaning <strong>the</strong> <strong>Printer</strong> 44<br />
Exterior 44<br />
Pick-up Roller 45<br />
8 Troubleshooting .............................................................................................. 47<br />
Indicator Messages 48<br />
Error Messages 48<br />
Service Messages 49<br />
Clearing Jams 50<br />
Solving Problems-Printing Quality 53<br />
A Appendix .......................................................................................................... 57<br />
Safety Specifications 58<br />
Technical Specifications 58<br />
<strong>Printer</strong> 58<br />
Parallel Interface Connectors and Cable 60<br />
USB Interface Connectors and Cable 60<br />
Consumables Life Expectancies Chart 60<br />
Our Concern for Environmental Protection 61<br />
What is an ENERGY STAR product? 61<br />
Interference-Causing Equipment Standard (ICES-003 ISSUE 3) 61<br />
For Canadian Users 61<br />
FCC Part 15 - Radio Frequency Devices 62<br />
For United States Users 62<br />
CE Marking (Declaration of Conformity) 63<br />
For European Users 63<br />
CISPR 22 and Local Rules 63<br />
Acoustic Noise 63<br />
Safety Information 64<br />
Warning and Precaution Symbols 64<br />
Meaning of Symbols 64<br />
WARNING 65<br />
CAUTION 67<br />
Working Safely with your Laser <strong>Printer</strong> 68<br />
Notes on your Safety and Operating Safety 68<br />
Laser Safety 70<br />
Internal Laser Radiation 70<br />
Laser Safety Label 71<br />
Contents iii<br />
EDNord - Istedgade 37A - 9000 Aalborg - telefon 96333500
iv<br />
For United States Users 71<br />
For Users in All Countries 72<br />
For Denmark Users 72<br />
For Norway Users 72<br />
For Finland, Sweden Users 72<br />
EDNord - Istedgade 37A - 9000 Aalborg - telefon 96333500<br />
Contents
Introduction<br />
EDNord - Istedgade 37A - 9000 Aalborg - telefon 96333500<br />
1
Getting Acquainted with Your <strong>Printer</strong><br />
2<br />
<strong>Printer</strong> Parts<br />
The following drawings illustrate <strong>the</strong> parts of your printer referred to throughout<br />
this guide, so please take some time to become familiar with <strong>the</strong>m.<br />
Front View<br />
1—Top cover<br />
2—Output tray<br />
3—Control panel<br />
4—Imaging cartridge<br />
(Toner cartridge plus Drum cartridge)<br />
5—Front cover<br />
6—Tray 1<br />
7—Front cover grip<br />
8—Paper guide stopper<br />
9—Paper guides<br />
10—Ventilation grilles<br />
11—Power switch<br />
Rear View<br />
1—AC power connection<br />
2—Parallel port<br />
3—USB port<br />
11<br />
1 2<br />
10<br />
Drum cartridge<br />
Getting Acquainted with Your <strong>Printer</strong><br />
EDNord - Istedgade 37A - 9000 Aalborg - telefon 96333500<br />
3<br />
2<br />
9<br />
8<br />
7<br />
3<br />
4<br />
5<br />
6<br />
Imaging<br />
cartridge<br />
Toner cartridge<br />
1
About <strong>the</strong> Indicator Functions<br />
Indicator Functions<br />
The control panel has two indicators<br />
and one button. The control panel<br />
indicators provide information on <strong>the</strong><br />
status of <strong>the</strong> printer.<br />
1—Ready indicator<br />
2—Error indicator<br />
3—Cancel button<br />
The Cancel button allows you to:<br />
Continue a print job after an<br />
error message<br />
Cancel a print job<br />
Continuing a Print Job after an Error Message<br />
You can continue <strong>the</strong> print job after correcting <strong>the</strong> following types of errors:<br />
When <strong>the</strong> print job is too complex and <strong>the</strong> memory capacity of <strong>the</strong> printer<br />
is inadequate<br />
When <strong>the</strong>re is no more paper in <strong>the</strong> tray<br />
When paper of a different format than that set in <strong>the</strong> printer driver was fed<br />
into <strong>the</strong> printer<br />
1 Check that one of <strong>the</strong> above errors has occurred.<br />
2 Perform <strong>the</strong> remedial action according to <strong>the</strong> error.<br />
3 Press <strong>the</strong> Cancel button to operate <strong>the</strong> media feed.<br />
The print job continues.<br />
For details on <strong>the</strong> error messages, refer to chapter 8, “Troubleshooting” on<br />
page 47.<br />
Cancelling a Print Job<br />
You can cancel a print job that is currently being processed.<br />
1 While data is being processed or printed (<strong>the</strong> green “Ready” indicator is<br />
blinking), hold down <strong>the</strong> Cancel button for more than 5 seconds.<br />
2 Release <strong>the</strong> Cancel button after both indicators light up.<br />
The current print job has now been cancelled.<br />
About <strong>the</strong> Indicator Functions 3<br />
EDNord - Istedgade 37A - 9000 Aalborg - telefon 96333500<br />
1<br />
2<br />
3
4<br />
The indicators may show five types of signals:<br />
Off<br />
On<br />
Slow blinking—1 blink every 2 seconds<br />
Blinking—1 blink per second<br />
Rapid blinking—2 blink per second<br />
Status Message<br />
Status messages indicate <strong>the</strong> current condition of <strong>the</strong> printer. The printer status<br />
also can be checked on <strong>the</strong> Status Display. (Refer to <strong>the</strong> “Working with<br />
<strong>the</strong> Status Display” on page 16.)<br />
Ready<br />
indicator<br />
(green)<br />
Error<br />
indicator<br />
(orange)<br />
Condition Action<br />
Off Off Power off None<br />
On Off Ready to print None<br />
Rapid blinking<br />
Off Warming up None<br />
Blinking Off Processing data<br />
Printing<br />
None<br />
On On Initializing (power on)<br />
Canceling a print job<br />
None<br />
Slow blinking Off Power save mode None<br />
About <strong>the</strong> Indicator Functions<br />
EDNord - Istedgade 37A - 9000 Aalborg - telefon 96333500
Ready<br />
indicator<br />
(green)<br />
On Slow blinking Toner near empty Prepare <strong>the</strong> toner<br />
cartridge.<br />
On Blinking Toner empty Replace <strong>the</strong> toner<br />
cartridge.<br />
On Rapid blinking<br />
Note<br />
Error<br />
indicator<br />
(orange)<br />
Condition Action<br />
Toner out Replace <strong>the</strong> toner<br />
cartridge.<br />
No toner cartridge is<br />
installed.<br />
A toner cartridge o<strong>the</strong>r<br />
than a genuine<br />
KONICA MINOLTA<br />
toner cartridge has<br />
been detected.<br />
Install <strong>the</strong> toner cartridge.<br />
Install a genuine<br />
KONICA MINOLTA<br />
toner cartridge.<br />
If <strong>the</strong> toner cartridge that is used is not genuine, cleaning will be<br />
performed after each page printed, which will reduce <strong>the</strong> printing speed.<br />
About <strong>the</strong> Indicator Functions 5<br />
EDNord - Istedgade 37A - 9000 Aalborg - telefon 96333500
6<br />
About <strong>the</strong> Indicator Functions<br />
EDNord - Istedgade 37A - 9000 Aalborg - telefon 96333500
Software<br />
Installation<br />
EDNord - Istedgade 37A - 9000 Aalborg - telefon 96333500<br />
2
<strong>Installing</strong> <strong>the</strong> USB Device <strong>Driver</strong><br />
8<br />
When connecting <strong>the</strong> printer to your computer with a USB cable, install <strong>the</strong><br />
USB device driver according to <strong>the</strong> following instructions before installing <strong>the</strong><br />
printer driver.<br />
Note<br />
In Windows 2000/XP, you do not have to install <strong>the</strong> USB device driver.<br />
When <strong>the</strong> “Found New Hardware” wizard dialog box appears, cancel it.<br />
<strong>Installing</strong> <strong>the</strong> USB Device <strong>Driver</strong> under Windows Me and<br />
98SE<br />
1 Turn on your computer.<br />
2 Turn on <strong>the</strong> printer.<br />
3 When Windows and <strong>the</strong> printer are both ready, insert <strong>the</strong> CD-ROM,<br />
included with your printer, into your computer’s CD-ROM drive.<br />
4 Connect <strong>the</strong> printer to <strong>the</strong> computer with <strong>the</strong> USB cable. The Add New<br />
Hardware Wizard dialog box appears.<br />
Follow <strong>the</strong> instructions on <strong>the</strong> screen.<br />
Browse <strong>the</strong> printer driver CD-ROM and navigate to:<br />
“drivers\English\Win9x” (for Windows Me and 98SE).<br />
5 Click Finish. This completes <strong>the</strong> installation of <strong>the</strong> USB device driver.<br />
6 When <strong>the</strong> Add New Hardware Wizard dialog box appears after clicking<br />
Finish, click Cancel.<br />
<strong>Installing</strong> <strong>the</strong> USB Device <strong>Driver</strong><br />
EDNord - Istedgade 37A - 9000 Aalborg - telefon 96333500
<strong>Installing</strong> <strong>the</strong> <strong>Printer</strong> <strong>Driver</strong><br />
Note<br />
Do not use <strong>the</strong> “Found New Hardware” or “Add New Hardware” wizard<br />
to install <strong>the</strong> PagePro 1350W driver and utilities.<br />
<strong>Installing</strong> from <strong>the</strong> CD-ROM<br />
1 Insert <strong>the</strong> CD-ROM in <strong>the</strong> CD-ROM drive of your computer. The CD-ROM<br />
installer automatically starts.<br />
If not , browse with <strong>the</strong> Windows Explorer to <strong>the</strong> CD-ROM and double-click<br />
on setup.exe.<br />
2Follow <strong>the</strong> instructions on <strong>the</strong> screen.<br />
For a USB connection, select “USBxxx” as <strong>the</strong> printer port.<br />
For a Parallel connection, select “LPTx” as <strong>the</strong> printer port.<br />
<strong>Installing</strong> <strong>the</strong> <strong>Printer</strong> <strong>Driver</strong> 9<br />
EDNord - Istedgade 37A - 9000 Aalborg - telefon 96333500
10<br />
<strong>Installing</strong> <strong>the</strong> <strong>Printer</strong> <strong>Driver</strong><br />
EDNord - Istedgade 37A - 9000 Aalborg - telefon 96333500
Working with <strong>the</strong><br />
<strong>Printer</strong> <strong>Driver</strong><br />
EDNord - Istedgade 37A - 9000 Aalborg - telefon 96333500<br />
3
Displaying <strong>Printer</strong> <strong>Driver</strong> Settings<br />
12<br />
Displaying Settings under Windows XP<br />
1 From <strong>the</strong> Start menu, click Control Panel.<br />
2 In Pick a category, click <strong>Printer</strong>s and O<strong>the</strong>r Hardware.<br />
3 In Pick a task…, click View installed printers or fax printers.<br />
4 In <strong>the</strong> <strong>Printer</strong>s and Faxes directory, select <strong>the</strong> KONICA MINOLTA<br />
PagePro 1350W printer icon.<br />
5 To display <strong>the</strong> printer driver settings, from <strong>the</strong> File menu, click Printing<br />
Preferences....<br />
Displaying Settings under Windows 2000/Me/98SE<br />
1 From <strong>the</strong> Start menu, point to Settings, and <strong>the</strong>n click <strong>Printer</strong>s to display<br />
<strong>the</strong> <strong>Printer</strong>s directory.<br />
2 Select <strong>the</strong> KONICA MINOLTA PagePro 1350W printer icon.<br />
3 Display <strong>the</strong> printer driver settings:<br />
Windows 2000—From <strong>the</strong> File menu, click Printing Preferences....<br />
Windows Me/98SE—From <strong>the</strong> File menu, click Properties, and <strong>the</strong>n<br />
click <strong>the</strong> <strong>Printer</strong> Properties tab.<br />
Displaying <strong>Printer</strong> <strong>Driver</strong> Settings<br />
EDNord - Istedgade 37A - 9000 Aalborg - telefon 96333500
Using <strong>the</strong> <strong>Printer</strong> <strong>Driver</strong><br />
Refer to <strong>the</strong> printer drivers online help for information on all of <strong>the</strong><br />
functions.<br />
Common Buttons<br />
The buttons described below appear on each tab.<br />
OK<br />
Click to exit <strong>the</strong> Properties dialog box, saving any changes made.<br />
Cancel<br />
Click to exit <strong>the</strong> Properties dialog box without saving any changes made.<br />
Apply<br />
Click to save all changes without exiting <strong>the</strong> Properties dialog box.<br />
Help<br />
Click to view online help.<br />
Easy Set<br />
To save <strong>the</strong> current settings, click Save.... Afterward, <strong>the</strong> saved settings can<br />
be selected from <strong>the</strong> drop-down list.<br />
Select Default from <strong>the</strong> drop-down list to reset <strong>the</strong> functions of <strong>the</strong> tab to <strong>the</strong>ir<br />
original values.<br />
Page Layout<br />
Check this option button to display a sample of <strong>the</strong> page layout in <strong>the</strong> figure<br />
area.<br />
<strong>Printer</strong> Figure<br />
Check this option button to display an image of <strong>the</strong> printer in <strong>the</strong> figure area.<br />
Using <strong>the</strong> <strong>Printer</strong> <strong>Driver</strong> 13<br />
EDNord - Istedgade 37A - 9000 Aalborg - telefon 96333500
14<br />
Setup Tab<br />
The Setup tab allows you to<br />
Print several pages of a document on <strong>the</strong> same page (n-up printing)<br />
Provide a watermark on printed documents<br />
Design custom watermarks<br />
Specify manual duplex printing<br />
Specify <strong>the</strong> paper source<br />
Define <strong>the</strong> type of media<br />
Print using a form overlay<br />
Create/edit a form overlay<br />
Paper Tab<br />
The Paper tab allows you to<br />
Specify <strong>the</strong> size of <strong>the</strong> original document<br />
Define custom media sizes<br />
Fit printed documents to a specified media size<br />
Select <strong>the</strong> output media size<br />
Scale (enlarge/reduce) documents<br />
Adjust <strong>the</strong> printing position<br />
Specify <strong>the</strong> number of copies<br />
Turn on/off <strong>the</strong> printer’s sorting function<br />
Turn on/off <strong>the</strong> Proof Print function<br />
Specify <strong>the</strong> orientation of <strong>the</strong> media<br />
Rotate <strong>the</strong> print image 180° to <strong>the</strong> media orientation<br />
Quality Tab<br />
The Quality tab allows you to<br />
Specify <strong>the</strong> resolution<br />
Adjust <strong>the</strong> contrast and brightness of <strong>the</strong> printed document<br />
Turn on/off Toner Save mode<br />
Device Options Setting Tab<br />
The Device Options Setting tab allows you to<br />
View version and copyright information about <strong>the</strong> printer driver<br />
Using <strong>the</strong> <strong>Printer</strong> <strong>Driver</strong><br />
EDNord - Istedgade 37A - 9000 Aalborg - telefon 96333500
Working with <strong>the</strong><br />
Status Display<br />
EDNord - Istedgade 37A - 9000 Aalborg - telefon 96333500<br />
4
Working with <strong>the</strong> Status Display<br />
16<br />
Introduction<br />
The Status Monitor shows information about <strong>the</strong> current status of <strong>the</strong> computer’s<br />
local printer.<br />
Environment<br />
The Status Display can be used with Windows XP, 2000, Me, and 98SE connected<br />
via a parallel cable or USB cable.<br />
Opening <strong>the</strong> Status Display and Showing <strong>the</strong> Supplies<br />
Status<br />
Use one of <strong>the</strong> following steps to open <strong>the</strong> Status Display.<br />
Windows XP—Choose Start, All Programs, <strong>the</strong>n KONICA MINOLTA<br />
PagePro 1350W Utilities, and <strong>the</strong>n KONICA MINOLTA PagePro 1350W<br />
Status.<br />
Windows Me/2000/98SE—From <strong>the</strong> Start menu, choose Programs, <strong>the</strong>n<br />
KONICA MINOLTA PagePro 1350W Utilities, and <strong>the</strong>n KONICA MINOLTA<br />
PagePro 1350W Status.<br />
Altering <strong>the</strong> Size of <strong>the</strong> Status Display Window<br />
From <strong>the</strong> Display menu, choose Status (Reduce) to decrease <strong>the</strong> size of<br />
<strong>the</strong> window, or<br />
From <strong>the</strong> Display menu, choose Status (Expand) to increase <strong>the</strong> size of<br />
<strong>the</strong> window.<br />
Using <strong>the</strong> Status Display<br />
When <strong>the</strong> background of <strong>the</strong> right-hand printer graphic is green, <strong>the</strong><br />
printer is in standby mode or a job is printing normally.<br />
When <strong>the</strong> background of <strong>the</strong> right-hand printer graphic is red, <strong>the</strong>re is an<br />
error and <strong>the</strong> job has been interrupted. The status of <strong>the</strong> printer and <strong>the</strong><br />
error message are shown in <strong>the</strong> dialog boxes on <strong>the</strong> left.<br />
The function areas include:<br />
<strong>Printer</strong> status—Displays text messages that describe <strong>the</strong> current operational<br />
status of <strong>the</strong> printer.<br />
How to recover—Provides you with explanations of what you need to do<br />
in order to correct problems and recover from error conditions.<br />
Working with <strong>the</strong> Status Display<br />
EDNord - Istedgade 37A - 9000 Aalborg - telefon 96333500
Warning status—Displays text messages that alerts you of such conditions<br />
as low toner.<br />
<strong>Printer</strong> status figure—Shows a graphic representation of <strong>the</strong> printer and<br />
indicates where <strong>the</strong> problem is.<br />
Printing status—Displays <strong>the</strong> status of <strong>the</strong> current print job.<br />
Select popup message—Allows you to choose which message(s) you<br />
want to bring to <strong>the</strong> foreground when that particular condition occurs with<br />
<strong>the</strong> printer.<br />
Maintenance—Allows you to specify <strong>the</strong> Midnight Mode functions and<br />
Auto Continue functions.<br />
Supplies status—Displays consumables usage statuses (percentage<br />
remaining) of <strong>the</strong> toner cartridge.<br />
Refer to <strong>the</strong> online help for information on all of its functions.<br />
Recognizing Status Display Alerts<br />
When <strong>the</strong> Status Display detects a printing problem, several actions occur at<br />
<strong>the</strong> same time, depending on your settings. First, <strong>the</strong> icon changes from<br />
green to yellow or red, depending on <strong>the</strong> severity of <strong>the</strong> printer problem.<br />
Refer to <strong>the</strong> online help for fur<strong>the</strong>r information on <strong>the</strong>se settings.<br />
Recovering from a Status Display Alert<br />
When <strong>the</strong> Status Display notifies you of a printing problem, double-click on its<br />
icon to open <strong>the</strong> Status Display. The Status Display identifies which printer<br />
has an error and what type of error has occurred.<br />
Refer to <strong>the</strong> online help for fur<strong>the</strong>r information on <strong>the</strong>se settings.<br />
Recognizing Status Display Alerts 17<br />
EDNord - Istedgade 37A - 9000 Aalborg - telefon 96333500
Closing <strong>the</strong> Status Display<br />
18<br />
To close <strong>the</strong> Status Display from <strong>the</strong> File menu, choose Exit.<br />
If you click <strong>the</strong> X button in <strong>the</strong> upper-right corner of <strong>the</strong> Status Display<br />
window to close <strong>the</strong> window, <strong>the</strong> Status Display remains available at<br />
<strong>the</strong> bottom right of <strong>the</strong> taskbar. Double-click <strong>the</strong> icon to open it again.<br />
Closing <strong>the</strong> Status Display<br />
EDNord - Istedgade 37A - 9000 Aalborg - telefon 96333500
Using Media<br />
EDNord - Istedgade 37A - 9000 Aalborg - telefon 96333500<br />
5
About Media<br />
20<br />
What sizes/weights of media can I use?<br />
Media Media Size Weights<br />
Millimeters Inches<br />
A4 210.0 × 297.0 8.2 × 11.7 60–90 g/m²<br />
(16–24 lb)<br />
B5 (JIS) 182.0 × 257.0 7.2 × 10.1<br />
A5 148.0 × 210.0 5.9 × 8.3<br />
Legal 215.9 × 355.6 8.5 × 14.0<br />
Letter 215.9 × 279.4 8.5 × 11.0<br />
Statement 140.0 × 216.0 5.5 × 8.5<br />
Executive 184.0 × 267.0 7.25 × 10.5<br />
Folio 210 × 330.0 8.25 × 13.0<br />
Letter Plus 216 × 322 8.5 × 12.69<br />
UK Quarto 203 × 254 8 × 10<br />
Foolscap 203 × 330 8 × 13<br />
G. Letter 203 × 267.0 8 × 10.5<br />
G. Legal 216 × 330 8 1/2 × 13<br />
Chinese 16 185.0 × 260.0 7.3 × 10.2<br />
Chinese 32 130.0 × 185.0 5.1 × 7.3<br />
16K 195 × 270 7 3/4 × 10 3/4<br />
B5 (ISO) 176.0 × 250.0 6.6 × 9.8<br />
Envelope #10 105 × 241 4.125 × 9.5<br />
Envelope C5 162.0 × 229.0 6.4 × 9.0<br />
Envelope DL 110.0 × 220.0 4.3 × 8.7 N/A<br />
Envelope Monarch 98.0 × 191.0 3.875 × 7.5 60–90 g/m²<br />
(16–24 lb)<br />
Envelope C6 114.0 × 162.0 4.5 × 6.4<br />
Envelope Cho #3 120 × 235 4 3/4 × 9 1/4<br />
Envelope Cho #4 90 × 205 3 1/2 × 8<br />
Japanese Postcard 100.0 × 148.0 3.9 × 5.8 N/A<br />
Double Postcard 148 × 200 5 3/4 × 7 3/4<br />
Thick stock 91–163g/m²<br />
(25–90 lb)<br />
EDNord - Istedgade 37A - 9000 Aalborg - telefon 96333500<br />
About Media
What type and amount of media can I load?<br />
Note<br />
Do not allow media to go above <strong>the</strong> fill limit mark inside <strong>the</strong> tray or <strong>the</strong><br />
media may not be fed correctly.<br />
Media Storage<br />
Media Source/Maximum Amount Input Capacity<br />
Media Type Tray 1<br />
Plain Paper 60–90 g/m2 (16–24 lb) 150 sheets<br />
Special Media Envelopes 10 sheets<br />
Label sheets 10 sheets<br />
Letter head 10 sheets<br />
Postcards (Japanese Size) 50 sheets (first face)<br />
Thick paper 91–163 g/m<br />
20 sheets (second face)<br />
2 (24–90 lb) 10 sheets<br />
Transparencies 5 sheets<br />
Keep media on a flat, level surface in its original wrapper until it is time to<br />
load it.<br />
If media has been removed from its wrapper, place it in its original packaging<br />
and store in a cool, dark place.<br />
When storing media, avoid<br />
Moisture, excess humidity<br />
Keep media between 30% to 65% relative humidity. Toner does not<br />
adhere well to moist or wet paper<br />
On <strong>the</strong> o<strong>the</strong>r hand, media that has been stored for a long time without<br />
staying in its packaging may dry up too much and also cause jamming.<br />
Direct sunlight<br />
Excess heat (up to 35° C/95° F)<br />
Dust<br />
Leaning against o<strong>the</strong>r objects or placed in an upright position<br />
Before purchasing a large quantity or special media, do a trial printing with<br />
<strong>the</strong> same media and check <strong>the</strong> print quality.<br />
About Media 21<br />
EDNord - Istedgade 37A - 9000 Aalborg - telefon 96333500
22<br />
Media Not Suitable for Printing<br />
Note<br />
Do not use <strong>the</strong> media types listed below. These could cause poor print<br />
quality, media jams, or damage to <strong>the</strong> printer. Also, using <strong>the</strong>m will void<br />
your warranty.<br />
Coated with a processed surface (such as carbon paper, digitally glosscoated<br />
media, colored paper that has been treated)<br />
Carbon backed<br />
Iron-on transfer media (heat-sensitive paper, heat-pressure paper,<br />
heat-press transfer paper)<br />
Cold water transfer paper<br />
Pressure sensitive<br />
Special media designed specifically for inkjet printers (superfine paper,<br />
glossy paper, glossy film, postcards, etc.)<br />
Media that has already been printed with<br />
– An inkjet printer<br />
– A monochrome or color laser printer or copier<br />
– A heat-transfer printer<br />
– Ano<strong>the</strong>r printer or fax machine<br />
Wet (or damp)<br />
Layered<br />
Adhesive<br />
Folded, creased, curled, embossed, warped, or wrinkled<br />
Perforated, three-hole punched, or torn<br />
Too slick, too coarse, too textured<br />
Different in texture (roughness) on <strong>the</strong> front and back<br />
Too thin or too thick<br />
Stuck toge<strong>the</strong>r because of static electricity<br />
Composed of foil or gilt; too luminous<br />
Heat sensitive or cannot withstand <strong>the</strong> fusing temperature (205° C/401° F)<br />
Irregularly shaped (not rectangular or not cut at right angles)<br />
Attached with glue, tape, paper clips, staples, ribbons, hooks, or buttons<br />
Acidic<br />
Any o<strong>the</strong>r media that is not approved<br />
EDNord - Istedgade 37A - 9000 Aalborg - telefon 96333500<br />
About Media
Use media that is<br />
Suitable for plain-paper laser printers, such as standard paper<br />
What Is <strong>the</strong> guaranteed imageable (printable) area?<br />
Each media size has a specific imageable area, <strong>the</strong> maximum area on which<br />
<strong>the</strong> printer can print clearly and without distortion.<br />
Page Margins<br />
4 mm<br />
(0.157 in.)<br />
4 mm<br />
(0.157 in.)<br />
4 mm<br />
(0.157 in.)<br />
4 mm<br />
(0.157 in.)<br />
Margins are set through your application. Some applications allow you to set<br />
custom page sizes and margins while o<strong>the</strong>rs have only standard page sizes<br />
and margins from which to choose. If you choose a standard format, you may<br />
lose part of your image (due to imageable area constraints). If you can<br />
custom-size your page in your application, use those sizes given for <strong>the</strong><br />
imageable area for optimum results.<br />
About Media 23<br />
EDNord - Istedgade 37A - 9000 Aalborg - telefon 96333500
Loading Media<br />
24<br />
How do I refill Tray 1?<br />
Refill <strong>the</strong> tray only when it is completely empty.<br />
1 Squeeze <strong>the</strong> right paper guide<br />
and open <strong>the</strong> paper guides.<br />
2 Load <strong>the</strong> media lengthwise and<br />
printing-side up in <strong>the</strong> tray.<br />
A maximum of 150 sheets<br />
(75 g/m 2 [20 lb] plain paper) can<br />
be loaded. If media is loaded<br />
past <strong>the</strong> media limit mark, it<br />
may not be fed correctly.<br />
Load letterhead with <strong>the</strong> side to<br />
be printed facing up and <strong>the</strong> preprinted<br />
letterhead at <strong>the</strong> top (facing<br />
<strong>the</strong> printer).<br />
3 Squeeze <strong>the</strong> right paper guide<br />
and adjust <strong>the</strong> paper guides so<br />
that both <strong>the</strong> left and right sides<br />
of <strong>the</strong> media are secure.<br />
EDNord - Istedgade 37A - 9000 Aalborg - telefon 96333500<br />
Loading Media
Printing on Media<br />
How do I load and print custom media?<br />
Do not use custom media that does not have approved dimensions<br />
Width: 76 mm (3 in.) up to 216 mm (8.5 in.)<br />
Length: 127 mm (5 in.) up to 356 mm (14 in.)<br />
1 In <strong>the</strong> printer driver (Setup tab/Media Type option), select plain paper.<br />
2 Set <strong>the</strong> media size (Paper tab/Original Document Size/Edit Custom...)<br />
3 Load <strong>the</strong> custom media lengthwise and printing-side up in Tray 1.<br />
4 Adjust <strong>the</strong> paper guides to <strong>the</strong> width of <strong>the</strong> custom media.<br />
Note<br />
Improperly adjusted guides may cause poor print quality, media<br />
jams, or printer damage.<br />
5 Print <strong>the</strong> custom media.<br />
How do I load and print envelopes?<br />
Before printing on envelopes, we recommend printing a test page. If<br />
<strong>the</strong> print result is not oriented as desired, select Rotated (Paper tab/<br />
Orientation option).<br />
Do not use envelopes that have<br />
Sticky flaps<br />
Tape seals, metal objects, paper clips, fasteners, or peel-off strips for<br />
sealing<br />
Transparent windows<br />
Rough surface<br />
Material that will melt, vaporize, or emit dangerous fumes<br />
Been presealed<br />
Printing on Media 25<br />
EDNord - Istedgade 37A - 9000 Aalborg - telefon 96333500
26<br />
Use envelopes that are<br />
Common office envelopes with diagonal joints, sharp folds and edges,<br />
and ordinary gummed flaps<br />
Approved for laser printing<br />
Dry<br />
1 In <strong>the</strong> printer driver (Setup tab/Media Type option), select Envelope.<br />
2 Select <strong>the</strong> size of <strong>the</strong> envelope (Paper tab/Original Document Size<br />
option).<br />
3 Place <strong>the</strong> envelopes on a flat surface, and flatten <strong>the</strong>m by pressing down<br />
<strong>the</strong> corners.<br />
4 Flex <strong>the</strong> envelope stack (including <strong>the</strong> edges) to remove any stiffness.<br />
5 Correct any bent corners, and tap <strong>the</strong> envelopes on a flat surface to align<br />
<strong>the</strong>m.<br />
6 Squeeze <strong>the</strong> right paper guide<br />
and open <strong>the</strong> paper guides.<br />
7 Load <strong>the</strong> envelopes lengthwise and <strong>the</strong> printing-side up as shown in <strong>the</strong><br />
illustrations.<br />
Printing on Media<br />
EDNord - Istedgade 37A - 9000 Aalborg - telefon 96333500
Note<br />
Print envelopes on <strong>the</strong> front address side only. Some parts of <strong>the</strong><br />
envelope consist of three layers of paper—<strong>the</strong> front, back, and flap.<br />
Anything printed in <strong>the</strong>se layered regions may be lost or faded.<br />
8 Recheck <strong>the</strong> paper guides to make sure <strong>the</strong>y are adjusted to <strong>the</strong> width of<br />
<strong>the</strong> envelopes.<br />
Note<br />
Improperly adjusted guides may cause poor print quality, media<br />
jams, or printer damage.<br />
9 Print <strong>the</strong> envelopes.<br />
10 Open <strong>the</strong> flap of each envelope immediately (before it cools) after <strong>the</strong><br />
envelope is delivered to <strong>the</strong> output tray.<br />
Because <strong>the</strong> envelopes pass through heated rollers, <strong>the</strong> gummed<br />
area on <strong>the</strong> flaps may seal. Using envelopes with emulsion-based<br />
glue avoids this problem.<br />
How do I load and print labels?<br />
A label consists of a face sheet (<strong>the</strong> printing surface), adhesive, and a carrier<br />
sheet:<br />
The face sheet must follow <strong>the</strong> plain paper specification.<br />
The face sheet surface must cover <strong>the</strong> entire carrier sheet, and no<br />
adhesive should come through on <strong>the</strong> surface.<br />
You can print continuously with label paper. However, this could affect <strong>the</strong><br />
media feed, depending on <strong>the</strong> media quality and printing environment. If<br />
problems occur, stop <strong>the</strong> continuous print and print one sheet at a time.<br />
Format label data within your application. Try printing your data on a plain<br />
sheet of paper first to check placement. Check your application documentation<br />
for o<strong>the</strong>r information on printing labels.<br />
Do not use label sheets that<br />
Have labels that easily peel off<br />
Labels may stick to <strong>the</strong> fuser, causing <strong>the</strong>m to peel off and media jams to<br />
occur.<br />
Printing on Media 27<br />
EDNord - Istedgade 37A - 9000 Aalborg - telefon 96333500
28<br />
Are precut<br />
Use label sheets that are<br />
Recommended for laser printers<br />
1 In <strong>the</strong> printer driver (Setup tab/Media Type option), select Thick Paper.<br />
2 Select <strong>the</strong> size of <strong>the</strong> label (Paper tab/Original Document Size option).<br />
3 Load <strong>the</strong> label media lengthwise and printing-side up in Tray 1.<br />
4 Adjust <strong>the</strong> paper guides to <strong>the</strong> width of <strong>the</strong> label media.<br />
Note<br />
Improperly adjusted guides may cause poor print quality, media<br />
jams, or printer damage.<br />
5 Print <strong>the</strong> labels.<br />
How do I load and print postcards?<br />
Do not use postcards that are<br />
Coated<br />
Warped or bent<br />
Designed for inkjet printers<br />
Multicolored<br />
Preprinted or multicolored (may result in printer jamming)<br />
Use postcards that are<br />
Do not use OK to use<br />
Full page labels<br />
(uncut)<br />
Postcards (100 × 148 mm/3.9 × 5.8 in.) recommended for laser printers<br />
1 In <strong>the</strong> printer driver (Setup tab/Media Type option), select Postcard.<br />
2 Select <strong>the</strong> size of <strong>the</strong> postcard (Paper tab/Original Document Size<br />
option).<br />
Printing on Media<br />
EDNord - Istedgade 37A - 9000 Aalborg - telefon 96333500
3 Place <strong>the</strong> postcards on a flat surface, and flatten <strong>the</strong>m by pressing down<br />
<strong>the</strong> corners.<br />
4 Remove any media in Tray 1.<br />
5 Load <strong>the</strong> postcard media lengthwise and printing-side up in Tray 1.<br />
6 Adjust <strong>the</strong> paper guides to <strong>the</strong> width of <strong>the</strong> postcards.<br />
Note<br />
Improperly adjusted guides may cause poor print quality, media<br />
jams, or printer damage.<br />
7 Print <strong>the</strong> postcards.<br />
How do I load and print thick stock?<br />
Test all thick stock to ensure acceptable performance and to ensure that <strong>the</strong><br />
image does not shift.<br />
Do not use thick stock that is<br />
Mixed with any o<strong>the</strong>r media in <strong>the</strong> media trays (as this will cause printer<br />
jamming)<br />
Note<br />
Do not mix thick stock with any o<strong>the</strong>r media in <strong>the</strong> same tray, as this will<br />
cause printer jamming.<br />
1 In <strong>the</strong> printer driver (Setup tab/Media Type option), select Thick Paper.<br />
2 Select <strong>the</strong> size of <strong>the</strong> stock (Paper tab/Original Document Size option).<br />
3 Load <strong>the</strong> thick stock media lengthwise and printing-side up in Tray 1.<br />
4 Adjust <strong>the</strong> paper guides to <strong>the</strong> width of <strong>the</strong> thick stock.<br />
Note<br />
Improperly adjusted guides may cause poor print quality, media<br />
jams, or printer damage.<br />
5 Print <strong>the</strong> thick stock.<br />
Printing on Media 29<br />
EDNord - Istedgade 37A - 9000 Aalborg - telefon 96333500
30<br />
How do I load and print transparencies?<br />
Note<br />
Using unsupported transparency media such as coated color<br />
transparencies will result in damaging <strong>the</strong> printer and in voiding your<br />
warranty.<br />
Remove transparency media as soon as possible from <strong>the</strong> output tray to<br />
avoid static buildup.<br />
If you touch <strong>the</strong> face of transparencies with your bare hands, print quality may<br />
be affected. Do not handle transparency media too much.<br />
You can print continuously with transparencies. However, this could affect <strong>the</strong><br />
media feed, depending on <strong>the</strong> media quality, static buildup, and printing environment.<br />
If you have problems loading a large number of transparencies at a<br />
time, try loading only 1–10 sheets.<br />
Do not use transparencies that<br />
Are coated, such as transparencies designed for color printers or copiers<br />
Have static electricity that will cause <strong>the</strong>m to stick toge<strong>the</strong>r<br />
Use transparencies that are<br />
Monochrome, uncoated transparencies (also known as OHP film)<br />
1 In <strong>the</strong> printer driver (Setup tab/Media Type option) select Transparency.<br />
2 Select <strong>the</strong> size of <strong>the</strong> transparency (Paper tab/Original Document Size<br />
option).<br />
3 Fan a few transparencies.<br />
Fanning a large number<br />
will build up static electricity.<br />
4 Load <strong>the</strong> transparency media lengthwise and printing-side up in Tray 1.<br />
5 Adjust <strong>the</strong> paper guides to <strong>the</strong> width of <strong>the</strong> transparencies.<br />
Note<br />
Improperly adjusted guides may cause poor print quality, media<br />
jams, or printer damage.<br />
6 Print <strong>the</strong> transparencies.<br />
7 Immediately remove <strong>the</strong> printed transparencies from <strong>the</strong> output tray.<br />
Printing on Media<br />
EDNord - Istedgade 37A - 9000 Aalborg - telefon 96333500
Manual Duplexing<br />
Select paper with high opacity for duplex (2-sided) printing. For best results,<br />
print a small quantity to make sure <strong>the</strong> opacity is acceptable.<br />
How do I manually duplex?<br />
Media jams may occur if <strong>the</strong> printed sheet(s) reinserted are not<br />
entirely flat.<br />
1 In <strong>the</strong> printer driver (Setup tab/Duplex/Booklet option), select <strong>the</strong> appropriate<br />
setting from Short Edge Binding, Long Edge Binding, Booklet<br />
Left Binding, or Booklet Right Binding.<br />
2 From <strong>the</strong> print dialog box of your software, select <strong>the</strong> necessary settings<br />
and print all pages.<br />
3 Remove <strong>the</strong> single-sided printouts<br />
from <strong>the</strong> output tray, and<br />
<strong>the</strong>n insert <strong>the</strong>m into Tray 1 with<br />
<strong>the</strong> same orientation that <strong>the</strong>y<br />
were fed out.<br />
4 Click Proceed on <strong>the</strong> screen of your PC or press <strong>the</strong> Cancel button.<br />
Manual Duplexing 31<br />
EDNord - Istedgade 37A - 9000 Aalborg - telefon 96333500
32<br />
Manual Duplexing<br />
EDNord - Istedgade 37A - 9000 Aalborg - telefon 96333500
Replacing<br />
Consumables<br />
EDNord - Istedgade 37A - 9000 Aalborg - telefon 96333500<br />
6
Replacing <strong>the</strong> Toner Cartridge<br />
34<br />
When it is time to replace <strong>the</strong> toner cartridge, "Toner Low" displays in <strong>the</strong> Status<br />
Display. The supplies status indication in <strong>the</strong> Status Display is only a reference.<br />
Printing can continue even though <strong>the</strong> warning appears. However,<br />
printing gradually fades out, so replace <strong>the</strong> toner cartridge as soon as possible.<br />
In this manual, a toner car-<br />
Imaging<br />
tridge attached to a drum Drum cartridge<br />
cartridge<br />
cartridge is referred to as an<br />
imaging cartridge.<br />
1 Grab <strong>the</strong> front cover grip and<br />
open <strong>the</strong> front cover.<br />
2 Pull <strong>the</strong> handle of <strong>the</strong> imaging<br />
cartridge toward you, and <strong>the</strong>n<br />
pull out <strong>the</strong> imaging cartridge.<br />
Note<br />
Do not expose <strong>the</strong> imaging<br />
cartridge to light for a long period<br />
of time. If <strong>the</strong> drum cartridge is<br />
exposed to light, decreased<br />
image quality may result.<br />
Toner cartridge<br />
Replacing <strong>the</strong> Toner Cartridge<br />
EDNord - Istedgade 37A - 9000 Aalborg - telefon 96333500
3 Move <strong>the</strong> lever on <strong>the</strong> toner cartridge<br />
in <strong>the</strong> direction of <strong>the</strong><br />
arrow.<br />
4 Using both hands, separate <strong>the</strong><br />
toner cartridge and drum cartridge.<br />
Drum cartridge<br />
Toner cartridge<br />
Note<br />
When separating <strong>the</strong> toner cartridge and drum cartridge, keep <strong>the</strong>m<br />
level.<br />
Do not touch <strong>the</strong> OPC drum under <strong>the</strong> flap of <strong>the</strong> drum cartridge,<br />
o<strong>the</strong>rwise decreased image quality may result.<br />
Do not touch any metal parts of <strong>the</strong> drum cartridge and toner cartridge,<br />
o<strong>the</strong>rwise damage from static electricity may result.<br />
Replacing <strong>the</strong> Toner Cartridge 35<br />
EDNord - Istedgade 37A - 9000 Aalborg - telefon 96333500
36<br />
5 Remove a new toner cartridge from its box.<br />
Do not throw away <strong>the</strong> box. It may be used to pack <strong>the</strong> used toner cartridge.<br />
6 Holding it firmly with both hands,<br />
rock <strong>the</strong> toner cartridge left and<br />
right, to distribute <strong>the</strong> toner<br />
evenly.<br />
7 Remove <strong>the</strong> protective cover<br />
from <strong>the</strong> toner cartridge.<br />
Note<br />
Do not touch <strong>the</strong> developing roller<br />
of <strong>the</strong> toner cartridge, o<strong>the</strong>rwise<br />
decreased image quality may<br />
result.<br />
Replacing <strong>the</strong> Toner Cartridge<br />
EDNord - Istedgade 37A - 9000 Aalborg - telefon 96333500
8 Holding both <strong>the</strong> toner cartridge<br />
and <strong>the</strong> drum cartridge in your<br />
hands, align <strong>the</strong> colored guide<br />
on <strong>the</strong> drum cartridge with <strong>the</strong><br />
matching colored projection on<br />
<strong>the</strong> toner cartridge to fit <strong>the</strong> two<br />
cartridges toge<strong>the</strong>r.<br />
9 Align <strong>the</strong> imaging cartridge with<br />
<strong>the</strong> guides in <strong>the</strong> printer, and<br />
<strong>the</strong>n insert <strong>the</strong> cartridge.<br />
Note<br />
Do not insert <strong>the</strong> imaging cartridge at an angle or with extreme force,<br />
o<strong>the</strong>rwise <strong>the</strong> printer may be damaged.<br />
10 Press on <strong>the</strong> front cover grip and<br />
close <strong>the</strong> front cover.<br />
11 Place <strong>the</strong> used toner cartridge into <strong>the</strong> box that came with <strong>the</strong> new toner<br />
cartridge.<br />
Replacing <strong>the</strong> Toner Cartridge 37<br />
EDNord - Istedgade 37A - 9000 Aalborg - telefon 96333500
Replacing <strong>the</strong> Drum Cartridge<br />
38<br />
When <strong>the</strong> printed documents become faint or blurred, <strong>the</strong> drum cartridge may<br />
be at <strong>the</strong> end of its life.<br />
The drum cartridge has a capacity of about 16,000 (one-page jobs) to 20,000<br />
(continuous printing) letter/A4 pages (at an average of 5% or less toner coverage).<br />
Select <strong>the</strong> Print menu in <strong>the</strong> Status Display, print out <strong>the</strong> Configuration page<br />
(Print Config Page), and <strong>the</strong>n check <strong>the</strong> total number of printouts.<br />
Note<br />
The OPC drum is extremely sensitive to bright light, direct sunlight, and<br />
touch. Always leave <strong>the</strong> drum cartridge in its protective package until<br />
you’re ready to install it.<br />
In this manual, a toner cartridge<br />
attached to a drum<br />
cartridge is an imaging cartridge.<br />
1 Grab <strong>the</strong> front cover grip and<br />
open <strong>the</strong> front cover.<br />
Drum cartridge<br />
Imaging<br />
cartridge<br />
Toner cartridge<br />
Replacing <strong>the</strong> Drum Cartridge<br />
EDNord - Istedgade 37A - 9000 Aalborg - telefon 96333500
2 Pull <strong>the</strong> handle of <strong>the</strong> imaging<br />
cartridge toward you, and <strong>the</strong>n<br />
pull out <strong>the</strong> imaging cartridge.<br />
3 Move <strong>the</strong> lever on <strong>the</strong> toner cartridge<br />
in <strong>the</strong> direction of <strong>the</strong><br />
arrow.<br />
4 Using both hands, separate <strong>the</strong><br />
toner cartridge and drum cartridge.<br />
Note<br />
When separating <strong>the</strong> toner<br />
cartridge and drum cartridge,<br />
keep <strong>the</strong>m level.<br />
Do not touch <strong>the</strong> developing roller<br />
of <strong>the</strong> toner cartridge, o<strong>the</strong>rwise<br />
decreased image quality may<br />
result.<br />
5 Remove a new drum cartridge from its box.<br />
Drum cartridge<br />
Toner cartridge<br />
Replacing <strong>the</strong> Drum Cartridge 39<br />
EDNord - Istedgade 37A - 9000 Aalborg - telefon 96333500
40<br />
Do not throw away <strong>the</strong> box. It will be used to pack <strong>the</strong> used drum cartridge.<br />
6 Holding both <strong>the</strong> toner cartridge<br />
and <strong>the</strong> drum cartridge in your<br />
hands, align <strong>the</strong> colored guide<br />
on <strong>the</strong> drum cartridge with <strong>the</strong><br />
matching colored projection on<br />
<strong>the</strong> toner cartridge to fit <strong>the</strong> two<br />
cartridges toge<strong>the</strong>r.<br />
Note<br />
Do not touch <strong>the</strong> OPC drum under <strong>the</strong> flap of <strong>the</strong> drum cartridge,<br />
o<strong>the</strong>rwise decreased image quality way result.<br />
Do not touch any metal parts of <strong>the</strong> drum cartridge and toner cartridge,<br />
o<strong>the</strong>rwise damage from static electricity may result.<br />
7 Align <strong>the</strong> imaging cartridge with<br />
<strong>the</strong> guides in <strong>the</strong> printer, and<br />
<strong>the</strong>n insert <strong>the</strong> cartridge.<br />
Note<br />
Do not insert <strong>the</strong> imaging<br />
cartridge at an angle or with<br />
extreme force, o<strong>the</strong>rwise <strong>the</strong><br />
printer may be damaged.<br />
Replacing <strong>the</strong> Drum Cartridge<br />
EDNord - Istedgade 37A - 9000 Aalborg - telefon 96333500
8 Press on <strong>the</strong> front cover grip and<br />
close <strong>the</strong> front cover.<br />
9 Place <strong>the</strong> used drum cartridge into <strong>the</strong> box that came with <strong>the</strong> new drum<br />
cartridge.<br />
Replacing <strong>the</strong> Drum Cartridge 41<br />
EDNord - Istedgade 37A - 9000 Aalborg - telefon 96333500
42<br />
Replacing <strong>the</strong> Drum Cartridge<br />
EDNord - Istedgade 37A - 9000 Aalborg - telefon 96333500
Maintaining <strong>the</strong><br />
<strong>Printer</strong><br />
EDNord - Istedgade 37A - 9000 Aalborg - telefon 96333500<br />
7
Cleaning <strong>the</strong> <strong>Printer</strong><br />
44<br />
Exterior<br />
Note<br />
Never spray cleaning solutions directly on <strong>the</strong> printer’s surface; <strong>the</strong><br />
spray could penetrate through <strong>the</strong> air vents of <strong>the</strong> printer and damage<br />
<strong>the</strong> internal circuits.<br />
CAUTION<br />
Do not spill water or detergent into <strong>the</strong> printer; o<strong>the</strong>rwise <strong>the</strong> printer will<br />
be damaged and an electric shock may occur.<br />
Cleaning <strong>the</strong> <strong>Printer</strong><br />
EDNord - Istedgade 37A - 9000 Aalborg - telefon 96333500
Pick-up Roller<br />
1 Turn off <strong>the</strong> printer, unplug <strong>the</strong> power cord, and disconnect all interface<br />
cables before cleaning.<br />
2 Grab <strong>the</strong> front cover grip and<br />
open <strong>the</strong> front cover.<br />
3 Pull <strong>the</strong> handle of <strong>the</strong> imaging<br />
cartridge toward you, and <strong>the</strong>n<br />
pull out <strong>the</strong> imaging cartridge.<br />
Note<br />
Do not expose <strong>the</strong> imaging<br />
cartridge to light for a long<br />
period of time. If <strong>the</strong> drum<br />
cartridge is exposed to light,<br />
decreased image quality may<br />
result.<br />
CAUTION<br />
The fusing unit is extremely hot.<br />
Touching any part near <strong>the</strong> fusing<br />
unit may result in burns.<br />
Do not touch <strong>the</strong> image transfer<br />
roller inside <strong>the</strong> printer, o<strong>the</strong>rwise<br />
decreased image quality may<br />
result.<br />
Cleaning <strong>the</strong> <strong>Printer</strong> 45<br />
EDNord - Istedgade 37A - 9000 Aalborg - telefon 96333500
46<br />
4 Wipe <strong>the</strong> pick-up roller with a<br />
soft, dry cloth.<br />
5 Align <strong>the</strong> imaging cartridge with<br />
<strong>the</strong> guides in <strong>the</strong> printer, and<br />
<strong>the</strong>n insert <strong>the</strong> cartridge.<br />
Note<br />
Do not insert <strong>the</strong> imaging<br />
cartridge at an angle or with<br />
extreme force, o<strong>the</strong>rwise <strong>the</strong><br />
printer may be damaged.<br />
6 Press on <strong>the</strong> front cover grip and<br />
close <strong>the</strong> front cover.<br />
Cleaning <strong>the</strong> <strong>Printer</strong><br />
EDNord - Istedgade 37A - 9000 Aalborg - telefon 96333500
Troubleshooting<br />
EDNord - Istedgade 37A - 9000 Aalborg - telefon 96333500<br />
8
Indicator Messages<br />
48<br />
The control panel indicators (Ready, Error) provide information about your<br />
printer and help you locate each problem.<br />
Error Messages<br />
These messages indicate errors which you must correct before a print job<br />
can continue or <strong>the</strong> printer status returned to “Ready”.<br />
Ready<br />
indicator<br />
(green)<br />
Error<br />
indicator<br />
(orange)<br />
Condition Action<br />
Blinking Blinking Communication Error. Check <strong>the</strong> printer<br />
cable.<br />
Video Under-run Turn off <strong>the</strong> printer.<br />
After a few seconds,<br />
turn on <strong>the</strong> printer.<br />
Change to a lower<br />
resolution.<br />
Rapid blinking alternately<br />
No media in <strong>the</strong> tray<br />
specified in <strong>the</strong> printer<br />
driver.<br />
Media size error<br />
If <strong>the</strong> “Auto Continue”<br />
option has been activated<br />
in <strong>the</strong> Status Display,<br />
<strong>the</strong> sheet already<br />
fed in, is automatically<br />
ejected after a predetermined<br />
time.<br />
Waiting for <strong>the</strong> Manual<br />
Duplex.<br />
Load <strong>the</strong> appropriate<br />
type of media into<br />
Tray 1.<br />
Load <strong>the</strong> appropriate<br />
size media into Tray 1.<br />
Load <strong>the</strong> second side<br />
of <strong>the</strong> media. (Refer to<br />
<strong>the</strong> “Manual Duplexing”<br />
on page 31.)<br />
Waiting for a proof print Press <strong>the</strong> Cancel button<br />
if <strong>the</strong> proof print is<br />
acceptable. If it is not<br />
acceptable, hold down<br />
<strong>the</strong> Cancel button for<br />
more than 5 seconds<br />
to cancel <strong>the</strong> current<br />
job.<br />
Indicator Messages<br />
EDNord - Istedgade 37A - 9000 Aalborg - telefon 96333500
Ready<br />
indicator<br />
(green)<br />
Off Slow blinking<br />
Service Messages<br />
Paper empty Load media into Tray<br />
1.<br />
Off Blinking Media jam Clear <strong>the</strong> jam, close<br />
<strong>the</strong> front cover, and<br />
<strong>the</strong>n continue with <strong>the</strong><br />
print job.<br />
Off On Front cover or top cover<br />
is open.<br />
Close <strong>the</strong> front cover<br />
or top cover.<br />
This message indicates a more serious fault that can only be corrected by a<br />
customer service engineer.<br />
Ready<br />
indicator<br />
(green)<br />
Error<br />
indicator<br />
(orange)<br />
Error<br />
indicator<br />
(orange)<br />
Off Rapid blinking<br />
Condition Action<br />
Condition Action<br />
Fatal error Turn <strong>the</strong> printer<br />
off, <strong>the</strong>n on again.<br />
If <strong>the</strong> problem<br />
persists, contact<br />
your vendor or<br />
authorized service<br />
provider.<br />
Indicator Messages 49<br />
EDNord - Istedgade 37A - 9000 Aalborg - telefon 96333500
Clearing Jams<br />
50<br />
Understanding <strong>the</strong> printer’s media path will help you locate media jams.<br />
1 Grab <strong>the</strong> front cover grip and<br />
open <strong>the</strong> front cover.<br />
2 Pull <strong>the</strong> handle of <strong>the</strong> imaging<br />
cartridge toward you, and <strong>the</strong>n<br />
pull out <strong>the</strong> imaging cartridge.<br />
Note<br />
Do not expose <strong>the</strong> imaging<br />
cartridge to light for a long period<br />
of time, o<strong>the</strong>rwise decreased<br />
image quality may result.<br />
Transfer roller<br />
Pick-up roller<br />
EDNord - Istedgade 37A - 9000 Aalborg - telefon 96333500<br />
Feed roller<br />
Clearing Jams
3 Pull out <strong>the</strong> jammed media along<br />
<strong>the</strong> feeding direction.<br />
Note<br />
If media is jammed in <strong>the</strong> fusing unit,<br />
pull <strong>the</strong> media downward to remove<br />
it.<br />
CAUTION<br />
The fusing unit is extremely hot.<br />
Touching any part near <strong>the</strong> fusing<br />
unit may result in burns.<br />
Do not touch <strong>the</strong> image transfer<br />
roller inside <strong>the</strong> printer, o<strong>the</strong>rwise<br />
decreased image quality may<br />
result.<br />
Clearing Jams 51<br />
EDNord - Istedgade 37A - 9000 Aalborg - telefon 96333500
52<br />
4 Align <strong>the</strong> imaging cartridge with<br />
<strong>the</strong> guides in <strong>the</strong> printer, and<br />
<strong>the</strong>n insert <strong>the</strong> cartridge.<br />
Note<br />
Do not insert <strong>the</strong> imaging<br />
cartridge at an angle or with<br />
extreme force, o<strong>the</strong>rwise <strong>the</strong><br />
printer may be damaged.<br />
5 Press on <strong>the</strong> front cover grip and<br />
close <strong>the</strong> front cover.<br />
EDNord - Istedgade 37A - 9000 Aalborg - telefon 96333500<br />
Clearing Jams
Solving Problems-Printing Quality<br />
Symptom Cause Solution<br />
Blank page The toner cartridge may be<br />
defective.<br />
Black page The toner cartridge may be<br />
defective.<br />
Your printer may require<br />
servicing.<br />
Print too light The toner cartridge may<br />
running out of toner.<br />
The toner cartridge may be<br />
defective.<br />
The “Contrast” and “Brightness”<br />
of an image is not set<br />
correctly in <strong>the</strong> printer driver.<br />
Remove <strong>the</strong> toner cartridge<br />
and check it for damage.<br />
Replace <strong>the</strong> toner cartridge, if<br />
necessary.<br />
Remove <strong>the</strong> toner cartridge<br />
and check it for damage.<br />
Replace <strong>the</strong> toner cartridge, if<br />
necessary.<br />
Contact your local<br />
vendor, or refer to <strong>the</strong> General<br />
Information Guide.<br />
Remove <strong>the</strong> toner cartridge<br />
and shake it left and right a few<br />
times to distribute remaining<br />
toner.<br />
If <strong>the</strong> problem persists, replace<br />
<strong>the</strong> toner cartridge.<br />
Remove <strong>the</strong> toner cartridge<br />
and check it for damage.<br />
Replace <strong>the</strong> toner cartridge, if<br />
necessary.<br />
In <strong>the</strong> printer driver, select <strong>the</strong><br />
Quality tab and adjust <strong>the</strong><br />
Contrast and Brightness and<br />
try printing again.<br />
Solving Problems-Printing Quality 53<br />
EDNord - Istedgade 37A - 9000 Aalborg - telefon 96333500
54<br />
Symptom Cause Solution<br />
Print too dark The toner cartridge may be<br />
defective.<br />
Blurred<br />
background<br />
Uneven print<br />
density<br />
The “Contrast” and “Brightness”<br />
of an image is not set<br />
correctly in <strong>the</strong> printer driver.<br />
The toner cartridge may be<br />
defective.<br />
The toner may be unevenly<br />
distributed inside <strong>the</strong> toner<br />
cartridge.<br />
The toner cartridge may be<br />
defective.<br />
The image transfer roller may<br />
be defective.<br />
Irregularities The media may have absorbed<br />
some moisture due to high<br />
humidity or because of direct<br />
contact with water.<br />
Remove <strong>the</strong> toner cartridge<br />
and check it for damage.<br />
Replace <strong>the</strong> toner cartridge, if<br />
necessary.<br />
In <strong>the</strong> printer driver, select <strong>the</strong><br />
Quality tab and adjust <strong>the</strong><br />
Contrast and Brightness and<br />
try printing again.<br />
Remove <strong>the</strong> toner cartridge<br />
and check it for damage.<br />
Replace <strong>the</strong> toner cartridge, if<br />
necessary.<br />
Remove <strong>the</strong> toner cartridge<br />
and shake it left and right a few<br />
times to distribute remaining<br />
toner.<br />
Remove <strong>the</strong> toner cartridge<br />
and check it for damage.<br />
Replace <strong>the</strong> toner cartridge, if<br />
necessary.<br />
Contact your local vendor.<br />
Since toner will not adhere well<br />
to wet media, replace <strong>the</strong><br />
media you are using with dry<br />
media and try printing again.<br />
Solving Problems-Printing Quality<br />
EDNord - Istedgade 37A - 9000 Aalborg - telefon 96333500
Symptom Cause Solution<br />
White or black<br />
lines<br />
Dark lines on<br />
<strong>the</strong> edges.<br />
Toner<br />
smudges<br />
The toner cartridge may be<br />
defective.<br />
Remove <strong>the</strong> toner cartridge<br />
and check it for damage.<br />
Replace <strong>the</strong> toner cartridge, if<br />
necessary.<br />
The transfer roller is dirty. Contact your local vendor.<br />
The toner may be unevenly<br />
distributed inside <strong>the</strong> toner<br />
cartridge.<br />
The toner cartridge may be<br />
defective.<br />
Smudges on <strong>the</strong> media indicate<br />
a dirty feed roller.<br />
Remove <strong>the</strong> toner cartridge<br />
and shake it left and right a few<br />
times to distribute remaining<br />
toner.<br />
Remove <strong>the</strong> toner cartridge<br />
and check it for damage.<br />
Replace <strong>the</strong> toner cartridge, if<br />
necessary.<br />
Contact your local vendor.<br />
Solving Problems-Printing Quality 55<br />
EDNord - Istedgade 37A - 9000 Aalborg - telefon 96333500
56<br />
Symptom Cause Solution<br />
There is insufficient<br />
fusing<br />
or <strong>the</strong> image<br />
comes off<br />
when rubbed.<br />
The media is moist from<br />
humidity.<br />
Media with specifications not<br />
covered by <strong>the</strong> printer warranty<br />
is being used.<br />
The media type may be incorrectly<br />
set.<br />
Remove <strong>the</strong> moist media and<br />
replace it with new, dry media.<br />
Use media that is covered by<br />
<strong>the</strong> printer warranty.<br />
When printing envelopes,<br />
labels, thick stock, and transparencies,<br />
<strong>the</strong> appropriate<br />
media type must be specified<br />
in <strong>the</strong> printer driver.<br />
Solving Problems-Printing Quality<br />
EDNord - Istedgade 37A - 9000 Aalborg - telefon 96333500
Appendix<br />
EDNord - Istedgade 37A - 9000 Aalborg - telefon 96333500<br />
A
Safety Specifications<br />
Technical Specifications<br />
58<br />
<strong>Printer</strong><br />
Safety standards U.S. model UL 60950, CSA C22.2 No. 60950<br />
European model EU Directive 73/23/EEC<br />
EU Directive 93/68/EEC<br />
EN 60950 (IEC 60950)<br />
China model GB 4943<br />
EMC standards U.S. model FCC part 15 subpart B class B<br />
ICES-003<br />
European model EU Directive 89/336/EEC<br />
EN 55022 (CISPR Pub. 22) class B<br />
EN 61000-3-2<br />
EN 61000-3-3<br />
China model GB 9254 class B, GB 17625.1<br />
Australian model AS/NZS 3548 class B<br />
<strong>Printer</strong><br />
Type Desktop laser beam printer<br />
Print system Electrostatic dry powder imaging system<br />
Exposure system Laser diode + polygon mirror scanning<br />
Developing system Electrophotographic printing system<br />
Resolution 1200dpi × 1200dpi (at half speed),<br />
600dpi × 600dpi or 1200dpi × 600dpi<br />
Print speed 600dpi × 600dpi or 1200dpi × 600dpi<br />
20 pages per minute for A4<br />
21 pages per minute for letter<br />
1200dpi × 1200dpi<br />
10 pages per minute for A4 or letter<br />
First print 1200dpi × 600 dpi<br />
Within 13 seconds (A4/Letter)<br />
1200dpi × 1200 dpi<br />
Within 22 seconds (A4/Letter)<br />
Warm-up time 21 seconds or less at startup<br />
Safety Specifications<br />
EDNord - Istedgade 37A - 9000 Aalborg - telefon 96333500
Media sizes • Paper—Letter, Legal, Executive, G Letter,<br />
Statement, Folio, Letter Plus, UK Quarto,<br />
Foolscap, G Legal, 16K, A4, A5, B5 JIS, Chinese<br />
16K, Chinese 32K, custom paper sizes<br />
• Envelopes—#10, Monarch, DL, C5, C6, B5<br />
(ISO), Choukei-3Gou and Choukei-4Gou<br />
• Postcard, Double Postcard<br />
Paper/Media • Plain paper (60 to 90g/m2 ; 16 to 24 lb.)<br />
• Recycled paper (60 to 90g/m2 ; 16 to 24 lb.)<br />
• Transparencies<br />
• Envelopes<br />
• Thick paper (90 to 163g/m2 ; 24 to 43 lb.)<br />
• Postcard<br />
• Letterhead<br />
• Label sheet<br />
Paper feeding • Tray 1<br />
Input capacity • Tray 1: 150 sheets<br />
Output capacity • Output tray: 100 sheets<br />
Operating temperature 10° to 35°C (50° to 95°F)<br />
Operating humidity 15 to 85%<br />
Power supply 110-127 V, 50-60 Hz<br />
220-240 V, 50-60 Hz<br />
Power consumption 120 V: 900 W<br />
220-240 V: 900 W<br />
Amperage 120 V: 8.0 A or less<br />
220-240 V: 4.5 A or less<br />
Acoustic Noise Printing: 54 dB or less<br />
Standby: 35 dB or less<br />
External dimensions (with<br />
Tray1 and <strong>the</strong> output tray<br />
closed)<br />
Height: 283 mm (11.1 in.)<br />
Width: 387 mm (15.2 in.)<br />
Depth: 291 mm (11.5 in.)<br />
Weight <strong>Printer</strong>: approximately 6kg (13.2 lb.)<br />
Drum cartridge: approximately 0.3kg (0.7 lb.)<br />
Toner cartridge: approximately 0.5kg (1.1 lb.)<br />
Interface IEEE 1284 compliant type B (Compatible/Nibble/ECP)<br />
USB Revision 1.1 compliant<br />
CPU Naltec N1 chip<br />
Standard memory 8 MB<br />
Technical Specifications 59<br />
EDNord - Istedgade 37A - 9000 Aalborg - telefon 96333500
60<br />
Parallel Interface Connectors and Cable<br />
Connectors <strong>Printer</strong>: Parallel 36-pin connector<br />
Computer: EIA 25-pin connector<br />
Cable type Shielded<br />
Each signal and earth pair should be twisted<br />
Pin assignments IEEE 1284 compliant type B connector<br />
USB Interface Connectors and Cable<br />
Connectors <strong>Printer</strong>: Series B plug<br />
Computer: Series A plug<br />
Cable type Require twisted data conductors or a shielded<br />
Pin assignments 1: V BUS<br />
2: D+<br />
3: D-<br />
4: GND Shell: Shield<br />
Consumables Life Expectancies Chart<br />
Item Average Life Expectancy (in Simplex Pages)<br />
Toner Cartridge At 5% coverage, using A4-size media<br />
Starter Cartridge = 1,500 printing<br />
Replacement Cartridge = 3,000 continuous<br />
printing or 2,400 intermittent printing.<br />
6,000 continuous printing or 4,800 intermittent<br />
printing.<br />
Drum cartridge 16,000 intermittent printing<br />
(for example, one-page jobs)<br />
20,000 continuous printing<br />
Technical Specifications<br />
EDNord - Istedgade 37A - 9000 Aalborg - telefon 96333500
Our Concern for Environmental Protection<br />
As an ENERGY STAR ® Partner, we have determined that this machine meets<br />
<strong>the</strong> ENERGY STAR Guidelines for energy efficiency.<br />
What is an ENERGY STAR product?<br />
An ENERGY STAR product has a special feature that allows it to automatically<br />
switch to a “low-power mode” after a period of inactivity. An ENERGY<br />
STAR product uses energy more efficiently, saves you money on utility bills<br />
and helps protect <strong>the</strong> environment.<br />
Interference-Causing Equipment Standard<br />
(ICES-003 ISSUE 3)<br />
For Canadian Users<br />
This Class B digital apparatus complies with Canadian ICES-003.<br />
Cet appareil numérique de la classe B est conforme à la norme NMB-003 du<br />
Canada.<br />
Our Concern for Environmental Protection 61<br />
EDNord - Istedgade 37A - 9000 Aalborg - telefon 96333500
FCC Part 15 - Radio Frequency Devices<br />
62<br />
For United States Users<br />
FCC: Declaration of Conformity<br />
Product Type Laser Beam <strong>Printer</strong><br />
Product Name PagePro 1350W<br />
Options<br />
This device complies with Part 15 of <strong>the</strong> FCC Rules<br />
Operation is subject to <strong>the</strong> following two conditions:<br />
• This device may not cause harmful interference, and this device must<br />
accept any interference received, including interference that may cause<br />
undesired operation.<br />
This equipment has been tested and found to comply with <strong>the</strong> limits for<br />
a Class B digital device, pursuant to Part 15 of <strong>the</strong> FCC Rules. These<br />
limits are designed to provide reasonable protection against harmful<br />
interference in a residential installation. This equipment generates,<br />
uses and can radiate radio frequency energy and, if not installed and<br />
used in accordance with <strong>the</strong> instructions, may cause harmful interference<br />
to radio communications. However, <strong>the</strong>re is no guarantee that<br />
interference will not occur in a particular installation. If this equipment<br />
does cause harmful interference to radio or television reception, which<br />
can be determined by turning <strong>the</strong> equipment off and on, <strong>the</strong> user is<br />
encouraged to try to correct <strong>the</strong> interface by one or more of <strong>the</strong> following<br />
measures:<br />
Reorient or relocate <strong>the</strong> receiving antenna.<br />
Increase <strong>the</strong> separation between <strong>the</strong> equipment and receiver.<br />
Connect <strong>the</strong> equipment into an outlet on a circuit different from that<br />
to which <strong>the</strong> receiver is connected.<br />
Consult <strong>the</strong> dealer or an experienced radio/TV technician for help.<br />
FCC Part 15 - Radio Frequency Devices<br />
EDNord - Istedgade 37A - 9000 Aalborg - telefon 96333500
WARNING!<br />
The design and production of this unit conform to FCC regulations, and<br />
any changes or modifications must be registered with <strong>the</strong> FCC and are<br />
subject to FCC control. Any changes made by <strong>the</strong> purchaser or user<br />
without first contacting <strong>the</strong> manufacturer will be subject to penalty<br />
under FCC regulations.<br />
This device must be used with a shielded parallel interface cable and<br />
shielded USB interface cable.<br />
The use of non-shielded cables is likely to result in interference with<br />
radio communications and is prohibited under FCC rules.<br />
CE Marking (Declaration of Conformity)<br />
For European Users<br />
This product complies with <strong>the</strong> following EU directives:<br />
89/336/EEC, 73/23/EEC, and 93/68/EEC directives.<br />
This declaration is valid for <strong>the</strong> areas of <strong>the</strong> European Union (EU) only.<br />
This device must be used with a shielded parallel interface cable and<br />
shielded USB interface cable. The use of non-shielded cables is likely to<br />
result in interference with radio communications and is prohibited under 89/<br />
336/EEC rules.<br />
CISPR 22 and Local Rules<br />
This device must be used with a shielded parallel interface cable and<br />
shielded USB interface cable.<br />
The use of non-shielded cables is likely to result in interference with radio<br />
communications and is prohibited under CISPR 22 and local rules.<br />
Acoustic Noise<br />
Machine Noise Regulation 3 GSGV, 18.01.1991: The sound pressure level at<br />
<strong>the</strong> operator position according to EN27779 is equal to or less than 70dB (A).<br />
CE Marking (Declaration of Conformity) 63<br />
EDNord - Istedgade 37A - 9000 Aalborg - telefon 96333500
Safety Information<br />
64<br />
This section contains detailed instructions on <strong>the</strong> operation and maintenance<br />
of this machine. To achieve optimum utility of this device, all operators should<br />
carefully read and follow <strong>the</strong> instructions in this manual.<br />
Please read <strong>the</strong> next section before using this device. It contains important<br />
information related to user safety and preventing equipment problems.<br />
Make sure you observe all of <strong>the</strong> precautions listed in this manual.<br />
Note that some parts of <strong>the</strong> contents of this section may not correspond<br />
with <strong>the</strong> purchased product.<br />
Warning and Precaution Symbols<br />
Meaning of Symbols<br />
Ignoring this warning could cause serious injury or<br />
even death.<br />
Ignoring this caution could cause injury or damage to<br />
property.<br />
A triangle indicates a danger against which you should take<br />
precaution.<br />
This symbol warns against cause burn.<br />
A diagonal line indicates a prohibited course of action.<br />
This symbol warns against dismantling <strong>the</strong> device.<br />
A black circle indicates an imperative course of action.<br />
This symbol indicates you must unplug <strong>the</strong> device.<br />
Safety Information<br />
EDNord - Istedgade 37A - 9000 Aalborg - telefon 96333500
WARNING<br />
• Do not modify this product, as a fire, electrical shock, or<br />
breakdown could result. If <strong>the</strong> product employs a laser,<br />
<strong>the</strong> laser beam source could cause blindness.<br />
• Do not attempt to remove <strong>the</strong> covers and panels which<br />
have been fixed to <strong>the</strong> product. Some products have a<br />
high-voltage part or a laser beam source inside that could<br />
cause an electrical shock or blindness.<br />
• Only use <strong>the</strong> power cord supplied in <strong>the</strong> package. Failure<br />
to use this cord could result in a fire or electrical shock.<br />
• Use only <strong>the</strong> specified power source voltage. Failure to<br />
do that could result in a fire or electrical shock.<br />
• Do not use a multiple outlet adapter to connect any o<strong>the</strong>r<br />
appliances or machines. Use of a power outlet for more<br />
than <strong>the</strong> marked current value could result in a fire or<br />
electrical shock.<br />
• Do not unplug and plug in <strong>the</strong> power cord with a wet<br />
hand, as an electrical shock could result.<br />
• Plug <strong>the</strong> power cord all <strong>the</strong> way into <strong>the</strong> power outlet.<br />
Failure to do this could result in a fire or electrical shock.<br />
• Do not scratch, abrade, place a heavy object on, heat,<br />
twist, bend, pull on, or damage <strong>the</strong> power cord. Use of a<br />
damaged power cord (exposed core wire, broken wire,<br />
etc.) could result in a fire or breakdown.<br />
Should any of <strong>the</strong>se conditions be found, immediately<br />
turn OFF <strong>the</strong> power switch, unplug <strong>the</strong> power cord from<br />
<strong>the</strong> power outlet, and <strong>the</strong>n call your authorized service<br />
representative.<br />
• In principle, do not use an extension cord. Use of an<br />
extension cord could cause a fire or electrical shock.<br />
Contact your authorized service representative if an<br />
extension cord is required.<br />
Safety Information 65<br />
EDNord - Istedgade 37A - 9000 Aalborg - telefon 96333500
66<br />
• Do not place a flower vase or o<strong>the</strong>r container that contains<br />
water, metal clips or o<strong>the</strong>r small metallic objects on<br />
this product. Spilled water or metallic objects dropped<br />
inside <strong>the</strong> product could result in a fire, electrical shock,<br />
or break-down.<br />
• Should a piece of metal, water, or any o<strong>the</strong>r similar foreign<br />
matter get inside <strong>the</strong> product, immediately turn OFF<br />
<strong>the</strong> power switch, unplug <strong>the</strong> power cord from <strong>the</strong> power<br />
outlet, and <strong>the</strong>n call your authorized service representative.<br />
• If this product becomes inordinately hot or emits smoke,<br />
or unusual odor or noise, immediately turn OFF <strong>the</strong><br />
power switch, unplug <strong>the</strong> power cord from <strong>the</strong> power outlet,<br />
and <strong>the</strong>n call your authorized service representative.<br />
If you keep on using it as is, a fire or electrical shock<br />
could result.<br />
• If this product has been dropped or its cover damaged,<br />
immediately turn OFF <strong>the</strong> power switch, unplug <strong>the</strong><br />
power cord from <strong>the</strong> power outlet, and <strong>the</strong>n call your<br />
authorized service representative. If you keep on using it<br />
as is, a fire or electrical shock could result.<br />
• Do not throw <strong>the</strong> toner cartridge or toner into an open<br />
flame. The hot toner may scatter and cause burns or<br />
o<strong>the</strong>r damage.<br />
• Connect <strong>the</strong> power cord to an electrical outlet that is<br />
equipped with a grounding terminal.<br />
Safety Information<br />
EDNord - Istedgade 37A - 9000 Aalborg - telefon 96333500
CAUTION<br />
• Do not use flammable sprays, liquids, or gases near this<br />
product, as a fire could result.<br />
• Do not leave a toner unit or drum unit in a place within<br />
easy reach of children.<br />
Licking or ingesting any of <strong>the</strong>se things could injure your<br />
health.<br />
• Do not let any object plug <strong>the</strong> ventilation holes of this<br />
product. Heat could accumulate inside <strong>the</strong> product,<br />
resulting in a fire or malfunction.<br />
• Do not install this product at a site that is exposed to<br />
direct sunlight, or near an air conditioner or heating apparatus.<br />
The resultant temperature changes inside <strong>the</strong><br />
product could cause a malfunction, fire, or electrical<br />
shock.<br />
• Do not place <strong>the</strong> product in a dusty place, or a site<br />
exposed to soot or steam, near a kitchen table, bath, or a<br />
humidifier. A fire, electrical shock, or breakdown could<br />
result.<br />
• Do not place this product on an unstable or tilted bench,<br />
or in a location subject to a lot of vibration and shock. It<br />
could drop or fall, causing personal injury or mechanical<br />
breakdown.<br />
• After installing this product, mount it on a secure base. If<br />
<strong>the</strong> unit moves or falls, it may cause personal injury.<br />
• Do not store toner units and PC drum units near a floppy<br />
disk or watch that are susceptible to magnetism. They<br />
could cause <strong>the</strong>se products to malfunction.<br />
• Do not place any objects around <strong>the</strong> power plug as <strong>the</strong><br />
power plug may be difficult to pull out when an emergency<br />
occurs.<br />
• Do not touch <strong>the</strong> electrical contacts that are located<br />
inside <strong>the</strong> top cover and underneath <strong>the</strong> cartridge as an<br />
electrostatic discharge may damage <strong>the</strong> printer.<br />
• The inside of this product has areas subject to high temperature,<br />
which may cause burns. When checking <strong>the</strong><br />
inside of <strong>the</strong> unit for malfunctions such as a paper misfeed,<br />
do not touch <strong>the</strong> locations (around <strong>the</strong> fusing unit,<br />
etc.) which are indicated by a “Caution! Hot Surface” caution<br />
label.<br />
Safety Information 67<br />
EDNord - Istedgade 37A - 9000 Aalborg - telefon 96333500
68<br />
Working Safely with your Laser <strong>Printer</strong><br />
Notes on your Safety and Operating Safety<br />
Working improperly with <strong>the</strong> printer can result in health hazards, electric<br />
shocks and even fires. Before you unpack <strong>the</strong> laser printer, you should make<br />
yourself familiar with this information on your safety and operating safety.<br />
CAUTION<br />
• The socket-outlet shall be installed near <strong>the</strong> machine and<br />
shall be easily accessible as <strong>the</strong> power plug may be difficult<br />
to pull out when an emergency occurs.<br />
• Always use this product in a well ventilated location.<br />
Operating <strong>the</strong> product in a poorly ventilated room for an<br />
extended period of time could injure your health. Ventilate<br />
<strong>the</strong> room at regular intervals.<br />
• Whenever moving this product, be sure to disconnect <strong>the</strong><br />
power cord and o<strong>the</strong>r cables. Failure to do this could<br />
damage <strong>the</strong> cord or cable, resulting in a fire, electrical<br />
shock, or breakdown.<br />
• When moving this product, always hold it by <strong>the</strong> locations<br />
specified in <strong>the</strong> user manual or o<strong>the</strong>r documents. If <strong>the</strong><br />
unit falls it may cause severe personal injury. The product<br />
may also be damaged or malfunction.<br />
• Remove <strong>the</strong> power plug from <strong>the</strong> outlet more than one<br />
time a year and clean <strong>the</strong> area between <strong>the</strong> plug terminals.<br />
Dust that accumulates between <strong>the</strong> plug terminals<br />
may cause a fire.<br />
• When unplugging <strong>the</strong> power cord, be sure to hold onto<br />
<strong>the</strong> plug. Pulling on <strong>the</strong> power cord could damage <strong>the</strong><br />
cord, resulting in a fire or electrical shock.<br />
Observe <strong>the</strong> following information:<br />
Make sure that <strong>the</strong> power cord is correctly plugged into <strong>the</strong> socket and<br />
that <strong>the</strong> socket is at all times visible and readily accessible.<br />
Do not pull on <strong>the</strong> cord to pull <strong>the</strong> power plug out of <strong>the</strong> socket as this may<br />
damage <strong>the</strong> cord. The result could be an electric shock or a fire.<br />
Remove <strong>the</strong> power plug from <strong>the</strong> socket if <strong>the</strong> machine will not be in use<br />
for an extended period of time.<br />
Do not remove <strong>the</strong> power cord from <strong>the</strong> socket with wet hands as this may<br />
result in an electric shock.<br />
Safety Information<br />
EDNord - Istedgade 37A - 9000 Aalborg - telefon 96333500
Do not move <strong>the</strong> unit unless <strong>the</strong> power cord has been removed from <strong>the</strong><br />
socket. O<strong>the</strong>rwise you may damage <strong>the</strong> cord. The result could be a<br />
short-circuit or a fire.<br />
Do not place any heavy objects on <strong>the</strong> power cord. Do not pull or kink <strong>the</strong><br />
cord as this can result in damage to <strong>the</strong> cord. The result could be an electric<br />
shock or a fire.<br />
Make sure that <strong>the</strong> machine is not standing on a cord to ano<strong>the</strong>r machine<br />
as this can result in damage to that cord. The result could be a fire or<br />
improper functioning of <strong>the</strong> unit in question.<br />
Make sure that <strong>the</strong> power supply to <strong>the</strong> unit has <strong>the</strong> correct voltage. O<strong>the</strong>rwise<br />
<strong>the</strong> result could be a fire or an electric shock.<br />
Switch off <strong>the</strong> unit immediately and unplug <strong>the</strong> power cord if <strong>the</strong> power<br />
supply cord is damaged. Failure to do so could result in a fire or an electric<br />
shock. Inform your customer support technical specialist.<br />
Use only extension cords that are designed for at least <strong>the</strong> maximum<br />
power rating of <strong>the</strong> machine. Extension cords with lower ratings can result<br />
in <strong>the</strong> unit overheating and can even lead to a fire.<br />
Perform only <strong>the</strong> procedures that are described in this manual. Using <strong>the</strong><br />
machine improperly can result in a fire or an electric shock.<br />
Do not place any heavy objects on <strong>the</strong> machine.<br />
Do not open any covers on <strong>the</strong> machine while printing is in progress.<br />
Do not switch off <strong>the</strong> unit while printing is in progress.<br />
Do not place any magnetic objects near <strong>the</strong> machine.<br />
Do not use any flammable sprays, liquids or gases in <strong>the</strong> vicinity of <strong>the</strong><br />
machine.<br />
Do not remove any safety devices and do not alter <strong>the</strong> construction of <strong>the</strong><br />
machine. The unit is equipped with high-voltage components. Using <strong>the</strong><br />
machine improperly can result in a fire or an electric shock.<br />
Do not insert any paper clips, staples or o<strong>the</strong>r small metal objects into<br />
openings on <strong>the</strong> machine. The result could be an electric shock or a fire. If<br />
metal pieces are fed into <strong>the</strong> machine, switch it off immediately, disconnect<br />
<strong>the</strong> power cord and inform your customer support technical specialist.<br />
Do not place coffee cups, drinks bottles or o<strong>the</strong>r containers with liquids in<br />
<strong>the</strong>m on <strong>the</strong> machine. If liquid enters <strong>the</strong> machine <strong>the</strong> result could be an<br />
electric shock or a fire. If liquid does get into <strong>the</strong> machine, switch it off<br />
immediately, disconnect <strong>the</strong> power cord and inform your customer support<br />
technical specialist.<br />
If <strong>the</strong> machine becomes unusually hot, or if you notice smoke or an<br />
unusual odor coming from <strong>the</strong> machine, switch it off immediately and<br />
Safety Information 69<br />
EDNord - Istedgade 37A - 9000 Aalborg - telefon 96333500
70<br />
remove <strong>the</strong> power cord from <strong>the</strong> socket. Inform your customer support<br />
technical specialist.<br />
Laser Safety<br />
This printer is a page printer which operated by means of a laser. There is no<br />
possibility of danger from <strong>the</strong> laser, provided <strong>the</strong> printer is operated according<br />
to <strong>the</strong> instructions in this manual.<br />
Since radiation emitted by <strong>the</strong> laser is completely confined within protective<br />
housings and external covers, <strong>the</strong> laser beam cannot escape from <strong>the</strong><br />
machine during any phase of user operation.<br />
Internal Laser Radiation<br />
Maximum average radiation power:<br />
36.903µW at <strong>the</strong> laser aperture of <strong>the</strong> print head unit.<br />
Wavelength: 770-800 nm<br />
This product employs a Class 3b laser diode that emits an invisible laser<br />
beam.<br />
The laser diode and <strong>the</strong> scanning polygon mirror are incorporated in <strong>the</strong> print<br />
head unit.<br />
The print head unit is NOT A FIELD SERVICEABLE ITEM.<br />
Therefore, <strong>the</strong> print head unit should not be opened under any circumstances.<br />
WARNING!<br />
The print head unit is<br />
NOT A FIELD SERVICE<br />
ITEM. Therefore, <strong>the</strong><br />
print head unit should<br />
not be opened under<br />
any circumstances.<br />
Laser aperture of <strong>the</strong> print head unit.<br />
Safety Information<br />
EDNord - Istedgade 37A - 9000 Aalborg - telefon 96333500
Laser Safety Label<br />
A laser safety label is attached to <strong>the</strong> outside of <strong>the</strong> machine as shown below.<br />
For United States Users<br />
CDRH Regulations<br />
This printer is certified as a Class 1 laser product under <strong>the</strong> Regulation<br />
Performance Standard according to <strong>the</strong> Food, Drug, and Cosmetic Act of<br />
1990. Compliance is mandatory for laser products marketed in <strong>the</strong> United<br />
States, and is reported to <strong>the</strong> Center for Devices and Radiological Health<br />
(CDRH) of <strong>the</strong> U.S. Food and Drug Administration (FDA) of <strong>the</strong> Department<br />
of Health and Human Services (DHHS). This means that <strong>the</strong> product does<br />
not produce hazardous laser radiation.<br />
The label shown above indicated compliance with <strong>the</strong> CDRH regulations and<br />
must be attached to laser products marketed in <strong>the</strong> United States.<br />
CAUTION<br />
Use of controls, adjustments, or performance of procedures o<strong>the</strong>r than those<br />
specified in this manual may result in hazardous radiation exposure.<br />
This is a semiconductor laser. The maximum power of <strong>the</strong> laser diode is<br />
15 mW, and <strong>the</strong> wavelength is 770–800 nm.<br />
Safety Information 71<br />
EDNord - Istedgade 37A - 9000 Aalborg - telefon 96333500
72<br />
For Users in All Countries<br />
CAUTION<br />
Use of controls, adjustments or performance of procedures o<strong>the</strong>r than those<br />
specified in this manual may result in hazardous radiation exposure.<br />
This machine is certified as a Class 1 laser product. This means that <strong>the</strong><br />
machine does not produce hazardous laser radiation.<br />
This is a semiconductor laser. The maximum power of <strong>the</strong> laser diode is<br />
15 mW and <strong>the</strong> wavelength is 770-800 nm.<br />
For Denmark Users<br />
ADVARSEL<br />
Usynlig laserstråling ved åbning, når sikkerhedsafbrydere er ude af funktion.<br />
Undgå udsættelse for stråling.<br />
Klasse 1 laser produkt der opfylder IEC60825 sikkerheds kravene.<br />
Dansk: Dette er en halvlederlaser. Laserdiodens højeste styrke er 15 mW og<br />
bølgelængden er 770-800 nm.<br />
For Norway Users<br />
ADVERSEL<br />
Dersom apparatet brukes på annen måte enn spesifisert i denne bruksanvisning,<br />
kan brukeren utsettes for unsynlig laserstråling som overskrider<br />
grensen for laser klass 1.<br />
Dette en halvleder laser. Maksimal effekt till laserdiode er 15 mW og bølgelengde<br />
er 770-800 nm.<br />
For Finland, Sweden Users<br />
LOUKAN 1 LASERLAITE<br />
KLASS 1 LASER APPARAT<br />
VAROITUS!<br />
Laitteen käyttäminen muulla kuin tässä käyttöohjeessa mainitulla tavalla<br />
saattaa altistaa käyttäjän turvallisuusluokan 1 ylittävälle näkymättömälle<br />
lasersäteilylle.<br />
Tämä on puolijohdelaser. Laserdiodin suurin teho on 15 mW ja aallonpituus<br />
on 770 – 800 nm.<br />
Safety Information<br />
EDNord - Istedgade 37A - 9000 Aalborg - telefon 96333500
VARNING!<br />
Om apparaten används på annat sätt än i denna bruksanvisning specificerats,<br />
kan användaren utsättas för osynlig laserstrålning, som överskrider<br />
gränsen för laserklass 1.<br />
Det här är en halvledarlaser. Den maximala effekten för laserdioden är<br />
15 mW och våglängden är 770 – 800 nm.<br />
VARO!<br />
Avattaessa ja suojalukitus ohitettaessa olet alttiina näkymättömälle lasersäteilylle.<br />
Älä katso säteeseen.<br />
VARNING!<br />
Osynlig laserstrålning när denna del är öppnad och spärren är urkopplad.<br />
Betrakta ej strålen.<br />
Ozone release<br />
During printer operation, a small quantity of ozone is released. This amount is<br />
not large enough to harm anyone adversely. However, be sure <strong>the</strong> room<br />
where <strong>the</strong> machine is being used has adequate ventilation, especially if you<br />
are printing a high volume of materials, or if <strong>the</strong> machine is being used continuously<br />
over a long period.<br />
Safety Information 73<br />
EDNord - Istedgade 37A - 9000 Aalborg - telefon 96333500
74<br />
Safety Information<br />
EDNord - Istedgade 37A - 9000 Aalborg - telefon 96333500
Index<br />
C<br />
CE Marking 63<br />
Cleaning<br />
Exterior 44<br />
Pick-up Roller 45<br />
D<br />
Drum cartridge<br />
Replacing 38<br />
Duplex 31<br />
I<br />
Indicator 3<br />
Error messages 48<br />
Service messages 49<br />
Status message 4<br />
<strong>Installing</strong><br />
USB Device driver 8, 9<br />
Interference-causing equipment<br />
standard 61<br />
L<br />
Laser<br />
CDRH 71<br />
Internal laser radiation 70<br />
Laser safety 70<br />
Laser safety label 71<br />
Loading<br />
Media 21, 24<br />
Index 75<br />
EDNord - Istedgade 37A - 9000 Aalborg - telefon 96333500
M<br />
Manual Duplexing 31<br />
Media<br />
Clearing jams 50<br />
Loading 21, 24<br />
Size 20<br />
Storage 21<br />
Type 21<br />
Weight 20<br />
P<br />
Page margins 23<br />
Paper tab 14<br />
Printable area 23<br />
<strong>Printer</strong><br />
Parts 2<br />
<strong>Printer</strong> driver 13<br />
Paper tab 14<br />
Quality tab 14<br />
Setting 12<br />
Setup tab 14<br />
Printing<br />
Envelope 25<br />
Label 27<br />
Postcard 28<br />
Thick stock 29<br />
Transparency 30<br />
Q<br />
Quality tab 14<br />
S<br />
Safety information 64<br />
Setup tab 14<br />
Status display<br />
Closing 18<br />
Opening 16<br />
Using 16<br />
76<br />
T<br />
Toner cartridge<br />
Replacing 34<br />
Troubles shooting 47<br />
Clearing jams 50<br />
U<br />
USB<br />
USB Device driver 8, 9<br />
EDNord - Istedgade 37A - 9000 Aalborg - telefon 96333500<br />
Index