service manual - Expert-CM
service manual - Expert-CM
service manual - Expert-CM

You also want an ePaper? Increase the reach of your titles
YUMPU automatically turns print PDFs into web optimized ePapers that Google loves.
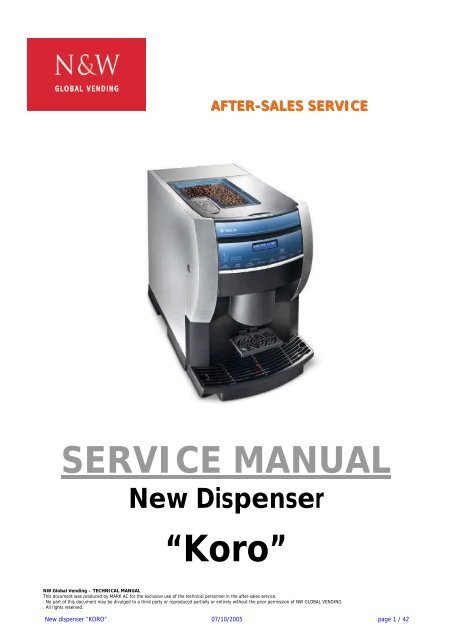
AFTER-SALES SERVICE<br />
SERVICE MANUAL<br />
New Dispenser<br />
“Koro”<br />
NW Global Vending – TECHNICAL MANUAL<br />
This document was produced by MARK AC for the exclusive use of the technical personnel in the after-sales <strong>service</strong>.<br />
. No part of this document may be divulged to a third party or reproduced partially or entirely without the prior permission of NW GLOBAL VENDING<br />
. All rights reserved.<br />
New dispenser “KORO” 07/10/2005 page 1 / 42
TABLE OF CONTENTS<br />
1<br />
2<br />
2.1<br />
2.2<br />
3<br />
4<br />
5<br />
6<br />
7<br />
8<br />
9<br />
10<br />
11<br />
12<br />
13<br />
14<br />
15<br />
16<br />
17<br />
18<br />
19<br />
20<br />
21<br />
22<br />
23<br />
24<br />
25<br />
26<br />
27<br />
28<br />
29<br />
30<br />
31<br />
32<br />
PLANNED MODELS<br />
MAIN EXTERNAL COMPONENTS<br />
MAIN INTERNAL COMPONENTS<br />
REAR COMPARTMENT WITHOUT PROTECTIVE CASING<br />
LIST OF MAIN COMPONENTS<br />
TECHNICAL DATA AND FEATURES<br />
ELECTRICAL SAFETY AND RELEVANT STANDARDS<br />
REQUIREMENT FOR THE USERS<br />
HYDRAULIC LAYOUT OF ESPRESSO VERSION<br />
HYDRAULIC LAYOUT OF INSTANT VERSION<br />
HYDRAULIC LAYOUT OF FRESH BREWER VERSION<br />
HYDRAULIC LAYOUT OF VARIABLE CHAMBER ESPRESSO<br />
INTERNAL LAYOUTS<br />
ELECTRICAL SYSTEMS – CONNECTIONS<br />
CONNECTION OF ELECTRONIC BOARDS<br />
WIRING DIAGRAMS<br />
ACTUATION BOARD – CONFIGURATIONS<br />
SIGMA BREWER CONTROL BOARD<br />
PUSH-BUTTON BOARD<br />
BOILER CONTROL BOARD<br />
AIR-BREAK AND BOILERS (INSTANT & ESPRESSO)<br />
PUMPS AND BYPASS<br />
ESPRESSO COFFEE, FRESH-BREWER UNIT & SIGMA<br />
BREWER<br />
SPOUTS ASSEMBLY<br />
POWDER PRODUCT CONTAINER AND DOSER DEVICES<br />
ASSY.<br />
MIXER UNIT<br />
COFFEE GRINDER AND DOSER DEVICE ASSEMBLY<br />
POWDER AND LIQUID DOSE TABLES<br />
ROUTINE AND EXTRAORDINARY MAINTENANCE<br />
PROGRAM<br />
TROUBLE-SHOOTING<br />
HACCP DIRECTIVE<br />
DAILY CLEANING AND HYGIENE PROGRAM<br />
DAILY CLEANING AND HYGIENE PROGRAM FRESH-<br />
BREWER UNIT<br />
MONTHLY CLEANING AND HYGIENE PROGRAM<br />
NW Global Vending – TECHNICAL MANUAL<br />
This document was produced by MARK AC for the exclusive use of the technical personnel in the after-sales <strong>service</strong>.<br />
. No part of this document may be divulged to a third party or reproduced partially or entirely without the prior permission of NW GLOBAL VENDING<br />
. All rights reserved.<br />
Pag. 3 - 4<br />
Pag. 5<br />
Pag. 6<br />
Pag. 7-8<br />
Pag. 9<br />
Pag. 10<br />
Pag. 11<br />
Pag. 11<br />
Pag. 12<br />
Pag. 13<br />
Pag. 14<br />
Pag. 15<br />
Pag. 16<br />
Pag. 17<br />
Pag. 17- 18<br />
Pag. 19<br />
Pag. 20-21<br />
Pag. 22<br />
Pag. 23<br />
Pag. 23<br />
Pag. 24 - 26<br />
Pag. 27<br />
Pag. 28 -29<br />
Pag. 30<br />
Pag. 31<br />
Pag. 32<br />
Pag. 33<br />
Pag. 34<br />
Pag. 35<br />
Pag. 36 - 38<br />
Pag. 39<br />
Pag. 40<br />
Pag. 41<br />
Pag. 42<br />
New dispenser “KORO” 07/10/2005 page 2 / 42
1 - PLANNED MODELS<br />
INSTANT VERSION (OPEN AND CLOSED DOOR)<br />
ESPRESSO VERSION (OPEN AND CLOSED DOOR)<br />
NW Global Vending – TECHNICAL MANUAL<br />
This document was produced by MARK AC for the exclusive use of the technical personnel in the after-sales <strong>service</strong>.<br />
. No part of this document may be divulged to a third party or reproduced partially or entirely without the prior permission of NW GLOBAL VENDING<br />
. All rights reserved.<br />
New dispenser “KORO” 07/10/2005 page 3 / 42
FRESH-BREWER VERSION (OPEN AND CLOSED DOOR)<br />
Internal water supply tank<br />
External water supply tank<br />
NW Global Vending – TECHNICAL MANUAL<br />
This document was produced by MARK AC for the exclusive use of the technical personnel in the after-sales <strong>service</strong>.<br />
. No part of this document may be divulged to a third party or reproduced partially or entirely without the prior permission of NW GLOBAL VENDING<br />
. All rights reserved.<br />
New dispenser “KORO” 07/10/2005 page 4 / 42
1<br />
2<br />
7<br />
8<br />
9<br />
10<br />
11<br />
2 - MAIN EXTERNAL COMPONENTS<br />
NW Global Vending – TECHNICAL MANUAL<br />
This document was produced by MARK AC for the exclusive use of the technical personnel in the after-sales <strong>service</strong>.<br />
. No part of this document may be divulged to a third party or reproduced partially or entirely without the prior permission of NW GLOBAL VENDING<br />
. All rights reserved.<br />
New dispenser “KORO” 07/10/2005 page 5 / 42<br />
3<br />
4<br />
5<br />
6
22<br />
12<br />
2.1 - MAIN INTERNAL COMPONENTS<br />
2<br />
4<br />
21<br />
13<br />
8<br />
Fustino<br />
fondi liquidi<br />
6<br />
23 24<br />
Contenitori<br />
solubili<br />
25<br />
14<br />
Mixer<br />
Ugelli mobili<br />
NW Global Vending – TECHNICAL MANUAL<br />
This document was produced by MARK AC for the exclusive use of the technical personnel in the after-sales <strong>service</strong>.<br />
. No part of this document may be divulged to a third party or reproduced partially or entirely without the prior permission of NW GLOBAL VENDING<br />
. All rights reserved.<br />
19<br />
20<br />
15<br />
New dispenser “KORO” 07/10/2005 page 6 / 42<br />
1<br />
Espresso Version<br />
Fresh Brewer Version<br />
26 27 28<br />
29<br />
16<br />
17<br />
18
2.2 REAR COMPARTMENT WITHOUT PROTECTIVE<br />
VISTA CON PORTA APERTA<br />
CASING<br />
Detail of machine board<br />
(FRESH-BREWER version only)<br />
NW Global Vending – TECHNICAL MANUAL<br />
This document was produced by MARK AC for the exclusive use of the technical personnel in the after-sales <strong>service</strong>.<br />
. No part of this document may be divulged to a third party or reproduced partially or entirely without the prior permission of NW GLOBAL VENDING<br />
. All rights reserved.<br />
Detail of CPU / actuation machine board<br />
New dispenser “KORO” 07/10/2005 page 7 / 42<br />
30<br />
31<br />
32<br />
33<br />
34<br />
35<br />
36<br />
37<br />
38<br />
39
Perspective view without protective casing<br />
NW Global Vending – TECHNICAL MANUAL<br />
This document was produced by MARK AC for the exclusive use of the technical personnel in the after-sales <strong>service</strong>.<br />
. No part of this document may be divulged to a third party or reproduced partially or entirely without the prior permission of NW GLOBAL VENDING<br />
. All rights reserved.<br />
40<br />
41<br />
43<br />
Side view without protective casing<br />
open-top boiler side (FB – Instant)<br />
Side view without protective casing<br />
– espresso boiler side<br />
New dispenser “KORO” 07/10/2005 page 8 / 42<br />
44<br />
42
3 - LIST OF MAIN COMPONENTS<br />
N° Ref. DESCRIPTION<br />
1 Lock<br />
2 Cabinet<br />
3 User interface<br />
4 Selection keypad<br />
5 Dispensing unit<br />
6 Dispensing compartment<br />
7 Back protective casing<br />
8 Grid fuses<br />
9 Main switch<br />
10 Water inlet solenoid valve<br />
11 Power supply cable<br />
12 Grinder / doser device<br />
13 Instant product container<br />
14 Mixers<br />
15 Door<br />
16 Coffee beans door<br />
17 Coffee beans hopper<br />
18 Decaf coffee door (powder)<br />
19 Water supply tank (espresso)<br />
20 Drip tray<br />
21 Solid waste container<br />
22 Brewer unit Z3000<br />
23 Coffee container for FB (powder)<br />
24 Instant product container<br />
25 Dispensing compartment<br />
26 Hot water nozzle<br />
27 FB unit SIGMA BREWER<br />
28 Mixers<br />
29 Protective casing<br />
30 Actuation board<br />
31 Steam exhauster<br />
32 Boiler heating element actuation board<br />
33 Grid fuses<br />
34 Main switch<br />
35 Sigma Brewer control board (FB version only)<br />
36 Transformer fuses<br />
37 Transformer<br />
38 Grid noise suppressor<br />
39 Power supply cable clamp<br />
40 Coffee grinder unit<br />
41 Espresso boiler compartment<br />
42 Espresso boiler<br />
43 Electromagnetic pump<br />
44 Open-top boiler (Instant & Fresh brewer)<br />
NW Global Vending – TECHNICAL MANUAL<br />
This document was produced by MARK AC for the exclusive use of the technical personnel in the after-sales <strong>service</strong>.<br />
. No part of this document may be divulged to a third party or reproduced partially or entirely without the prior permission of NW GLOBAL VENDING<br />
. All rights reserved.<br />
New dispenser “KORO” 07/10/2005 page 9 / 42
4 – TECHNICAL DATA AND FEATURES<br />
Height 500 mm<br />
Width 508 mm<br />
Depth 528 mm<br />
Overall depth with door open 724 mm<br />
Weight 28 Kg<br />
Power supply voltage 230 V AC - 50 Hz<br />
Installed power 1500 W (espresso)<br />
2400 W (FB / I)<br />
Payment systems used<br />
The machine is pre-set to use<br />
(by means of specific kits) payment systems<br />
coin mechanisms and 24 V DC validators with protocols<br />
EXECUTIVE BDV, MDB<br />
Water supply:<br />
From the mains with a water pressure of 5 to 85 N/cm 2<br />
BASE VERSIONS:<br />
Espresso – Instant – Fresh brewer<br />
INSTALLED BOILERS AND TEMPERATURE<br />
One pressure boiler for the espresso version<br />
One open-top boiler for instant and Fresh-brew<br />
versions<br />
Temperature setting via software<br />
SAFETY DEVICES<br />
Main switch (at the back) – Main switch upon opening the door<br />
Water inlet solenoid valve with overflow device<br />
Manual-reset boiler safety thermostat<br />
Manual-reset instant boiler anti-boiling thermostat<br />
Air-break float block<br />
Presence of liquid waste tray – Presence of coffee grounds tray<br />
Boiler sensor control (short-circuit or failure)<br />
Double heating and timing protection for:<br />
Pump – Doser devices – Coffee unit ratiomotor – Coffee grinder – Mixer motors<br />
Fuse protection for: Transformers, electronic boards and main wiring<br />
CONTROLS<br />
Presence of water<br />
Presence of coffee<br />
Operating temperature reached<br />
NW Global Vending – TECHNICAL MANUAL<br />
This document was produced by MARK AC for the exclusive use of the technical personnel in the after-sales <strong>service</strong>.<br />
. No part of this document may be divulged to a third party or reproduced partially or entirely without the prior permission of NW GLOBAL VENDING<br />
. All rights reserved.<br />
New dispenser “KORO” 07/10/2005 page 10 / 42<br />
500<br />
528<br />
508<br />
331<br />
724<br />
331
5 - ELECTRICAL SAFETY AND RELEVANT STANDARDS<br />
The vending machine New Dispenser was designed and made in conformity with the<br />
provisions of the following directives and related European standards:<br />
MACHINE SAFETY DIRECTIVE EEC 98/37<br />
EN 60529 UNI EN 292 –1-2 IEC 695-2-2<br />
LOW VOLTAGE DIRECTIVE EEC 73/23; EEC 89/392; EEC<br />
89/336<br />
(the low voltage directive covers all equipment powered with voltage below 400 V AC)<br />
The following European standards are applied:<br />
EN 60335-2-14 EN 60335-2-15 EN 60335-2-24 EN 60335-2-75<br />
ELECTROMAGNETIC COMPATIBILITY DIRECTIVE<br />
EN 61000-3-3 EN 61000-4-2 EN 61000-4-3 EN 61000-4-4 EN 61000-4-5 EN 61000-4-11<br />
---…----…---…---<br />
With regard to Low Voltage and Electromagnetic Compatibility this vending machine was tested and<br />
certified by a certifying body authorised by ministerial decree: IMQ.<br />
It is therefore prohibited (on pain of voiding the warranty and the responsibility of the certification) to<br />
replace any electrical component with non-original parts during the routine and extraordinary maintenance<br />
operations.<br />
Therefore it is also prohibited to:<br />
Tamper with or deactivate the safety systems installed in the vending machine.<br />
Install the vending machine outdoor or in any case in a place that is not protected from the weather.<br />
Use the vending machine for purposes other than those indicated in the sales contract.<br />
Connect the vending machine by means of extension cords or multiple sockets and/or adapters.<br />
Use water jets for cleaning.<br />
Then, it is also compulsory to:<br />
Verify the conformity and suitability of power supply line and of the power outlet.<br />
6 – REQUIREMENT FOR THE USERS<br />
For safety purposes, three different operators with different qualifications have been defined.<br />
USER<br />
The user is practically the final user who buys the products from the machine.<br />
The user must not have any access whatsoever to the inside of the machine.<br />
PERSON RESPONSIBLE FOR REFILLING AND ROUTINE CLEANING<br />
The person responsible for refilling has the key for opening the machine and is in charge of the refilling,<br />
cleaning and internal hygiene of the machine.<br />
He must not have any access to energised parts or moving parts.<br />
MAINTENANCE TECHNICIAN<br />
The maintenance technician must be a highly skilled person and must be aware of the electrical hazards in<br />
the event of complex technical operations and can operate with the machine switched on and the door<br />
open, using the safety key supplied.<br />
NW Global Vending – TECHNICAL MANUAL<br />
This document was produced by MARK AC for the exclusive use of the technical personnel in the after-sales <strong>service</strong>.<br />
. No part of this document may be divulged to a third party or reproduced partially or entirely without the prior permission of NW GLOBAL VENDING<br />
. All rights reserved.<br />
New dispenser “KORO” 07/10/2005 page 11 / 42
6<br />
5<br />
4<br />
3<br />
2<br />
1<br />
7 – HYDRAULIC LAYOUT “ESPRESSO”<br />
ESPRESSO VERSION COMPONENTS<br />
REF. DESCRIPTION REF. DESCRIPTION REF. DESCRIPTION<br />
1 Spouts assembly 2 Pump 3 Mixers<br />
4 Boiler assembly 5 Brewer unit 6 Solenoid valve block<br />
7 Bypass 8 Water supply tank 9 Volumetric counter<br />
N.B. The diagram shown is given only as a reference as it may differ for each version.<br />
NW Global Vending – TECHNICAL MANUAL<br />
This document was produced by MARK AC for the exclusive use of the technical personnel in the after-sales <strong>service</strong>.<br />
. No part of this document may be divulged to a third party or reproduced partially or entirely without the prior permission of NW GLOBAL VENDING<br />
. All rights reserved.<br />
New dispenser “KORO” 07/10/2005 page 12 / 42<br />
7<br />
8<br />
9
2<br />
1<br />
INSTANT VERSION COMPONENTS<br />
8 – HYDRAULIC LAYOUT INSTANT<br />
REF. DESCRIPTION REF. DESCRIPTION REF. DESCRIPTION<br />
1 Spouts assembly 2 Mixers 3 Solenoid valves<br />
4 Boiler assembly 5 Water supply pump 6 Water supply tank<br />
N.B. The diagram shown is given only as a reference as it may differ for each version.<br />
NW Global Vending – TECHNICAL MANUAL<br />
This document was produced by MARK AC for the exclusive use of the technical personnel in the after-sales <strong>service</strong>.<br />
. No part of this document may be divulged to a third party or reproduced partially or entirely without the prior permission of NW GLOBAL VENDING<br />
. All rights reserved.<br />
3<br />
New dispenser “KORO” 07/10/2005 page 13 / 42<br />
4<br />
5<br />
6
3<br />
9 – HYDRAULIC LAYOUT “FRESH BREWER”<br />
1<br />
COMPONENTI VERSIONE FRESH BREWER<br />
2<br />
REF. DESCRIPTION REF. DESCRIPTION REF. DESCRIPTION<br />
1 Spouts assembly 2 Sigma Brewer boiler 3 Mixer<br />
4 Solenoid valves 5 Boiler 6 Water supply pump<br />
7 Water supply tank 8 9<br />
N.B. The diagram shown is given only as a reference as it may differ for each version.<br />
NW Global Vending – TECHNICAL MANUAL<br />
This document was produced by MARK AC for the exclusive use of the technical personnel in the after-sales <strong>service</strong>.<br />
. No part of this document may be divulged to a third party or reproduced partially or entirely without the prior permission of NW GLOBAL VENDING<br />
. All rights reserved.<br />
New dispenser “KORO” 07/10/2005 page 14 / 42<br />
5<br />
4<br />
6<br />
7
3<br />
2<br />
1<br />
10 – HYDRAULIC LAYOUT<br />
“VARIABLE CHAMBER ESPRESSO ”<br />
COMPONENTS OF ESPRESSO VERSION WITH VARIABLE BREWING CHAMBER<br />
REF. DESCRIPTION REF. DESCRIPTION REF. DESCRIPTION<br />
1 Spouts assembly 2 Mixer unit 3 Brewer unit<br />
4 Chamber with piston 5 Solenoid valve assembly 6 Discharge solenoid valve<br />
7 By-pass (4 bar) 8 Boiler 9 By-pass (12 bar)<br />
10 Piston solenoid valve 11 Water supply tank 12 Volumetric counter<br />
13 Vibration pump<br />
4<br />
13<br />
This diagram is used exclusively for variable chamber brewer units, as it differs also with regard to the electrical circuit<br />
and it is specific to some versions<br />
NW Global Vending – TECHNICAL MANUAL<br />
This document was produced by MARK AC for the exclusive use of the technical personnel in the after-sales <strong>service</strong>.<br />
. No part of this document may be divulged to a third party or reproduced partially or entirely without the prior permission of NW GLOBAL VENDING<br />
. All rights reserved.<br />
5<br />
New dispenser “KORO” 07/10/2005 page 15 / 42<br />
6<br />
7<br />
8<br />
9<br />
10<br />
11<br />
12
EXAMPLES OF INTERNAL LAYOUT<br />
11- INTERNAL LAYOUTS<br />
NOTE: THE FOLLOWING I LAYOUTS ARE ONLY GIVEN AS AN EXAMPLE FOR THE PURPOSE OF INDICATING THE CONFIGURATION<br />
POSSIBILITIES. REFER TO THE TABLES SUPPLIED WITH THE MACHINE FOR THE ACTUAL LAYOUT.<br />
Layout Koro Espresso Layout Koro Fresh Brewer<br />
Layout Koro Instant<br />
NW Global Vending – TECHNICAL MANUAL<br />
This document was produced by MARK AC for the exclusive use of the technical personnel in the after-sales <strong>service</strong>.<br />
. No part of this document may be divulged to a third party or reproduced partially or entirely without the prior permission of NW GLOBAL VENDING<br />
. All rights reserved.<br />
New dispenser “KORO” 07/10/2005 page 16 / 42
12 - ELECTRICAL SYSTEMS – CONNECTIONS<br />
The machine is designed to operate under a single-phase voltage of 230 V AC (+5-10V)<br />
It is protected with a main 15 A fuse on both phases.<br />
With regard to the transformer: the primary winding is protected with a 125 mA fuse<br />
the secondary winding is protected with a 1.25 mA fuse<br />
It is fitted with a door opening safety switch.<br />
The power cable can be supplied as standard feature and chosen among the following types:<br />
1) HO5 RN – F copper with a 3 x 1.5 mm 2 section<br />
2) HO5 V V – F ,, ,, ,, ,,<br />
3) HO5 V V – F ,, ,, ,, ,,<br />
Fitted with a fixed SCHUKO ** plug.<br />
NB **: it is possible that for some specific markets a cable with specific plug be fitted in accordance with the<br />
regulations in force in that country.<br />
In the event of replacement cables of exactly the same characteristics must be used.<br />
Since the “KORO” vending machine is approved by an electrical safety certification institute (IMQ),<br />
replacements with non-original components are not permitted.<br />
Otherwise the electrical safety certificate and the warranty will be void.<br />
3<br />
4<br />
13 – CONNECTION OF ELECTRONIC BOARDS<br />
2<br />
Scheda attuazioni<br />
View of power supply unit compartment and actuation board<br />
(Espresso version without protective casing)<br />
1 Actuation board<br />
2 Steam exhauster<br />
3 Terminal strip<br />
4 Switch and fuses<br />
5 Boiler control board<br />
NW Global Vending – TECHNICAL MANUAL<br />
This document was produced by MARK AC for the exclusive use of the technical personnel in the after-sales <strong>service</strong>.<br />
. No part of this document may be divulged to a third party or reproduced partially or entirely without the prior permission of NW GLOBAL VENDING<br />
. All rights reserved.<br />
6 Secondary winding fuses<br />
7 Noise suppressor<br />
8 Transformer<br />
New dispenser “KORO” 07/10/2005 page 17 / 42<br />
5<br />
6<br />
7<br />
8
BOARD CONNECTION DIAGRAM<br />
F<br />
230 V<br />
N<br />
Signal DESCRIPTION<br />
SAL<br />
SM FB<br />
Power supply card<br />
Sigma brewer control board<br />
SM Actuation and control board<br />
CCG Mechanical general counter<br />
SM 1 Push-button and display control card<br />
Liquid crystal display<br />
LCD<br />
24 V<br />
12 V<br />
P46<br />
SM FB<br />
SAL J12 J10<br />
SM<br />
Actuation<br />
J 14<br />
IDEC Decaf. coffee door switch<br />
P5<br />
SM 1<br />
NB: The above listed codes are indicated in the wiring diagrams and on information sheets supplied with the machine.<br />
NW Global Vending – TECHNICAL MANUAL<br />
This document was produced by MARK AC for the exclusive use of the technical personnel in the after-sales <strong>service</strong>.<br />
. No part of this document may be divulged to a third party or reproduced partially or entirely without the prior permission of NW GLOBAL VENDING<br />
. All rights reserved.<br />
New dispenser “KORO” 07/10/2005 page 18 / 42
14 - WIRING DIAGRAM<br />
ESPRESSO MODEL<br />
FRESH BREWER MODEL<br />
NW Global Vending – TECHNICAL MANUAL<br />
This document was produced by MARK AC for the exclusive use of the technical personnel in the after-sales <strong>service</strong>.<br />
. No part of this document may be divulged to a third party or reproduced partially or entirely without the prior permission of NW GLOBAL VENDING<br />
. All rights reserved.<br />
New dispenser “KORO” 07/10/2005 page 19 / 42
15 - ACTUATION BOARD - CONFIGURATIONS<br />
ACTUATION BOARD<br />
This board, placed at the back of the machine, (see Fig. 29)<br />
processes the information from the push-button card and<br />
from the payment system; it also controls the actuations, the<br />
input signals and the boiler board.<br />
The 15 VAC voltage necessary for operating the board is<br />
supplied by the transformer, protected by a 125 mAT fuse on<br />
the primary winding and by a 1.25 AT fuse on the secondary<br />
winding; the voltage is rectified and stabilised directly by the<br />
board.<br />
This board houses the Flash EPROM. The control software of<br />
the board is installed directly (via RS232) in the<br />
microprocessor.<br />
- The red LED (7) indicates the operating status of the<br />
boiler heating element;<br />
- The red LED (9) for resetting the CPU glows during the<br />
board reset;<br />
- The green LED (11) blinking indicates that the<br />
microprocessor is working correctly;<br />
- The yellow LED (12) indicates the presence of 12 V DC.<br />
10 11 12<br />
9<br />
8<br />
7<br />
6<br />
13<br />
5 4 3 2 1<br />
14 15 16 17 18<br />
NW Global Vending – TECHNICAL MANUAL<br />
This document was produced by MARK AC for the exclusive use of the technical personnel in the after-sales <strong>service</strong>.<br />
. No part of this document may be divulged to a third party or reproduced partially or entirely without the prior permission of NW GLOBAL VENDING<br />
. All rights reserved.<br />
New dispenser “KORO” 07/10/2005 page 20 / 42
1 - 230 V~ power users<br />
2 - Input signal<br />
3 - Can-Bus connection<br />
4 - Can-Bus connection<br />
5 - Relay expansion connection<br />
6 - Boiler control probes<br />
7 - Red LED - boiler heating element<br />
8 - Input signal<br />
9 - Red LED<br />
10 - Not used<br />
11 - Green LED<br />
12 - Yellow LED<br />
13 - To the push-button board<br />
14 - Connector for board programming (RS232)<br />
15 – Up-Key connector<br />
16 - Board power supply (15Vac)<br />
17 - Relays K1 to K16<br />
18 - Connector for 230 V AC power users<br />
SM1: REFERENCE TO RELAY CODE AND ACTUATIONS - ESPRESSO / FB<br />
ESPRESSO CONFIGURATION FRESH BREWER CONFIGURATION<br />
K 1 Starting pump Pump<br />
K 2 Not used Not used<br />
K 3 Whipper motor 1 Whipper motor 1<br />
K 4 Not used Not used<br />
K 5 Coffee dispensing solenoid valve Instant prod. solenoid valve 3<br />
K 6 Discharge solenoid valve 1 Fresh Brewer solenoid valve<br />
K 7 Coffee brewer motor Not used<br />
K 8 Discharge solenoid valve 2 Not used<br />
K 9 Instant prod. solenoid valve 1 Instant prod. solenoid valve 1<br />
K 10 Doser device motor 1 Doser device motor 1<br />
K 11 Instant prod. solenoid valve 2 Instant prod. solenoid valve 2<br />
K 12 Not used Not used<br />
K 13 Not used Not used<br />
K 14 Mains water inlet solenoid valve Mains water inlet solenoid valve<br />
K 15 Not used Not used<br />
K 16 Coffee grinder ratiomotor Doser device 2<br />
NW Global Vending – TECHNICAL MANUAL<br />
This document was produced by MARK AC for the exclusive use of the technical personnel in the after-sales <strong>service</strong>.<br />
. No part of this document may be divulged to a third party or reproduced partially or entirely without the prior permission of NW GLOBAL VENDING<br />
. All rights reserved.<br />
New dispenser “KORO” 07/10/2005 page 21 / 42
16 - SIGMA BREWER CONTROL BOARD<br />
DETAIL OF REAR SECTION WITHOUT PROTECTIVE CASING<br />
3<br />
2<br />
1<br />
13 12 11 10<br />
6 5<br />
9 8 7<br />
This board, located at the back of the machine, is<br />
additional to the actuation board and controls the<br />
SIGMA BREWER unit function only for the FB version.<br />
(see photo without protective casing)<br />
It processes the information from the brewer unit and<br />
controls its functions.<br />
The board also controls the dispensing of fresh product<br />
and the flow diverter solenoid valve from<br />
spout/external nozzle.<br />
The 24 VAC voltage necessary for operating the board<br />
is supplied by the transformer, protected by a 800 mAT<br />
fuse on the primary winding and by a 3.15 AT fuse on<br />
the secondary winding; the voltage is rectified and<br />
stabilised directly by the board.<br />
- The green LED (7) indicates the presence of +5 V;<br />
- The green LED (8) indicates the presence of 34 V<br />
DC variable;<br />
- The green LED (9) indicates the presence of 34 V<br />
DC.<br />
NW Global Vending – TECHNICAL MANUAL<br />
This document was produced by MARK AC for the exclusive use of the technical personnel in the after-sales <strong>service</strong>.<br />
. No part of this document may be divulged to a third party or reproduced partially or entirely without the prior permission of NW GLOBAL VENDING<br />
. All rights reserved.<br />
New dispenser “KORO” 07/10/2005 page 22 / 42<br />
4<br />
1 - To Sigma brewer unit<br />
2 - Not used<br />
3 - MDFB and EVDEV<br />
4 - Board power supply 24Vac<br />
5 - Not used<br />
6 - Not used<br />
7 - Green LED +5V<br />
8 - Green LED 34Vdc variable<br />
9 - Green LED 34 Vdc<br />
10 - Tray detection micro-switch<br />
11 - Tray detection micro-switch<br />
12 - Can-bus with actuation board<br />
13 - Can-bus with actuation board
17 - PUSH-BUTTON BOARD<br />
2 3 4 5 6 7 8 9 10 11 12 13<br />
STRC<br />
1<br />
1 - Selection buttons<br />
2 - Not used<br />
3 - To mechanical counter (optional)<br />
4 - To actuation/CPU board<br />
5 - Input<br />
6 - Display adjustment trimmer<br />
7 - To display<br />
8 - 12 Vdc validators<br />
9 - Not used<br />
10 - RS232 serial port<br />
11 - Not used<br />
12 - Programming access button<br />
13 - Wash button<br />
14 - Display card<br />
18 - BOILER CONTROL BOARD<br />
Triac board<br />
This board is controlled by the machine board and is<br />
powered under 230 V AC.<br />
It used for controlling and starting the boiler heating<br />
element.<br />
Connector J2 is connected to a 230V AC phase<br />
Connector J1 receives the information from the SM board<br />
that sends a consent signal to activate the triac for the<br />
power supply to the heating element.<br />
NW Global Vending – TECHNICAL MANUAL<br />
This document was produced by MARK AC for the exclusive use of the technical personnel in the after-sales <strong>service</strong>.<br />
. No part of this document may be divulged to a third party or reproduced partially or entirely without the prior permission of NW GLOBAL VENDING<br />
. All rights reserved.<br />
14<br />
New dispenser “KORO” 07/10/2005 page 23 / 42
19 – AIR-BREAK & BOILERS<br />
In the currently coded versions the use of an air-break is not planned; in the instant and fresh brewer versions the<br />
open-top boiler is used, which is equipped with a level control system and therefore the relevant functions are<br />
incorporated in the boiler (see next paragraph).<br />
In the espresso versions an internal water supply tank is used, having the functions of the air-break.<br />
There will be in any case some versions with water supply from the mains, where an air-break will be fitted;<br />
therefore the proper documentation will be supplied later.<br />
The air-break is a functional unit that has the function of keeping the water level constant and to have signal<br />
indicating the lack of water from the mains, and in such event it allows the completion of the current selection.<br />
Furthermore (in the espresso version) it serves the purpose of have a water reserve at atmospheric pressure, so<br />
that the pump can draw the water dose needed for the selection and send it to the espresso boiler without pressure<br />
changes that may affect the volumetric counter reading.<br />
The water level is ensured by a float that triggers a microswitch, keeping the level between a factory set minimum<br />
and maximum (it very important not to replace the microswitch with any one of different mechanical<br />
characteristics, as a variety of malfunctions may occur).<br />
Furthermore, in the event of failure to the maximum level microswitch, an overflow hole allows the water to be<br />
conveyed through a tube and to the safety device fitted on the water inlet solenoid valve, thus causing its<br />
mechanical lock (such safety device is triggered also in the event of a power failure).<br />
Water supply tank for the Espresso version,<br />
complete with softener filter and magnetic float<br />
NW Global Vending – TECHNICAL MANUAL<br />
This document was produced by MARK AC for the exclusive use of the technical personnel in the after-sales <strong>service</strong>.<br />
. No part of this document may be divulged to a third party or reproduced partially or entirely without the prior permission of NW GLOBAL VENDING<br />
. All rights reserved.<br />
Water supply tank for the Instant &<br />
fresh Brewer version<br />
The water supply tanks are preset for the use of internal softener filters and are fitted with a magnetic<br />
level signal that trigger a sensor located inside the vending machine.<br />
New dispenser “KORO” 07/10/2005 page 24 / 42
For the KORO model there are three base versions:<br />
19.1 – BOILERS<br />
1) Espresso version, fitted with a pressure boiler, very similar to the one used in the entire range.<br />
2) Instant version, fitted with only the open-top instant boiler, also fitted with a new design level control<br />
system.<br />
3) Fresh-brew version, fitted with only the open-top instant boiler used in the Instant version.<br />
The espresso boiler is the same used for KIKKO models, therefore with the same well known and<br />
established characteristics and reliability.<br />
The open-top boiler for the Instant / FB version is a new and specific design with the feature of being<br />
molded from thermoplastic material with specific technical characteristics.<br />
Vibration pump<br />
Side view without protective casing<br />
– pressure boiler inspection side<br />
PRESSURE BOILERS<br />
Pressure<br />
boiler<br />
SONDA NT<br />
Pressure boiler removed from the machine<br />
NW Global Vending – TECHNICAL MANUAL<br />
This document was produced by MARK AC for the exclusive use of the technical personnel in the after-sales <strong>service</strong>.<br />
. No part of this document may be divulged to a third party or reproduced partially or entirely without the prior permission of NW GLOBAL VENDING<br />
. All rights reserved.<br />
Solenoid valve assembly<br />
(Three 2-way valves + one<br />
3-way valve)<br />
Bipolar safety<br />
thermostat<br />
New dispenser “KORO” 07/10/2005 page 25 / 42
SIDE VIEW WITHOUT PROTECTIVE CASING –<br />
OPEN-TOP BOILER COMPARTMENT<br />
OPEN-TOP BOILER<br />
NOTE: The open-top is made of special thermoplastic material and coated with insulating material for more efficient heat<br />
insulation; two overheating protections are fitted for safety.<br />
1) Dry operation protection.<br />
TERMOSTATO<br />
2) Anti-boiling protection.<br />
CALDAIA<br />
In the event of failure to the control system and boiler without water, thermostat 1 is triggered at approximately 125°C and<br />
disconnects the power supply; in order to reactivate everything the malfunction must be identified and the thermostat must be<br />
reset by pressing the central red button.<br />
In the event of failure to the control system and the boiler full, upon reaching boiling temperature, as the steam exits from tube A<br />
it touches and triggers the two thermostats 2.<br />
Proceed as above to reset them; see specific chapter to identify the type of malfunction. See relevant section in the functional unit<br />
<strong>manual</strong> for details, photos and complete description: BOILERS<br />
The internal temperature control (in both boilers) is by means of an NTC type electronic probe fitted with an internal 12K ohm (±<br />
4 ohm) resistance at a temperature of 25°C.<br />
Boiler temperature °C Value in ohm Allowed tolerance<br />
0 35875 +/-7 ohm<br />
25 12000 +/- 4 ohm<br />
50 2900 ,,<br />
85 1475 ,,<br />
90 1260 ,,<br />
100 963 ,,<br />
OPEN-TOP BOILER<br />
OPEN-TOP BOILER – DETAIL OF SOLENOID VALVES AND OVERHEATING PROTECTIONS<br />
NW Global Vending – TECHNICAL MANUAL<br />
This document was produced by MARK AC for the exclusive use of the technical personnel in the after-sales <strong>service</strong>.<br />
. No part of this document may be divulged to a third party or reproduced partially or entirely without the prior permission of NW GLOBAL VENDING<br />
. All rights reserved.<br />
New dispenser “KORO” 07/10/2005 page 26 / 42
20 – PUMPS AND BY-PASS<br />
In order to supply water to the espresso boiler a vibration pump used, which is the same used in the entire H&C<br />
range of Necta.<br />
The application is specific, as pump, boiler, TRIAC circuit and connections are positioned inside the espresso<br />
module and easily accessible after opening the compartment wall, closed by only two screws and a quick snap<br />
fastener (see Page 16)<br />
This solution ensures maximum access for maintenance and hygiene, it also allows the option of using<br />
configurations with two espresso modules as an alternative to other two modules, and even mixed modules<br />
espresso/instant/fresh-brew.<br />
The pump has overheating protection in case of continuous or dry operation by means of a 90°C self-reset<br />
klixon. It is fitted with a by-pass at the outlet to ensure correct and consistent dispensing pressure.<br />
The by-pass is factory pre-set at 12 bar.<br />
The pump is activated by relay K 8 (see previous page for the pictures).)<br />
The pump is located in the espresso boiler unit.<br />
In the event of malfunctions the pump can be<br />
replaced with a new one.<br />
In order to access to it, the brewer unit must be<br />
removed (Fig. 1).<br />
Therefore the boiler unit protective casing must be<br />
opened (Fig. 2) undoing the two fastening screws.<br />
The PUMP is located on the left-hand side and is<br />
mounted on two rubber anti-vibration elastic supports.<br />
Disconnect the connection cables and remove after<br />
undoing the special screws.<br />
NEVER change the setting of the bypass, especially<br />
adjusted at the factory, if the malfunction is due to<br />
clogging from calcium deposits; replace with the<br />
complete check-valve spare part set.<br />
If the malfunction was due to triggering of the klixon,<br />
replace it with an identical one.<br />
PUMP REMOVED FROM THE BOILER UNIT<br />
WATER INLET<br />
BY PASS<br />
Klixon<br />
Overheating<br />
protection<br />
CHECK-VALVE<br />
POMPA<br />
NW Global Vending – TECHNICAL MANUAL<br />
This document was produced by MARK AC for the exclusive use of the technical personnel in the after-sales <strong>service</strong>.<br />
. No part of this document may be divulged to a third party or reproduced partially or entirely without the prior permission of NW GLOBAL VENDING<br />
. All rights reserved.<br />
New dispenser “KORO” 07/10/2005 page 27 / 42
21– ESPRESSO & FB BREWER UNITS<br />
The espresso version is equipped with the new Z3000 unit, used in three specific versions (refer to the specific Z3000<br />
<strong>service</strong> <strong>manual</strong>). In any case it is an evolution, with many improvements, of the model Z2000, more specifically planned for<br />
the following versions:<br />
1) Standard version, which is equivalent to the old Z2000 but with a simpler structure.<br />
2) Variable chamber version, which permits brewing with variable coffee doses.<br />
3) Larger chamber version, which permits selections with more coffee compared to the maximum possible with the base<br />
unit.<br />
A heating system has been designed for all versions, for the purpose of increasing the temperature of the first coffee.<br />
A specific brewer unit for filtered coffee, SIGMA BREWER, is used in the FB version.<br />
For further details on the functional units refer to the specific H&C functional unit <strong>manual</strong>s “BREWER UNITS”.<br />
The Espresso brewer unit uses that is ground on the spot by the grinder and doser unit, specifically designed for this model<br />
and that also uses a particular method of metering the ground coffee dose.<br />
The FB unit uses specific coffee, already ground to an optimum grade for quick and adequate brewing.<br />
DETAIL OF BASE Z3000 UNIT BEING REMOVED<br />
In order to remove the unit from the vending<br />
machine, undo the brass knurled knob, disconnect<br />
the unit's hydraulic connections, undoing the upper<br />
tube fastening nut and release the dispensing tube.<br />
When removing the unit, make sure it positioned at<br />
the upper dead centre (Fig. 1). To reposition it,<br />
follow the same procedure in the reverse order,<br />
again making sure it positioned at the upper dead<br />
centre, carefully inserting it onto the special<br />
positioning pins.<br />
NW Global Vending – TECHNICAL MANUAL<br />
This document was produced by MARK AC for the exclusive use of the technical personnel in the after-sales <strong>service</strong>.<br />
. No part of this document may be divulged to a third party or reproduced partially or entirely without the prior permission of NW GLOBAL VENDING<br />
. All rights reserved.<br />
Heating plate<br />
functioning by<br />
contact with the<br />
brewing chamber<br />
New dispenser “KORO” 07/10/2005 page 28 / 42
DETAIL OF BREWING CHAMBER<br />
BEING REMOVED<br />
DETAIL OF SIGMA BREWER UNIT BEING REMOVED<br />
DETAIL OF LOWER FILTER BEING<br />
REMOVED<br />
BREWING CHAMBER AND FILTER COMPLETELY DISASSEMBLED<br />
SIGMA BREWER UNIT REMOVED FROM<br />
THE VENDING MACHINE<br />
The SIGMA BREWER is a new unit<br />
especially designed for the vending<br />
machine Koro, FB version.<br />
It is a highly innovative and advanced unit<br />
that allows disassembly of parts to be<br />
cleaned in a few instants.<br />
Furthermore, it uses a system with air<br />
pressure for brewing; such system permits<br />
greater extraction of the coffee flavourings.<br />
NW Global Vending – TECHNICAL MANUAL<br />
This document was produced by MARK AC for the exclusive use of the technical personnel in the after-sales <strong>service</strong>.<br />
. No part of this document may be divulged to a third party or reproduced partially or entirely without the prior permission of NW GLOBAL VENDING<br />
. All rights reserved.<br />
New dispenser “KORO” 07/10/2005 page 29 / 42
22 – SPOUTS ASSEMBLY<br />
EXTERNAL VIEW OF SPOUTS ASSEMBLY<br />
DETAIL OF SUPPORT TRAY BEING REMOVED<br />
Because of the size of the vending machine<br />
FIXED SPOUTS have been designed.<br />
The spouts are mounted onto a tray that is<br />
easy to remove for daily cleaning.<br />
NW Global Vending – TECHNICAL MANUAL<br />
This document was produced by MARK AC for the exclusive use of the technical personnel in the after-sales <strong>service</strong>.<br />
. No part of this document may be divulged to a third party or reproduced partially or entirely without the prior permission of NW GLOBAL VENDING<br />
. All rights reserved.<br />
New dispenser “KORO” 07/10/2005 page 30 / 42
23 – DOSER DEVICES AND POWDER PRODUCT<br />
CONTAINERS<br />
In According to new market requirements, it was necessary to design new solutions using quick fastening<br />
without any screws, to allow easy access for maintenance, as well as quick changes to the layout by means of<br />
preassembled modules.<br />
INSTANT PRODUCT CONTAINER OPEN<br />
AND BEING REMOVED<br />
MIXER RATIOMOTOR ASSEMBLY<br />
VIEWED FROM BELOW<br />
INSTANT PRODUCT CONTAINER OPEN AND<br />
BEING REMOVED<br />
MIXER RATIOMOTOR ASSEMBLY<br />
BEING REMOVED FROM ITS SEAT<br />
RATIOMOTOR REMOVED FROM ITS SEAT<br />
Standards components are used, already adopted in<br />
other applications, but in a new support and with<br />
newly designed specific powder containers,<br />
comprising also the mixer assembly.<br />
The system is modular and of the same width as a<br />
powder container.<br />
It was designed for quick and easy removal as<br />
required by the particular type of machine.<br />
NW Global Vending – TECHNICAL MANUAL<br />
This document was produced by MARK AC for the exclusive use of the technical personnel in the after-sales <strong>service</strong>.<br />
. No part of this document may be divulged to a third party or reproduced partially or entirely without the prior permission of NW GLOBAL VENDING<br />
. All rights reserved.<br />
New dispenser “KORO” 07/10/2005 page 31 / 42
TRAY UNDER THE MIXER BEING REMOVED<br />
MIXER HAVING THE EXTERNAL PARTS THAT NEED<br />
DAILY HYGIENE BEING REMOVED<br />
24 – MIXER UNIT<br />
MIXER IN EXTRACTION POSITION:<br />
DETAIL OF RELEASE LEVER<br />
PLASTIC COMPONENTS OF DISASSEMBLED MIXER<br />
The mixers are newly designed, although many components are developed from the ones used in previous<br />
models.<br />
More specifically, the release and opening system of the external assembly is new, while the motor and the<br />
water tightness system are identical.<br />
The new system permits easier disassembly for daily cleaning.<br />
For further details and technical information refer to the specific “Service Manual”.<br />
NW Global Vending – TECHNICAL MANUAL<br />
This document was produced by MARK AC for the exclusive use of the technical personnel in the after-sales <strong>service</strong>.<br />
. No part of this document may be divulged to a third party or reproduced partially or entirely without the prior permission of NW GLOBAL VENDING<br />
. All rights reserved.<br />
New dispenser “KORO” 07/10/2005 page 32 / 42
Side view without protective casing<br />
– coffee grinder unit position area<br />
25 – DOSER GRINDER UNIT<br />
COFFEE GRINDER - VIEW IN OPERATING POSITION<br />
COFFEE GRINDER (PERSPECTIVE VIEW)<br />
The coffee grinder is a new design and the ground coffee dose is<br />
determined via software setting and by means of a sensor that counts<br />
the number of revolutions of the grinding wheels (see view below).<br />
Therefore, it is very important that the mechanical adjustments to the<br />
grade of grinding be checked very frequently. In order to get a dose of<br />
7 grams of coffee a certain number of revolutions is counted; by<br />
increasing or decreasing such value the amount increases or decreases.<br />
It is therefore possible to set selections with different coffee doses.<br />
It is therefore clear that it is very important to keep the adjustment of<br />
the grinding wheels constant to obtain accurate coffee doses.<br />
Especially in the first period of use (1000-2000 selections), because of<br />
the greater wear due to the initial settling.<br />
The adjustment can be performed also approximately by regularly<br />
checking the weight of the ground coffee and its grade of grinding.<br />
The motor winding is fitted with a self-reset overheating protection.<br />
Flat-type grinding wheels are used.<br />
For further information refer to the specific <strong>manual</strong>.<br />
Knob for adjusting the distance<br />
between grinding wheels<br />
COFFEE GRINDER (VIEW FROM BELOW)<br />
Ground outlet exit port<br />
SENSOR SIDE<br />
EXPLODED VIEW<br />
NW Global Vending – TECHNICAL MANUAL<br />
This document was produced by MARK AC for the exclusive use of the technical personnel in the after-sales <strong>service</strong>.<br />
. No part of this document may be divulged to a third party or reproduced partially or entirely without the prior permission of NW GLOBAL VENDING<br />
. All rights reserved.<br />
DISTANCE TO<br />
BE CHECKED<br />
New dispenser “KORO” 07/10/2005 page 33 / 42
26 – POWDER AND LIQUID DOSE TABLES<br />
The software is programmed by default with the most suitable settings for the relevant market.<br />
The following table is an example, and are for the Italian market settings, and the correct and updated<br />
settings are indicated in the tables supplied with the machine.<br />
Selection Remarks Coffee<br />
beans<br />
Coffee<br />
Instant<br />
Water<br />
c.c.<br />
Powder<br />
g<br />
NW Global Vending – TECHNICAL MANUAL<br />
This document was produced by MARK AC for the exclusive use of the technical personnel in the after-sales <strong>service</strong>.<br />
. No part of this document may be divulged to a third party or reproduced partially or entirely without the prior permission of NW GLOBAL VENDING<br />
. All rights reserved.<br />
Fresh-brew<br />
coffee<br />
g<br />
Remarks<br />
NOTE 1<br />
The water flow in the mixers is approximately 10 c.c. per second and it is given as a guideline, as there are<br />
many variables that can affect the accuracy.<br />
The liquid dose is determined by the flow-meter pulse counting (volumetric counter).<br />
Both versions (Instant and Espresso) use an electromechanical vibration pump (with the espresso boiler) for<br />
the water flow, therefore the liquid dose in both versions is measured in flow-meter pulses (fmp).<br />
NOTE 2<br />
To be noted that the number of pulses does not change in a linear manner (i.e. double the amount of water<br />
does not correspond to double the number of pulses), however the counter varies the accuracy according to<br />
the water flow velocity, and namely:<br />
For espresso coffee it is reduced considerably because of the coffee compress reaction that slows down the<br />
water flow, while it is accelerated in the instant drinks selections, since there are no obstructions to the<br />
water flow. Therefore, in the event of changing the doses set at the factory, some measurements must be<br />
made using measuring containers.<br />
New dispenser “KORO” 07/10/2005 page 34 / 42
The vending machine KORO was designed to operate for a long time without malfunctions; however in order to<br />
ensure excellent reliability periodic maintenance is necessary.<br />
Such maintenance must be performed according to the number of selections made and the time lapsed.<br />
Periodic and correct maintenance ensures reliability, constant quality and also guarantees safety standards over<br />
time.<br />
The following table indicates the functional units that must be subjected to periodic maintenance and the<br />
frequency of maintenance. For the operations to be carried out, refer to the specific Functional unit <strong>manual</strong>s.<br />
Name of unit DESCRIPTION OF OPERATION<br />
Espresso brewer<br />
unit<br />
1) Check state of filters and wear of silicone O-ring seal<br />
2) Replace upper and lower filters and related seals<br />
3) Descale the internal vent hole and lubricate with specific<br />
food-safe grease<br />
Fresh brewer unit 1) Check state of filters and wear of silicone O-ring seal; see<br />
details in the functional unit <strong>manual</strong> for FB coffee brewing<br />
2) Open the unit and check the state of wear and internal<br />
lubrication and if necessary replace and lubricate<br />
Mixer unit 1) Check the water tightness in the axial bush and the<br />
correct assembly, if necessary replace.<br />
2) Check the wear of the motor brushes and clean off the<br />
Boiler and<br />
solenoid valve<br />
assembly<br />
Steam exhauster<br />
unit<br />
Coffee grinder<br />
assembly<br />
27 – ROUTINE & EXTRAORDINARY<br />
MAINTENANCE PROGRAM<br />
excess of carbon powder<br />
If the boilers and the solenoid valves operate with soft water<br />
or are fitted with specific softener filters, the should be no<br />
need of periodic maintenance; otherwise periodically check<br />
the grade of scaling and if necessary proceed to complete<br />
descaling<br />
There is not need of any particular maintenance<br />
For perfect functioning, it is necessary that the powder<br />
removal boxes be emptied periodically.<br />
In addition, daily cleaning ensures also maximum hygiene of<br />
the machine.<br />
The motor was designed to operate for more than 200000<br />
grinding cycles and the grinding wheels can ensure correct<br />
grinding for at least 50000 cycles.<br />
However, these values can vary because of possible<br />
impurities in the coffee (pebbles, pieces of hard wood, etc.),<br />
therefore it is advisable, except for premature wear, to<br />
check and if necessary replace the grinding wheels every<br />
50000 cycles.<br />
Every 200000 cycles check the state of wear of the<br />
ratiomotor brushes, if necessary replace and clean off the<br />
wear residues.<br />
In addition, every month check the correct positioning of the<br />
grinding wheels and if necessary adjust to the correct<br />
setting by means of the knurled knob.<br />
NW Global Vending – TECHNICAL MANUAL<br />
This document was produced by MARK AC for the exclusive use of the technical personnel in the after-sales <strong>service</strong>.<br />
. No part of this document may be divulged to a third party or reproduced partially or entirely without the prior permission of NW GLOBAL VENDING<br />
. All rights reserved.<br />
N. of<br />
selections<br />
5000<br />
8000<br />
30.000<br />
Max<br />
frequency<br />
1 month<br />
6 months<br />
annual<br />
New dispenser “KORO” 07/10/2005 page 35 / 42<br />
4000<br />
40.000<br />
50.000<br />
According to<br />
the water<br />
hardness<br />
50000<br />
200000<br />
4000<br />
1 month<br />
annual<br />
annual<br />
Every 6<br />
months<br />
Every day<br />
Every year<br />
month<br />
Extraordinary maintenance is carried out in the event of possible malfunctions.<br />
For the most typical problems the vending machine is fitted with sensors that inform the software about any<br />
malfunction. The following tables list the possible malfunctions and possible remedies.
PROBLEM<br />
(and/or indication on the display)<br />
The machine does not<br />
go into the boiler<br />
heating phase and the<br />
display shows the<br />
message<br />
“WATER FAILURE”<br />
(espresso versions)<br />
The display indicates<br />
the message<br />
“NO COFFEE”<br />
The display indicates<br />
the message<br />
“WASTE CONTAINER FULL”<br />
The display indicates<br />
the message<br />
“AIR-BREAK”<br />
The display indicates<br />
the message<br />
“VOLUMETRIC COUNTER”<br />
28 – TROUBLE-SHOOTING<br />
POSSIBLE CAUSE<br />
If the micro-switch of the air-break (if<br />
fitted) float in the instant boiler, or of the<br />
float in the water supply tank, is not<br />
activate within one minute, the software<br />
disables the machine.<br />
If the coffee grinder exceeds the grinding<br />
speed for longer than 5 seconds, the<br />
espresso coffee selections are disabled. All<br />
instant product selections remain available.<br />
When the float in the liquid waste tray<br />
triggers the signal micro-switch.<br />
The machine locks if after 10 selections the<br />
float micro-switch does not change<br />
position.<br />
When the counter does not signal any<br />
counting within a time-out set by default.<br />
NW Global Vending – TECHNICAL MANUAL<br />
This document was produced by MARK AC for the exclusive use of the technical personnel in the after-sales <strong>service</strong>.<br />
. No part of this document may be divulged to a third party or reproduced partially or entirely without the prior permission of NW GLOBAL VENDING<br />
. All rights reserved.<br />
SOLUTION<br />
Check the following situations:<br />
Machine with air-break: check that there is<br />
water from the mains; if this is the problem,<br />
wait for the water from the mains to be<br />
resumed. Otherwise, check the operation of the<br />
inlet solenoid valve from the mains, check the<br />
operation of the air-break micro-switch<br />
Machine with instant boiler: in this case it is<br />
the boiler to perform the air-break function.<br />
Then, repeat the above checks.<br />
Machine with water supply tank:<br />
Check the operation of the magnetic float, and<br />
of the water supply pump.<br />
Check the activation of relays K1 and K14<br />
When an espresso coffee selection is made the<br />
grinder is activated conveying coffee directly to<br />
the brewing chamber of the Z3000 unit, and the<br />
amount is determined by the number of<br />
revolutions of the grinding wheels by means of<br />
a special sensor.<br />
Check the presence of coffee<br />
Check the distance between the grinding wheels<br />
Check the presence of the sensor<br />
Check the functioning of the relay K16<br />
Empty the tray, removing it from the lower<br />
section of the cabinet.<br />
Check the operation and correct functioning of<br />
float and micro-switch.<br />
Check the following situations:<br />
Machine with air-break: check that there is<br />
water from the mains; if this is the problem,<br />
wait for the water from the mains to be<br />
resumed. Otherwise, check the operation of the<br />
inlet solenoid valve from the mains, check the<br />
operation of the air-break micro-switch<br />
Machine with instant boiler: in this case it is<br />
the boiler to perform the air-break function.<br />
Then, repeat the above checks.<br />
Machine with water supply tank:<br />
Check the operation of the magnetic float, and<br />
of the water supply pump.<br />
Check the activation of relays K1 and K14<br />
The water amounts necessary for espresso<br />
coffee selections are ensured by a volumetric<br />
counter that with the water flow causes a wheel<br />
to rotate and sends to the software a number of<br />
pulses corresponding to the set water dose; if<br />
such dose is not reached within 60 seconds it<br />
means that there is a problem.<br />
Check that there is water (see above); check<br />
that there are no obstructions to the correct<br />
flow of water.<br />
Check the correct functioning of the impellers.<br />
There must be 5 VAC on the terminals during<br />
the counter operation. Check that coffee was<br />
ground correctly and that dose is accurate.<br />
Check that the coffee filters are not clogged.<br />
New dispenser “KORO” 07/10/2005 page 36 / 42
The display indicates<br />
the message<br />
“BOILER”<br />
The display indicates<br />
the message<br />
“CAN-BUS BOARD”<br />
The display indicates<br />
the message<br />
“COIN MECHANISM”<br />
(only if equipped with a<br />
payment system)<br />
The display indicates<br />
the message<br />
“GRINDER BLOCKED”<br />
The display indicates<br />
the message<br />
“ESPRESSO UNIT”<br />
The display indicates<br />
the message<br />
“RAM DATA”<br />
The display indicates<br />
the message<br />
“FRESH-BREWER PISTON”<br />
The display indicates<br />
the message<br />
“FRESH-BREWER BRUSH”<br />
The machine will lock if after the maximum<br />
time of heating from the machine start, or<br />
from the last selection, there is no signal of<br />
correctly reaching the temperature set in<br />
the software.<br />
Failed dialogue between CPU board and<br />
can-bus board that controls the SIGMA<br />
BREWER unit.<br />
The machine will lock if it receives an<br />
impulse longer than two seconds on a<br />
validator line or there is no communication<br />
with the serial coin mechanism for more<br />
than 30 seconds (executive protocol).<br />
Or 75 seconds (BDV protocol)<br />
If the coffee grinder does not rotate or<br />
rotates too slowly for longer than 5<br />
seconds, the espresso coffee based<br />
selections are disabled.<br />
If the unit does not reach the initial standby<br />
position after making a selection (checked<br />
by a position micro-switch) the espresso<br />
based selections are disabled.<br />
One or more areas of the RAM memory<br />
contain altered or non-compatible data,<br />
which is corrected by the software with<br />
default setting data; therefore the machine<br />
continues to operate with the initial data,<br />
but initialise will be required.<br />
The default position is determined by the<br />
micro-switches, and the position is factory<br />
preset; if for any reasons they are not<br />
triggered, FRESH-BREW coffee selections<br />
are disabled.<br />
The default position is determined by the<br />
micro-switches, and the position is factory<br />
preset; if for any reasons they are not<br />
triggered, FRESH-BREW coffee selections<br />
are disabled.<br />
NW Global Vending – TECHNICAL MANUAL<br />
This document was produced by MARK AC for the exclusive use of the technical personnel in the after-sales <strong>service</strong>.<br />
. No part of this document may be divulged to a third party or reproduced partially or entirely without the prior permission of NW GLOBAL VENDING<br />
. All rights reserved.<br />
Check that the heating element and the STRC<br />
card are functioning correctly.<br />
Check that the overheating control systems<br />
were not triggered.<br />
Check the functioning of the probe (ohm<br />
control)<br />
Should the overheating protection be triggered<br />
before resetting, the cause must be found and<br />
eliminated.<br />
Check the connections.<br />
Check that the power supply is correct.<br />
Replace the board.<br />
Check that connection is correct and the<br />
software setting is correct for the protocol.<br />
If necessary replace the payment system.<br />
The grinder rotation is controlled by a sensor; if<br />
no rotation is detected within 5 seconds, check:<br />
That there are no blockages in the grinding<br />
wheels.<br />
That the overheating control systems on the<br />
winding were not triggered.<br />
That the sensor works correctly.<br />
Check the activation of relay K16<br />
The standby position is checked by a position<br />
micro-switch, and every time the machine is<br />
started the unit is checked.<br />
If the change in the “on” condition is not read,<br />
check that:<br />
the motor is started, the position micro-switch<br />
works correctly, the brewing chamber is not<br />
clogged with too much coffee.<br />
Check the activation of relay K7.<br />
Enter into the installation procedure and<br />
initialise the software; if the failure persists<br />
replace the CPU board.<br />
The standby position is checked by a position<br />
micro-switch, and every time the machine is<br />
started the unit is checked.<br />
check that:<br />
the motor is started, the position micro-switch<br />
works correctly, the brewing chamber is not<br />
clogged with too much coffee.<br />
the filter is not clogged.<br />
Check the connection with the FB board<br />
The standby position is checked by a position<br />
micro-switch, and every time the machine is<br />
started the unit is checked.<br />
check that: the brush is new and the motor is<br />
activated.<br />
That there are not any mechanical blockages.<br />
Check the connection with the FB board<br />
New dispenser “KORO” 07/10/2005 page 37 / 42
For espresso only:<br />
Coffee is dispensed too<br />
slowly and it tastes<br />
burnt.<br />
For espresso only:<br />
The coffee lacks body<br />
and is dispensed too<br />
quickly.<br />
The mixers clog up<br />
Excessive coffee dose or ground too finely. The dose is calculated using an algorithm that<br />
counts the number revolutions of the grinder,<br />
and the doses are dispensed correctly if the<br />
grinder is adjusted with the correct grade of<br />
grinding.<br />
Check that the distance between the grinding<br />
wheels is the factory default one.<br />
Coffee dose too small, or ground too<br />
coarsely.<br />
Failed rotation of the mixer.<br />
Excessive instant product dose.<br />
Steam exhaust box clogged.<br />
Water to powder ratio not correct.<br />
NW Global Vending – TECHNICAL MANUAL<br />
This document was produced by MARK AC for the exclusive use of the technical personnel in the after-sales <strong>service</strong>.<br />
. No part of this document may be divulged to a third party or reproduced partially or entirely without the prior permission of NW GLOBAL VENDING<br />
. All rights reserved.<br />
The dose is calculated using an algorithm that<br />
counts the number revolutions of the grinder,<br />
and the doses are dispensed correctly if the<br />
grinder is adjusted with the correct grade of<br />
grinding.<br />
The dispensing time must remain constant.<br />
Check that the distance between the grinding<br />
wheels is the factory default one; with use the<br />
grinding wheels are subject to wear and it will<br />
be necessary to reset the correct measurement<br />
periodically.<br />
Check for the motor overheat protection trigger,<br />
if necessary check the cause of such trigger.<br />
Empty the powder removal box, adjust and<br />
check the correct water to powder ratio.<br />
Check the logic of the cycles.<br />
Check the activation of relay K3.<br />
New dispenser “KORO” 07/10/2005 page 38 / 42
29 –HACCP DIRECTIVE<br />
HACCP DIRECTIVE (EEC 93/43 and 96/3)<br />
Outline and instructions for use<br />
Notes: What is it and what is indicated by the European Directive<br />
Directives EEC 93/43 and 96/3 regard the hygiene of food products and are based on the HACCP<br />
(Hazard Analysis Critical Control Point).<br />
The purpose of this directive is to safeguard the consumer health, suggesting a series of actions to be taken<br />
by the vending company, aimed at checking, identifying and correcting any critical aspects in the foodstuff<br />
chain, from the purchase of products and machines to the dispensing of the product.<br />
The HACCP is therefore a system that addresses the analysis of any potential risks in the manufacturing<br />
and distribution cycle of food product and the identification of critical points where such risks can occur; the<br />
system also highlights the actions to be undertaken and the decisions to be made with regard to such critical<br />
points, as well as the implementation of checking and monitoring procedures.<br />
Therefore, each vending company must develop a Company Hygiene Self-control Manual according to the<br />
provisions of the directive - and if necessary use the information and recommendations formulated by some<br />
associations in the sector. The <strong>manual</strong> must contain a programming and checking schedule for the vending<br />
machine hygiene condition<br />
Important notes:<br />
For a correct use of the machine, the directives must be fully applied. The operator is responsible for<br />
correct operations on a vending machine<br />
HACCP Directives (EEC 93/43 and 96/3)<br />
Guidelines for correct application<br />
- Ensure hygiene control with a special <strong>manual</strong> for correct hygiene practices.<br />
- After cleaning, do not touch the surface of any elements that may come into contact with food.<br />
- Wash your hands thoroughly, preferably using disinfectant, before starting any hygiene operations<br />
- Use disposable sterile gloves<br />
- Always use a clean cloth to wipe dry.<br />
- Keep the work area tidy.<br />
- Check that the product packages are intact and not damaged.<br />
- Keep coffee and powder products in a cool, dark and dry place.<br />
- Use products within the recommended time period (see expiry date on the package).<br />
- Always use products from the warehouse according to the principle of “first-in first-out”.<br />
- Tightly close and seal any product packages not completely used.<br />
- Coffee and consumables must be kept and transported separate from the cleaning products.<br />
- The product containers must be cleaned regularly (see operation instructions).<br />
- Only fill coffee or other product containers with sufficient amount for the expected use until the next<br />
cleaning.<br />
Cleaning the machine (Pages 40, 41 & 42)<br />
- Carefully observe the following cleaning instructions!<br />
- Clean the machine, preferably at the end of the day or in the morning before the machine is used.<br />
- After cleaning, dispense and check a drink (see last check).<br />
- Fill in the check list log for cleaning operations.<br />
- When the display indicates an error message immediately check the trouble-shooting sheet.<br />
- Use only recommended cleaning products approved for foodstuff, preferably liquid; avoid the use of<br />
powder and abrasive products.<br />
NW Global Vending – TECHNICAL MANUAL<br />
This document was produced by MARK AC for the exclusive use of the technical personnel in the after-sales <strong>service</strong>.<br />
. No part of this document may be divulged to a third party or reproduced partially or entirely without the prior permission of NW GLOBAL VENDING<br />
. All rights reserved.<br />
New dispenser “KORO” 07/10/2005 page 39 / 42
Daily Cleaning And Hygiene - espresso Version<br />
(Expected time 6 minutes)<br />
Fig. 1<br />
Fig. 3<br />
30 – DAILY CLEANING AND HYGIENE PROGRAM<br />
Fig. 5<br />
Remove the dispensing compartment and the tray,<br />
slide out the internal tank. Clean and rinse the<br />
components thoroughly under current water, empty<br />
and rinse the tank (FIG. 1 – FIG. 2)<br />
Remove the coffee grounds container, empty it and<br />
rinse it thoroughly (FIG. 3)<br />
Remove the drip tray located under the mixer, rinse<br />
it and eliminate any residue (FIG. 4)<br />
Slide out the external mixer assembly and<br />
disassemble it (FIG. 5 – 6 ), clean and rinse out<br />
thoroughly all residue.<br />
Remove the brewer unit, clean and rinse with hot<br />
water (FIG. 7 – 8).<br />
Reassemble all parts, taking care not to touch with<br />
your hands any parts that come into contact with<br />
food.<br />
Carry out a mixer automatic wash cycle according to<br />
the pre-set procedures.<br />
Close the door and make some test selections.<br />
NB: In order to speed up the operations, it is<br />
advisable to replace with components that were<br />
already cleaned and sanitised at the workshop, and<br />
take to the workshop the dirty components for<br />
cleaning and sanitising. The cleaning and hygiene<br />
operations must be carried out the evening, after the<br />
machine use, or the next morning before starting to<br />
use the machine.<br />
Fig. 6<br />
Fig. 8<br />
NW Global Vending – TECHNICAL MANUAL<br />
This document was produced by MARK AC for the exclusive use of the technical personnel in the after-sales <strong>service</strong>.<br />
. No part of this document may be divulged to a third party or reproduced partially or entirely without the prior permission of NW GLOBAL VENDING<br />
. All rights reserved.<br />
Fig. 2<br />
Fig. 4<br />
Fig. 7<br />
New dispenser “KORO” 07/10/2005 page 40 / 42
Daily Cleaning And Hygiene - Fresh brewer Version<br />
( Expected time 6 minutes)<br />
Fig. 1<br />
Fig. 3<br />
31 – DAILY CLEANING AND HYGIENE PROGRAM<br />
FRESH BREWER UNIT<br />
Fig. 5<br />
Remove the dispensing compartment and<br />
the tray, slide out the external tank. Clean<br />
and rinse the components thoroughly under<br />
current water, empty and rinse the tank<br />
(FIG. 1)<br />
Remove the coffee grounds container, empty<br />
it and rinse it thoroughly<br />
(FIG. 2)<br />
Remove the brewing chamber and<br />
disassemble it, clean and rinse under hot<br />
current water (FIG. 3 – 5)<br />
Remove the lower filter-holder, clean and<br />
rinse thoroughly (FIG. 4)<br />
Remove the spouts assembly and the support<br />
tray, clean and rinse thoroughly (FIG 7).<br />
Slide out the external mixer assembly and<br />
disassemble it (FIG. 6 ), clean and rinse out<br />
thoroughly all residue.<br />
Reassemble all parts, taking care not to touch<br />
with your hands any parts that come into<br />
contact with food.<br />
Carry out a mixer automatic wash cycle<br />
according to the pre-set procedures.<br />
Close the door and make some test<br />
selections.<br />
Fig. 7<br />
Fig. 2<br />
Fig. 6<br />
Fig. 4<br />
NW Global Vending – TECHNICAL MANUAL<br />
This document was produced by MARK AC for the exclusive use of the technical personnel in the after-sales <strong>service</strong>.<br />
. No part of this document may be divulged to a third party or reproduced partially or entirely without the prior permission of NW GLOBAL VENDING<br />
. All rights reserved.<br />
New dispenser “KORO” 07/10/2005 page 41 / 42
32 – MONTHLY CLEANING AND HYGIENE PROGRAM<br />
Monthly Cleaning And Hygiene (or every 5000 selections)<br />
For all versions: Espresso - Fresh Brewer - Instant<br />
Expected time 18 minutes<br />
FIG. 1<br />
FIG. 3<br />
FIG. 5<br />
ONCE A MONTH, OR EVERY 5000 SELECTIONS, THE<br />
FOLLOWING SCHEDULED MAINTENANCE OPERATIONS<br />
MUST BE CARRIED OUT; AS USUAL IT IS ADVISABLE TO<br />
CARRY OUT SUCH OPERATIONS AT THE WORKSHOP, AND<br />
ON SITE SIMPLY REPLACE THE UNITS WITH THE ONES<br />
WHICH WERE ALREADY SUBJECTED TO SCHEDULED<br />
MAINTENANCE.<br />
Remove the “Z3000’ unit from the vending machine<br />
(FIG. 1 – FIG. 2); disassemble the unit completely,<br />
remove the upper piston and the lower brewing<br />
chamber (FIG. 3 – FIG. 4); carry out the<br />
maintenance operations indicated in the specific<br />
<strong>manual</strong>, and more specifically, clean or replace the<br />
filters and lubricate the seals.<br />
Remove the “SIGMA BREWER” unit from the<br />
machine; clean thoroughly (see specific <strong>manual</strong>),<br />
more specifically the brewing chamber and the lower<br />
filter; check the efficiency of the mechanism and of<br />
the position micro-switches.<br />
If the filter is clogged for more than 50% must be<br />
replaced (FIG. 5)<br />
Remove the powder containers, empty and clean<br />
them thoroughly in the inside, especially the ports<br />
and the auger (FIG. 6)<br />
Remove the grinder and doser assembly, empty any<br />
coffee residue, check the state of the grinding<br />
wheels, check the efficiency of the sensor that<br />
detects the number of revolutions (FIG. 7)<br />
Reset the correct distance between the grinding<br />
wheels (see specific <strong>manual</strong>).<br />
Reassemble all parts, taking care not to touch any<br />
parts that come into contact with food.<br />
FIG. 7<br />
FIG. 4<br />
FIG. 6<br />
NW Global Vending – TECHNICAL MANUAL<br />
This document was produced by MARK AC for the exclusive use of the technical personnel in the after-sales <strong>service</strong>.<br />
. No part of this document may be divulged to a third party or reproduced partially or entirely without the prior permission of NW GLOBAL VENDING<br />
. All rights reserved.<br />
New dispenser “KORO” 07/10/2005 page 42 / 42<br />
FIG. 2