Installing MacBook Pro 15" Core Duo Model A1150 LCD ... - iFixit
Installing MacBook Pro 15" Core Duo Model A1150 LCD ... - iFixit
Installing MacBook Pro 15" Core Duo Model A1150 LCD ... - iFixit

You also want an ePaper? Increase the reach of your titles
YUMPU automatically turns print PDFs into web optimized ePapers that Google loves.
<strong>Installing</strong> <strong>MacBook</strong> <strong>Pro</strong> 15" <strong>Core</strong> <strong>Duo</strong> <strong>Model</strong> <strong>A1150</strong> <strong>LCD</strong> Panel High Definition<br />
(1920x1200)<br />
<strong>Installing</strong> <strong>MacBook</strong> <strong>Pro</strong> 15" <strong>Core</strong><br />
<strong>Duo</strong> <strong>Model</strong> <strong>A1150</strong> <strong>LCD</strong> Panel<br />
High Definition (1920x1200)<br />
TOOLS:<br />
Phillips 00 Screwdriver (1)<br />
Sorting Tray (1)<br />
Spudger (1)<br />
T6 Torx Screwdriver (1)<br />
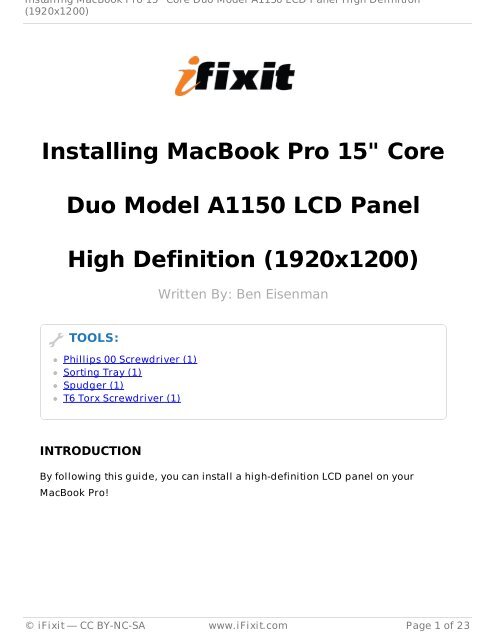
INTRODUCTION<br />
Written By: Ben Eisenman<br />
By following this guide, you can install a high-definition <strong>LCD</strong> panel on your<br />
<strong>MacBook</strong> <strong>Pro</strong>!<br />
© <strong>iFixit</strong> — CC BY-NC-SA www.<strong>iFixit</strong>.com Page 1 of 23
<strong>Installing</strong> <strong>MacBook</strong> <strong>Pro</strong> 15" <strong>Core</strong> <strong>Duo</strong> <strong>Model</strong> <strong>A1150</strong> <strong>LCD</strong> Panel High Definition<br />
(1920x1200)<br />
Step 1 — Battery<br />
Step 2 — Memory Door<br />
Use your fingers to push both<br />
battery release tabs away<br />
from the battery, and lift the<br />
battery out of the computer.<br />
Remove the three identical<br />
Phillips screws from the<br />
memory door.<br />
Make sure to record<br />
which sets of screws<br />
came from where. This will<br />
help when re-assembling.<br />
© <strong>iFixit</strong> — CC BY-NC-SA www.<strong>iFixit</strong>.com Page 2 of 23
<strong>Installing</strong> <strong>MacBook</strong> <strong>Pro</strong> 15" <strong>Core</strong> <strong>Duo</strong> <strong>Model</strong> <strong>A1150</strong> <strong>LCD</strong> Panel High Definition<br />
(1920x1200)<br />
Step 3<br />
Step 4 — Upper Case<br />
Lift the memory door up<br />
enough to get a grip on it,<br />
and slide it toward you,<br />
pulling it away from the<br />
casing.<br />
Remove the two Phillips<br />
screws in the battery<br />
compartment near the latch.<br />
© <strong>iFixit</strong> — CC BY-NC-SA www.<strong>iFixit</strong>.com Page 3 of 23
<strong>Installing</strong> <strong>MacBook</strong> <strong>Pro</strong> 15" <strong>Core</strong> <strong>Duo</strong> <strong>Model</strong> <strong>A1150</strong> <strong>LCD</strong> Panel High Definition<br />
(1920x1200)<br />
Step 5<br />
Step 6<br />
Remove the following 6<br />
screws:<br />
Two 10 mm T6 Torx screws<br />
on either side of the RAM<br />
slot.<br />
Four 14.5 mm Phillips<br />
screws along the hinge.<br />
Remove the four Phillips<br />
screws on the port side of the<br />
computer.<br />
© <strong>iFixit</strong> — CC BY-NC-SA www.<strong>iFixit</strong>.com Page 4 of 23
<strong>Installing</strong> <strong>MacBook</strong> <strong>Pro</strong> 15" <strong>Core</strong> <strong>Duo</strong> <strong>Model</strong> <strong>A1150</strong> <strong>LCD</strong> Panel High Definition<br />
(1920x1200)<br />
Step 7<br />
Step 8<br />
Rotate the computer 90<br />
degrees and remove the two<br />
Phillips screws from the rear<br />
of the computer.<br />
Rotate the computer 90<br />
degrees again and remove<br />
the four Phillips screws from<br />
the side of the computer.<br />
© <strong>iFixit</strong> — CC BY-NC-SA www.<strong>iFixit</strong>.com Page 5 of 23
<strong>Installing</strong> <strong>MacBook</strong> <strong>Pro</strong> 15" <strong>Core</strong> <strong>Duo</strong> <strong>Model</strong> <strong>A1150</strong> <strong>LCD</strong> Panel High Definition<br />
(1920x1200)<br />
Step 9<br />
Do not yank the upper<br />
case off quickly. The<br />
case is attached to the logic<br />
board via a ribbon cable.<br />
Lift up at the rear of the case<br />
and work your fingers along<br />
the sides, freeing the case as<br />
you go. Once you have freed<br />
the sides, you may need to<br />
rock the case up and down to<br />
free the front of the upper<br />
case. This stage can be quite<br />
tricky. Over the DVD reader<br />
are 4 tabs set back which pull<br />
out vertically.<br />
Note that the two small<br />
tongues on the left hand front<br />
of the upper case may bend<br />
while you remove the upper<br />
case. When re-installing, you<br />
may need to bend them back<br />
to fit in the grooves in the<br />
lower case.<br />
© <strong>iFixit</strong> — CC BY-NC-SA www.<strong>iFixit</strong>.com Page 6 of 23
<strong>Installing</strong> <strong>MacBook</strong> <strong>Pro</strong> 15" <strong>Core</strong> <strong>Duo</strong> <strong>Model</strong> <strong>A1150</strong> <strong>LCD</strong> Panel High Definition<br />
(1920x1200)<br />
Step 10<br />
Step 11 — Display Assembly<br />
Disconnect the trackpad and<br />
keyboard ribbon cable from<br />
the logic board, removing<br />
tape as necessary.<br />
Remove the upper case.<br />
Disconnect the two antenna<br />
cables attached to the Airport<br />
Extreme card.<br />
The white antenna<br />
cable connects to the<br />
left side of the Airport<br />
Extreme card.<br />
© <strong>iFixit</strong> — CC BY-NC-SA www.<strong>iFixit</strong>.com Page 7 of 23
<strong>Installing</strong> <strong>MacBook</strong> <strong>Pro</strong> 15" <strong>Core</strong> <strong>Duo</strong> <strong>Model</strong> <strong>A1150</strong> <strong>LCD</strong> Panel High Definition<br />
(1920x1200)<br />
Step 12<br />
Step 13<br />
Deroute the Airport antenna<br />
cables from their channel in<br />
the left speaker.<br />
Disconnect the iSight,<br />
inverter, and left fan cables<br />
from the logic board.<br />
© <strong>iFixit</strong> — CC BY-NC-SA www.<strong>iFixit</strong>.com Page 8 of 23
<strong>Installing</strong> <strong>MacBook</strong> <strong>Pro</strong> 15" <strong>Core</strong> <strong>Duo</strong> <strong>Model</strong> <strong>A1150</strong> <strong>LCD</strong> Panel High Definition<br />
(1920x1200)<br />
Step 14<br />
Step 15<br />
Disconnect the display data<br />
cable from the logic board.<br />
Remove the silver T6 Torx<br />
screw securing the ground<br />
loop on the display data<br />
cable to the casing.<br />
© <strong>iFixit</strong> — CC BY-NC-SA www.<strong>iFixit</strong>.com Page 9 of 23
<strong>Installing</strong> <strong>MacBook</strong> <strong>Pro</strong> 15" <strong>Core</strong> <strong>Duo</strong> <strong>Model</strong> <strong>A1150</strong> <strong>LCD</strong> Panel High Definition<br />
(1920x1200)<br />
Step 16<br />
Step 17<br />
Support the display with one<br />
hand while removing the<br />
following 3 screws:<br />
Two 9.5 mm silver T6 Torx<br />
screws with threads on only<br />
part of the shaft on the<br />
inside of the display<br />
hinges.<br />
One 9.5 mm silver T6 Torx<br />
screw with threads on the<br />
entire shaft on the outside<br />
of the left hinge.<br />
Grasp the display assembly<br />
on both sides and lift it up<br />
and out of the computer.<br />
© <strong>iFixit</strong> — CC BY-NC-SA www.<strong>iFixit</strong>.com Page 10 of 23
<strong>Installing</strong> <strong>MacBook</strong> <strong>Pro</strong> 15" <strong>Core</strong> <strong>Duo</strong> <strong>Model</strong> <strong>A1150</strong> <strong>LCD</strong> Panel High Definition<br />
(1920x1200)<br />
Step 18 — Rear Display Bezel<br />
Remove the Phillips screws from the lower left and right corners of the<br />
display (two screws total).<br />
Step 19<br />
Insert the flat end of a spudger perpendicular to the face of the display<br />
between the plastic strip attached to the rear bezel and the front bezel.<br />
Do not insert your spudger between the plastic strip and the rear<br />
bezel.<br />
With the spudger still inserted, rotate it away from the display to separate<br />
the front and rear bezels.<br />
Work along the left edge of the display until the rear bezel is evenly<br />
separated from the front bezel.<br />
© <strong>iFixit</strong> — CC BY-NC-SA www.<strong>iFixit</strong>.com Page 11 of 23
<strong>Installing</strong> <strong>MacBook</strong> <strong>Pro</strong> 15" <strong>Core</strong> <strong>Duo</strong> <strong>Model</strong> <strong>A1150</strong> <strong>LCD</strong> Panel High Definition<br />
(1920x1200)<br />
Step 20<br />
Insert the flat end of a spudger perpendicular to the face of the display<br />
between the plastic strip attached to the rear bezel and the front bezel.<br />
With the spudger still inserted, rotate it away from the display to separate<br />
the front and rear bezels.<br />
Work along the right edge of the display until the rear bezel is evenly<br />
separated from the front bezel.<br />
Step 21<br />
Insert the flat end of a spudger between the front bezel and the plastic strip<br />
attached to the rear bezel near the screw holes at the bottom corners of the<br />
display.<br />
Rotate your spudger toward the rear bezel to separate it from the front<br />
bezel.<br />
If necessary, enlarge the gap between the lower edge of the rear bezel and<br />
the clutch cover until the two components are completely separated.<br />
© <strong>iFixit</strong> — CC BY-NC-SA www.<strong>iFixit</strong>.com Page 12 of 23
<strong>Installing</strong> <strong>MacBook</strong> <strong>Pro</strong> 15" <strong>Core</strong> <strong>Duo</strong> <strong>Model</strong> <strong>A1150</strong> <strong>LCD</strong> Panel High Definition<br />
(1920x1200)<br />
Step 22<br />
Step 23 — <strong>LCD</strong> Panel<br />
Lift the rear bezel by its<br />
bottom edge and rotate it<br />
away from the display<br />
assembly to separate the top<br />
edge.<br />
Remove the rear display<br />
bezel from the display<br />
assembly.<br />
Remove the pieces of yellow kapton tape from the bottom left corner of the<br />
display.<br />
Remove the pieces of tape securing the display data cable and camera<br />
cable to the display.<br />
Peel the three green antenna ground straps off the copper tape along the<br />
bottom edge of the <strong>LCD</strong>.<br />
The adhesive connecting these straps to the display is very strong.<br />
An edged tool is helpful to separate the adhesive while you peel the<br />
straps off.<br />
Remove the piece of tape securing the camera cable to the <strong>LCD</strong>.<br />
© <strong>iFixit</strong> — CC BY-NC-SA www.<strong>iFixit</strong>.com Page 13 of 23
<strong>Installing</strong> <strong>MacBook</strong> <strong>Pro</strong> 15" <strong>Core</strong> <strong>Duo</strong> <strong>Model</strong> <strong>A1150</strong> <strong>LCD</strong> Panel High Definition<br />
(1920x1200)<br />
Step 24<br />
Step 25<br />
Carefully peel the camera<br />
cable off the foam tape along<br />
the top edge of the <strong>LCD</strong>.<br />
Use the tip of a spudger and<br />
carefully flip the ZIF<br />
connector bar up to release<br />
the before the camera cable.<br />
Gently pull the camera cable<br />
away from its socket on the<br />
camera board.<br />
Pull the cable parallel<br />
to the face of the <strong>LCD</strong>.<br />
© <strong>iFixit</strong> — CC BY-NC-SA www.<strong>iFixit</strong>.com Page 14 of 23
<strong>Installing</strong> <strong>MacBook</strong> <strong>Pro</strong> 15" <strong>Core</strong> <strong>Duo</strong> <strong>Model</strong> <strong>A1150</strong> <strong>LCD</strong> Panel High Definition<br />
(1920x1200)<br />
Step 26<br />
Step 27<br />
Pull the display data cable<br />
connector away from its<br />
socket on the <strong>LCD</strong>.<br />
Pull the connector<br />
parallel to the face of<br />
the <strong>LCD</strong>.<br />
Remove the four black Phillips screws along the left and right edges of the<br />
display (eight screws total).<br />
© <strong>iFixit</strong> — CC BY-NC-SA www.<strong>iFixit</strong>.com Page 15 of 23
<strong>Installing</strong> <strong>MacBook</strong> <strong>Pro</strong> 15" <strong>Core</strong> <strong>Duo</strong> <strong>Model</strong> <strong>A1150</strong> <strong>LCD</strong> Panel High Definition<br />
(1920x1200)<br />
Step 28<br />
The next few steps will<br />
require you to separate<br />
the <strong>LCD</strong> from the adhesive<br />
applied to the upper and<br />
lower edges of the front<br />
bezel. A heat gun may be<br />
helpful to soften the adhesive<br />
to prevent damaging the <strong>LCD</strong><br />
panel during removal.<br />
The adhesive is applied<br />
such that it sticks to a<br />
thin steel strip around the<br />
perimeter of the <strong>LCD</strong>. When<br />
prying your <strong>LCD</strong> away from<br />
the front panel, be sure you<br />
are separating the front<br />
panel from the steel strip on<br />
the <strong>LCD</strong>.<br />
Use the flat end of a spudger<br />
to gently lift one of the top<br />
corners of the <strong>LCD</strong> out of the<br />
front bezel.<br />
© <strong>iFixit</strong> — CC BY-NC-SA www.<strong>iFixit</strong>.com Page 16 of 23
<strong>Installing</strong> <strong>MacBook</strong> <strong>Pro</strong> 15" <strong>Core</strong> <strong>Duo</strong> <strong>Model</strong> <strong>A1150</strong> <strong>LCD</strong> Panel High Definition<br />
(1920x1200)<br />
Step 29<br />
Step 30<br />
Work your way along the top<br />
edge of the <strong>LCD</strong>, slowly<br />
prying the attached steel<br />
strip away from the front<br />
bezel.<br />
Now that the top edge is free, slightly lift the <strong>LCD</strong> out of the front bezel for<br />
enough room to pry the steel strip along the lower edge of the <strong>LCD</strong> away<br />
from the front bezel.<br />
Pry along the lower edge of the <strong>LCD</strong> until it is freed from the adhesive on<br />
the front bezel.<br />
© <strong>iFixit</strong> — CC BY-NC-SA www.<strong>iFixit</strong>.com Page 17 of 23
<strong>Installing</strong> <strong>MacBook</strong> <strong>Pro</strong> 15" <strong>Core</strong> <strong>Duo</strong> <strong>Model</strong> <strong>A1150</strong> <strong>LCD</strong> Panel High Definition<br />
(1920x1200)<br />
Step 31<br />
Lift the inverter out of the clutch cover.<br />
Disconnect the <strong>LCD</strong> backlight connector from its socket on the inverter<br />
board.<br />
Step 32<br />
Lift the <strong>LCD</strong> out of the front<br />
bezel, minding any cables<br />
that may get caught.<br />
© <strong>iFixit</strong> — CC BY-NC-SA www.<strong>iFixit</strong>.com Page 18 of 23
<strong>Installing</strong> <strong>MacBook</strong> <strong>Pro</strong> 15" <strong>Core</strong> <strong>Duo</strong> <strong>Model</strong> <strong>A1150</strong> <strong>LCD</strong> Panel High Definition<br />
(1920x1200)<br />
Step 33 — <strong>LCD</strong> Panel High Definition (1920x1200)<br />
Reconnect the following connectors back in their respective sockets on the<br />
logic board:<br />
Camera connector cable<br />
Inverter cable<br />
Left fan<br />
Display data cable<br />
Do not reassemble the display to the lower case assembly just yet.<br />
The display can lay next to the laptop.<br />
© <strong>iFixit</strong> — CC BY-NC-SA www.<strong>iFixit</strong>.com Page 19 of 23
<strong>Installing</strong> <strong>MacBook</strong> <strong>Pro</strong> 15" <strong>Core</strong> <strong>Duo</strong> <strong>Model</strong> <strong>A1150</strong> <strong>LCD</strong> Panel High Definition<br />
(1920x1200)<br />
Step 34<br />
Connect the display data cable and the inverter cable connector back into<br />
their respective sockets on the original <strong>LCD</strong> assembly.<br />
Step 35<br />
Use a spudger to re-seat the trackpad/keyboard ribbon cable connector to<br />
its socket on the logic board.<br />
Carefully realign the upper case over the lower case.<br />
Do not secure the upper case to the lower case just yet.<br />
© <strong>iFixit</strong> — CC BY-NC-SA www.<strong>iFixit</strong>.com Page 20 of 23
<strong>Installing</strong> <strong>MacBook</strong> <strong>Pro</strong> 15" <strong>Core</strong> <strong>Duo</strong> <strong>Model</strong> <strong>A1150</strong> <strong>LCD</strong> Panel High Definition<br />
(1920x1200)<br />
Step 36<br />
Connect an external USB mouse to your <strong>MacBook</strong> <strong>Pro</strong>.<br />
Power up the <strong>MacBook</strong> <strong>Pro</strong> and boot into the OS.<br />
Carefully lift the upper case and use a spudger to pry the<br />
trackpad/keyboard ribbon cable up off the logic board. Remove the upper<br />
case from the computer.<br />
Use your external mouse to select the "Sleep" option from the Apple menu.<br />
Make sure that the sleep light is pulsing before continuing.<br />
© <strong>iFixit</strong> — CC BY-NC-SA www.<strong>iFixit</strong>.com Page 21 of 23
<strong>Installing</strong> <strong>MacBook</strong> <strong>Pro</strong> 15" <strong>Core</strong> <strong>Duo</strong> <strong>Model</strong> <strong>A1150</strong> <strong>LCD</strong> Panel High Definition<br />
(1920x1200)<br />
Step 37<br />
Disconnect the display data cable and inverter cable from the original <strong>LCD</strong><br />
panel.<br />
Connect the display data cable and inverter to the high definition <strong>LCD</strong><br />
panel.<br />
© <strong>iFixit</strong> — CC BY-NC-SA www.<strong>iFixit</strong>.com Page 22 of 23
<strong>Installing</strong> <strong>MacBook</strong> <strong>Pro</strong> 15" <strong>Core</strong> <strong>Duo</strong> <strong>Model</strong> <strong>A1150</strong> <strong>LCD</strong> Panel High Definition<br />
(1920x1200)<br />
Step 38<br />
Use a spudger to re-seat the trackpad/keyboard ribbon cable connector to<br />
its socket on the logic board.<br />
This will wake the machine from sleep mode.<br />
The <strong>MacBook</strong> <strong>Pro</strong> will now readjust itself to a resolution of 1920 x 1200!<br />
The high definition resolution will be retained upon rebooting your<br />
<strong>MacBook</strong> <strong>Pro</strong>. However, if you reset your machine's PRAM/NVRAM, it<br />
will revert to standard definition, and you will need to redo the entire<br />
process!<br />
To reassemble your device, follow these instructions in reverse order.<br />
This docum ent was last generated on 2013-05-16 03:51:04 AM.<br />
© <strong>iFixit</strong> — CC BY-NC-SA www.<strong>iFixit</strong>.com Page 23 of 23