INSTRUCTION MANUAL CyberScan pH/Ion 510 - Welcome to ...
INSTRUCTION MANUAL CyberScan pH/Ion 510 - Welcome to ...
INSTRUCTION MANUAL CyberScan pH/Ion 510 - Welcome to ...

Create successful ePaper yourself
Turn your PDF publications into a flip-book with our unique Google optimized e-Paper software.
<strong>CyberScan</strong> <strong>pH</strong> <strong>510</strong>/<strong>Ion</strong> <strong>510</strong><br />
5 SETUP FUNCTIONS<br />
The advanced SETUP mode lets you cus<strong>to</strong>mize your meter’s preferences and defaults:<br />
P1.0: Memory Clear (Clr)<br />
P2.0: Viewing electrode data (ELE)<br />
P3.0: Selecting buffer sets (bUF)<br />
P4.0: Reset <strong>to</strong> fac<strong>to</strong>ry default settings (rSt)<br />
To enter the SETUP mode:<br />
1. Turn meter OFF.<br />
2. With meter off, press and hold the MODE key and press and release the ON key. The display will show<br />
the [SETUP] indica<strong>to</strong>r. If the display indicates you are in the measurement mode turn the meter off and try<br />
step 2 again until [SETUP] appears.<br />
NOTE: To exit the SETUP mode at anytime without confirming changes press CAL/MEAS until the<br />
measurement mode appears. You may have <strong>to</strong> press CAL/MEAS key two times before the meter reverts <strong>to</strong> the<br />
measurement mode.<br />
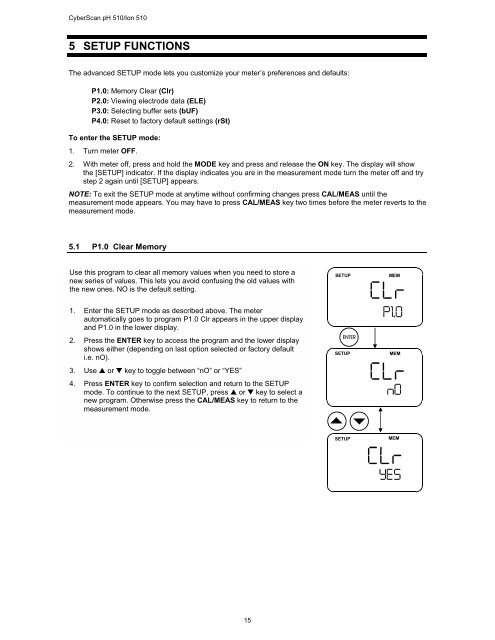
5.1 P1.0 Clear Memory<br />
Use this program <strong>to</strong> clear all memory values when you need <strong>to</strong> s<strong>to</strong>re a<br />
new series of values. This lets you avoid confusing the old values with<br />
the new ones. NO is the default setting.<br />
1. Enter the SETUP mode as described above. The meter<br />
au<strong>to</strong>matically goes <strong>to</strong> program P1.0 Clr appears in the upper display<br />
and P1.0 in the lower display.<br />
2. Press the ENTER key <strong>to</strong> access the program and the lower display<br />
shows either (depending on last option selected or fac<strong>to</strong>ry default<br />
i.e. nO).<br />
3. Use ▲ or ▼ key <strong>to</strong> <strong>to</strong>ggle between “nO” or “YES”<br />
4. Press ENTER key <strong>to</strong> confirm selection and return <strong>to</strong> the SETUP<br />
mode. To continue <strong>to</strong> the next SETUP, press ▲ or ▼ key <strong>to</strong> select a<br />
new program. Otherwise press the CAL/MEAS key <strong>to</strong> return <strong>to</strong> the<br />
measurement mode.<br />
15