REMOTE SURVEILLANCE CAMERA - One Call
REMOTE SURVEILLANCE CAMERA - One Call
REMOTE SURVEILLANCE CAMERA - One Call

You also want an ePaper? Increase the reach of your titles
YUMPU automatically turns print PDFs into web optimized ePapers that Google loves.
Using the Camera<br />
Using the Camera<br />
With the camera setup and connected, you can now set up local viewing, remote viewing, and<br />
wireless connectivity. Before starting the installation, please ensure your computer is connected<br />
to the same local network as the camera and has access to the Internet.<br />
It is recommended to install the camera when your computer is wired to the local network. If you<br />
are using the wireless connection on your computer, please connect your computer to your<br />
wireless router using an Ethernet cable (not included).<br />
14<br />
Note: The following refers to a Windows Vista installation. Security windows may differ<br />
in Windows XP.<br />
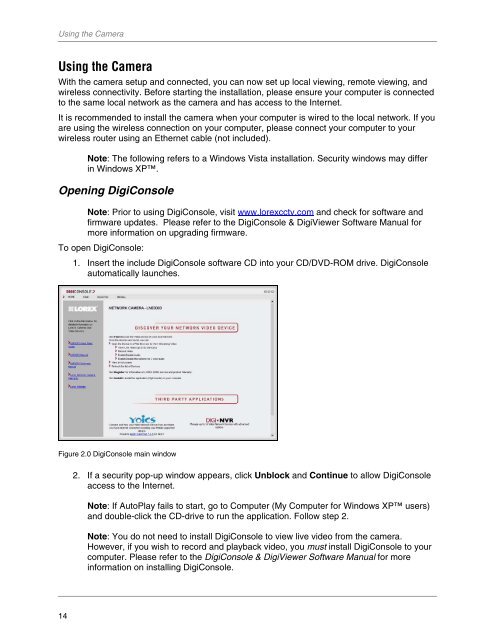
Opening DigiConsole<br />
Note: Prior to using DigiConsole, visit www.lorexcctv.com and check for software and<br />
firmware updates. Please refer to the DigiConsole & DigiViewer Software Manual for<br />
more information on upgrading firmware.<br />
To open DigiConsole:<br />
1. Insert the include DigiConsole software CD into your CD/DVD-ROM drive. DigiConsole<br />
automatically launches.<br />
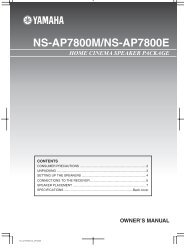
Figure 2.0 DigiConsole main window<br />
2. If a security pop-up window appears, click Unblock and Continue to allow DigiConsole<br />
access to the Internet.<br />
Note: If AutoPlay fails to start, go to Computer (My Computer for Windows XP users)<br />
and double-click the CD-drive to run the application. Follow step 2.<br />
Note: You do not need to install DigiConsole to view live video from the camera.<br />
However, if you wish to record and playback video, you must install DigiConsole to your<br />
computer. Please refer to the DigiConsole & DigiViewer Software Manual for more<br />
information on installing DigiConsole.