MXEditor Programming Manual - One Call
MXEditor Programming Manual - One Call
MXEditor Programming Manual - One Call

You also want an ePaper? Increase the reach of your titles
YUMPU automatically turns print PDFs into web optimized ePapers that Google loves.
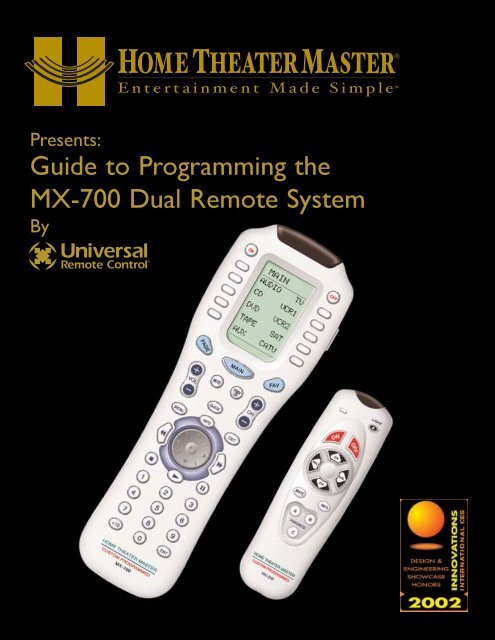
Presents:<br />
Guide to <strong>Programming</strong> the<br />
MX-700 Dual Remote System<br />
By
Guide to <strong>Programming</strong> the MX-700 Dual Remote Control System © 2002 Universal Remote Control, Inc.<br />
The information in this manual is copyright protected. No part of this manual may be copied or reproduced in any<br />
form without prior written consent from Universal Remote Control, Inc.<br />
UNIVERSAL REMOTE CONTROL, INC. SHALL NOT BE LIABLE FOR OPERATIONAL,TECHNICAL OR EDITORIAL<br />
ERRORS/OMISSIONS MADE IN THIS MANUAL.<br />
The information in this manual may be subject to change without prior notice.<br />
Home Theater Master is a registered trademark of Universal Remote Control, Inc. Entertainment Made Simple is a<br />
trademark of Universal Remote Control, Inc. All other brand or product names are trademarks or registered<br />
trademarks of their respective companies or organizations.<br />
500 Mamaroneck Avenue<br />
Harrison, NY 10528<br />
Phone: (914) 835-4484<br />
Fax: (914) 835-4532
Table of Contents<br />
BEFORE YOU START 1<br />
Prequalifications 1<br />
You Need a Personal Computer With Serial Port 1<br />
You Need an RS232 Connecting Cable & Adapters As Necessary 1<br />
You Need to be Skilled With Windows and Home Theater Configuration 1<br />
How To Use This Book 1<br />
BASIC PROGRAMMING GUIDELINES 2<br />
Overview 2<br />
The Goal - Minimize Training Time and Effort 2<br />
TIP - Program To Operate As Shown In The Guide to Operation 2<br />
MAIN Power On and Power Off 2<br />
MAIN Activity Based Macros 3<br />
MAIN Punch Through Volume and Mute 3<br />
FAV Channel Macros Are Optional 4<br />
The SideKick 4<br />
The <strong>Programming</strong> Window 5<br />
WINDOWS,MENUS,TOOLS AND DEFINITIONS 5<br />
The Menu Bar and the Menus 6<br />
File Menu 6<br />
Program Menu 6<br />
Communications Menu 7<br />
Help Menu 7<br />
The Toolbar and Shortcut Buttons 7<br />
The Simulator 8<br />
Navigating and Selecting Buttons 8<br />
Button Capabilities and Flags 8<br />
Tree View 9<br />
Devices and Pages 9<br />
i<br />
T<br />
H<br />
E<br />
M<br />
X<br />
7<br />
0<br />
0<br />
D<br />
U<br />
A<br />
L<br />
R<br />
E<br />
M<br />
O<br />
T<br />
E<br />
S<br />
Y<br />
S<br />
T<br />
E<br />
M
ii<br />
U<br />
S<br />
I<br />
N<br />
G<br />
M<br />
X<br />
E<br />
D<br />
I<br />
T<br />
O<br />
R<br />
T<br />
O<br />
P<br />
R<br />
O<br />
G<br />
R<br />
A<br />
M<br />
Table of Contents<br />
MX-700 Tree View or SideKick Via Tabs 10<br />
The Edit and Label Buttons Window 11<br />
The Edit and Label Buttons Toolbar 11<br />
The Delete Window 11<br />
Labels 12<br />
Shortcuts - Copying Buttons 12<br />
The Macro/Favorite Window 13<br />
The Macro Toolbar 13<br />
Re-Ordering Macro Steps 13<br />
Macro Details 13<br />
STEP BY STEP TUTORIAL 14<br />
<strong>Programming</strong> Overview 14<br />
A. New File, Existing File on PC or in Remote 14<br />
B. Use SAVE AS 14<br />
C. Use the Program Menu 14<br />
D. Save and Export 14<br />
E. Download to both Remote Controls 14<br />
Creating, Naming and Arranging Devices 15<br />
Open the Create and Name Devices Window 15<br />
Creating Devices 15<br />
Using the IR Database 17<br />
Discrete Codes,Toggles and other New Words 17<br />
Selecting a Code Set from the Database 17<br />
Testing 20<br />
Downloading to TEST Pre-Programmed IR Commands From The Database 20<br />
Preparing the List of Buttons to be Learned 20<br />
Using LCD Button Editor 21<br />
Labeling and Deleting Buttons 21<br />
Dragging and Dropping Buttons 22
Table of Contents<br />
Hiding Pages 22<br />
Moving Through Pages In Favorites 22<br />
Shortcuts - Copying Existing Buttons 22<br />
Learning Tips 23<br />
Learning IR Codes <strong>One</strong> at a Time 23<br />
Learning a Batch of Buttons Efficiently 24<br />
Download and Test All Learned Buttons 25<br />
Copying and Pasting Devices 25<br />
Importing and Exporting Devices 26<br />
Importing Step by Step 26<br />
Macro <strong>Programming</strong> 27<br />
What is a Macro? 27<br />
What Buttons Can Playback a Macro? 27<br />
Discrete IR Codes vs Toggle IR Codes 27<br />
Toggle Commands create “Point & Pray” Macros 28<br />
Finding Workarounds for Toggle Commands in Macros 28<br />
<strong>Programming</strong> a Power On Macro 29<br />
<strong>Programming</strong> a Power Off Macro 33<br />
<strong>Programming</strong> Activity Macros on MAIN LCD “Device” Buttons 34<br />
<strong>Programming</strong> FAVORITE Macros 35<br />
Inserting Macros (Copying or Cloning a Macro) 36<br />
<strong>Programming</strong> Punch Through 37<br />
<strong>Programming</strong> the SideKick 38<br />
Backlight On Time 41<br />
Downloading to MX-700 and SideKick 41<br />
Download Failures 42<br />
Uploading from the Remote to PC 43<br />
iii<br />
T<br />
H<br />
E<br />
M<br />
X<br />
7<br />
0<br />
0<br />
D<br />
U<br />
A<br />
L<br />
R<br />
E<br />
M<br />
O<br />
T<br />
E<br />
S<br />
Y<br />
S<br />
T<br />
E<br />
M
iv<br />
U<br />
S<br />
I<br />
N<br />
G<br />
M<br />
X<br />
E<br />
D<br />
I<br />
T<br />
O<br />
R<br />
T<br />
O<br />
P<br />
R<br />
O<br />
G<br />
R<br />
A<br />
M<br />
Table of Contents<br />
ADVANCED PROGRAMMING TECHNIQUES AND IDEAS 44<br />
Push and Hold Macros 44<br />
Push and Hold for Activity Macros and Tap to Switch Devices 44<br />
Two Functions on <strong>One</strong> LCD Button 44<br />
Status Messages for Impatient Clients with Long Macros 45<br />
Helping Confused Clients 47<br />
TOAD - TV Input “Scrolls” or “Toggle” and has no Workaround 47<br />
All the Components Have “Toggle” Power Commands 48<br />
MAIN Page Only - Changing Devices Confuses Client 49<br />
Modular Macro <strong>Programming</strong> - Using the Import Macro Feature 53<br />
Building A Device Library 53<br />
INDEX 54<br />
ERRATA 59<br />
Batteries 59<br />
Cleaning The Screen 59<br />
Warranty 59<br />
Specifications 59<br />
NOTES 60
Prequalifications<br />
You Need a Personal Computer With Serial Port<br />
<strong>MXEditor</strong> will run on any Pentium II or faster Windows PC. Your PC should be equipped with an adequate amount<br />
of RAM for the operating system you use. <strong>MXEditor</strong> is compatible with the Windows 98, ME, 2000, XP and XP Pro<br />
operating systems.<br />
Note that many modern laptops do not come equipped with a serial port. If there is no serial port, purchase a USB<br />
to Serial adapter. Although many manufacturers supply adapters or hubs for this purpose, we can vouch for the<br />
operation of Belkin and Keyspan hubs and adapters.<br />
<strong>MXEditor</strong> is installed via a self extracting installer file downloadable from www.hometheatermaster.com. You need a<br />
connection to the internet to download the file or to update <strong>MXEditor</strong>.<br />
You Need an RS232 Connecting Cable & Adapters As Necessary<br />
Universal offers a pre-made cable suitable for connecting a Serial port to a Home Theater Master remote control.<br />
However, should you wish to make your own, here is the pin configuration for a serial cable:<br />
DB 9 DB25 Function Stereo 3.5mm Plug Connection<br />
Pin 3 Pin 2 Host Transmit To Tip<br />
Pin 2 Pin 3 Host Receive To Middle Ring<br />
Pin 5 Pin 7 Host Ground To Base Ring<br />
You Need to be Skilled With Windows and Home Theater Configuration<br />
Before attempting to learn <strong>MXEditor</strong> you should have a working knowledge of Windows.We assume that you<br />
understand how Windows programs open, close, minimize, maximize and save files. If you do not know how to use a<br />
mouse or navigate through Windows Explorer and My Computer, please stop now, go to a bookstore and purchase a<br />
basic Windows "How To" manual. You will not understand any of the following instructions until you have these<br />
fundamentals mastered. In addition, we assume that you understand home theater operation and configuration in<br />
great detail. Many of the tricks of programming automated home theaters have nothing to do with programming<br />
remote controls and everything to do with how the system is hooked up!<br />
How To Use This Book<br />
Before You Start<br />
Read the planning guide first with the Operations <strong>Manual</strong> and the remote control itself beside you. After familiarizing<br />
yourself with its basic capabilities, dive in. Using the step by step instructions most installers complete their first basic<br />
configuration very quickly.<br />
If you have questions about a specific feature, use the INDEX or the TABLE OF CONTENTS for page numbers for<br />
the feature. When you are ready to see how you can stretch the MX-700 to fit unusual requirements with its<br />
advanced features, read the Advanced <strong>Programming</strong> section. If you use this manual on screen electronically, both the<br />
index and the table of contents are HYPERLINKED. Simply click on the page number in the table of contents or<br />
index and you are immediately jumped to the page you clicked.<br />
1<br />
T<br />
H<br />
E<br />
M<br />
X<br />
7<br />
0<br />
0<br />
D<br />
U<br />
A<br />
L<br />
R<br />
E<br />
M<br />
O<br />
T<br />
E<br />
S<br />
Y<br />
S<br />
T<br />
E<br />
M
2<br />
Overview<br />
The Goal - Minimize Training Time and Effort<br />
Training clients has traditionally taken too much of an installer’s time and effort. Creating<br />
hand written summary sheets and instruction books for customers is a waste of time.The<br />
MX-700 Dual Remote Control system is designed to save time.With each remote control,<br />
Home Theater Master includes a pre-printed Operation <strong>Manual</strong>. Unlike other remote<br />
controls, this manual has nothing to do with setup or programming. It is a guide to operating<br />
the client’s home theater! Although the flexibility of the <strong>MXEditor</strong> software enables you to<br />
program remote controls in thousands of different ways, the operations manual will show<br />
the customers how to operate their home theater if you follow a few tips as you program.<br />
TIP - Program To Operate As Shown In The Guide to Operation<br />
The key things you have to program are:<br />
1 You must create a DEVICE (a set of hard buttons and 1 to 4 dedicated LCD pages) for each remote<br />
control in the system. Use the IR database or IR learning so that the MX-700 replaces all the remote<br />
controls for normal operation.<br />
2 The MAIN Power On and Power Off buttons turn on and off the entire system with a macro.<br />
3 Each of the MAIN LCD Device buttons issues a macro that reconfigures the system inputs and modes as<br />
necessary for the client to watch or listen to the selected source.<br />
4 Punch Through Volume and Mute have been programmed for all devices so that the client can always<br />
adjust the volume regardless of which device has been selected.<br />
MAIN Power On and Power Off<br />
Turn On Your Entire System<br />
Power on/off your entire system<br />
with the MAIN Menu by following<br />
these steps:<br />
1. Touch the MAIN button to make<br />
sure that you are on the MAIN Menu.<br />
It doesn’t matter which page of the<br />
MAIN Menu is displayed.<br />
2. Point the Home Theater Master at<br />
the system (usually a repeating sensor<br />
near the screen).<br />
3. Touch the On or Off button as<br />
desired. Hold the remote steady and<br />
pointed at the system until all components<br />
are correctly powered on or off.<br />
Turning on the system may take ten to<br />
twenty seconds.<br />
4. If one component does not turn<br />
on/off, simply touch the button again.<br />
TIP – Hold the remote control<br />
steady and pointed at the system<br />
until the indicator<br />
stops flashing.<br />
2<br />
Page 2 of the Owner’s <strong>Manual</strong><br />
describes Powering On/Off.<br />
Basic <strong>Programming</strong> Guidelines<br />
Since most systems will require some delays in the macros you program to turn the system on,<br />
you will make operation much smoother for your customers if you have them turn everything on<br />
first with one long macro.Then, after the system is on, they can switch between activities like DVD<br />
and Satellite without lengthy delays in the macros.<br />
In a system that responds instantly (no long Power On delays before responding to input or<br />
mode commands) you might opt to program Power On commands for each activity macro as well.<br />
The manual describes a two step operation:<br />
1) Go to MAIN and press Power On.<br />
2) Choose your activity and tap the correct button.<br />
GUIDE TO<br />
SSIIMPLLEE<br />
HOME<br />
THEATER<br />
OPERATION<br />
WITH YOUR<br />
HOME THEATER MASTER<br />
REMOTE CONTROLS<br />
The Owner’s <strong>Manual</strong> for the<br />
MX-700 Dual remote control<br />
system was created to be a<br />
“summary sheet” for the<br />
entire home theater.<br />
The manual emphasizes the need for the client to point the remote during the macro at the TV or<br />
the sensor near the TV. You need to spend time explaining the time needed for each macro.<br />
Encourage the client to be careful to hold the remote control steady and pointed at the<br />
equipment or sensor until the macro is finished.<br />
1
MAIN Activity Based Macros<br />
3<br />
Using the MAIN Menu<br />
The MAIN Menu enables you to either<br />
select a new Activity or simply select a<br />
new Device to control.<br />
When you select a new activity, the<br />
Home Theater Master will issue a<br />
MACRO (a timed sequence of many<br />
commands from many different remote<br />
controls). This MACRO was custom<br />
programmed for your system by your<br />
installer. It will issue all of the commands<br />
necessary to switch the sound<br />
and picture of your system.<br />
When you select a device, the Home<br />
Theater Master becomes the remote<br />
control you select WITHOUT affecting<br />
the home theater.<br />
Select a New ACTIVITY<br />
1. Touch the MAIN button to make<br />
sure that you are on the MAIN<br />
Menu. Touch the PAGE button if you<br />
don’t see the activity you want.<br />
2. Point the Home Theater Master at<br />
the system (or at the repeating<br />
INFRARED sensor if one is<br />
installed).<br />
3. Touch the activity button next to<br />
the desired screen label. For example<br />
if you wish to watch a DVD<br />
movie, touch the DVD button.<br />
Hold the remote<br />
steady and<br />
pointed at the<br />
system until<br />
the sound<br />
and picture<br />
have been<br />
switched.<br />
The MAIN Menu buttons issue<br />
MACROS that reset the sound and<br />
picture of your home theater to a new<br />
activity.<br />
TIP TIP– - Hold the remote control control<br />
steady and pointed at at the the system sys-<br />
until tem the until the indicator indicator stops<br />
flashing.<br />
stops flashing.<br />
If the sound or the picture still are<br />
not correct, repeat steps 1 - 4.<br />
Select a DEVICE Only<br />
1. Touch the MAIN button to make<br />
sure that you are on the MAIN<br />
Menu. Touch the Page button if you<br />
don’t see the activity you want.<br />
2. Press and hold the MAIN button.<br />
While holding the MAIN button<br />
down, touch the button next to the<br />
desired screen label. The remote<br />
control will now display the name of<br />
the selected device and all buttons<br />
will operate the device, however, the<br />
sound and the picture of your system<br />
have not been changed.<br />
Page 3 and 4 of the Owner’s <strong>Manual</strong><br />
describe how Activity macros automate<br />
their system.<br />
MAIN Punch Through Volume and Mute<br />
5<br />
Controlling the Volume<br />
For your convenience, the VOLUME<br />
Up, VOLUME Down and the MUTE<br />
buttons will always control the surround<br />
sound system, regardless of<br />
what activity or device you are controlling.<br />
Operating any Device<br />
You can see the name of the device at<br />
the top of the screen. If it is not the<br />
one you want, return to the MAIN<br />
Menu and select a new device or<br />
activity.<br />
All of the printed<br />
label buttons on the<br />
remote operate just<br />
like the original<br />
remote control (with<br />
the exception of<br />
Volume Up, Volume<br />
Down and Mute<br />
which operate your<br />
surround sound system).<br />
6<br />
The Power ON and OFF buttons now<br />
operate only the selected device (to<br />
turn the entire system on/off, return to<br />
the MAIN Menu).<br />
4<br />
The ten screen labeled buttons are<br />
now labeled with any commands<br />
that do not fit one of the buttons with<br />
printed labels.<br />
Up to 40 screen labeled buttons are<br />
available for each device. To view<br />
the additional buttons, press the<br />
PAGE button to display additional<br />
pages. The Home Theater Master<br />
can display up to four pages of<br />
screen labeled buttons for each<br />
activity or device! As you scroll<br />
through the pages, notice that the<br />
bottom title bar displays which page<br />
you are viewing (PAGE 1, PAGE 2,<br />
etc.).<br />
Page 5 of the Owner’s <strong>Manual</strong> describes<br />
how volume always adjusts the surround<br />
sound system. Page 5 and 6 describe<br />
normal operation of any device.<br />
Basic <strong>Programming</strong> Guidelines<br />
The device LCD buttons on MAIN are automatically programmed<br />
with a navigational “jump” to the device they correspond to.<br />
The device LCD buttons on the MAIN menu should be programmed<br />
with a macro that issues every command necessary to reconfigure<br />
the home theater for the activity (inputs, modes, play, channel etc. ).<br />
This macro will be issued every time the client presses the button.<br />
This is described in the manual.<br />
Remember to train your power user clients to hold down the MAIN<br />
button while they press a device LCD button.That way, the macro is<br />
not sent, the MX-700 simply jumps to the device.<br />
If you are willing to make your own summary sheet, you can program<br />
the activity macro to only be issued if the client presses and holds<br />
the button.This requires the use of the Advanced <strong>Programming</strong><br />
technique Press and Hold Macros on page 44.<br />
Use the Punch Through programming step (step #6) to program<br />
Volume and Mute to operate the surround sound processor<br />
regardless of what device is active.<br />
It has been common in the past for installers to program a way for<br />
the customer to watch TV using the internal speakers of the TV<br />
rather than the surround sound system.There is a good way to<br />
accomplish this on the MX-700 system.You could program the TV’s<br />
internal volume on two of the LCD buttons on the TV device.<br />
3<br />
T<br />
H<br />
E<br />
M<br />
X<br />
7<br />
0<br />
0<br />
D<br />
U<br />
A<br />
L<br />
R<br />
E<br />
M<br />
O<br />
T<br />
E<br />
S<br />
Y<br />
S<br />
T<br />
E<br />
M
4<br />
U<br />
S<br />
I<br />
N<br />
G<br />
M<br />
X<br />
E<br />
D<br />
I<br />
T<br />
O<br />
R<br />
T<br />
O<br />
P<br />
R<br />
O<br />
G<br />
R<br />
A<br />
M<br />
FAV Channel Macros Are Optional<br />
7<br />
The thumbpad is a Home Theater<br />
Master exclusive control for both right<br />
and left handed operators. When you<br />
are operating a device with any kind of<br />
on-screen menu, guide or display, the<br />
thumbpad offers you easy one-handed<br />
control with your thumb.<br />
Simply rock your thumb in the<br />
direction you<br />
wish to<br />
move the<br />
onscreen<br />
indicator.<br />
You don’t have<br />
to look at the remote control!<br />
To SELECT or say OK, simply press<br />
your thumb straight down. You’ll feel<br />
the click as the OK/SELECT/ENTER<br />
command is sent.<br />
Using FAV - Favorites<br />
The favorites menu is created uniquely<br />
for you by your custom installer. The<br />
screen labeled buttons now issue<br />
timed sequences of commands that<br />
will reset your system with one touch.<br />
Typically, the favorites menu is programmed<br />
with one touch “shortcut”<br />
buttons that issue all of the necessary<br />
commands to change the channel of<br />
your satellite dish or television. Thus,<br />
instead of entering a two or three digit<br />
number (which you must remember)<br />
and the enter command, you simply<br />
select the favorite button labeled HBO,<br />
CNN, TNT etc.<br />
The Favorite menu can be programmed<br />
with any favorite activity. It is not limited<br />
to channel favorites. Your custom<br />
installer may invent a feature unique to<br />
The SideKick<br />
your system. Discuss any non-channel<br />
favorite label with your installer, so that<br />
you understand how to use it.<br />
To use the FAVORITE Menu:<br />
1. Press the FAV button. The top<br />
title bar will now display FAV.<br />
8<br />
Use the FAV button and the PAGE<br />
button to navigate through your various<br />
pages of FAVORITES. The FAV<br />
button scrolls up from Page 1 to<br />
Page 5, using the PAGE button<br />
scrolls down from Page 5 to Page 1.<br />
As you select a new page, the bottom<br />
title bar will display the page<br />
number (page 1, page 2, etc.)<br />
To EXIT Fav and return to the last<br />
activity/device selected, press the<br />
MAIN button ONCE. To EXIT Fav<br />
and go to the MAIN Menu, press the<br />
MAIN button twice.<br />
Page 7 and 8 of the Owner’s <strong>Manual</strong><br />
describe how the FAV button navigates to<br />
the Favorites pages.<br />
9<br />
Backlighting<br />
Turn on the backlighting<br />
by pressing<br />
the LIGHT button on<br />
the right side of the<br />
Home Theater<br />
Master remote control.<br />
The backlighting<br />
will stay on briefly,<br />
then turn off automatically.<br />
If you wish<br />
to turn it off without<br />
waiting, simply tap<br />
the LIGHT button<br />
again.<br />
* Note that your battery life is reduced<br />
by how often you use the backlighting.<br />
Changing Contrast<br />
Press and Hold BOTH the MAIN and<br />
the UP thumbpad button at the same<br />
time to make the screen DARKER.<br />
Press and Hold BOTH the MAIN and<br />
the DOWN thumbpad button at the<br />
same time to make it LIGHTER.<br />
Using the SideKickTM 10<br />
The SideKickTM remote control offers<br />
the simplest way to<br />
enjoy watching one of<br />
your favorite activities.<br />
Typically programmed<br />
for either TV or<br />
Satellite viewing, it<br />
does not replace the<br />
MX700TM, but it does<br />
offer a comfortable,<br />
ultra simple interface<br />
perfect for casual<br />
users or children.<br />
The ON button<br />
turns on your entire<br />
home theater and sets it up to watch<br />
TV or Satellite (whatever is your<br />
favorite). The OFF button turns the<br />
entire system off. Remember to hold<br />
the remote steady and pointed at the<br />
system until all components are correctly<br />
powered on or off. Turning on<br />
the system may take ten to twenty<br />
seconds.<br />
TIP – You can tell when to stop<br />
pointing the SideKick TM when<br />
the command LED indicator<br />
stops flashing.<br />
CHANNEL and VOLUME control buttons<br />
will operate the device programmed<br />
into these buttons.There are<br />
also three Favorite buttons that take<br />
you directly to your three favorites<br />
(typically channels) with one button<br />
press. The LIGHT button will light up<br />
the SideKick buttons for easy visibility<br />
in low-light conditions.<br />
Page 9 of the Owner’s <strong>Manual</strong> describes<br />
how backlighting and contrast adjust. Page<br />
10 describes how to use the SideKick.<br />
Basic <strong>Programming</strong> Guidelines<br />
A channel lineup change in the future will require a service call to reprogram a<br />
few pages of channel macros for your client. If the client approves the costs of<br />
reprogramming whenever the channel lineup changes, then by all means<br />
program channel macros in FAV. However, there are many other uses for FAV<br />
that will not be affected by channel lineup changes.<br />
Remember the advantage of FAV. Whenever you press the FAV button, the<br />
MX-700 remembers the device you were last on. So, when you are finished<br />
using FAV, you simply tap the MAIN button. The MX-700 will return to the<br />
device and page you were last using!<br />
FAV LCD buttons can do a macro with 1 to 190 steps. Thus it can issue (by<br />
programming a MACRO of one step) any single IR command that is learned or<br />
preprogrammed with one exception. FAV LCD buttons cannot issue an IR code<br />
that must be sustained when the user presses and holds the button, like volume<br />
up. This makes FAV the perfect place to program one step macros to all of the<br />
system components’ Power commands. You train your customer to go to FAV to<br />
turn individual components on and off. This is the recommended technique<br />
when the lack of discrete on and off codes makes macros unreliable.<br />
In most systems, you will program the SideKick for watching TV or satellite.The<br />
button labeling of the SideKick is best suited for that. However, the manual does<br />
say “typically.” Sometimes, a customer may rarely watch TV and usually watch<br />
DVD movies. Feel free to program the Channel up and down buttons with the<br />
DVD Chapter commands, the A, B and C buttons with Play, Pause and Stop.The<br />
Power On button can easily be programmed with a turn on macro that<br />
configures the system to watch DVDs.<br />
Each of the SideKick’s buttons can be programmed with the IR command or<br />
macro of ANY MX-700 button. All can be macros, all can be IR commands, or<br />
any mix you can imagine. However, there is only one “page” of SideKick<br />
commands.
The <strong>Programming</strong> Window<br />
A<br />
B<br />
C<br />
D<br />
E<br />
F<br />
Windows, Menus,Tools and Definitions<br />
Menus and Shortcut buttons for common tasks. The Program Menu activates each task in the correct order.<br />
Tree View of the MX-700 configuration. Tabs enable you to switch to program the MX-700 or the SideKick.<br />
Tree View enables quick navigation, Sidekick enables drag and drop programming of the SideKick.<br />
The MX-700 Simulator is used to navigate and to select a button to program, edit or record a macro to.<br />
Floating Edit and Label Buttons window is used to label buttons and move IR commands via shortcuts.<br />
The floating Macro and Favorite window is used to view and edit macros.<br />
The information bar displays whether your keyboard is cap locked or num locked.<br />
A<br />
B C D<br />
The important thing to remember as you program is that most Windows conventions hold true in <strong>MXEditor</strong>. Explore<br />
the program menus. Hover your mouse over most of the buttons and controls and a balloon will appear with a hint<br />
as to purpose. Navigate around the program window and explore a little before you begin programming.<br />
E<br />
F<br />
5<br />
T<br />
H<br />
E<br />
M<br />
X<br />
7<br />
0<br />
0<br />
D<br />
U<br />
A<br />
L<br />
R<br />
E<br />
M<br />
O<br />
T<br />
E<br />
S<br />
Y<br />
S<br />
T<br />
E<br />
M
6<br />
U<br />
S<br />
I<br />
N<br />
G<br />
M<br />
X<br />
E<br />
D<br />
I<br />
T<br />
O<br />
R<br />
T<br />
O<br />
P<br />
R<br />
O<br />
G<br />
R<br />
A<br />
M<br />
The Menu Bar and the Menus<br />
Like all Windows programs, the menu bar reveals menus of commonly used tasks. Simply click on the menu title and<br />
the menu appears. Move the mouse cursor over the menu choice you wish to select and click.<br />
File Menu<br />
Configurations for particular clients are saved as files on your PC.Thus the file menu enables you to open, save and<br />
save copies of configurations.<br />
New - Use this to start programming a file from scratch.<br />
Open - Use this to open a file anywhere on your computer.<br />
Close - Closes only the current file, not <strong>MXEditor</strong>.<br />
Save - If you wish to save your work to the current file.<br />
Save As - If you wish to save a new copy of the current file<br />
with a new file name.<br />
Recently opened files appear here for you to reopen with a click.<br />
Exit - To exit <strong>MXEditor</strong> completely.<br />
Program Menu<br />
Windows, Menus,Tools and Definitions<br />
Many of the Program Menu steps will open a new window in front of the main window. Simply click on Cancel to<br />
close these windows if you open them in the course of exploring <strong>MXEditor</strong>.<br />
1. Create & Name Devices - Opens a new floating window for creating and<br />
naming Devices. You’ll need a grouping of hard buttons and LCD pages for every<br />
remote control that you are replacing. That is called a Device. With the Create &<br />
Name Devices window, you will be able to create, name and rearrange up to twenty<br />
devices.<br />
2. IR Database - Opens a new floating window to test and program IR code sets<br />
from the Universal IR database<br />
3. LCD Button Editor - Opens a new floating window that allows you to arrange,<br />
label and program the LCD buttons for MAIN, Devices and your Favorites.<br />
4. Learn - Grayed out until you select a button. Once you have selected a button, selecting LEARN on the<br />
<strong>Programming</strong> Menu activates the LEARNING function (which is a button on the Edit and Label buttons window) on<br />
whatever button is currently selected.<br />
5. Macro - This menu choice is grayed out until you select a button capable of being programmed with a macro<br />
(Power On, Power Off or an LCD button only). Once you have selected a button, selecting Macro activates the<br />
MACRO recorder. Now, use the MX-700 Simulator to select each step of your macro. The recorded steps appear in<br />
the Macro window.
6. Punch Through - Opens a floating window that enables you to program a button to “punch through” to<br />
another device.Typically used to program Volume Up, Down and Mute to always operate the surround sound<br />
receiver/preamp.<br />
7. SideKick - This switches the left hand tabs from TREE VIEW of the MX-700 to a simulator of the the SideKick.<br />
Once the SideKick is in view, you can drag and drop any button of the MX-700 to the SideKick.<br />
8. Backlight On Time - Opens a new window for adjusting the amount of time the backlighting will stay on.<br />
Communications Menu<br />
Upload - Get the programming from a remote control and open it in <strong>MXEditor</strong> as a<br />
new file. Once it is uploaded, you can save it, edit it and/or export the devices in it.<br />
Download - Send the currently open file to the remote control.<br />
Settings - Choose a different com port for the cable connecting the remote control<br />
to your computer.<br />
Help Menu<br />
Go to website - This will open your internet browser, connect to<br />
the internet and link you to the Home Theater Master website for<br />
additional technical support and resources.<br />
Live Update - Click on this after connecting to the Internet to<br />
download the newest version of <strong>MXEditor</strong>.<br />
Firmware Version - Connect your remote control to the PC and click on this to identify the firmware version of<br />
the remote control when asked to do so by technical support.<br />
The Toolbar and Shortcut Buttons<br />
Hover your mouse over the Shortcut buttons, you will see a popup<br />
flag displaying the function of the shortcut. Click on the button to<br />
activate it. The most common functions of the menus are displayed<br />
on the toolbar, plus the two icons for displaying the Edit and Label<br />
Buttons Window , and the Macro Window .<br />
When you click on these shortcut buttons you turn<br />
the corresponding windows display on and off.<br />
Windows, Menus,Tools and Definitions<br />
7<br />
T<br />
H<br />
E<br />
M<br />
X<br />
7<br />
0<br />
0<br />
D<br />
U<br />
A<br />
L<br />
R<br />
E<br />
M<br />
O<br />
T<br />
E<br />
S<br />
Y<br />
S<br />
T<br />
E<br />
M
8<br />
U<br />
S<br />
I<br />
N<br />
G<br />
M<br />
X<br />
E<br />
D<br />
I<br />
T<br />
O<br />
R<br />
T<br />
O<br />
P<br />
R<br />
O<br />
G<br />
R<br />
A<br />
M<br />
The Simulator<br />
Navigating and Selecting Buttons<br />
The Simulator is the center of programming. You use the Simulator to SELECT a<br />
BUTTON. When a button is SELECTED it has a green circle around it. Once a button<br />
is SELECTED, you can use the Edit and Label Buttons Window or the Macro Window<br />
to program it.<br />
When you want to switch to a new device, first, click on the MAIN button.<br />
Choose the new device from the MAIN MENU by double clicking on it.<br />
On a real MX-700, the double click is not necessary. But within <strong>MXEditor</strong><br />
you sometimes will want to program an LCD button on the MAIN page and<br />
single clicking the button enables you to select it for editing or macro<br />
programming.<br />
Cycle through Pages 1 to 4 of any device by clicking on the PAGE button.<br />
Navigate to the FAV device by clicking on the FAV button.<br />
Hover your mouse over a button to see the drag and drop flag.<br />
Click on a button to SELECT it.<br />
Button Capabilities and Flags<br />
Windows, Menus,Tools and Definitions<br />
A button with no flag will not do anything when pressed. It is empty and has no programming yet.<br />
A red dot indicates that the button is programmed with an IR database code. An IR database code can be<br />
tapped or pressed and held for a sustained burst.All buttons except the hard buttons within the MAIN or<br />
FAV devices can be programmed with IR database codes (you cannot program the navigation buttons-PAGE,<br />
MAIN or FAV either) .<br />
An L flag indicates that the button is programmed with a learned IR code. A learned code can be tapped<br />
or pressed and held for a sustained burst. All buttons can be programmed with learned codes (including all<br />
MAIN buttons, hard and LCD) except the buttons on FAV pages and the navigation buttons themselves.<br />
An M flag indicates that the button is programmed with a Macro. Only the LCD buttons and the Power<br />
ON and Power OFF buttons can be programmed with MACROS. Hard buttons cannot be programmed<br />
with MACROS directly (they can issue a macro, if you program the macro on an LCD button and create a<br />
shortcut from the hard button to the LCD button). A macro with a single step cannot be pressed and held<br />
for a sustained burst.<br />
A black arrow on yellow indicates that the button is programmed with a shortcut to another button. A<br />
shortcut programs the button to do whatever is programmed on the button the shortcut points to (thus if<br />
it shortcuts to a learned or preprogrammed code, the button can be pressed and held for a sustained<br />
burst; while if it points to a macro with a single step, it cannot). A shortcut can point to any kind of<br />
button. FAV buttons cannot be programmed with shortcuts.<br />
A PT flag indicates that the button is programmed to “Punch Through” to another device.<br />
The drag and drop flag appears when you hover your mouse over a button. It will reveal the device and<br />
the button label plus indicators for pre-programmed, learned, etc. This aids programming the SideKick.
Tree View<br />
Devices and Pages<br />
Windows, Menus,Tools and Definitions<br />
Tree View controls what you see in the Simulator. It serves as the quickest way to navigate (especially when<br />
programming macros) and enables you to cut, copy and delete devices and/or pages via the right click context<br />
menus.<br />
A Page refers only to a group of ten LCD buttons, not to the hard buttons in the same device.<br />
A Device is comprised of up to four pages of LCD buttons and one set of functions for the hard buttons.<br />
Click on a device to SELECT it (the highlighting indicates it is selected) and the corresponding MAIN LCD<br />
button (the green circle indicates that a button is selected).<br />
Double Click on a device to expand or collapse your view of its pages (or you can single click on the +/-).<br />
Collapsed Expanded<br />
A single click on a page in Tree View will change the SIMULATOR to the selected PAGE and DEVICE.<br />
Right click on a device to reveal the Device Context Menu:<br />
Insert Page will insert an additional page to the device (to a maximum of 4).<br />
Cut will copy the entire device and when pasted will delete the original.<br />
Copy will copy the entire device without changing the original.<br />
Paste will paste the copied or cut device into the selected device, completely<br />
replacing whatever previous programming you had.<br />
Import Device will enable you to import a device you have previously exported,<br />
replacing the selected device.<br />
Export Device will allow you to save the selected device for future import.<br />
Delete Contents will delete all labels and codes but not the pages of a device or<br />
the name of the selected device.<br />
Delete will delete everything about the selected device.<br />
9<br />
T<br />
H<br />
E<br />
M<br />
X<br />
7<br />
0<br />
0<br />
D<br />
U<br />
A<br />
L<br />
R<br />
E<br />
M<br />
O<br />
T<br />
E<br />
S<br />
Y<br />
S<br />
T<br />
E<br />
M
10<br />
U<br />
S<br />
I<br />
N<br />
G<br />
M<br />
X<br />
E<br />
D<br />
I<br />
T<br />
O<br />
R<br />
T<br />
O<br />
P<br />
R<br />
O<br />
G<br />
R<br />
A<br />
M<br />
Right click on a page to reveal the Context Menu for pages:<br />
You can delete the contents of a page, or delete the entire selected page.When you select the last page (4<br />
of 4, 3 of 3, 2 of 2 or 1 of 1) you can HIDE a page. A page that is hidden can still be used to hold<br />
commands that are used for macros. However, the end user will not be able to navigate to a HIDDEN page,<br />
so he/she will never accidentally issue codes that you place there.<br />
Cut, copy and paste are always grayed out, you cannot cut, copy and paste PAGES.<br />
MX-700 Tree View or SideKick Via Tabs<br />
Windows, Menus,Tools and Definitions<br />
Switch between the two views by left clicking on the tabs. MX-700 Tree View is useful for navigating while<br />
programming the MX-700. SideKick view is used to program the SideKick.<br />
SideKick programming is done via drag and drop. You simply drag any button on the MX-700 to one of the SideKick’s<br />
buttons.<br />
A macro from MAIN Power On is dragged to<br />
the SideKick.<br />
In this illustration, you can see that the<br />
MACRO from MAIN Power On has been<br />
successfully dropped into the SideKick’s ON<br />
button.
The Edit and Label Buttons Window<br />
If the Edit and Label Buttons Window is closed, reopen it by clicking on the shortcut button on the toolbar.<br />
Whenever you SELECT a button, the Edit and Label Buttons window displays the button name (editable), the Device<br />
and the IR Code from the database. If you change the button name, the IR Code list box displays both the name you<br />
created and the original database name for the code (in paranthesis).<br />
The Edit and Label Buttons Toolbar<br />
Like the main toolbar, the shortcut buttons will display a hint if you hover your mouse over them. A single click<br />
activates their function.<br />
TEST - For learned codes. Will only test pre-programmed codes if you have downloaded to the remote.<br />
LEARN - Puts the software into learning mode, if an MX-700 remote control is connected to the PC (See p. 23).<br />
CONTINUE - When you are learning a number of IR codes, use CONTINUE mode to automatically save and select<br />
the next button of that device. This saves tremendous time. See the section on LEARNING on p. 24.<br />
IR DATABASE - Another way to open the IR Database window.<br />
DELETE - Opens up the DELETE window, which enables you to selectively delete any part of a button’s<br />
programming.<br />
The Delete Window<br />
Windows, Menus,Tools and Definitions<br />
Simply click on the function you want to delete. For example, you can<br />
selectively delete just a MACRO, leaving the button to perform a<br />
previously programmed learned IR command.<br />
Or, you can delete all programming by selecting Button.<br />
11<br />
T<br />
H<br />
E<br />
M<br />
X<br />
7<br />
0<br />
0<br />
D<br />
U<br />
A<br />
L<br />
R<br />
E<br />
M<br />
O<br />
T<br />
E<br />
S<br />
Y<br />
S<br />
T<br />
E<br />
M
12<br />
U<br />
S<br />
I<br />
N<br />
G<br />
M<br />
X<br />
E<br />
D<br />
I<br />
T<br />
O<br />
R<br />
T<br />
O<br />
P<br />
R<br />
O<br />
G<br />
R<br />
A<br />
M<br />
Labels<br />
Shortcuts - Copying Buttons<br />
Windows, Menus,Tools and Definitions<br />
You can change the name of any button. When you change the<br />
name of a button, it not only affects how the button appears in<br />
an LCD display, it also changes how the button displays in the<br />
pull down Code list (although the original name still appears<br />
beside the new label).<br />
You can create a SHORTCUT to another button by selecting<br />
it via the pull down lists under Device and IR Code.<br />
A SHORTCUT is simply a duplicate of whatever is<br />
programmed in the button you select via the two pull<br />
down lists.<br />
You CAN’T program SHORTCUTS in FAV buttons.<br />
You can make a hard button issue a macro by programming<br />
the macro on an LCD button somewhere, then creating a<br />
shortcut to the LCD button.<br />
You must press SAVE to make a SHORTCUT.<br />
Each page of LCD buttons is listed in the pull down IR Code<br />
list.
The Macro/Favorite Window<br />
If the Macro Window is closed, reopen it by clicking on the shortcut button on the toolbar.<br />
The Macro Toolbar<br />
TEST You must select the first step you want played back first, then connect the remote to the PC.<br />
All steps after the selected step will play back, including any delays.<br />
RECORD This starts and stops the recording of macro steps.<br />
SAVE Any macro programming you do will be discarded unless you press the SAVE button.<br />
DELAY Opens the Delay window so that you can specify a delay in between macro steps. If you<br />
place a delay as the first step in a macro, the user has to hold down the button for<br />
that much time before the macro will be issued. If the user does not hold down the<br />
button for the specified delay, the macro is not issued.<br />
JUMP Enables you to jump to any PAGE of any DEVICE at the end of a MACRO.<br />
INSERT You must select the button you want the macro inserted in, click on the INSERT button, then<br />
click on the button containing the macro you want copied. All of the macro steps are inserted<br />
into the new button in one step. Make any changes you want to the new macro, it is independent<br />
of the original (the original is not affected by any changes you make, nor is the copy affected<br />
by changes you make in the original).<br />
DELETE You must select the first step you want deleted first, then click on DELETE.<br />
Re-Ordering Macro Steps<br />
You can simply drag and drop steps to any order once they are programmed. Just click on if you want the<br />
changes you made SAVED.<br />
Macro Details<br />
Windows, Menus,Tools and Definitions<br />
The location (Device/Page/Name) of the button that will issue the<br />
macro when pressed.<br />
A Macro Step indicates the type of step with an icon, the # of the<br />
step, the function (name) of the step, and the Device it is actually<br />
taken from.<br />
Tip - There is more information on <strong>Programming</strong> Macros in the Tutorial on p. 27.<br />
13<br />
T<br />
H<br />
E<br />
M<br />
X<br />
7<br />
0<br />
0<br />
D<br />
U<br />
A<br />
L<br />
R<br />
E<br />
M<br />
O<br />
T<br />
E<br />
S<br />
Y<br />
S<br />
T<br />
E<br />
M
14<br />
U<br />
S<br />
I<br />
N<br />
G<br />
M<br />
X<br />
E<br />
D<br />
I<br />
T<br />
O<br />
R<br />
T<br />
O<br />
P<br />
R<br />
O<br />
G<br />
R<br />
A<br />
M<br />
<strong>Programming</strong> Overview<br />
A. New File, Existing File on PC or in Remote<br />
NEW - Starting from scratch on a new job, go to the File Menu, choose New from the File Menu and pick<br />
the type of template you would like to use to program with. None of the templates have any IR codes, just<br />
prelabeled empty devices (although the Audio device has codes for factory testing in both the 10 device<br />
and the 20 device templates). Any of the three is ok, since you can quickly make an empty configuration<br />
have twenty devices, and just as quickly make a twenty device configuration completely empty! It’s just<br />
personal preference whether you rename a list of devices or create new ones in an empty configuration.<br />
OPEN - Open a configuration that you have worked on before and saved onto the PC hard drive.<br />
UPLOAD - Get a file from a client’s remote control that another installer created. Now, you can save the<br />
file on your laptop, make any edits or changes as the client requests or the jobsite requires.<br />
B. Use SAVE AS<br />
The templates files are simply configuration files that have been preprogrammed for you. They will keep any changes<br />
you make. Utilize Save As to make a new file with a new file name. All configuration files are saved with the file<br />
extension .mxf; all device files are saved with the extension .mxd (see D. Save and Export, below).<br />
TIP — Always use File | Save As to rename the file before doing any programming!<br />
Use the customer’s name and a rev # (i.e. SmithTheaterRev1.mxf)<br />
C. Use the Program Menu<br />
D. Save and Export<br />
The Program Menu is your lifeline to a fast, easy programming experience. Follow the<br />
steps in the order shown in the Menu for best results.Typically, you will download to the<br />
remote control several times throughout this process and test what you have done so<br />
far.You’ll need to download after finishing all programming. For macro playback to work,<br />
you need to have downloaded. These downloads are not listed in the steps here in the<br />
Program Menu and are not automatically done for you.<br />
It is important that you do all of the tasks for each step before moving on to the next<br />
step. Keep this manual handy so that you can verify that you have completed all of your<br />
tasks.<br />
Archive and save your customer files. In addition, you can export devices as .mxd files. <strong>Programming</strong> systems with<br />
similar components gets even faster when you don’t have to redo your work over and over. You have your own ideas<br />
about what buttons should be labeled and how they should be arranged. You’ll save all of your work in a unique and<br />
time saving way by exporting the device stand alone.That way, you can import just the device in any new configuration.<br />
E. Download to both Remote Controls<br />
Step by Step Tutorial<br />
For once, you have a pre-printed summary sheet and an instruction manual for the entire Home Theater! Enjoy a<br />
brief training with your client and get home on time tonight!
Creating, Naming and Arranging Devices<br />
A device is the basic grouping of a set of hard buttons and up to 4 LCD button pages. You will need one device<br />
group for each remote control that the MX-700 is replacing. You can have a maximum of 20 devices in your<br />
configuration. Every device is automatically linked with a jump-link to the device via the MAIN MENU (see<br />
operation manual for more detail).<br />
Open the Create and Name Devices Window<br />
You can open the Create and Name Devices window by clicking on the first item of the Program Menu or by clicking<br />
on the Toolbar icon as shown here.<br />
TIP - Hover the mouse over the Toolbar buttons and a pop-up label identifies it!<br />
Creating Devices<br />
Step by Step Tutorial<br />
1 Click on the position you would like to create a new device in.Type the new name and hit either the<br />
ENTER or the TAB key on your keyboard, then type another name in. If you wish to leave a position blank,<br />
simply TAB past it.<br />
2 You must hit the SAVE button to create all the new devices in the order you selected.<br />
3 Tree View reveals the new devices you’ve created and the simulator shows the new MAIN MENU LCD<br />
button names.<br />
15<br />
T<br />
H<br />
E<br />
M<br />
X<br />
7<br />
0<br />
0<br />
D<br />
U<br />
A<br />
L<br />
R<br />
E<br />
M<br />
O<br />
T<br />
E<br />
S<br />
Y<br />
S<br />
T<br />
E<br />
M
16<br />
U<br />
S<br />
I<br />
N<br />
G<br />
M<br />
X<br />
E<br />
D<br />
I<br />
T<br />
O<br />
R<br />
T<br />
O<br />
P<br />
R<br />
O<br />
G<br />
R<br />
A<br />
M<br />
Step by Step Tutorial<br />
4 Try the simulator out now. If you click once a MAIN MENU button, you’ll simply select the button, if you<br />
click again you will jump-link to the device group. Once at the new device group, you can<br />
touch the MAIN button to return to the MAIN MENU, etc.<br />
5 Open the Create and Name Device window again, and experiment with rearranging devices by simply<br />
dragging them to an empty location.<br />
Here the TV device is successfully dragged to the<br />
empty spot.<br />
Both Tree View and the MX-700<br />
Simulator show the newly created<br />
devices.<br />
In this example the TV device cannot be dragged<br />
to the RADIO spot.You must move the RADIO<br />
device first, then move the TV.<br />
TIP - When all positions are filled, you must delete one to do any rearranging of devices.<br />
6 To delete a device, simply select it by clicking on it once, then click on the DELETE key of your keyboard<br />
or the Delete Device button.<br />
To delete a device, select it first, then click on the<br />
Delete Device button.
Using the IR Database<br />
Discrete Codes, Toggles and other New Words<br />
The <strong>MXEditor</strong> database is unique in the industry because it includes “secret” discrete codes that are not on the<br />
actual remote controls for many components. These codes are highly sought after by professional installers because<br />
they make automation of the home theater possible via reliable macros! Here are the facts you need to know:<br />
Discrete Commands versus Toggle Commands<br />
When a remote control’s only button to turn on and off a TV set is labeled Power, it is usually a “toggle” command.<br />
Test it by pressing the button twice. If the power button turns on the TV, then turns it off, it is a toggle command.<br />
That is a big problem when you are programming macros! If you program a macro for watching TV with a toggle,<br />
then the macro is essentially point and pray (if the TV was off, it will turn on, if it was already on, it will turn off). On<br />
the other hand, if a macro is programmed with a discrete Power ON command, the macro will work every time (if<br />
the TV was off, it will turn on, if it was already on, it will stay on).<br />
So the term “discrete command” or “discrete code” means that the code will only do ONE THING to a component.<br />
For example:<br />
A single “Input” command is a toggle type command if it simply changes the input to another input when issued,<br />
while separate buttons for Antenna A, Antenna B, Ext 1, Ext 2 and Ext 3 are discrete input commands if, when issued,<br />
the TV goes directly to the named input (and if you give the same command again, it stays on the selected input).<br />
Here are some important facts about Discrete commands:<br />
“Secret” Discrete Codes exist for some components. Why are they secret? Because the manufacturer<br />
wants the remote control that accompanies the component to have the simplest appearance (fewest buttons). Since<br />
toggles reduce the number of buttons, they make the remote control appear easier to operate. Many manufacturers<br />
understand the needs of custom installers and build their components to also respond to discrete codes. They<br />
distribute the discrete codes via service remotes, etc. For the first time, those codes are collected and integrated<br />
into our database.<br />
Not all components respond to the discrete codes in the Database. A component has to be BUILT to<br />
respond to discrete codes.The fact that other models from the same manufacturer do respond to discrete codes<br />
is the reason the codes are added to a code set. However, some models will not respond, because the manufacturers<br />
did not build it to respond through budgetary considerations, time constraints or a simple oversight.<br />
Selecting a Code Set from the Database<br />
1 Open the Database Window - Select IR<br />
Database from the Program Menu or the Toolbar.<br />
2 Select the Device - selecting it from the list box<br />
as shown:<br />
TIP - Start with the top Device first, so that after you<br />
have programmed the first device, you can avoid<br />
pulling down the menu again, simply tap the Next<br />
Device button.<br />
Step by Step Tutorial<br />
17<br />
T<br />
H<br />
E<br />
M<br />
X<br />
7<br />
0<br />
0<br />
D<br />
U<br />
A<br />
L<br />
R<br />
E<br />
M<br />
O<br />
T<br />
E<br />
S<br />
Y<br />
S<br />
T<br />
E<br />
M
18<br />
U<br />
S<br />
I<br />
N<br />
G<br />
M<br />
X<br />
E<br />
D<br />
I<br />
T<br />
O<br />
R<br />
T<br />
O<br />
P<br />
R<br />
O<br />
G<br />
R<br />
A<br />
M<br />
Step by Step Tutorial<br />
2 Category - Select the type or category of component (i.e.TV, VCR or DVD player).<br />
3 Brand - Select the company that made the component (i.e. B & K, Sony, Krell)<br />
4 Model - Select the Model or the Code Set number (sometimes the actual model, sometimes a generic #<br />
assigned by us to a code set that operates many models over the years).
5 Test the Code Set<br />
Step by Step Tutorial<br />
A.Verify the MX-700 is loaded with fresh batteries and connect the MX-700 to the PC via the serial<br />
port.<br />
B.Turn on the component<br />
C. Point the connected MX-700 so that it is in range and within line of sight of the component.<br />
D. Click on the Test button as shown here:<br />
E. Observe the component. If it stays on, click on another Model and continue until you find the<br />
Code Set that turns the component off. When it turns off, click on Save.<br />
F. If you know the Code Set # from prior experience, enter it in the text box, or use the up and<br />
down arrows to change the code number. If you have to test all of the code sets, this is probably<br />
the fastest way to test all code sets (usually learning codes is much quicker, try that first).<br />
G.After you find the correct Code Set, click on SAVE.When you do, the LCD Button Editor window<br />
pops open. Check the buttons on the original remote and compare to those on the LCD Button<br />
Editor. You can correct any labels that you think could be more user friendly. Feel free to<br />
rearrange buttons as you wish. Moving LCD buttons with the LCD button Editor is exactly like<br />
moving Devices, simply click and drag to an empty location. Once you are reasonably satisfied with<br />
the arrangement, click on the Apply button.<br />
6 Continue with the rest of the devices you need, using the Next Device button to move to the next device<br />
(or manually picking them from the Device list box).<br />
19<br />
T<br />
H<br />
E<br />
M<br />
X<br />
7<br />
0<br />
0<br />
D<br />
U<br />
A<br />
L<br />
R<br />
E<br />
M<br />
O<br />
T<br />
E<br />
S<br />
Y<br />
S<br />
T<br />
E<br />
M
20<br />
U<br />
S<br />
I<br />
N<br />
G<br />
M<br />
X<br />
E<br />
D<br />
I<br />
T<br />
O<br />
R<br />
T<br />
O<br />
P<br />
R<br />
O<br />
G<br />
R<br />
A<br />
M<br />
Testing<br />
In most home theater systems, you will find that some codes have to be learned. You may have a brand new<br />
component whose codes are not yet in the Universal Database or you may have most of the codes for a<br />
component, but a few are missing. To find out what you’ll need to learn, you must rigorously test all of the codes<br />
you have programmed using the IR Database and correctly label the buttons that have to be learned. Of course<br />
you can simply test a button and if it doesn’t work, go into learn mode, test the command, relearn as necessary<br />
and so on. However, this wastes time. The best approach is to download, test all the commands, make a list, then<br />
use <strong>MXEditor</strong> to modify labels, and delete unnecessary codes.<br />
Downloading to TEST Pre-Programmed IR Commands From The Database<br />
When you choose Download from the File Menu or click on the Download button on the Toolbar, the Download<br />
window appears.There are two choices for downloading:<br />
Partial Download - This quickly downloads all of the pre-programmed codes from the database.This stage of<br />
programming (before any learning or macro programming has been accomplished) is really the only time you can<br />
use this option. It does save you time!<br />
Full Download - This is the normal download you will use most of the time. It takes a little longer, but all<br />
commands, macros and programming are downloaded to the remote control.<br />
Once you’ve selected a Partial or Full download, click on the Download button.<br />
Preparing the List of Buttons to be Learned<br />
1 Test ALL Buttons<br />
Begin testing the codes you downloaded to the MX-700 remote control. Make sure that you test all<br />
buttons (hard buttons and the LCD buttons on each page or every device). Don’t try to learn new<br />
commands yet, wait until you can do all of them at once systematically.<br />
2 Make a List of all buttons that don’t work.<br />
Step by Step Tutorial<br />
3 Compare the original remote control to the MX-700. Add missing functions that need to be learned to<br />
the List.
Using LCD Button Editor<br />
A<br />
B<br />
C<br />
D<br />
E<br />
F<br />
Device List - Select the device whose pages you would like to edit.<br />
Button Labels - Select the button you would like to rename by double clicking.To delete, single click then<br />
click on the Delete button in E.<br />
Hide Page Check Boxes - You must hide pages back to front. If you want page 1 hidden, move the buttons<br />
to page 4, then hide page 4. See Hiding pages section on the next page for more detail on HIDDEN pages.<br />
Scroll Pages - Since you can only view four pages at a time, the scroll pages buttons become active in FAV,<br />
which has five pages.<br />
Add, Edit & Delete Buttons - Select the button location where you would like to add, edit or delete a<br />
button, then simply single click on the desired action. In fact, there is no difference in function between Add<br />
and Edit.There are two buttons to prevent confusion.<br />
Save and Cancel - Only by clicking on SAVE, will your work be saved. No matter how many buttons you<br />
move or edit, hitting CANCEL will discard all the work you have done.<br />
Labeling and Deleting Buttons<br />
Step by Step Tutorial<br />
E<br />
A<br />
Use the LCD Button Editor to correct labels for LCD buttons on each of the devices you’ve created. Label empty<br />
buttons for codes that you need to learn.To LABEL a button, SELECT it by single clicking on it, then begin typing.<br />
Delete a button by selecting it with a single click and then clicking on either the DELETE key on your keyboard or<br />
the Delete button. Pressing the TAB or ENTER buttons on your keyboard will select the next position.<br />
TIP - If you label a button on a blank page, a new page will be added after you save.<br />
F<br />
D<br />
C<br />
B<br />
21<br />
T<br />
H<br />
E<br />
M<br />
X<br />
7<br />
0<br />
0<br />
D<br />
U<br />
A<br />
L<br />
R<br />
E<br />
M<br />
O<br />
T<br />
E<br />
S<br />
Y<br />
S<br />
T<br />
E<br />
M
22<br />
U<br />
S<br />
I<br />
N<br />
G<br />
M<br />
X<br />
E<br />
D<br />
I<br />
T<br />
O<br />
R<br />
T<br />
O<br />
P<br />
R<br />
O<br />
G<br />
R<br />
A<br />
M<br />
Dragging and Dropping Buttons<br />
You can drag and drop a programmed button/label to any empty button. If there are no empty buttons, simply<br />
delete unused buttons first, then re-arrange as desired. Drag and drop requires that you click and hold on a button,<br />
then move to the new location and let go of the mouse button.<br />
Hiding Pages<br />
A hidden page is accessible during MACRO programming but the end user cannot manually access the page using<br />
the PAGE button. If all pages are hidden, the end user cannot access the hard buttons of the device either, essentially<br />
creating a HIDDEN DEVICE. This is the only way to prevent the automatic jump action that occurs on the MAIN<br />
menu for any DEVICE LCD button. You HIDE pages using the HIDE checkbox. However, you must hide pages from<br />
THE BACK TO THE FRONT. You cannot hide page 1, you must move buttons to page 4 and hide page 4. Once<br />
page 4 is hidden, you are allowed to hide page 3; after page 4 and page 3 is hidden, you may hide page 2. Only<br />
after page 4, 3 and 2 are hidden may you hide page 1.<br />
Tip - You can still program a Macro to jump to a HIDDEN page for special purposes!<br />
Moving Through Pages In Favorites<br />
FAV or the Favorites device has five pages, thus you cannot view all pages at once in LCD button editor. However,<br />
two scroll buttons (normally grayed out) become active when you are editing FAV. By utilizing these buttons, you can<br />
edit and view pages 1 through 4 or 2 through 5.<br />
Shortcuts - Copying Existing Buttons<br />
Any button on MAIN or a Device (not FAV buttons) can be programmed with a shortcut to another button. When<br />
you program a shortcut the icon will appear next to the button. When a button is programmed with a shortcut,<br />
it is essentially an exact copy of the other button regardless of how it is programmed (Learned IR, IR Database or<br />
Macro). Since a shortcut can copy a macro, it is the only way you can get a hard button to issue a macro (you<br />
program the macro on an LCD button on a hidden page somewhere, but the end user issues it by pressing a<br />
hard button programmed with a shortcut).To program a shortcut:<br />
1 Select the button you want to program.<br />
2 Open the Edit and Label Buttons window if it is<br />
closed.<br />
3 Pull down the Device list and select the device<br />
where the button you want to copy is located.<br />
4 Pull down the IR Code list and select the button<br />
you want by clicking on it.<br />
5 Click on SAVE.<br />
Step by Step Tutorial<br />
2<br />
3<br />
4<br />
5
Learning Tips<br />
Fresh Batteries in the Original Remote Control - Weak batteries will cause <strong>MXEditor</strong> to fail to<br />
correctly learn. Note that EVEN if the original remote still operates the component, the batteries can be<br />
too weak to produce a strong enough carrier for any learning remote control to detect!!!! When a code fails,<br />
replace the batteries FIRST!<br />
Tap instead of Pressing and Holding - With some codes, this will produce better results. Normally, you<br />
should press and hold.<br />
The “Flutter” Technique - If you are having problems with a Code that has to be sustained (like volume<br />
up or down), sometimes fluttering the button while in learn mode will reduce errors.<br />
The “Semaphore” Technique - Use a book or another opaque object in between the two remotes. Press<br />
the button on the original remote, then remove the obstruction for a moment, then put it back. Experiment<br />
with different timings.<br />
Learning IR Codes <strong>One</strong> at a Time<br />
1<br />
2<br />
3<br />
4<br />
1<br />
Step by Step Tutorial<br />
Start with the remote controls an inch apart. Vary the learning distance from<br />
one inch to as much as four feet if the code doesn’t test correctly. Make sure<br />
the remotes are pointed head to head!<br />
Select the Button - Select the button that you want to teach to by single clicking it.<br />
Click on the LEARN Shortcut Button - The Learn shortcut button stays depressed to indicate that you<br />
have selected LEARN mode.<br />
Wait for READY to Appear - The MX-700 (not the SideKick) must be connected to the PC. Once you<br />
see the READY indicator, press and hold the corresponding button on the original remote control while<br />
pointing it at the TOP of the MX-700. When the code is successfully learned, the window will say GOOD,<br />
confirming that the code learned “correctly.” Actually, the GOOD means that the code might be good.... Press<br />
the test icon and point the connected MX-700 at the component to test if it really is good! Reteach as<br />
necessary.<br />
` Click on SAVE - You must click on SAVE to save the LEARNED command.<br />
2<br />
3<br />
4<br />
23<br />
T<br />
H<br />
E<br />
M<br />
X<br />
7<br />
0<br />
0<br />
D<br />
U<br />
A<br />
L<br />
R<br />
E<br />
M<br />
O<br />
T<br />
E<br />
S<br />
Y<br />
S<br />
T<br />
E<br />
M
24<br />
U<br />
S<br />
I<br />
N<br />
G<br />
M<br />
X<br />
E<br />
D<br />
I<br />
T<br />
O<br />
R<br />
T<br />
O<br />
P<br />
R<br />
O<br />
G<br />
R<br />
A<br />
M<br />
Learning a Batch of Buttons Efficiently<br />
1<br />
2<br />
3<br />
4<br />
1<br />
Step by Step Tutorial<br />
Tip - Find the correct “learning distance” using single code learning before<br />
beginning batch learning.<br />
3<br />
2<br />
Select the STARTING Button - Select the button that is the top left of the buttons you want to teach<br />
to. When learning a batch of buttons, <strong>MXEditor</strong> starts at the top left, moves down the LCD buttons on the<br />
left, then goes to the top right LCD button.When learning Hard buttons, <strong>MXEditor</strong> starts at the top left,<br />
moves across each row, then moves down.<br />
Select both the LEARN and the CONTINUE shortcut buttons - The combination activates the batch<br />
learning capability of <strong>MXEditor</strong>.<br />
Watch the INFO Window - When the info window says READY, press and hold the button on the<br />
original remote control.When it says GOOD, release the button.<br />
4<br />
Automatic SAVE and ReSelect - During batch processing, <strong>MXEditor</strong> automatically saves and then<br />
reselects the next button. When you see that a new button has been selected and the INFO window says<br />
READY, then teach the corresponding button on the original remote control. This greatly speeds the learning<br />
process.<br />
Tip - To skip a button in the automatic sequence, simply select a new button.
Download and Test All Learned Buttons<br />
This time when you download, make sure that you choose FULL DOWNLOAD, otherwise your learned codes will not<br />
download to the remote control.Test all the learned buttons, and go ahead and correct the problems as you find<br />
them.<br />
Copying and Pasting Devices<br />
Step by Step Tutorial<br />
If you right click on a device in Tree View, a context menu appears that enables<br />
you to Copy a device.When you select another device, right click and select<br />
Paste.The entire contents of the selected device will be erased and replaced<br />
by the contents of the device you copied.The original copy stays in place<br />
unchanged.<br />
If you wish to delete the original then choose Cut instead of Copy.When you<br />
choose Cut, then the original device is deleted when you Paste into a selected<br />
new device.<br />
Tip - Use Copy and Paste to create a duplicate of your customer’s receiver device,<br />
then rename the duplicate “Tuner” or “Radio”.Then use LCD button editor to<br />
eliminate all of the surround sound and input buttons in the RADIO device and all<br />
of the Tuner functions from the “RCVR” device. This creates a very simple RADIO<br />
device that is much easier for your clients to understand.<br />
Many installers go a step further and HIDE all the pages in the RCVR device, so that<br />
their clients cannot readjust and accidentally ruin the surround sound calibration.<br />
Remember, buttons on hidden pages are still programmable as macro steps!<br />
25<br />
T<br />
H<br />
E<br />
M<br />
X<br />
7<br />
0<br />
0<br />
D<br />
U<br />
A<br />
L<br />
R<br />
E<br />
M<br />
O<br />
T<br />
E<br />
S<br />
Y<br />
S<br />
T<br />
E<br />
M
26<br />
U<br />
S<br />
I<br />
N<br />
G<br />
M<br />
X<br />
E<br />
D<br />
I<br />
T<br />
O<br />
R<br />
T<br />
O<br />
P<br />
R<br />
O<br />
G<br />
R<br />
A<br />
M<br />
Importing and Exporting Devices<br />
Tip - Name your EXPORTED device files by Category, Manufacturer & the Model #.<br />
Importing Step by Step<br />
Step by Step Tutorial<br />
1 Right click on Tree View and choose Import Device.<br />
If you right click on a device in Tree View, a context menu appears that enables<br />
you to Import or Export a device.When you select a device, right click and<br />
select Export.The entire contents of the selected device will be saved to your<br />
PC with a new file name.The original copy stays in place unchanged.<br />
If you have some saved DEVICE files, choose Import to add the device to<br />
your client’s remote control.<br />
2 When the Open dialog window appears (as you see below), navigate to the folder you stored your device<br />
files and select the one you want to import.<br />
3 Once you select a file, the Import Device window will open as you see below.<br />
4 In the Available Devices window, select the device you see (it will have the original 5 letter LCD label from<br />
the original configuration, rather than the Manufacturer/Model/Category name you filed it as).<br />
5 Now select an EMPTY position on either MAIN page 1 or MAIN page 2.You cannot replace an existing<br />
device, only an empty spot.<br />
6 Click on the ARROW pointing to the right at the MAIN pages, then click on SAVE.
Macro <strong>Programming</strong><br />
What is a Macro?<br />
A macro is a recording of a sequence of commands that is played back when the user presses a single button. A<br />
macro can have up to 190 steps. A step can be:<br />
IR Command - Any IR command on any hard button, LCD button on any device. IR commands in the IR<br />
Database are not available to Macros until they have been programmed into a button somewhere within<br />
the configuration.<br />
Delay - Adjustable delay between steps of .1 and 30 seconds. Longer delays can be created by using more<br />
than one delay. If a delay is programmed as the first step in a Macro, the macro will not be issued until the<br />
button is pressed and held for the specified amount of time.<br />
Jump - As the last step in a Macro, you can specify a jump to any page of any device. However, an LCD<br />
button on MAIN is automatically programmed to jump to the first page of the device as the first step in a<br />
Macro (unless all pages are hidden). You can program another jump in the macro, so that the automatic<br />
jump will happen at the beginning of the macro and the manually programmed jump will happen at the end<br />
of the macro. See Advanced <strong>Programming</strong> Tips on page 45 for examples of how you can utilize this feature.<br />
What Buttons Can Playback a Macro?<br />
Only LCD buttons and the Power On and Power Off buttons can be PROGRAMMED with a Macro. However, any<br />
button can playback a Macro by using a shortcut to a button that has a Macro in it.Thus, if you need a Macro on a<br />
hard button (i.e. Prev CH), you can program the macro on an LCD button (could be in a hidden page somewhere)<br />
and simply shortcut to it (see page 22 for step by step info on shortcuts).<br />
Discrete IR Codes vs Toggle IR Codes<br />
Step by Step Tutorial<br />
Manufacturers program their products to respond to IR codes with one action or many:<br />
Toggle - More than one action can occur when the code is sent by a remote control. An example is a POWER<br />
button.The manufacturer programs the TV to respond to a POWER command by turning it on if it was off and<br />
turning off if it was on. So one button can do two things. This requires that the user “know” or “see” that the<br />
television is on or off before pressing the button.<br />
Another example is a television with an “INPUT” command. When the code is issued, the television changes its<br />
input. Since the television has 5 inputs, the single “INPUT” command can have five different results, depending on<br />
what input was previously selected.The user has to “know” or “see” what input was previously selected before<br />
deciding how many times to push the INPUT button.<br />
Discrete - Only one action can occur when the code is sent by a remote control. An example is a television with<br />
a POWER ON button and a POWER OFF button. If the television is already on, the POWER ON command has no<br />
effect. If the television is off, the POWER ON command will turn on the television. Another example is a television<br />
with five discrete input commands (ANT A, ANT B, EXT 1, EXT 2 and EXT 3). No matter what input was previously<br />
selected, any of these commands will change the television to the desired input WITHOUT the end user “knowing”<br />
or “seeing” what the previously selected input was!<br />
Tip - Not all components have “discrete” codes on their original remotes, check the IR Database!<br />
27<br />
T<br />
H<br />
E<br />
M<br />
X<br />
7<br />
0<br />
0<br />
D<br />
U<br />
A<br />
L<br />
R<br />
E<br />
M<br />
O<br />
T<br />
E<br />
S<br />
Y<br />
S<br />
T<br />
E<br />
M
28<br />
U<br />
S<br />
I<br />
N<br />
G<br />
M<br />
X<br />
E<br />
D<br />
I<br />
T<br />
O<br />
R<br />
T<br />
O<br />
P<br />
R<br />
O<br />
G<br />
R<br />
A<br />
M<br />
Toggle Commands create “Point & Pray” Macros<br />
Imagine a system with three components (a TV, a VCR and a surround sound Receiver). Each has a toggle type<br />
POWER command on the original remote control. You program a macro with the three power commands on the<br />
MAIN Power ON button and tell your client to turn on their system with this button. Here’s what will happen:<br />
The client will pick out a videotape and insert it in the VCR (the VCR will now automatically turn on).The client sits<br />
down, picks up their MX-700 and presses the MAIN Power On button.The three toggle type power commands are<br />
issued. So, since the TV and the Receiver were Off, they turn on, however the VCR was already on from inserting the<br />
tape, so it turns off. The client is puzzled that they don’t see a picture, so they press the MAIN Power On button<br />
again.The three toggle type power commands are issued again.This time the TV and the Receiver turn off and the<br />
VCR turns on.The client begins to get frustrated...<br />
TIP - For systems with lots of toggle Power codes, create a “Power” help list.<br />
You cannot successfully train a family to use a Point & Pray macro. It is too inconsistent. You are<br />
better off creating a help list device named “POWER.” On the Power Page 1, create shortcut<br />
buttons to all of the components toggle power commands.Train the customer to turn on the system<br />
by pressing the Power button on MAIN, then turning anything that they need on one at a time. Once<br />
the system is on, they press MAIN and decide what they want to watch or listen to.<br />
Professional Installations Require “Bullet-Proof” (Reliable) Macros or a help list.The use of Point &<br />
Pray macros will create service calls and a lot of bad will. Never leave a customer with a remote<br />
programmed to “maybe” work...<br />
Finding Workarounds for Toggle Commands in Macros<br />
By creatively experimenting you may find that you can workaround the lack of discrete codes.This takes time and<br />
there is no guarantee that you will find a workaround for any given component. Here are some common examples:<br />
DVD and VCR Power Workaround<br />
Most DVD players will turn on when off when they receive a Play command.Thus you can workaround like this:<br />
DVD ON = 1) Play<br />
2) DVD Stop<br />
Step by Step Tutorial<br />
DVD OFF= 1) DVD Play<br />
2) Delay (amount of delay varies with brand and model, typically 1<br />
or 2 seconds)<br />
3) DVD Power<br />
TV scrolling “INPUT” Workarounds<br />
Many televisions respond to a channel up or a channel number command by changing to the Antenna input regardless<br />
of what input was last selected.This creates an “anchor” action that puts the television in a known input.Thus you<br />
can create a workaround as follows:<br />
EXAMPLE - CH Up takes TV to the ANT A input (and the TV has 5 inputs -Ant A,Ant B, EXT1, EXT2 and EXT3)<br />
TV to EXT3 = 1) Ch Up (takes TV to ANT A regardless of what input was last selected)<br />
2) Input (takes TV to next input - ANT B)<br />
3) Input (takes TV to next input - EXT 1)<br />
4) Input (takes TV to next input - EXT 2)<br />
5) Input (takes TV to desired input - EXT 3)
EXAMPLE 2 - Any channel number and ENTER takes TV to the ANT A input (and the TV has 5 inputs -Ant A,Ant B, EXT1,<br />
EXT2 and EXT3)<br />
TV to EXT3 = 1) “0”<br />
2) “2”<br />
3) “Enter” (takes TV to ANT A)<br />
2) Input (takes TV to next input - ANT B)<br />
3) Input (takes TV to next input - EXT 1)<br />
4) Input (takes TV to next input - EXT 2)<br />
5) Input (takes TV to desired input - EXT 3)<br />
<strong>Programming</strong> the Power On Macro<br />
Set up your laptop and the connected remote within operational range of the home theater system while<br />
programming the Power On macro. Power On macros usually require extensive testing of delays and you can<br />
expect to do a lot of experimenting while programming.<br />
1 Select the Power On button on the MAIN page.<br />
2 Click on the RECORD icon<br />
Step by Step Tutorial<br />
3 Take a look at the MAIN page (both pages if you have two MAIN pages). Decide which components you<br />
want to power on. Start adding their Power On commands to the list by navigating to the device and page<br />
where the codes are located and clicking on the buttons with the Power On commands.<br />
Select the device by clicking its button on the MAIN menu.<br />
Now, click on the button with the device’s Power On command.<br />
The new step appears in the list.<br />
29<br />
T<br />
H<br />
E<br />
M<br />
X<br />
7<br />
0<br />
0<br />
D<br />
U<br />
A<br />
L<br />
R<br />
E<br />
M<br />
O<br />
T<br />
E<br />
S<br />
Y<br />
S<br />
T<br />
E<br />
M
30<br />
U<br />
S<br />
I<br />
N<br />
G<br />
M<br />
X<br />
E<br />
D<br />
I<br />
T<br />
O<br />
R<br />
T<br />
O<br />
P<br />
R<br />
O<br />
G<br />
R<br />
A<br />
M<br />
Step by Step Tutorial<br />
4 Once you have all of your Power On Commands in the list, re-arrange them as desired by clicking and<br />
dragging them into whatever order you want.<br />
5 Ask the client what they think they will watch most often (TV, satellite, DVD, etc.). Program steps to select<br />
the correct TV and Receiver input for that activity. In this example, both the television and the receiver<br />
have discrete input codes and the client’s favored activity is watching Satellite.<br />
Select the RCVR by clicking its button on the MAIN menu.<br />
Select the TV by clicking its button on the MAIN menu.<br />
Now, click on the button with the SAT input command.<br />
Now, click on the button with the<br />
correct input command.<br />
The new step appears in the list.<br />
The new step appears in the list.
6 OPTIONAL - Program a jump to the MAIN page you would like them to choose their favorite activity<br />
from. This ensures that if they were on MAIN page 2, after they power up, they will automatically be on<br />
MAIN page 1.<br />
Click on the JUMP icon.<br />
Step by Step Tutorial<br />
Select the MAIN device.<br />
Select PAGE 1 by clicking its button on the MAIN menu.<br />
The new step appears in the list.<br />
7 First, turn the TV and the Receiver to the wrong input, then turn off everything in the theater. Point the<br />
connected MX-700 at the system. Select the first step in the list by clicking on it. Now, click on the TEST<br />
button. Observe the television and the receiver. Did they both switch to the correct input?<br />
31<br />
T<br />
H<br />
E<br />
M<br />
X<br />
7<br />
0<br />
0<br />
D<br />
U<br />
A<br />
L<br />
R<br />
E<br />
M<br />
O<br />
T<br />
E<br />
S<br />
Y<br />
S<br />
T<br />
E<br />
M
32<br />
U<br />
S<br />
I<br />
N<br />
G<br />
M<br />
X<br />
E<br />
D<br />
I<br />
T<br />
O<br />
R<br />
T<br />
O<br />
P<br />
R<br />
O<br />
G<br />
R<br />
A<br />
M<br />
8 <strong>Programming</strong> additional delay in the macro is sometimes necessary. Each macro step usually takes some<br />
time, so there may be enough built in delay for the television and the receiver to both be fully active by<br />
the time the input commands are sent. Sometimes the component is not fully awake. It is fashionable for<br />
many modern televisions and receivers to require 5 or more seconds of warm up time before they are<br />
responsive to new commands. In a case like that, you will need to add more delay between steps.<br />
Select the Delay icon<br />
The new step appears in the list.<br />
Step by Step Tutorial<br />
Now, click on the preset amount of delay or enter any time between .1<br />
second and 30 seconds in the “Customize” window.<br />
Now, drag the delay step to the correct location.<br />
TIP - Sometimes a change in order can provide the delay you need.
9 Again, turn the TV and the Receiver to the wrong input, then turn off everything in the theater. Point the<br />
connected MX-700 at the system. Select the first step in the list by clicking on it. Now, click on the TEST<br />
button. Observe the television and the receiver. Did they both switch to the correct input? Continue<br />
to revise the macro with delays or changes in order and test until the macro ALWAYS correctly turns<br />
everything on and switches the surround sound receiver and television to the correct input.<br />
When the macro is perfect, click on the SAVE shortcut button.<br />
<strong>Programming</strong> a Power Off Macro<br />
Step by Step Tutorial<br />
A Power Off macro is much simpler than a Power On macro, since there are rarely any delays to test, etc. Usually, to<br />
give the client some feedback that the macro is working, the TV is turned off first.<br />
When you are forced to “workaround” a DVD player or VCR without a discrete off command, you will make the<br />
macro more reliable if you place the time consuming anchor (the play command) at the beginning of the macro.<br />
Make sure that you turn the DVD player off before testing this kind of workaround. You are testing the worst case,<br />
you know that a toggle type power command will turn the DVD player off, you are concerned about an event that<br />
might happen.The DVD player is already off, but the client presses the MAIN Power Off to turn everything else on. If<br />
you only programmed a toggle Power command, everything else would turn off, but the DVD player would turn on.<br />
This “workaround” ensures that the DVD player turns off.<br />
Play command turns on DVD player if OFF. If it is<br />
already on, it stays on.<br />
Other power commands provide enough delay<br />
that the DVD player will respond to a Power<br />
command if the play command just turned it off.<br />
Power command turns off DVD player.<br />
33<br />
T<br />
H<br />
E<br />
M<br />
X<br />
7<br />
0<br />
0<br />
D<br />
U<br />
A<br />
L<br />
R<br />
E<br />
M<br />
O<br />
T<br />
E<br />
S<br />
Y<br />
S<br />
T<br />
E<br />
M
34<br />
U<br />
S<br />
I<br />
N<br />
G<br />
M<br />
X<br />
E<br />
D<br />
I<br />
T<br />
O<br />
R<br />
T<br />
O<br />
P<br />
R<br />
O<br />
G<br />
R<br />
A<br />
M<br />
Step by Step Tutorial<br />
<strong>Programming</strong> Activity Macros on MAIN LCD “Device” Buttons<br />
An Activity Macro is typically programmed to be as fast as possible. They simply select the correct input on both the<br />
television and the surround sound receiver, since all the components have already been powered on by the Power<br />
On macro.<br />
There is no need to program a JUMP to a page in a MAIN LCD<br />
“Device” button.They are automatically programmed to JUMP to the<br />
Device.<br />
Sometimes activity macros will share the same input settings. Here, a DVD player doubles as a CD player. The<br />
programmer has copied the DVD device, named it CD, so that there are two identical devices (with the same DVD<br />
player IR codes).The only difference between them is the Activity Macros you see below. The DVD Activity Macro<br />
selects THX Surround Sound with 5 speakers with the TV on, while the CD Activity selects Stereo with 4 speakers<br />
and forces the TV off. For components that have play commands it is typically ok to have a “Play” command in the<br />
macro.Watch out for components with toggle type play/pause buttons.That kind of “Play/Pause” command should<br />
not be placed in an Activity Macro without a preceding “Stop” command, to make sure that the toggle can only play<br />
the component!<br />
<strong>One</strong> DVD Player - Two Devices and Two Activity Macros<br />
DVD Activity Macro CD Activity Macro<br />
Note how the programmer is using the same DVD input on the surround sound receiver for both activities, the<br />
macro simply changes the surround sound settings.<br />
TIP - Don’t OVERAUTOMATE, make sure that every step is truly useful!
<strong>Programming</strong> FAVORITE Macros<br />
<strong>Programming</strong> fifty favorite channels may sound like a lot of work, but if you take advantage of <strong>MXEditor</strong>’s time<br />
saving capabilities, you can program all fifty in five minutes or less! First, get a program guide for the satellite service<br />
or Cable TV provider your client uses. Have them mark their favorites for you. Use LCD Button Editor to relabel as<br />
needed and hide any unnecessary pages (likable clients are allowed 50 favorites, snotty clients get 10 favorites). Now,<br />
you are ready to program:<br />
1 In Tree View, click on the + sign next to the Device (SAT, CABLE) that you will need to program the<br />
favorites from.This expands the device, so that you can see the Pages.<br />
2 On the Simulator, click on the Favorite you would like to program and click the RECORD button.<br />
1<br />
Step by Step Tutorial<br />
3 In Tree View, click on one of the Pages of the device (SAT, CABLE) you are using to make the favorite.This<br />
instantly changes the Simulator from FAV to the device, whereas using the Simulator to navigate would<br />
have taken several mouse clicks.<br />
2<br />
35<br />
T<br />
H<br />
E<br />
M<br />
X<br />
7<br />
0<br />
0<br />
D<br />
U<br />
A<br />
L<br />
R<br />
E<br />
M<br />
O<br />
T<br />
E<br />
S<br />
Y<br />
S<br />
T<br />
E<br />
M
36<br />
U<br />
S<br />
I<br />
N<br />
G<br />
M<br />
X<br />
E<br />
D<br />
I<br />
T<br />
O<br />
R<br />
T<br />
O<br />
P<br />
R<br />
O<br />
G<br />
R<br />
A<br />
M<br />
Step by Step Tutorial<br />
4 Click on the hard buttons to record the channel number you want. If you forget which favorite you are<br />
programming, remember that the name of the favorite is displayed above the macro list of steps.<br />
5 Add delay if needed. You should test the first favorite thoroughly for any need for delay. Components vary<br />
widely in their response time. Some brands will be fine with no delay step in between IR commands. Other<br />
brands require delays in the interval between commands. However, if the channel favorite has two identical<br />
digits, you may require some delay between the two identical commands.<br />
6 Click on the SAVE icon and continue to the next Favorite until all are complete.<br />
Inserting Macros (Copying or Cloning a Macro)<br />
You can often speed programming by instantly inserting all of the steps of a previously programmed macro as the<br />
starting point of a new macro.The inserted steps are completely editable, without changing the original macro.<br />
1 Do not start recording at the new location. Simply select the button where you would like the macro<br />
inserted.Then click on the INSERT button.
2 Navigate to the device and page where the original macro is programmed. Click on the button that contains<br />
the macro. During navigation, you might click on a device button which happens to contain a macro. A<br />
popup window will appear asking if you want to insert this macro. Answer NO<br />
if you are simply using the device button to navigate. Answer YES if you want<br />
this macro copied/cloned/inserted.<br />
3 When you click on the button that contains the original macro, all of the steps are copied/cloned into the<br />
new button location and the Simulator jumps back to the new button’s device and page:<br />
4 Edit as needed and click on SAVE.<br />
<strong>Programming</strong> Punch Through<br />
Step by Step Tutorial<br />
<strong>MXEditor</strong> enables you to quickly set up common functions on all devices for the hard buttons. Usually used only for<br />
Volume Up, Down and Mute; however, you may find it convenient to punch through to the VCR transport controls on<br />
the TV device, so that your client can rewind and cue up videotapes while he/she is watching TV. The Punch Through<br />
window makes any configuration you can imagine very fast to accomplish.<br />
1 Open the Punch Through window by clicking on the shortcut button in the toolbar or by selecting<br />
Punch Through from the Program Menu.<br />
2 Select the devices which you want to change programming by clicking on them<br />
while holding down the CONTROL key on the keyboard. If you want them all<br />
selected (normal for Volume Up, Down and Mute), simply click on the Select All<br />
button. Any device you select will be HIGHLIGHTED in the “Punch To” list.<br />
37<br />
T<br />
H<br />
E<br />
M<br />
X<br />
7<br />
0<br />
0<br />
D<br />
U<br />
A<br />
L<br />
R<br />
E<br />
M<br />
O<br />
T<br />
E<br />
S<br />
Y<br />
S<br />
T<br />
E<br />
M
38<br />
U<br />
S<br />
I<br />
N<br />
G<br />
M<br />
X<br />
E<br />
D<br />
I<br />
T<br />
O<br />
R<br />
T<br />
O<br />
P<br />
R<br />
O<br />
G<br />
R<br />
A<br />
M<br />
3 Select the device that has the codes you want used:<br />
4 Click on SAVE. Check the devices you programmed, you should see the yellow PT (Punch Through) flag<br />
on every button affected on all the devices you programmed:<br />
TV VCR1 MAIN<br />
5 Repeat for any other groups of codes as you like.<br />
<strong>Programming</strong> the SideKick<br />
Step by Step Tutorial<br />
1 Switch from MX-700 Tree View to SideKick view using the tabs above Tree View.
Step by Step Tutorial<br />
2 Navigate to the MAIN page and drag the MAIN Power On and the MAIN Power Off macros to the<br />
SideKick’s On and Off buttons.This is assuming that you have programmed the MAIN Power On macro<br />
to select TV or Satellite as the favorite activity. If you have not, program an LCD button somewhere (can<br />
be on a hidden page) to turn on the system and select the source you plan to use for the SideKick.<br />
Drag them by clicking on the Simulator button (a yellow drag and drop label will appear). Keep the mouse<br />
button depressed and drag the mouse over to the SideKick. Once the mouse pointer is hovering over the<br />
desired SideKick button, release the mouse.<br />
3 Navigate to the device with the correct Channel Up/Down and Info (Display) commands. Drag and drop<br />
them to the SideKick.<br />
39<br />
T<br />
H<br />
E<br />
M<br />
X<br />
7<br />
0<br />
0<br />
D<br />
U<br />
A<br />
L<br />
R<br />
E<br />
M<br />
O<br />
T<br />
E<br />
S<br />
Y<br />
S<br />
T<br />
E<br />
M
40<br />
U<br />
S<br />
I<br />
N<br />
G<br />
M<br />
X<br />
E<br />
D<br />
I<br />
T<br />
O<br />
R<br />
T<br />
O<br />
P<br />
R<br />
O<br />
G<br />
R<br />
A<br />
M<br />
Step by Step Tutorial<br />
4 Navigate to the device with the surround sound receiver codes and drag and drop Volume Up/Down and<br />
Mute to the SideKick.<br />
5 Navigate to the Favorites pages. Drag and drop the three favorite channels into the appropriate SideKick<br />
buttons.Typically, you pick three favorites that are spread around the dial, so that the client does not get<br />
frustrated trying to surf up and down through all of their channels. By judiciously spreading out the three<br />
favorites, the client can skip up a third of the way through the channels using a Favorite, then skip one at a<br />
time to the channel he/she wants.
6 Click on the SAVE button.<br />
Backlight On Time<br />
1 Open the Backlight On Time window by clicking on the shortcut button on the toolbar or selecting it<br />
from the Program Menu.<br />
2 Enter the amount of time you would like the backlighting to stay on (after the backlight button is pushed).<br />
Downloading to MX-700 and SideKick<br />
You download to both remote controls the same way:<br />
Step by Step Tutorial<br />
1 Make sure the remote control has fresh batteries inserted correctly.<br />
2 Connect the cable between the PC and the remote control.<br />
3 Verify that the file you have open in <strong>MXEditor</strong> is the one you want to download to the remote control.<br />
41<br />
T<br />
H<br />
E<br />
M<br />
X<br />
7<br />
0<br />
0<br />
D<br />
U<br />
A<br />
L<br />
R<br />
E<br />
M<br />
O<br />
T<br />
E<br />
S<br />
Y<br />
S<br />
T<br />
E<br />
M
42<br />
U<br />
S<br />
I<br />
N<br />
G<br />
M<br />
X<br />
E<br />
D<br />
I<br />
T<br />
O<br />
R<br />
T<br />
O<br />
P<br />
R<br />
O<br />
G<br />
R<br />
A<br />
M<br />
4 Click on the Download to Remote Control shortcut button on the toolbar or choose Download from the<br />
Communications Menu.<br />
5 When the Download window appears, select the Full Download checkbox and click on the Download<br />
button. Do not move the mouse or touch the keyboard during the download.<br />
Download Failures<br />
Should you have a download failure, try repeating the download. In certain circumstances, the remote control can<br />
become locked up and might display an error message. If this occurs, do the following:<br />
1 Remove the batteries until the display fades away. Then, replace the batteries and connect to the PC.<br />
2 Do a PARTIAL Download.<br />
3 If successful, do a FULL Download. If not successful go to step 4.<br />
4 Save your work and restart Windows.<br />
5 Do a PARTIAL Download.<br />
6 Do a FULL Download.<br />
Step by Step Tutorial<br />
TIP - Make sure that the cable plug is solidly pushed all the way in to the connector.
Uploading from the Remote to PC<br />
Uploading is necessary when you arrive at a jobsite with an existing MX-700 system that you would like to service,<br />
edit or clone. Simply upload the file to your PC, save it with a new file name and you can edit the file, send it to<br />
other remotes, make a touch up and download back into the customer’s remote.<br />
TIP - You cannot upload from the SideKick, only from the MX-700!.<br />
1 Make sure the remote control has fresh batteries inserted correctly.<br />
2 Connect the cable between the PC and the remote control.<br />
3 Save any work and open a NEW empty file.<br />
Step by Step Tutorial<br />
4 Click on the Upload from Remote Control shortcut button on the toolbar or choose Upload from the<br />
Communications Menu.<br />
5 When the Upload window appears, click on the Upload button. Do not move the mouse or touch the<br />
keyboard during the Upload.<br />
43<br />
T<br />
H<br />
E<br />
M<br />
X<br />
7<br />
0<br />
0<br />
D<br />
U<br />
A<br />
L<br />
R<br />
E<br />
M<br />
O<br />
T<br />
E<br />
S<br />
Y<br />
S<br />
T<br />
E<br />
M
44<br />
U<br />
S<br />
I<br />
N<br />
G<br />
M<br />
X<br />
E<br />
D<br />
I<br />
T<br />
O<br />
R<br />
T<br />
O<br />
P<br />
R<br />
O<br />
G<br />
R<br />
A<br />
M<br />
Push and Hold Macros<br />
Any macro can be programmed so that nothing will happen if the button is simply tapped. You can force the client to<br />
press and hold for any time between .1 and 30 seconds to issue a macro. For most clients, this would be a bad idea<br />
since it makes things more difficult and more time consuming. However, here is an application that we think you<br />
might find useful for particular clients:<br />
Push and Hold for Activity Macros and Tap to Switch Devices<br />
If you have a hobbyist client, a power user who is constantly switching devices and making adjustments to different<br />
components, this can improve operation for him/her.<br />
Here’s how this application works:<br />
Program all of the MAIN LCD Activity Macros with a 1 or 2 second delay as the first step.This ensures<br />
that the client will have to Press and Hold the button to issue the Macro.<br />
When the client simply taps a MAIN activity button, he/she simply switches devices.<br />
Two Functions on <strong>One</strong> LCD Button<br />
Advanced <strong>Programming</strong> Techniques and Ideas<br />
If the LCD button is programmed with an IR code from the Database, then a tap will issue the code, while a press<br />
and hold will issue a macro. However, the two functions on one button “feature” will not work with shortcuts.You<br />
might have just the surround sound receiver’s input if you tap, and a macro if you press and hold the button.The<br />
only caveat is that if the normal action is a Learned Code, you select LEARN & MACRO from the Device list in the<br />
Edit and Label Buttons window.This enables two functions on one button for a Learned code.<br />
No special action is required for Pre-Programmed codes from the database. Just program the Macro AFTER the<br />
database code is programmed.
Advanced <strong>Programming</strong> Techniques and Ideas<br />
Status Messages for Impatient Clients with Long Macros<br />
For clients who have problems waiting for long macros to finish, it is helpful to<br />
design the system to give a dramatic status message while the macro is working,<br />
otherwise they may put the remote down in the middle of the macro, frustrating<br />
themselves. This is possible for a system with UP TO 10 DEVICES. Here’s how<br />
to do it:<br />
This is the kind of status message you can have the remote<br />
display WHILE a macro is being issued!<br />
1 Move all of the devices with their IR programming to MAIN Page 2. Just drag and drop them using Create<br />
and Move Devices (Program Menu #1).<br />
2 Now, create new devices on MAIN Page 1. Duplicate the exact order of MAIN Page 2.<br />
3 Use LCD Button Editor to label page 1 of each of the first ten devices (the ones on MAIN Page 1 without<br />
IR codes) with a message that will be visible as long as the macro is working:<br />
45<br />
T<br />
H<br />
E<br />
M<br />
X<br />
7<br />
0<br />
0<br />
D<br />
U<br />
A<br />
L<br />
R<br />
E<br />
M<br />
O<br />
T<br />
E<br />
S<br />
Y<br />
S<br />
T<br />
E<br />
M
46<br />
U<br />
S<br />
I<br />
N<br />
G<br />
M<br />
X<br />
E<br />
D<br />
I<br />
T<br />
O<br />
R<br />
T<br />
O<br />
P<br />
R<br />
O<br />
G<br />
R<br />
A<br />
M<br />
Advanced <strong>Programming</strong> Techniques and Ideas<br />
4 Program Activity Macros normally on all the MAIN page 2 buttons.<br />
5 On Main Page 1, import the corresponding Macro from Page 2 to each LCD button on Page 1:<br />
6 Add a page jump to each of the MACROs on MAIN Page 1 to the Devices with the IR Codes programmed<br />
in them:<br />
As you can see, when you pull<br />
down the list of devices, there<br />
are two of each device.<br />
You want to create a jump to<br />
the second device on the list,<br />
they are the page 2 devices<br />
with codes, rather than the ten<br />
phony devices you created with<br />
status messages.<br />
7 In operation, the only inconsistency that occurs is that if the client goes to MAIN page 2 and operates<br />
from there, they will not get the status message during the macro.That will probably be rare, so this is a<br />
fairly workable strategy for impatient clients.
Helping Confused Clients<br />
Advanced <strong>Programming</strong> Techniques and Ideas<br />
When do clients get confused? When their system is full of old gear they couldn’t afford to replace! When the<br />
salesmen sell components without discrete codes! When the manufacturer of a cool new product blows it and<br />
incorporates hard to use, but vital features!<br />
In any event, by using <strong>MXEditor</strong> you can often solve some problems very effectively.<br />
TOAD - TV Input “Scrolls” or “Toggle” and has no Workaround<br />
When you have a component that is difficult to automate, it helps to call it names (TOAD, for Toggle Only Actuated<br />
Device, has been suggested). Once you have vented your feelings, get out <strong>MXEditor</strong> and go to work.There is a<br />
relatively simple way to make operation of a device like this much less confusing. Here’s how to go about it:<br />
1 Using LCD Button Editor, move the top right button in every device that uses the TV to another location<br />
on another page if necessary.<br />
2 Now, program each empty button on each device to shortcut to the TV Input command. In this example,<br />
the Satellite device’s top left button is programmed with the TV’s scrolling Input command.<br />
3 Using LCD Button Editor relabel each of these shortcut buttons an easy name for the client to remember.<br />
The end result is a client who always knows how to fix his TV...<br />
47<br />
T<br />
H<br />
E<br />
M<br />
X<br />
7<br />
0<br />
0<br />
D<br />
U<br />
A<br />
L<br />
R<br />
E<br />
M<br />
O<br />
T<br />
E<br />
S<br />
Y<br />
S<br />
T<br />
E<br />
M
48<br />
U<br />
S<br />
I<br />
N<br />
G<br />
M<br />
X<br />
E<br />
D<br />
I<br />
T<br />
O<br />
R<br />
T<br />
O<br />
P<br />
R<br />
O<br />
G<br />
R<br />
A<br />
M<br />
All the Components Have “Toggle” Power Commands<br />
1 Create a new device named “Power”.<br />
Advanced <strong>Programming</strong> Techniques and Ideas<br />
2 On the new device’s first page, create a shortcut to each problem component’s power command, by pulling<br />
down the device list, then the command list.<br />
3 After the shortcut is created, rename it for the component it controls as shown above.<br />
Using this system of a “list” that helps your client through a difficult process,<br />
you can create devices that help them through any complex process. For<br />
example here is a help list for a client who wants to occasionally record and<br />
cannot remember all of the steps to the process.The installer creates a list<br />
of shortcut buttons that indicate the order of the steps top to bottom.
Advanced <strong>Programming</strong> Techniques and Ideas<br />
MAIN Page Only - Changing Devices Confuses Client<br />
With a small system, you may opt to program the MX-700 so that it never changes devices. By keeping the set of<br />
commands to the minimum necessary, many systems that consist of nothing more than a surround sound receiver, a<br />
TV, a satellite receiver and a DVD player can be completely operated from the MAIN page. By making all of the<br />
pages on the devices that hold the complete IR database code set HIDDEN, the MAIN menu LCD buttons no longer<br />
jump to the associated device.Thus, they become shortcuts to power commands and any other needs.<br />
1 Create the devices for each component and program them normally using the IR database, imported<br />
devices or by learning the IR commands.<br />
2 In Tree View, work from the bottom up. Expand all of the devices, then beginning with the last page of the<br />
last device, right click and choose Hide from the context menu. Hide all of the pages of all of the devices.<br />
Make sure that ALL of the pages of each device are hidden.You can tell that a page has been<br />
hidden at a glance since its icon will be grayed out .<br />
TIP - Hide all of the pages of a device to disable the autojump from MAIN buttons.<br />
49<br />
T<br />
H<br />
E<br />
M<br />
X<br />
7<br />
0<br />
0<br />
D<br />
U<br />
A<br />
L<br />
R<br />
E<br />
M<br />
O<br />
T<br />
E<br />
S<br />
Y<br />
S<br />
T<br />
E<br />
M
50<br />
U<br />
S<br />
I<br />
N<br />
G<br />
M<br />
X<br />
E<br />
D<br />
I<br />
T<br />
O<br />
R<br />
T<br />
O<br />
P<br />
R<br />
O<br />
G<br />
R<br />
A<br />
M<br />
Advanced <strong>Programming</strong> Techniques and Ideas<br />
3 Program the MAIN pages to Punch Through to other devices as desired:<br />
4 Only a few hard buttons need to be programmed with shortcuts. In the example system, the Menu, Guide<br />
and cursor buttons are programmed with SAT commands.<br />
5 Program Power On and Activity Macros as needed. In this example system, there are only two activities<br />
(watching VCR or watching SAT), so the only macros are Power On and Off (which actually turn on four<br />
components: the TV, the VCR, the Satellite receiver and the surround sound receiver) and the Activity<br />
Macros for watching VCR or watching Satellite (which simply switch inputs on the surround sound<br />
receiver).
Advanced <strong>Programming</strong> Techniques and Ideas<br />
6 To avoid confusing the client, delete the LABELS of devices you don’t want them to see. In the example<br />
system, the labels for the surround sound receiver and the TV have been backspaced and saved.<br />
Backspacing and saving empty labels is only one strategy. Another is to use the device location as a shortcut<br />
to a useful IR command. For example, if this system’s TV needed to have its input changed and had no<br />
discrete Input commands, one would program the LCD button on MAIN that actually represents the TV<br />
device “FIXTV” and program the button with a shortcut to the TV device’s Input command. Your Tree View<br />
now is pretty confusing, the device you renamed FIXTV is actually the TV. You must remember what you’ve<br />
done, unfortunately there is no way to notate in the program what you have done.<br />
51<br />
T<br />
H<br />
E<br />
M<br />
X<br />
7<br />
0<br />
0<br />
D<br />
U<br />
A<br />
L<br />
R<br />
E<br />
M<br />
O<br />
T<br />
E<br />
S<br />
Y<br />
S<br />
T<br />
E<br />
M
52<br />
U<br />
S<br />
I<br />
N<br />
G<br />
M<br />
X<br />
E<br />
D<br />
I<br />
T<br />
O<br />
R<br />
T<br />
O<br />
P<br />
R<br />
O<br />
G<br />
R<br />
A<br />
M<br />
Advanced <strong>Programming</strong> Techniques and Ideas<br />
7 You can continue to use the LCD buttons on MAIN for other purposes, as long as you remember that any<br />
button you LABEL will create a new empty device of the same name in Tree View. Make sure that each<br />
device’s pages are all HIDDEN! This is critical. Otherwise, touching the button will jump to the empty<br />
device. In this example, a DVD player was added to the bedroom system and the codes were put one at a<br />
time into MAIN LCD buttons, thus creating a number of empty devices.<br />
In this example, a system with a VCR, a DVD player, a<br />
Satellite receiver, a TV and a surround sound receiver has<br />
all of the basic commands on one page. No button ever<br />
changes its function. For some users this is simpler to<br />
understand and they do not require the hobbyist functions.<br />
Tip - Replacing the DVD Menu controls with a<br />
Macro is required. Many DVD discs will freeze on<br />
the opening menu and a Play command will not<br />
always get them to play. In a system like this, the<br />
user will not appreciate having to navigate<br />
menus.Write the DVD Activity Macro with a few<br />
additional steps to bypass DVD title menus:<br />
Step 1 DVD Play (turn on DVD)<br />
Step 2 Delay (long enough for the DVD to<br />
find the menu)<br />
Step 3 Stop<br />
Step 4 Delay (typically .5 seconds)<br />
Step 5 Stop<br />
Step 6 Play<br />
This macro bypasses DVD title menus and plays<br />
the movie on most DVD players.
Modular Macro <strong>Programming</strong> - Using the Import Macro Feature<br />
Utilize the Import Macro feature for speed in programming.The only catch to using Import Macro is that you must<br />
do it before you press RECORD. By first programming macros on an unused device page (you can delete them after<br />
you are finished programming your macros), you can break up long macros into modules and greatly speed the<br />
macro recording process.<br />
For example, if you have a system with components that require long sections within each Activity Macro for anchoring<br />
the TV input, dimming the lights, or setting up the surround sound, precisely write the sections first, then import each<br />
section into each of your Activity Macros, edit as required and SAVE.<br />
In this example, macro components are arranged on an empty VCR page. After all the MAIN Activity Macros are<br />
programmed, these macros can be deleted or left on a hidden page as you see fit.<br />
Building A Device Library<br />
Advanced <strong>Programming</strong> Techniques and Ideas<br />
<strong>MXEditor</strong>’s ability to import and export devices is a powerful programming accelerator. Remember, when you export<br />
a device you export all of its learned IR codes and custom labels.Whenever you find that you have done extensive<br />
learning and/or labeling, EXPORT the device and save it for use in other systems. Always save it with a name that<br />
gives all three database fields: Category (VCR), Manufacturer (SONY), and Model (SLV5000).Whenever you are<br />
starting a new system, peruse your saved devices (.mxd files) and IMPORT any that are previously configured.<br />
TIP - Export FAVORITES that you have relabeled and Import them at similar jobs.<br />
53<br />
T<br />
H<br />
E<br />
M<br />
X<br />
7<br />
0<br />
0<br />
D<br />
U<br />
A<br />
L<br />
R<br />
E<br />
M<br />
O<br />
T<br />
E<br />
S<br />
Y<br />
S<br />
T<br />
E<br />
M
54<br />
U<br />
S<br />
I<br />
N<br />
G<br />
M<br />
X<br />
E<br />
D<br />
I<br />
T<br />
O<br />
R<br />
T<br />
O<br />
P<br />
R<br />
O<br />
G<br />
R<br />
A<br />
M<br />
A<br />
B<br />
C<br />
Activity Macros 3, 34<br />
Adapters 1<br />
Alternate Macro 44<br />
Auto Learning (Batch) 24<br />
Backlight On Time 7, 41<br />
Batch Learning 24<br />
Brand of Device 18<br />
Button Capabilities 8<br />
Button Flags 8<br />
Button Label 12<br />
Button Name 12<br />
Buttons - Adding, Editing & Deleting<br />
21<br />
Buttons with two functions 44<br />
Cable 1<br />
Category of Device 18<br />
Channel Macros 4, 35<br />
Cloning from Remote 43<br />
Close Files 6<br />
Code Set number 18<br />
Communications Menu 7<br />
Index<br />
D<br />
Confused Clients 47<br />
Connecting 1<br />
Context Menu 9, 10<br />
Copy 9<br />
Copying and Pasting Devices 25<br />
Copying Buttons 12, 22<br />
Copying Devices - Why? 34<br />
Copying/Inserting Macros 36<br />
Create & Name Devices 6<br />
Create and Name Devices Window<br />
15<br />
Creating Devices 15<br />
Creating, Naming and Arranging<br />
Devices 15<br />
Cut 9<br />
Database 17<br />
Delay 13, 32<br />
Delete Device 9, 16<br />
Delete Window 11<br />
Device Button Labels 21<br />
Device Context Menu 9<br />
Device Library 53<br />
Devices 9<br />
Devices - Copy & Paste 25
E<br />
F<br />
Devices - Export 26<br />
Devices - Import 26<br />
Devices, Rearranging 16<br />
Discrete Codes 17, 27<br />
discrete command 17<br />
Download 7, 14, 20, 25, 41<br />
Download, Full vs. Partial 20<br />
Download to SideKick 41<br />
drag and drop 10, 39<br />
drag and drop label 8<br />
drag and drop to Sidekick 39<br />
drag macro steps 32<br />
Dragging and Dropping LCD<br />
Buttons 22<br />
DVD Play Macro 52<br />
DVD Power Workaround 28, 33<br />
Edit and Label Buttons Window 5, 7,<br />
11<br />
Existing File 14<br />
Export Device 9, 26, 53<br />
Export FAVORITES 53<br />
FAV 4<br />
Index<br />
G<br />
H<br />
I<br />
Favorite Macros 35<br />
Favorites, Selecting 22<br />
File Menu 6<br />
Firmware Version 7<br />
Flag 8<br />
Flutter Technique 23<br />
Full Download 20<br />
Global Commands - Punch Through<br />
37<br />
Help List 48<br />
Help Menu 7<br />
Help Pages 48<br />
Hidden Pages 21, 22, 25, 49<br />
Impatient Clients 45<br />
Import Device 9, 26, 53<br />
Information Bar 5<br />
Infrared Learning 23<br />
INPUT Workarounds 28<br />
Insert Macro 13, 36, 53<br />
Insert Page 9<br />
IR Database 6, 17<br />
55<br />
T<br />
H<br />
E<br />
M<br />
X<br />
7<br />
0<br />
0<br />
D<br />
U<br />
A<br />
L<br />
R<br />
E<br />
M<br />
O<br />
T<br />
E<br />
S<br />
Y<br />
S<br />
T<br />
E<br />
M
56<br />
U<br />
S<br />
I<br />
N<br />
G<br />
M<br />
X<br />
E<br />
D<br />
I<br />
T<br />
O<br />
R<br />
T<br />
O<br />
P<br />
R<br />
O<br />
G<br />
R<br />
A<br />
M<br />
J<br />
L<br />
M<br />
Jump to Page 31<br />
label 12<br />
Labels Empty 51<br />
Laptops 1<br />
LCD Button Editor 6, 21<br />
LCD Button Editor Advanced 47<br />
LCD Button Labels 21<br />
Learn 6<br />
Learning - Batch 24<br />
Learning Tips 23<br />
Live Update 7<br />
Macro 6, 13<br />
Macro and Favorite Window 5, 13<br />
Macro Delays 32<br />
Macro For DVD Movie 52<br />
Macro Insert 36, 53<br />
Macro Modules 53<br />
Macro <strong>Programming</strong> 27<br />
Macro <strong>Programming</strong> Basics 13<br />
Macro Window 7<br />
Index<br />
N<br />
O<br />
P<br />
Macro Won't Work 48<br />
Macro, Copying/Cloning/Inserting 36<br />
Macros - Status Messages 45<br />
MAIN Activity Based Macros 3, 34<br />
MAIN LCD Buttons 34<br />
MAIN Punch Through Volume and<br />
Mute 3<br />
Menus 6<br />
Model of Device 18<br />
Modular Macro 53<br />
Moving Devices 16<br />
MX200 - The SideKick 38<br />
Name 12<br />
Naming Devices 15<br />
Navigating 8<br />
New File 6, 14<br />
<strong>One</strong> DVD Player - Two Devices 34<br />
Open File 6<br />
Operation <strong>Manual</strong> 2<br />
Page Context Menu 10<br />
Page Jumps 31
Pages 9<br />
Partial Download 20<br />
Paste 9<br />
Playback a Macro 27<br />
Point & Pray Macros 28<br />
Power Off Macro 33<br />
Power On Macro 29<br />
Power Page 48<br />
Pre-Programmed Codes 17<br />
Press & Hold Learning 23<br />
Program Menu 6, 14<br />
<strong>Programming</strong> Macros 27<br />
<strong>Programming</strong> Activity Macros 34<br />
<strong>Programming</strong> Batch Learning 24<br />
<strong>Programming</strong> Button Copies 22<br />
<strong>Programming</strong> Delays 32<br />
<strong>Programming</strong> Devices 16<br />
<strong>Programming</strong> Downloads 41<br />
<strong>Programming</strong> Favorites 35<br />
<strong>Programming</strong> Guidelines 2<br />
<strong>Programming</strong> IR Database 17<br />
<strong>Programming</strong> Learn IR 23<br />
<strong>Programming</strong> Page Jumps 31<br />
<strong>Programming</strong> Punch Through 37<br />
Index<br />
R<br />
S<br />
<strong>Programming</strong> Shortcuts 22<br />
<strong>Programming</strong> SideKick 38<br />
<strong>Programming</strong> Uploads 43<br />
<strong>Programming</strong> Window 5<br />
Punch Through 3, 7, 37<br />
Push and Hold Macros 44<br />
Record 13<br />
Requirements 1<br />
Right Click 9, 10<br />
RS232 1<br />
Save and Export 14<br />
Save As 14<br />
Save Files 6<br />
Scroll Pages 21, 22<br />
Scrolling Input Workaround 28, 47<br />
Secret Codes 17<br />
Semaphore Technique 23<br />
Sending to Remote 41<br />
Serial Port 1<br />
Settings 7<br />
Shortcut 12<br />
57<br />
T<br />
H<br />
E<br />
M<br />
X<br />
7<br />
0<br />
0<br />
D<br />
U<br />
A<br />
L<br />
R<br />
E<br />
M<br />
O<br />
T<br />
E<br />
S<br />
Y<br />
S<br />
T<br />
E<br />
M
58<br />
U<br />
S<br />
I<br />
N<br />
G<br />
M<br />
X<br />
E<br />
D<br />
I<br />
T<br />
O<br />
R<br />
T<br />
O<br />
P<br />
R<br />
O<br />
G<br />
R<br />
A<br />
M<br />
T<br />
Shortcut Buttons 7, 22<br />
SideKick 4, 7, 10, 38<br />
SideKick - Uploads N/A 43<br />
SideKick <strong>Programming</strong> 10<br />
Simulator 5<br />
Simulator, Controlling via Tree View<br />
9<br />
Small System <strong>Programming</strong> 49<br />
Status Messages 45<br />
Steps in a Macro 27<br />
Tabs 5, 10, 38<br />
Test Learned Code 11<br />
Test Macro 13<br />
Test Pre-Programmed IR Codes 19<br />
Testing via Download 20<br />
Time Delay in Macro 32<br />
TOAD 47<br />
Toggle Power Workaround 48<br />
Toggles 17, 27, 47<br />
Toolbar 7<br />
Training 2<br />
Transferring from Remote 43<br />
Transferring to Remote 41<br />
Index<br />
U<br />
V<br />
W<br />
Tree View 5, 9, 10<br />
TV Input Workaround 47<br />
Upload 7, 14, 43<br />
VCR Power Workaround 28<br />
Watch TV Macro 34<br />
Windows Conventions 5<br />
Workarounds 28, 33, 47
Batteries<br />
If the batteries are running low, the screen will display a warning at the bottom of the screen whenever you press the<br />
Power ON button. You may also experience a slight drop in the operating distance of either the MX-700 TM or the<br />
SideKick TM remote control when the batteries are running low.<br />
Please replace all of the batteries with fresh, new AAA batteries. Do not mix old and new batteries.<br />
The MX-700 TM and SideKick TM will both retain all programming even if the batteries are removed for an extended<br />
period.<br />
Cleaning The Screen<br />
Do not use abrasives or liquid cleaning solutions!<br />
Use a dry, soft, and lint-free cloth to clean the screen. Be careful not to use excessive force. The screen is glass and<br />
is easily breakable.<br />
Warranty<br />
Both the MX-700 TM and the SideKick TM are covered against any manufacturer’s defects or workmanship for a period<br />
of one year from the date of purchase. This warranty does not cover the following items:<br />
-Batteries, or damage to the remote from faulty batteries.<br />
-Damage from misuse, neglect, or acts of nature.<br />
-Products that have been modified or incorporated into other products.<br />
-Products purchased more than 12 months from the current date.<br />
-Units purchased in "AS IS" condition or units purchased as "Distressed Merchandise."<br />
Specifications<br />
MX-700 TM:<br />
Range: 40 to 60 feet, depending upon components<br />
Weight: 8 oz. (with batteries)<br />
Size: 9.0” x 3.0” x 1.3”<br />
Batteries: Four AAA Alkaline batteries (included)<br />
LCD Size: 1.4” x 2.1”<br />
SideKick TM:<br />
Range: 40 to 60 feet, depending upon components<br />
Weight: 5 oz. (with batteries)<br />
Size: 5.8”x 1.7”x 1.3”<br />
Batteries: Two AAA alkaline batteries (included)<br />
Errata<br />
59<br />
T<br />
H<br />
E<br />
M<br />
X<br />
7<br />
0<br />
0<br />
D<br />
U<br />
A<br />
L<br />
R<br />
E<br />
M<br />
O<br />
T<br />
E<br />
S<br />
Y<br />
S<br />
T<br />
E<br />
M
60<br />
U<br />
S<br />
I<br />
N<br />
G<br />
M<br />
X<br />
E<br />
D<br />
I<br />
T<br />
O<br />
R<br />
T<br />
O<br />
P<br />
R<br />
O<br />
G<br />
R<br />
A<br />
M<br />
Notes
500 Mamaroneck Avenue<br />
Harrison, NY 10528<br />
Phone: (914) 835-4484<br />
Fax: (914) 835-4532<br />
www.universalremote.com