REMOTE SURVEILLANCE CAMERA - One Call
REMOTE SURVEILLANCE CAMERA - One Call
REMOTE SURVEILLANCE CAMERA - One Call

You also want an ePaper? Increase the reach of your titles
YUMPU automatically turns print PDFs into web optimized ePapers that Google loves.
Setting up Yoics Remote Viewing<br />
18<br />
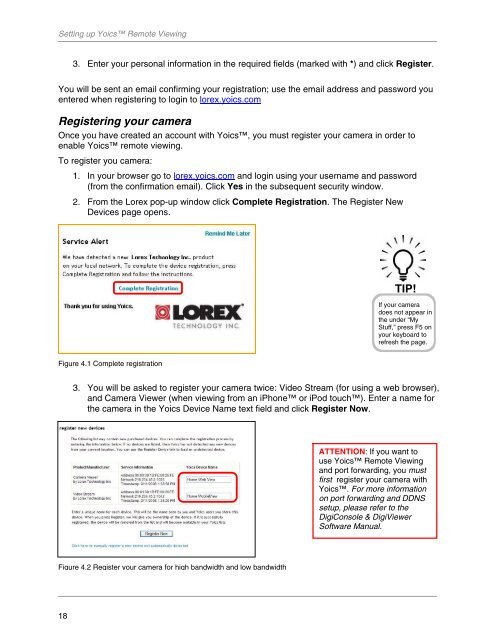
3. Enter your personal information in the required fields (marked with *) and click Register.<br />
You will be sent an email confirming your registration; use the email address and password you<br />
entered when registering to login to lorex.yoics.com<br />
Registering your camera<br />
Once you have created an account with Yoics, you must register your camera in order to<br />
enable Yoics remote viewing.<br />
To register you camera:<br />
1. In your browser go to lorex.yoics.com and login using your username and password<br />
(from the confirmation email). Click Yes in the subsequent security window.<br />
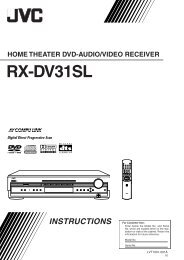
2. From the Lorex pop-up window click Complete Registration. The Register New<br />
Devices page opens.<br />
Figure 4.1 Complete registration<br />
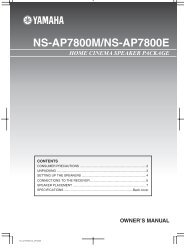
3. You will be asked to register your camera twice: Video Stream (for using a web browser),<br />
and Camera Viewer (when viewing from an iPhone or iPod touch). Enter a name for<br />
the camera in the Yoics Device Name text field and click Register Now.<br />
Figure 4.2 Register your camera for high bandwidth and low bandwidth<br />
TIP!<br />
If your camera<br />
does not appear in<br />
the under “My<br />
Stuff,” press F5 on<br />
your keyboard to<br />
refresh the page.<br />
ATTENTION: If you want to<br />
use Yoics Remote Viewing<br />
and port forwarding, you must<br />
first register your camera with<br />
Yoics. For more information<br />
on port forwarding and DDNS<br />
setup, please refer to the<br />
DigiConsole & DigiViewer<br />
Software Manual.