
You also want an ePaper? Increase the reach of your titles
YUMPU automatically turns print PDFs into web optimized ePapers that Google loves.
Quad Camera DVR<br />
4.16 Restore Factory Defaults<br />
Press the MENU button and select the “Restore factory default” option to reset the<br />
system to it’s factory default settings.<br />
Note: If you forget the system password, turn off the system and remove the Hard Drive.<br />
Power the system up again and press the II PAUSE button ten times. This will reset the<br />
system to it’s factory default settings.<br />
5. Recording<br />
5.1 Start Recording<br />
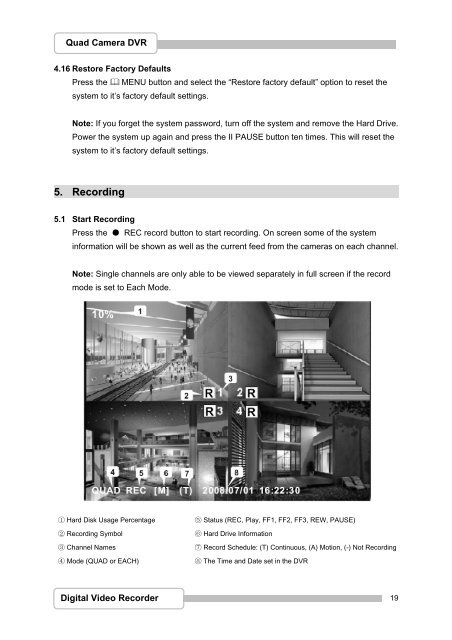
Press the ● REC record button to start recording. On screen some of the system<br />
information will be shown as well as the current feed from the cameras on each channel.<br />
Note: Single channels are only able to be viewed separately in full screen if the record<br />
mode is set to Each Mode.<br />
① Hard Disk Usage Percentage ⑤ Status (REC, Play, FF1, FF2, FF3, REW, PAUSE)<br />
② Recording Symbol ⑥ Hard Drive Information<br />
③ Channel Names ⑦ Record Schedule: (T) Continuous, (A) Motion, (-) Not Recording<br />
④ Mode (QUAD or EACH) ⑧ The Time and Date set in the DVR<br />
Digital Video Recorder<br />
19