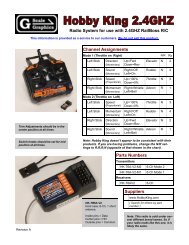

You also want an ePaper? Increase the reach of your titles
YUMPU automatically turns print PDFs into web optimized ePapers that Google loves.
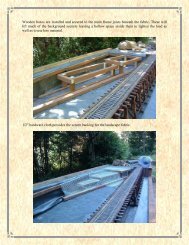
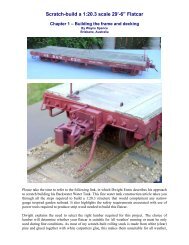
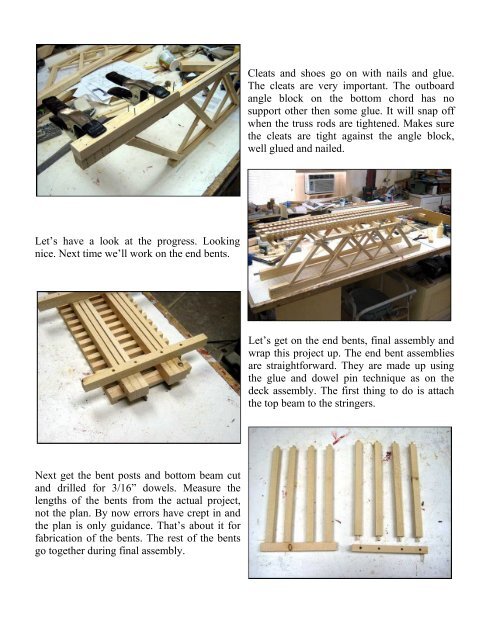
Let’s have a look at the progress. Looking<br />
nice. Next time we’ll work on the end bents.<br />
Next get the bent posts and bottom beam cut<br />
and drilled for 3/16” dowels. Measure the<br />
lengths of the bents from the actual project,<br />
not the plan. By now errors have crept in and<br />
the plan is only guidance. That’s about it for<br />
fabrication of the bents. The rest of the bents<br />
go together during final assembly.<br />
Cleats and shoes go on with nails and glue.<br />
The cleats are very important. The outboard<br />
angle block on the bottom chord has no<br />
support other then some glue. It will snap off<br />
when the truss rods are tightened. Makes sure<br />
the cleats are tight against the angle block,<br />
well glued and nailed.<br />
Let’s get on the end bents, final assembly and<br />
wrap this project up. The end bent assemblies<br />
are straightforward. They are made up using<br />
the glue and dowel pin technique as on the<br />
deck assembly. The first thing to do is attach<br />
the top beam to the stringers.