Push Button Panels PP7, PP17-I, PP17-II - Siemens Industry Online ...
Push Button Panels PP7, PP17-I, PP17-II - Siemens Industry Online ...
Push Button Panels PP7, PP17-I, PP17-II - Siemens Industry Online ...

Create successful ePaper yourself
Turn your PDF publications into a flip-book with our unique Google optimized e-Paper software.
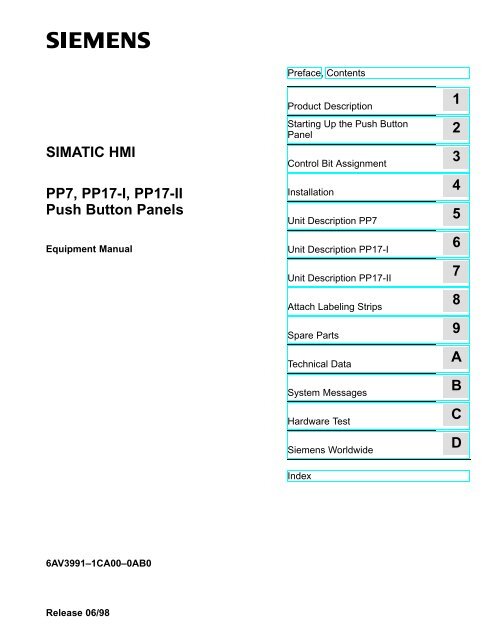
SIMATIC HMI<br />
<strong>PP7</strong>, <strong>PP17</strong>-I, <strong>PP17</strong>-<strong>II</strong><br />
<strong>Push</strong> <strong>Button</strong> <strong>Panels</strong><br />
Equipment Manual<br />
6AV3991–1CA00–0AB0<br />
Release 06/98<br />
Preface, Contents<br />
Product Description<br />
Starting Up the <strong>Push</strong> <strong>Button</strong><br />
Panel<br />
Control Bit Assignment<br />
Installation<br />
Unit Description <strong>PP7</strong><br />
Unit Description <strong>PP17</strong>-I<br />
Unit Description <strong>PP17</strong>-<strong>II</strong><br />
Attach Labeling Strips<br />
Spare Parts<br />
Technical Data<br />
System Messages<br />
Hardware Test<br />
<strong>Siemens</strong> Worldwide<br />
Index<br />
1<br />
2<br />
3<br />
4<br />
5<br />
6<br />
7<br />
8<br />
9<br />
A<br />
B<br />
C<br />
D
Safety Guidelines<br />
!<br />
!<br />
Qualified Personnel<br />
Correct Usage<br />
Trademarks<br />
Impressum<br />
!<br />
This manual contains notices which you should observe to ensure your own personal safety, as<br />
well as to protect the product and connected equipment. These notices are highlighted in the<br />
manual by a warning triangle and are marked as follows according to the level of danger:<br />
Warning<br />
indicates that death, severe personal injury or substantial property damage can result if proper<br />
precautions are not taken.<br />
Caution<br />
indicates that minor personal injury or property damage can result if proper precautions are not<br />
taken.<br />
Note<br />
draws your attention to particularly important information on the product, handling the product,<br />
or to a particular part of the documentation.<br />
Equipment may be commissioned and operated only by qualified personnel. Qualified personnel<br />
within the meaning of the safety notices in this manual are persons who are authorized to<br />
commission, ground and identify equipment, systems and circuits in accordance with safety<br />
engineering standards.<br />
Note the following:<br />
Warning<br />
The equipment may be used only for the applications stipulated in the catalog and in the technical<br />
description and only in conjunction with other equipment and components recommended<br />
or approved by <strong>Siemens</strong>.<br />
Startup must not take place until it is established that the machine, which is to accommodate<br />
this component, is in conformity with the guideline 89/392/EEC.<br />
Faultless and safe operation of the product presupposes proper transportation, proper storage,<br />
erection and installation as well as careful operation and maintenance.<br />
SIMATIC is a registered trademark of <strong>Siemens</strong> AG.<br />
Some of the other designations used in these documents are also registered trademarks; the<br />
owner’s rights may be violated if they are used be third parties for their own purposes.<br />
Editor and Publisher: A&D PT1<br />
Copyright <strong>Siemens</strong> AG 1996 All rights reserved<br />
The reproduction, transmission or use of this document or its<br />
contents is not permitted without express written authority.<br />
Offenders will be liable for damages. All rights, including rights<br />
created by patent grant or registration of a utility model or design,<br />
are reserved.<br />
<strong>Siemens</strong> AG,<br />
Bereich Automatisierungstechnik,<br />
Bedienen und Beobachten<br />
Postfach 4848, D-90327 Nuernberg<br />
Disclaimer of Liability<br />
We have checked the contents of this manual for agreement with<br />
the hardware and software described. Since deviations cannot be<br />
precluded entirely, we cannot guarantee full agreement. However,<br />
the data in this manual are reviewed regularly and any necessary<br />
corrections included in subsequent editions. Suggestions for improvement<br />
are welcomed.<br />
Technical data subject to change.<br />
<strong>Siemens</strong> AG 1997<br />
<strong>Siemens</strong> Aktiengesellschaft Order No. 6AV3991–1CA00–0AB0<br />
Equipment Manual TP37
Preface<br />
Purpose<br />
Organization of the<br />
manual<br />
Further support<br />
<strong>PP7</strong>, <strong>PP17</strong>-I, <strong>PP17</strong>-<strong>II</strong> Equipment Manual<br />
Release 06/98<br />
This equipment manual is designed to provide operators, installation personnel,<br />
planners and system maintenance technicians with information concerning the<br />
functionality, operation and technical configuration of <strong>Push</strong> <strong>Button</strong> <strong>Panels</strong>.<br />
The equipment manual for the <strong>Push</strong> <strong>Button</strong> <strong>Panels</strong> <strong>PP7</strong>, <strong>PP17</strong>-I and <strong>PP17</strong>-<strong>II</strong> is<br />
divided into the following sections:<br />
Chapters Content<br />
1 General description of the <strong>Push</strong> <strong>Button</strong> <strong>Panels</strong><br />
2 Step-by-step instructions on how to configure a <strong>Push</strong><br />
<strong>Button</strong> Panel<br />
3 Detailed information on the interrelationship between the<br />
<strong>Push</strong> <strong>Button</strong> Panel and PLC<br />
4 Mechanical and electrical installation of the <strong>Push</strong> <strong>Button</strong><br />
<strong>Panels</strong><br />
5 - 7 Unit description of the various <strong>Push</strong> <strong>Button</strong> Panel<br />
versions<br />
8 Information on labelling<br />
9 Information on spare parts<br />
Appendices Technical data, system messages, hardware test<br />
Please address technical questions to your local <strong>Siemens</strong> partners in the subsidiaries<br />
and branch offices responsible for your area. Refer to Appendix D of this<br />
equipment manual for a list of addresses.<br />
i
SIMATIC Customer Support Hotline<br />
Available worldwide around the clock:<br />
ii<br />
Johnson City<br />
Nuremberg<br />
SIMATIC BASIC Hotline<br />
Local time: Mon-Fri 8:00 to<br />
18:00<br />
Tel.: +49 (911) 895-7000<br />
Fax: +49 (911) 895-7002<br />
E-mail: simatic.support@<br />
nbgm.siemens.de<br />
SIMATIC Premium Hotline<br />
(chargeable,<br />
SIMATIC Card required)<br />
Times: Mon-Fri 0:00 to<br />
24:00<br />
Tel.: +49 (911) 895-7777<br />
Fax: +49 (911) 895-7001<br />
Nuremberg<br />
Simatic Basic Hotline<br />
Johnson City<br />
SIMATIC BASIC Hotline<br />
Local time: Mon-Fri 8:00 to<br />
17:00<br />
Tel.: +1 423 461-2522<br />
Fax: +1 423 461-2231<br />
E-mail: simatic.hotline@<br />
sea.siemens.com<br />
Singapore<br />
Singapore<br />
SIMATIC BASIC Hotline<br />
Local time: Mon-Fri 8:30 to<br />
17:30<br />
Tel.: +65 740-7000<br />
Fax: +65 740-7001<br />
E-mail: simatic@<br />
singnet.com.sg<br />
<strong>PP7</strong>, <strong>PP17</strong>-I, <strong>PP17</strong>-<strong>II</strong> Equipment Manual<br />
Release 06/98
SIMATIC Customer Support <strong>Online</strong> Services<br />
SIMATIC Customer Support offers you comprehensive additional information about SI-<br />
MATIC products through its <strong>Online</strong> Services as follows:<br />
Up-to-date general information is provided<br />
– on the internet at http://www.ad.siemens.de/simatic<br />
– from the fax polling service on 08765-93 02 77 95 00<br />
Up-to-date product information and downloads for practical use can be found<br />
– on the internet at http://www.ad.siemens.de/support/<br />
html–00/<br />
– from the Bulletin Board System (BBS) in Nuremberg (SIMATIC Customer<br />
Support Mailbox) on +49 (911) 895-7100.<br />
For calling up the mailbox, you should use a modem with up to<br />
V.34 (28.8 kBaud) capability and set the parameters as follows: 8, N, 1,<br />
ANSI, or connect via ISDN (x.75, 64 kBit).<br />
<strong>PP7</strong>, <strong>PP17</strong>-I, <strong>PP17</strong>-<strong>II</strong> Equipment Manual<br />
Release 06/98<br />
iii
iv<br />
<strong>PP7</strong>, <strong>PP17</strong>-I, <strong>PP17</strong>-<strong>II</strong> Equipment Manual<br />
Release 06/98
Contents<br />
1 Product Description . . . . . . . . . . . . . . . . . . . . . . . . . . . . . . . . . . . . . . . . . . . . . . . . . . . . . 1-1<br />
1.1 <strong>Push</strong> <strong>Button</strong> Panel Overview . . . . . . . . . . . . . . . . . . . . . . . . . . . . . . . . . . . . . . 1-3<br />
1.2 Operating and Display Elements . . . . . . . . . . . . . . . . . . . . . . . . . . . . . . . . . . . 1-4<br />
2 Starting Up the <strong>Push</strong> <strong>Button</strong> Panel . . . . . . . . . . . . . . . . . . . . . . . . . . . . . . . . . . . . . . . . 2-1<br />
2.1 Configure Interface to PLC on the <strong>Push</strong> <strong>Button</strong> Panel . . . . . . . . . . . . . . . . . 2-3<br />
2.2 Define Configuration in PLC . . . . . . . . . . . . . . . . . . . . . . . . . . . . . . . . . . . . . . . 2-6<br />
2.2.1 MPI connection . . . . . . . . . . . . . . . . . . . . . . . . . . . . . . . . . . . . . . . . . . . . . . . . . . 2-6<br />
2.2.2 PROFIBUS-DP connection . . . . . . . . . . . . . . . . . . . . . . . . . . . . . . . . . . . . . . . . 2-6<br />
2.3 Configuring Keys/LEDs . . . . . . . . . . . . . . . . . . . . . . . . . . . . . . . . . . . . . . . . . . . 2-9<br />
2.3.1 Configuring Keys/LEDs When Using MPI Connection . . . . . . . . . . . . . . . . . 2-11<br />
2.3.2 Configuring Keys/LEDs When Using PROFIBUS-DP Connection . . . . . . . 2-12<br />
2.4 Coordinating the <strong>Push</strong> <strong>Button</strong> Panel and PLC . . . . . . . . . . . . . . . . . . . . . . . . 2-13<br />
3 Control Bit Assignment . . . . . . . . . . . . . . . . . . . . . . . . . . . . . . . . . . . . . . . . . . . . . . . . . . 3-1<br />
4 Installation . . . . . . . . . . . . . . . . . . . . . . . . . . . . . . . . . . . . . . . . . . . . . . . . . . . . . . . . . . . . . . 4-1<br />
5 Unit Description <strong>PP7</strong> . . . . . . . . . . . . . . . . . . . . . . . . . . . . . . . . . . . . . . . . . . . . . . . . . . . . . 5-1<br />
6 Unit Description <strong>PP17</strong>-I . . . . . . . . . . . . . . . . . . . . . . . . . . . . . . . . . . . . . . . . . . . . . . . . . . 6-1<br />
7 Unit Description <strong>PP17</strong>-<strong>II</strong> . . . . . . . . . . . . . . . . . . . . . . . . . . . . . . . . . . . . . . . . . . . . . . . . . . 7-1<br />
8 Attach Labeling Strips . . . . . . . . . . . . . . . . . . . . . . . . . . . . . . . . . . . . . . . . . . . . . . . . . . . 8-1<br />
9 Spare Parts . . . . . . . . . . . . . . . . . . . . . . . . . . . . . . . . . . . . . . . . . . . . . . . . . . . . . . . . . . . . . 9-1<br />
A Technical Data . . . . . . . . . . . . . . . . . . . . . . . . . . . . . . . . . . . . . . . . . . . . . . . . . . . . . . . . . . A-1<br />
A.1 General technical data . . . . . . . . . . . . . . . . . . . . . . . . . . . . . . . . . . . . . . . . . . . . A-1<br />
A.2 Digital inputs and outputs . . . . . . . . . . . . . . . . . . . . . . . . . . . . . . . . . . . . . . . . . A-2<br />
A.3 Interface assignment . . . . . . . . . . . . . . . . . . . . . . . . . . . . . . . . . . . . . . . . . . . . . A-4<br />
B System Messages . . . . . . . . . . . . . . . . . . . . . . . . . . . . . . . . . . . . . . . . . . . . . . . . . . . . . . . B-1<br />
C Hardware Test . . . . . . . . . . . . . . . . . . . . . . . . . . . . . . . . . . . . . . . . . . . . . . . . . . . . . . . . . . . C-1<br />
D <strong>Siemens</strong> Worldwide . . . . . . . . . . . . . . . . . . . . . . . . . . . . . . . . . . . . . . . . . . . . . . . . . . . . .<br />
D-1<br />
<strong>PP7</strong>, <strong>PP17</strong>-I, <strong>PP17</strong>-<strong>II</strong> Equipment Manual<br />
Release 06/98<br />
v
vi<br />
<strong>PP7</strong>, <strong>PP17</strong>-I, <strong>PP17</strong>-<strong>II</strong> Equipment Manual<br />
Release 06/98
Product Description<br />
Use of <strong>Push</strong><br />
<strong>Button</strong> <strong>Panels</strong><br />
Installation<br />
possibilities<br />
<strong>PP7</strong>, <strong>PP17</strong>-I, <strong>PP17</strong>-<strong>II</strong> Equipment Manual<br />
Release 06/98<br />
The <strong>Push</strong> <strong>Button</strong> <strong>Panels</strong> can be used to display the operating statuses of a<br />
machine or system and to control processes.<br />
Until now, keys and lamps had to be individually mounted, wired and tested<br />
for this purpose. This was also a time-consuming process. In contrast to this,<br />
installation of <strong>Push</strong> <strong>Button</strong> <strong>Panels</strong> requires only a rectangular cut-out and a bus<br />
connection (DP or MPI). The standard configuration ensures that the panel is<br />
ready to operate immediately after all the connections have been made. This<br />
results in considerable advantages in respect of time compared to conventional<br />
connections.<br />
The <strong>Push</strong> <strong>Button</strong> <strong>Panels</strong> provide a large variety of features which can be used<br />
without the necessity of PLC programs:<br />
Short-stroke keys with surface illumination according to the LED colors<br />
Additional 24 V digital inputs and outputs<br />
All short-stroke keys and digital 24 V inputs can also be individually<br />
configured as switches<br />
Integrated lamp and key test<br />
Central release input to lock all operating actions<br />
Integrated flash timing<br />
Color-coding for LEDs, such as red, green, orange<br />
Pulse extension for short-stroke keys and digital 24 V inputs can be<br />
specified via parameters<br />
Perforated cut-outs for 22.5 mm standard optional elements, such as<br />
key-operated switch and emergency shutdown switch<br />
OP design, can be set in rows, without gaps<br />
1<br />
The <strong>Push</strong> <strong>Button</strong> <strong>Panels</strong> have been conceived for installation in cabinets and<br />
can be implemented in all situations where keys, switches and lamps are required.<br />
The high degree of protection (IP65 on the front side) and the fact they are<br />
maintenance-free make the <strong>Push</strong> <strong>Button</strong> <strong>Panels</strong> suitable for use even in rough<br />
industrial environments.<br />
1-1
Connection types<br />
Unit configuration<br />
1-2<br />
The <strong>Push</strong> <strong>Button</strong> <strong>Panels</strong> can be operated using the following connections:<br />
via MPI to a SIMATIC S7-200<br />
via MPI to a SIMATIC S7-300<br />
via MPI to a SIMATIC S7-400<br />
via PROFIBUS-DP to a SIMATIC S5<br />
via PROFIBUS-DP to a SIMATIC S7<br />
via PROFIBUS-DP as standard slave to a DP master from a different<br />
manufacturer; possible restrictions regarding configuration of the <strong>Push</strong><br />
<strong>Button</strong> Panel.<br />
Parameters in the <strong>Push</strong> <strong>Button</strong> <strong>Panels</strong> are predefined and the unit is thus immediately<br />
ready to operate. Various options can also be activated by adjusting<br />
certain parameters. Each key, LED, digital input and output can be individually<br />
adapted according to specific requirements.<br />
No special configuration software is necessary for the <strong>Push</strong> <strong>Button</strong> Panel. All<br />
adjustment of the settings is carried out either directly on the <strong>Push</strong> <strong>Button</strong><br />
Panel or by means of the PLC configuration software.<br />
All adjustments to settings carried out on the <strong>Push</strong> <strong>Button</strong> Panel are stored in<br />
its memory module. In cases where the unit electronics or the entire unit are<br />
replaced, the interface need not be reconfigured. Only the old memory module<br />
needs to be transferred to the new unit.<br />
<strong>PP7</strong>, <strong>PP17</strong>-I, <strong>PP17</strong>-<strong>II</strong> Equipment Manual<br />
Release 06/98
1.1 <strong>Push</strong> <strong>Button</strong> Panel Overview<br />
Short-stroke<br />
keys, keys, surface il- illumination<br />
<strong>PP7</strong>, <strong>PP17</strong>-I, <strong>PP17</strong>-<strong>II</strong> Equipment Manual<br />
Release 06/98<br />
<strong>PP7</strong> <strong>PP17</strong>-I <strong>PP17</strong>-<strong>II</strong><br />
Hardware <strong>PP7</strong> <strong>PP17</strong>-I <strong>PP17</strong>-<strong>II</strong><br />
Number of short-stroke<br />
keys keys<br />
8 16 32<br />
Inputs/Outputs p p Number of digital inputs 4 16 16<br />
Installable operating<br />
elements<br />
Number of digital outputs - 16 16<br />
Number of 22.5 mm elements<br />
which can be integrated<br />
Release input Lock operation of the<br />
<strong>Push</strong> <strong>Button</strong> Panel<br />
3 12 –<br />
- <br />
Interfaces PLC connection MPI or Profibus DP<br />
Communication SIMATIC SIMATIC S5<br />
– PROFIBUS-DP <br />
Data transmission<br />
SIMATIC SIMATIC S7/M7<br />
– MPI<br />
<br />
– PROFIBUS PROFIBUS-DP DP<br />
<br />
<br />
<br />
Baud rate Max. 1.5 MBaud Max. 12 MBaud<br />
1-3
1.2 Operating and Display Elements<br />
Standard operating<br />
and display elements<br />
Operating concept<br />
Digital inputs and<br />
outputs<br />
Release input<br />
1-4<br />
The <strong>Push</strong> <strong>Button</strong> <strong>Panels</strong> are all equipped with a keyboard containing shortstroke<br />
keys. The individual keys can be configured in respect of their function<br />
as either switches or keys.<br />
Function momentary–contact switch:<br />
The corresponding bit in the PLC is set as long as the<br />
key is pressed.<br />
Function switches: Pressing the key sets the corresponding bit, pressing<br />
again resets it.<br />
Two LEDs are integrated in the keys and are used to display the bit status of<br />
the connected PLC. The LEDs can indicate four different statuses, one of<br />
which can be defined via parameters.<br />
All the operating elements of the <strong>Push</strong> <strong>Button</strong> <strong>Panels</strong> are linked to bits in the<br />
PLC. The keys on the <strong>Push</strong> <strong>Button</strong> Panel can be used to influence the bits in<br />
the PLC and thus control the affect of processes. At the same time, the LEDs<br />
indicate the bit status of the PLC and, thus, the operating status of the process<br />
being monitored.<br />
When several keys are pressed simultaneously, it is detected by the <strong>Push</strong> <strong>Button</strong><br />
Panel and the bits are set in the PLC. After restarting the system following<br />
a power failure, all the bits are set to 0.<br />
Additional 22.5 mm elements can be connected using the digital inputs and<br />
outputs. Non-connected digital inputs are automatically set to 0.<br />
The release input serves to lock the <strong>Push</strong> <strong>Button</strong> Panel. A key-operated switch<br />
can be connected here, for example. The release input permits switching between<br />
normal operation (open contact) and monitoring mode (closed contact).<br />
In normal operation, all the functions on the <strong>Push</strong> <strong>Button</strong> Panel are available<br />
for use, whereas in monitoring mode, the following restrictions are valid<br />
the inputs are locked, no signal exchanges are reported to the PLC,<br />
the last status of all the keys is maintained by the PLC until normal<br />
operation returns.<br />
<strong>PP7</strong>, <strong>PP17</strong>-I, <strong>PP17</strong>-<strong>II</strong> Equipment Manual<br />
Release 06/98
Pulse diagrams<br />
Lamp/Key test<br />
<strong>PP7</strong>, <strong>PP17</strong>-I, <strong>PP17</strong>-<strong>II</strong> Equipment Manual<br />
Release 06/98<br />
The following pulse diagrams elucidate the relationship between the actions<br />
initiated on the <strong>Push</strong> <strong>Button</strong> Panel and changing bit status in the PLC:<br />
Function as momentary–contact switch<br />
Key<br />
Bit in<br />
PLC<br />
Contact<br />
Release<br />
input<br />
Key<br />
Bit in<br />
PLC<br />
Contact<br />
Release<br />
input<br />
pressed<br />
not pressed<br />
1<br />
0<br />
closed<br />
open<br />
Time<br />
Function as switch<br />
pressed<br />
not pressed<br />
1<br />
0<br />
closed<br />
open<br />
Time<br />
The Lamp/Key test serves to test the functional capabilitity of all the keys and<br />
lamps on the <strong>Push</strong> <strong>Button</strong> Panel. The Lamp/Key test can be activated by the<br />
following measures in normal operation:<br />
By pressing the key assigned to the Lamp/Key test function by the<br />
corresponding parameter.<br />
By setting the two LED bits of the key assigned to the Lamp/Key test<br />
function according to the configuration. The bits must be set in the PLC<br />
using a relevant program.<br />
The Lamp/Key test function is assigned to Key 1 (top right) in the pre-adjusted<br />
system settings.<br />
1-5
1-6<br />
On activating the Lamp/Key test, the unit switches to the corresponding operating<br />
mode. In this case<br />
the ERROR LED blinks,<br />
the LEDs integrated in the <strong>Push</strong> <strong>Button</strong> Panel keyboard are activated,<br />
all the <strong>Push</strong> <strong>Button</strong> Panel digital outputs are set to 1.<br />
After pressing any key when in operating mode Lamp/Key test,<br />
the LED/lamps go out for the period in which the key is pressed,<br />
all the <strong>Push</strong> <strong>Button</strong> Panel digital outputs are set to 1.<br />
This is valid for the period in which the key is pressed. All the keys and digital<br />
inputs can be tested in this way.<br />
In order that no unwanted signals are transmitted to the PLC during the Lamp/<br />
Key test, the following restrictions are valid in respect of <strong>Push</strong> <strong>Button</strong> Panel<br />
operation:<br />
the inputs are locked and no signal exchanges are reported to the PLC,<br />
the last status of all the keys is maintained by the PLC until normal<br />
operation returns.<br />
The last key operation reported to the PLC is the pressing of the Lamp/Key test<br />
button.<br />
To terminate the Lamp/Key test,<br />
release the corresponding key, or<br />
reset the corresponding bits in the PLC<br />
The unit returns to normal operation and the restrictions regarding the <strong>Push</strong><br />
<strong>Button</strong> Panel operation are released.<br />
<strong>PP7</strong>, <strong>PP17</strong>-I, <strong>PP17</strong>-<strong>II</strong> Equipment Manual<br />
Release 06/98
Starting Up the <strong>Push</strong> <strong>Button</strong> Panel<br />
MPI connection<br />
<strong>PP7</strong>, <strong>PP17</strong>-I, <strong>PP17</strong>-<strong>II</strong> Equipment Manual<br />
Release 06/98<br />
The following section provides help regarding the configuration possibilities of<br />
the <strong>Push</strong> <strong>Button</strong> Panel. Connection type MPI is pre-selected in the system settings.<br />
The system settings for the MPI connection are:<br />
MPI address: 3<br />
Baud rate: 187.5 KBaud<br />
Data area type: Marker byte<br />
Memory word: 100<br />
Configuring data block: 0<br />
PLC address: 2<br />
PLC type: 300 (S7-300)<br />
Highest station address: 126<br />
Number of MPI masters: 1<br />
The following table provides an overview of the possibilities for modifying the<br />
defined system settings:<br />
Intention Procedure Chapters<br />
Modify MPI address Set MPI address on <strong>Push</strong><br />
<strong>Button</strong> Panel<br />
2.1<br />
Change baud rate Change baud rate on <strong>Push</strong><br />
<strong>Button</strong> Panel<br />
2.1<br />
Change data area type Change data area type on<br />
<strong>Push</strong> <strong>Button</strong> Panel<br />
2.1<br />
Configure <strong>Push</strong> <strong>Button</strong> Panel Set up configuring data block 2.3.1<br />
properties p p which deviate from in the PLC<br />
pre-adjusted dj d system settings i<br />
Set parameter 2.3<br />
Set the number of the configuring<br />
data block on the <strong>Push</strong><br />
<strong>Button</strong> Panel<br />
2<br />
2.1<br />
2-1
DP connection<br />
2-2<br />
The system settings for the DP connection are:<br />
DP slave address: 3<br />
Baud rate: 1500 KBaud<br />
The following table provides an overview of the possibilities for modifying the<br />
defined system settings:<br />
Intention Procedure Chapters<br />
Set connection type DP Set connection type DP on the<br />
<strong>Push</strong> <strong>Button</strong> Panel<br />
Change DP slave address Change the DP slave address<br />
on the <strong>Push</strong> <strong>Button</strong> Panel<br />
Change baud rate Change baud rate on <strong>Push</strong><br />
<strong>Button</strong> Panel<br />
Configure <strong>Push</strong> <strong>Button</strong> Panel Set parameter in the configu-<br />
properties which deviate from<br />
ration software<br />
pre-adjusted system settings<br />
2.1<br />
2.1<br />
2.1<br />
2.3<br />
<strong>PP7</strong>, <strong>PP17</strong>-I, <strong>PP17</strong>-<strong>II</strong> Equipment Manual<br />
Release 06/98
2.1 Configure Interface to PLC on the <strong>Push</strong> <strong>Button</strong> Panel<br />
Calling in and<br />
operating<br />
configuration<br />
mode<br />
<strong>PP7</strong>, <strong>PP17</strong>-I, <strong>PP17</strong>-<strong>II</strong> Equipment Manual<br />
Release 06/98<br />
The settings of the interface to the PLC are menu-controlled and can be defined<br />
via the rear side display of the <strong>Push</strong> <strong>Button</strong> Panel. The so-called configuration<br />
mode is provided for this.<br />
All the parameters concerning the interface to the PLC are stored in the <strong>Push</strong><br />
<strong>Button</strong> Panel memory module. In cases where the unit electronics or the entire<br />
unit are replaced, the interface need not be reconfigured. Only the old memory<br />
module needs to be transferred to the new unit.<br />
Key Description<br />
ESC + OK<br />
OK<br />
ESC<br />
If this key combination is pressed while the unit is<br />
starting up (directly after switching on), the unit<br />
enters configuration mode.<br />
In configuration mode, this key serves to store a<br />
modification in the current menu level and skip forward<br />
to the next menu level. The key has no function<br />
in the bottom menu level.<br />
In configuration mode, this key serves to skip back<br />
to the superordinated menu level. The key has no<br />
function in the top menu level.<br />
Caution: Any modifications carried out to the settings<br />
in the current menu level are not stored.<br />
In configuration mode, this key serves to skip forward<br />
to the next menu level. The key has no function<br />
in the bottom menu level.<br />
Caution: Any modifications carried out to the settings<br />
in the current menu level are not stored.<br />
In configuration mode, this key serves to scroll upwards<br />
through the alternatives within a menu level.<br />
In configuration mode, this key serves to scroll<br />
downwards through the alternatives within a menu<br />
level.<br />
This key serves to exit from configuration mode.<br />
The current settings are stored. The key can be<br />
operated in any menu level.<br />
2-3
2-4<br />
The following menu structure is displayed in configuration mode (the numeric<br />
values and underlined alternatives indicate the predefined system settings):<br />
DP<br />
CONNECTION<br />
DP / MPI<br />
MPI<br />
SLAVE-ADR<br />
BAUDRATE<br />
3<br />
DEFAULT<br />
YES / NO<br />
1500 KBaud<br />
100<br />
MB<br />
MW<br />
PP-MPI-ADR<br />
BAUDRATE<br />
DATA<br />
MB / DB<br />
PARAM.-DB<br />
PLC-ADR<br />
PLC-TYPE<br />
2 / 3 / 400<br />
200 300<br />
3<br />
187,5 KBaud<br />
0<br />
2<br />
DB<br />
DW<br />
400<br />
RACK-NO<br />
SLOT-NO<br />
HSA<br />
DB<br />
NUMBER OF<br />
MPI-MASTER<br />
100<br />
<strong>PP7</strong>, <strong>PP17</strong>-I, <strong>PP17</strong>-<strong>II</strong> Equipment Manual<br />
Release 06/98<br />
0<br />
0<br />
3<br />
126<br />
1
<strong>PP7</strong>, <strong>PP17</strong>-I, <strong>PP17</strong>-<strong>II</strong> Equipment Manual<br />
Release 06/98<br />
Refer to the following table for the significance of the various menu items:<br />
Name Explanation<br />
DEFAULT Used to select whether all the parameters should be reset<br />
to the predefined system settings values.<br />
CONNECTION<br />
DP/MPI<br />
Used to select the system connection type. Either MPI or<br />
PROFIBUS-DP.<br />
SLAVE-ADR Defines the slave address of the <strong>Push</strong> <strong>Button</strong> Panel in<br />
the PROFIBUS-DP system.<br />
PP-MPI-ADR Defines the MPI address of the <strong>Push</strong> <strong>Button</strong> Panel.<br />
BAUDRATE Defines the baud rate for data transmission using connection<br />
type MPI or PROFIBUS-DP in KBaud.<br />
DATA MB/DB Used to select whether the data area for the <strong>Push</strong> <strong>Button</strong><br />
Panel is created as a Memory Byte (MB) or Data Block<br />
(DB).<br />
MW Defines the number of the first, reserved memory word<br />
for the <strong>Push</strong> <strong>Button</strong> Panel.<br />
DB Defines the number of the data block in which the data<br />
area for the <strong>Push</strong> <strong>Button</strong> Panel is reserved.<br />
DW Defines the number of the first, reserved data word for<br />
the <strong>Push</strong> <strong>Button</strong> Panel in the data block.<br />
PARAM.-DB Defines the number of the configuring data block.<br />
PLC-ADR Defines the address of the PLC to which the <strong>Push</strong> <strong>Button</strong><br />
Panel is connected.<br />
PLC-TYPE<br />
2/3/400<br />
Used to select the type of PLC to which the <strong>Push</strong> <strong>Button</strong><br />
Panel is connected.<br />
RACK-NO Defines the number of the rack in which the PLC is<br />
installed.<br />
SLOT-NO Defines the number of the slot within the rack.<br />
HSA Defines the highest station address within the MPI system.<br />
NUMBER OF<br />
MPI-MASTER<br />
Defines the number of the MPI master in the system.<br />
2-5
2.2 Define Configuration in PLC<br />
2.2.1 MPI connection<br />
2.2.2 PROFIBUS-DP connection<br />
2-6<br />
If connection type MPI is used for the <strong>Push</strong> <strong>Button</strong> Panel, no hardware configuration<br />
is necessary. Only the MPI address needs to be set on the <strong>Push</strong> <strong>Button</strong><br />
Panel.<br />
Interrelated memory areas must be set up in the PLC for the keys, LEDs and<br />
digital inputs and outputs. The following table indicates the length of the<br />
memory areas to be set up for the various unit versions.<br />
Memory area <strong>PP7</strong> <strong>PP17</strong>-I <strong>PP17</strong>-<strong>II</strong><br />
Keys 1 Byte 2 Bytes 4 Bytes<br />
Digital inputs 1 Byte 2 Bytes 2 Bytes<br />
LEDs 2 Bytes 4 Bytes 8 Bytes<br />
Digital outputs – 4 Bytes 4 Bytes<br />
Total 4 Bytes 12 Bytes 18 Bytes<br />
In order to modify system settings, a data block must be created in the PLC<br />
which contains the configuration data for the <strong>Push</strong> <strong>Button</strong> Panel. The structure<br />
of this configuring data block is depicted in Chapter 2.4. The number of the<br />
configuring data block must be specified when configuring the <strong>Push</strong> <strong>Button</strong><br />
Panel.<br />
When connection type PROFIBUS-DP is used, the <strong>Push</strong> <strong>Button</strong> Panel must be<br />
installed in the PROFIBUS configuration software as a slave in the network. In<br />
the case of SIMATIC S5, the configuration software used is COM-PROFIBUS,<br />
and for SIMATIC S7 connection to the network is performed via HW-<br />
CONFIG. The configuration software defines the following:<br />
station address,<br />
the I/O area used<br />
and the configuration of the buttons and LEDs.<br />
Ensure that the same station address is specified that is set on the <strong>Push</strong> <strong>Button</strong><br />
Panel.<br />
<strong>PP7</strong>, <strong>PP17</strong>-I, <strong>PP17</strong>-<strong>II</strong> Equipment Manual<br />
Release 06/98
<strong>PP7</strong>, <strong>PP17</strong>-I, <strong>PP17</strong>-<strong>II</strong> Equipment Manual<br />
Release 06/98<br />
The special GSD files transfer information concerning the <strong>Push</strong> <strong>Button</strong> Panel<br />
to the configuration software COM-PROFIBUS (SIMATIC S5) and HW-<br />
CONFIG (SIMATIC S7). Older versions of the configuration software do not<br />
contain these GSD files. For this reason, a disk is enclosed with the manual<br />
which contains the current GSD files for the <strong>Push</strong> <strong>Button</strong> Panel.<br />
The following procedure is recommended in respect of the GSD files:<br />
Step<br />
1 Check whether your system is already provided with the special<br />
GSD file required for your <strong>Push</strong> <strong>Button</strong> Panel. To do this, call in<br />
the configuration software COM-PROFIBUS (SIMATIC S5) or<br />
HW-CONFIG (SIMATIC S7).<br />
COM-PROFIBUS<br />
(SIMATIC S5)<br />
HW-CONFIG<br />
(SIMATIC S7)<br />
Check whether an entry exists in the hardware<br />
family SIMATIC or SIMATIC PP for<br />
your <strong>Push</strong> <strong>Button</strong> Panel.<br />
Check whether an entry exists in the hardware<br />
catalog under PROFIBUS-DP/<br />
ADDITIONAL FIELD DEVICES/<br />
SIMATIC for your <strong>Push</strong> <strong>Button</strong> Panel.<br />
If the corresponding entry already exists, the system already contains<br />
the GSD files. In this case, skip the points 2 and 3 of these<br />
instructions.<br />
2 If the respective entry is not available in COM-PROFIBUS<br />
(SIMATIC S5) or HW-CONFIG (SIMATIC S7), the GSD files<br />
relevant to your <strong>Push</strong> <strong>Button</strong> Panel must be loaded in the system.<br />
The GSD files for the <strong>Push</strong> <strong>Button</strong> <strong>Panels</strong> are contained on the disk<br />
enclosed with this manual.<br />
COM-PROFIBUS<br />
(SIMATIC S5)<br />
HW-CONFIG<br />
(SIMATIC S7)<br />
Copy:<br />
1. all the files from directory GSD on the<br />
disk to subdirectory GSD in the COM-<br />
PROFIBUS installation, and<br />
2. all the files from directory BITMAPS<br />
on the disk to subdirectory BITMAPS<br />
in the COM-PROFIBUS installation.<br />
Copy:<br />
1. all the files from directory GSD on the<br />
disk to the path S7DATA/GSD in the<br />
STEP 7 installation, and<br />
2. all the files from directory BITMAPS<br />
on the disk to the path S7DATA/<br />
NSBMP in the STEP 7 installation.<br />
2-7
2-8<br />
Step<br />
3 Update the GSD files available in the system.<br />
COM-PROFIBUS<br />
(SIMATIC S5)<br />
HW-CONFIG<br />
(SIMATIC S7)<br />
Select the command Update DDB Files<br />
from the menu File.<br />
Select the command Update DDB Files<br />
from the menu Options.<br />
After the GSD files have been correctly integrated in the system, the <strong>Push</strong><br />
<strong>Button</strong> Panel can be used in your configuration.<br />
<strong>PP7</strong>, <strong>PP17</strong>-I, <strong>PP17</strong>-<strong>II</strong> Equipment Manual<br />
Release 06/98
2.3 Configuring Keys/LEDs<br />
<strong>PP7</strong>, <strong>PP17</strong>-I, <strong>PP17</strong>-<strong>II</strong> Equipment Manual<br />
Release 06/98<br />
The switches and keys need only be configured when a configuration deviating<br />
from the predefined system settings is required.<br />
The following parameters can be adjusted for the <strong>Push</strong> <strong>Button</strong> Panel:<br />
Parameter Description<br />
Pulse extension<br />
Lamp/Key<br />
test<br />
Function<br />
keys<br />
The signal pulse regarding all operations initiated by pressing<br />
buttons on the PLC is extended in order to ensure reliable<br />
switch/key polling by the PLC even when pressed very<br />
briefly.<br />
The extension of the signal pulse results from:<br />
Pulse = Entered value x 20 ms<br />
Value range: 0 to 50<br />
System default setting: No pulse extension<br />
A key on the keyboard is assigned for activating the Lamp<br />
test. The parameter indicates the number of the key which is<br />
assigned the Lamp test function. The keys are numbered<br />
from right to left, in rows, beginning at the top right moving<br />
down. The value 0 deactivates the Lamp test.<br />
Value range: 0 to total number of keys<br />
System default setting: Lamp test assigned to Key 1 (top<br />
right)<br />
It is possible to define whether a key on the keyboard should<br />
function as a key or switch.<br />
Function momentary–contact switch:<br />
The corresponding bit in the PLC is set<br />
as long as the key is pressed.<br />
Function switch: Pressing the key sets the corresponding<br />
bit, pressing again resets it.<br />
The way in which each key functions is defined by a single<br />
bit. The keys are numbered from right to left, in rows, beginning<br />
at the top right moving down, so that the first bit in the<br />
configuration is designated for the key at the top right and the<br />
last bit for the key at the bottom left.<br />
Bit = 0: Function momentary–contact switch<br />
Bit = 1: Function switch<br />
System default setting: All the keys are configured as keys.<br />
2-9
2-10<br />
Parameter<br />
Function of<br />
digital inputs<br />
Description<br />
Analog to the functionality of the keys on the keyboard, the<br />
functioning of the digital inputs is defined here. The digital<br />
inputs on the rear side of the <strong>Push</strong> <strong>Button</strong> Panel are counted<br />
from top to bottom. Here, too, the way each input functions is<br />
defined by a single bit.<br />
System default setting: All digital inputs are configured as<br />
momentary–contact switch.<br />
LED mode Two control bits are reserved in successive bytes for configuring<br />
the mode of an LED. The diagram below clarifies the<br />
position of the control bits in a memory byte or data block.<br />
Byte n<br />
Byte n+1<br />
} Control bits for<br />
Bit 7 Bit 0<br />
LED 1<br />
Two successive configuration bits in one configuring data<br />
block define the way in which the status of the control bits<br />
are displayed. The following table illustrates the effects of<br />
the various combinations of configuration bits on the LED<br />
display:<br />
Configuration<br />
bits<br />
xx<br />
xx<br />
xx<br />
00<br />
01<br />
10<br />
11<br />
Control bits LED<br />
00<br />
01<br />
10<br />
11<br />
11<br />
11<br />
11<br />
off<br />
lights green<br />
lights red<br />
System default setting: Configuration bits = 00<br />
flashes green<br />
lights orange<br />
flashes red<br />
flashes orange<br />
<strong>PP7</strong>, <strong>PP17</strong>-I, <strong>PP17</strong>-<strong>II</strong> Equipment Manual<br />
Release 06/98
2.3.1 Configuring Keys/LEDs When Using MPI Connection<br />
<strong>PP7</strong>, <strong>PP17</strong>-I, <strong>PP17</strong>-<strong>II</strong> Equipment Manual<br />
Release 06/98<br />
The structure of this configuring data block is depicted in the following table.<br />
In order to simplify the creation of such a data block, library elements for<br />
STEP 7 are available. These are contained in directory UDT on the disk enclosed<br />
with this manual.<br />
Entry for <strong>PP7</strong> Entry for <strong>PP17</strong>-I Entry for <strong>PP17</strong>-<strong>II</strong><br />
Byte 0 0 0 0<br />
Byte 1 0 0 0<br />
Byte 2 P P P<br />
Byte 3 P P P<br />
Byte 4 0 1 1<br />
Byte 5 7 7 7<br />
Byte 6 1 2 4<br />
Byte 7 2 4 8<br />
Byte 8 1 2 2<br />
Byte 9 0 4 4<br />
Byte 10 0 0 0<br />
Byte 11 0 0 0<br />
Byte 12 Pulse extension Pulse extension Pulse extension<br />
Byte 13 Lamp test key Lamp test key Lamp test key<br />
Byte 14 Function: key 1-8 Function: key 1-8 Function: key 1-8<br />
Byte 15 Function: digital<br />
input 1-4<br />
Byte 16 Mode: LED 1-4 Function: digital<br />
input 1-8<br />
Byte 17 Mode: LED 5-8 Function: digital<br />
input 9-16<br />
Function: key 9-16 Function: key 9-16<br />
Function: of key<br />
17-24<br />
Function: key<br />
25-32<br />
Byte 18 Mode: LED 1-4 Function: digital<br />
input 1-8<br />
Byte 19 Mode: LED 5-8 Function: digital<br />
input 9-16<br />
Byte 20 Mode: LED 9-12 Mode: LED 1-4<br />
Byte 21 Mode: LED 13-16 Mode: LED 5-8<br />
Byte 22 Mode: LED 9-12<br />
Byte 23 Mode: LED 13-16<br />
2-11
2-12<br />
Entry for <strong>PP7</strong><br />
Entry for <strong>PP17</strong>-I<br />
Entry for <strong>PP17</strong>-<strong>II</strong><br />
Byte 24 Mode: LED 17-20<br />
Byte 25 Mode: LED 21-24<br />
Byte 26 Mode: LED 25-28<br />
Byte 27 Mode: LED 29-32<br />
2.3.2 Configuring Keys/LEDs When Using PROFIBUS-DP Connection<br />
After having loaded the GSD files in the system, as described in Chapter 2.2,<br />
the configuration software COM-PROFIBUS (SIMATIC S5) or HW-CONFIG<br />
(SIMATIC S7) can be used to define all the settings for the <strong>Push</strong> <strong>Button</strong> Panel.<br />
COM-PROFIBUS Call in dialog box Slave properties by double clicking<br />
on the PP symbol. When it appears, click on button<br />
Configure.<br />
HW-CONFIG Select property page Configure in dialog box Object<br />
properties.<br />
<strong>PP7</strong>, <strong>PP17</strong>-I, <strong>PP17</strong>-<strong>II</strong> Equipment Manual<br />
Release 06/98
2.4 Coordinating the <strong>Push</strong> <strong>Button</strong> Panel and PLC<br />
Introduction<br />
Description<br />
Byte n+1<br />
<strong>PP7</strong>, <strong>PP17</strong>-I, <strong>PP17</strong>-<strong>II</strong> Equipment Manual<br />
Release 06/98<br />
In the case of connection type MPI, so-called control and acknowledgment bits<br />
are provided for the coordination between the <strong>Push</strong> <strong>Button</strong> Panel and PLC.<br />
They are used for the following functions:<br />
Detection of <strong>Push</strong> <strong>Button</strong> Panel startup by the S7 program<br />
Analysis of <strong>Push</strong> <strong>Button</strong> Panel life bit by the S7 program<br />
Polling error information in the S7 program<br />
The control and acknowledgment bits are set in the first and second byte of the<br />
configuring data block. In order to use the above mentioned functions, a configuring<br />
data block must be created, as described in Chapter 2.4.<br />
The first byte is reserved.<br />
The figure below illustrates the structure of byte n+1. The individual bits are<br />
described underneath the figure.<br />
Life bit<br />
Start bit<br />
Address<br />
n+1<br />
7 6 5 4 3 2 1 0<br />
Bit 0 Start bit: 1 = <strong>Push</strong> <strong>Button</strong> Panel has started up<br />
Bit 2 Life bit :<br />
The bit is set by the <strong>Push</strong> <strong>Button</strong> Panel on completion<br />
of startup. You can reset the bit via the S7 program and<br />
thus detect if the OP is restarted.<br />
The life bit is set from 0 to 1 by the <strong>Push</strong> <strong>Button</strong> Panel.<br />
You can cyclically reset the bit via the S7 program to<br />
detect whether the connection to the <strong>Push</strong> <strong>Button</strong> Panel<br />
still exists.<br />
2-13
2-14<br />
<strong>PP7</strong>, <strong>PP17</strong>-I, <strong>PP17</strong>-<strong>II</strong> Equipment Manual<br />
Release 06/98
Control Bit Assignment<br />
Keys<br />
8 1<br />
16 9<br />
<strong>PP7</strong>, <strong>PP17</strong>-I, <strong>PP17</strong>-<strong>II</strong> Equipment Manual<br />
Release 06/98<br />
This chapter explains the relationship between the control bits and the keys and<br />
LEDs assigned to them on the <strong>Push</strong> <strong>Button</strong> <strong>Panels</strong>.<br />
The following figures clarify the numeration of keys, LEDs and digital inputs<br />
on the <strong>Push</strong> <strong>Button</strong> Panel, and their links to bits in the PLC.<br />
Byte n<br />
Byte n+1<br />
Figure 3-1 Numeration of keys on the <strong>Push</strong> <strong>Button</strong> Panel<br />
Digital inputs<br />
1<br />
16<br />
Byte n<br />
Byte n+1<br />
Bit 7 Bit 0<br />
T8 T1<br />
T16 T9<br />
Bit 7 Bit 0<br />
Figure 3-2 Numeration of the digital inputs on the <strong>Push</strong> <strong>Button</strong> Panel<br />
DI8 DI1<br />
DI16 DI9<br />
3<br />
3-1
3-2<br />
LEDs<br />
8 1<br />
16 9<br />
Byte n<br />
Byte n+1<br />
Byte n+2<br />
Byte n+4<br />
Figure 3-3 Numeration of the LEDs on the <strong>Push</strong> <strong>Button</strong> Panel<br />
Digital outputs<br />
1<br />
16<br />
Byte n<br />
Byte n+1<br />
Byte n+2<br />
Byte n+4<br />
Bit 7 Bit 0<br />
L8 L1<br />
L8 L1<br />
L16 L9<br />
L16 L9<br />
Bit 7 Bit 0<br />
Figure 3-4 Numeration of the digital outputs on the <strong>Push</strong> <strong>Button</strong> Panel<br />
DO8 DO1<br />
DO8 DO1<br />
DO16 DO9<br />
DO16 DO9<br />
Red<br />
Green<br />
Red<br />
Green<br />
The following table indicates the data area for keys, LEDs, digital inputs and<br />
digital outputs of the <strong>Push</strong> <strong>Button</strong> Panel in the PLC:<br />
Marker area <strong>PP7</strong> <strong>PP17</strong>-I <strong>PP17</strong>-<strong>II</strong><br />
Keys 1 Byte 2 Bytes 4 Bytes<br />
Digital inputs 1 Byte 2 Bytes 2 Bytes<br />
LEDs 2 bytes 4 Bytes 8 Bytes<br />
Digital outputs - 4 Bytes 4 Bytes<br />
Total 4 Bytes 12 Bytes 18 Bytes<br />
A data area for the entire length must be set up, even when the full functional<br />
capacity of the unit is not used.<br />
<strong>PP7</strong>, <strong>PP17</strong>-I, <strong>PP17</strong>-<strong>II</strong> Equipment Manual<br />
Release 06/98
Element assignment:<br />
Digital<br />
inputs<br />
(DI)<br />
1–4 1<br />
4<br />
Figure 3-5 Control bits for <strong>PP7</strong><br />
Element assignment:<br />
Digital<br />
Digital<br />
inputs<br />
outputs<br />
(DI) 1 1 (DO)<br />
1–16<br />
1–16<br />
8<br />
16<br />
<strong>PP7</strong>, <strong>PP17</strong>-I, <strong>PP17</strong>-<strong>II</strong> Equipment Manual<br />
Release 06/98<br />
8<br />
16<br />
Figure 3-6 Control bits for <strong>PP17</strong>-I<br />
The figures below illustrate the structure of the data areas in the PLC which are<br />
assigned to the <strong>Push</strong> <strong>Button</strong> Panel. It is important to note that two control bits<br />
are assigned to each LED and each output, and the bits are distributed on<br />
successive bytes. The combination of these bits determines the appearance of<br />
the LED or display element.<br />
Key 1<br />
LED 1<br />
Digital<br />
input 2<br />
Key 1<br />
LED 1<br />
Key 15<br />
LED 15<br />
Digital<br />
input 5<br />
Digital<br />
output 10<br />
Structure of the data in the PLC:<br />
Bit<br />
7<br />
0<br />
Assignment:<br />
Byte 0<br />
Keys 1–8<br />
Digital inputs 1–4<br />
3<br />
}<br />
LEDs 1–8<br />
Structure of the data in the PLC:<br />
Bit<br />
7<br />
0<br />
Assignment:<br />
Byte0<br />
Keys 1–8<br />
Keys 9–16<br />
Digital inputs 1–8<br />
Digital inputs 9–16<br />
11<br />
}<br />
}<br />
}<br />
}<br />
LEDs 1–8<br />
LEDs 9–16<br />
Digital outputs 1–8<br />
Digital outputs 9–16<br />
3-3
3-4<br />
Element assignment:<br />
Digital<br />
inputs<br />
(DI)<br />
1–16<br />
1<br />
8<br />
16<br />
1<br />
8<br />
16<br />
Digital<br />
outputs<br />
(DO)<br />
1–16<br />
Figure 3-7 Control bits for <strong>PP17</strong>-<strong>II</strong><br />
Key 1<br />
LED 1<br />
Key 24<br />
LED 24<br />
Digital<br />
input 5<br />
Digital<br />
output 10<br />
Structure of the data in the PLC:<br />
Bit<br />
7<br />
0<br />
Assignment:<br />
Byte 0<br />
Keys 1–8<br />
Keys 9–16<br />
Keys 17–24<br />
Keys 25–32<br />
Digital inputs 1–8<br />
Digital inputs 9–16<br />
10<br />
17<br />
}<br />
}<br />
}<br />
}<br />
}<br />
}<br />
LEDs 1–8<br />
LEDs 9–16<br />
LEDs 17–24<br />
LEDs 25–32<br />
Digital outputs 1–8<br />
Digital outputs 9–16<br />
<strong>PP7</strong>, <strong>PP17</strong>-I, <strong>PP17</strong>-<strong>II</strong> Equipment Manual<br />
Release 06/98
Installation<br />
Degree of Protection<br />
!<br />
Caution<br />
<strong>PP7</strong>, <strong>PP17</strong>-I, <strong>PP17</strong>-<strong>II</strong> Equipment Manual<br />
Release 06/98<br />
4<br />
The <strong>Push</strong> <strong>Button</strong> Panel must be brought to room temperature before it is<br />
commissioned. If condensation forms, do not switch the <strong>Push</strong> <strong>Button</strong> Panel<br />
on until it is absolutely dry.<br />
To prevent the <strong>Push</strong> <strong>Button</strong> Panel overheating during operation, ensure the<br />
air vents in the housing are not covered following installation.<br />
The <strong>Push</strong> <strong>Button</strong> Panel was function-tested before shipping. If a fault occurs<br />
however, please enclose a full account of the fault when returning the<br />
unit.<br />
4-1
Mechanical installation<br />
of the <strong>Push</strong><br />
<strong>Button</strong> Panel<br />
4-2<br />
Step Action<br />
1 Insert the <strong>Push</strong> <strong>Button</strong> Panel from the front in the mounting cutout<br />
provided.<br />
2 Insert the retaining hooks of the five enclosed screw-type clamps<br />
in the corresponding openings in the <strong>Push</strong> <strong>Button</strong> Panel<br />
housing. Alternative openings are provided on the sides of the<br />
<strong>Push</strong> <strong>Button</strong> Panel to enable the installation of several units beside<br />
each other without leaving any gaps between them.<br />
Front panel<br />
<br />
<strong>Push</strong><br />
<strong>Button</strong><br />
Panel<br />
3 Secure the <strong>Push</strong> <strong>Button</strong> Panel in the front panel from the rear<br />
using a screwdriver. Note:<br />
– Do not overtighten the screws to avoid damage.<br />
Front panel<br />
Front panel thickness: max. 6 mm<br />
<br />
<strong>Push</strong><br />
<strong>Button</strong><br />
Panel<br />
<strong>PP7</strong>, <strong>PP17</strong>-I, <strong>PP17</strong>-<strong>II</strong> Equipment Manual<br />
Release 06/98
Mechanical<br />
installation of<br />
22.5 mm elements<br />
EMC compatible<br />
design<br />
!<br />
<strong>PP7</strong>, <strong>PP17</strong>-I, <strong>PP17</strong>-<strong>II</strong> Equipment Manual<br />
Release 06/98<br />
Step Action<br />
1 Select the snap-out opening on the front of the <strong>Push</strong> <strong>Button</strong> Panel<br />
in which the 22.5 mm element is to be inserted.<br />
2 Cut a slit in the foil on the front side of the <strong>Push</strong> <strong>Button</strong> Panel. The<br />
slit must be located directly above the elongated hole in the<br />
middle of the selected snap-out opening. Use a sharp knife to slit<br />
the foil.<br />
<br />
3 Cut the foil corresponding to outer circumference of the<br />
selected snap-out opening. The round piece of foil, in whose place<br />
the 22.5 mm element is to be inserted, is only connected to the<br />
remaining foil above the three metal bars .<br />
Note:<br />
Ensure that the foil on the front side of the <strong>Push</strong> <strong>Button</strong> Panel is<br />
only cut in the area of the snap-out opening. In this way, the degree<br />
of protection of the front surface is retained after the 22.5 mm<br />
element has been installed.<br />
4 Insert a screwdriver or similarly appropriate tool from the rear<br />
through the elongated hole in the middle of the selected snapout<br />
hole. Use the screwdriver to lever the metal piece out where<br />
the 22.5 mm element is to be inserted.<br />
5 Cut the foil corresponding to the opening which appears in the<br />
front section of the <strong>Push</strong> <strong>Button</strong> Panel.<br />
6 Insert the 22.5 mm element in the opening in the front of the <strong>Push</strong><br />
<strong>Button</strong> Panel.<br />
The basis for interference-free operation is EMC hardware design of the PLC<br />
and the use of interference-proof cables. The guidelines on the interferencefree<br />
design of the PLC apply equally to the installation of the <strong>Push</strong> <strong>Button</strong><br />
Panel.<br />
Caution<br />
Only shielded cables are permitted for all signal connections.<br />
Screw or lock all plug connections.<br />
Do not install signal lines in the same cable ducts as power cables.<br />
<strong>Siemens</strong> AG refuses to accept liability for malfunctions and damage<br />
arising from use of self-made cables or cables from other manufacturers.<br />
<br />
<br />
4-3
Cable<br />
Voltage supply<br />
4-4<br />
!<br />
Grounding connection<br />
Connection of<br />
additional display<br />
and operating elements<br />
!<br />
All MPI and DP bus cables can be used.<br />
Caution<br />
When using a 24 V supply, ensure that the extra-low voltage is safely isolated.<br />
The supply voltage must be within the specified voltage range. Voltages<br />
outside this range may cause malfunctions.<br />
Connect the grounding connection of the <strong>Push</strong> <strong>Button</strong> Panel to the cabinet<br />
ground. To do this, use the grounding screw supplied with the <strong>Push</strong> <strong>Button</strong><br />
Panel.<br />
+24 V<br />
0 V<br />
<strong>Push</strong><br />
<strong>Button</strong><br />
Panel<br />
Input<br />
+24 V<br />
0 V<br />
<strong>Push</strong><br />
<strong>Button</strong><br />
Panel<br />
Output<br />
Warning<br />
No safety-related functions may be realized using the <strong>Push</strong> <strong>Button</strong> Panel.<br />
<strong>PP7</strong>, <strong>PP17</strong>-I, <strong>PP17</strong>-<strong>II</strong> Equipment Manual<br />
Release 06/98
Unit Description <strong>PP7</strong><br />
Unit dimensions<br />
Mounting cut-out<br />
188<br />
<strong>PP7</strong>, <strong>PP17</strong>-I, <strong>PP17</strong>-<strong>II</strong> Equipment Manual<br />
Release 06/98<br />
<br />
144<br />
128<br />
204<br />
108<br />
<br />
55<br />
The <strong>PP7</strong> requires a mounting cut-out of 130 mm x 190 mm (W x H).<br />
Note<br />
The installation depth of the <strong>Push</strong> <strong>Button</strong> Panel is dependent on the type of<br />
connection cable to the PLC. It does not correspond to the outer dimensions of<br />
the unit. Ensure the cable has a sufficient bending radius.<br />
30<br />
5<br />
4<br />
5-1
Rear view<br />
<br />
<br />
<br />
<br />
<br />
5-2<br />
<br />
<br />
Figure 5-1 Element positions on the rear side of the <strong>PP7</strong><br />
<br />
<br />
<strong>PP7</strong>, <strong>PP17</strong>-I, <strong>PP17</strong>-<strong>II</strong> Equipment Manual<br />
Release 06/98
Unit Description <strong>PP17</strong>-I<br />
Unit dimensions<br />
Mounting cut-out<br />
188<br />
<strong>PP7</strong>, <strong>PP17</strong>-I, <strong>PP17</strong>-<strong>II</strong> Equipment Manual<br />
Release 06/98<br />
<br />
240<br />
224<br />
204<br />
<br />
The <strong>PP17</strong>-I requires a mounting cut-out of 226 mm x 190 mm (W x H).<br />
Note<br />
The installation depth of the <strong>Push</strong> <strong>Button</strong> Panel is dependent on the type of<br />
connection cable to the PLC. It does not correspond to the outer dimensions of<br />
the unit. Ensure the cable has a sufficient bending radius.<br />
95<br />
53<br />
32<br />
6<br />
4<br />
6-1
Rear view<br />
<br />
<br />
<br />
<br />
<br />
6-2<br />
<br />
<br />
<br />
Figure 6-1 Element positions on the rear side of the <strong>PP17</strong>-I<br />
<br />
<br />
<br />
<br />
<br />
<br />
<strong>PP7</strong>, <strong>PP17</strong>-I, <strong>PP17</strong>-<strong>II</strong> Equipment Manual<br />
Release 06/98
Unit Description <strong>PP17</strong>-<strong>II</strong><br />
Unit dimensions<br />
Mounting cut-out<br />
188<br />
<strong>PP7</strong>, <strong>PP17</strong>-I, <strong>PP17</strong>-<strong>II</strong> Equipment Manual<br />
Release 06/98<br />
<br />
240<br />
224<br />
204<br />
<br />
The <strong>PP17</strong>-<strong>II</strong> requires a mounting cut-out of 226 mm x 190 mm (W x H).<br />
Note<br />
The installation depth of the <strong>Push</strong> <strong>Button</strong> Panel is dependent on the type of<br />
connection cable to the PLC. It does not correspond to the outer dimensions of<br />
the unit. Ensure the cable has a sufficient bending radius.<br />
99<br />
53<br />
32<br />
7<br />
4<br />
7-1
Rear view<br />
<br />
<br />
<br />
<br />
<br />
7-2<br />
<br />
<br />
<br />
Figure 7-1 Element positions on the rear side of the <strong>PP17</strong>-<strong>II</strong><br />
<br />
<br />
<br />
<br />
<br />
<br />
<strong>PP7</strong>, <strong>PP17</strong>-I, <strong>PP17</strong>-<strong>II</strong> Equipment Manual<br />
Release 06/98
Attach Labeling Strips<br />
Labeling strip<br />
dimensions<br />
<strong>PP7</strong>, <strong>PP17</strong>-I, <strong>PP17</strong>-<strong>II</strong> Equipment Manual<br />
Release 06/98<br />
The function of all the keys on the <strong>Push</strong> <strong>Button</strong> Panel can be clearly indicated<br />
by attaching labeling strips. Standard commercial transparent foil or even normal<br />
paper, up to a thickness of 0.25 mm, can be used for this. The labeling<br />
strips must be inserted from the rear side of the unit in the openings provided<br />
behind the IP65 front panel. The <strong>Push</strong> <strong>Button</strong> Panel need not be opened to do<br />
this. If the worktop in which the <strong>Push</strong> <strong>Button</strong> Panel is less than 1 mm, the labeling<br />
strips can be inserted or replaced when in an assembled state. The foil or<br />
paper labeling strips can be produced by implementing a commercially available<br />
text program and printing out on a standard printer.<br />
The disk supplied with this document contains a directory SLIDES in which<br />
the file SLIDES.DOC is stored. This is a text file in Word for Windows 6.0<br />
format with which the labeling strips for the <strong>Push</strong> <strong>Button</strong> Panel can be printed<br />
in the correct size.<br />
The following table contains the dimensional specifications for producing the<br />
labeling strips:<br />
Size <strong>PP7</strong> <strong>PP17</strong>-I <strong>PP17</strong>-<strong>II</strong><br />
Labeling strip length 133.25 mm 253.0 mm<br />
Labeling strip height 15.7 mm<br />
In order to ease insertion of the labeling strips, the corners can be rounded on<br />
the insertion side.<br />
Refer to the following figure to determine the position of the inscriptions on<br />
the labeling strips. Please note that the diagrams are not true to scale (all specifications<br />
in mm).<br />
0 36.9 60.8 84.7 108.6 133.25<br />
Figure 8-1 Text positions for keyboard <strong>PP7</strong><br />
8<br />
8-1
8-2<br />
0 45.0 76.0 107.0 133.25<br />
Figure 8-2 Text positions for 22.5 mm elements <strong>PP7</strong><br />
0 67.0 90.4 113.8 137.2 160.6 184.0 207.4 230.8 253.0<br />
Figure 8-3 Text positions for keyboards <strong>PP17</strong>-I and <strong>PP17</strong>-<strong>II</strong><br />
0 72.0 102.8 133.6 164.4 195.2 226.0 253.0<br />
Figure 8-4 Text positions for 22.5 mm elements <strong>PP17</strong>-I<br />
<strong>PP7</strong>, <strong>PP17</strong>-I, <strong>PP17</strong>-<strong>II</strong> Equipment Manual<br />
Release 06/98
Spare Parts<br />
<strong>PP7</strong>, <strong>PP17</strong>-I, <strong>PP17</strong>-<strong>II</strong> Equipment Manual<br />
Release 06/98<br />
The memory module is available as a spare part for all the <strong>Push</strong> <strong>Button</strong> Panel<br />
unit versions.<br />
All the parameters concerning the interface to the PLC are stored in the <strong>Push</strong><br />
<strong>Button</strong> Panel memory module. In cases where the unit electronics or the entire<br />
unit are replaced, the interface need not be reconfigured. Only the old memory<br />
module needs to be transferred to the new unit.<br />
If the <strong>Push</strong> <strong>Button</strong> Panel memory module is defect, the message EEPROM<br />
ERR appears in the display in both normal operation and hardware test mode.<br />
In this case, the memory module must be replaced.<br />
The following spare parts are only available for the <strong>PP17</strong>-I unit:<br />
Standard keyboard<br />
Electronics<br />
Front panel<br />
9<br />
It is not necessary to remove the <strong>Push</strong> <strong>Button</strong> Panel from the cabinet in order to<br />
install the spare parts. Even the 22.5 mm elements, individually installed and<br />
connected by the customer, can remain in position.<br />
9-1
9-2<br />
<strong>PP7</strong>, <strong>PP17</strong>-I, <strong>PP17</strong>-<strong>II</strong> Equipment Manual<br />
Release 06/98
Technical Data<br />
A.1 General technical data<br />
Housing <strong>PP7</strong> <strong>PP17</strong>-I <strong>PP17</strong>-<strong>II</strong><br />
External dimensions W x H x D (mm) 240 x 144 x 53 204 x 240 x 53<br />
Mounting cut-out W x H (mm) 130 x 190 226 x 190<br />
Mounting depth (mm)<br />
without bus connector<br />
with angled bus connector<br />
Order no.: GES 7972 - 0BB10-0 x 70<br />
with non-angled bus connector<br />
Order no.: GGK 1500 - 0EA00<br />
Degree of protection<br />
Front panel<br />
IP65<br />
Rear panel<br />
IP20<br />
Weight approx. (kg) 0.72 1.13<br />
24 V voltage supply <strong>PP7</strong> <strong>PP17</strong>-I <strong>PP17</strong>-<strong>II</strong><br />
Rated voltage (VDC) +24<br />
Permissible range (VDC) +18 to +30<br />
Typical power consumption at 24 V with<br />
no load applied at digital outputs<br />
<strong>PP7</strong>, <strong>PP17</strong>-I, <strong>PP17</strong>-<strong>II</strong> Equipment Manual<br />
Release 06/98<br />
53<br />
75<br />
130<br />
0.2 A 0.4 A<br />
Starting current inrush I 2 t 30x10 –3 A 2 s<br />
Fuse type, internal Electronic fuse<br />
Reverse battery protection Yes<br />
Ambient conditions <strong>PP7</strong> <strong>PP17</strong>-I <strong>PP17</strong>-<strong>II</strong><br />
Ambient temperature<br />
In operation<br />
Shipping, storage<br />
Relative humidity<br />
Operation<br />
Shipping, storage<br />
0 to 55 C<br />
-20 ... 70 C<br />
95%, no condensation<br />
95%<br />
A<br />
A-1
Ambient conditions<br />
Shock loading<br />
Operation<br />
Shipping, storage<br />
Vibration<br />
Operation<br />
Shipping, storage<br />
A-2<br />
<strong>PP7</strong><br />
<strong>PP17</strong>-I<br />
15 g/11 msec<br />
25 g/6 msec<br />
0.075 mm (10 Hz ... 58 Hz)<br />
1 g (58 Hz ... 500 Hz)<br />
3.5 mm (5 Hz ... 10 Hz)<br />
1 g (10 Hz ... 500 Hz)<br />
Max. pressure difference (front/rear sides) 2hPa<br />
Barometric pressure<br />
Operation<br />
Shipping, storage<br />
706 to1030 hPa<br />
581 to 1030 hPa<br />
<strong>PP17</strong>-<strong>II</strong><br />
The conformity of the product described with the regulations of Directive 89/336 EEC is proved by compliance<br />
with the following standards:<br />
Interference immunity EN 50082-1 <strong>PP7</strong> <strong>PP17</strong>-<strong>II</strong> <strong>PP17</strong>-<strong>II</strong><br />
Static discharge (contact discharge) EN 61000-4-2 Class 3<br />
RF irradiation EN 61000-4-3 Class 3<br />
Pulse modulation ENV 50204 (900 MHz 5 MHz)<br />
RF conduction ENV 50141 Class 3<br />
Burst interference ENV 61000-4-4 Class 3<br />
Radio interference EN 50081-2 <strong>PP7</strong> <strong>PP17</strong>-I <strong>PP17</strong>-<strong>II</strong><br />
RFI suppression EN 55011 Class A<br />
A.2 Digital inputs and outputs<br />
24 V digital inputs <strong>PP7</strong> <strong>PP17</strong>-I <strong>PP17</strong>-<strong>II</strong><br />
Power supply<br />
Rated value<br />
Permissible range<br />
Value at t < 0.5 s<br />
+ 24 V DC<br />
+18.0 ... +30.0 V<br />
35 V<br />
Connectable Keys, switches<br />
Number of inputs 4 16<br />
Potential isolation from internal circuitry -<br />
<strong>PP7</strong>, <strong>PP17</strong>-I, <strong>PP17</strong>-<strong>II</strong> Equipment Manual<br />
Release 06/98
24 V digital inputs<br />
Input voltage<br />
Rated value<br />
with signal “0”<br />
with signal “1”<br />
<strong>PP7</strong>, <strong>PP17</strong>-I, <strong>PP17</strong>-<strong>II</strong> Equipment Manual<br />
Release 06/98<br />
<strong>PP7</strong><br />
<strong>PP17</strong>-I<br />
24 V DC<br />
0 ... 5 V<br />
15 ... 30 V<br />
Input current with signal “1” Typ. 5 mA at 24 V<br />
Time delay of imputs 0.3 ms<br />
Connection of mechanical switches Possible<br />
Bouncing time 10 ms<br />
Maximum cable length<br />
with unshielded cables<br />
with shielded cables<br />
1 m<br />
> 1 m<br />
<strong>PP17</strong>-<strong>II</strong><br />
24 V Digital outputs <strong>PP7</strong> <strong>PP17</strong>-I <strong>PP17</strong>-<strong>II</strong><br />
Number of outputs<br />
in groups of<br />
output DO1 to DO4<br />
output DO5 to DO8<br />
output DO9 to DO12<br />
output DO13 to DO16<br />
–<br />
–<br />
–<br />
–<br />
–<br />
–<br />
16<br />
4<br />
Group 1<br />
Group 2<br />
Group 3<br />
Group 4<br />
Potential isolation – –<br />
Short circuit protection – Yes<br />
Permissible loads<br />
–<br />
–<br />
–<br />
Resistive<br />
Lamps<br />
Inductive<br />
Max. inductive power – 200 mWs<br />
Output voltage<br />
With signal “0”<br />
With signal “1”<br />
Output current<br />
with signal “0”<br />
with signal “1”<br />
Switching frequency with<br />
resistive load<br />
lamp load<br />
inductive load<br />
–<br />
–<br />
–<br />
–<br />
–<br />
–<br />
–<br />
Max. 2 V (idling)<br />
Min. voltage supply -3 V<br />
Max. 1 mA<br />
Max. 500 mA per group;<br />
1 output 200 mA<br />
and the others 100 mA<br />
Max. 100 Hz<br />
Max. 8 Hz<br />
Max. 0.5 Hz<br />
A-3
24 V Digital outputs<br />
Load current per group<br />
aggregate current<br />
on short circuit<br />
Maximum cable length<br />
with unshielded cables<br />
with shielded cables<br />
A-4<br />
<strong>PP7</strong><br />
–<br />
–<br />
–<br />
–<br />
<strong>PP17</strong>-I<br />
<strong>PP17</strong>-<strong>II</strong><br />
500mA<br />
Deactivation of all outputs<br />
1 m<br />
> 1 m<br />
Release input <strong>PP7</strong> <strong>PP17</strong>-I <strong>PP17</strong>-<strong>II</strong><br />
Potential isolation from internal logic – –<br />
Input voltage<br />
rated value<br />
release on entry<br />
lock on entry<br />
–<br />
–<br />
–<br />
24 V DC<br />
0 ... 5 V<br />
15 ... 30 V<br />
Input current with entry locked – Typ. 2 mA at 24 V<br />
A.3 Interface assignment<br />
Bus connection<br />
PROFIBUS-DP<br />
MPI 5 1<br />
9 6<br />
Assignment of the 9-pin Sub-D socket:<br />
Pin Assignment<br />
1<br />
2<br />
3 Data B<br />
4<br />
5 GND (floating)<br />
6 +5 V (floating)<br />
7<br />
8 Data A<br />
9<br />
<strong>PP7</strong>, <strong>PP17</strong>-I, <strong>PP17</strong>-<strong>II</strong> Equipment Manual<br />
Release 06/98
System Messages<br />
Messages during<br />
unit start-up<br />
Error LED signals<br />
<strong>PP7</strong>, <strong>PP17</strong>-I, <strong>PP17</strong>-<strong>II</strong> Equipment Manual<br />
Release 06/98<br />
The following message appears in the <strong>Push</strong> <strong>Button</strong> Panel display when the<br />
unit is starting up:<br />
PPxx Vy.y<br />
START<br />
When the start-up routine has been completed and communication with the<br />
PLC has begun, the following message appears in the <strong>Push</strong> <strong>Button</strong> Panel display:<br />
PPxx Vy.y<br />
READY<br />
These messages contain the following information:<br />
xx Unit identification of the <strong>Push</strong> <strong>Button</strong> Panel: 7 or 17<br />
y.y<br />
Version identification of the <strong>Push</strong> <strong>Button</strong> Panel<br />
The following table should help to determine the cause of Error LED signals:<br />
Signal Cause Remedy<br />
LED flashes<br />
(Normal operation)<br />
LED lights up<br />
(Hardware test mode)<br />
LED lights up<br />
(Normal operation)<br />
The unit is in Lamp/Key test mode. Terminate the Lamp test by<br />
releasing the corresponding key,<br />
or<br />
resetting the corresponding bits<br />
in the PLC.<br />
Hardware test mode is displayed. Restart the unit or terminate Hardware<br />
test mode via the menu.<br />
The unit has detected a communication<br />
or software error.<br />
B<br />
Note the error message in the display.<br />
B-1
Display messages<br />
B-2<br />
The following table should help to determine the cause of error messages<br />
which appear in the display:<br />
Message Cause Remedy<br />
Error message in A defect in the <strong>Push</strong> <strong>Button</strong> Panel Return the unit for repair.<br />
Hardware Test<br />
mode<br />
electronics has been detected.<br />
EEPROM ERR The memory module is faulty or not Install a memory module.<br />
available.<br />
Replace the current memory module, if<br />
necessary.<br />
EEPROM INV The memory module contains in- Configure the interface on the <strong>Push</strong> <strong>Button</strong><br />
valid data.<br />
Panel again.<br />
NO PLC Connection to the PLC cannot be Check all cables and connections.<br />
established because<br />
a bus cable is faulty, or<br />
Check the configuration of the interface on<br />
the <strong>Push</strong> <strong>Button</strong> Panel.<br />
the interface configuration is incorrect.<br />
PP START There is a connection fault. Check the network configuration and the<br />
(PROFIBUS-DP<br />
connection)<br />
configuration of the interface on the <strong>Push</strong><br />
<strong>Button</strong> Panel.<br />
PP START Connection to the defined MPI ad- Check the following settings in the <strong>Push</strong><br />
(MPI connection)<br />
dress cannot be established. <strong>Button</strong> Panel interface configuration:<br />
BAUDRATE,<br />
PLC-ADR,<br />
RACK-NO and<br />
SLOT-NO.<br />
NO PAR. DB The set configuring data block in Create a configuring data block.<br />
the PLC is not available.<br />
In order to use the system default settings<br />
for keys and LEDs, set PARAM-DB in the<br />
<strong>Push</strong> <strong>Button</strong> Panel interface configuration<br />
to 0.<br />
PARAM ERROR The configuring data block defined Check the structure of the configuring data<br />
in the PLC contains invalid data. block parameter.<br />
DIAG-ERROR There is a short circuit in one of the<br />
digital outputs.<br />
Check the wiring of the digital outputs.<br />
<strong>PP7</strong>, <strong>PP17</strong>-I, <strong>PP17</strong>-<strong>II</strong> Equipment Manual<br />
Release 06/98
Hardware Test<br />
Activating and operating<br />
Hardware<br />
Test mode<br />
<strong>PP7</strong>, <strong>PP17</strong>-I, <strong>PP17</strong>-<strong>II</strong> Equipment Manual<br />
Release 06/98<br />
The hardware components of the <strong>Push</strong> <strong>Button</strong> Panel can be tested via a menu.<br />
The so-called Hardware Test mode mode is provided for this.<br />
Key Description<br />
ESC +<br />
OK<br />
If this key combination is pressed while the unit is<br />
starting up (directly after switching on), the unit<br />
enters Hardware Test mode. The message Any<br />
key to enter display mode appears in the<br />
display. Acknowledge it by pressing any key.<br />
In Hardware Test mode, this key serves the function<br />
in the current menu level. The results of the individual<br />
tests appear as they are completed:<br />
OK:<br />
ERROR:<br />
A fault has occurred.<br />
The functional unit tested is defective.<br />
In Hardware Test mode, this key serves to skip back<br />
to the superordinated menu level. The key has no<br />
function in the first menu level.<br />
In Hardware Test mode, this key serves to skip forward<br />
to the next menu level. The key has no function<br />
in the bottom menu level.<br />
Exit from Hardware Test mode by switching the unit off or executing the<br />
function TEST END in the bottom menu level.<br />
C<br />
C-1
Functions in Hardware<br />
Test mode<br />
C-2<br />
The following functions are available for selection after activating Hardware<br />
Test mode:<br />
Function <strong>PP7</strong> display <strong>PP17</strong>-I and<br />
<strong>PP17</strong>-I display<br />
EPROM TEST CHECK SUM<br />
xxxx<br />
DISPL TEST Displays the code of the key<br />
pressed<br />
KEYB. TEST After pressing a key on the<br />
keyboard, the corresponding<br />
LED lights up orange<br />
EEPROM TEST EEPROM OK<br />
SPC2-TEST/<br />
ASPC2-TEST<br />
SPC2 OK ASPC2 OK<br />
DIGIO-TEST DI = xxxx DI = xxxx<br />
DO = xxxx<br />
KEY-TEST Not implemented<br />
KEYB.ID Not implemented<br />
EXT MODUL Not implemented<br />
Comment<br />
Message concerning<br />
the valid checksum for<br />
the respective firmware<br />
version<br />
Terminate the function<br />
with key combination<br />
ESC + OK<br />
Terminate the function<br />
with key<br />
or<br />
xxxx = Status of the<br />
digital inputs and outputs<br />
as hexadecimal<br />
values<br />
xx Status of the release input<br />
xxxx Keyboard identification:<br />
xxxx xxxx<br />
xxxx xxxx<br />
<strong>PP17</strong>-I: 2010<br />
<strong>PP17</strong>-I: 4020<br />
Extension module identification<br />
TEST END Terminate Hardware<br />
Test mode<br />
<strong>PP7</strong>, <strong>PP17</strong>-I, <strong>PP17</strong>-<strong>II</strong> Equipment Manual<br />
Release 06/98
<strong>Siemens</strong> Worldwide<br />
In this Appendix<br />
<strong>Siemens</strong> Sales<br />
Offices in the<br />
Federal Republic<br />
of Germany<br />
Aachen<br />
Augsburg<br />
Bayreuth<br />
Berlin<br />
Bielefeld<br />
Bonn<br />
Bremen<br />
Brunswick<br />
Chemnitz<br />
Coblenz<br />
Cologne<br />
Constance<br />
Darmstadt<br />
Dortmund<br />
Dresden<br />
Duisburg<br />
Düsseldorf<br />
Erfurt<br />
Essen<br />
Frankfurt am Main<br />
Freiburg<br />
Hamburg<br />
Heilbronn<br />
Karlsruhe<br />
<strong>PP7</strong>, <strong>PP17</strong>-I, <strong>PP17</strong>-<strong>II</strong> Equipment Manual<br />
Release 06/98<br />
In this appendix you will find a list of:<br />
All cities in the Federal Republic of Germany with <strong>Siemens</strong> Sales Offices<br />
and<br />
All European and non-European <strong>Siemens</strong> Companies and Representatives<br />
The following table lists all <strong>Siemens</strong> Sales Offices in the Federal Republic of<br />
Germany.<br />
Kassel<br />
Kempten/Allg.<br />
Kiel<br />
Laatzen<br />
Leipzig<br />
Lingen<br />
Magdeburg<br />
Mainz<br />
Mannheim<br />
Munich<br />
Münster/Westf.<br />
Nuremberg<br />
Osnabrück<br />
Regensburg<br />
Rostock<br />
Saarbrücken<br />
Siegen<br />
Stuttgart<br />
Ulm<br />
Wetzlar<br />
Wilhelmshaven<br />
Wuppertal<br />
Würzburg<br />
D<br />
D-1
European<br />
Companies and<br />
Representatives<br />
Austria<br />
<strong>Siemens</strong> AG Österreich<br />
Bregenz<br />
Graz<br />
Innsbruck<br />
Linz<br />
Salzburg<br />
Vienna<br />
Belgium<br />
<strong>Siemens</strong> S.A.<br />
Brussels<br />
Liège<br />
<strong>Siemens</strong> N. V.<br />
Antwerp<br />
Bosnia-Herzegovina<br />
Generalexport Predstavnistvo Sarajevo<br />
Sarajevo<br />
Bulgaria<br />
<strong>Siemens</strong> AG, Bulgaria Representative<br />
Sofia<br />
Croatia<br />
<strong>Siemens</strong> d. o. o.<br />
Zagreb<br />
Cyprus<br />
GEVO Ltd.<br />
or<br />
Jolali Ltd.<br />
Nicosia<br />
Czech Republic<br />
<strong>Siemens</strong> AG<br />
Brno<br />
Mladá Boleslav<br />
Prague<br />
Denmark<br />
<strong>Siemens</strong> A/S<br />
Copenhagen, Ballerup<br />
D-2<br />
The following table lists all European <strong>Siemens</strong> Companies and<br />
Representatives.<br />
Finland<br />
<strong>Siemens</strong> Oy<br />
Espoo, Helsinki<br />
France<br />
<strong>Siemens</strong> S.A.<br />
Haguenau<br />
Lille, Seclin<br />
Lyon, Caluire-et-Cuire<br />
Marseille<br />
Metz<br />
Paris, Saint-Denis<br />
Strasbourg<br />
Toulouse<br />
Great Britain<br />
<strong>Siemens</strong> plc<br />
Birmingham, Walsall<br />
Bristol, Clevedon<br />
Congleton<br />
Edinburgh<br />
Glasgow<br />
Leeds<br />
Liverpool<br />
London, Sunbury-on-Thames<br />
Manchester<br />
Newcastle<br />
Greece<br />
<strong>Siemens</strong> A.E.<br />
Athens, Amaroussio<br />
Thessaloniki<br />
Hungaria<br />
<strong>Siemens</strong> Kft<br />
Budapest<br />
Iceland<br />
Smith & Norland H/F<br />
Reykjavik<br />
Ireland<br />
<strong>Siemens</strong> Ltd.<br />
Dublin<br />
<strong>PP7</strong>, <strong>PP17</strong>-I, <strong>PP17</strong>-<strong>II</strong> Equipment Manual<br />
Release 06/98
Italy<br />
<strong>Siemens</strong> S.p.A.<br />
Bari<br />
Bologna<br />
Brescia<br />
Casoria<br />
Florence<br />
Genoa<br />
Milan<br />
Padua<br />
Rome<br />
Turin<br />
Luxemburg<br />
<strong>Siemens</strong> S.A.<br />
Luxemburg<br />
Malta<br />
J. R. Darmanin & Co. Ltd.<br />
Valletta<br />
Netherlands<br />
<strong>Siemens</strong> Nederland N.V.<br />
The Hague<br />
Rijswijk<br />
Norway<br />
<strong>Siemens</strong> A/S<br />
Bergen<br />
Oslo<br />
Stavanger<br />
Trondheim<br />
Poland<br />
<strong>Siemens</strong> GmbH<br />
Gdansk-Letnica<br />
Katowice<br />
Warsaw<br />
Portugal<br />
<strong>Siemens</strong> S.A.<br />
Albufeira<br />
Coímbra<br />
Lisbon, Amadora<br />
Matosinhos<br />
Porto<br />
<strong>PP7</strong>, <strong>PP17</strong>-I, <strong>PP17</strong>-<strong>II</strong> Equipment Manual<br />
Release 06/98<br />
Romania<br />
<strong>Siemens</strong> birou de consultatii tehnice<br />
Bukarest<br />
Russia<br />
<strong>Siemens</strong> AG<br />
or<br />
Mosmatic<br />
Moscow<br />
<strong>Siemens</strong> AG<br />
Ekaterinburg<br />
Slovak Republic<br />
<strong>Siemens</strong> AG<br />
Bratislava<br />
Slovenia<br />
<strong>Siemens</strong> d. o. o.<br />
Ljubljana<br />
Spain<br />
<strong>Siemens</strong> S.A.<br />
Barcelona<br />
Bilbao<br />
Gijón<br />
Granada<br />
La Coruña<br />
Las Palmas de Gran Canaria<br />
León<br />
Madrid<br />
Málaga<br />
Murcia<br />
Palma de Mallorca<br />
Pamplona<br />
Sevilla<br />
Valencia<br />
Valladolid<br />
Vigo<br />
Zaragoza<br />
Sweden<br />
<strong>Siemens</strong> AB<br />
Göteborg<br />
Jönköping<br />
Malmö<br />
Sundsvall<br />
Upplands Väsby, Stockholm<br />
D-3
Switzerland<br />
<strong>Siemens</strong>-Albis AG<br />
Basel<br />
Bern<br />
Zürich<br />
<strong>Siemens</strong>-Albis S.A.<br />
Renens, Lausanne<br />
Non-European<br />
Companies and<br />
Representatives<br />
Africa<br />
Algeria<br />
<strong>Siemens</strong> Bureau d’Alger<br />
Alger<br />
Angola<br />
TECNIDATA<br />
Luanda<br />
Bophuthatswana<br />
<strong>Siemens</strong> Ltd.<br />
Mafekeng<br />
Egypt<br />
<strong>Siemens</strong> Technical Office<br />
Cairo-Mohandessin<br />
<strong>Siemens</strong> Technical Office<br />
Alexandria<br />
EGEMAC S.A.E.<br />
Cairo-Mattaria<br />
Ethiopia<br />
Addis Electrical Engineering Ltd.<br />
Addis Abeba<br />
Ivory Coast<br />
<strong>Siemens</strong> AG<br />
Abidjan<br />
Libya<br />
<strong>Siemens</strong> AG, Branch Libya<br />
Tripoli<br />
D-4<br />
Turkey<br />
SIMKO<br />
Adana<br />
Ankara<br />
Bursa<br />
Istanbul<br />
Izmir<br />
Samsun<br />
Ukraine<br />
<strong>Siemens</strong> AG<br />
Kiev<br />
The following table lists all non-European <strong>Siemens</strong> Companies and<br />
Representatives of <strong>Siemens</strong> AG.<br />
The following table lists all <strong>Siemens</strong> Companies and Representatives of<br />
<strong>Siemens</strong> AG in Africa.<br />
Morocco<br />
SETEL<br />
Société Electrotechnique et de Télécommunications<br />
S.A.<br />
Casablanca<br />
Mozambique<br />
<strong>Siemens</strong> Liaison Office<br />
Maputo<br />
Namibia<br />
<strong>Siemens</strong> (Pty.) Ltd.<br />
Windhoek<br />
Nigeria<br />
Electro Technologies Nigeria Ltd. (ELTEC)<br />
Lagos<br />
Rwanda<br />
Etablissement Rwandais<br />
Kigali<br />
Sambia<br />
Electrical Maintenance Lusaka Ltd.<br />
Lusaka<br />
Simbabwe<br />
Electro Technologies Corporation (Pvt.) Ltd. (ETC)<br />
Harare<br />
<strong>PP7</strong>, <strong>PP17</strong>-I, <strong>PP17</strong>-<strong>II</strong> Equipment Manual<br />
Release 06/98
South Africa<br />
<strong>Siemens</strong> Ltd.<br />
Cape Town<br />
Durban<br />
Johannesburg<br />
Middelburg<br />
Newcastle<br />
Port Elizabeth<br />
Pretoria<br />
Sudan<br />
National Electrical & Commercial Company (NECC)<br />
Khartoum<br />
America<br />
Argentina<br />
<strong>Siemens</strong> S.A.<br />
Bahía Blanca<br />
Buenos Aires<br />
Còrdoba<br />
Mendoza<br />
Rosario<br />
Bolivia<br />
Sociedad Comercial é Industrial Hansa Ltda.<br />
La Paz<br />
Brazil<br />
<strong>Siemens</strong> S.A.<br />
Belém<br />
Belo Horizonte<br />
Brasilia<br />
Campinas<br />
Curitiba<br />
Fortaleza<br />
Pôrto Alegre<br />
Recife<br />
Rio de Janeiro<br />
Salvador de Bahia<br />
São Paulo<br />
Vitória<br />
<strong>PP7</strong>, <strong>PP17</strong>-I, <strong>PP17</strong>-<strong>II</strong> Equipment Manual<br />
Release 06/98<br />
Swaziland<br />
<strong>Siemens</strong> (Pty.) Ltd.<br />
Mbabane<br />
Tanzania<br />
Tanzania Electrical Services Ltd.<br />
Dar-es-Salaam<br />
Tunesia<br />
Sitelec S.A.<br />
Tunis<br />
Zaire<br />
SOFAMATEL S.P.R.L.<br />
Kinshasa<br />
The following table lists all <strong>Siemens</strong> Companies and Representatives of<br />
<strong>Siemens</strong> AG in America.<br />
Canada<br />
<strong>Siemens</strong> Electric Ltd.<br />
Montreal, Québec<br />
Toronto<br />
Chile<br />
INGELSAC<br />
Santiago de Chile<br />
Colombia<br />
<strong>Siemens</strong> S.A.<br />
Barranquilla<br />
Bogotá<br />
Cali<br />
Medellín<br />
Costa Rica<br />
<strong>Siemens</strong> S.A.<br />
Panama<br />
San José<br />
Cuba<br />
Respresentación<br />
Consult iva EUMEDA<br />
La Habana<br />
Ecuador<br />
<strong>Siemens</strong> S.A.<br />
Quito<br />
D-5
El Salvador<br />
<strong>Siemens</strong> S.A.<br />
San Salvador<br />
Guatemala<br />
<strong>Siemens</strong> S.A.<br />
Ciudad de Guatemala<br />
Honduras<br />
Representaciones Electroindustriales S de R.L. -<br />
Relectro<br />
Tegucigalpa<br />
Mexico<br />
<strong>Siemens</strong> S.A. de CV<br />
Culiacán<br />
Gómez Palacio<br />
Guadalajara<br />
León<br />
México, D.F.<br />
Monterrey<br />
Puebla<br />
Nicaragua<br />
<strong>Siemens</strong> S.A.<br />
Managua<br />
Asia<br />
Bahrain<br />
Transitec Gulf<br />
Manama<br />
Bangladesh<br />
<strong>Siemens</strong> Bangladesh Ltd.<br />
Dhaka<br />
Brunei<br />
Brunei Darussalam<br />
Hong Kong<br />
<strong>Siemens</strong> Ltd.<br />
Hong Kong<br />
D-6<br />
Paraguay<br />
Rieder & Cia. S.A.C.I.<br />
Asunción<br />
Peru<br />
Siemsa<br />
Lima<br />
United States of America<br />
<strong>Siemens</strong> Industrial Automation Inc.<br />
Automation Division<br />
Alpharetta, GA<br />
Numeric Motion Control<br />
Elk Grove Village, Illinois<br />
Uruguay<br />
Conatel S.A.<br />
Montevideo<br />
Venezuela<br />
<strong>Siemens</strong> S.A.<br />
Caracas<br />
Valencia<br />
The following table lists all <strong>Siemens</strong> Companies and Representatives of<br />
<strong>Siemens</strong> AG in Asia.<br />
India<br />
<strong>Siemens</strong> Limited<br />
Ahmedabad<br />
Bangalore<br />
Bombay<br />
Calcutta<br />
Madras<br />
New Delhi<br />
Secúnderabad<br />
Indonesia<br />
P.T. <strong>Siemens</strong> Indonesia, P.T. <strong>Siemens</strong> Dian-Grana<br />
Elektrika, Representative <strong>Siemens</strong> AG<br />
Jakarta<br />
<strong>PP7</strong>, <strong>PP17</strong>-I, <strong>PP17</strong>-<strong>II</strong> Equipment Manual<br />
Release 06/98
Iraq<br />
Samhiry Bros. Co. Limited<br />
or<br />
<strong>Siemens</strong> AG (Iraq Branch)<br />
Baghdad<br />
Iran<br />
<strong>Siemens</strong> S.S.K.<br />
Teheran<br />
Japan<br />
<strong>Siemens</strong> K.K.<br />
Tokyo<br />
Korea<br />
<strong>Siemens</strong> Ltd.<br />
Changwon<br />
Seoul<br />
Ulsan<br />
Kuwait<br />
National & German Electrical and Electronic Services<br />
Co. (NGEECO)<br />
Kuwait, Arabia<br />
Lebanon<br />
Ets. F.A. Kettaneh S.A.<br />
Beirut<br />
Malaysia<br />
<strong>Siemens</strong> Electrical Engineering Sdn. Bhd.<br />
Kuala Lumpur<br />
Nepal<br />
Amatya Enterprises (Pvt.) Ltd.<br />
Kathmandu<br />
Oman<br />
Waleed Associates<br />
Muscat<br />
Pakistan<br />
<strong>Siemens</strong> Pakistan Engineering Co., Ltd.<br />
Islamabad<br />
Karachi<br />
Lahore<br />
Peshawar<br />
Quetta<br />
<strong>PP7</strong>, <strong>PP17</strong>-I, <strong>PP17</strong>-<strong>II</strong> Equipment Manual<br />
Release 06/98<br />
People’s Republic of China<br />
<strong>Siemens</strong> AG Representation<br />
Beijing<br />
Guangzhou<br />
Shanghai<br />
Philippine Islands<br />
Maschinen & Technik Inc. (MATEC)<br />
Manila<br />
Qatar<br />
Trags Electrical Engineering and Air Conditioning Co.<br />
Doha<br />
Saudi Arabia<br />
Arabia Electric Ltd. (Equipment)<br />
Al-Khobar<br />
Jeddah<br />
Riyadh<br />
Singapore<br />
<strong>Siemens</strong> (Pte.) Ltd.<br />
Singapore<br />
Sri Lanka<br />
Dimo Limited<br />
Colombo<br />
Syria<br />
<strong>Siemens</strong> AG, Branch (A.S.T.E.)<br />
Damascus<br />
Taiwan<br />
<strong>Siemens</strong> Ltd., TELEUNION Engineering Ltd.<br />
or<br />
TAI Engineering Co., Ltd.<br />
Taichung<br />
Taipei<br />
Thailand<br />
Berti Jucker Co. Ltd.<br />
Bangkok<br />
D-7
United Arab Emirates<br />
Electro Mechanical Co.<br />
or<br />
<strong>Siemens</strong> Resident Engineers<br />
Abu Dhabi<br />
Scientechnic<br />
or<br />
<strong>Siemens</strong> Resident Engineers<br />
Dubai<br />
Australia<br />
Australia<br />
<strong>Siemens</strong> Ltd.<br />
Adelaide<br />
Brisbane<br />
Melbourne<br />
Perth<br />
Sydney<br />
D-8<br />
Vietnam<br />
OAV Representative Office<br />
Hanoi<br />
Yemen (Arab. Republic)<br />
Tihama Tractors & Engineering Co., Ltd.<br />
or<br />
<strong>Siemens</strong> Resident Engineers<br />
Sanaa<br />
The following table lists all <strong>Siemens</strong> Companies and Representatives of<br />
<strong>Siemens</strong> AG in Australia<br />
New Zealand<br />
<strong>Siemens</strong> Ltd.<br />
Auckland<br />
Wellington<br />
<strong>PP7</strong>, <strong>PP17</strong>-I, <strong>PP17</strong>-<strong>II</strong> Equipment Manual<br />
Release 06/98
Index<br />
A<br />
Ambient conditions, A-1<br />
Assignment, Control bit, 3-1<br />
Assignment, interface, A-4<br />
Attach labeling strips, 8-1<br />
B<br />
Barometric pressure, A-2<br />
Baud rate, 1-3, 2-1, 2-2, 2-5<br />
Bits, PLC, 3-1<br />
Bouncing time, A-3<br />
Burst interference, A-2<br />
Bus connection, A-4<br />
C<br />
Cable, 4-4<br />
Cable length, maximum, A-4<br />
Checksum, C-2<br />
COM–PROFIBUS, 2-5, 2-6, 2-7, 2-12<br />
Communication, 1-3<br />
Conduction, RF, A-2<br />
Configuration, 1-2<br />
Interface to PLC, 2-3<br />
Keys, 2-9, 2-11, 2-12<br />
LEDs, 2-9, 2-11, 2-12<br />
PLC, 2-6<br />
Configuration mode, 2-3<br />
Configuring data block, 2-1, 2-5, 2-6, 2-11, B-2<br />
Connect<br />
Additional elements, 4-4<br />
Ground, 4-4<br />
Connectable elements, A-2<br />
Connection type, 2-1, 2-2<br />
MPI, 2-1, 2-5, 2-6, 2-11, 2-13<br />
PROFIBUS–DP, 2-2, 2-5, 2-6, 2-12<br />
Connection types, 1-2<br />
Contact discharge, A-2<br />
Control bit, Assignment, 3-1<br />
Coordination, PLC and <strong>Push</strong> <strong>Button</strong> Panel, 2-13<br />
<strong>PP7</strong>, <strong>PP17</strong>-I, <strong>PP17</strong>-<strong>II</strong> Equipment Manual<br />
Release 06/98<br />
D<br />
Data, technical, A-1<br />
Data area, 2-1<br />
Data block, 2-5, 2-6, 2-11<br />
Data transmission, Baud rate, 1-3<br />
Data word, 2-5<br />
Degree of protection, 4-1, A-1<br />
Delay, A-3<br />
Digital inputs, A-2, C-2<br />
Function, 2-10<br />
Numeration, 3-2<br />
Digital outputs, A-3, C-2<br />
Numeration, 3-1<br />
Discharge, static, A-2<br />
Display, Messages, B-2<br />
DP slave address, 2-2, 2-5<br />
E<br />
EMV, 4-3<br />
Error LED, Signals, B-1<br />
Error messages, B-2<br />
External dimensions, A-1<br />
F<br />
Front view<br />
<strong>PP17</strong>–I, 6-1<br />
<strong>PP17</strong>–<strong>II</strong>, 7-1<br />
<strong>PP7</strong>, 5-1<br />
Function keys, 2-9<br />
Fuse, internal, A-1<br />
G<br />
Grounding connection, 4-4<br />
Grounding screw, 4-4<br />
GSD files, 2-7, 2-12<br />
Index-1
H<br />
Hardware test, C-1<br />
Hardware test mode, B-1, B-2, C-1<br />
Highest station address, 2-1, 2-5<br />
Housing, A-1<br />
Humidity, A-1<br />
HW–CONFIG, 2-6, 2-7, 2-12<br />
I<br />
Inductive power, A-3<br />
Input current, A-3, A-4<br />
Input voltage, A-3, A-4<br />
Inputs, digital, 1-3, 1-4, 2-10, 3-1, A-2, C-2<br />
Installation, 4-1<br />
22.5 mm elements, 4-3<br />
mechanical, 4-2<br />
Installation possibilities, 1-1<br />
Interface assignment, A-4<br />
Interfaces, 1-3<br />
Interference transmission, A-2<br />
Irradiation, RF, A-2<br />
K<br />
Key test, 1-5, 2-9, B-1<br />
Keyboard identification, C-2<br />
Keys, 3-1<br />
Function, 2-9<br />
L<br />
Labels, Dimensions, 8-1<br />
Lamp test, 1-5, 2-9, B-1<br />
LEDs<br />
Mode, 2-10<br />
Numeration , 3-2<br />
Life bit, 2-13<br />
Line length, maximum, A-3<br />
List, System messages, B-1<br />
Load current, A-4<br />
Loads, permissible, A-3<br />
M<br />
Marker area, 2-6, 3-2<br />
Mechanical switches, A-3<br />
Memory module, 1-2, 2-3, 9-1, B-2<br />
Memory requirements, 3-2<br />
Memory word, 2-1, 2-5<br />
Index-2<br />
Messages, B-1, B-2<br />
Mounting cut–out, 4-2, A-1<br />
<strong>PP17</strong>–I, 6-1<br />
<strong>PP17</strong>–<strong>II</strong>, 7-1<br />
<strong>PP7</strong>, 5-1<br />
Mounting depth, A-1<br />
MPI address, 2-1, 2-5, 2-6<br />
MPI connection, 2-1, 2-5, 2-6, 2-11<br />
MPI master, 2-1, 2-5<br />
N<br />
Number of inputs, A-2<br />
O<br />
Operating concept, 1-4<br />
Operating elements, 1-3<br />
Operating temperature, A-1<br />
Output current, A-3<br />
Output voltage, A-3<br />
Outputs, digital, 1-3, 1-4, 3-2, A-3, C-2<br />
P<br />
Permissible loads, A-3<br />
Permissible range, A-1<br />
PLC address, 2-5<br />
PLC and <strong>Push</strong> <strong>Button</strong> Panel coordination, 2-13<br />
PLC type, 2-1, 2-5<br />
Potential isolation, A-2, A-3, A-4<br />
Power, inductive, A-3<br />
Power consumption, typical, A-1<br />
Power supply, A-2<br />
Pressure difference, maximum, A-2<br />
Product description, 1-1<br />
PROFIBUS–DP connection, 2-2, 2-6, 2-12<br />
Pulse diagrams, 1-4<br />
Pulse extension, 2-9<br />
Pulse modulation, A-2<br />
R<br />
Rack , 2-5<br />
Radio interference, A-2<br />
Rated voltage, A-1<br />
Rear view<br />
<strong>PP17</strong>–I, 6-2<br />
<strong>PP17</strong>–<strong>II</strong>, 7-2<br />
<strong>PP7</strong>, 5-2<br />
<strong>PP7</strong>, <strong>PP17</strong>-I, <strong>PP17</strong>-<strong>II</strong> Equipment Manual<br />
Release 06/98
Relative humidity, A-1<br />
Release input, 1-3, 1-4, C-2<br />
Retaining hooks, 4-2<br />
Reverse battery protection, A-1<br />
RF conduction, A-2<br />
RF irradiation, A-2<br />
RFI suppression, A-2<br />
S<br />
Shock loading, A-2<br />
Short circuit protection, A-3<br />
Short–stroke key, Functioning methods, 1-4<br />
Short–stroke keys, 1-3<br />
Side view<br />
<strong>PP17</strong>–I, 6-1<br />
<strong>PP17</strong>–<strong>II</strong>, 7-1<br />
<strong>PP7</strong>, 5-1<br />
<strong>Siemens</strong> representatives, D-1<br />
Signals, Error LED, B-1<br />
Slave address, 2-2, 2-5<br />
Slot, 2-5<br />
Snap–out opening, 4-3<br />
Spare Parts, 9-1<br />
Start bit, 2-13<br />
Starting current inrush, A-1<br />
Starting Up, 2-1<br />
Static discharge, A-2<br />
Station address, highest, 2-1, 2-5<br />
Storage requirements, 2-6<br />
Switching frequency, A-3<br />
System messages, List, B-1<br />
<strong>PP7</strong>, <strong>PP17</strong>-I, <strong>PP17</strong>-<strong>II</strong> Equipment Manual<br />
Release 06/98<br />
System settings, 2-5<br />
modify, 2-1, 2-2<br />
MPI connection, 2-1<br />
PROFIBUS–DP connection, 2-2<br />
T<br />
Technical Data<br />
<strong>PP17</strong>–I, A-1<br />
<strong>PP17</strong>–<strong>II</strong>, A-1<br />
<strong>PP7</strong>, A-1<br />
Test, Hardware, C-1<br />
U<br />
Unit description<br />
<strong>PP17</strong>–I, 6-1<br />
<strong>PP17</strong>–<strong>II</strong>, 7-1<br />
<strong>PP7</strong>, 5-1<br />
Unit dimensions<br />
<strong>PP17</strong>–I, 6-1<br />
<strong>PP17</strong>–<strong>II</strong>, 7-1<br />
<strong>PP7</strong>, 5-1<br />
Unit start–up, B-1, C-1<br />
V<br />
Vibration, A-2<br />
Voltage supply, 4-4, A-1<br />
W<br />
Weight, A-1<br />
Index-3
Index-4<br />
<strong>PP7</strong>, <strong>PP17</strong>-I, <strong>PP17</strong>-<strong>II</strong> Equipment Manual<br />
Release 06/98