FW-1884 Windows Drivers v. 1.50 Readme - 3.07 MB - Tascam
FW-1884 Windows Drivers v. 1.50 Readme - 3.07 MB - Tascam
FW-1884 Windows Drivers v. 1.50 Readme - 3.07 MB - Tascam

Create successful ePaper yourself
Turn your PDF publications into a flip-book with our unique Google optimized e-Paper software.
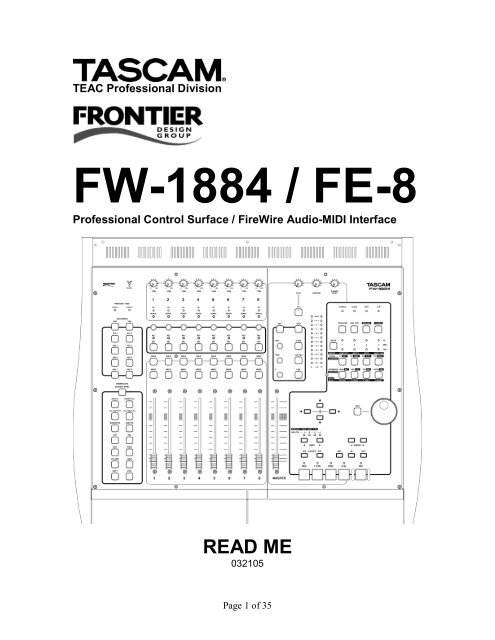
TEAC Professional Division<br />
<strong>FW</strong><strong>1884</strong> / FE8<br />
Professional Control Surface / FireWire AudioMIDI Interface<br />
READ ME<br />
032105<br />
Page 1 of 35
UPDATES............................................................................................................................................... 4<br />
REVISIONS TO OTHER DOCUMENTATION................................................................................... 4<br />
THE IEEE 1394 STANDARD AND THE <strong>FW</strong><strong>1884</strong>...................................................................................... 4<br />
MAKING CONNECTIONS ........................................................................................................................ 4<br />
SYSTEM REQUIREMENTS....................................................................................................................... 5<br />
PC................................................................................................................................................... 5<br />
Mac................................................................................................................................................. 5<br />
INSTALLING THE <strong>FW</strong><strong>1884</strong> DRIVERS ..................................................................................................... 6<br />
PC................................................................................................................................................... 6<br />
Mac................................................................................................................................................. 6<br />
EARLY G4............................................................................................................................................ 6<br />
HIDDEN KEY FUNCTIONS ...................................................................................................................... 6<br />
MAC OSX CONTROL PANEL............................................................................................................. 7<br />
ACCESSING THE <strong>FW</strong><strong>1884</strong> CONTROL PANEL IN MAC OSX ..................................................................... 7<br />
WINDOWS FEATURES (V1.10 & ABOVE) ........................................................................................ 8<br />
QUICK START (WDM) .......................................................................................................................... 8<br />
USING THE <strong>FW</strong><strong>1884</strong> WITH TASCAM GIGASTUDIO (GSIF)......................................................... 9<br />
96K ADAT I/O...................................................................................................................................... 10<br />
IN SYNC INDICATION (WINDOWS) ............................................................................................... 10<br />
A NOTE ABOUT COMMON CONTROL PROTOCOLS ................................................................. 10<br />
MACKIE CONTROL.............................................................................................................................. 10<br />
HUI ................................................................................................................................................... 10<br />
Pro Tools ...................................................................................................................................... 11<br />
USING THE <strong>FW</strong><strong>1884</strong> WITH LOGIC AUDIO................................................................................... 11<br />
USING THE <strong>FW</strong><strong>1884</strong> WITH PRO TOOLS....................................................................................... 12<br />
Pro Tools Free .............................................................................................................................. 12<br />
Pro Tools LE................................................................................................................................. 12<br />
Pro Tools TDM/ Pro Tools HD...................................................................................................... 12<br />
Chart: Pro Tools Software Compatibility ....................................................................................... 13<br />
MISCELLANEOUS ............................................................................................................................. 13<br />
CHANGES FROM PREVIOUS README DOCS ............................................................................. 13<br />
SINCE 082203..................................................................................................................................... 13<br />
Using external clocking under Mac OSX........................................................................................ 13<br />
Input Capability Matrix for Digital Performer ............................................................................... 14<br />
Maintenance Items ........................................................................................................................ 14<br />
Known Issues ................................................................................................................................ 14<br />
V1.10 DRIVER RELEASE NOTES..................................................................................................... 15<br />
INSTALLING THE V 1.10 DRIVER.......................................................................................................... 15<br />
<strong>Windows</strong> ....................................................................................................................................... 15<br />
Mac............................................................................................................................................... 16<br />
NEW FEATURES .................................................................................................................................. 16<br />
Analog to ADAT Routing ............................................................................................................... 16<br />
Six Channel Surround Monitoring ................................................................................................. 16<br />
Page 2 of 35
CONVERTER COMPENSATION (WDM) ................................................................................................. 17<br />
FE8 SUPPORT.................................................................................................................................... 18<br />
ADJUSTING FADER TOUCH SENSITIVITY ON FE8................................................................................. 19<br />
FE8 USE WITH SONAR ...................................................................................................................... 19<br />
FE8 Use With Digital Performer .................................................................................................. 20<br />
FE8 Use With Logic ..................................................................................................................... 21<br />
FE8 With Mackie Control and HUI Emulation modes................................................................... 22<br />
SOFTLCD........................................................................................................................................... 22<br />
MAINTENANCE ITEMS......................................................................................................................... 22<br />
KNOWN ISSUES................................................................................................................................... 23<br />
Playback of certain sound sources at high sample rates ................................................................. 23<br />
Logic Plugin ................................................................................................................................ 23<br />
V1.20 DRIVER RELEASE NOTES..................................................................................................... 24<br />
INSTALLING THE V 1.20 DRIVER.......................................................................................................... 24<br />
WHAT’S NEW..................................................................................................................................... 24<br />
SOFTLCD........................................................................................................................................... 24<br />
SONAR PLUGIN V 1.20..................................................................................................................... 24<br />
DIGITAL PERFORMER PLUGIN ............................................................................................................ 25<br />
MAC OS X DRIVER............................................................................................................................. 25<br />
WINDOWS DRIVER.............................................................................................................................. 25<br />
KNOWN ISSUES ................................................................................................................................. 26<br />
SHORTCUT KEYS IN LOGIC.................................................................................................................. 26<br />
CONTROL PANEL KEY IN OSX ............................................................................................................ 26<br />
MAC G5 KERNEL ISSUES..................................................................................................................... 26<br />
V 1.30 DRIVER RELEASE NOTES.................................................................................................... 27<br />
VIRTUAL MIDI PORTS ........................................................................................................................ 27<br />
GSIF2 SUPPORT ................................................................................................................................. 27<br />
MAC OSX 10.4 (TIGER)...................................................................................................................... 28<br />
MAINTENANCE ITEMS......................................................................................................................... 28<br />
V 1.40 DRIVER RELEASE NOTES.................................................................................................... 29<br />
CUBASE LE AND CUBASE SE SUPPORT................................................................................................ 29<br />
NEW FEATURES .................................................................................................................................. 29<br />
SONAR.......................................................................................................................................... 29<br />
MAINTENANCE ITEMS......................................................................................................................... 29<br />
OSX .............................................................................................................................................. 29<br />
V <strong>1.50</strong> DRIVER RELEASE NOTES.................................................................................................... 30<br />
FIXED SINCE V<strong>1.50</strong> PUBLIC BETA........................................................................................................ 30<br />
INSTALLATION.................................................................................................................................... 30<br />
SETUP ................................................................................................................................................ 30<br />
OPERATION ........................................................................................................................................ 31<br />
Channel Strips............................................................................................................................... 31<br />
Channel Encoders ......................................................................................................................... 31<br />
Transport ...................................................................................................................................... 32<br />
Shortcut Buttons............................................................................................................................ 33<br />
Automation Buttons ....................................................................................................................... 34<br />
NUDGE as Channel Views ............................................................................................................ 34<br />
User Programmable Functions...................................................................................................... 35<br />
Page 3 of 35
Updates<br />
Please visit the TASCAM web site at http://www.tascam.com to ensure that you have the<br />
latest software and documentation.<br />
Revisions to other documentation<br />
The points that follow are the most recent and correct information and may differ from<br />
information presented in the Owner’s Manual, Setup Guide or individual App Notes.<br />
Please use this information instead.<br />
The IEEE 1394 standard and the <strong>FW</strong><strong>1884</strong><br />
Additional Notes<br />
• FireWire devices should never be connected in a “loop” configuration. There<br />
should only be one cable path from one FireWire device to another. If you cable a<br />
FireWire system in a loop by mistake, it will not work.<br />
• Note: Use only a 6pin FireWire connection on the computer.<br />
Making Connections<br />
The <strong>FW</strong><strong>1884</strong> and FE8 do not pass power provided by the host computer through their<br />
IEEE1394 ports.<br />
If you are daisychaining devices on the 1394 bus after the <strong>FW</strong><strong>1884</strong> or FE8, ensure that<br />
they have their own power supply and are not powered via the 1394 connection, and the<br />
<strong>FW</strong><strong>1884</strong> or FE8 is powered on.<br />
Alternatively, the <strong>FW</strong><strong>1884</strong> or FE8 can be placed last in the chain. If your computer has<br />
more than 1 IEEE1394 port, other devices should be connected to a port other than the<br />
one used by the <strong>FW</strong><strong>1884</strong> or FE8<br />
Always make all connections between the <strong>FW</strong><strong>1884</strong>, FE8 and a host computer with<br />
power OFF on all devices.<br />
Page 4 of 35
System Requirements<br />
PC<br />
Mac<br />
• Reminder: The <strong>FW</strong><strong>1884</strong> requires an OHCI compliant 1394 port.<br />
• Reminder: The <strong>FW</strong><strong>1884</strong> requires an update to the 1394 driver provided in<br />
Microsoft <strong>Windows</strong>. This update is automatically installed from the <strong>FW</strong><strong>1884</strong><br />
driver installation application provided on the CDROM. The update requires<br />
that you have previously updated your <strong>Windows</strong> 2000 system to Service Pack<br />
3 or 4, or that you’ve updated your <strong>Windows</strong> XP system to Service Pack 1.<br />
To see what Service Pack is installed in your system, go to Control Panel | System<br />
and look in the “General” tab under “System.” You can download Service Packs<br />
to your machine using the “<strong>Windows</strong> Update” feature.<br />
• Also note that future versions of <strong>Windows</strong> 2000 (starting with Service<br />
Pack 5) and <strong>Windows</strong> XP (starting with Service Pack 2) will include the<br />
1394 update.<br />
• Due to OSX and application resource requirements, the following performance<br />
guidelines should be kept in mind:<br />
o A G4 processor and 512<strong>MB</strong> of RAM are strongly recommended to use the<br />
<strong>FW</strong><strong>1884</strong> as an 18Channel Sound Device in Core Audio.<br />
o A G3 based Mac running OSX may require very high buffer settings when<br />
the <strong>FW</strong><strong>1884</strong> is configured as anything greater than a 2Channel Sound<br />
Device in Core Audio.<br />
Page 5 of 35
Installing the <strong>FW</strong><strong>1884</strong> <strong>Drivers</strong><br />
PC<br />
Reminder: When presented with the <strong>Windows</strong> Logo testing warning, click<br />
through it by clicking on the “Continue Anyway” button.<br />
o Note: Due to the required installation of a Microsoft Hotfix (also called a<br />
“QFE”), drivers must be installed using the provided installer. Separate<br />
<strong>Windows</strong> driver files are not provided on the CD.<br />
o Note: After installation of the driver software it may take the <strong>Windows</strong><br />
Plug & Play process a few moments to recognize the <strong>FW</strong><strong>1884</strong>.<br />
o Note: In the event that the <strong>Windows</strong> Plug & Play process does not detect<br />
the <strong>FW</strong><strong>1884</strong> after running the installer, the driver installation may be<br />
completed from the <strong>Windows</strong> Device Manager as described below:<br />
1. Go to the Start menu, select Control Panel then double click<br />
System.<br />
2. Click on the Hardware tab then click on the Device Manager<br />
button.<br />
3. You should see a yellow icon representing the <strong>FW</strong><strong>1884</strong>. Right<br />
click on it and choose Update Driver.<br />
4. Follow the instructions in the Hardware Update Wizard.<br />
Mac<br />
o Note: OMS 2.3.8 for Mac OS9 is included on the <strong>FW</strong><strong>1884</strong> CD.<br />
o Note: Users of Digital Performer 3.x should remove the Digigram VX<br />
ASIO driver from their Performer ASIO folder as it has been shown to<br />
conflict with the <strong>FW</strong><strong>1884</strong> ASIO driver.<br />
o Note: Some USB MIDI interfaces have been shown to interfere with<br />
FireWire MIDI. If you experience MIDI communication problems with<br />
your <strong>FW</strong><strong>1884</strong> and you have a USB MIDI interface, try disconnecting the<br />
USB device.<br />
Early G4<br />
Some testers have reported computer freezes when using the <strong>FW</strong><strong>1884</strong> with the 400MHz<br />
G4. This early G4 had a different motherboard than later models. Later model G4s<br />
tested without problem. At the time of this writing there is no solution or workaround.<br />
Hidden Key Functions<br />
Hidden key shortcuts are included in their appropriate manual sections. They are also all<br />
available at the end of the Owner’s Manual in Section 7.3.<br />
Page 6 of 35
Mac OSX Control Panel<br />
Accessing the <strong>FW</strong><strong>1884</strong> Control Panel in Mac OSX<br />
The <strong>FW</strong><strong>1884</strong> Manager application, located in the Applications folder, launches the <strong>FW</strong><br />
<strong>1884</strong> Control Panel.<br />
While the Control Panel tabs for Settings, Routing and MIDI Programming are the same<br />
between <strong>Windows</strong>, Mac OS9 and Mac OSX, Mac OSX adds the Core Audio tab shown<br />
below. Here it is possible to configure how many I/O channels the <strong>FW</strong><strong>1884</strong> presents to<br />
the computer. On slower systems, it may be necessary to set this as a 2Channel or 8<br />
Channel Sound Device for good performance. See the note above about Mac system<br />
requirements.<br />
Note: Changing this setting will restart the <strong>FW</strong><strong>1884</strong> in order to configure its systems.<br />
No data (audio/MIDI/control) will pass through the device while it is restarting.<br />
Page 7 of 35
<strong>Windows</strong> Features (V1.10 & above)<br />
Quick Start (WDM)<br />
The tab shown below, Quick Start, has been added to the <strong>Windows</strong> Control Panel. This<br />
allows you to specify a set of channels which will always stream when using WDM/KS<br />
Driver Mode in Sonar. This, for example, speeds up the start of a playback or record<br />
operation in SONAR... especially when there are a lot of channels enabled. If there is a<br />
hesitation after pressing PLAY or RECORD before the operation begins, try enabling this<br />
feature.<br />
To use it, check the channels that you will be using in your WDM audio app. When the<br />
channels selected in the Quick Start tab match the channels actually used by your<br />
application, the <strong>FW</strong><strong>1884</strong> will not have to resync when the application begins to use<br />
those channels. This has shown to be much faster, and less prone to produce an “audio<br />
engine stop” message.<br />
Page 8 of 35
Using the <strong>FW</strong><strong>1884</strong> with TASCAM GigaStudio (GSIF)<br />
The <strong>Windows</strong> driver for the <strong>FW</strong><strong>1884</strong> implements the GSIF (Giga Streaming Interface)<br />
protocol, for highperformance operation with TASCAM GigaStudio software. The GSIF<br />
driver is installed automatically with the <strong>FW</strong><strong>1884</strong> driver; there is no need for a separate<br />
installation step.<br />
The <strong>FW</strong><strong>1884</strong>’s GSIF interface always operates at full 24bit resolution, although<br />
GigaStudio has settings which can dither output to lower resolutions in special situations.<br />
To use the <strong>FW</strong><strong>1884</strong> as your GigaStudio output device, make sure the <strong>FW</strong><strong>1884</strong> is<br />
plugged in and turned on, and then start GigaStudio. When the main screen appears,<br />
select the Settings | Hardware/Routing page. Use the dropdown combo box labeled<br />
“Hardware” to select the <strong>FW</strong><strong>1884</strong>. If you will also be using the <strong>FW</strong><strong>1884</strong>’s MIDI Inputs<br />
to connect a keyboard or other controller, you should select the <strong>FW</strong><strong>1884</strong>’s MIDI Input<br />
ports in the dropdown boxes labeled “Midi In Ports.”<br />
IMPORTANT: Be sure to click the “Apply” button to activate changes you<br />
have made in this screen!<br />
All eighteen output channels of the <strong>FW</strong><strong>1884</strong> may be utilized with GigaStudio. Since<br />
GigaStudio allows individual pairs of channels to be enabled via its Settings |<br />
Hardware/Routing page, it’s easy to control the number of active channels that<br />
GigaStudio is using. Channels that aren’t selected for use in GigaStudio are available to<br />
other applications via MME/WDM or ASIO since the <strong>FW</strong><strong>1884</strong> is a true MultiClient<br />
device.<br />
Here is a chart that shows the association of GigaStudio channel numbers<br />
with <strong>FW</strong><strong>1884</strong> outputs:<br />
Giga <strong>FW</strong><strong>1884</strong><br />
<br />
1,2 Analog 1:2<br />
3,4 Analog 3:4<br />
5,6 Analog 5:6<br />
7,8 Analog 7:8<br />
9,10 ADAT 1:2<br />
11,12 ADAT 3:4<br />
13,15 ADAT 5:6<br />
15,16 ADAT 7:8<br />
17,18 SPDIF 1:2<br />
Page 9 of 35
96k ADAT I/O<br />
Note: When operating in high sample rate modes (96k or 88.2k), the ADAT I/O reduces<br />
its channel I/O count to four. Because of this, when the sample rate is 96k or 88.2k, the<br />
<strong>FW</strong><strong>1884</strong> is a 14channel I/O device.<br />
In Sync Indication (<strong>Windows</strong>)<br />
Due to significant performance differences between computers at high sample rates, the<br />
computer and <strong>FW</strong><strong>1884</strong> may not be able to achieve sync with smaller buffer sizes. The<br />
<strong>FW</strong><strong>1884</strong>’s <strong>Windows</strong> control panel reports “In Sync” below the Sample Rate selection<br />
box when the <strong>FW</strong><strong>1884</strong> and host are communicating properly. If this text does not<br />
appear, try increasing the buffer size (Audio Latency slider) or lowering the sample rate<br />
until the “In Sync” indication appears.”<br />
A Note About Common Control Protocols<br />
By emulating either the Mackie Control or the HUI, the <strong>FW</strong><strong>1884</strong> can provide control<br />
over the most used parameters of your DAW software until your particular DAW<br />
implements more complete Native Mode parameter mapping. Typically, one or both of<br />
these two protocols will provide control over faders, mutes, solo, recordenable, pan, and<br />
the main transport functions. Other functions may be available on certain keys as noted<br />
in the documents covering these protocols.<br />
While these protocols have been implemented by many DAWs, their implementation and<br />
function may vary from DAW to DAW. Below is a list of known issues with these<br />
protocols as of this writing:<br />
Mackie Control<br />
AUX1: This key invokes the Mackie Control Edit function. For it to work in Cubase or<br />
Nuendo, an audio part must be selected.<br />
SHIFT+UNDO invokes the REDO function.<br />
CTRL+RECORD is not implemented.<br />
SET: This key invokes the Mackie Control Zoom function. For it to work in Cubase or<br />
Nuendo, the Arrange window must be selected.<br />
SHTL: Not implemented in Cubase as of this writing.<br />
HUI<br />
NOTE: There is no dedicated master fader in the HUI protocol. A channel fader is<br />
typically assigned to function as a master fader.<br />
AUX7: This key brings forward the DAW’s Edit window per the HUI protocol. This is<br />
not implemented in Cubase as of this writing.<br />
AUX8: This key brings forward the DAW’s Mixer window per the HUI protocol. This is<br />
not implemented in Cubase as of this writing.<br />
Page 10 of 35
Pro Tools<br />
The following key functions are only available in Pro Tools when using the <strong>FW</strong><strong>1884</strong> in<br />
HUI emulation mode as of this writing:<br />
ALT/CMD<br />
CTRL<br />
SHIFT+RECORD (QuickPunch)<br />
LOCATE>><br />
SET (Online)<br />
IN<br />
SHIFT+IN<br />
OUT<br />
(Also available in Nuendo)<br />
<br />
SHIFT+ BANK<br />
Using the <strong>FW</strong><strong>1884</strong> with Logic Audio<br />
The control surface plugin included on the CDROM has been tested with Logic<br />
versions 6.1 and 6.2.<br />
Page 11 of 35
Using the <strong>FW</strong><strong>1884</strong> with Pro Tools<br />
Pro Tools Free<br />
This software is available as a free download from Digidesign. It records and plays back<br />
up to eight tracks of audio and 48 tracks of MIDI, and has many of the plugin and<br />
editing power of the more highend versions of Pro Tools. It uses Apple Sound Manager<br />
on Mac OS 9 and <strong>Windows</strong> MME drivers. As of the time of this writing, Digidesign<br />
hasn’t announced a Mac OS X version of the product.<br />
The <strong>FW</strong><strong>1884</strong> functions as a control surface in HUI emulation mode with Pro Tools Free.<br />
Just add a “HUI” in the Pro Tools “Peripherals” window and you’ll have full transport,<br />
editing and mixing control. Select Sound Manager (Mac OS 9) or MME (<strong>Windows</strong>) as<br />
your audio system to get 2channel input and output. You can also use the fourport MIDI<br />
interface via OMS (Mac).<br />
Pro Tools LE<br />
Pro Tools LE is a version of Pro Tools that requires one of Digidesign’s interfaces to<br />
function, you can’t use the <strong>FW</strong><strong>1884</strong> as the audio interface for this software. However,<br />
you could use the <strong>FW</strong><strong>1884</strong>’s mic preamps, line inputs and ADAT inputs, submixed to a<br />
stereo signal, and record this digitally into Pro Tools using the <strong>FW</strong><strong>1884</strong>’s S/PDIF<br />
output.<br />
HUI emulation works with this software – all of the transport, editing and mixing<br />
commands supported in other versions of Pro Tools work in LE. You can also use the<br />
fourport MIDI interface via OMS (Mac).<br />
Pro Tools TDM/ Pro Tools HD<br />
The professional version of Pro Tools is called Pro Tools TDM. Currently at version 6.1,<br />
this is the version that ships with their Mix and HDseries hardware. It offers 128 tracks<br />
of playback at 192kHz, TDM plugins and many other features.<br />
Like Pro Tools LE, this software requires the user to have Digidesign hardware to<br />
function. Therefore, the <strong>FW</strong><strong>1884</strong> can’t function as the audio interface for this Pro Tools<br />
system. You can still use the <strong>FW</strong><strong>1884</strong>’s mic preamps, line inputs and ADAT inputs,<br />
submixed internally to a stereo signal, and record this digitally into Pro Tools using the<br />
<strong>FW</strong><strong>1884</strong>’s S/PDIF output.<br />
You still get full HUI control surface functionality with the Fw<strong>1884</strong>, from editing and<br />
transport controls to mixing and automation control. You can also use the fourport MIDI<br />
interface via OMS (Mac).<br />
Page 12 of 35
Chart: Pro Tools Software Compatibility<br />
Pro Tools Free Pro Tools LE Pro Tools TDM<br />
Audio 2channel I/O (n/a) (n/a)<br />
MIDI 4 MIDI I/O ports 4 MIDI I/O ports 4 MIDI I/O ports<br />
Transport Control <br />
Mixing Controls <br />
Editing Controls <br />
Miscellaneous<br />
• Section 5.1.3 MIDI Programming Tab (Owner’s Manual)<br />
o Please disregard the paragraph on this page entitled “Here’s a quick<br />
scenario”. Somehow software engineer notes found their way into the<br />
manual ☺<br />
Changes From Previous ReadMe Docs<br />
Please note that the ReadMe docs are stamped with their current date on the cover page.<br />
For example, 081903 is August 19, 2003.<br />
Since 082203<br />
Using external clocking under Mac OSX<br />
Selection of external clock sources may not be possible from within your OSX DAW<br />
software. Please note that you can still change the clock source manually on the <strong>FW</strong><br />
<strong>1884</strong> or from the <strong>FW</strong><strong>1884</strong> Manager app. While the system will be locked to the correct<br />
clock source, the DAW software will not display it.<br />
• This has been fixed with OSX driver version 1.03 and higher.<br />
Page 13 of 35
Input Capability Matrix for Digital Performer<br />
This has been fixed with Digital Performer 4.12<br />
Due to the method that Digital Performer handles FireWire audio streams, only eight<br />
inputs and eight outputs can be simultaneously accessed on the <strong>FW</strong><strong>1884</strong> when using<br />
DP4 in Mac OS X. When the <strong>FW</strong><strong>1884</strong> is configured as an 18channel interface (in the<br />
<strong>FW</strong><strong>1884</strong> Manager application), the eight analog mic/line inputs and outputs will be used<br />
for I/O. If the <strong>FW</strong><strong>1884</strong> is set to act as an 8channel interface, you will be able to choose<br />
the eight mic/line ins and outs or the ADAT input and output or a combination of the two.<br />
When the <strong>FW</strong><strong>1884</strong> is configured for 2channel operation, you will be able to choose any<br />
pair of inputs and outputs for use with Digital Performer.<br />
<strong>FW</strong><strong>1884</strong> Mode Available I/O<br />
18channel 8 mic/line inputs, 8 line outputs<br />
8channel • 8 mic/line inputs, 8 line outputs<br />
• ADAT input, ADAT output<br />
• 8 mic/line inputs, ADAT output<br />
• ADAT input, 8 line outputs<br />
2channel Any pair of inputs and outputs<br />
Maintenance Items<br />
• Some users have reported audio dropouts on dual processor G4 Macs running<br />
OSX. This is fixed with OSX driver version 1.03 and higher.<br />
Known Issues<br />
• On dual processor G4 Macs running DP4 and OSX, DAW faders may not respond<br />
accurately. Our testing has shown that the issue is more likely to present itself in<br />
bench testing rather than actual usage. This is currently under investigation.<br />
Page 14 of 35
V1.10 Driver Release Notes<br />
Installing the V 1.10 Driver<br />
<strong>Windows</strong><br />
Two versions of the V 1.10 driver installer for <strong>Windows</strong> are provided. They differ only in<br />
one aspect: the larger (~10<strong>MB</strong>) installer includes a required update to the Microsoft 1394<br />
bus driver, whereas the smaller (500KB) installer does not.<br />
To determine which version you need, open the <strong>Windows</strong> Control Panel on your<br />
computer, and launch the Add/Remove Programs dialog. Scroll down and look for the<br />
presence of the <strong>Windows</strong> Hotfix Q819111. If this hotfix is installed you can use the<br />
smaller (~500KB) installer. Otherwise, use the full (10<strong>MB</strong>) installer.<br />
If you are installing this driver version onto a PC that does not have a previous (V 1.00)<br />
<strong>FW</strong><strong>1884</strong> driver installation, the full 10<strong>MB</strong> installer must be used. This installation is<br />
identical to that described in this doc, the Owner’s Manual and the Setup Guide.<br />
If you are installing this driver version onto a PC that has V 1.00 drivers already installed,<br />
please use the approximately 500k updater.<br />
NOTE: When connected FE8 expander units, each unit will require <strong>Windows</strong> to go<br />
through the plug & play driver installation process. This is due to the fact that each FE8<br />
has its own unique identity to <strong>Windows</strong>. If more than one FE8 is connected during<br />
driver installation, their drivers will be installed sequentially by <strong>Windows</strong>. It is not<br />
necessary to reinstall the driver. FE8 drivers are included in the V 1.10 <strong>FW</strong><strong>1884</strong> driver<br />
so when an FE8 is connected, it will automatically be detected and installed.<br />
If you are installing V 1.10 drivers for the first time from the CD included with your <strong>FW</strong><br />
<strong>1884</strong> then your devices already have the latest firmware that goes with V 1.10.<br />
If you are installing over V 1.00 drivers then you will also need to run the Firmware<br />
Updater. The Firmware updater must be installed after installing the V 1.10 drivers. The<br />
Firmware updater app is a separate download file from the V 1.10 driver file you<br />
downloaded from the TASCAM web site and includes instructions to guide you through<br />
this very simple process. This updates the <strong>FW</strong><strong>1884</strong> from ARM135 / FPGA 45 to ARM<br />
145 / FPGA 49. These version numbers can be seen in the <strong>FW</strong><strong>1884</strong> control panel.<br />
Page 15 of 35
Mac<br />
If you are installing V 1.10 drivers over a previous V 1.00 installation, the installer will<br />
automatically overwrite V 1.00 files with V 1.10 files.<br />
If you are installing over V 1.00 drivers then you will need to run the Firmware Updater.<br />
The Firmware updater app includes instructions to guide you through this very simple<br />
process. This updates the <strong>FW</strong><strong>1884</strong> from ARM135 / FPGA 45 to ARM 145 / FPGA 49.<br />
These version numbers can be seen in the <strong>FW</strong><strong>1884</strong> control panel.<br />
In Mac OS 9, the Firmware updater is placed in the <strong>FW</strong><strong>1884</strong> <strong>Drivers</strong> folder which will<br />
appear on your desktop.<br />
In OSX, the Firmware updater is contained within the .dmg (disk image) file. Double<br />
click the image file to see its contents and run the installer & updater within.<br />
New Features<br />
Analog to ADAT Routing<br />
This setting in the Routing tab for all platforms (Mac OS 9, Mac OSX & <strong>Windows</strong>)<br />
allows the signals present at the analog inputs to route directly to the ADAT outputs.<br />
This provides for use of the <strong>FW</strong><strong>1884</strong>’s microphone preamps, control surface and MIDI<br />
ports with an audio card that has ADAT inputs but limited microphone inputs. An<br />
example would be the Digidesign 001.<br />
NOTE: Most applications permit several MIDI interfaces to be used simultaneously. For<br />
example, an app could simultaneously receive MIDI input from a keyboard while also<br />
receiving surface control via the <strong>FW</strong><strong>1884</strong> MIDI Control port. On the other hand, most<br />
audio apps do not permit multiple audio interfaces to be used simultaneously. This<br />
means that in the above example, the Digi 001 audio I/O would be used while the <strong>FW</strong><br />
<strong>1884</strong> would only be used for microphone preamps, MIDI and control surface. By using<br />
the Analog to ADAT routing feature, the ADAT output of the <strong>FW</strong><strong>1884</strong> could be<br />
connected to the ADAT input of a Digi 001, providing it with 8 additional mic pre’s.<br />
Six Channel Surround Monitoring<br />
Previously it was only possible to set the Monitor Level Control on the <strong>FW</strong><strong>1884</strong> to<br />
affect analog outputs 1&2 or 18. It is now additionally possible to set the Monitor Level<br />
Control to affect analog outputs 16 only, allowing analog outputs 7&8 to be used for<br />
other purposes, like sends to external equipment, while mixing in 5.1. This setting is<br />
made in the Settings tab on all platforms.<br />
Page 16 of 35
Converter Compensation (WDM)<br />
A new checkbox has been added in the Control Panel Settings tab on the <strong>Windows</strong><br />
platform called “Compensate for converter delay”. When enabled, this compensates for<br />
the A/D and D/A converter chips' inherent delay in WDM client apps. In Sonar, enabling<br />
this switch also requires the number of Buffers in Playback Queue get set to a minimum<br />
of 3 in Sonar’s audio configuration window as shown below. When the switch is not<br />
enabled, you can set the number of buffers to a minimum of 2 and you'll get less absolute<br />
latency, but the A/D, D/A delays won't be compensated.<br />
For example:<br />
• Enabling this switch when synchronizing to external time code will ensure audio<br />
gets written into the project at exactly the correct location relative to the incoming<br />
time code.<br />
• Disabling this switch will allow the lowest possible performance latency for<br />
virtual instruments and audio monitoring through the DAW.<br />
Page 17 of 35
FE8 Support<br />
Version 1.10 drivers support the FE8 channel strip expander unit. Below is a screen shot<br />
of the FE8 tab in the <strong>Windows</strong> control panel. The Mac version is the same.<br />
The order in which multiple FE8s are reported to a DAW can be changed in this tab by<br />
clicking an FE8 Name Assignment and using the Move Up or Move Down buttons at the<br />
bottom. When clicking the Identify button, the highlighted FE8 will flash its FireWire<br />
(1394) LED.<br />
It makes later FE8 assignment easier (if more than one FE8 is connected) if they are<br />
renamed at this point. Many users, for example, will want to rename the FE8s to reflect<br />
their physical position on the work surface (for example: “FE8 Left, FE8 Right”). After<br />
renaming, the FE8s must have their power cycled, then the new names will appear in the<br />
DAW for easy assignment. (In <strong>Windows</strong>, names entered in this dialog also become the<br />
names of the MIDI device names available to your audio applications.)<br />
Page 18 of 35
Adjusting Fader Touch Sensitivity on FE8<br />
SEL1 + SEL3 + SEL5 + CH8 Encoder<br />
Adjust touch fader sensitivity<br />
FE8 Use With Sonar<br />
First, the FE8 Control Ports must be activated in Sonar’s MIDI Devices window in order<br />
for them to appear in the Control Surfaces window. The FE8 Control Ports will become<br />
available after <strong>Windows</strong> has detected the hardware and installed the driver for the FE8.<br />
In the Control Surfaces window (shown below) under the Options menu, Sonar provides<br />
multiple slots to insert individual control surfaces. If you have one or more FE8s<br />
connected, each one will appear individually in the Add New Control Surface pulldown<br />
menu when the yellow star icon is clicked. Add control surfaces in the order you want<br />
them to match up with mixer faders from top to bottom in the Control Surfaces window.<br />
Multiple FE8s will be numbered & named according to their order and names in the FE<br />
8 tab of the control panel.<br />
NOTE: Sonar must be restarted for changes in this window to take effect, even though<br />
Sonar does not prompt for this.<br />
Page 19 of 35
FE8 Use With Digital Performer<br />
First, install the DP plugin V 1.10, included on the CD (or separately downloaded from<br />
the TASCAM web site).<br />
1. Open the Control Surface window (shown below) under the Setup menu. Select<br />
<strong>FW</strong><strong>1884</strong> under the Driver pulldown.<br />
2. Select <strong>FW</strong><strong>1884</strong> as the first Unit and choose a control port from the MIDI pull<br />
down. Any control port may be used.<br />
3. Click on the + sign next to the <strong>FW</strong><strong>1884</strong> control port to enable another unit. Do<br />
not click on the master + sign outside of the outlined box – that is used for adding<br />
a second driver type.<br />
4. Select FE8 as the second unit and choose a control port for it.<br />
5. Repeat steps 3 & 4 for all FE8s connected.<br />
NOTE: V 1.10 DP plugins only exist for DP 3.1 and DP 4. DP 2.7 and 3.0 do not<br />
support multiple control surfaces.<br />
Page 20 of 35
FE8 Use With Logic<br />
First, install the <strong>FW</strong><strong>1884</strong> Logic plugin included on the <strong>FW</strong><strong>1884</strong> CD and set up an <strong>FW</strong><br />
<strong>1884</strong> according to those installation instructions.<br />
To add an FE8, repeat those same steps for each FE8 connected as shown below:<br />
Page 21 of 35
FE8 With Mackie Control and HUI Emulation modes<br />
FE8 support using these emulation modes will vary from app to app with the particular<br />
app’s level of implementation. The outline below shows app support for these control<br />
protocols known at the time of this writing.<br />
• Cubase – Does not currently support multiple control surfaces.<br />
• Nuendo – Does not currently support multiple control surfaces.<br />
• Logic – It is recommended that the Logic plugin provided by Emagic and<br />
included with the <strong>FW</strong><strong>1884</strong> be used for surface control of Logic.<br />
• Pro Tools – Supports multiple HUI surfaces. Each HUI surface must be assigned<br />
to an <strong>FW</strong><strong>1884</strong> / FE8 Control Port. It may be necessary to trash the Pro Tools<br />
preferences file and/or rebuild your OMS setup in order for Pro Tools to properly<br />
communicate with multiple emulated HUIs. Pro Tools expects to see a HUI on<br />
MIDI channel #1 of a given Control Port.<br />
• Digital Performer – It is recommended that the DP plugin included with the <strong>FW</strong><br />
<strong>1884</strong> be used for surface control of DP.<br />
o Mackie Control – DP expects to see a Mackie Control on MIDI channel<br />
#16 of a given Control Port. Any number of FE8s emulating Mackie<br />
Control expanders may be added below a master <strong>FW</strong><strong>1884</strong> emulating a<br />
Mackie Control.<br />
o HUI – DP expects to see a HUI on MIDI channel #1 of a given Control<br />
Port. At the time of this writing DP does not support multiple HUI<br />
controllers.<br />
• Sonar – It is recommended that the Sonar plugin included with the <strong>FW</strong><strong>1884</strong> be<br />
used for surface control of Sonar.<br />
o Mackie Control – Sonar does not support the Mackie Control expander<br />
and therefore will not support an FE8 emulating a Mackie Control<br />
expander.<br />
SoftLCD<br />
This applet included with V 1.10 drivers is designed to emulate the function of a<br />
hardware LCD scribble strip when the <strong>FW</strong><strong>1884</strong> is used in Mackie Control or HUI<br />
emulation mode. The extent of the scribble strip emulation varies greatly from app to app<br />
and depends on a particular app’s implementation of the Mackie Control or HUI protocol.<br />
Revisions of the Sonar and Digital Performer plugins designed to work with SoftLCD<br />
are currently under development. This has been included with driver version 1.20 &<br />
higher.<br />
SoftLCD is not supported under Mac OS 9.<br />
Maintenance Items<br />
• Latency and record timing has been improved on all platforms.<br />
• A rare audio dropout problem on high speed dual processor Macs has been fixed.<br />
Page 22 of 35
Known Issues<br />
Playback of certain sound sources at high sample rates<br />
If you are experiencing difficulties playing back audio via QuickTime at high sample<br />
rates, set the sampling rate to 44.1 or 48 kHz. and restart the Mac.<br />
Here are some examples of sounds that play at 88.2k:<br />
iTunes plays MP3 file<br />
Mail beeps<br />
Here are some examples of sounds that DON'T play at 88.2k, but do at 44.1/48k:<br />
Safari plays back an MP3 file<br />
Finder plays back an AIFF file<br />
Quicktime Player plays back a Quicktime MOV File<br />
Logic Plugin<br />
• The issues below are currently being worked on by Emagic.<br />
o Fader touch is not currently functional. HUI emulation can be used for<br />
this purpose. Fixed with <strong>FW</strong><strong>1884</strong> Logic driver V1.10.<br />
o Scrub/Shuttle behavior is erratic. Fixed with <strong>FW</strong><strong>1884</strong> Logic driver<br />
V1.10.<br />
o The Logic master fader is not tracked correctly by the <strong>FW</strong><strong>1884</strong> physical<br />
fader. Fixed with <strong>FW</strong><strong>1884</strong> Logic driver V1.10.<br />
o The bank LEDs are not currently functional. This will be fixed in a future<br />
release of the Logic main app.<br />
Page 23 of 35
V1.20 Driver Release Notes<br />
Installing the V 1.20 Driver<br />
Please refer to the V1.10 installation instructions on pages 15 & 16 of this document.<br />
Installing V1.20 is the same. It is not necessary to install V1.10 before installing V1.20.<br />
It is possible to install V1.20 over previous V1.00 and V1.10 installs.<br />
What’s New<br />
SoftLCD<br />
• Added support for FE8’s to the SoftLCD application. Now SoftLCD can display<br />
data from both the <strong>FW</strong><strong>1884</strong> and FE8’s. (FE8/SoftLCD support is required in<br />
the control plugin to use this feature.)<br />
• Full support for Unicode added to the Sonar plugin to support alternate language<br />
based text.<br />
• Added support for full message data dumps to SoftLCD to accommodate the<br />
Logic Audio plugin.<br />
SONAR Plugin V 1.20<br />
Minimum requirement is the latest Sonar 3 patches. This is compatible with Sonar 4.<br />
• Added support in the Sonar Plugin for SoftLCD and the FE8.<br />
• Added Support for the track Select buttons in Sonar 3. Now pressing a track<br />
Select button will highlight that track and place it into the Track Inspector<br />
window.<br />
• Added support for the new Sonitus channel EQ’s in Sonar 3. Now the EQ section<br />
will automatically control any currently selected track or buss.<br />
o SHIFT + CTRL+ any Band button toggle the selected track/bus EQ on or<br />
off<br />
o SHIFT + Band button toggle that band on or off<br />
o CTRL+ Band button select the type of filter for that band<br />
o Gain, Freq, and Q encoders operate normally based on type of filter<br />
selected<br />
Page 24 of 35
• Added support for the new bussing scheme in Sonar 3. Now all hardware channel<br />
strips can be toggled between normal track mode and bus mode. This includes full<br />
support for level, pan, aux busses, EQ, automation, and banking.<br />
o SET + BANK> (right) put the <strong>FW</strong><strong>1884</strong> and any FE8’s into bus control<br />
mode. This will be indicated by a slow blinking of the Bank LED’s.<br />
o SET +
Known Issues<br />
Shortcut Keys in Logic<br />
The illumination state of these keys is not being updated correctly. This will be fixed in a<br />
future release of the Logic main app.<br />
Control Panel Key in OSX<br />
Occasionally may require two presses to open the <strong>FW</strong><strong>1884</strong> control panel, especially<br />
immediately after switching sample rates.<br />
Mac G5 Kernel Issues<br />
Some testers have reported the following issues on Mac G5 computers:<br />
• MIDI dropouts (Fixed in Driver Version 1.30)<br />
• Audio dropouts (Fixed in Driver Version 1.30)<br />
• System hang (Fixed in Driver Version 1.30)<br />
Page 26 of 35
V 1.30 Driver Release Notes<br />
Please note that V 1.30 drivers require firmware #173. For the Mac, this firmware<br />
updater was in the archive you downloaded from the TASCAM web site. For the PC, it<br />
is a separate updater from the driver updater and can be run before or after updating the<br />
driver.<br />
Virtual MIDI Ports<br />
With Version 1.30 it is now possible to assign physical controls in the MIDI Control<br />
layer to Virtual MIDI Ports accessible by the host computer via the FireWire connection.<br />
This allows an app running on the host computer to have its parameters controlled using<br />
standard MIDI controller messages. To use this new feature:<br />
1. Enter MIDI Programming Mode by pressing SHIFT + MIDI CTRL on the <strong>FW</strong><br />
<strong>1884</strong><br />
2. Operate any surface control to make it editable in the MIDI Programming tab<br />
3. Select VP1 (Virtual Port 1) or VP2 (Virtual Port 2) using the check boxes at the<br />
bottom of the tab. You may wish to uncheck any boxes representing the four<br />
physical MIDI ports.<br />
4. If the software app you wish to control offers a Learn function, enable it then<br />
operate the control to complete the link. If Learn is not available in your app, it is<br />
possible to manually set the output messages to anything needed within the<br />
Action section of the MIDI Programming tab.<br />
5. Press MIDI CTRL to exit MIDI Programming mode.<br />
It is possible to set all parameters in the MIDI Control layer back to factory default by<br />
pressing SHIFT + CTRL + F8. Note that this reset can only be performed when in<br />
normal operating mode, not MIDI Programming mode.<br />
GSIF2 Support<br />
Version 1.30 for <strong>Windows</strong> supports the TASCAM GSIF2 driver protocol for GigaStudio<br />
3. Please note that V 1.30 will still work with older versions of GigaStudio. GSIF2 adds<br />
three features when used with GigaStudio 3:<br />
• Kernel Level MIDI for the lowest possible MIDI latency and jitter. To use Kernel<br />
Level MIDI, select the <strong>FW</strong><strong>1884</strong>’s “GSIF – low latency” MIDI ports from within<br />
the Hardware tab in the System Settings window of GigaStudio. Compare normal<br />
MIDI with Kernel Level MIDI… the amount of latency reduction may surprise<br />
you!<br />
• Also in the Hardware tab of the GigaStudio System Settings window, it is now<br />
possible to enable hardware inputs as audio sources for GigaStudio. This can be<br />
useful to record sound into GigaStudio for sampling or for using GigaStudio’s<br />
convolution processing (GigaPulse Pro) as an effect.<br />
• Input and Output channel types (Analog, ADAT, S/PDIF) are named in the<br />
Hardware tab of GigaStudio’s System Settings window according to the GSIF2<br />
specification.<br />
Page 27 of 35
Mac OSX 10.4 (Tiger)<br />
At the time of this writing, V 1.30 has been tested with Beta versions of Tiger and found<br />
to be compatible. However further testing is needed with the Release version of Tiger to<br />
ensure compatibility – check the TASCAM web site before for news before upgrading to<br />
Tiger.<br />
Maintenance Items<br />
• The <strong>FW</strong><strong>1884</strong> Control Panel now opens automatically any time SHIFT + MIDI<br />
CTRL is pressed, entering MIDI Programming mode.<br />
• The <strong>FW</strong><strong>1884</strong> Control Panel now opens & closes more reliably with the shortcut<br />
key.<br />
• MIDI SysEx output overflow issues have been addressed.<br />
• Problems when using the <strong>FW</strong><strong>1884</strong> with Sonar on a HyperThreading enabled PC<br />
have been corrected.<br />
• Problems syncing the <strong>FW</strong><strong>1884</strong>’s physical faders to DAW faders when opening a<br />
previously saved DAW project have been corrected. This was reported when<br />
using the <strong>FW</strong><strong>1884</strong> in Mackie Control emulation with Steinberg apps.<br />
Page 28 of 35
V 1.40 Driver Release Notes<br />
Cubase LE and Cubase SE Support<br />
Control surface support for these versions of Steinberg’s Cubase has been added.<br />
Please see the document titled, “Cubase LE Setup” for details.<br />
New Features<br />
SONAR<br />
It is possible to control any of the three EQs in SONAR using the <strong>FW</strong><strong>1884</strong>. Use the key<br />
commands below to assign the <strong>FW</strong><strong>1884</strong>’s physical controls to the desired EQ:<br />
SET + HI = Sonitus track EQ<br />
SET + HIMID = Sonitus plugin EQ<br />
SET + LOMID = Cakewalk plugin FXEQ<br />
Maintenance Items<br />
OSX<br />
Previously custom MIDI programming of keys could get stuck in Controller mode in the<br />
MIDI Programming tab of the control panel. This has been fixed.<br />
Page 29 of 35
V <strong>1.50</strong> Driver Release Notes<br />
The following describes how to setup Cubase SX 2.2, Cubase SX3, Nuendo 2.2 and<br />
Nuendo 3 for the <strong>FW</strong><strong>1884</strong> and how to use the <strong>FW</strong><strong>1884</strong> features to control the DAW<br />
app.<br />
Fixed Since v<strong>1.50</strong> Public Beta<br />
The issue below was discovered during Public Beta and has been fixed in this Release:<br />
• Adjusting a Pan control after adjusting an EQ control will intermittently adjust the<br />
EQ control.<br />
Installation<br />
There are two <strong>Windows</strong> files available, a Full Installer and an Updater. Select the correct<br />
one to use from the following guide:<br />
• If you are running <strong>Windows</strong> XP Service Pack 1 and have not installed any <strong>FW</strong><br />
<strong>1884</strong> drivers, use the 10<strong>MB</strong> Full Installer<br />
• If you are running <strong>Windows</strong> XP Service Pack 1 and have previously installed an<br />
<strong>FW</strong><strong>1884</strong> Full Installer, use the Updater.<br />
• If you are running <strong>Windows</strong> XP Service Pack 2, use the Updater.<br />
Setup<br />
1. In the <strong>FW</strong><strong>1884</strong> Control Panel, select Cubase SX / Nuendo under Control<br />
Protocol<br />
2. In the Steinberg app, select Devices > Device Setup.<br />
a. If using Cubase SX 2.2 or Nuendo 2.2, click on the Add/Remove tab.<br />
b. Add one Mackie Control device.<br />
c. Click on the Setup tab and assign the Mackie Control device’s MIDI In<br />
and Out to the <strong>FW</strong><strong>1884</strong>’s control port. Press Apply.<br />
3. If using Cubase SX 3 or Nuendo 3, click on the + sign in the upper left of the<br />
Device Setup window and add one Mackie Control device.<br />
4. Click on the newly created Mackie Control device and assign its MIDI In and Out<br />
to the <strong>FW</strong><strong>1884</strong>’s control port. Press Apply.<br />
5. Note whether Enable Auto Select is checked. When checked, this automatically<br />
selects the channel in the DAW corresponding to the touch sensitive fader when<br />
the fader cap is touched.<br />
• To avoid confusion, we also recommend going to File/Preferences/Editing and<br />
unchecking “Enable Record on Selected Track”<br />
Note If your Project includes MIDI tracks you should select something other than “All<br />
MIDI Inputs” as each tracks input option. Not changing this default will result in an<br />
armed MIDI track trying to record all control surface data.<br />
Page 30 of 35
Operation<br />
Channel Strips<br />
The channel strips controls directly affect the associated onscreen channel. There is also<br />
a special control:<br />
REC + any SEL toggle track’s record enable<br />
Note: When you SOLO a channel, Cubase SX 2 also selects that channel.<br />
Channel Encoders<br />
Encoder coarse adjustment of selected parameter<br />
CTRL + Encoder fine adjustment of selected parameter<br />
NOTE: For proper operation, press the CTRL button and then turn the encoder.<br />
Pressing CTRL while you are turning the encoder you may result in unwanted changes to<br />
AUX or EQ parameters.<br />
In the “Encoders” section are buttons that determine the functions of the channel<br />
encoders. Pressing PAN sets them for panning. Pressing one of the AUX 18 buttons sets<br />
the encoders for Send (Aux) level adjustment. There are two AUX modes:<br />
• Single Aux Mode: In this mode a single AUX button is lit. Turning a channel<br />
encoder selects that channel strip (the channel’s SEL button will light) and adjusts<br />
the level of the aux send corresponding to the lit AUX button.<br />
• Single Channel Mode: In this mode all eight AUX buttons are lit. The channel<br />
encoders are used to adjust aux send levels 18 of the selected channel.<br />
To switch from Single Aux Mode to Single Channel Mode, press the lit AUX button. All<br />
eight AUX buttons should now light. To switch from Single Channel Mode to Single<br />
Aux Mode, press the AUX button that you want to be active. The other AUX button<br />
lights will go out. You can switch from either aux mode to pan mode. When you switch<br />
back the system remembers which aux mode you were last in.<br />
When the CTRL button is held down, the AUX buttons display the state of Aux Send<br />
on/off for that selected channel. Holding CTRL and pressing an AUX button toggles that<br />
Aux Send on and off. Please note that an Aux Send can only be turned on if it is first<br />
routed to an effect, group, or output channel … otherwise it will just briefly flash when<br />
you try to turn it on.<br />
Please note that the FLIP button is inactive in Cubase SX mode.<br />
Page 31 of 35
Transport<br />
The five main transport buttons (REW, F <strong>FW</strong>D, STOP, PLAY, RECORD) control their<br />
equivalent onscreen buttons. In addition, the buttons in this part of the <strong>FW</strong><strong>1884</strong> have<br />
these functions:<br />
SHIFT + REW go to beginning of project<br />
SHIFT + F <strong>FW</strong>D go to end of project<br />
CTRL + RECORD toggle punch in on/off<br />
< BANK Shift left 8 channels<br />
BANK > Shift right 8 channels<br />
CTRL + < BANK Shift left 1 channel<br />
CTRL + BANK > Shift right 1 channel<br />
IN go to left locator<br />
OUT go to right locator<br />
SET + IN userprogrammable Shift + F7; see below<br />
SET + OUT userprogrammable Shift + F8; see below<br />
> next marker<br />
SHTL user programmable as “User B”<br />
The data wheel can be used to move the timeline forwards and back. The arrow keys<br />
operate just like the arrow keys on your computer keyboard.<br />
Page 32 of 35
Shortcut Buttons<br />
The buttons to the left of the faders do the following functions:<br />
SAVE/F1 save<br />
REVERT/F2 (not implemented by Cubase SX 2’s Mackie Control<br />
device)<br />
ALL SAFE/F3 open/edit editor for the currently selected track<br />
CLR SOLO/F4 clear all solo’s<br />
SHIFT + CLR SOLO clear all mutes<br />
MARKER/F5 add a marker<br />
LOOP/F6 toggle cycle on/off<br />
CUT user programmable as F5; see below<br />
DEL user programmable as F6; see below<br />
COPY user programmable as F7; see below<br />
PASTE user programmable as F8; see below<br />
ALT/CMD (not used)<br />
UNDO undo<br />
CTRL + UNDO redo<br />
SHIFT used as a command modifier<br />
CTRL used as a command modifier<br />
Page 33 of 35
Automation Buttons<br />
These are used with Cubase SX 2 for a combination of automation and nonautomation<br />
functions:<br />
values<br />
READ toggle read automation for the selected channel<br />
SHIFT + READ toggle read automation for all channels<br />
WRITE toggle write automation for the selected channel<br />
SHIFT + WRITE toggle write automation for all channels<br />
TOUCH show Project window<br />
CTRL + TOUCH toggle between SMPTE time and beats/bars<br />
LATCH toggle Mixer window to front/back<br />
CTRL + LATCH toggle SoftLCD screen between parameter names and<br />
NUDGE as Channel Views<br />
In the lower left of the mixer screen are five icons that represent different kinds of tracks:<br />
audio, groups, VST instruments, ReWire, and MIDI. You can make different sets of<br />
tracks visible and invisible, and save that set as a “channel view.” Click on “Store View<br />
Set” and “Remove View Set” icons and you can add and remove settings, which can also<br />
be recalled (in order) using variations of the NUDGE buttons as follows:<br />
< NUDGE Channel view 1<br />
NUDGE > Channel view 2<br />
SET + < NUDGE Channel view 3<br />
SET + NUDGE > Channel view 4<br />
CTRL + < NUDGE Channel view 5<br />
CTRL + NUDGE > Channel view 6<br />
REC + < NUDGE Channel view 7<br />
REC + NUDGE > Channel view 8<br />
Page 34 of 35
User Programmable Functions<br />
There are 18 userprogrammable functions that can be used with Cubase SX 2. To<br />
program these, go to “Device/Device Setup …”, select “Mackie Control” on the left and<br />
the “Setup” tab on the right. You can now program the USER A (the footswitch), USER<br />
B (the SHTL button), and 8 buttons, both unshifted and shifted.<br />
Buttons Mapped to Cubase SX 2’s<br />
Footswitch User A<br />
SHTL User B<br />
F7 F1<br />
Shift + F7 Shift + F1<br />
F8 F2<br />
Shift + F8 Shift + F2<br />
F9 F3<br />
Shift + F9 Shift + F3<br />
F10 F4<br />
Shift + F10 Shift + F4<br />
CUT F5<br />
Shift + CUT Shift + F5<br />
DEL F6<br />
Shift + DEL Shift + F6<br />
COPY F7<br />
SET + IN Shift + F7<br />
PASTE F8<br />
SET + OUT Shift + F8<br />
There are two userprogrammable functions that we strongly recommend mapping to the<br />
set left/right locator functions:<br />
Buttons Mapped to Program as<br />
SET + IN Shift + F7 Transport/Set Left Locator<br />
SET + OUT Shift + F8 Transport/Set Right Locator<br />
There are hundreds of functions that can be applied to these buttons. Some that are<br />
particularly useful are:<br />
• Transport/Metronome on (toggles click on/off)<br />
• Add Track/Audio<br />
• Zoom/(various options)<br />
Page 35 of 35