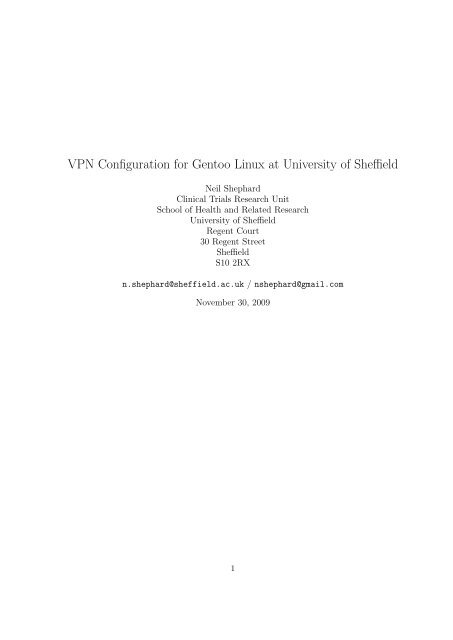
VPN Configuration for Gentoo Linux at University of Sheffield
VPN Configuration for Gentoo Linux at University of Sheffield
VPN Configuration for Gentoo Linux at University of Sheffield

You also want an ePaper? Increase the reach of your titles
YUMPU automatically turns print PDFs into web optimized ePapers that Google loves.
<strong>VPN</strong> <strong>Configur<strong>at</strong>ion</strong> <strong>for</strong> <strong>Gentoo</strong> <strong>Linux</strong> <strong>at</strong> <strong>University</strong> <strong>of</strong> <strong>Sheffield</strong><br />
Neil Shephard<br />
Clinical Trials Research Unit<br />
School <strong>of</strong> Health and Rel<strong>at</strong>ed Research<br />
<strong>University</strong> <strong>of</strong> <strong>Sheffield</strong><br />
Regent Court<br />
30 Regent Street<br />
<strong>Sheffield</strong><br />
S10 2RX<br />
n.shephard@sheffield.ac.uk / nshephard@gmail.com<br />
November 30, 2009<br />
1
Contents<br />
1 Overview 3<br />
2 Register <strong>for</strong> RATS 3<br />
3 Kernel <strong>Configur<strong>at</strong>ion</strong> 3<br />
4 S<strong>of</strong>tware 4<br />
4.1 Install the s<strong>of</strong>tware . . . . . . . . . . . . . . . . . . . . . . . . . . . . . . . . . . . . . 4<br />
4.2 Configuring vpnc . . . . . . . . . . . . . . . . . . . . . . . . . . . . . . . . . . . . . . 4<br />
5 Checking your Router 5<br />
6 Connecting to RATS 5<br />
7 NFS 6<br />
7.1 NFS/CIFS Kernel <strong>Configur<strong>at</strong>ion</strong> . . . . . . . . . . . . . . . . . . . . . . . . . . . . . 7<br />
7.2 S<strong>of</strong>tware . . . . . . . . . . . . . . . . . . . . . . . . . . . . . . . . . . . . . . . . . . . 7<br />
7.3 <strong>Configur<strong>at</strong>ion</strong> . . . . . . . . . . . . . . . . . . . . . . . . . . . . . . . . . . . . . . . . 8<br />
7.3.1 CICS / Novell Network Drives . . . . . . . . . . . . . . . . . . . . . . . . . . 8<br />
7.3.2 GNU/<strong>Linux</strong> NFS . . . . . . . . . . . . . . . . . . . . . . . . . . . . . . . . . . 8<br />
8 References 9<br />
2
1 Overview<br />
Virtual Priv<strong>at</strong>e Networks (<strong>VPN</strong>) provide a secure way <strong>of</strong> connecting to a secure network (The<br />
<strong>University</strong> <strong>of</strong> <strong>Sheffield</strong>) from an unsecure network (e.g. anywhere else on the internet). They work<br />
by implementing an additional network via s<strong>of</strong>tware (as opposed to hardware) between the secure<br />
network and the computer th<strong>at</strong> you are connecting from and are used <strong>at</strong> the <strong>University</strong> <strong>of</strong> <strong>Sheffield</strong><br />
to provide access to staff and students from home so th<strong>at</strong> they can take advantage <strong>of</strong> the services<br />
provided by the <strong>University</strong>.<br />
This document details how to install, configure and use a <strong>VPN</strong> under the <strong>Gentoo</strong> <strong>Linux</strong> distribution<br />
to access the <strong>University</strong> <strong>of</strong> <strong>Sheffield</strong>. Its quite specific to the distribution but the in<strong>for</strong>m<strong>at</strong>ion<br />
should be general enough th<strong>at</strong> it can be adapted and used <strong>for</strong> other <strong>Linux</strong> distributions.<br />
2 Register <strong>for</strong> RATS<br />
You must first register <strong>for</strong> Remote Access To <strong>Sheffield</strong> (RATS). These days 1 secure access is<br />
provided by a Virtual Priv<strong>at</strong>e Network (<strong>VPN</strong>) service from the <strong>University</strong> and you will be registered<br />
<strong>for</strong> this as part and parcel <strong>of</strong> registering with CICS.<br />
To retrieve your RATS password required <strong>for</strong> establishing a <strong>VPN</strong> connection simply go to the<br />
Computer Account Management Facility. Once logged in select Request new Remote Access<br />
(RATS) password and a new password will be emailed to your <strong>University</strong> email address. 2<br />
3 Kernel <strong>Configur<strong>at</strong>ion</strong><br />
In order <strong>for</strong> <strong>VPN</strong> s<strong>of</strong>tware to work under GNU/<strong>Linux</strong> the kernel must include the Universal<br />
TUN/TAP device driver. Most common binary distributions such as Debian 3 , Fedora and SuSE<br />
will likely already include this in the kernel (or if not as a module th<strong>at</strong> will be autom<strong>at</strong>ically loaded<br />
on the fly). However, you may find th<strong>at</strong> whilst installing the s<strong>of</strong>tware described below th<strong>at</strong> you<br />
are in<strong>for</strong>med th<strong>at</strong> your current kernel does not inlcude this support and you will there<strong>for</strong>e have to<br />
compile your own kernel to include support.<br />
How to compilie a kernel is beyond the scope <strong>of</strong> this document, but there are a number <strong>of</strong> useful<br />
resources available. . .<br />
• <strong>Gentoo</strong> <strong>Linux</strong> Kernel Upgrade Guide (If you’re only going to read one <strong>of</strong> these, read this one).<br />
• The <strong>Linux</strong> Kernel HOWTO<br />
• Upgrading the <strong>Linux</strong> Kernel on Red H<strong>at</strong> <strong>Linux</strong> systems<br />
1 I first <strong>at</strong>tended <strong>University</strong> <strong>of</strong> <strong>Sheffield</strong> back in 1995 when RATS provided students and staff with dial-up access!<br />
2 The remainder <strong>of</strong> these instructions are simply adapted from the <strong>Gentoo</strong> vpnc HowTo.<br />
3 This includes the myriad <strong>of</strong> Ubuntu distributions and deriv<strong>at</strong>ives.<br />
3
You will have to enable the following option in your kernel configur<strong>at</strong>ion, either directly in the<br />
kernel or as a module, be<strong>for</strong>e compiling and installing your kernel. Note th<strong>at</strong> this is the loc<strong>at</strong>ion<br />
<strong>of</strong> the ✓driver<br />
within the menuing system <strong>for</strong> kernel v2.6.31, it may differ <strong>for</strong> your kernel.<br />
-> Device Drivers<br />
-> Network device support (NETDEVICES [=y])<br />
Universal TUN/TAP device driver support.<br />
✒<br />
To ☛ compile and install the new kernel (assuming you are in the /usr/src/linux/ directory. . .<br />
darwin # make && make modules_install<br />
darwin # cp arch/x86/boot/bzImage /boot/2.6.31-ice<br />
✡<br />
After compiling and installing, don’t <strong>for</strong>get to upd<strong>at</strong>e your boot loader (whether ist GRUB or<br />
LILO).<br />
4 S<strong>of</strong>tware<br />
This guide uses the vpnc s<strong>of</strong>tware, but users should be aware th<strong>at</strong> there are other options such as<br />
Open<strong>VPN</strong>or Cisco <strong>VPN</strong> Client 4 , but this document uses vpnc as its small, simple and easy to<br />
install and configure.<br />
4.1 Install the s<strong>of</strong>tware<br />
How to install vpnc will depend very much on the distribution you are using. Examples <strong>for</strong> a couple<br />
<strong>of</strong> distributions are provided. Install<strong>at</strong>ion is straight <strong>for</strong>ward. Select any <strong>of</strong> the possible USE flags<br />
by adding ✬the<br />
appropri<strong>at</strong>e line to /etc/portage/package.use, <strong>for</strong> example. . .<br />
✩<br />
darwin # equery u net-misc/vpnc<br />
* Searching <strong>for</strong> net-misc/vpnc ...<br />
[ Legend : U - flag is set in make.conf ]<br />
[ : I - package is installed with flag ]<br />
[ Colors : set, unset ]<br />
* Found these USE flags <strong>for</strong> net-misc/vpnc-0.5.3:<br />
U I<br />
- - bindist : Flag to enable or disable options <strong>for</strong> prebuilt (GRP)<br />
packages (eg. due to licensing issues)<br />
- - hybrid-auth : Enable hybrid authentic<strong>at</strong>ion (certific<strong>at</strong>es), only if<br />
not redistributed as compiled binary<br />
- - resolvconf : Enable support <strong>for</strong> DNS managing framework net-dns/openresolv<br />
darwin # echo ’net-misc/vpnc resolvconf’ >> /etc/portage/package.use<br />
✫<br />
✪<br />
Once ✞ you’ve set the desired USE flags simply emerge vpnc. . .<br />
☎<br />
darwin # emerge -av net-misc/vpnc<br />
✝<br />
✆<br />
4 If you have succesfully installed and configured altern<strong>at</strong>ive <strong>VPN</strong> Clients, please consider contributing and expanding<br />
this document. Please contact CICS in the first instance.<br />
4<br />
✏<br />
✑<br />
✟<br />
✠
4.2 Configuring vpnc<br />
Once installed you need to configure vpnc to connect to the <strong>University</strong> <strong>of</strong> <strong>Sheffield</strong> Network. The<br />
configur<strong>at</strong>ion file is loc<strong>at</strong>ed <strong>at</strong> /etc/vpnc/vpnc.conf. The following example assumes th<strong>at</strong> you’re<br />
username <strong>for</strong> the Campus network is abc12xyz and th<strong>at</strong> your RATS password is 12345678. Substitute<br />
✤these<br />
as appropri<strong>at</strong>e.<br />
IPSec g<strong>at</strong>eway vpn.shef.ac.uk<br />
IPSec ID Unishef<br />
IPSec secret Unishef<br />
Xauth username abc12xyz<br />
Xauth password 12345678<br />
✣<br />
5 Checking your Router<br />
If you have a router in place on your home network then you must ensure th<strong>at</strong> it allows IPSec<br />
Pass-through which enables IP (Internet Protocol) traffic to pass through the router. How you do<br />
this will depend very much on your router and s<strong>of</strong>tware and is beyond the scope <strong>of</strong> this document.<br />
Please consult your routers document<strong>at</strong>ion.<br />
• Linksys Router Document<strong>at</strong>ion<br />
• Belkin Router Document<strong>at</strong>ion<br />
• Retrevo Manuals<br />
6 Connecting to RATS<br />
Once you’ve installed and configured the s<strong>of</strong>tware correctly you are ready to connect to the <strong>University</strong><br />
<strong>of</strong> <strong>Sheffield</strong>s <strong>VPN</strong>.<br />
To start the service, su to root and start vpnc and check your ifconfig with. . .<br />
5<br />
✜<br />
✢
✬<br />
darwin # /etc/init.d/vpnc start<br />
* Starting <strong>VPN</strong>C: vpnc...<br />
darwin vpnc # ifconfig<br />
eth0 Link encap:Ethernet HWaddr 00:1f:d0:20:79:79<br />
inet addr:192.168.1.107 Bcast:192.168.1.255 Mask:255.255.255.0<br />
inet6 addr: fe80::21f:d0ff:fe20:7979/64 Scope:Link<br />
UP BROADCAST RUNNING MULTICAST MTU:1500 Metric:1<br />
RX packets:110554423 errors:0 dropped:0 overruns:0 frame:0<br />
TX packets:76252808 errors:0 dropped:0 overruns:0 carrier:0<br />
collisions:0 txqueuelen:1000<br />
RX bytes:147275230677 (137.1 GiB) TX bytes:37278646011 (34.7 GiB)<br />
Interrupt:30 Base address:0x2000<br />
lo Link encap:Local Loopback<br />
inet addr:127.0.0.1 Mask:255.0.0.0<br />
inet6 addr: ::1/128 Scope:Host<br />
UP LOOPBACK RUNNING MTU:16436 Metric:1<br />
RX packets:84 errors:0 dropped:0 overruns:0 frame:0<br />
TX packets:84 errors:0 dropped:0 overruns:0 carrier:0<br />
collisions:0 txqueuelen:0<br />
RX bytes:7668 (7.4 KiB) TX bytes:7668 (7.4 KiB)<br />
✩<br />
tun0 Link encap:UNSPEC HWaddr 00-00-00-00-00-00-00-00-00-00-00-00-00-00-00-00<br />
inet addr:143.167.209.33 P-t-P:143.167.209.33 Mask:255.255.255.255<br />
UP POINTOPOINT RUNNING NOARP MULTICAST MTU:1412 Metric:1<br />
RX packets:0 errors:0 dropped:0 overruns:0 frame:0<br />
TX packets:2 errors:0 dropped:0 overruns:0 carrier:0<br />
collisions:0 txqueuelen:500<br />
RX bytes:0 (0.0 B) TX bytes:2824 (2.7 KiB)<br />
✫<br />
The important output is <strong>for</strong> the tun0 device which shows th<strong>at</strong> traffic is being routed through<br />
the <strong>University</strong>’s network<br />
✪<br />
5 .<br />
You should now be connected to the internet and <strong>for</strong> all intent and purposes your traffic will<br />
be routed through the Universities servers and you will be able to access electronic journals from<br />
home and connect to MUSE.<br />
7 NFS<br />
Once you’ve sucessfully setup a <strong>VPN</strong> connection to the <strong>University</strong> wh<strong>at</strong> can you do with it? One<br />
thing you can do is mount Network File Systems to your home computer and use them seamlessly<br />
5 Domain 143.167.*.*.<br />
6
(albeit with a bit <strong>of</strong> lag due to bandwidth limit<strong>at</strong>ions). There are a number <strong>of</strong> drives you may wish<br />
to mount, such as the network space CICS provide, or if you have <strong>Linux</strong> installed on your work<br />
computer you can configure it to export the local hard drives and mount them. There are two main<br />
protocols th<strong>at</strong> will be used to achieve this CIFS <strong>for</strong> mounting the network drives provided by CICS<br />
and your department and NFS <strong>for</strong> mounting the local drives on your work computer.<br />
7.1 NFS/CIFS Kernel <strong>Configur<strong>at</strong>ion</strong><br />
You must enable support <strong>for</strong> these protocols to work as a client in the kernel. Optionally if you<br />
wish to setup your work (or home) server to have the harddrives available as NFS you will have to<br />
enable ✬server<br />
support too.<br />
-> File Systems<br />
[*] Network File Systems --><br />
NFS client support<br />
[*] NFS client support <strong>for</strong> NFS version 3<br />
[*] NFS client support <strong>for</strong> the NFSv3 ACL protocol extension<br />
[*] NFS client support <strong>for</strong> NFS version 4 (EXPERIMENTAL)<br />
[ ] NFS client support <strong>for</strong> NFSv4.1 (DEVELOPER ONLY)<br />
[*] Root file system on NFS<br />
NFS server support<br />
[*] NFS server support <strong>for</strong> NFS version 3<br />
[ ] NFS server support <strong>for</strong> the NFSv3 ACL protocol extension<br />
[ ] NFS server support <strong>for</strong> NFS version 4 (EXPERIMENTAL)<br />
< > SMB file system support (OBSOLETE, please use CIFS)<br />
CIFS support (advanced network filesystem, SMBFS successor)<br />
[ ] CIFS st<strong>at</strong>istics<br />
[ ] Support legacy servers which use weaker LANMAN security<br />
[ ] Kerberos/SPNEGO advanced session setup<br />
[ ] CIFS extended <strong>at</strong>tributes<br />
[ ] Enable additional CIFS debugging routines<br />
[ ] DFS fe<strong>at</strong>ure support<br />
✫<br />
[ ] CIFS Experimental Fe<strong>at</strong>ures (EXPERIMENTAL)<br />
7.2 S<strong>of</strong>tware<br />
You now need to install the s<strong>of</strong>tware s<strong>of</strong>tware th<strong>at</strong> allows you to mount the network drives. For<br />
the shared network drives th<strong>at</strong> CICS and your department provide this requires the mount-cifs<br />
package. ✞ For the local hard-drives on your work <strong>Linux</strong> computer this requires nfs-utils. . .<br />
darwin # emerge -av mount-cifs<br />
✝<br />
7<br />
✩<br />
✪<br />
☎<br />
✆
7.3 <strong>Configur<strong>at</strong>ion</strong><br />
7.3.1 CICS / Novell Network Drives<br />
You must cre<strong>at</strong>e the file /etc/nfs_share.credentials which should contain your CICS username<br />
and password substitute these in the example below. To ensure the security <strong>of</strong> your connection<br />
you✓must also change the permissions so th<strong>at</strong> only the root user can read and write this file. . .<br />
darwin # echo ’username=abc12xyz’ > /etc/nfs_share.credentials<br />
darwin # echo ’password=123456789’ >> /etc/nfs_share.credentials<br />
✒<br />
darwin # chmod 0600 /etc/nfs_share.credentials<br />
Now cre<strong>at</strong>e a mount point and change ownership to your normal user (otherwise you will be<br />
unable to write to the drive). In the example below we mount the CICS directory <strong>for</strong> user abc12xyz<br />
which is on the server Darkwood, the account username on the home computer is me, again substitute<br />
these ✎appropri<strong>at</strong>ely.<br />
. .<br />
darwin # mkdir /mnt/abc12xyz<br />
darwin # chown -R me:me /mnt/abc12xyz<br />
✍<br />
Now add a line to your /etc/fstab file so th<strong>at</strong> you can mount and unmount the network<br />
drive. ✓.<br />
.<br />
## Work NFS drives<br />
//Darkwood/abc12xyz /mnt/abc1def cifs credentials=/etc/nfs_share.credentials,<br />
rw,uid=me,gid=me,umask=133 0 0<br />
✒<br />
You should now be able to mount the drive as root, and as a normal user cre<strong>at</strong>e and modify<br />
files. ✓.<br />
.<br />
darwin # mount /mnt/abc1def<br />
darwin # exit<br />
✒$<br />
echo ’Hello World!’ > /mnt/abc1def/test.txt<br />
7.3.2 GNU/<strong>Linux</strong> NFS<br />
TODO!<br />
8<br />
✏<br />
✑<br />
☞<br />
✌<br />
✏<br />
✑<br />
✏<br />
✑
8 References<br />
• <strong>Gentoo</strong> vpnc HowTo<br />
• <strong>Gentoo</strong> Wiki : Samba<br />
9